Lifecycle Stage Setup and Customization
How to Create and Initiate the Contact Lifecycle Setup?
Want to track your contact's journey from initial interaction to conversion? With Twozo, the Contact Lifecycle Stage helps you monitor their progress every step of the way, providing deeper insights into their interactions and engagement.
To set up the Contact Life Cycle Stage, follow these steps:
-
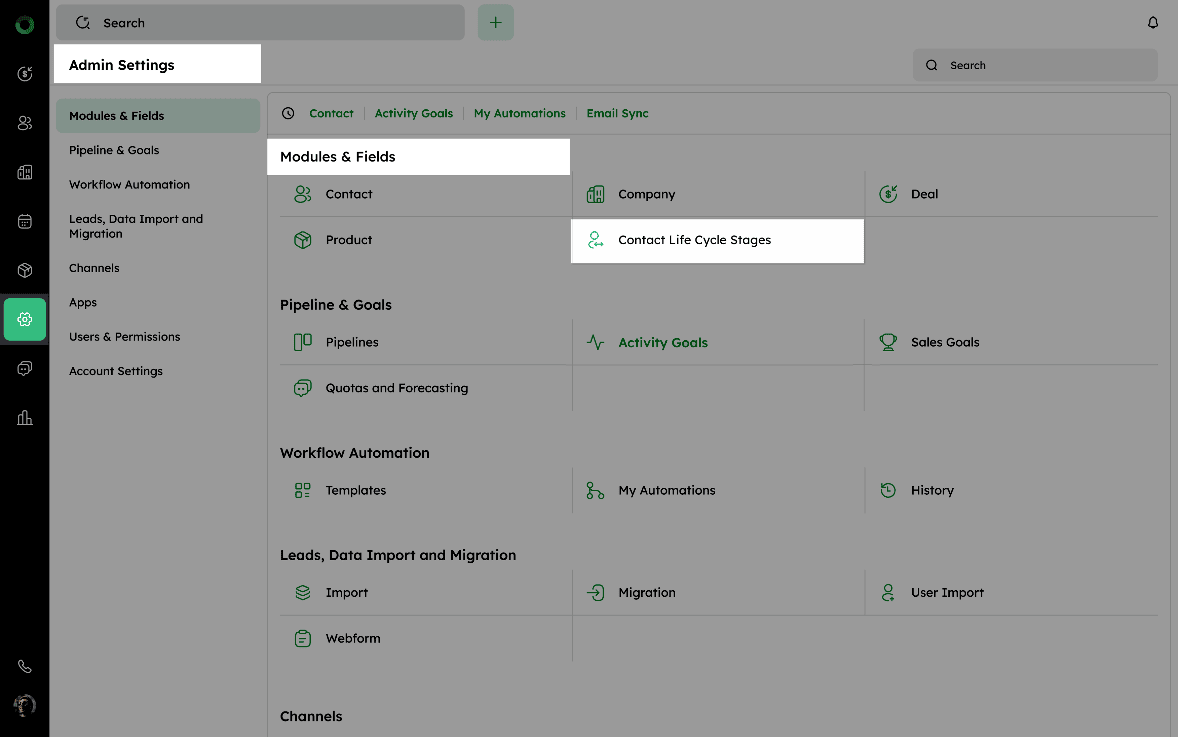
Access the Admin Settings from the main navigation menu.
-
Under CRM Modules & Automation, click Contact Life Cycle Stage.
- To create a lifecycle stage:
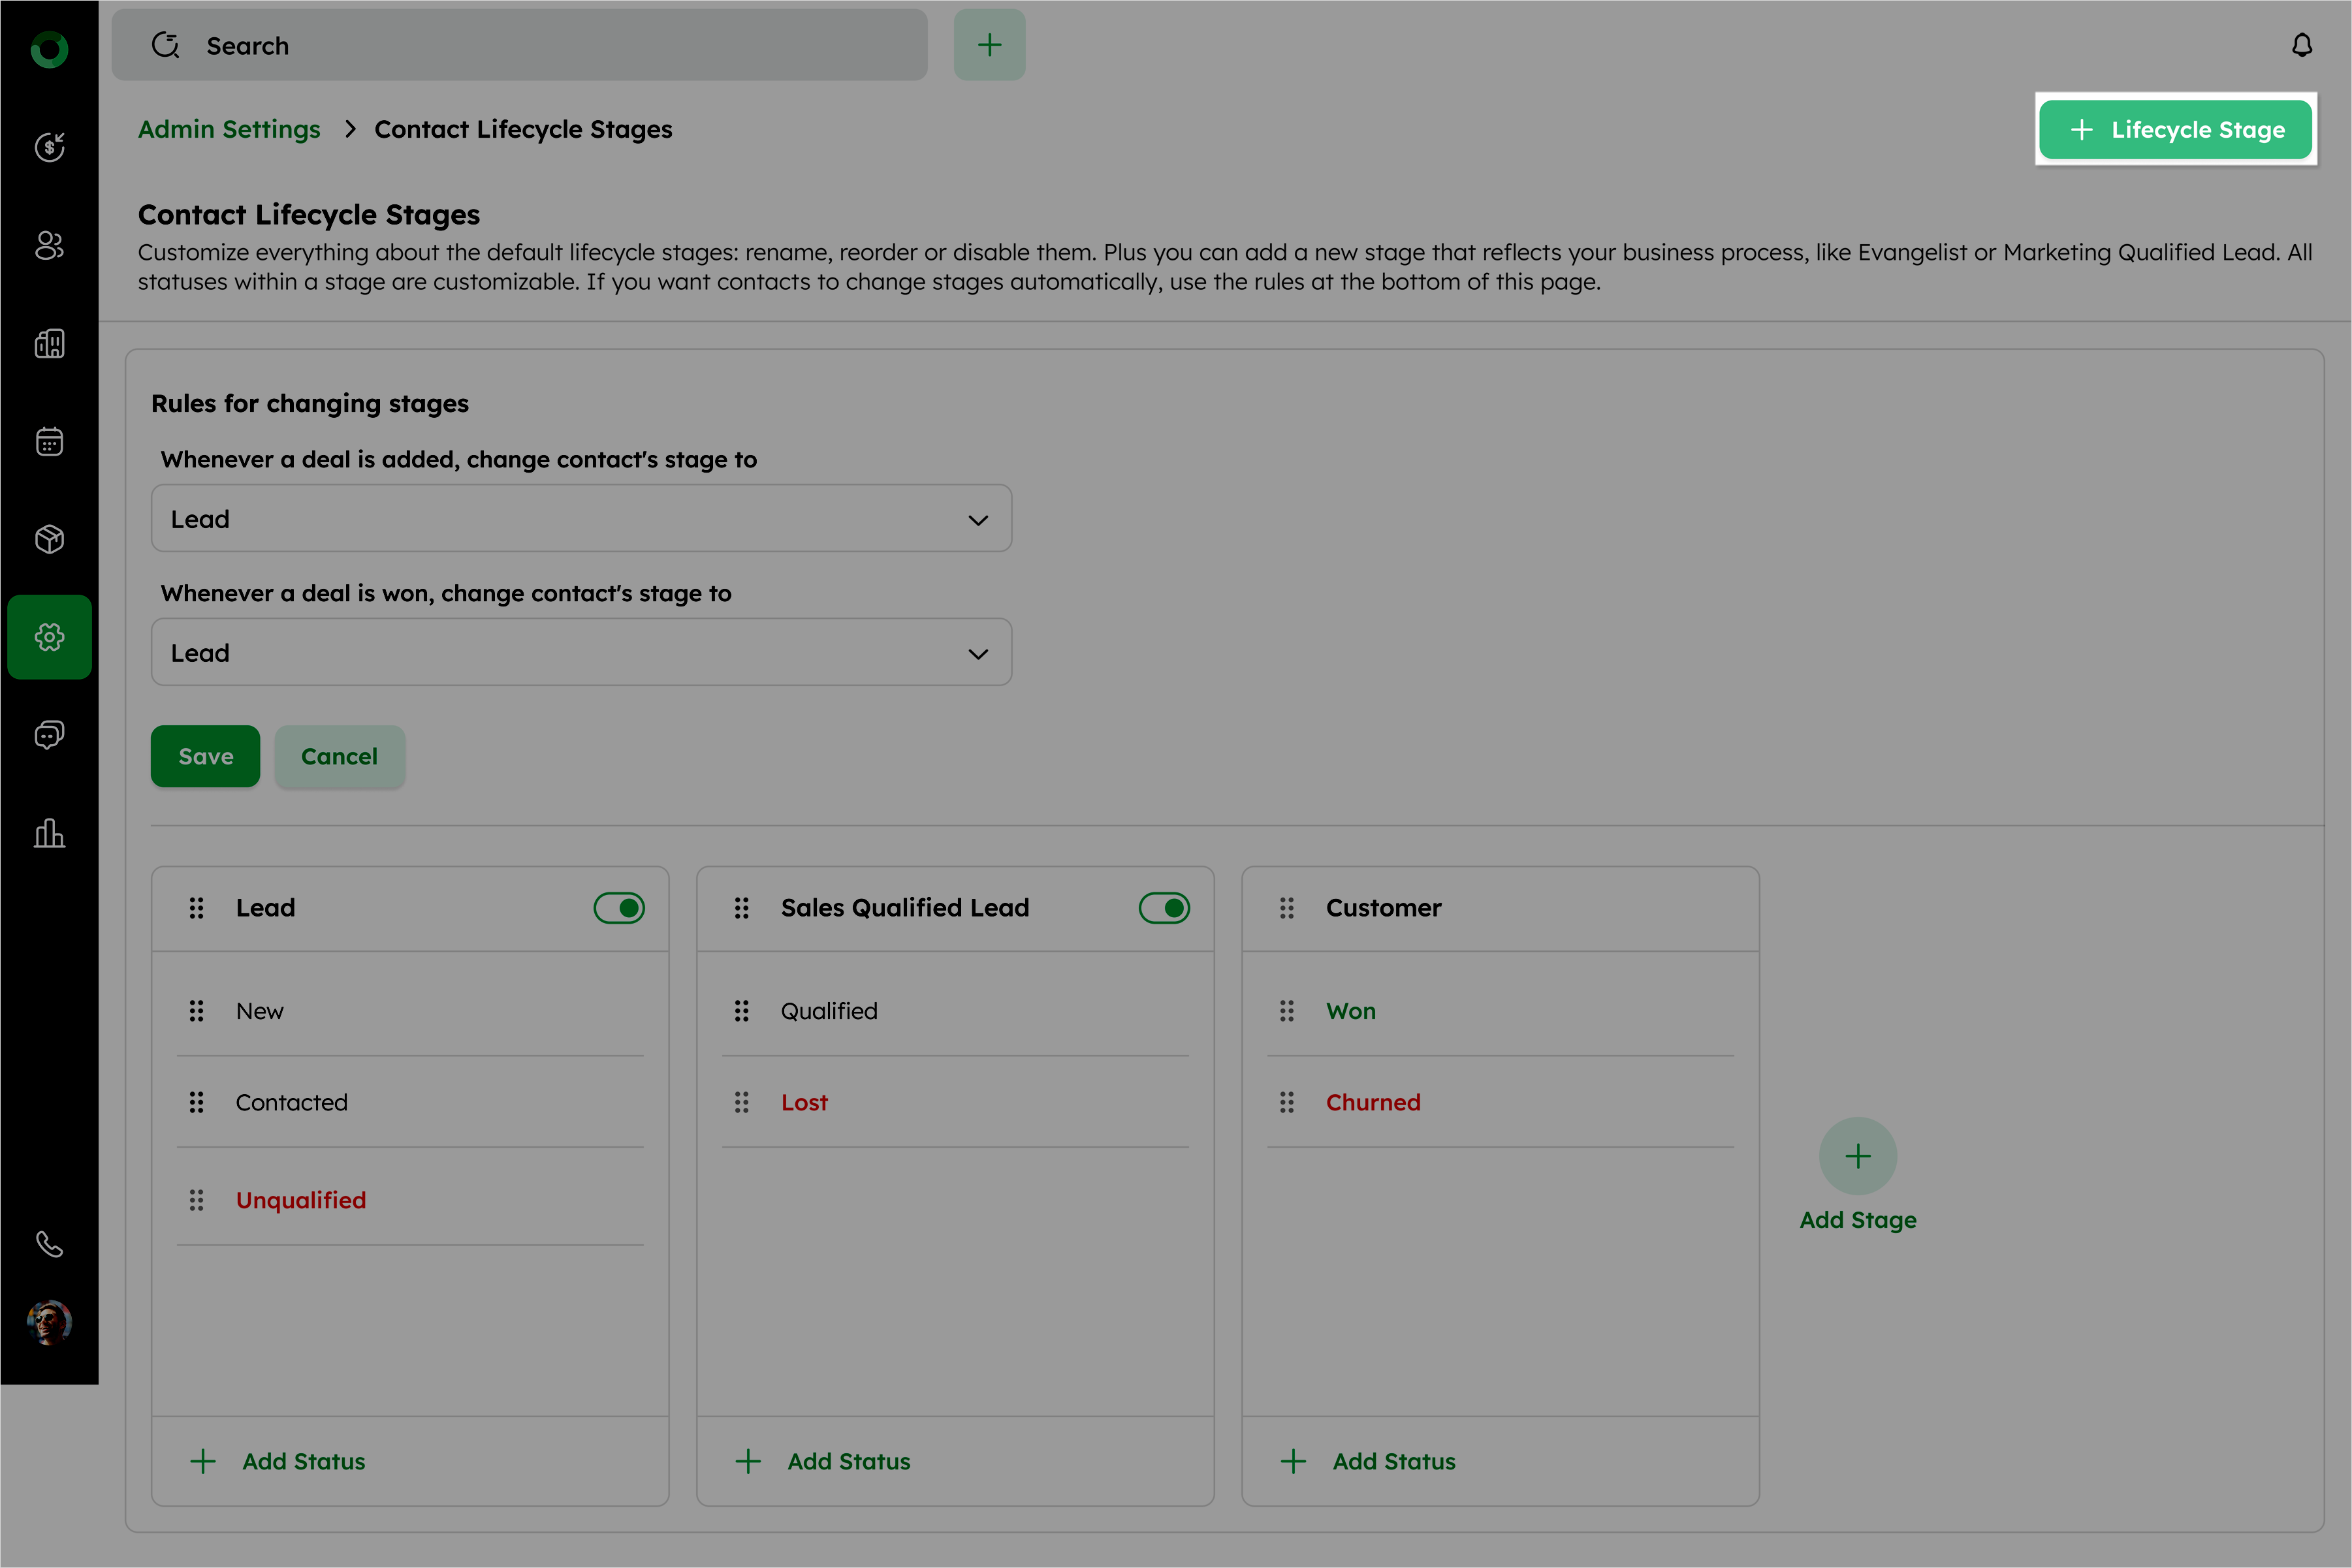
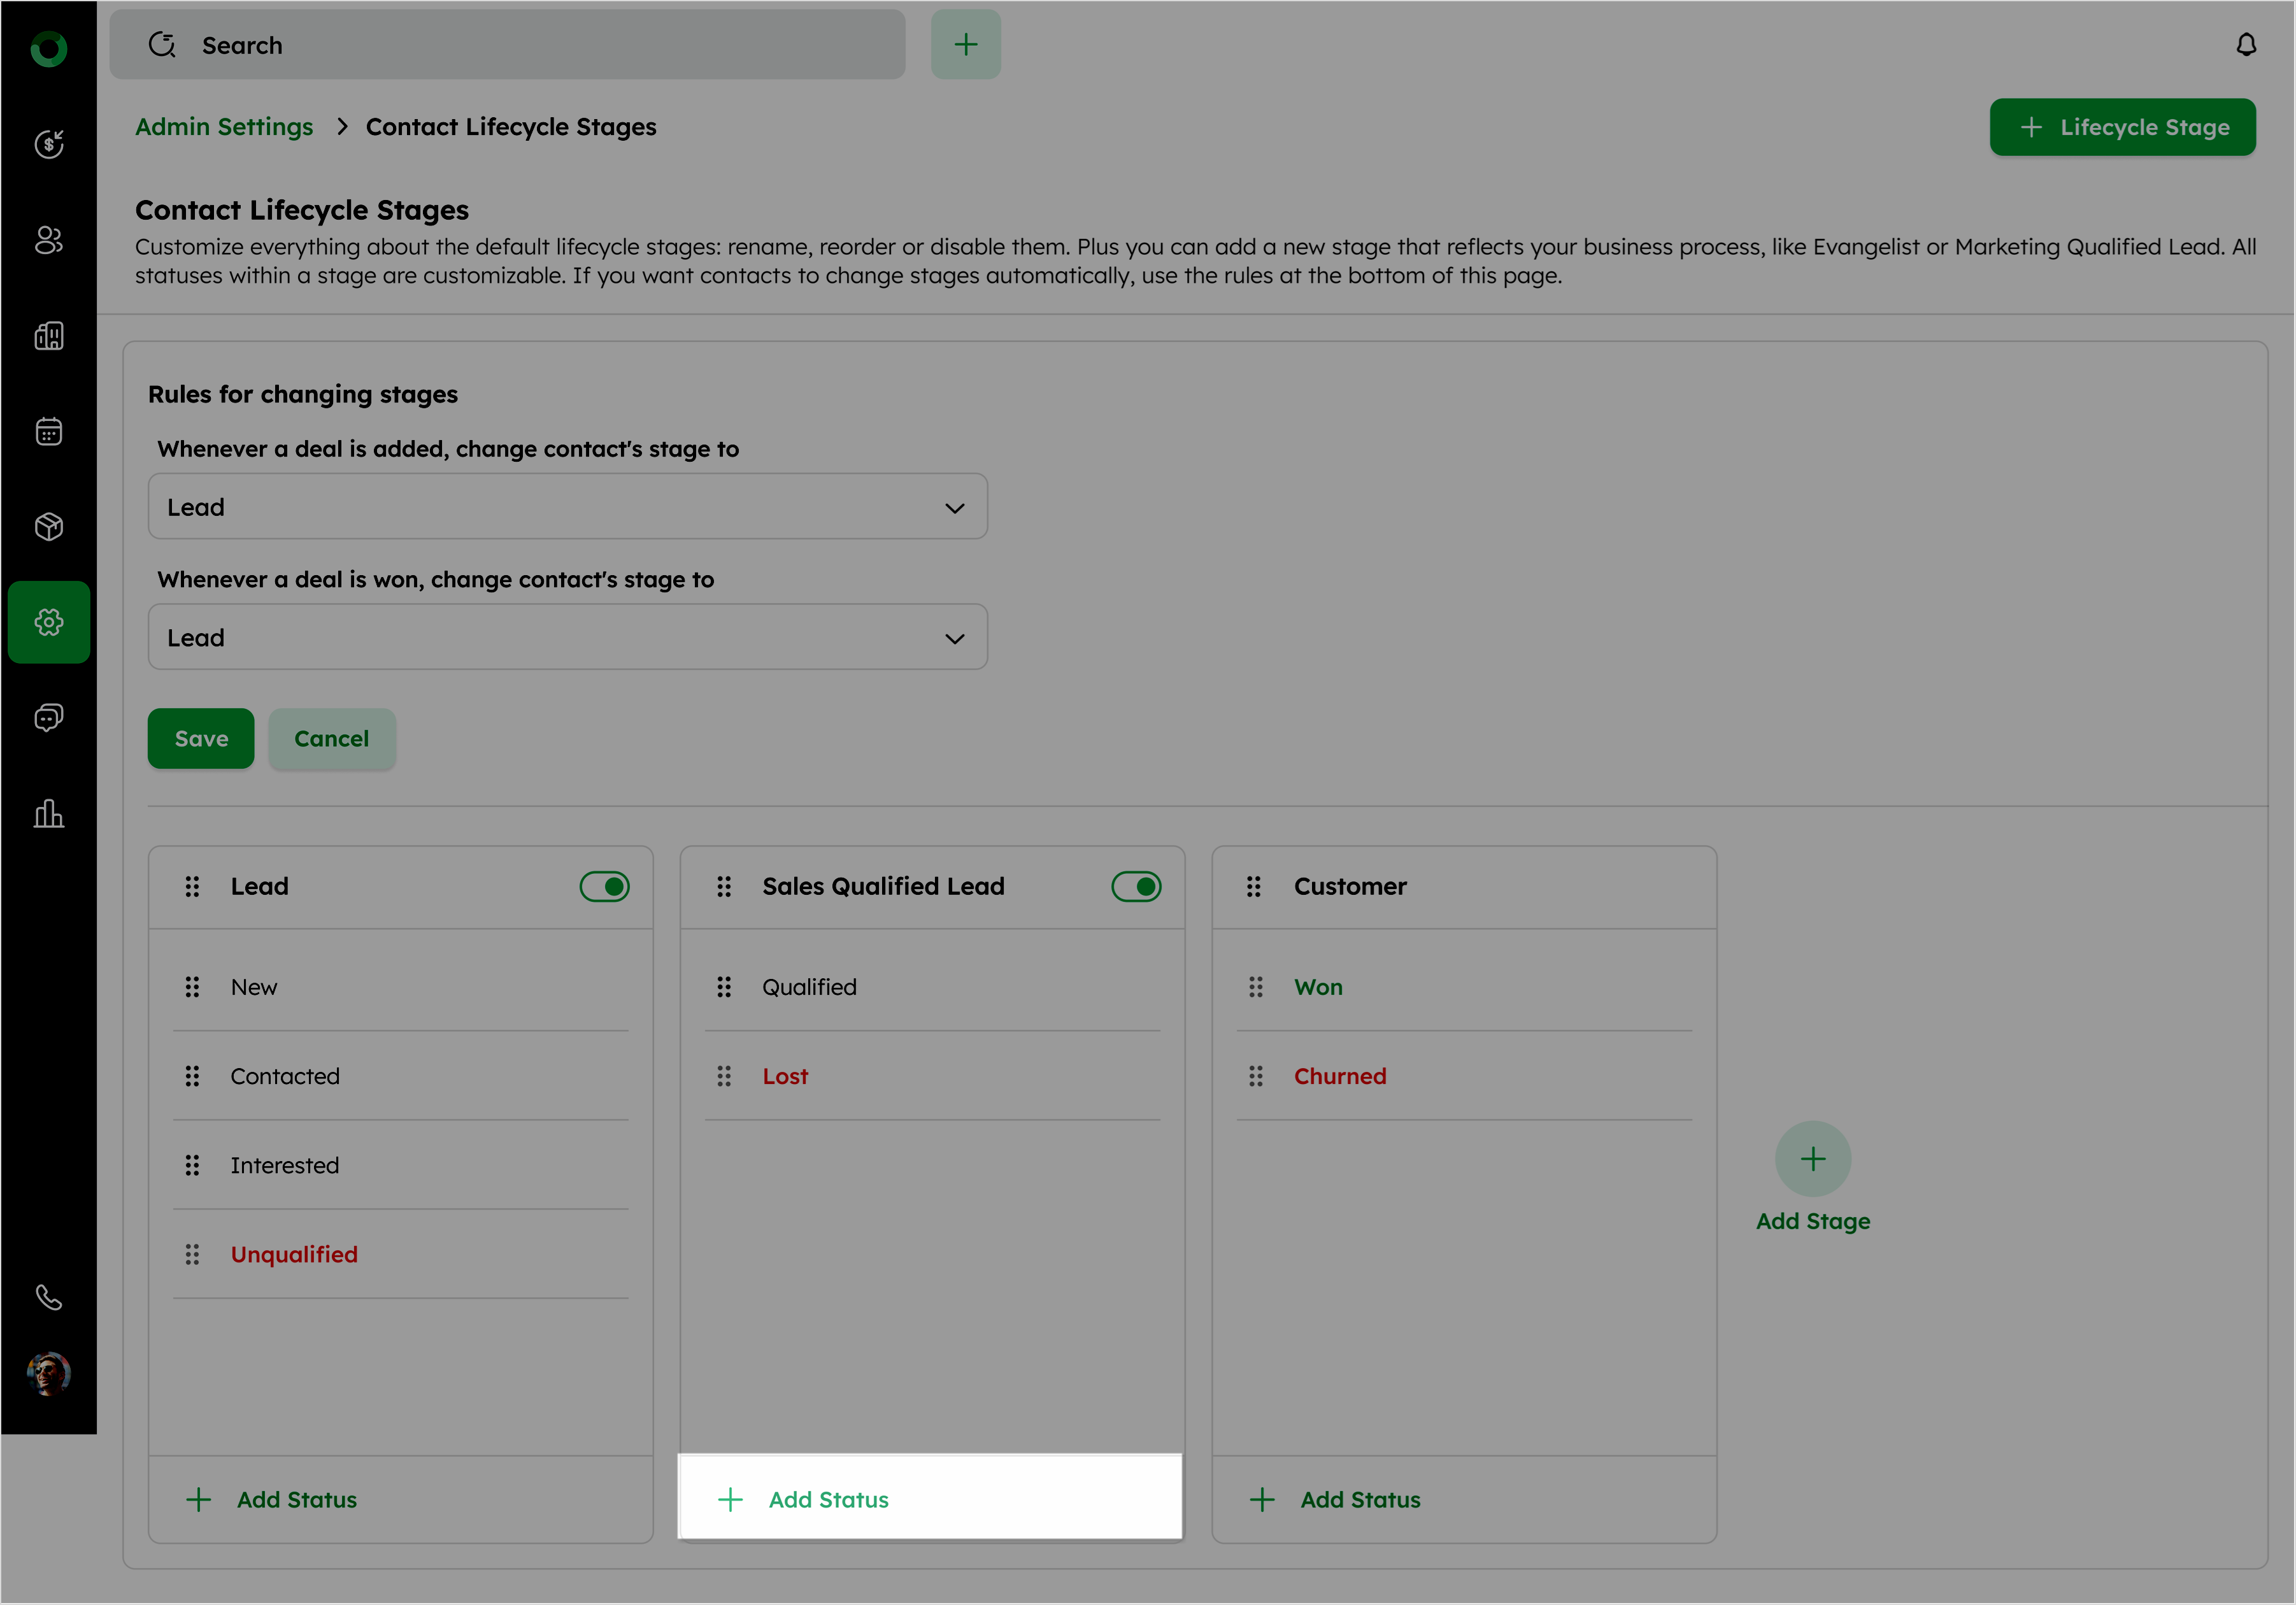
a) In the Contact Lifecycle setup page, click +Lifecycle Stage on the top-right corner to open the Add Lifecycle Stage drawer.
b) Enter the Lifecycle Stage Name.
c) Enter the Status for this stage.
d) Click +Add Status to include additional statuses if needed.
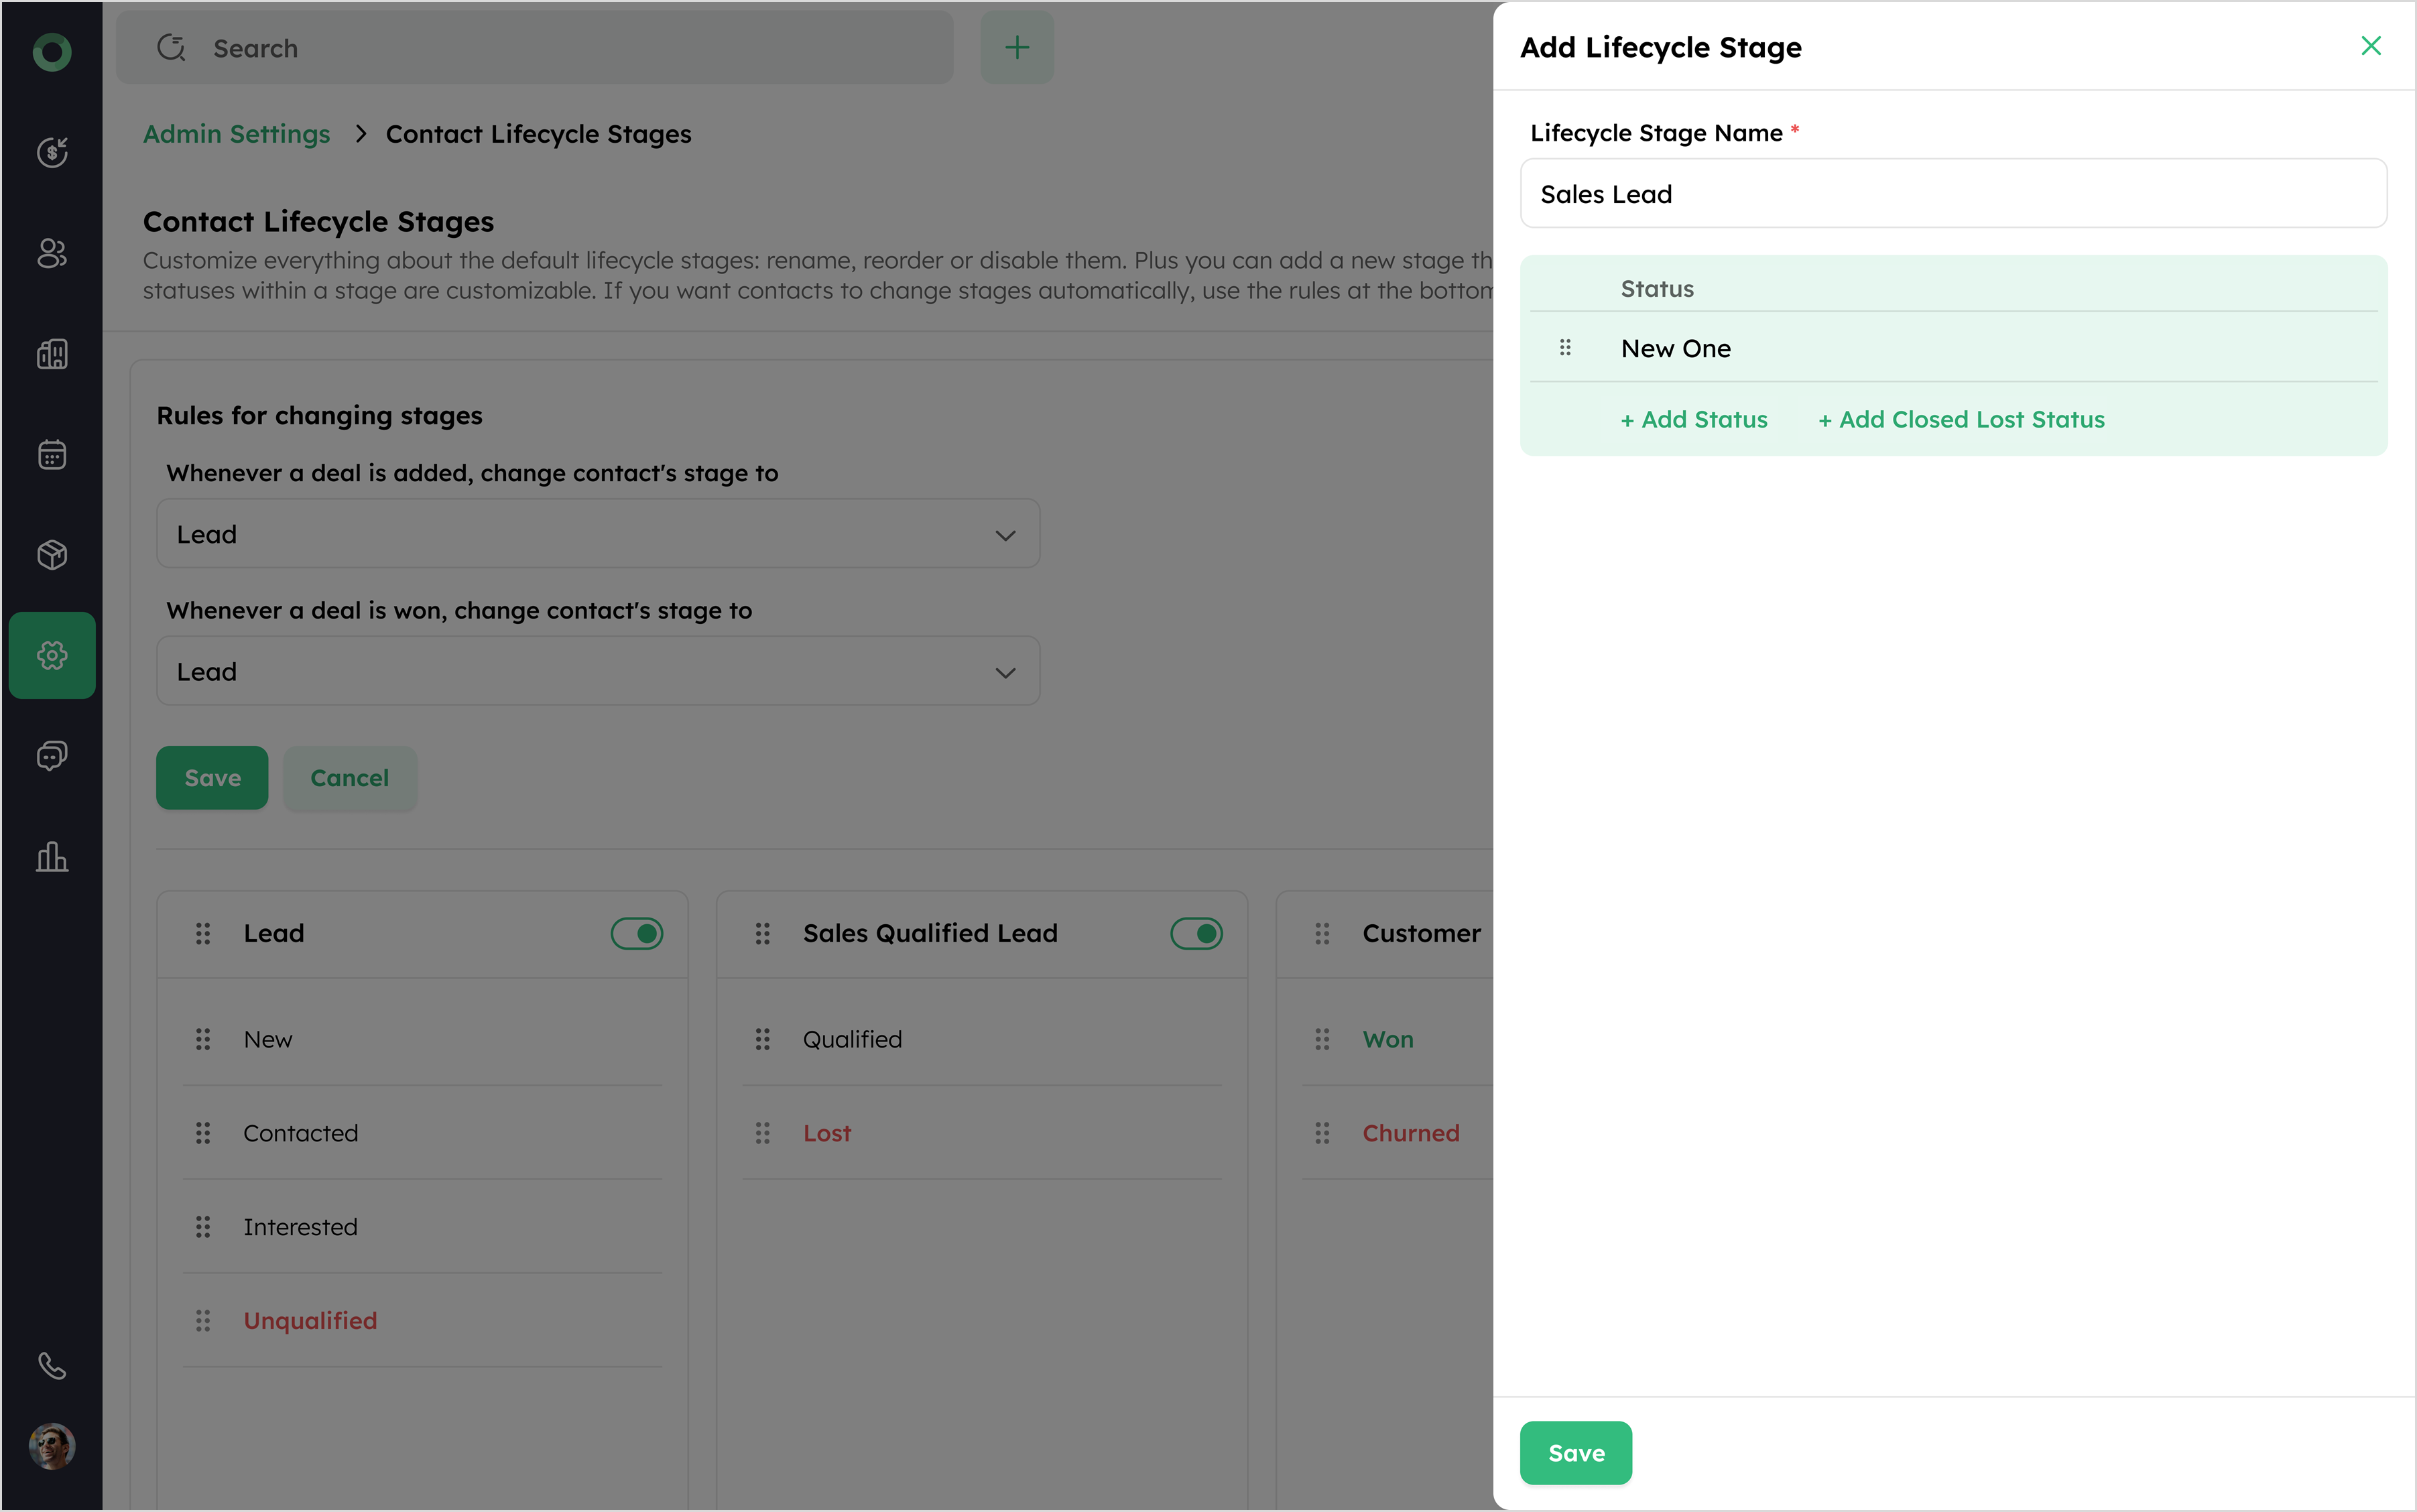
e) Use +Add Closed Lost Status to specify a status for lost opportunities. This status cannot be dragged and is always positioned at the end of the list.
f) Click Save to finalize the lifecycle stage.
-
At least one status must remain in every stage.
-
A maximum of 10 statuses can be added to any stage.
- Rename, reorder, or disable default stages, and add custom stages in the Contact Lifecycle Stages section.
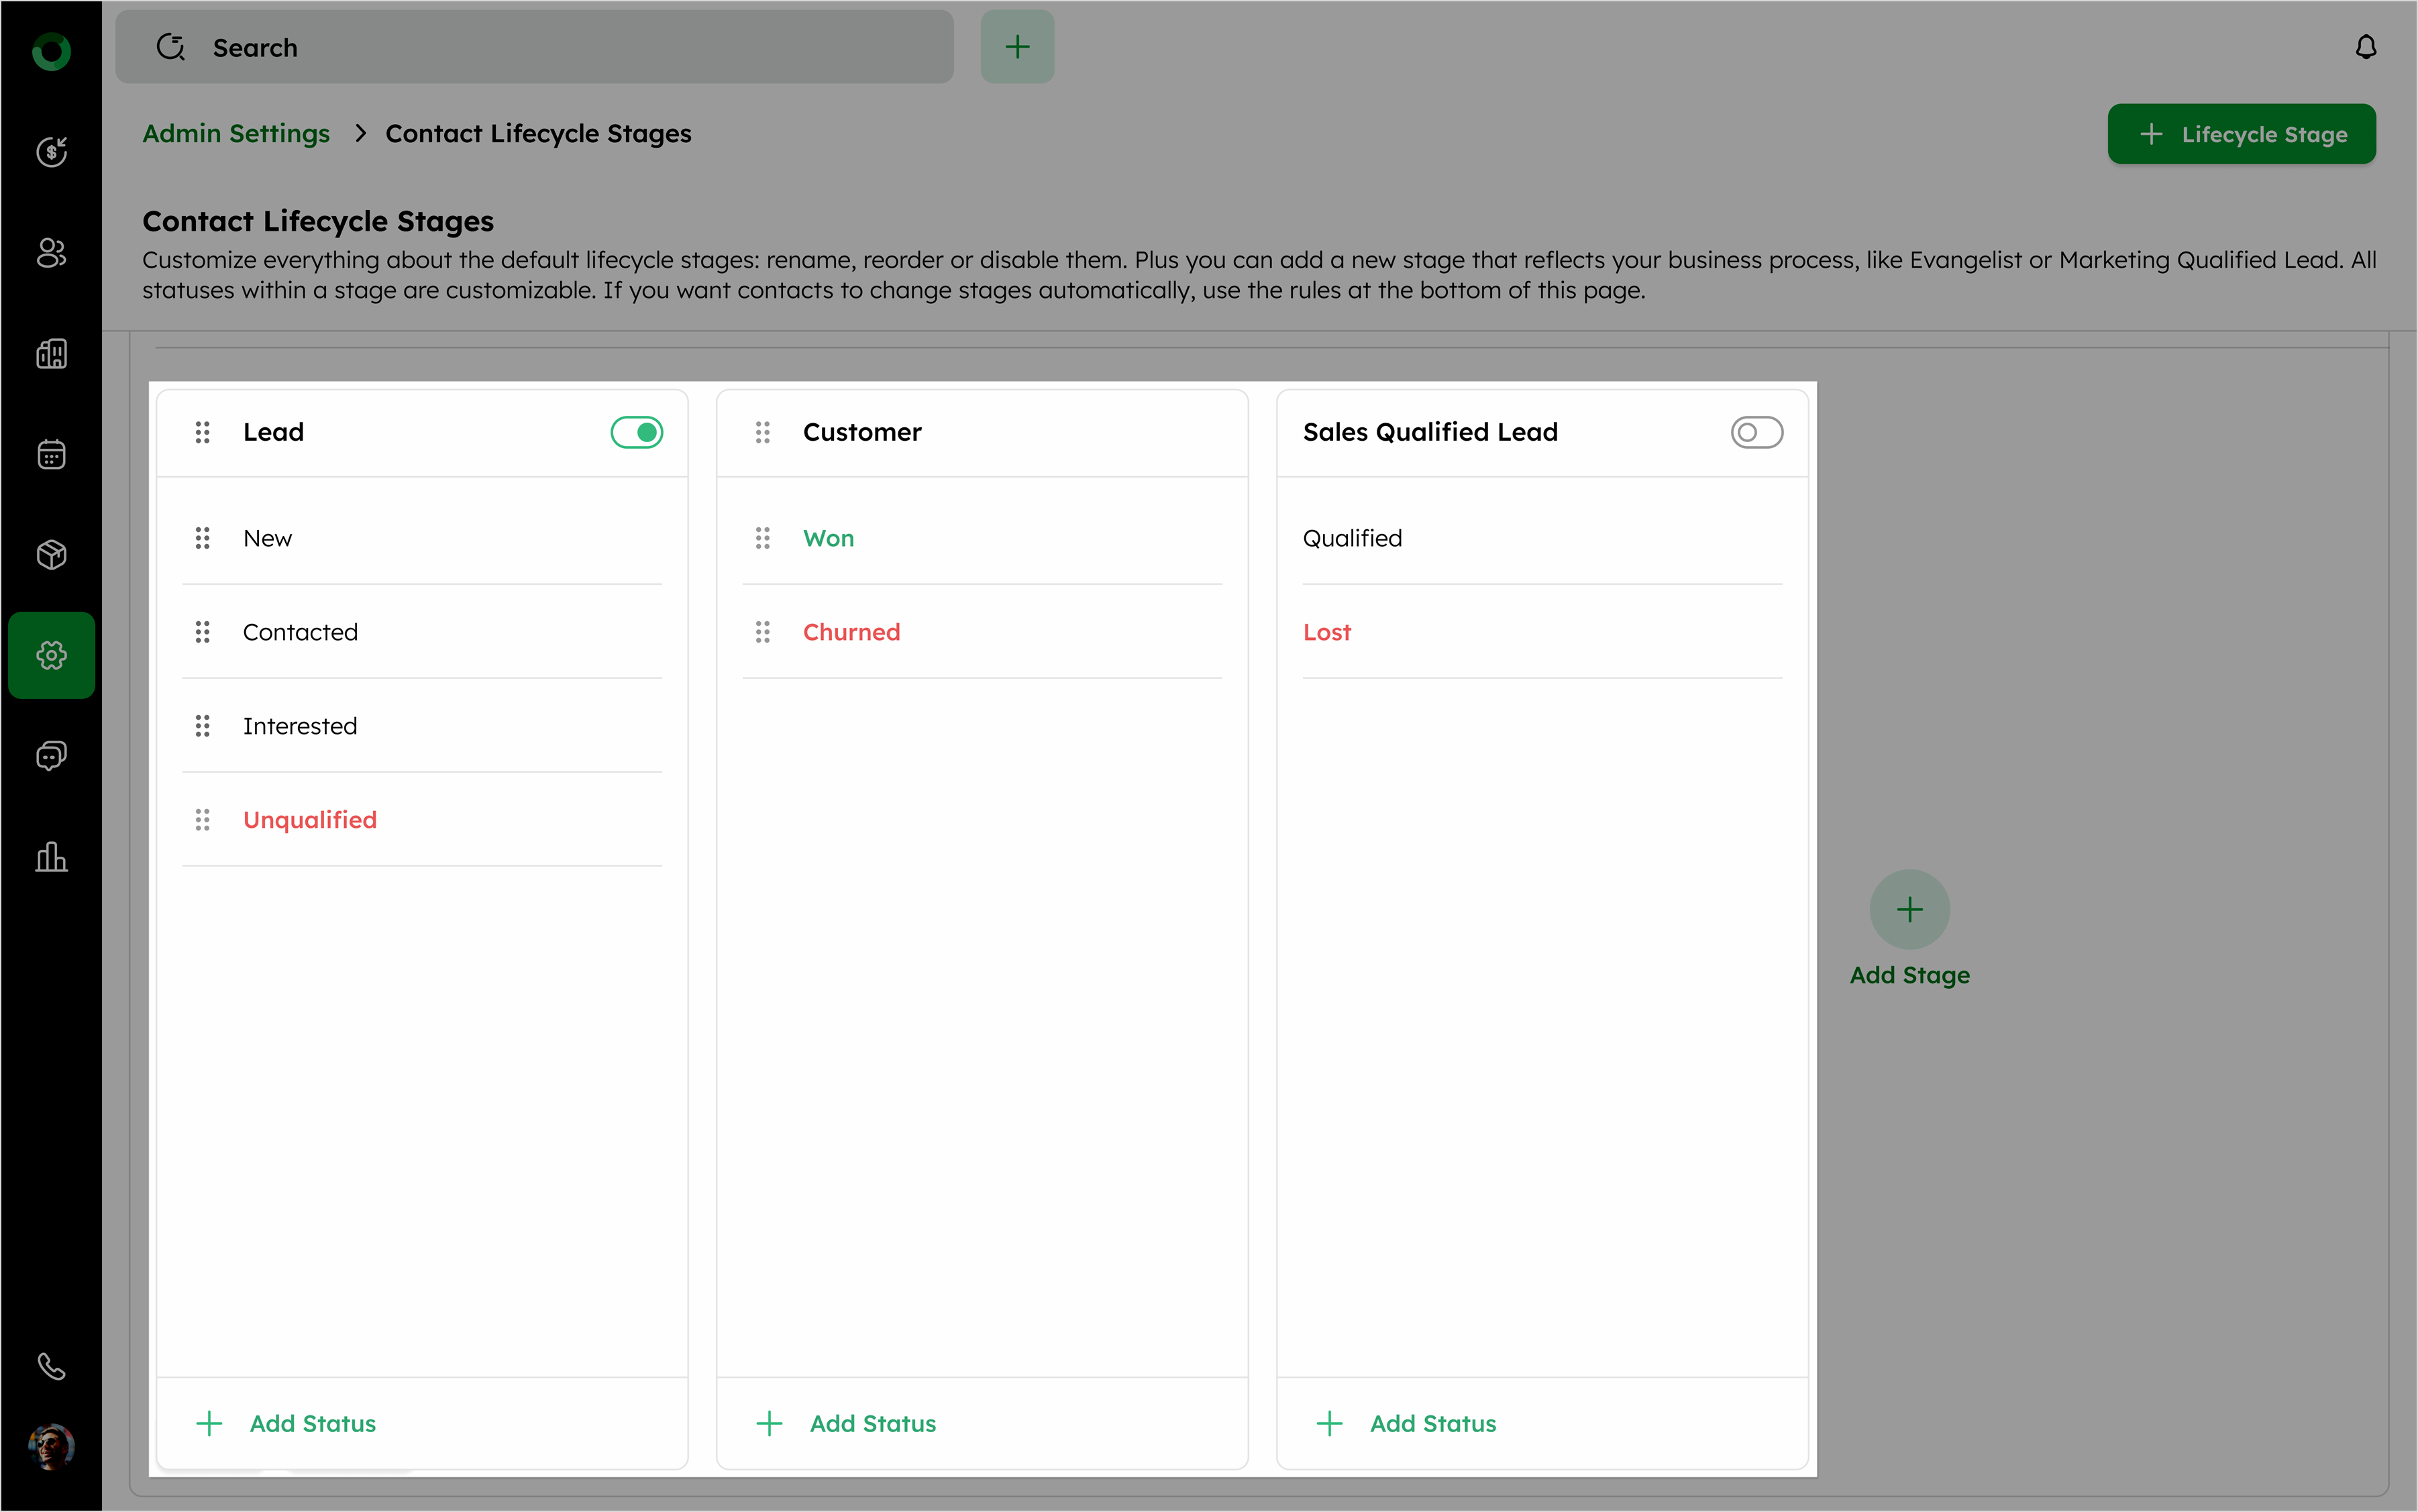
The Customer stage remains fixed and cannot be moved.
The Won and Lost statuses within the Customer stage cannot be removed.
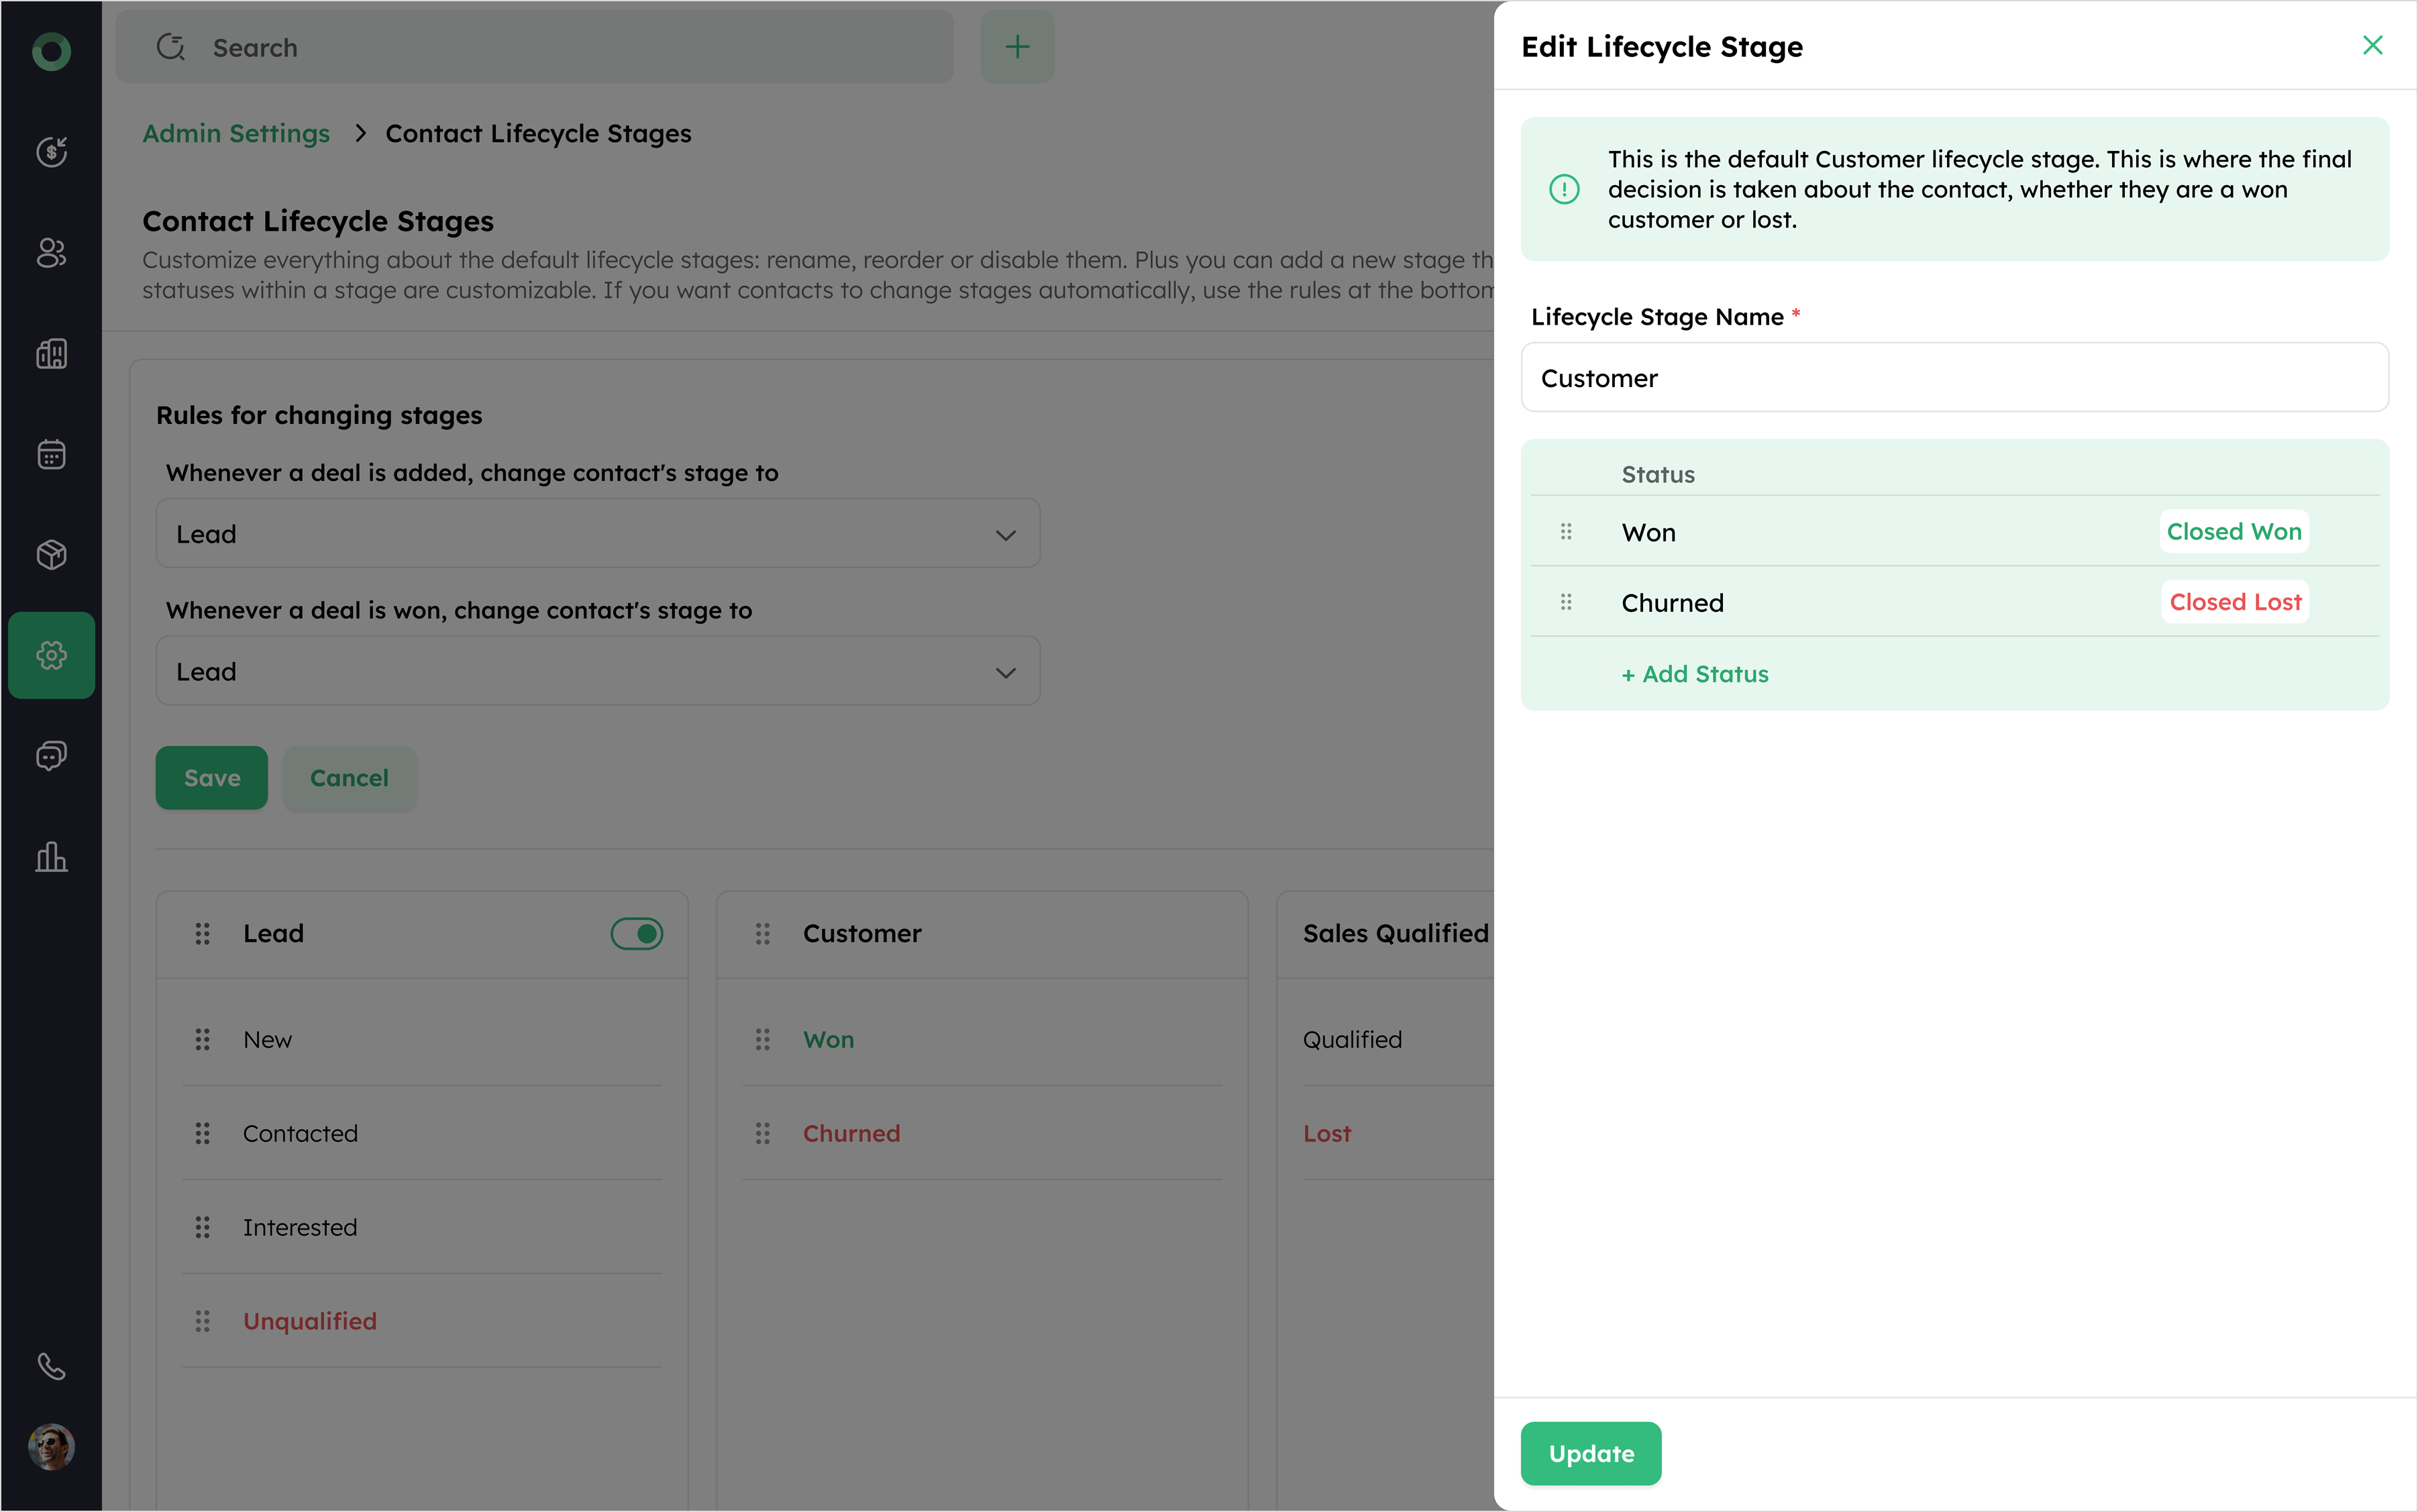
The Closed status (Won & Lost) is fixed as the final status and cannot be rearranged.
- Modify statuses within each stage and set up rules to automate stage transitions.
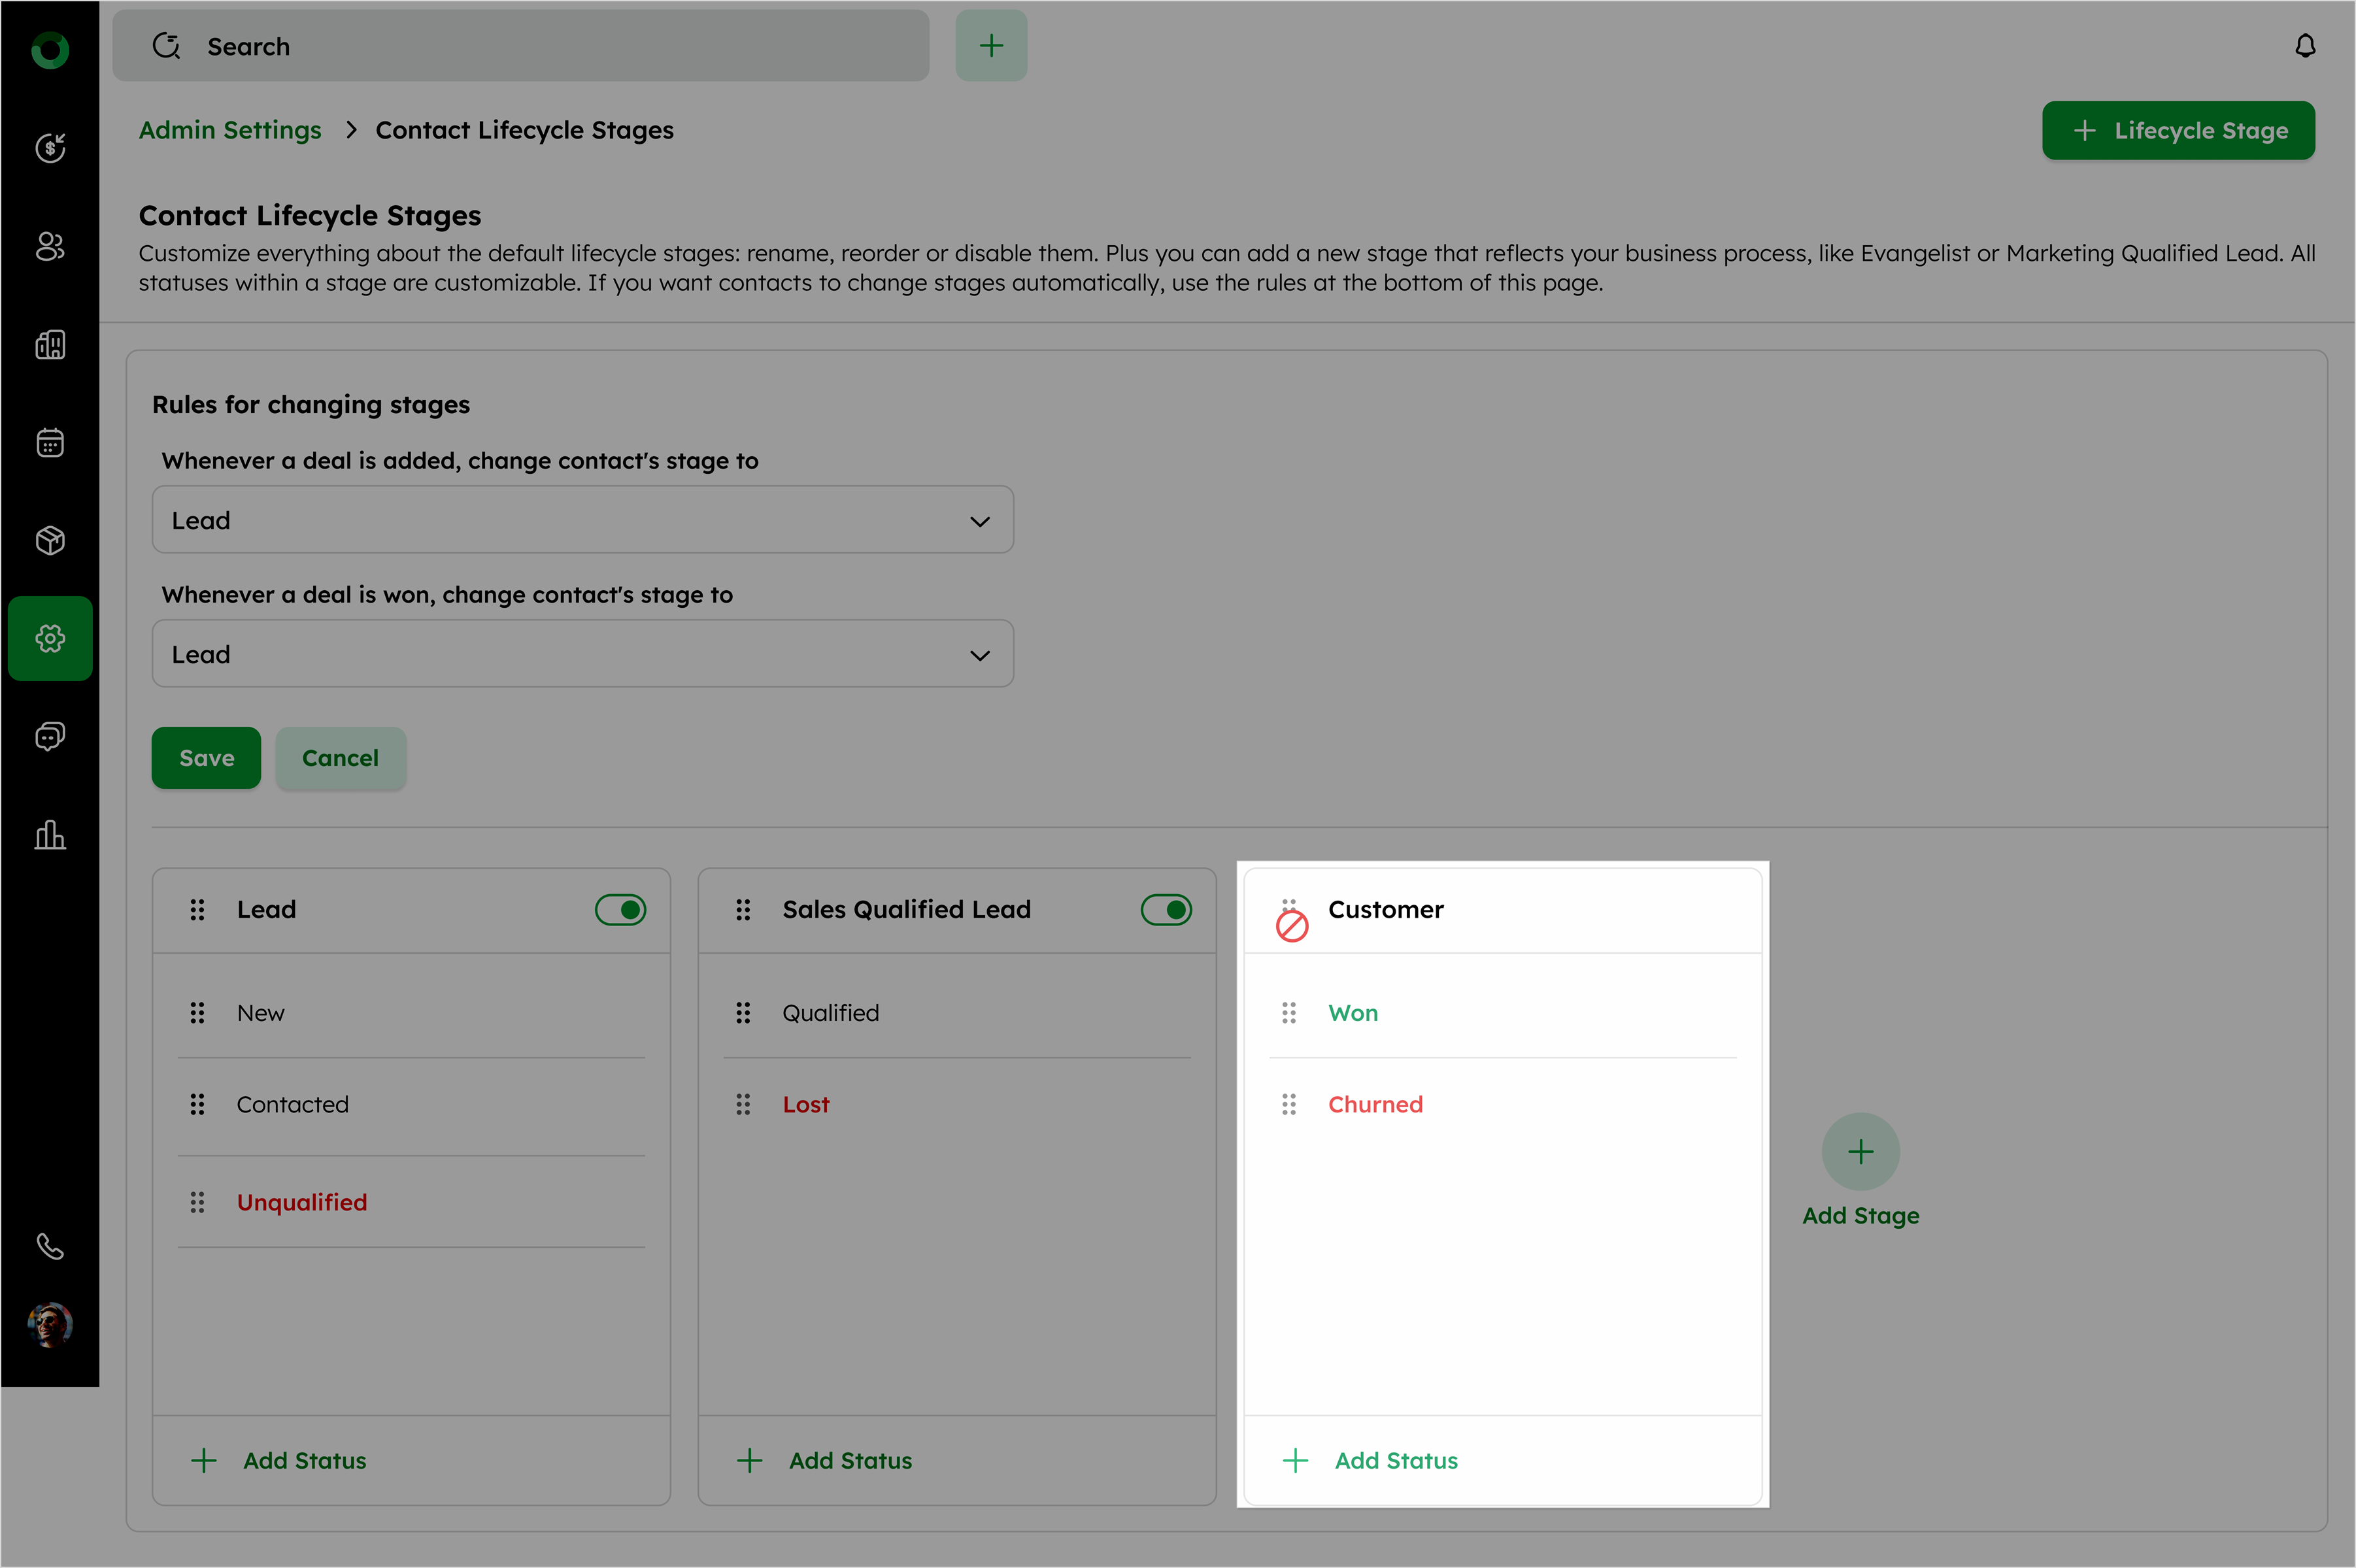
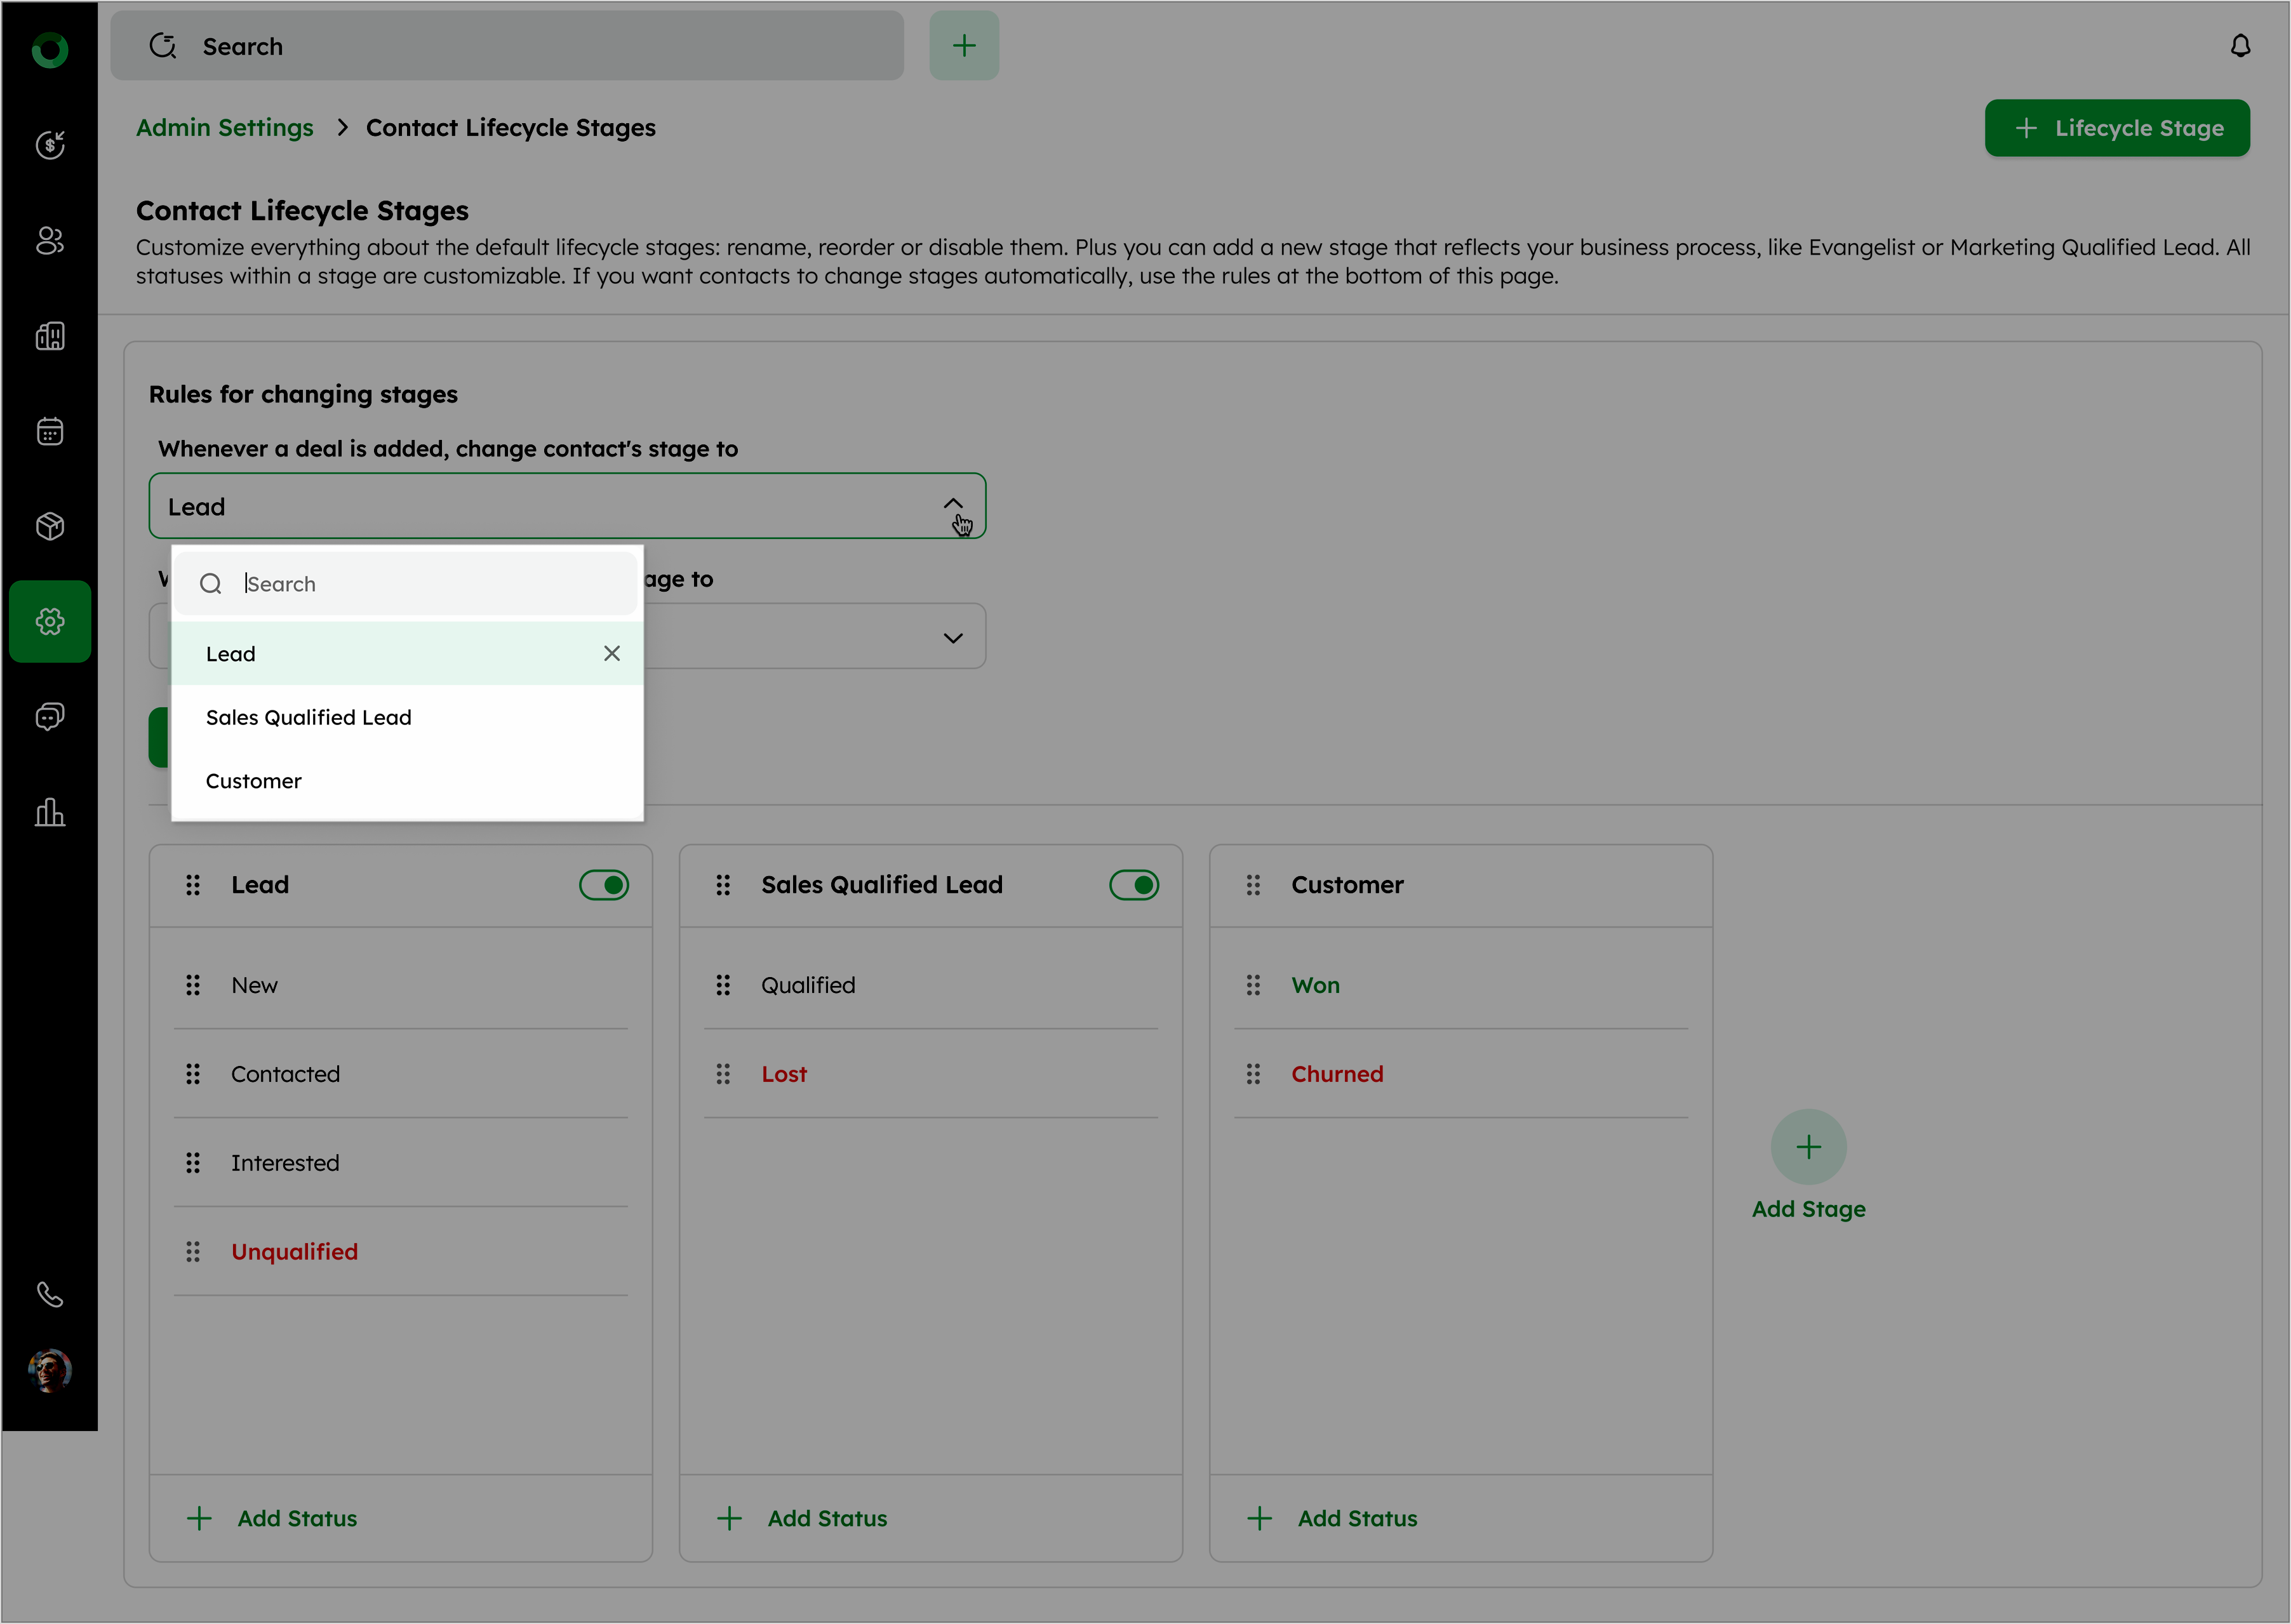
Setting Up Rules to Automate Transitions
- Select Whenever a deal is added or Whenever a deal is won as the trigger.
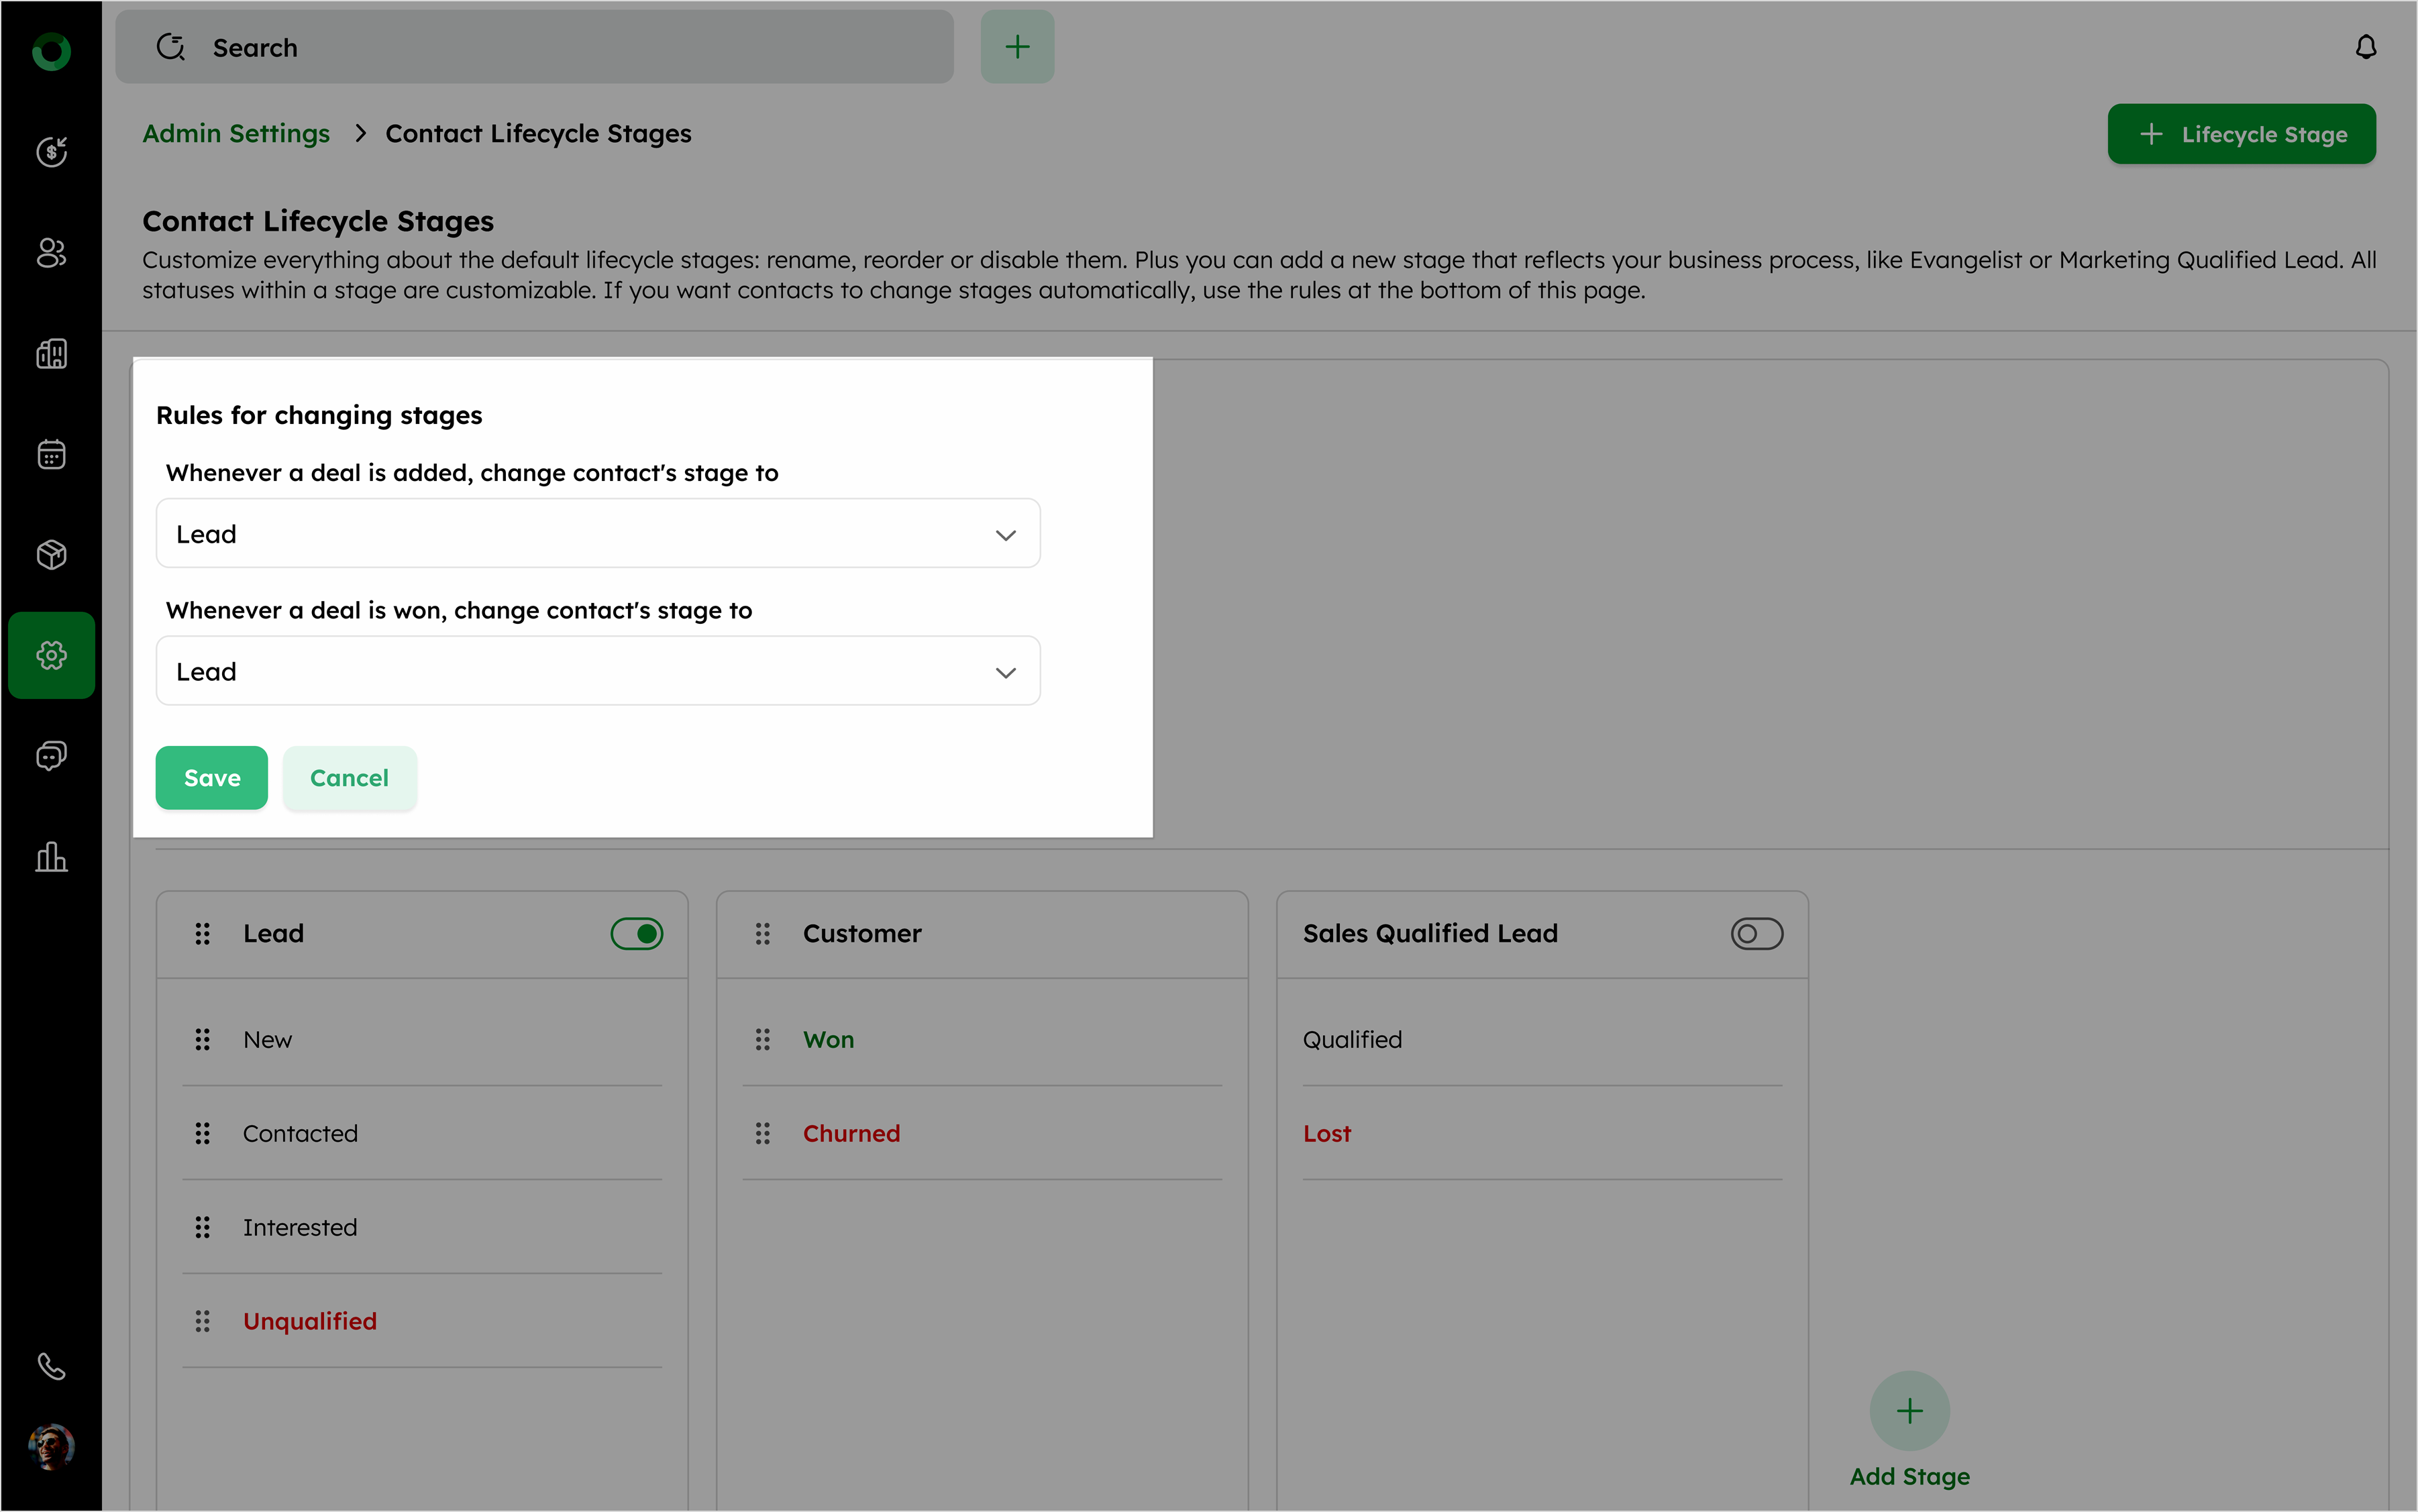
-
Choose the desired contact stage from the drop-down menu to move the contact, when the condition is triggered.
-
The drop-down menu includes both default and custom stages.
-
When triggered, the contact's stage updates automatically.
-
The rule applies to both the primary and related contacts linked to the deal.
The Lead and Sales Qualified Lead stages are the default stages. They can be disabled but not deleted, and you can rename them if needed.
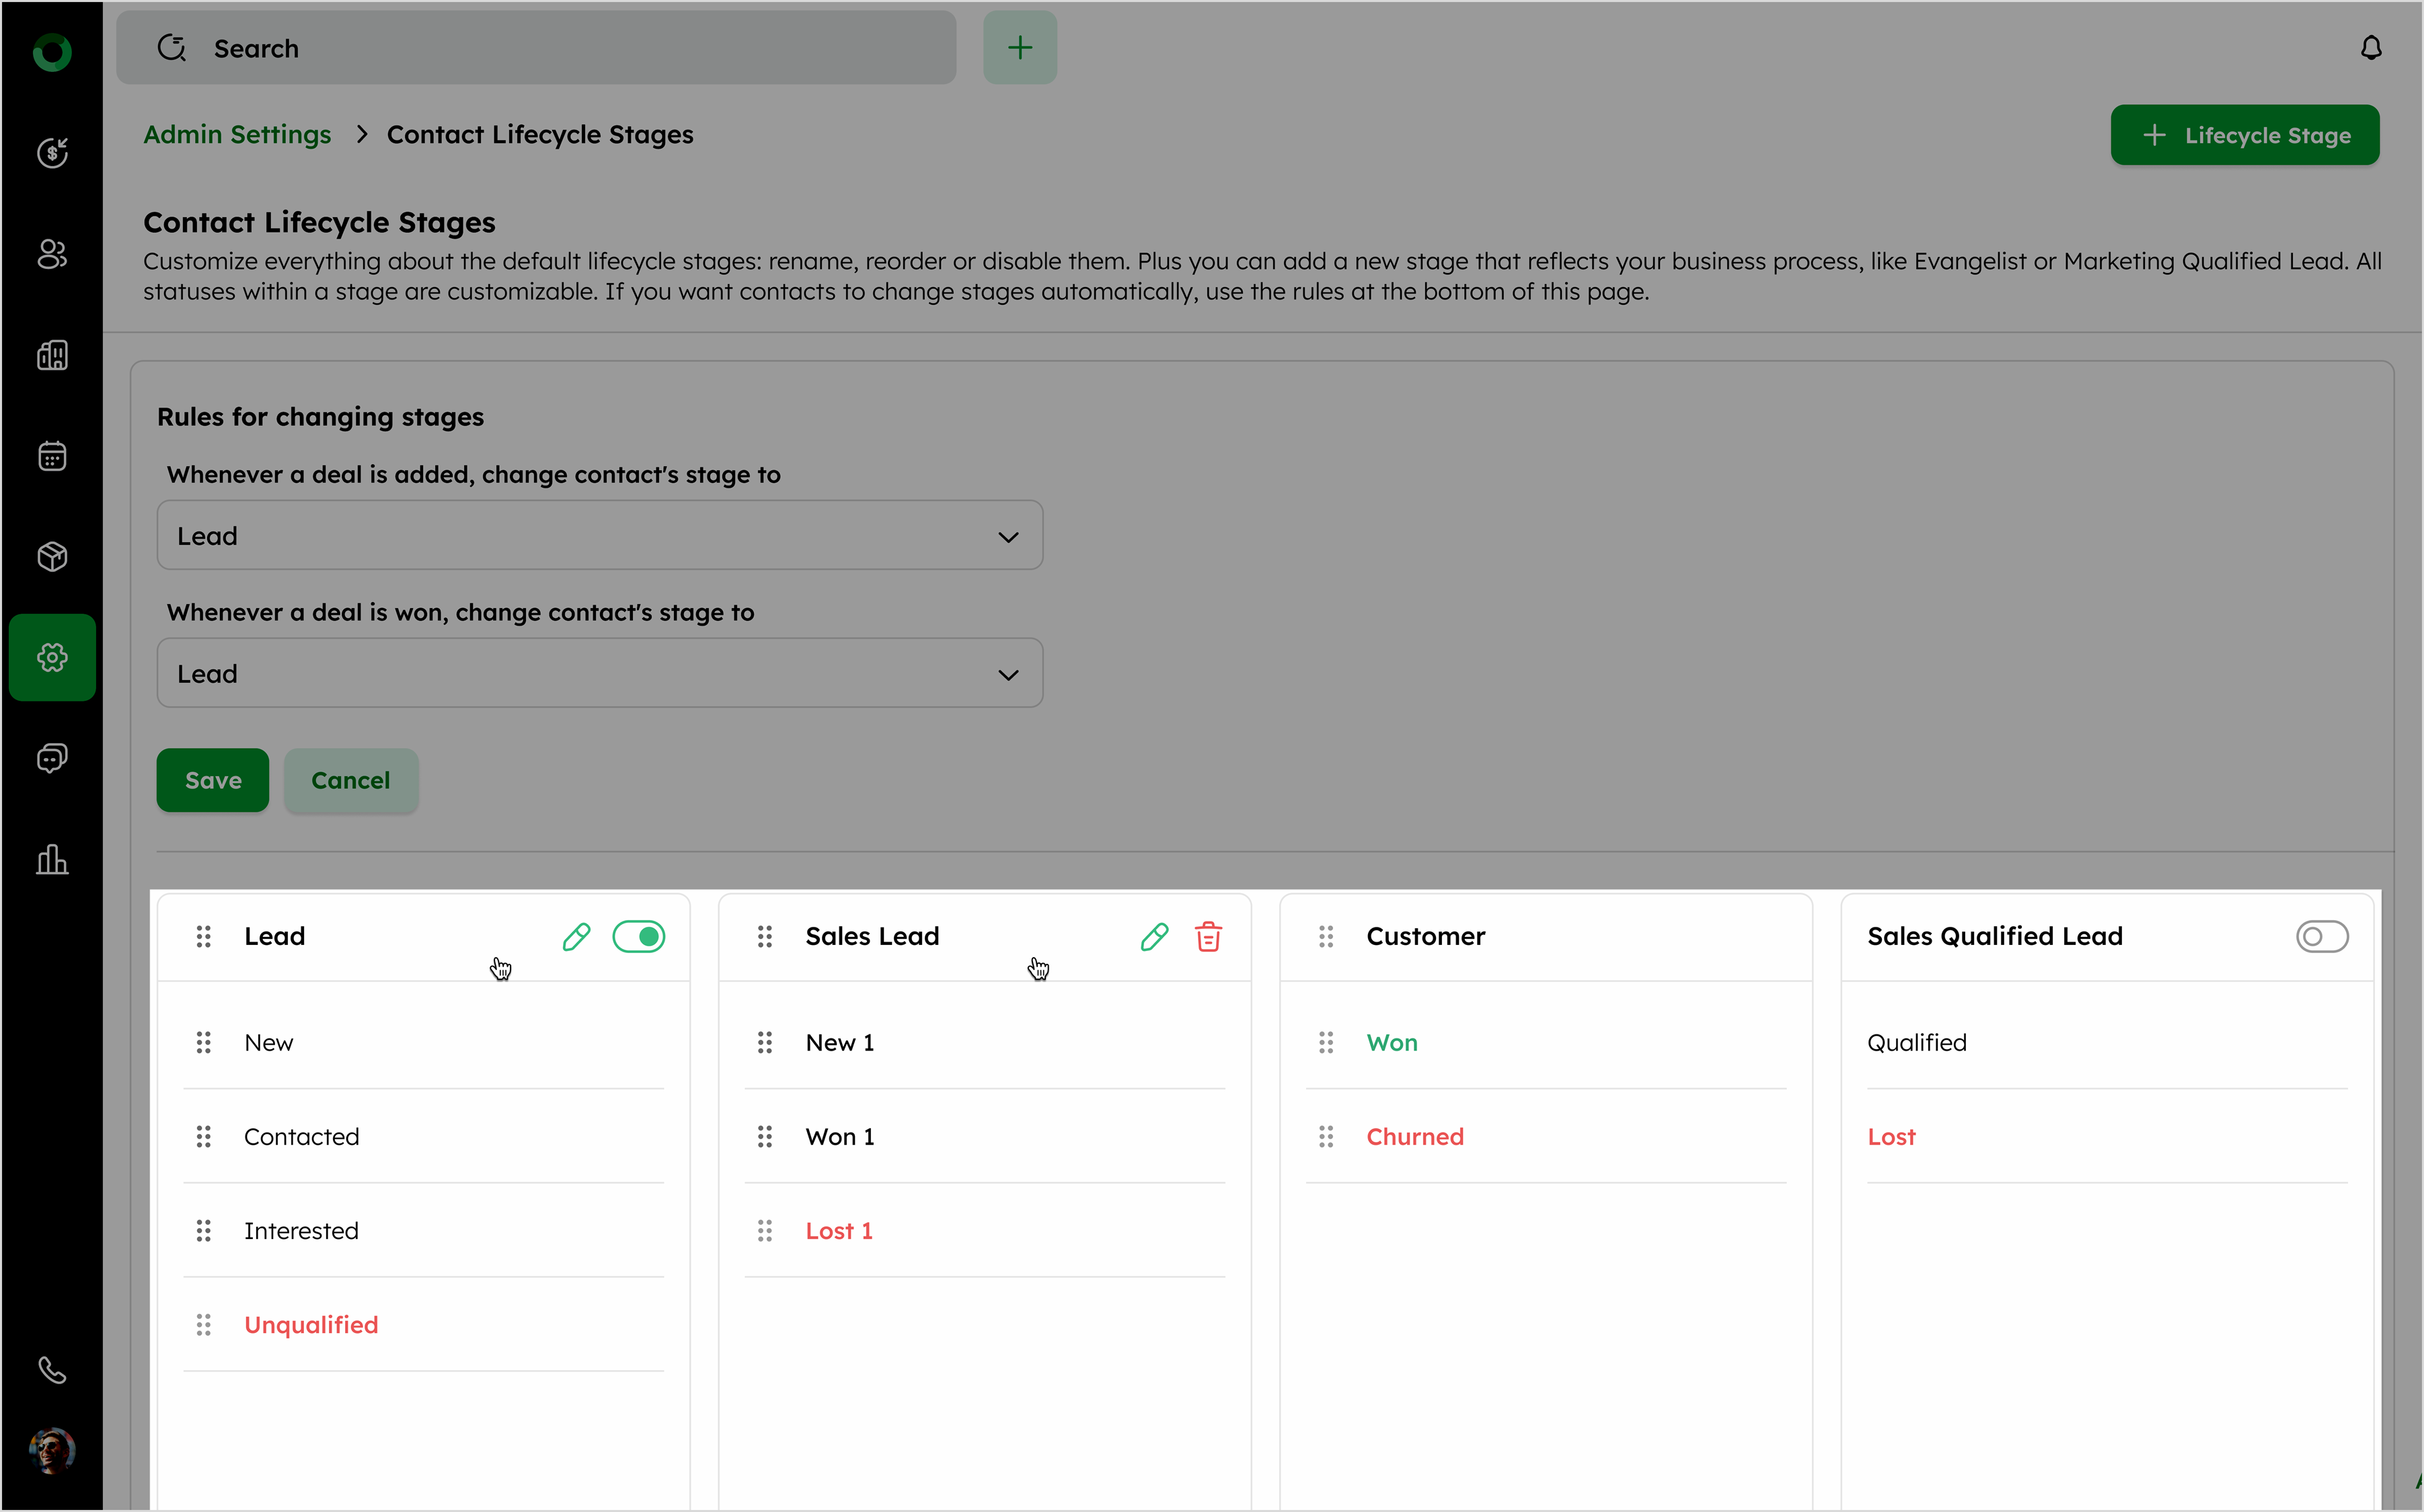
- Remove or add the status of default stages as needed.
Contacts will move as follows based on the stages enabled or disabled:
-
If the Lead stage is disabled, contacts move to Sales Qualified Lead.
-
If the Sales Qualified Lead stage is disabled, contacts move to Lead.
-
If both stages are disabled, contacts move directly to the final stage, Customer.
- Click the +Add Status option below the stage to open the Edit Lifecycle Stage drawer.
- Update the details and click Update at the bottom.
-
You can add a maximum of 10 stages, including default stages.
-
Duplicate stages or statuses are not allowed.
Viewing the Lifecycle Stage Scale
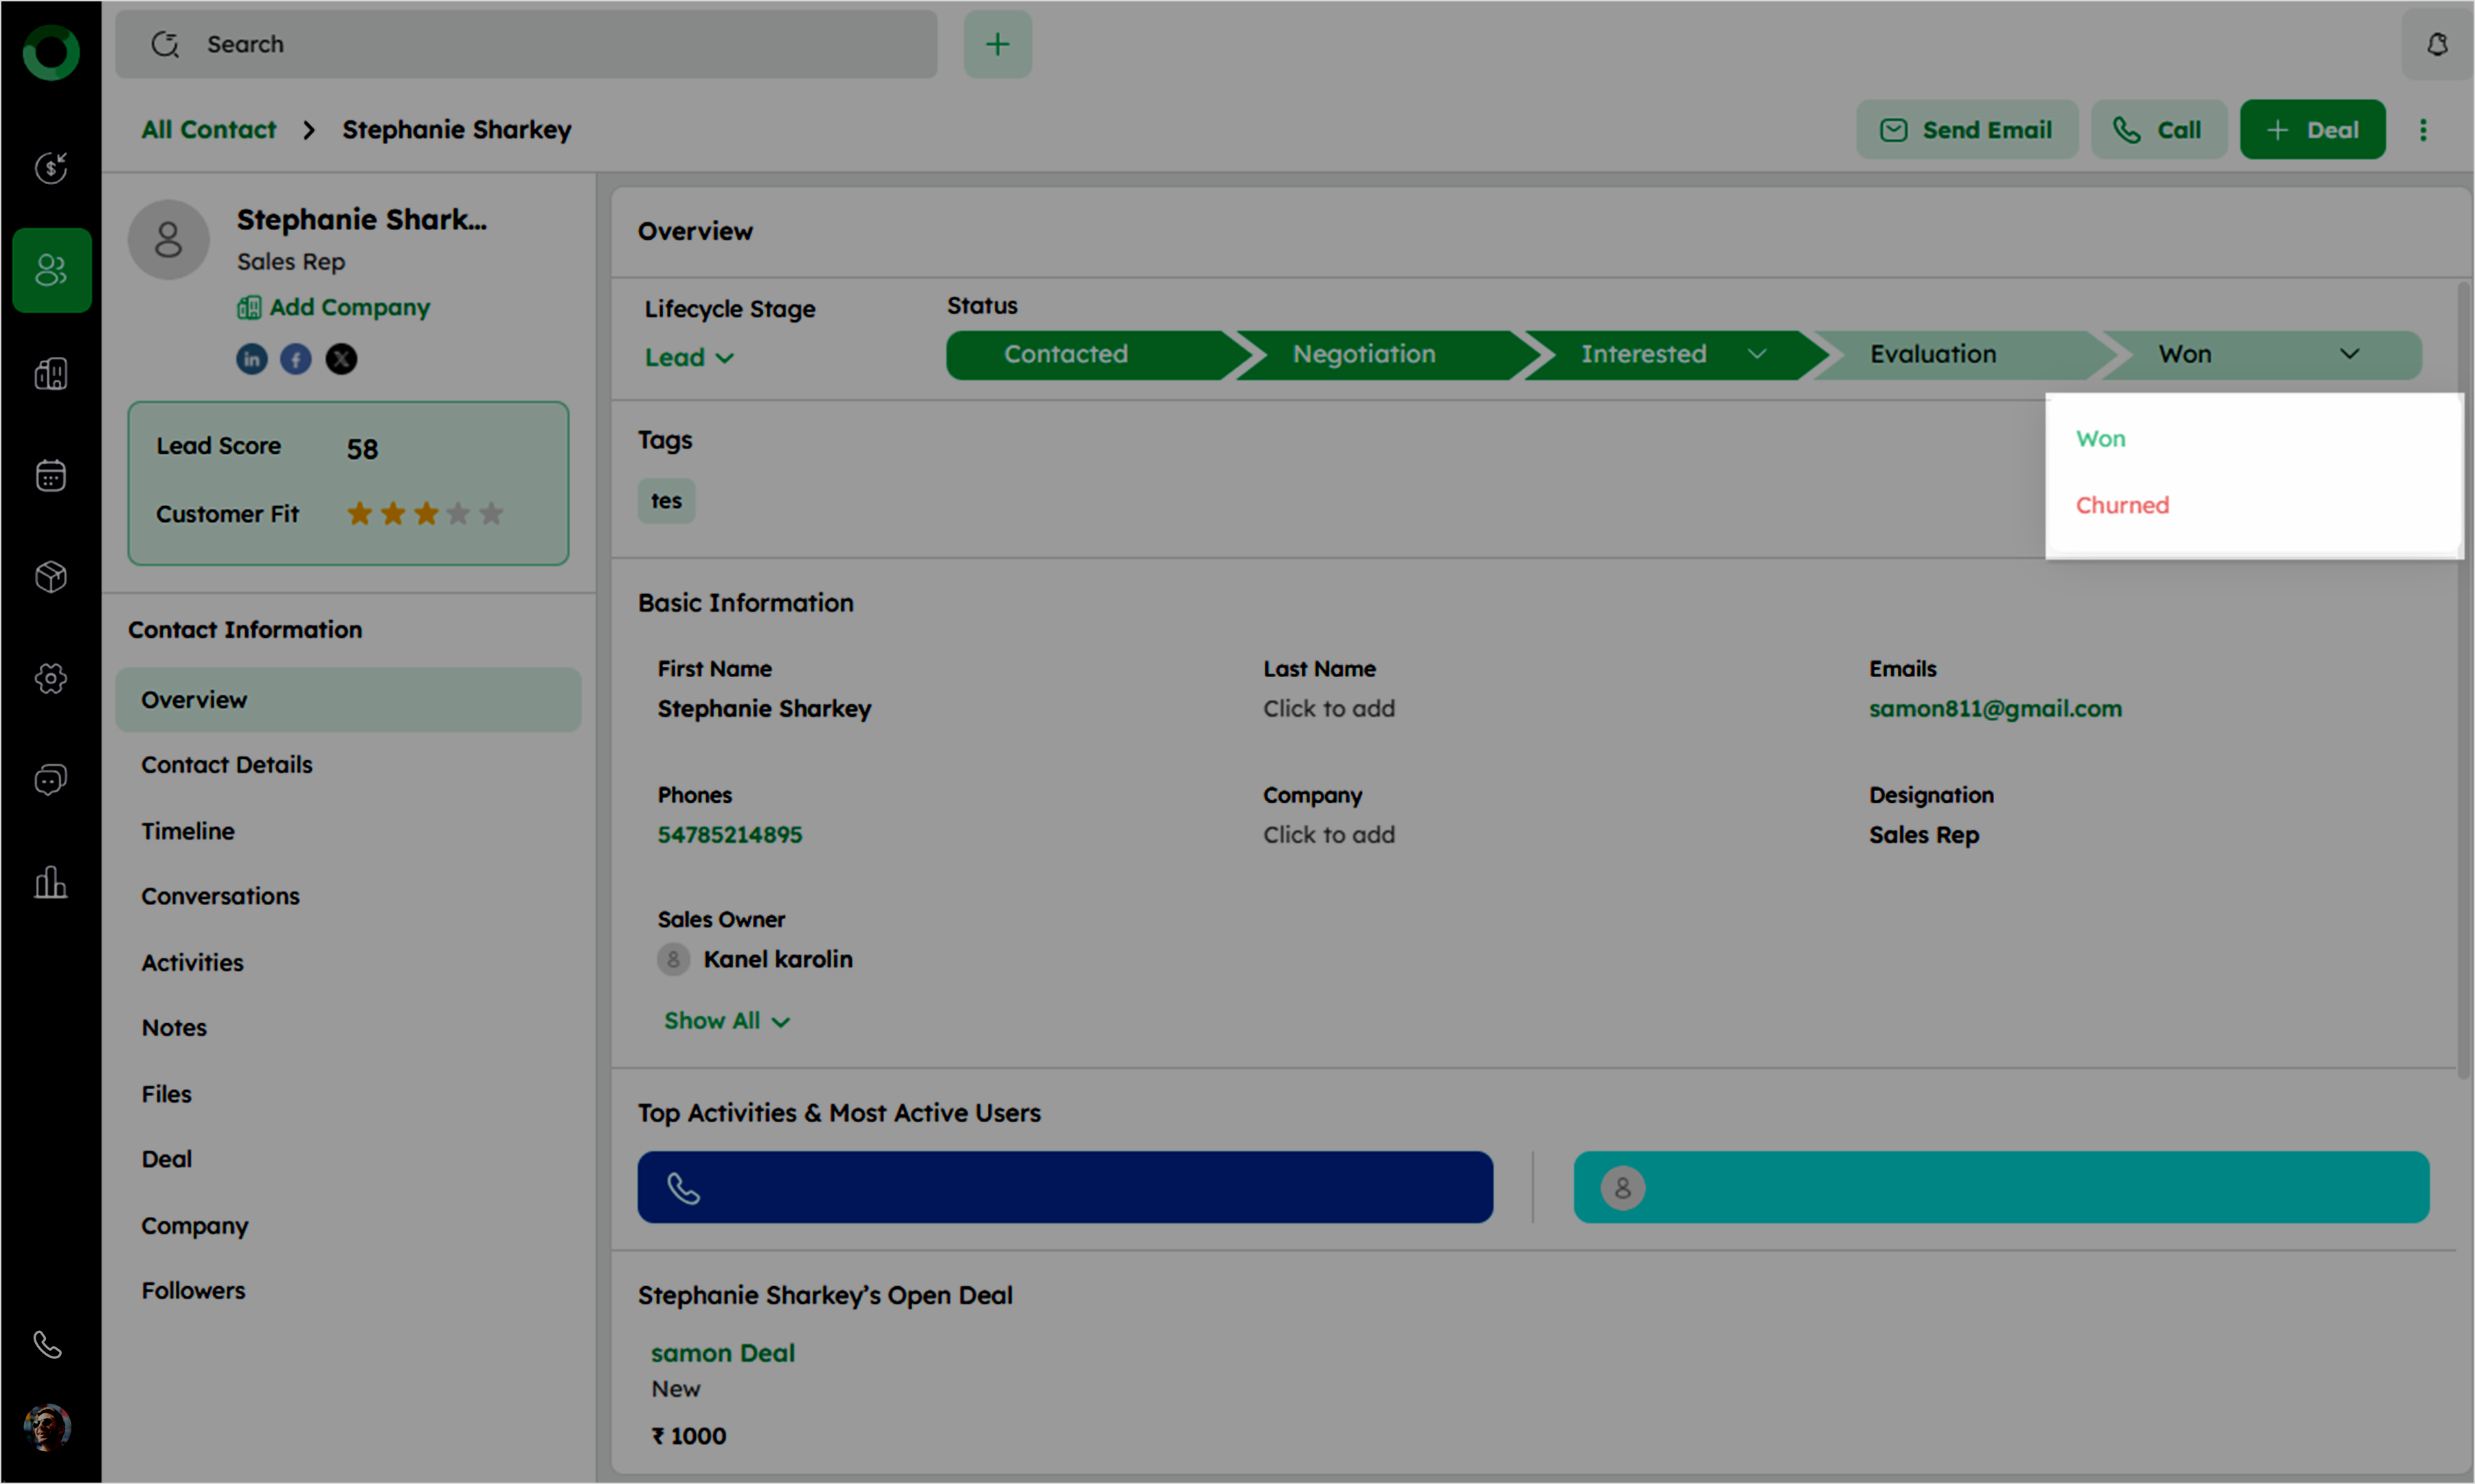
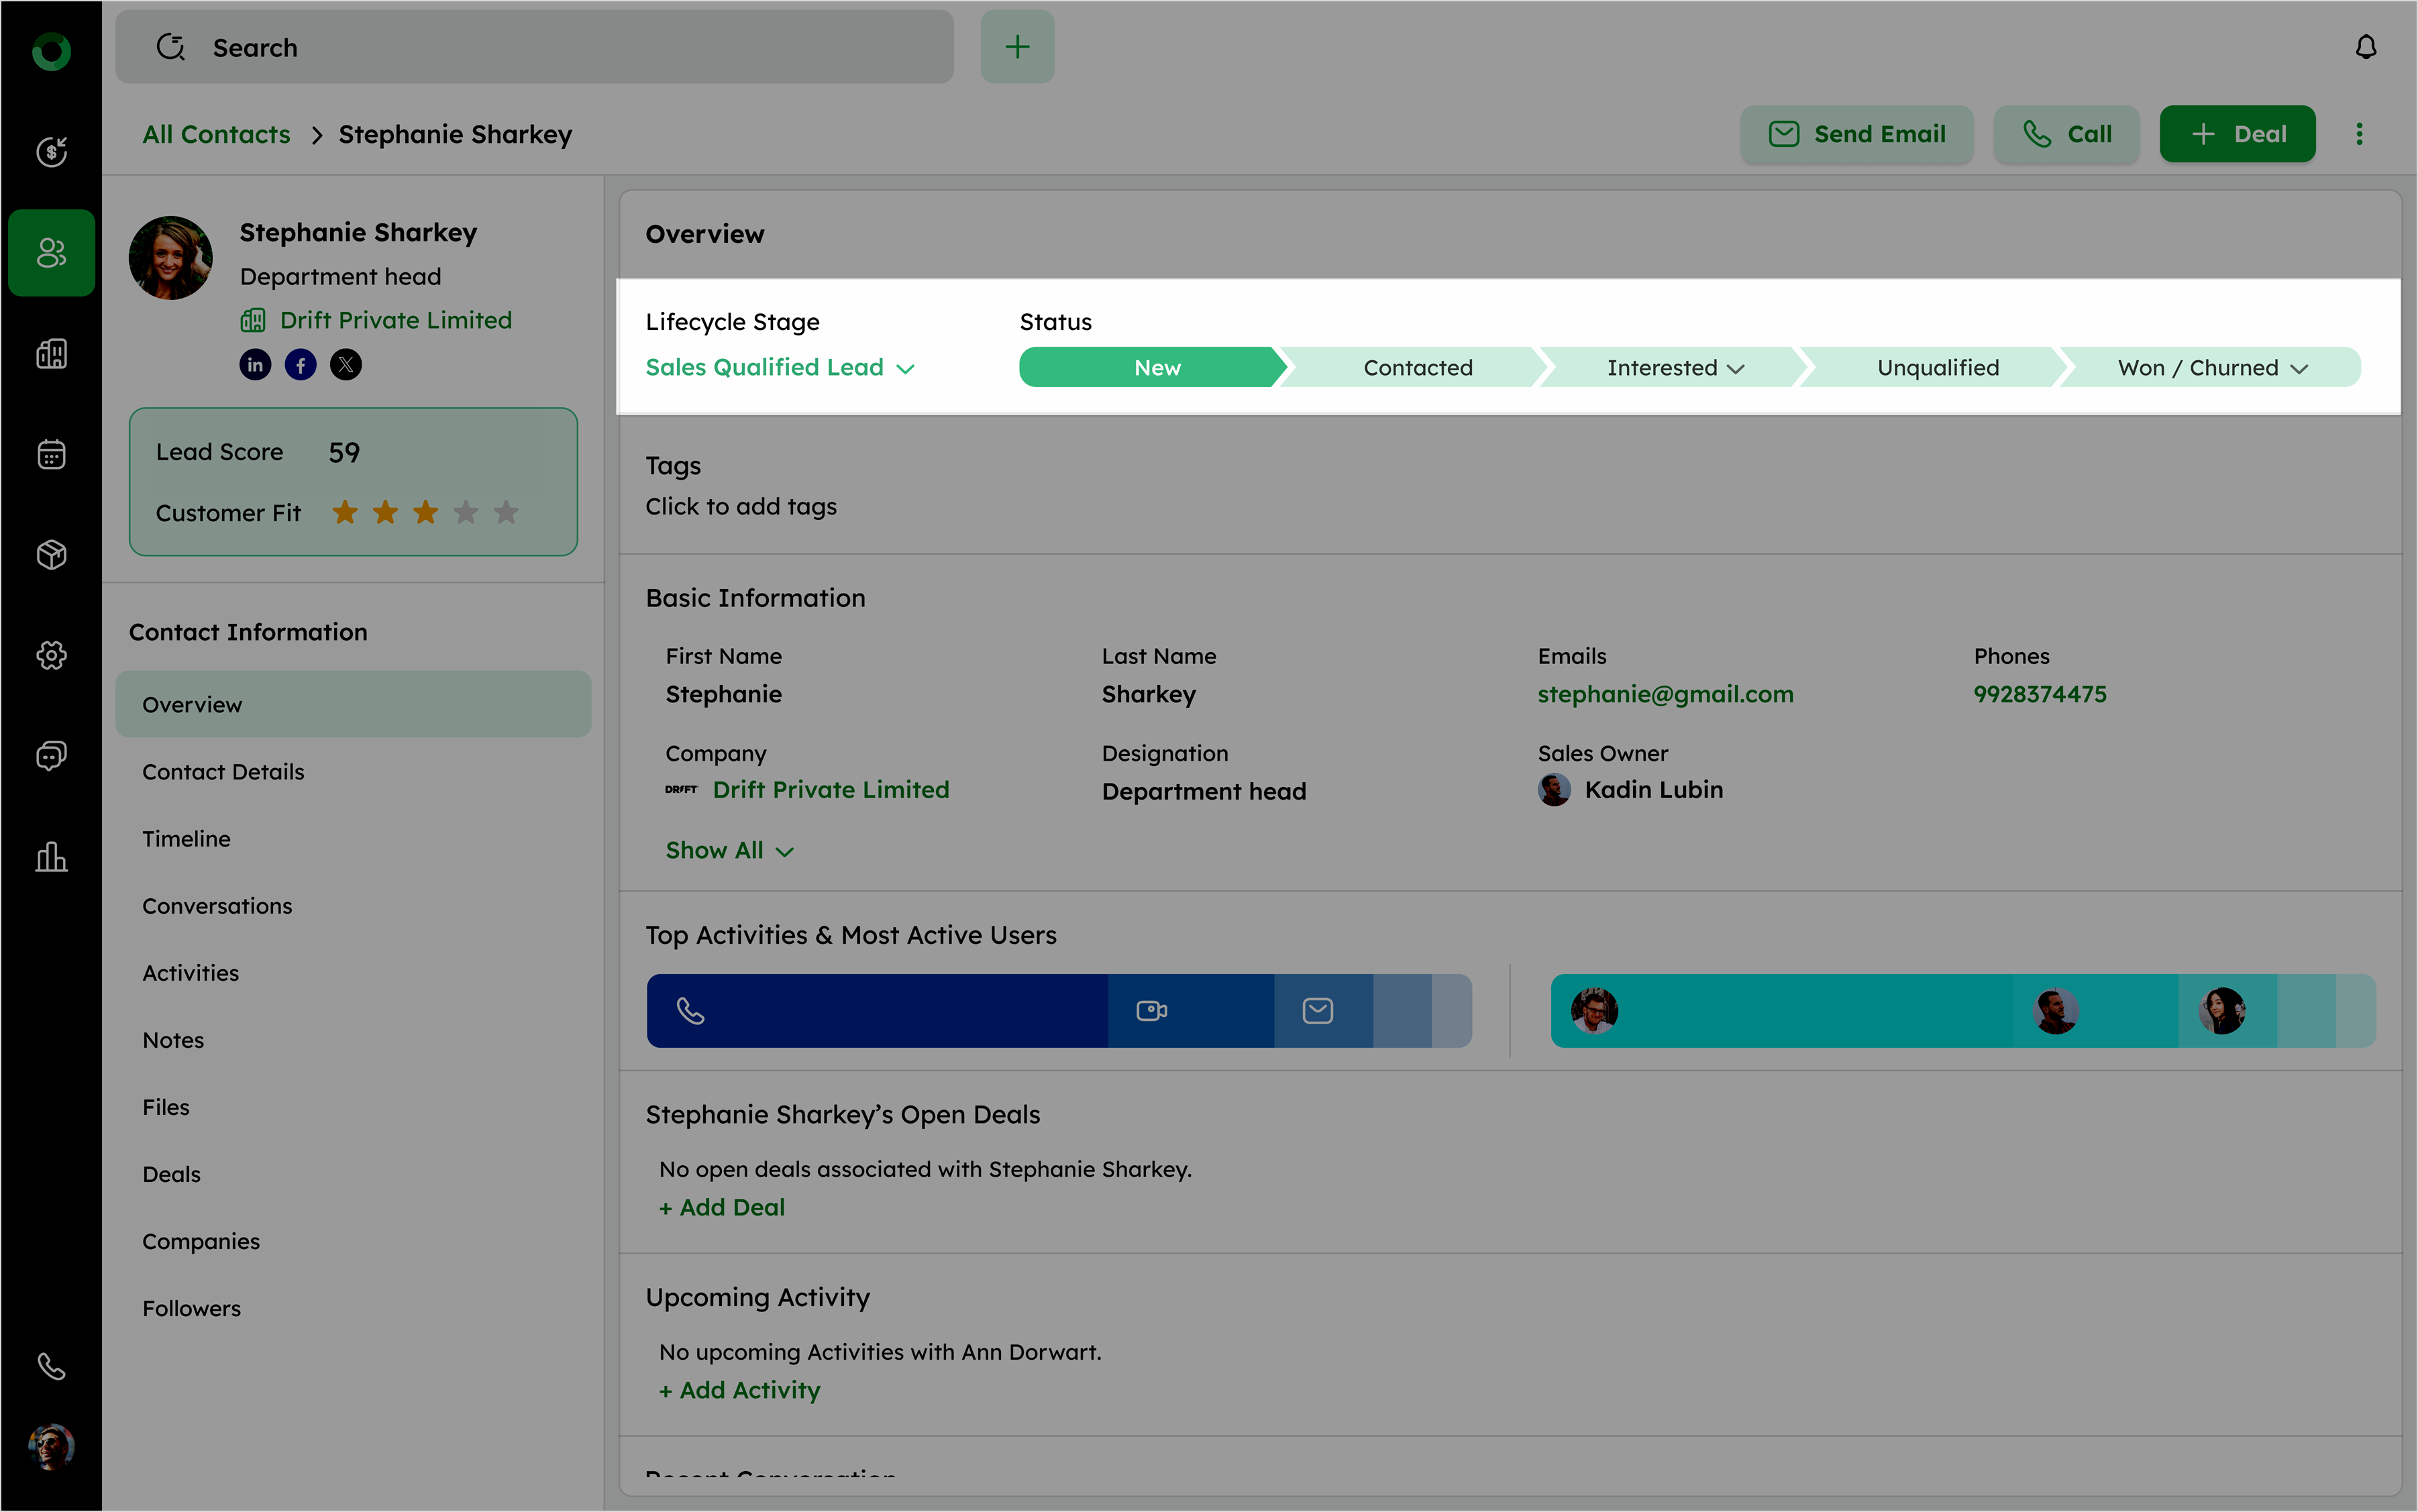
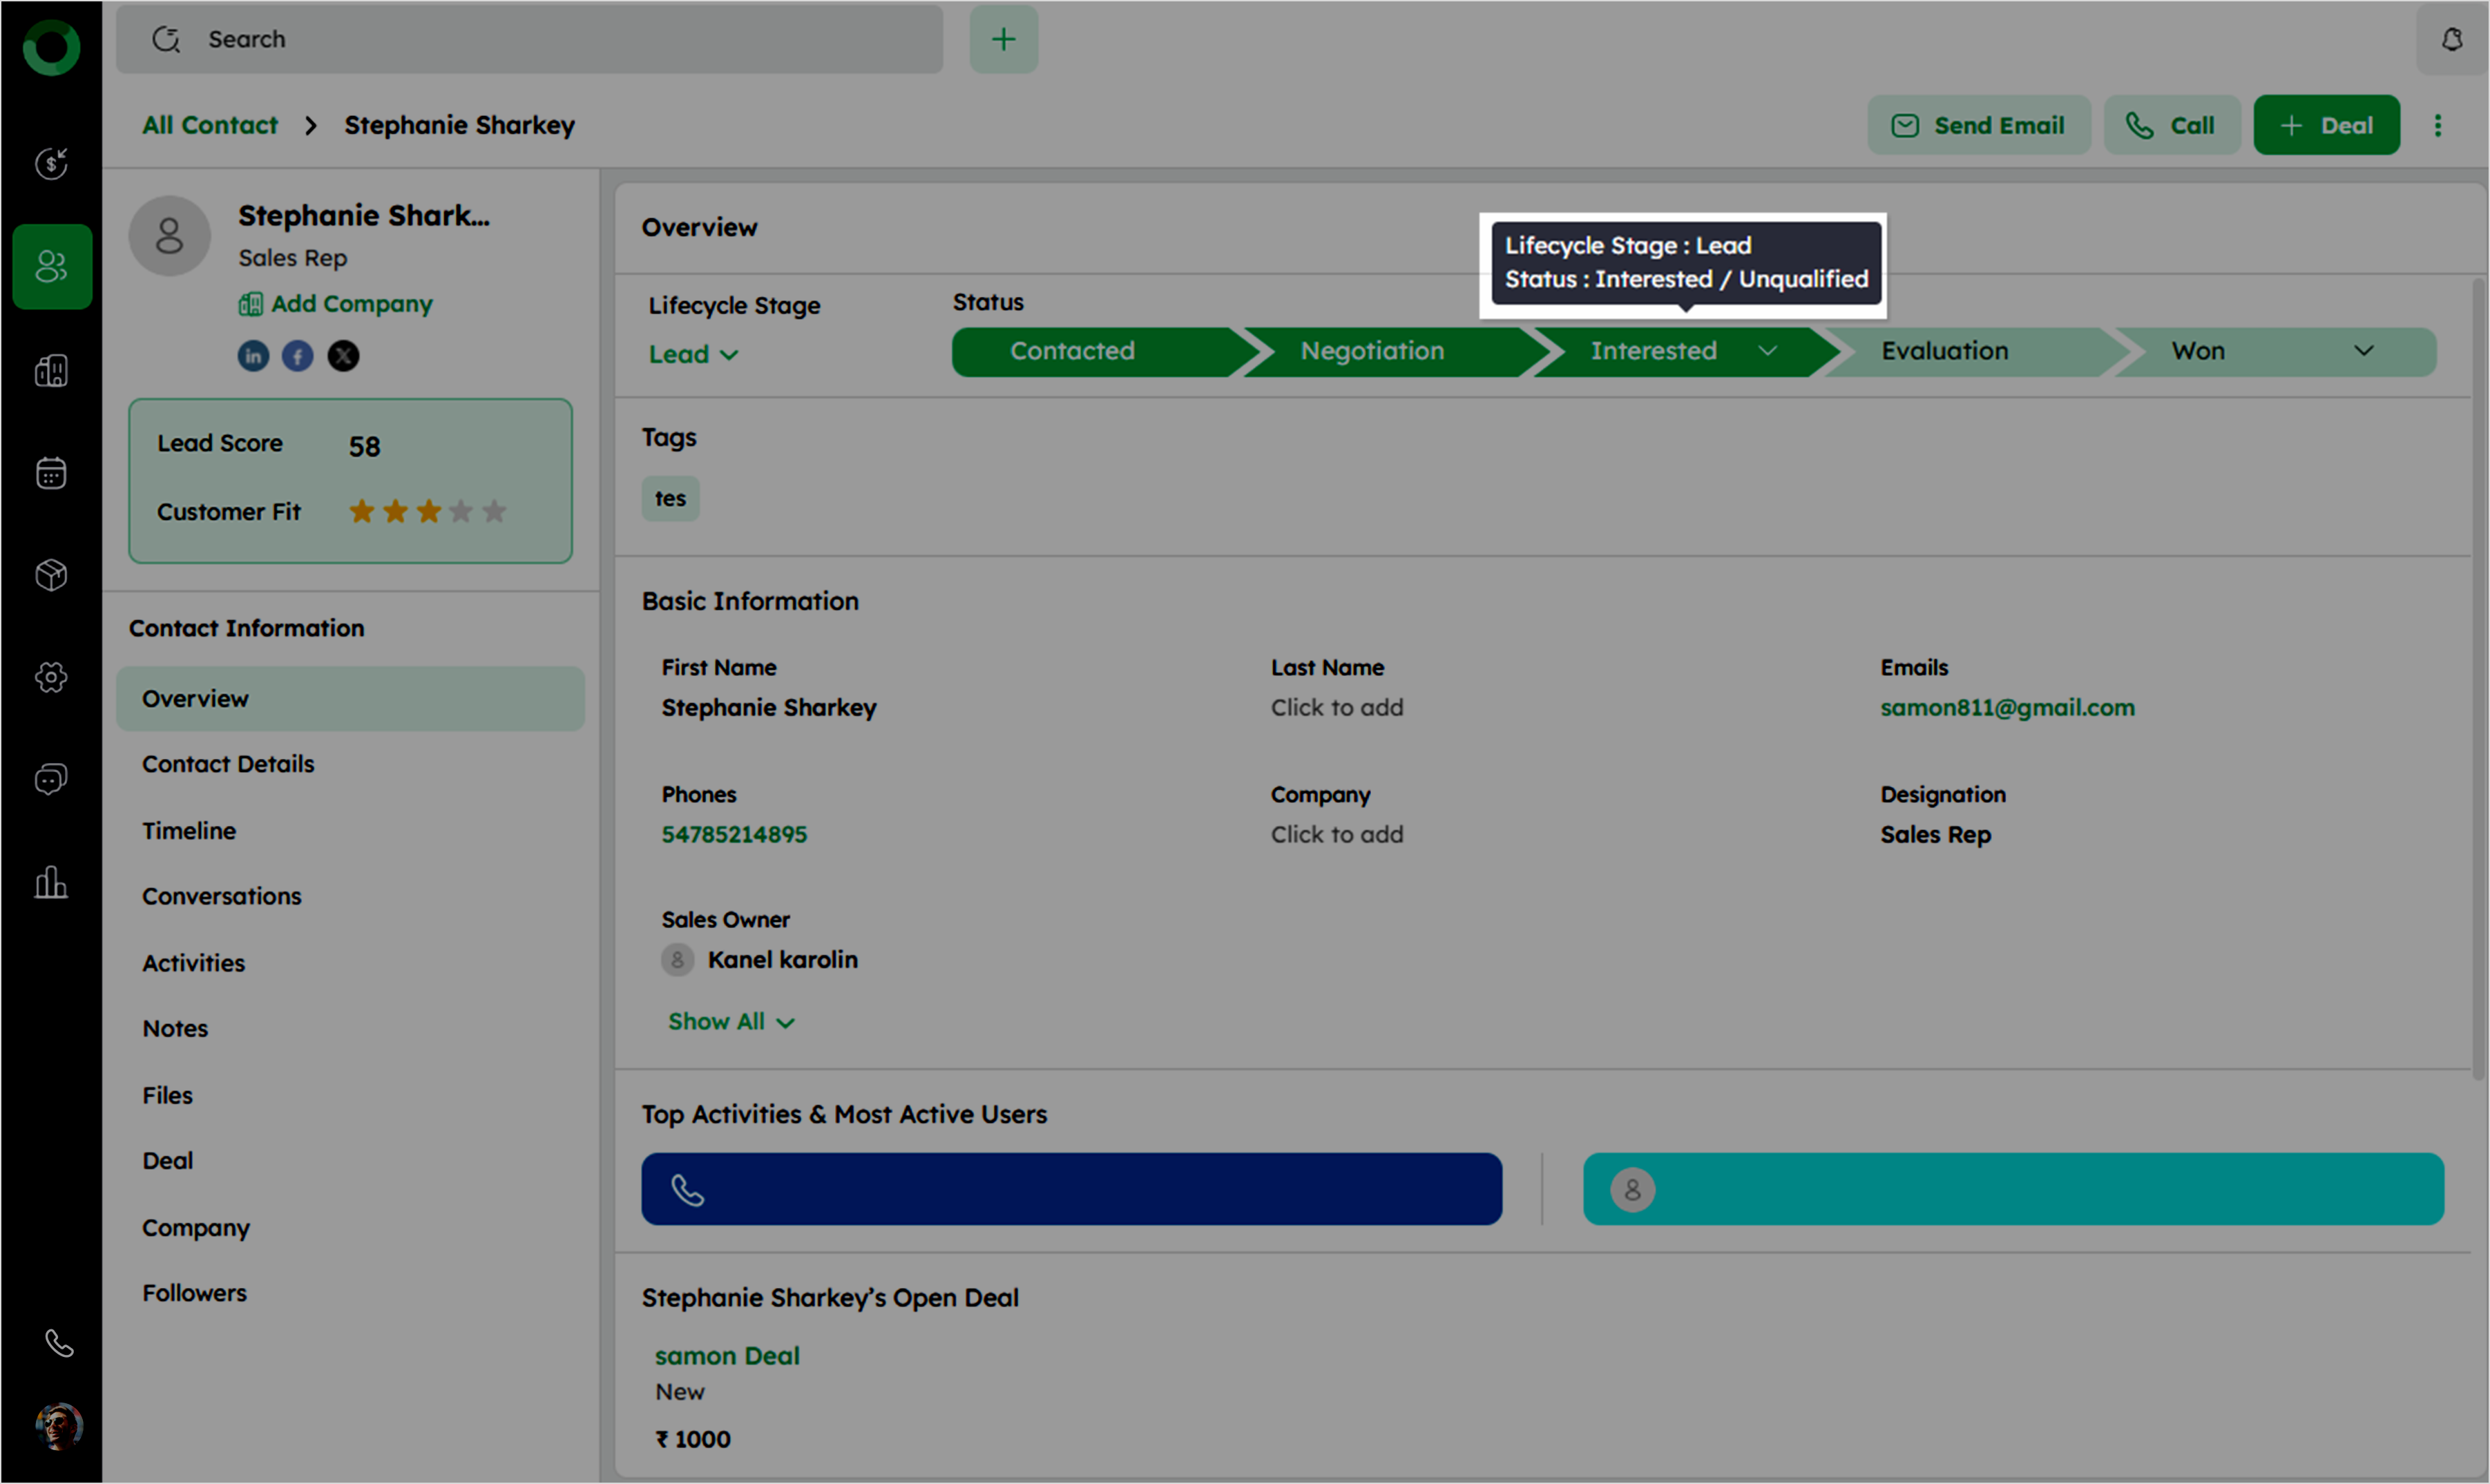
- On each Contact Detail Page, view the Lifecycle stage scale below the contact's profile.
-
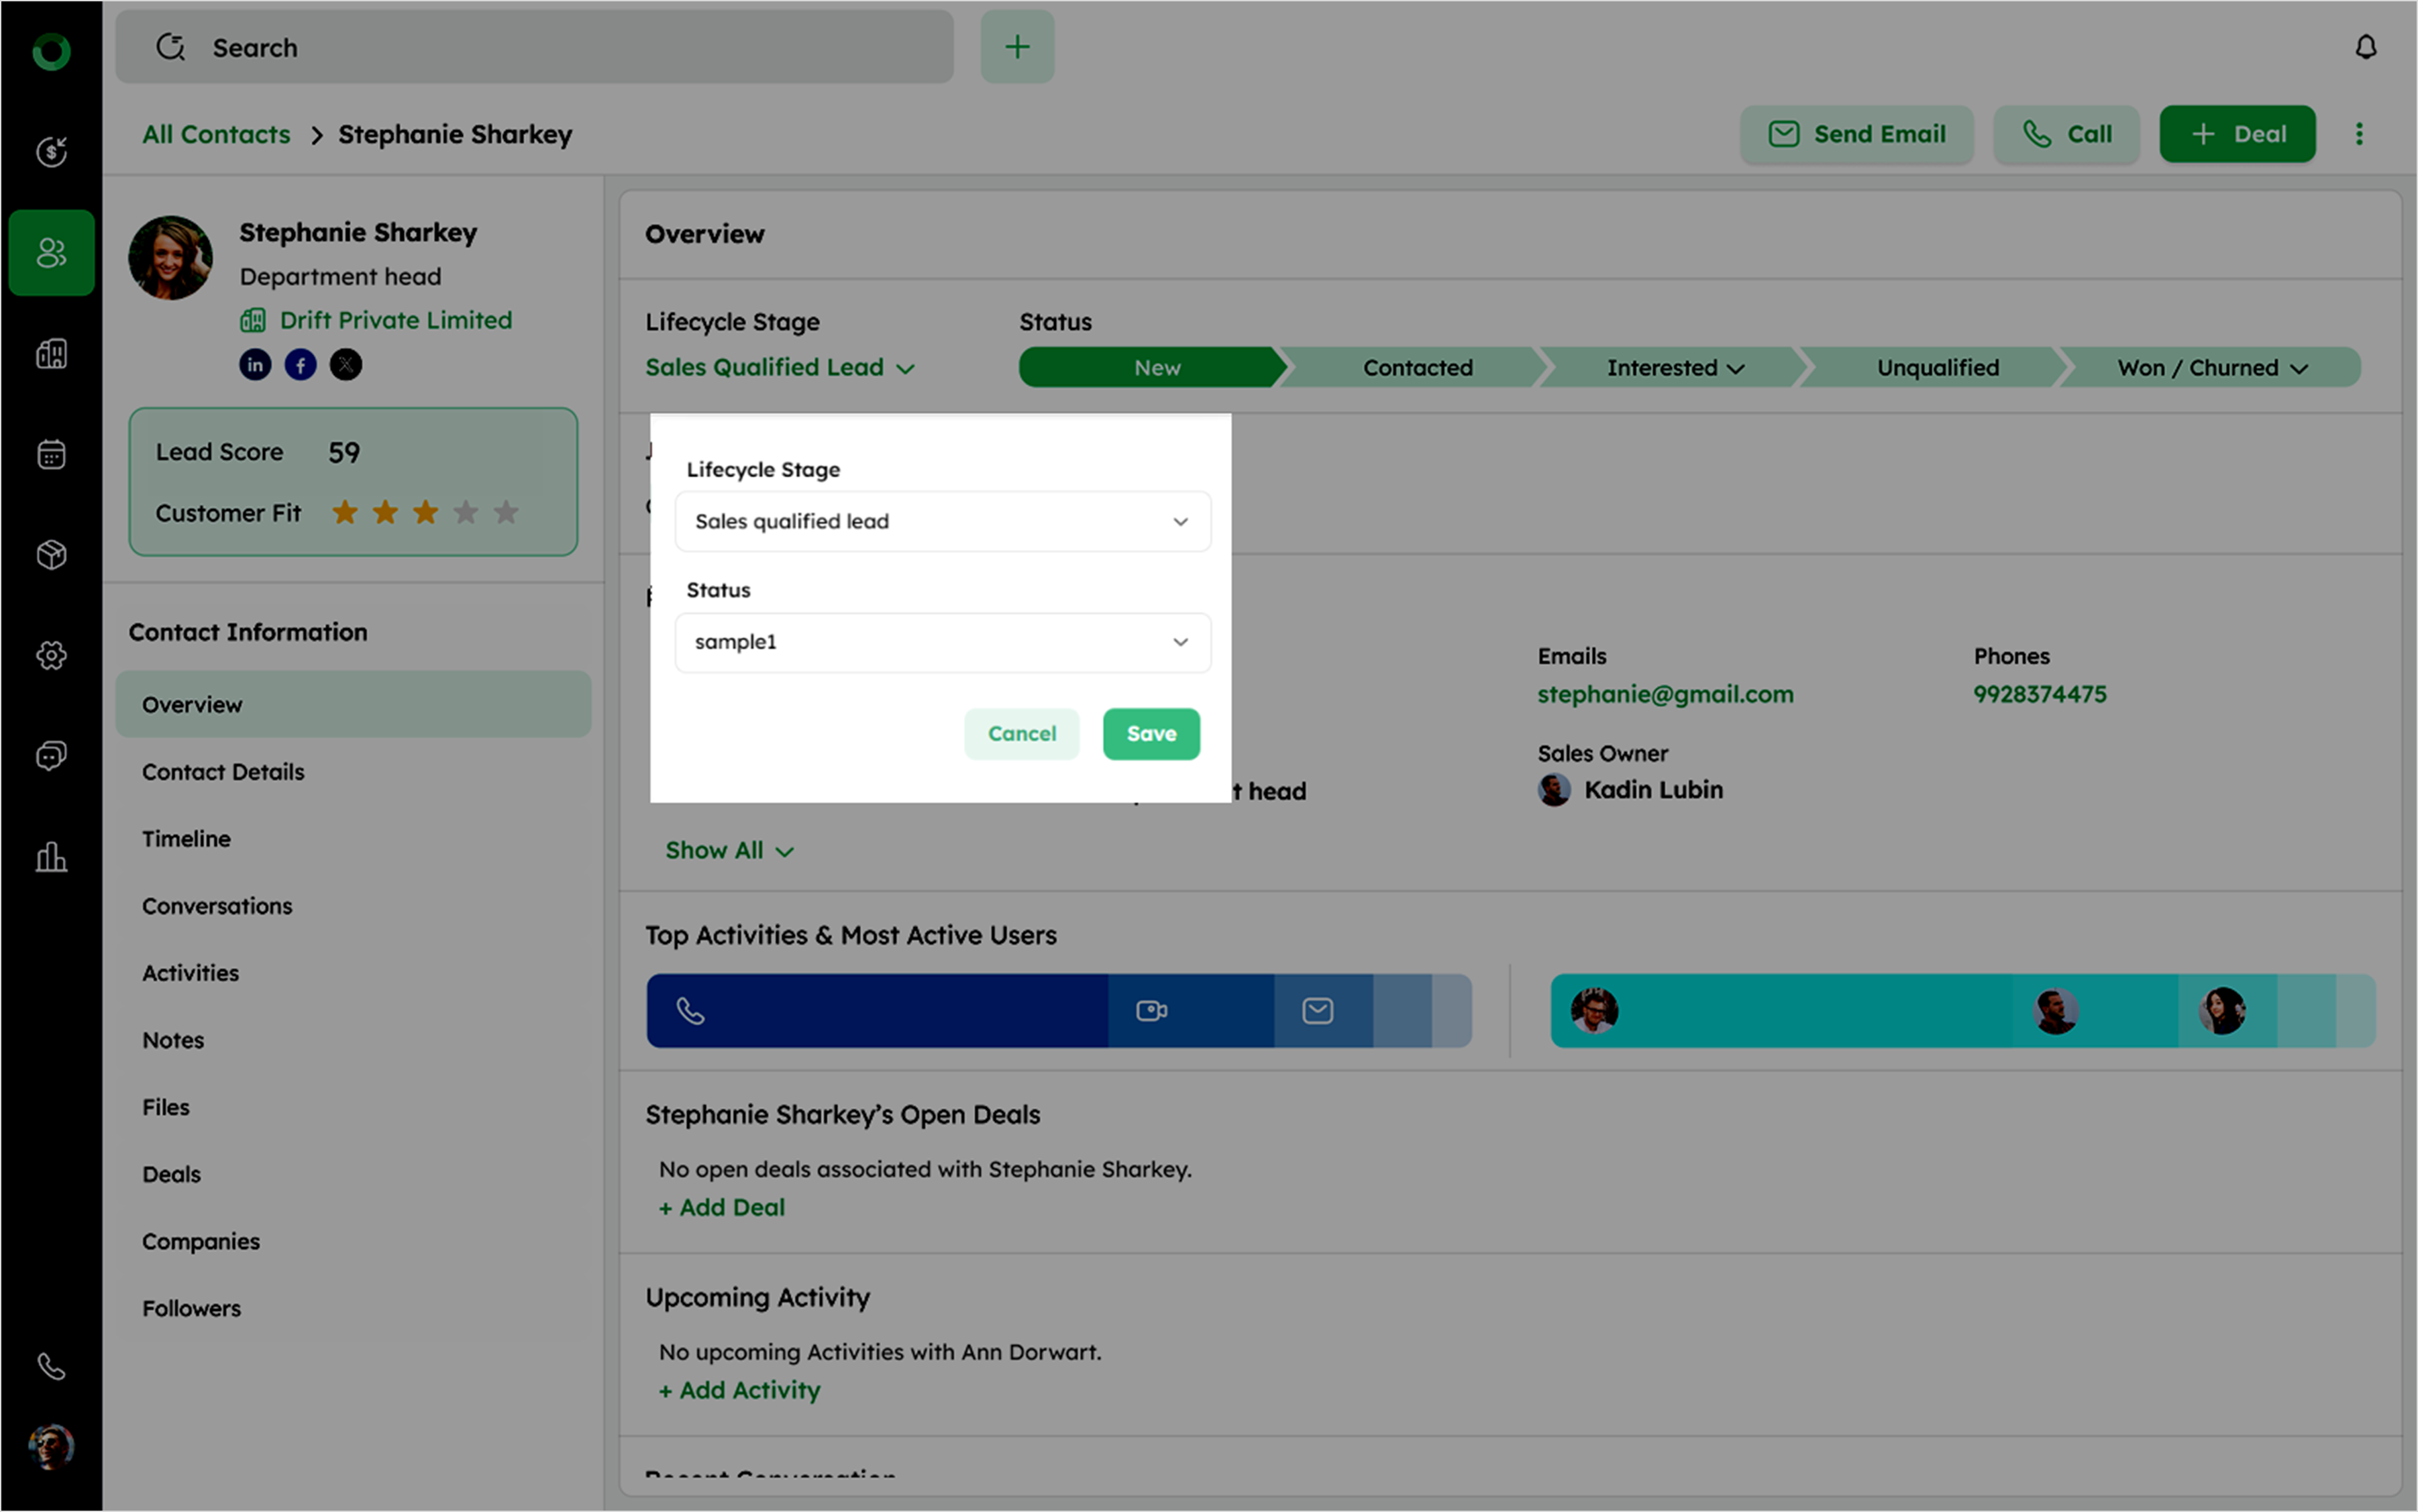
Click the Lifecycle Stage dropdown to open the dialogue box.
-
Choose the desired Lifecycle Stage and Status, then click Save to apply changes.
-
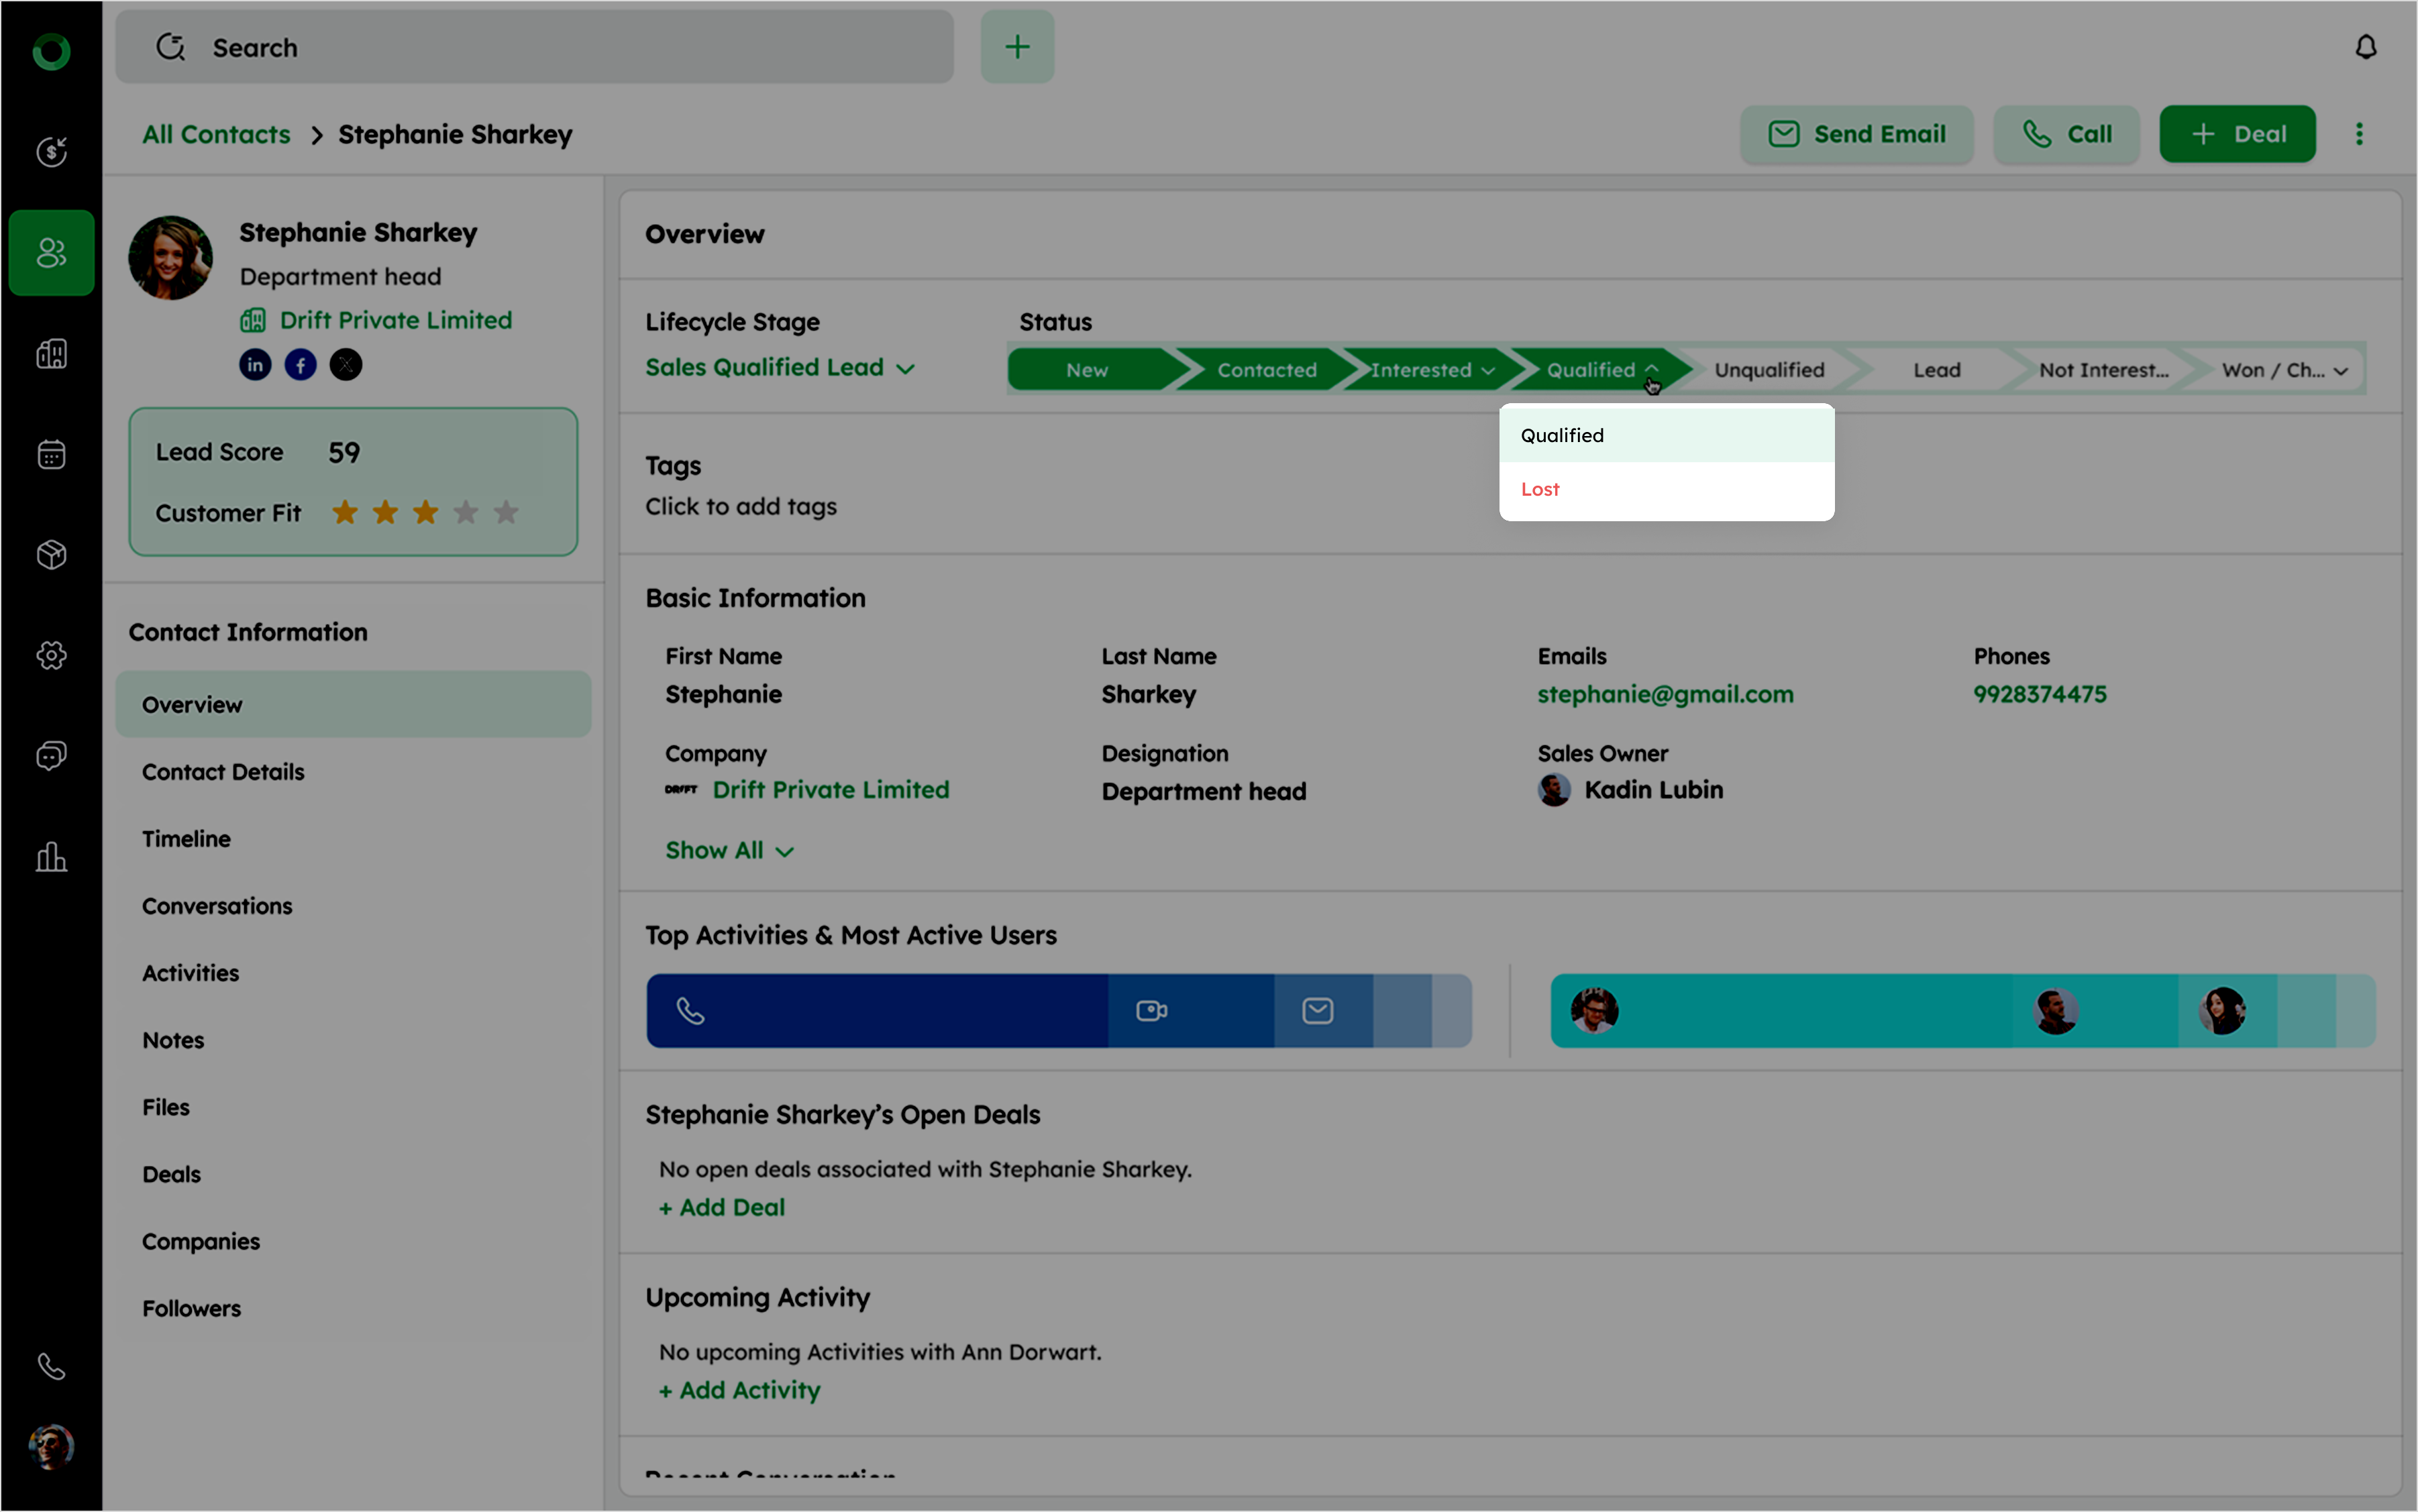
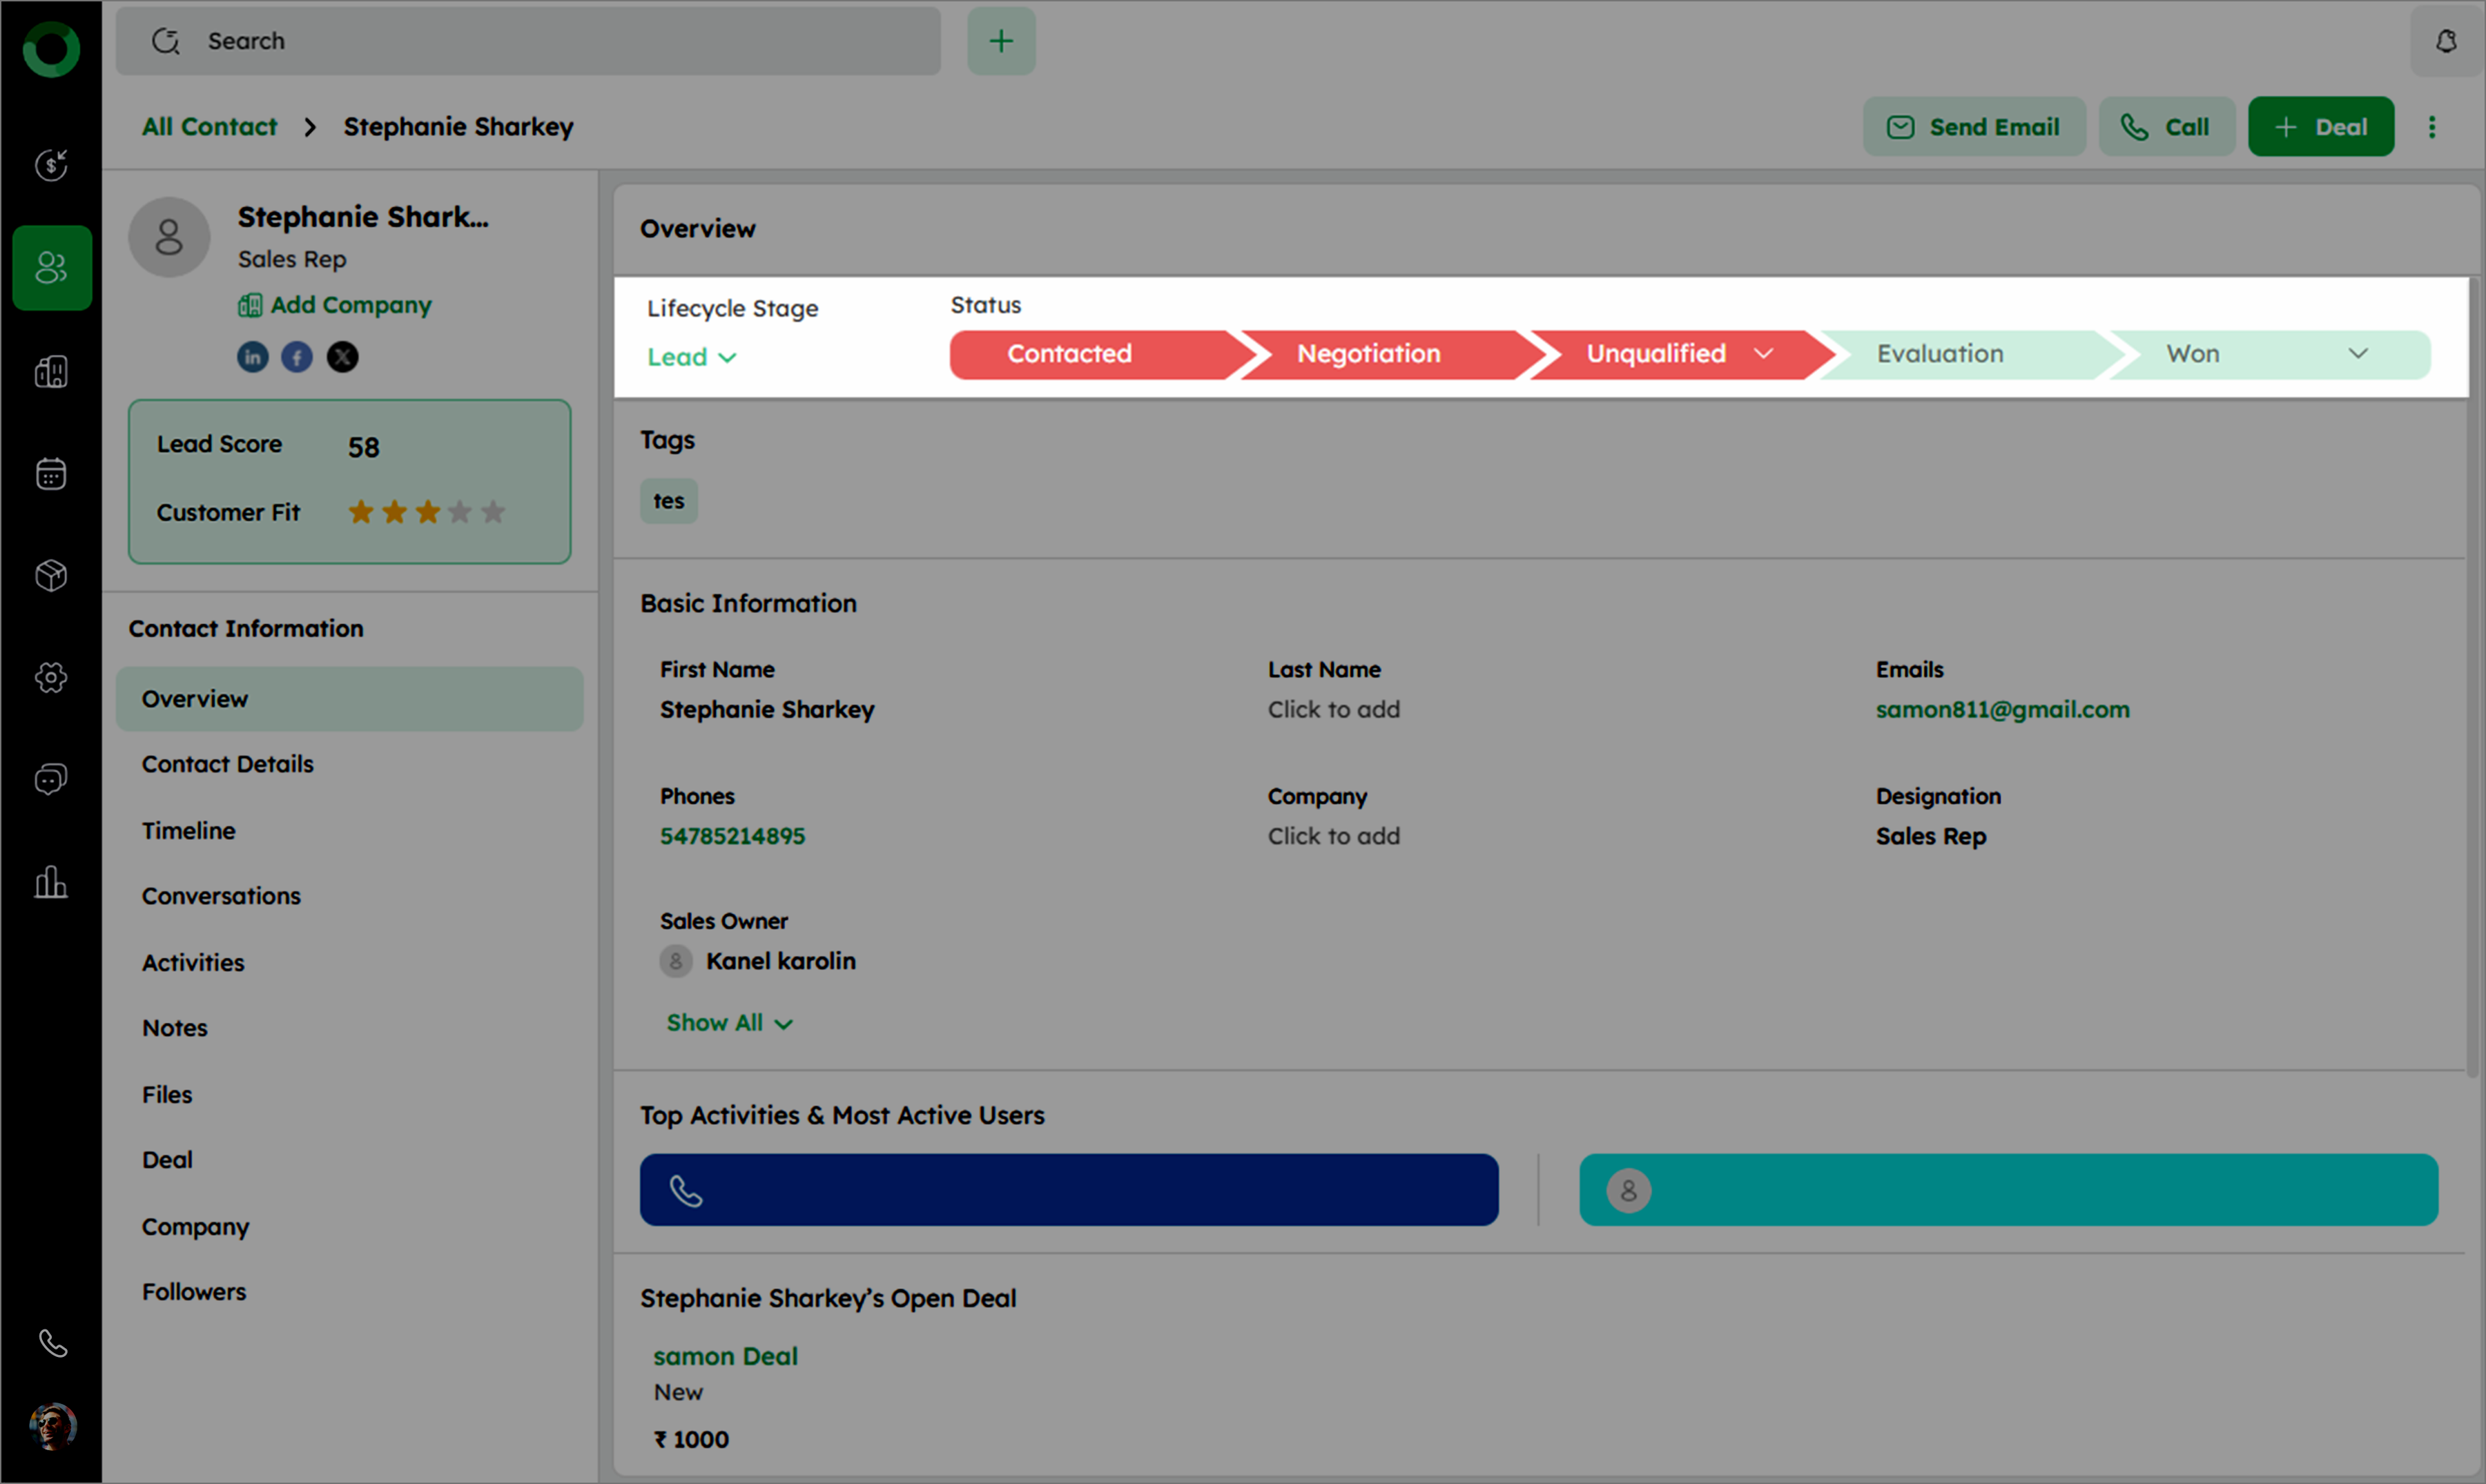
Each segment on the scale represents a status within the lifecycle stages.
-
If a stage includes a Closed Lost status, a dropdown will appear for selecting the final status within that stage.
- Mark a stage as Closed Lost to turn the scale view red, including previous stages.
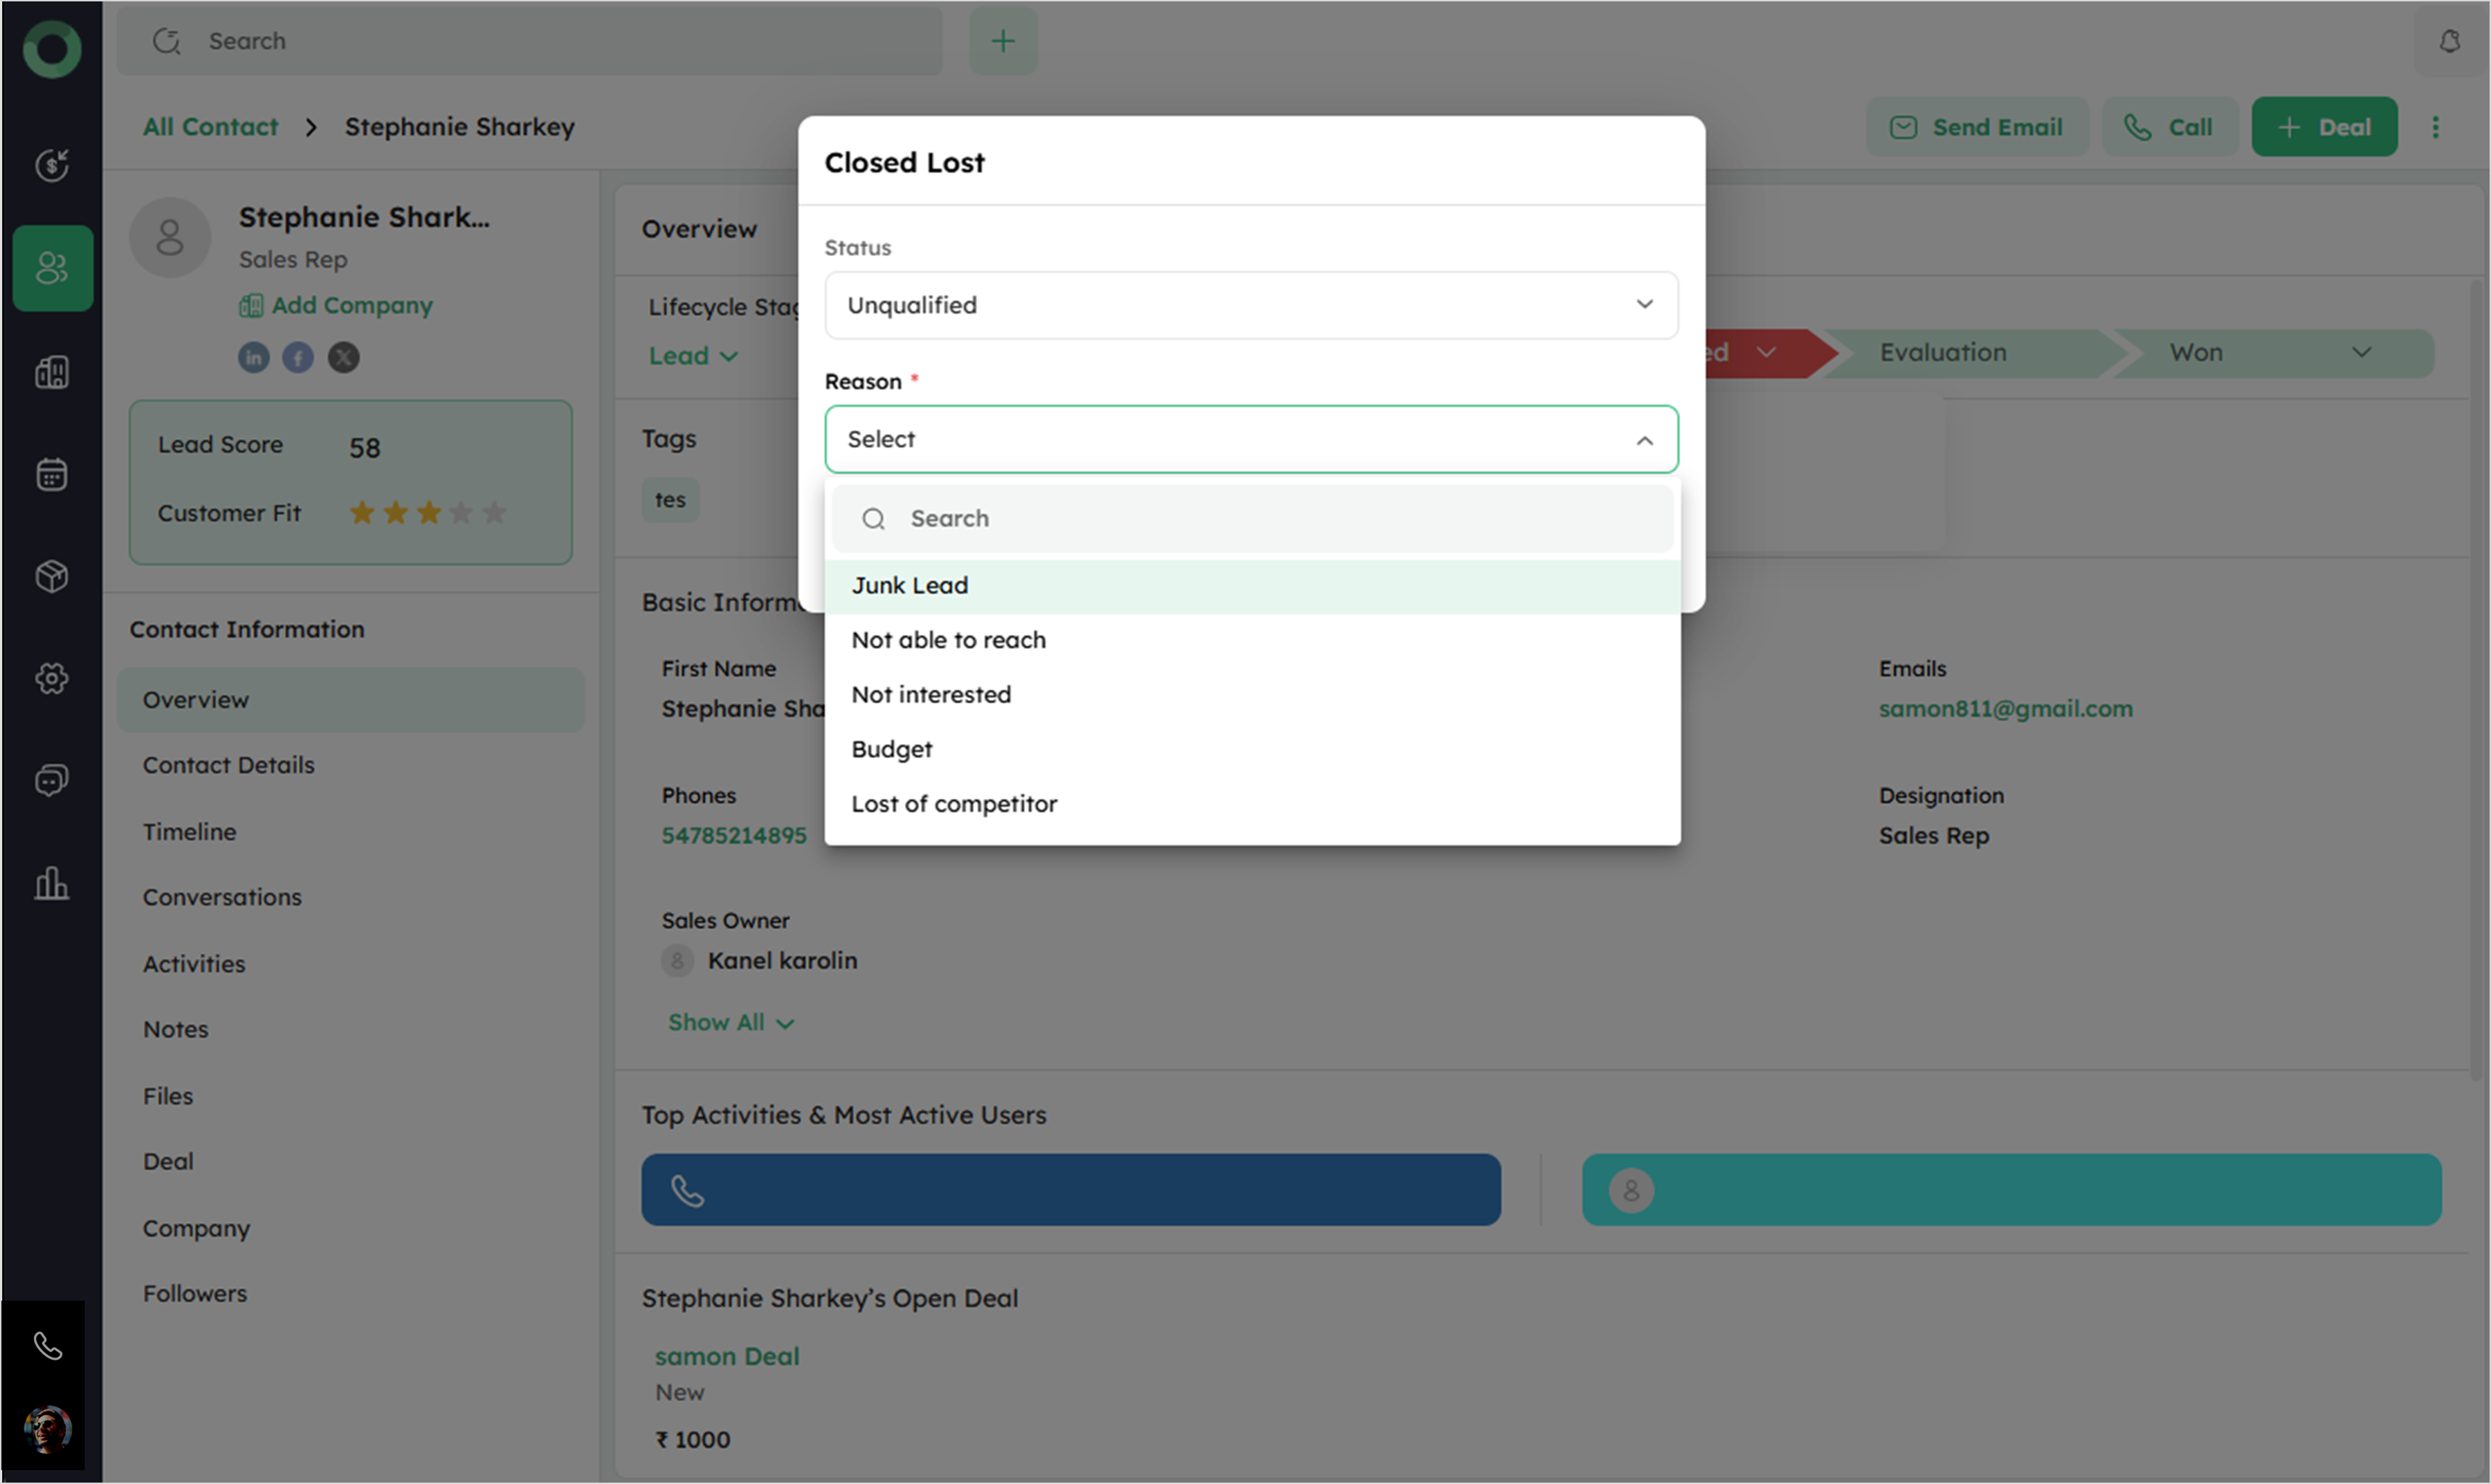
- Select Closed Lost to open a drawer and choose the reason for the loss.
- Hover over status to view a tooltip with the stage and status details.
- Click the final status dropdown, which provides the options Won and Lost to finalize the contact.