Webform Overview
Need customer data without the hassle? Twozo’s Webform makes it effortless to capture leads, inquiries, and registrations directly from your website automating data collection and streamlining customer engagement.
To access the Webform setup:
-
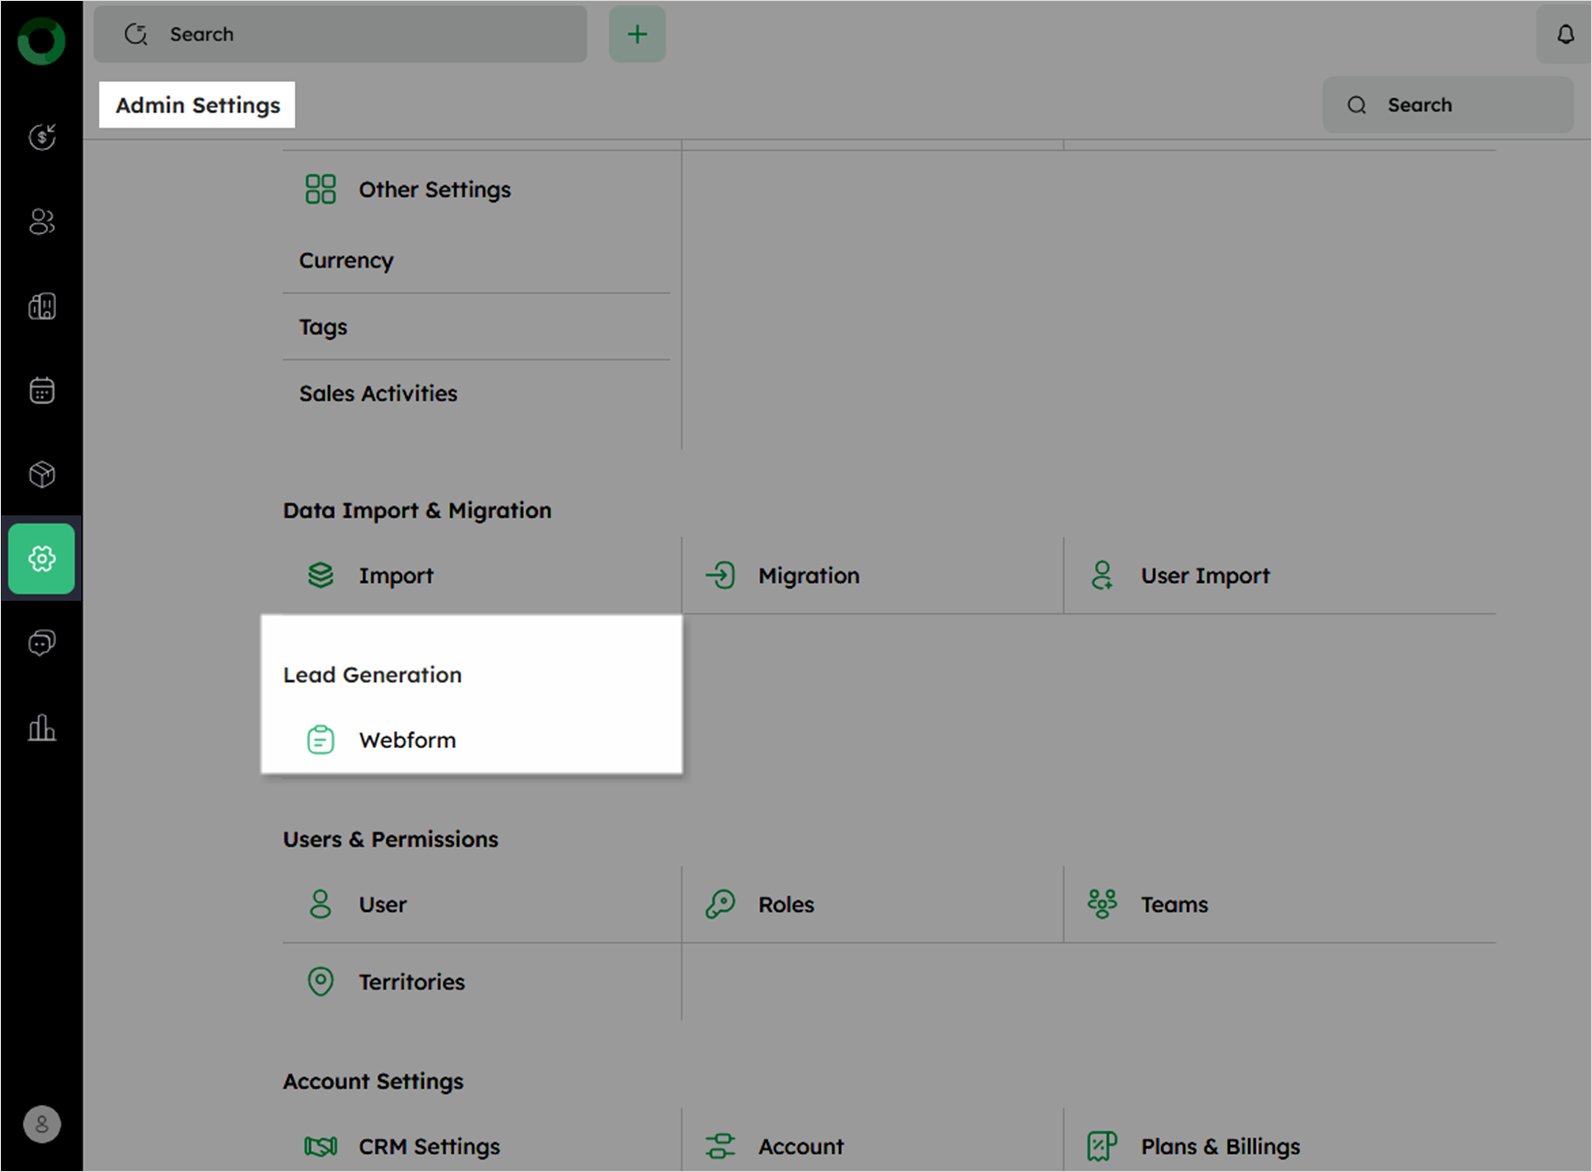
Navigate to the Admin Settings page.
-
Click Web Forms under Lead Generation to open the Webform List Page.
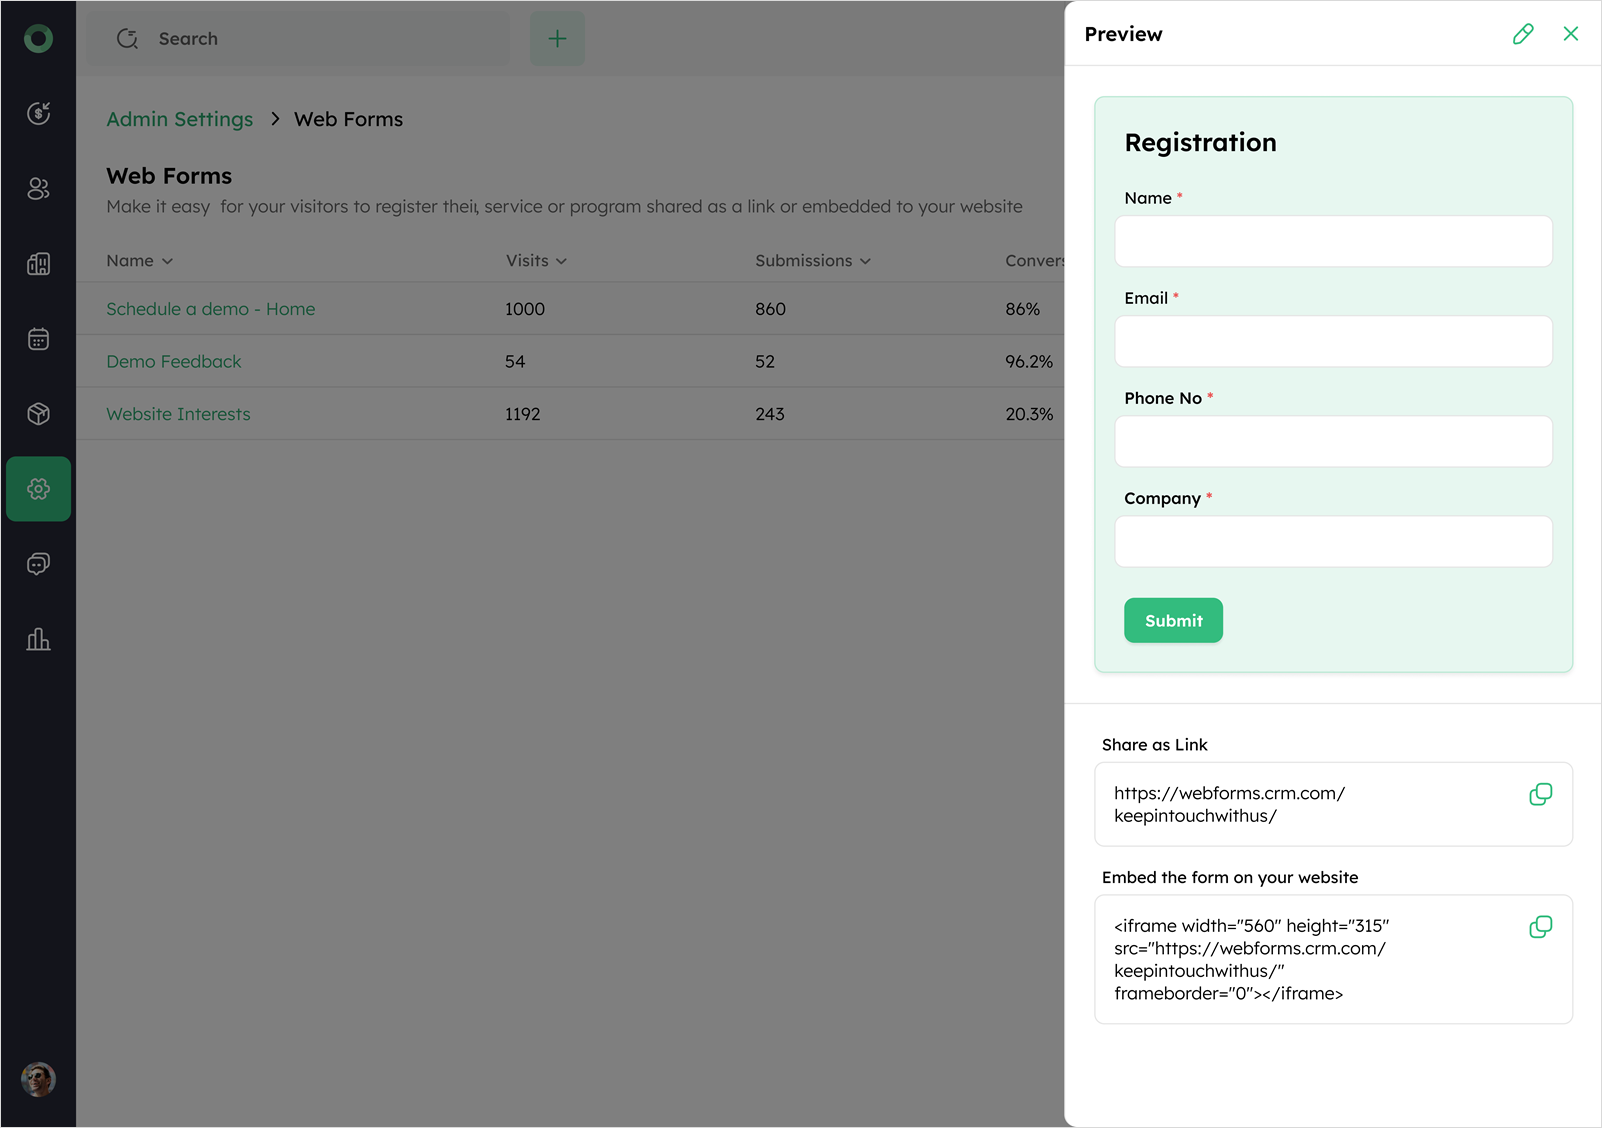
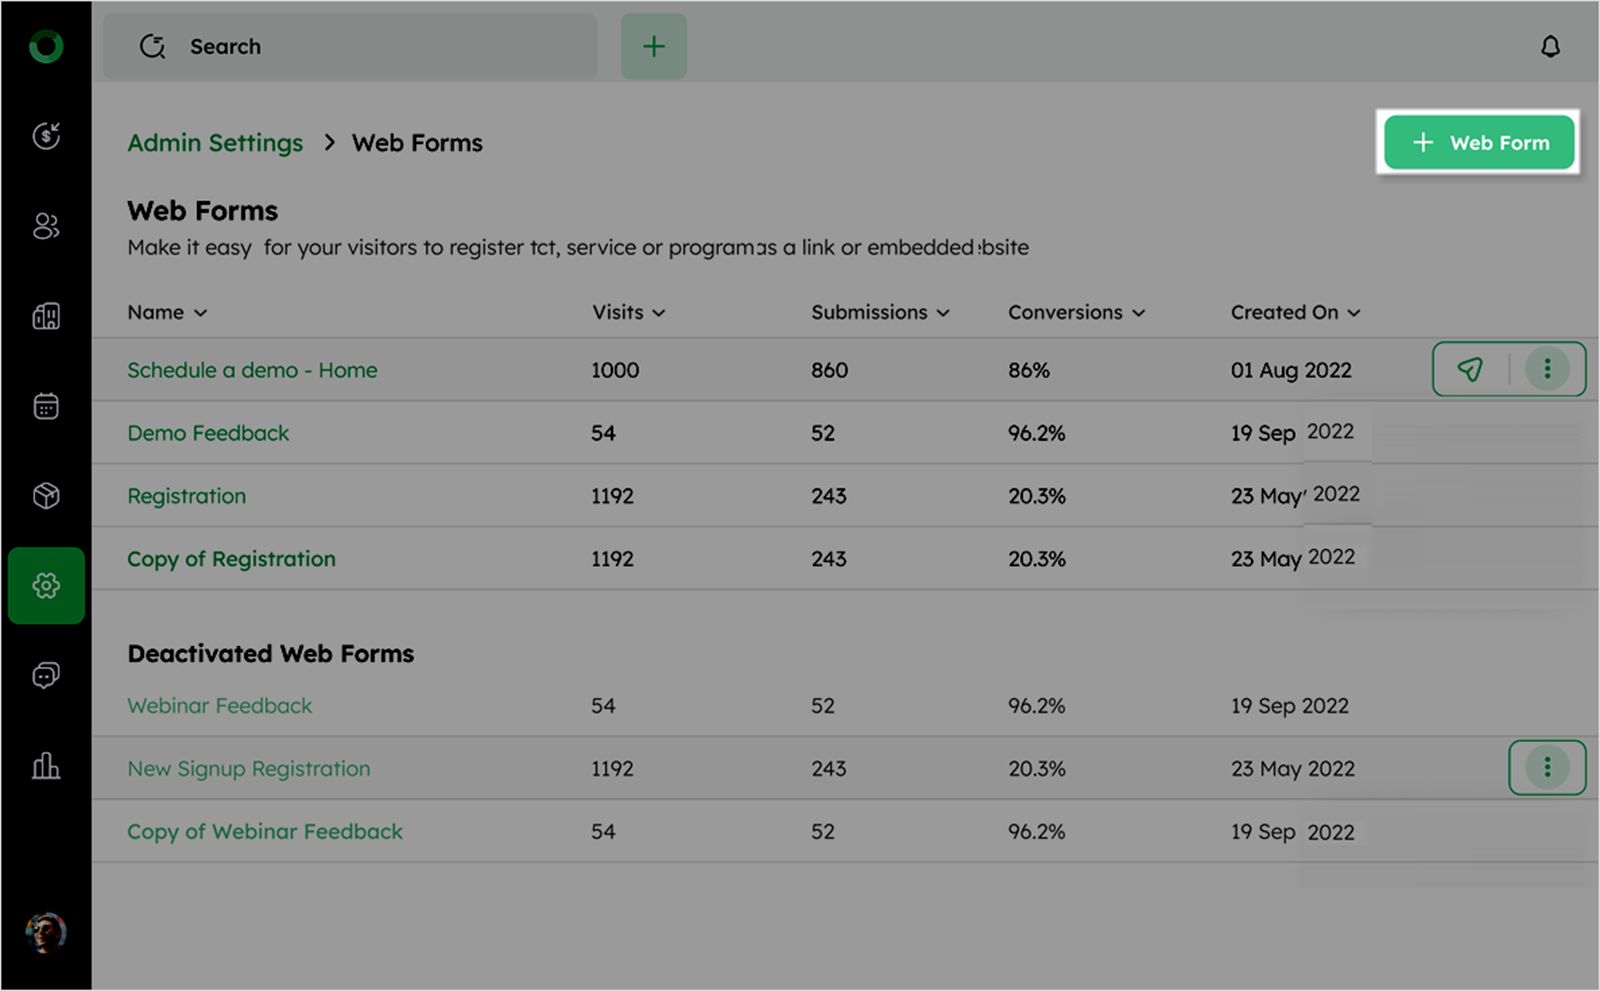
- The list view displays existing Webforms with the following details:
| Column Field | Description |
|---|---|
| Name | Title of the webform |
| Visits | Number of times the form was viewed |
| Submissions | Total form submissions |
| Conversions | Successful actions from submissions |
| Created On | Date the form was created |
- Hover over the list of Webforms to reveal the share and ellipsis icons.
![]()
-
Click the ellipsis icon to display three options:
-
Duplicate: Create a copy of the selected Webform.
-
Deactivate: Disable the Webform without deleting it.
-
Delete: Permanently remove the Webform from the system.
-
![]()
-
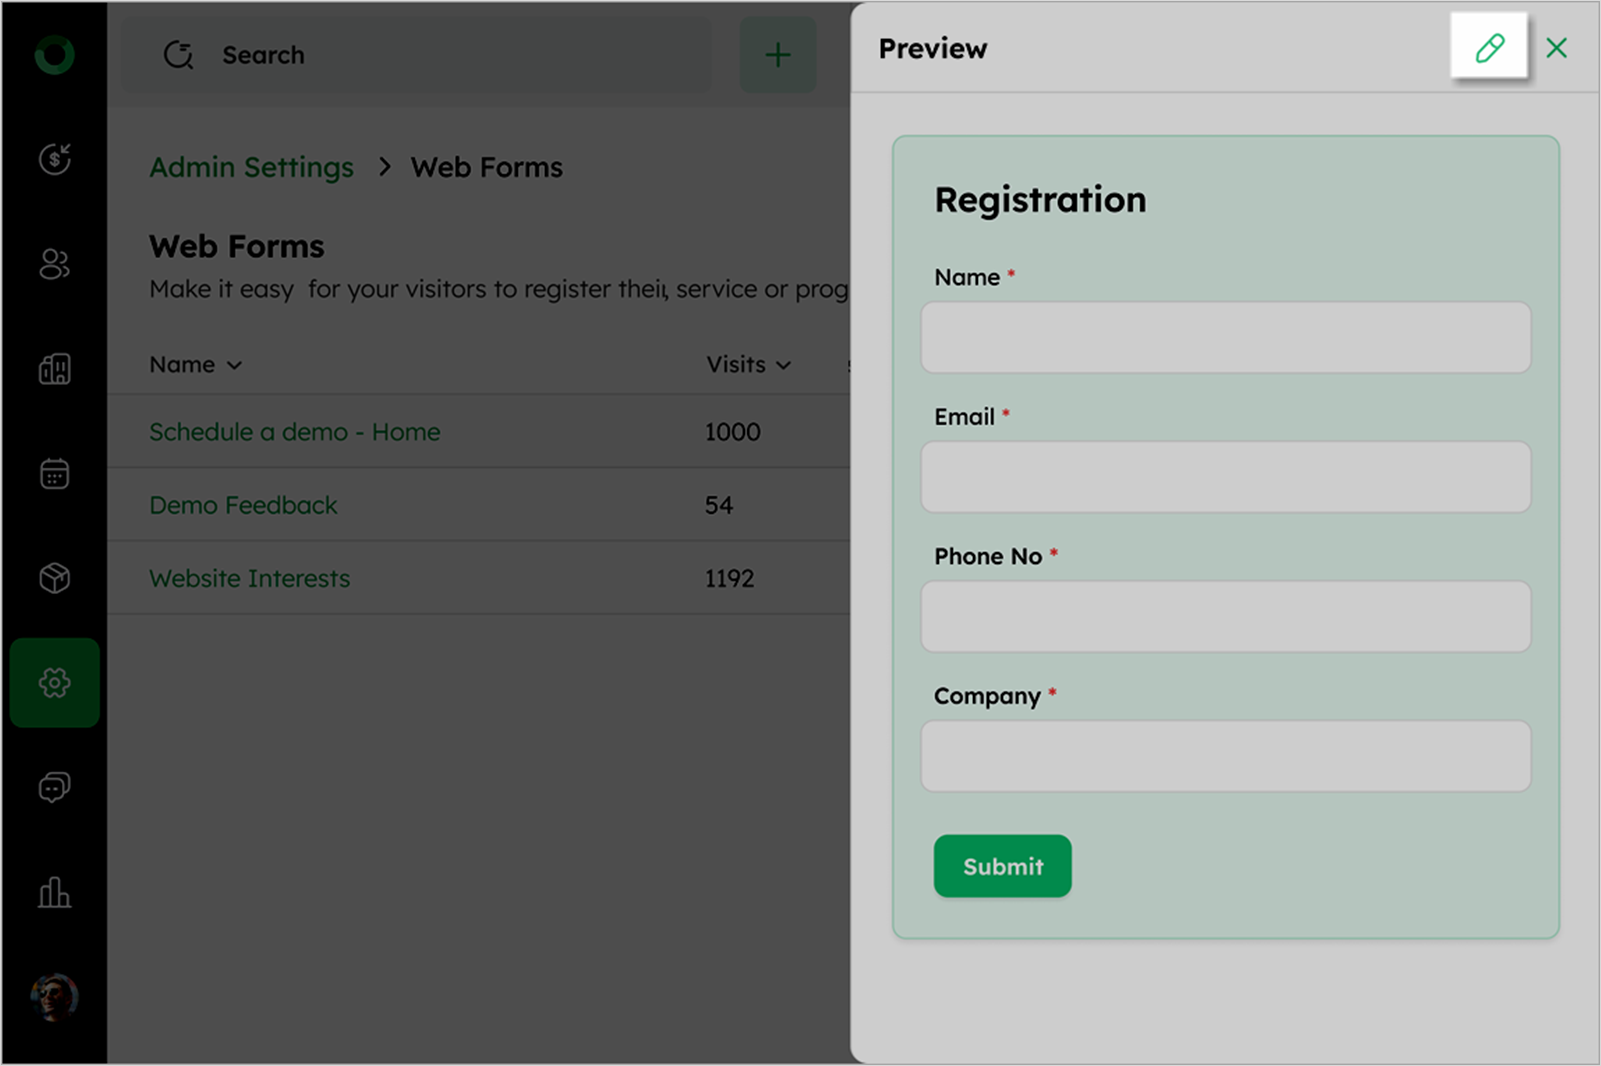
Click any Webform in the list or hover over the list and click the share icon.
-
A preview of the Webform opens, displaying the form layout.
-
In the preview, access sharing options:
-
Share as Link: Copy the direct URL to share the Webform.
-
Embed the form on your website: Copy the embed link to integrate the form directly into your website.
-
-
To edit the Webform, click the pen icon at the top-screen to access the editing interface.
To create a new Webform
- Click the + Web Form button at the top of the page.
-
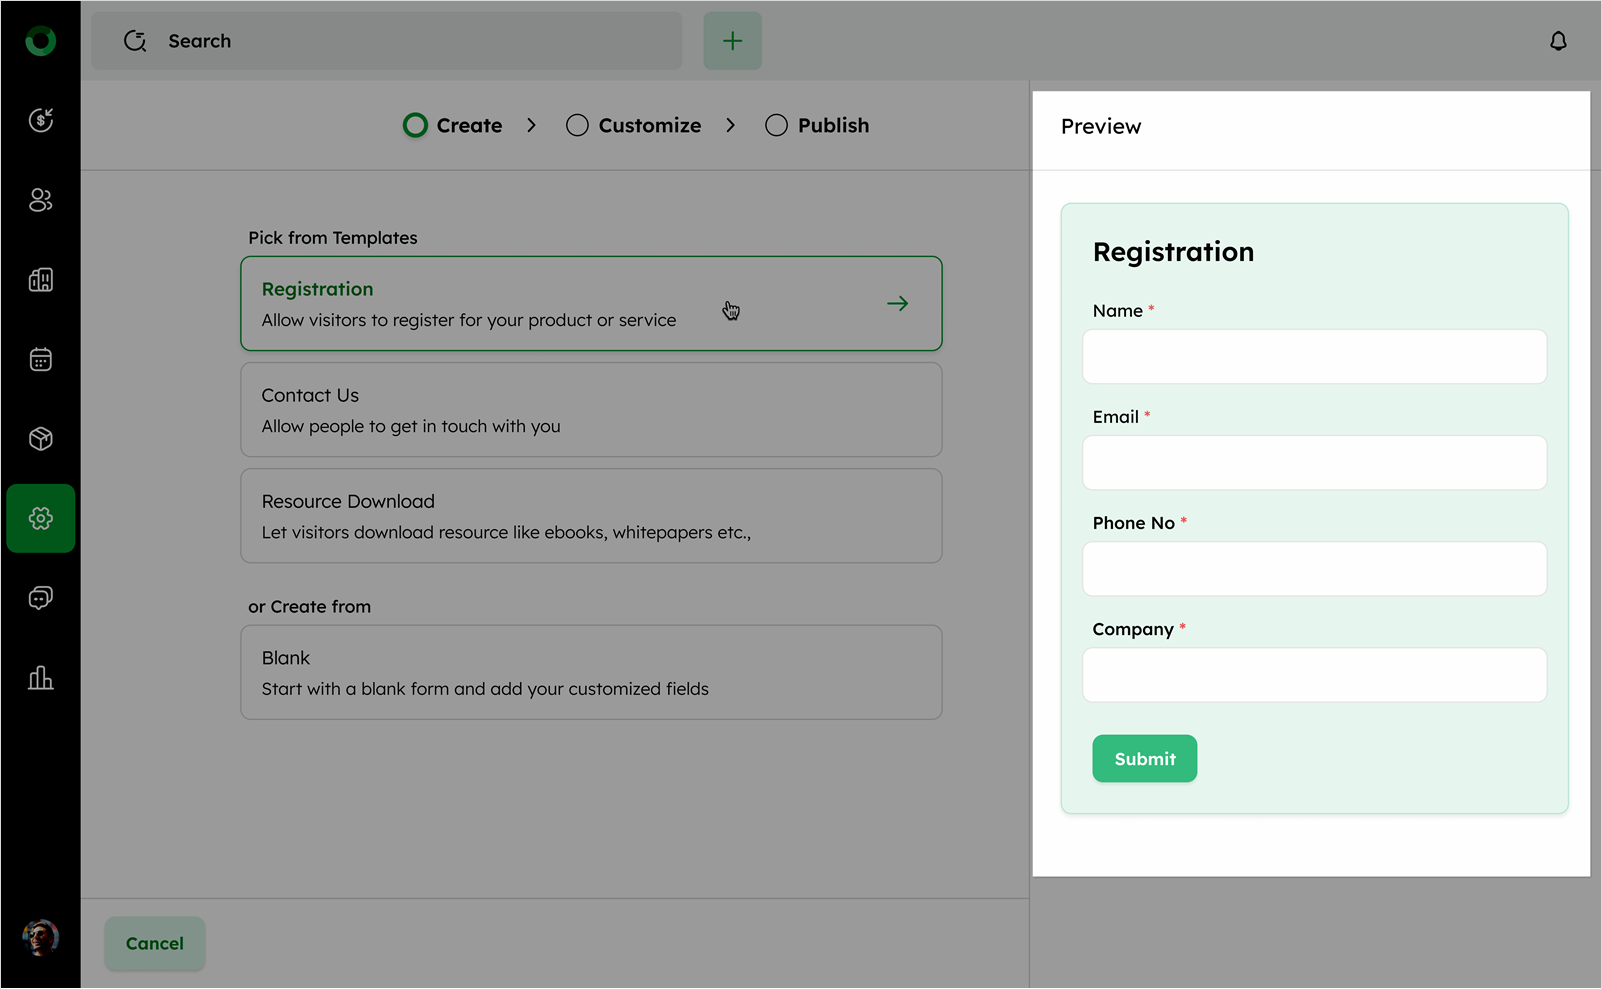
On the Create tab, select from the available templates:
-
Registration Form: Used for visitor registration.
-
Contact Us Form: Allows visitors to reach out.
-
Resource Download Form: Provides access to downloadable content.
-
Blank Form: Create a custom webform from scratch.
-
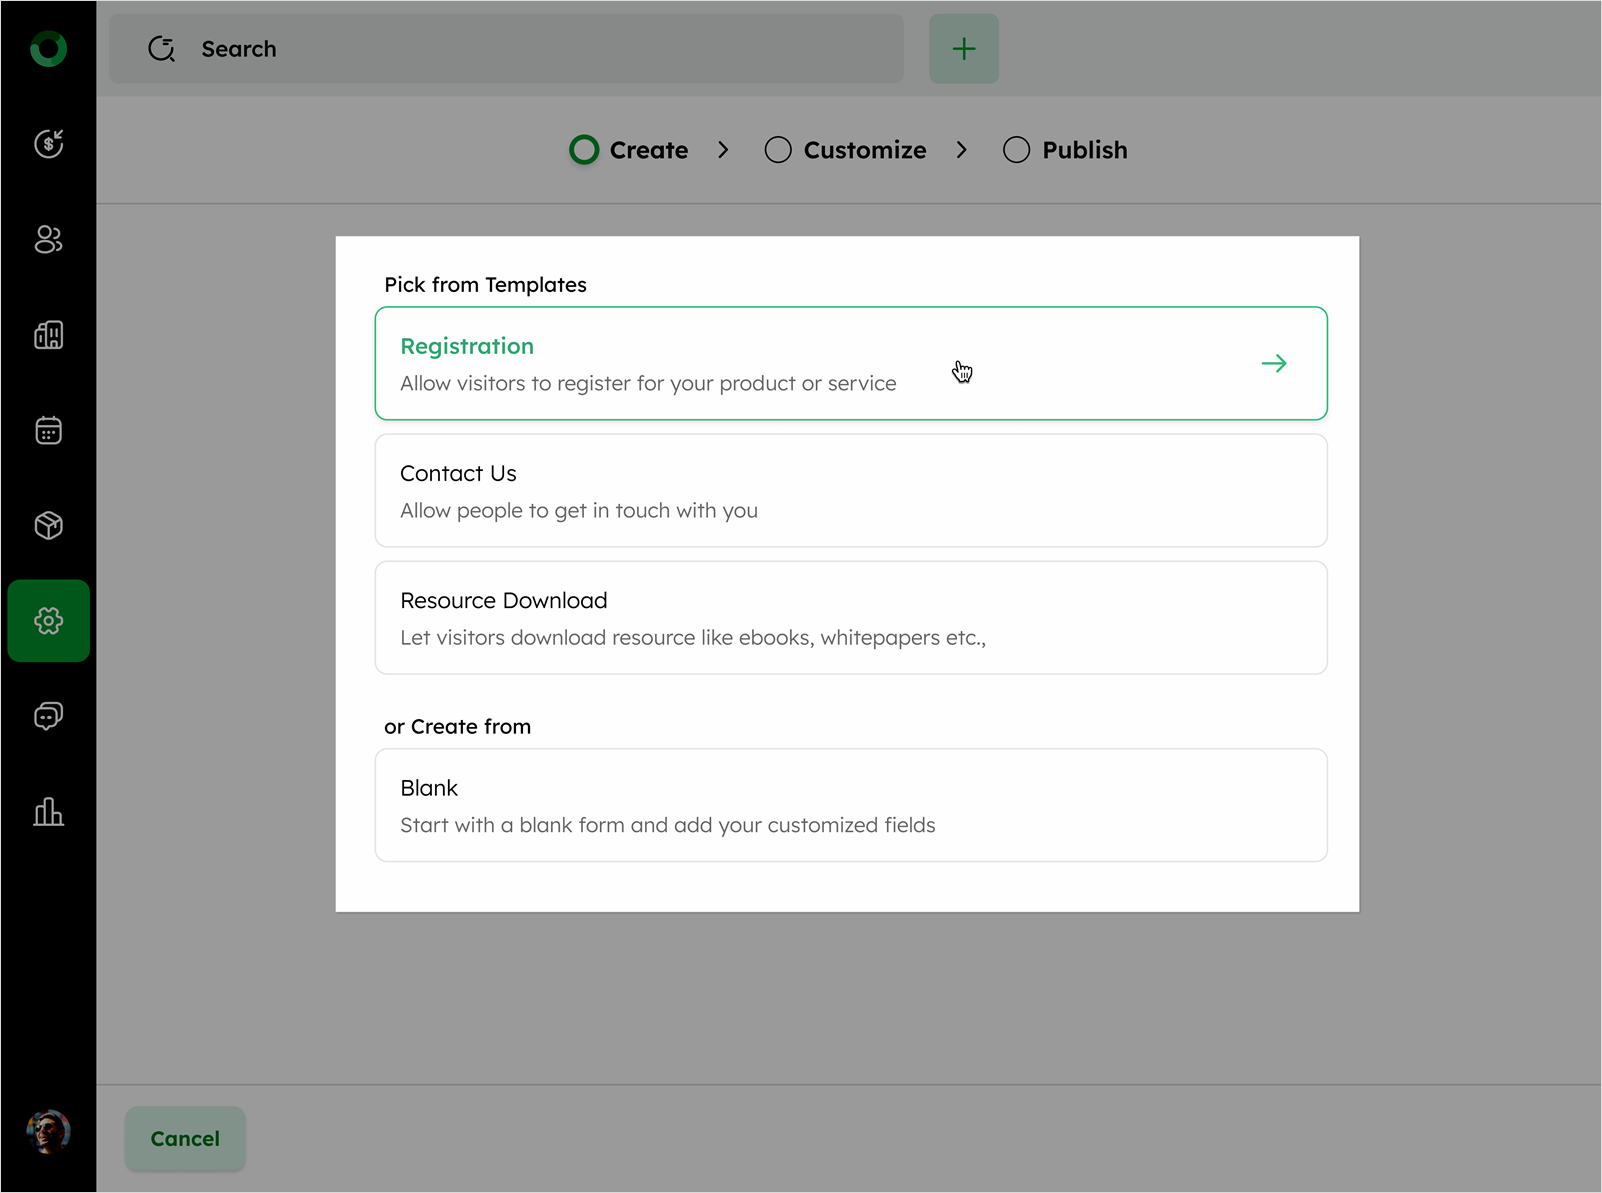
- The preview section and form layouts will be displayed on the right side of the screen.
-
After selecting a template, proceed to the Customize tab. Here, you can:
-
Edit form fields.
-
Define submission actions.
-
Style the form to match your brand.
-
Form Editor
- Add form fields, using the + icon.
![]()
- Select either Fields or Elements to add to your form.
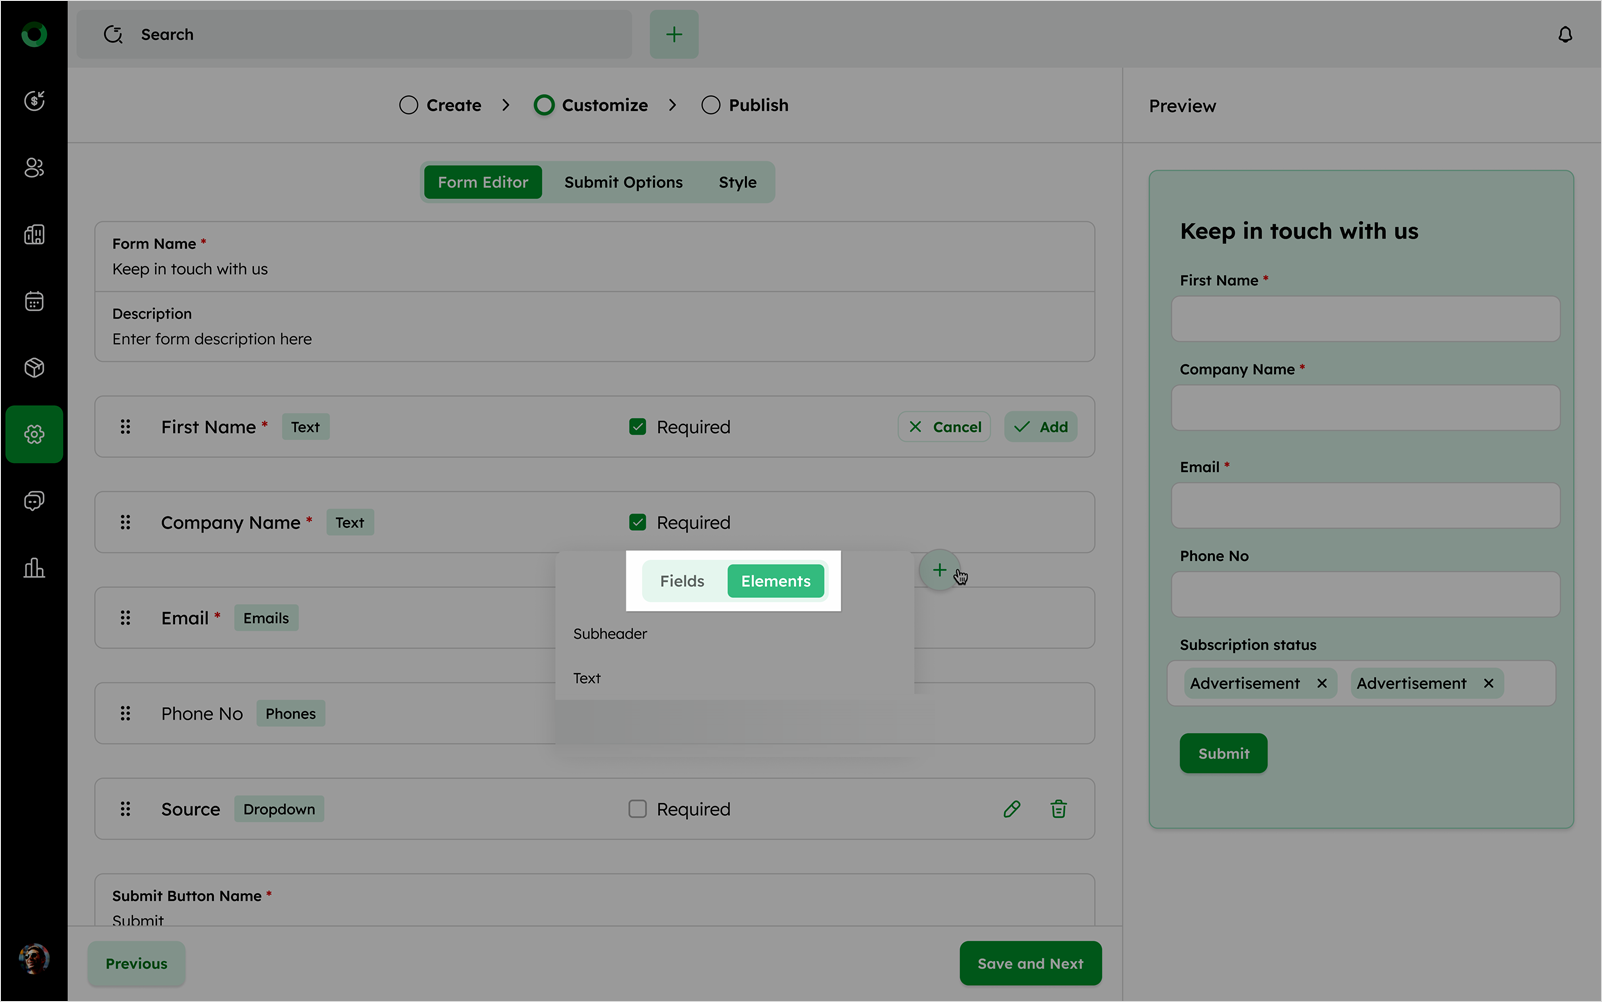
Fields
- Choose from available fields such as contact and company fields, including custom fields.
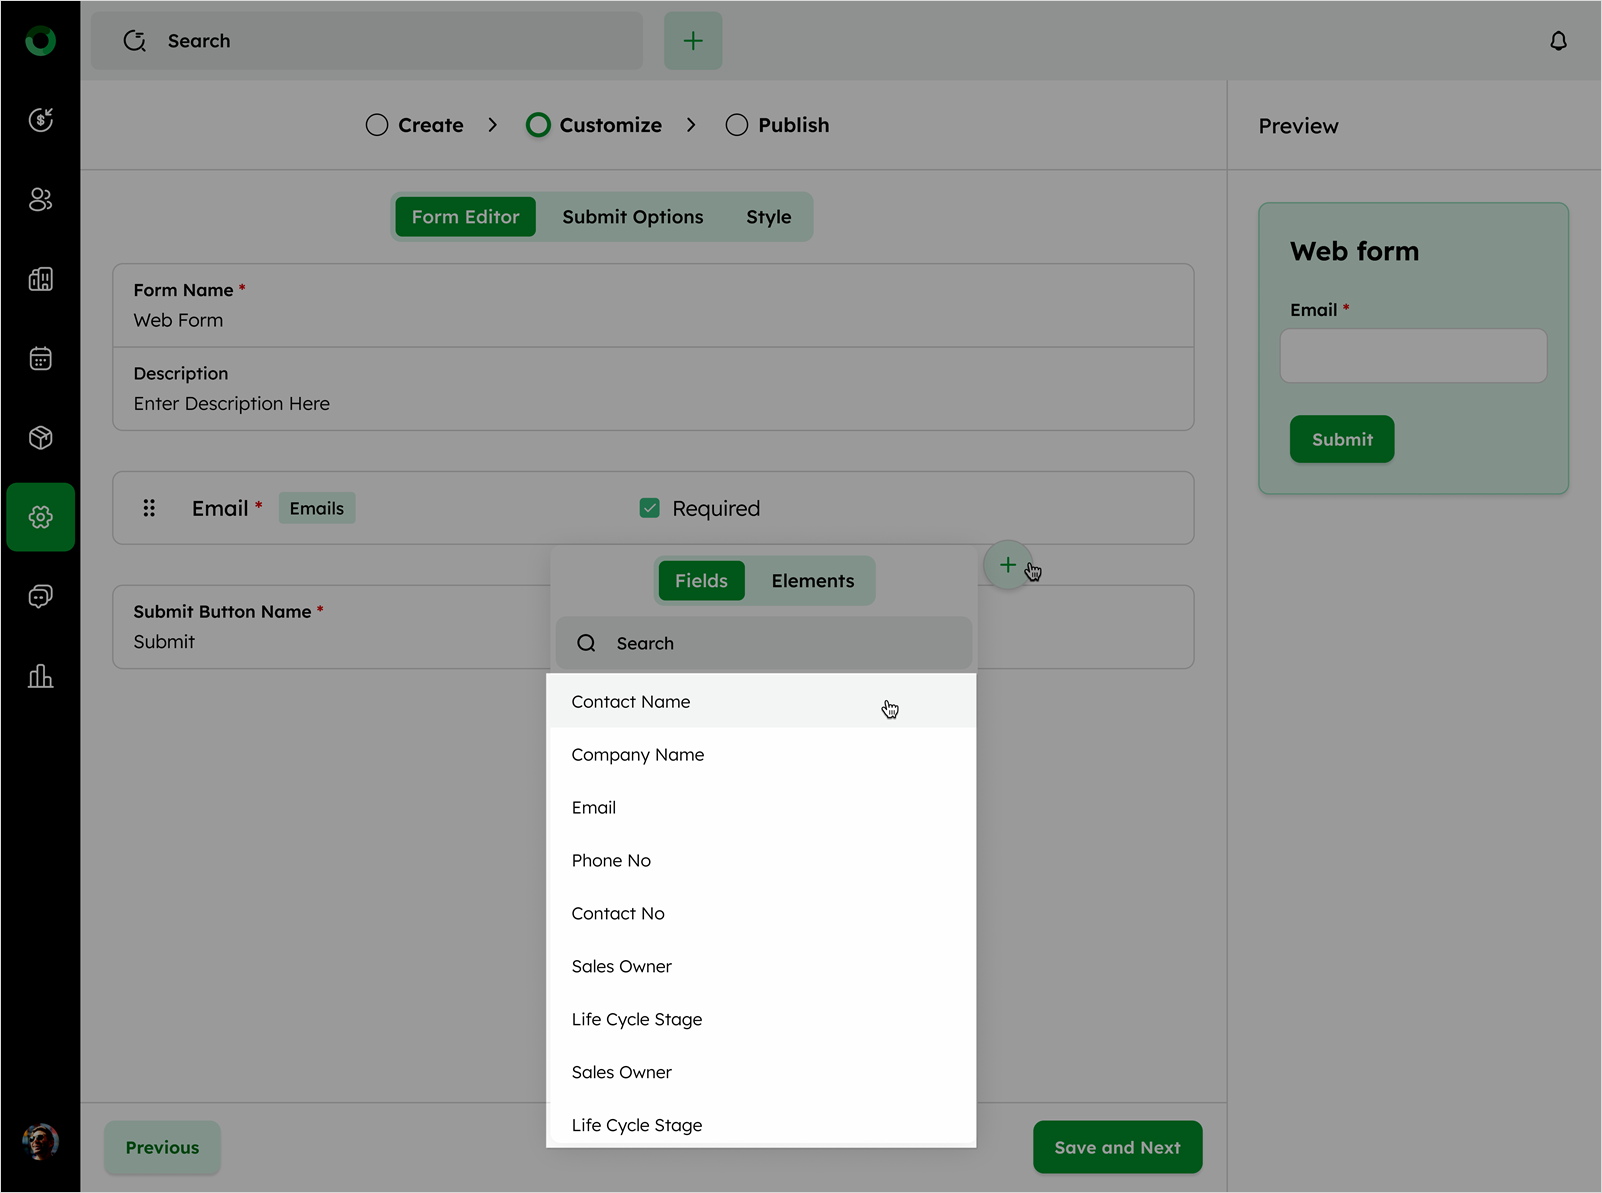
- Click Add to place the selected field into the form.
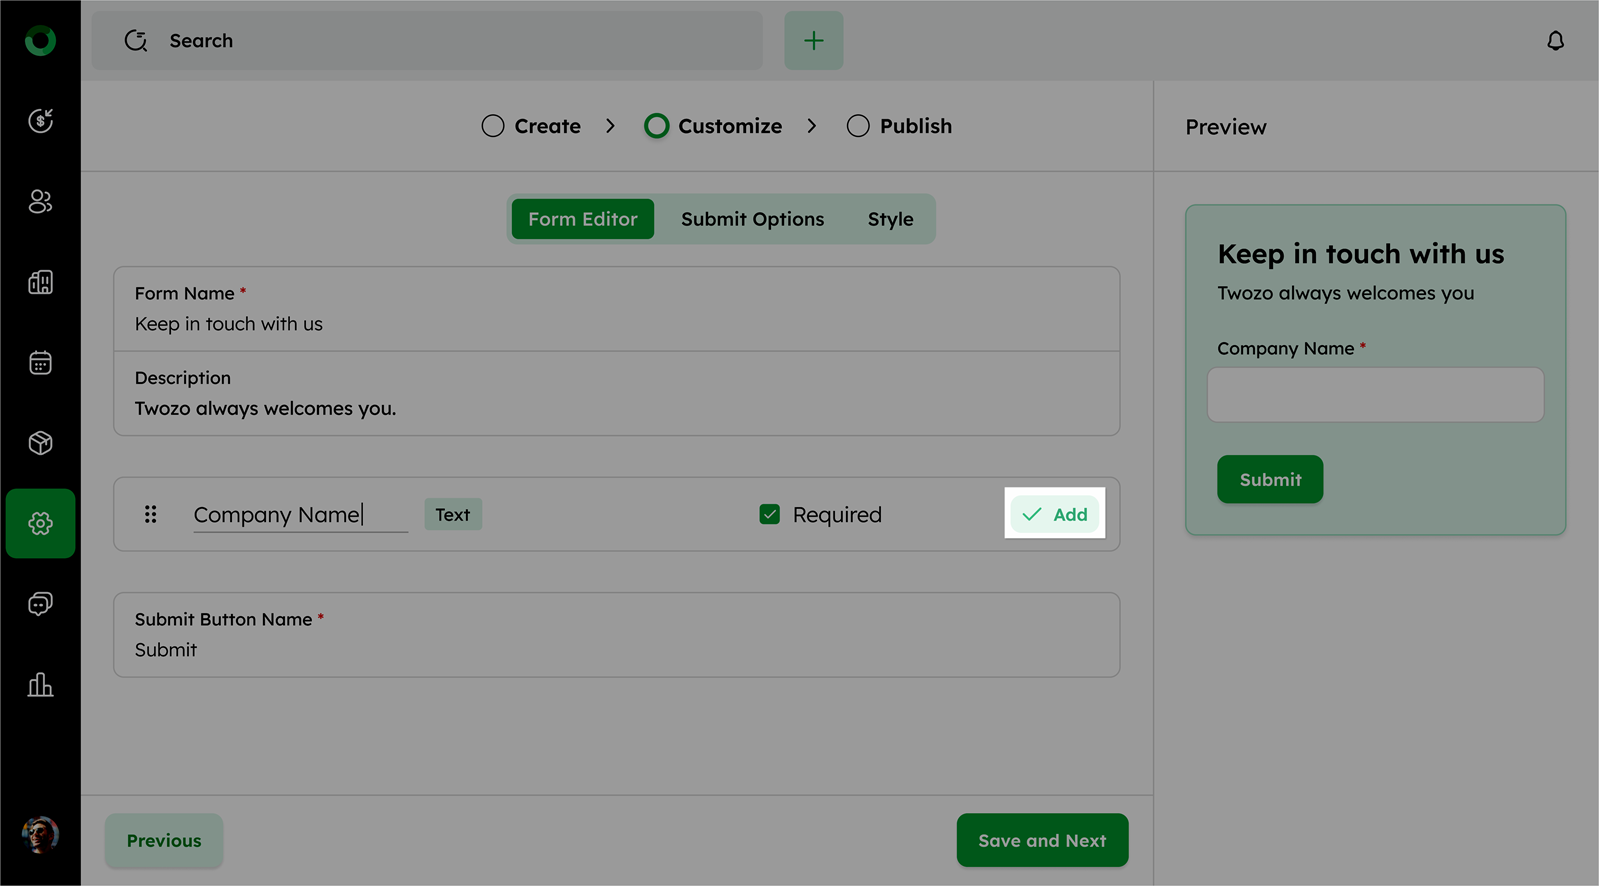
- Click the pen icon to edit the field name.
![]()
-
After editing, click Update to save the changes.
-
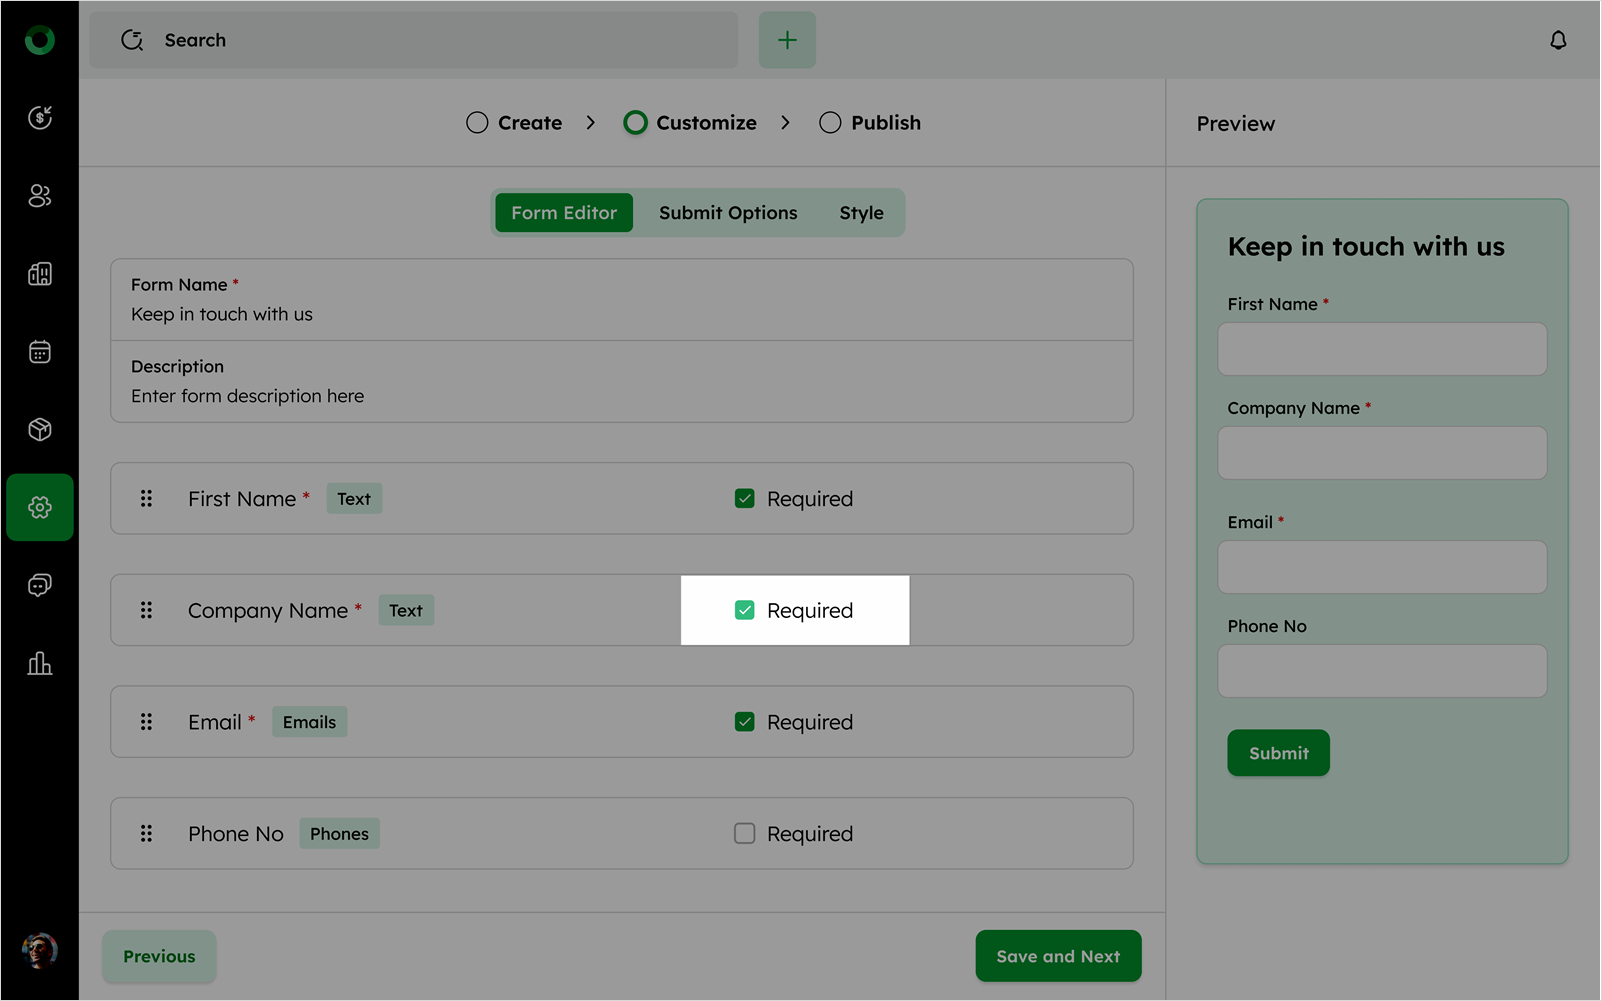
Use the Drag and Drop icon on any block to move it between the form title and the submit button. Each block will display the field name and type.
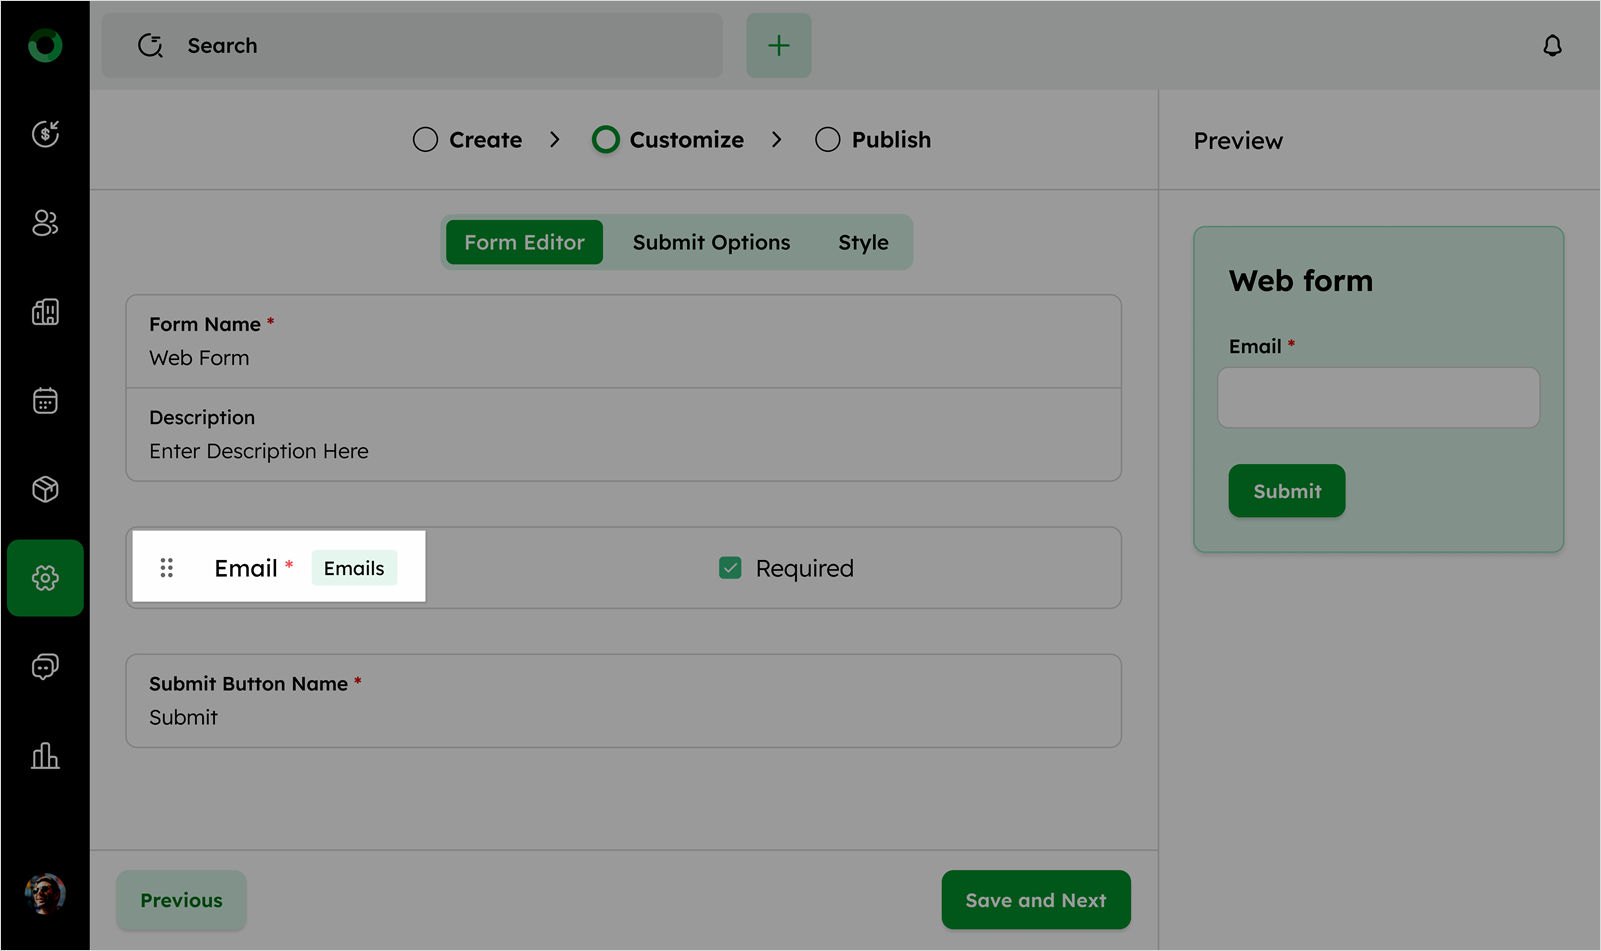
- Mark the checkbox to make the field mandatory.
Elements
Elements provide you with two options:
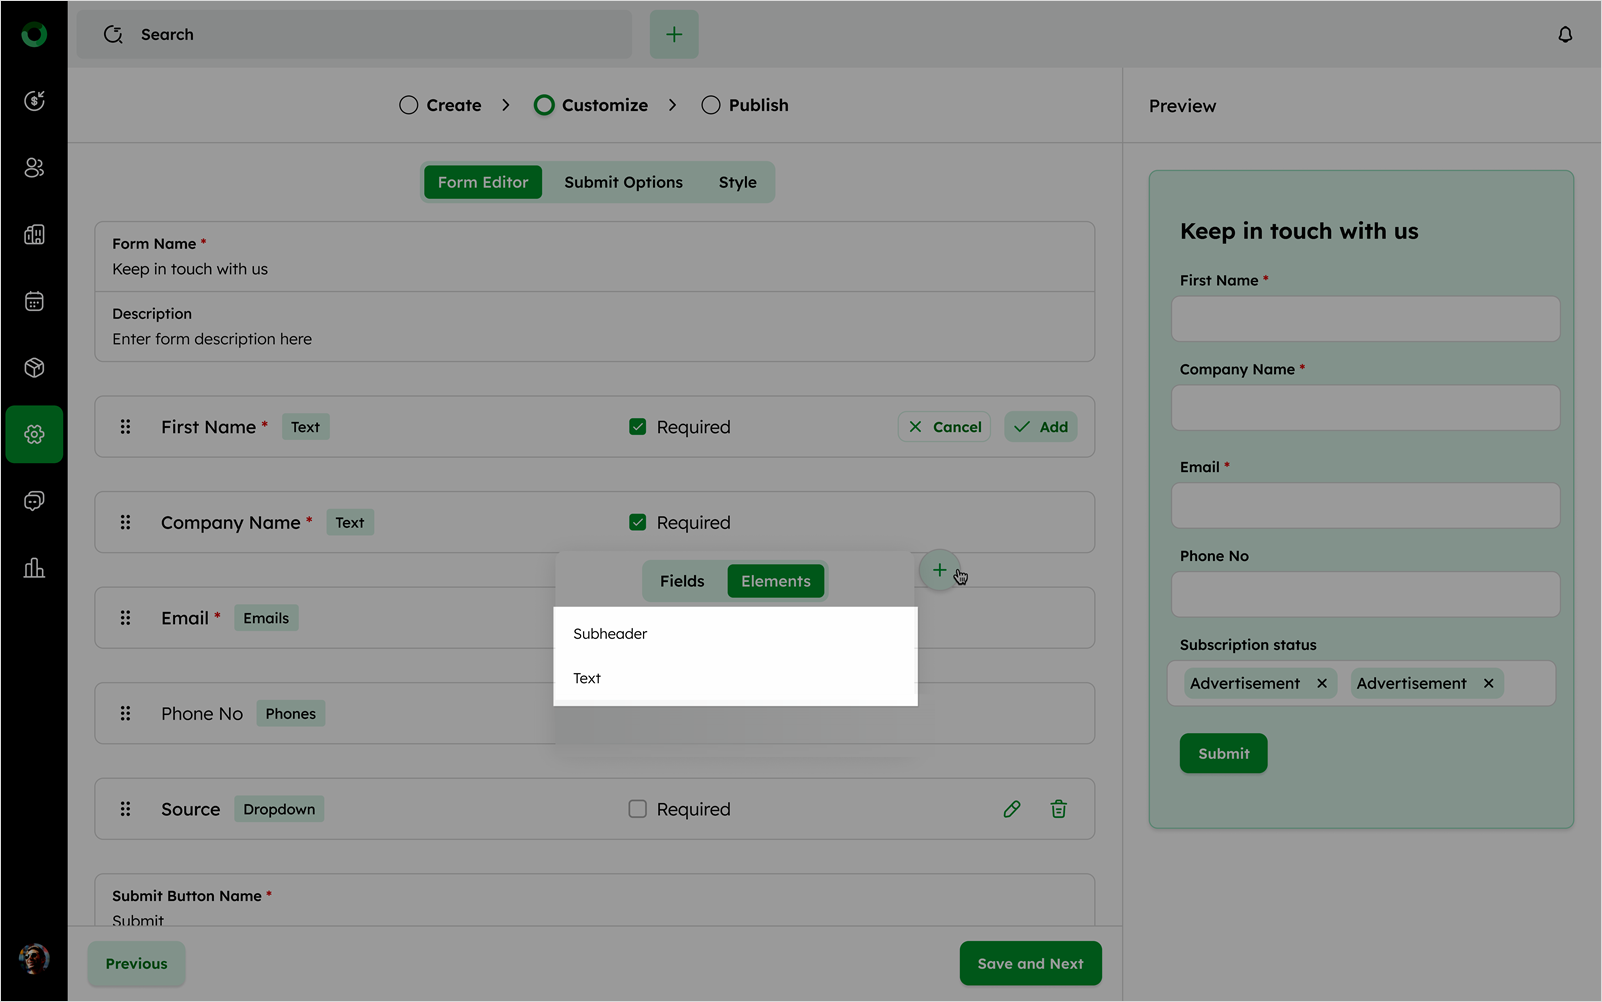
-
Add a Subheader block by clicking the Subheader option and entering the desired subheading.
-
Add a text block and edit the content by clicking the block.
-
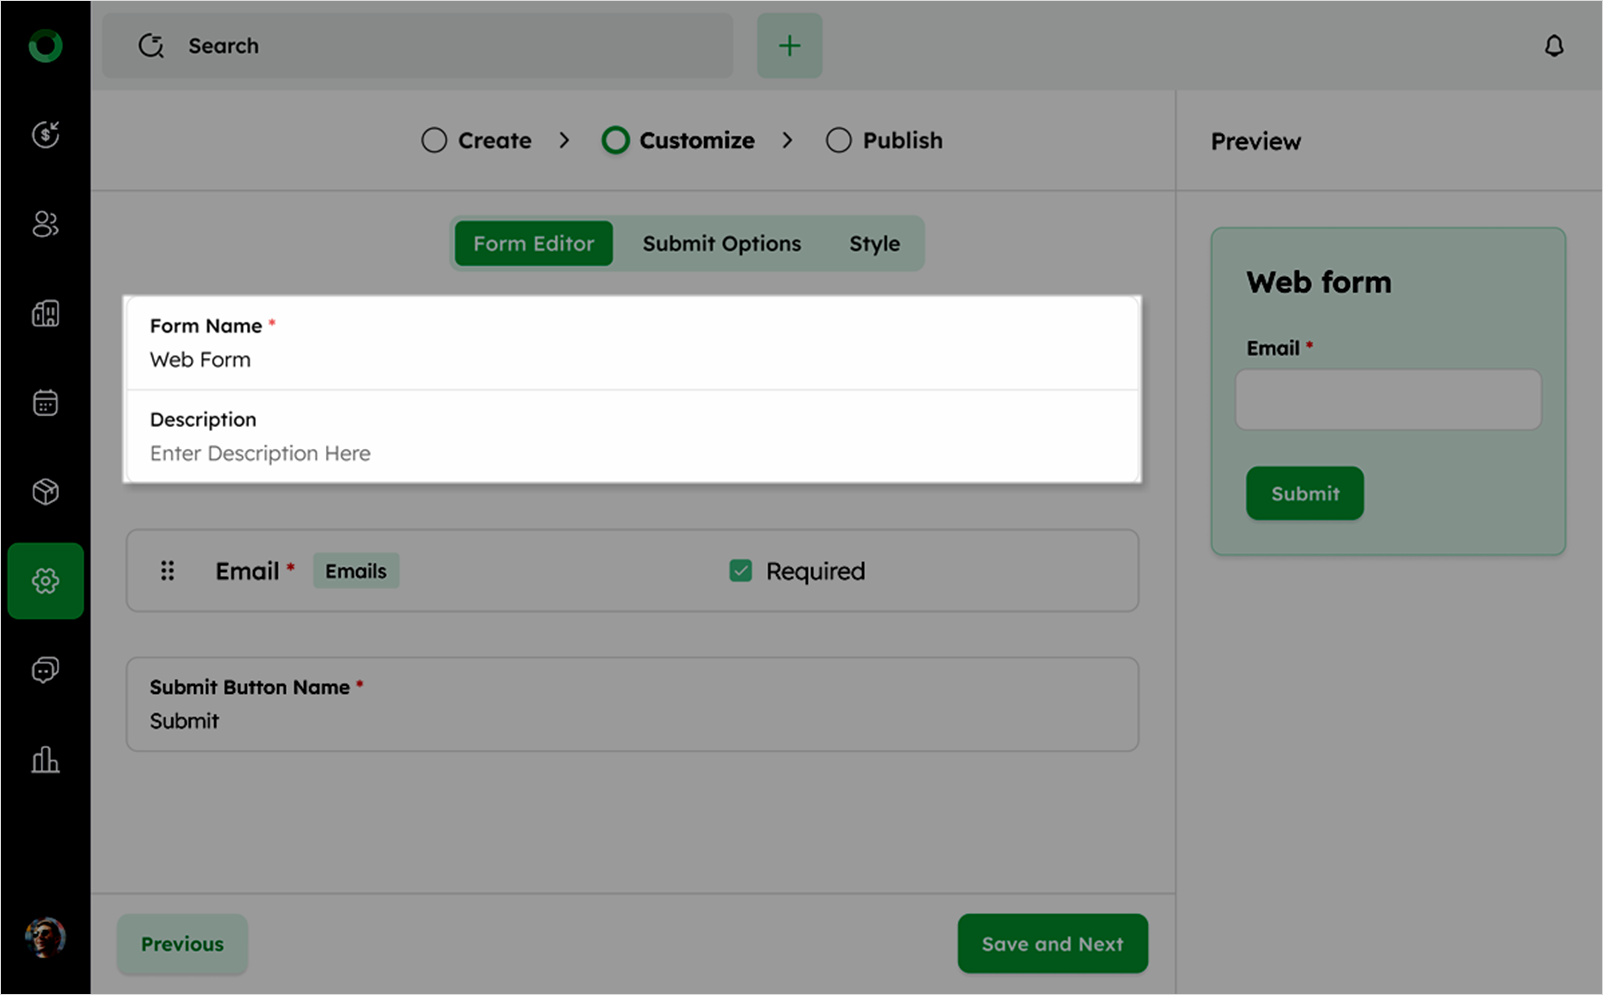
To edit the form name and description, click the respective block and make the necessary changes.
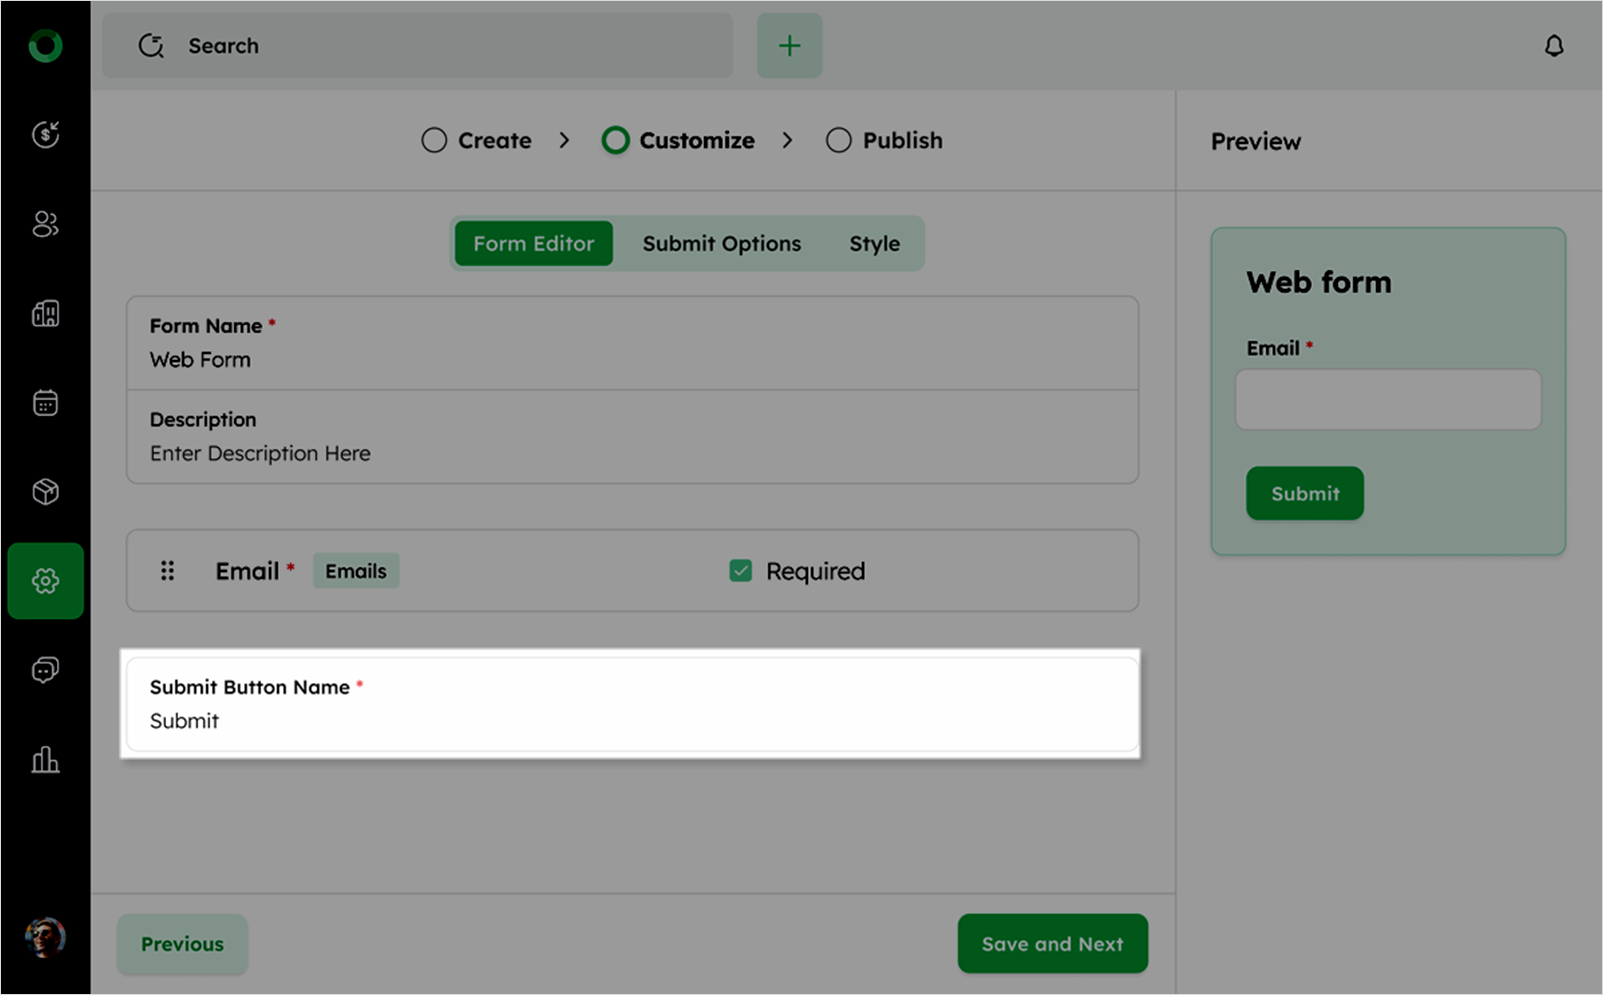
- Click the Submit button to change its text to your preference.
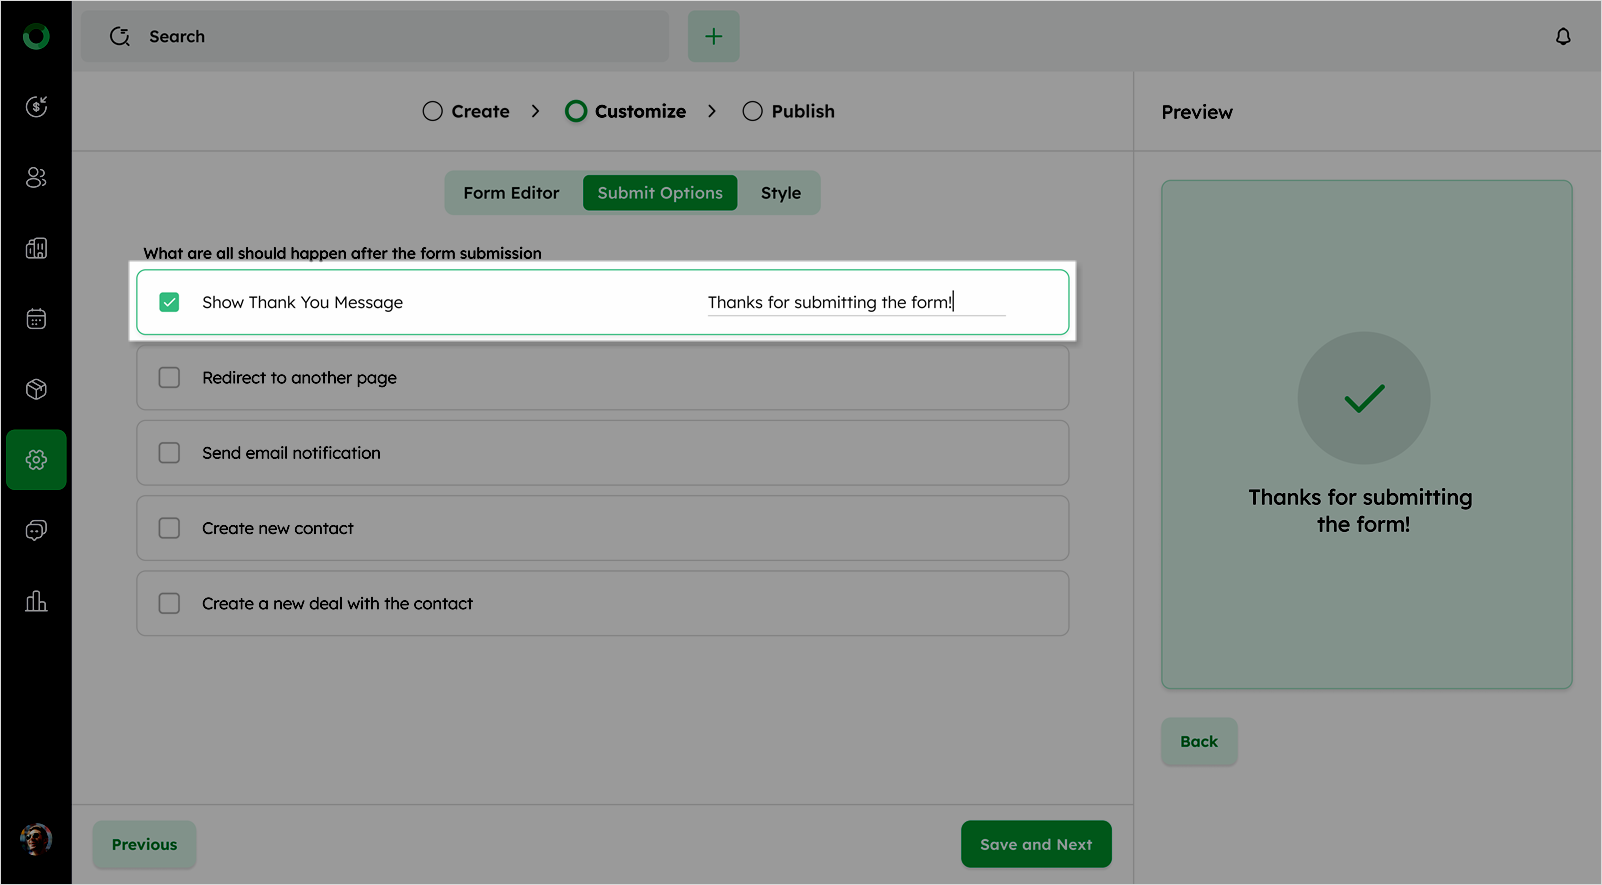
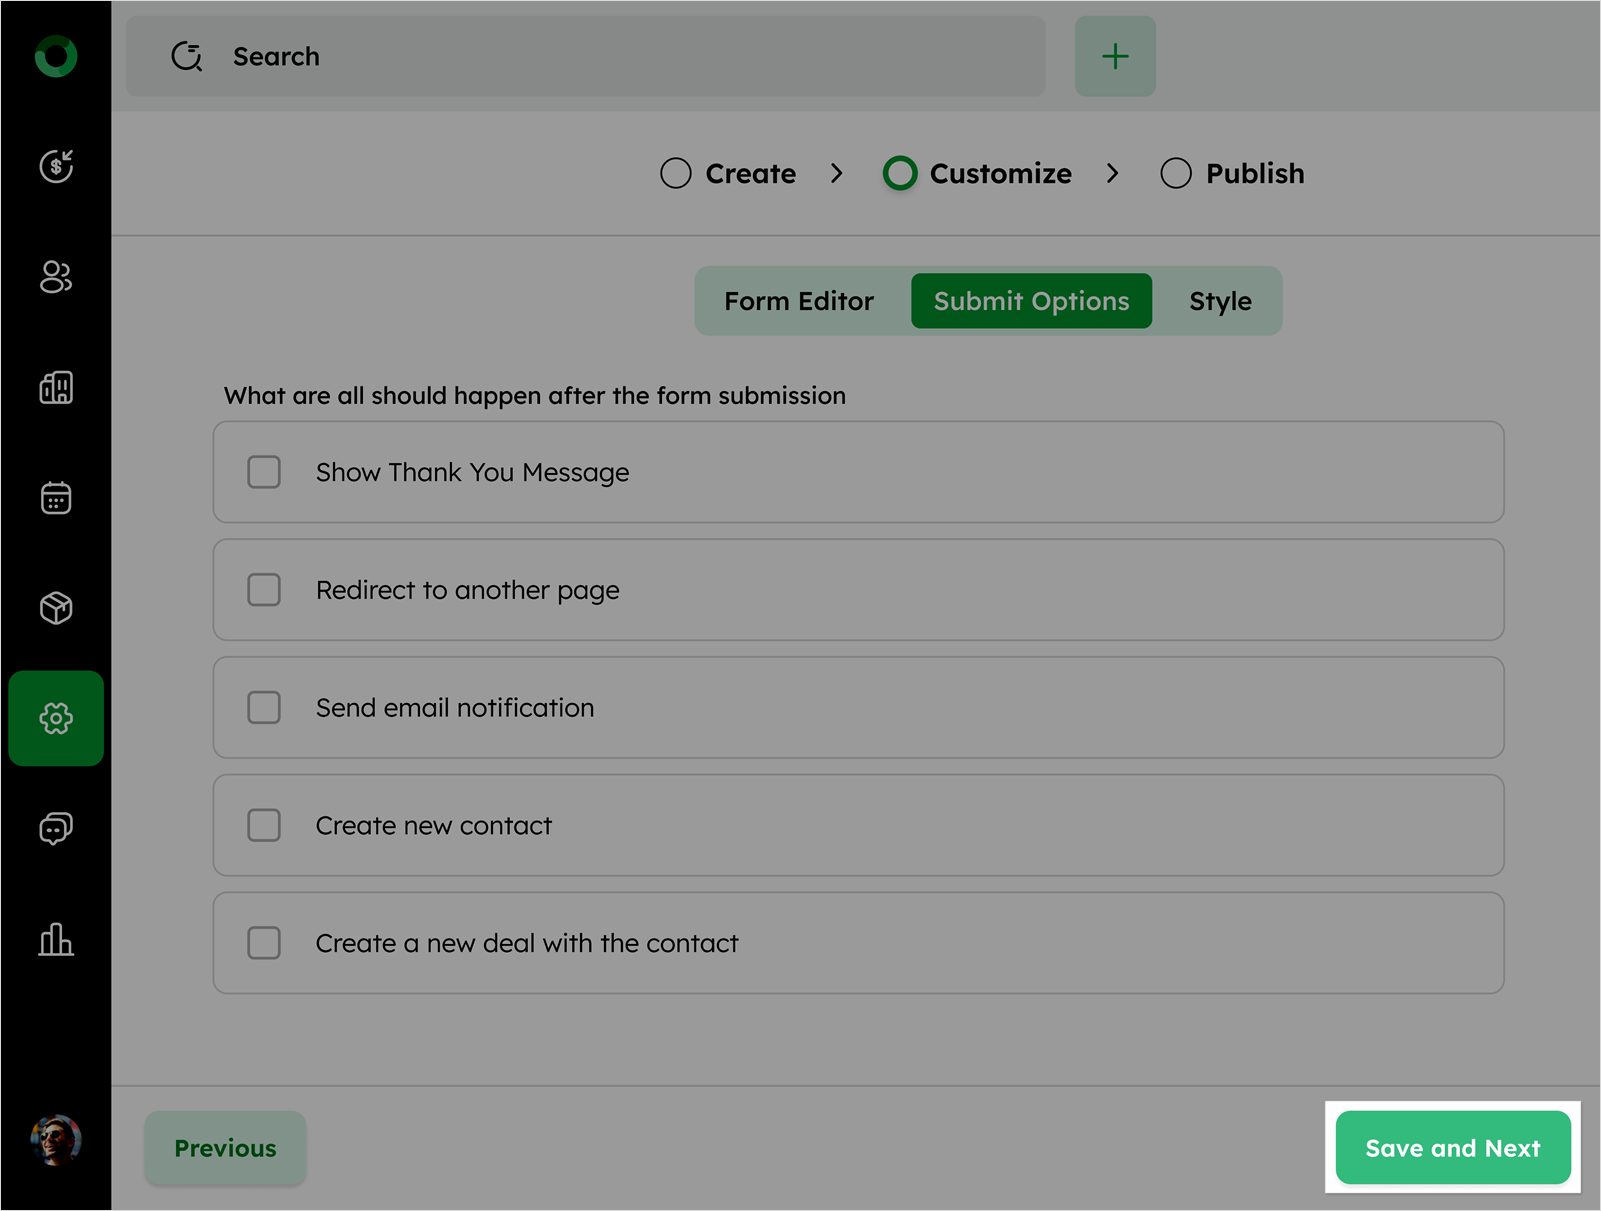
Submission
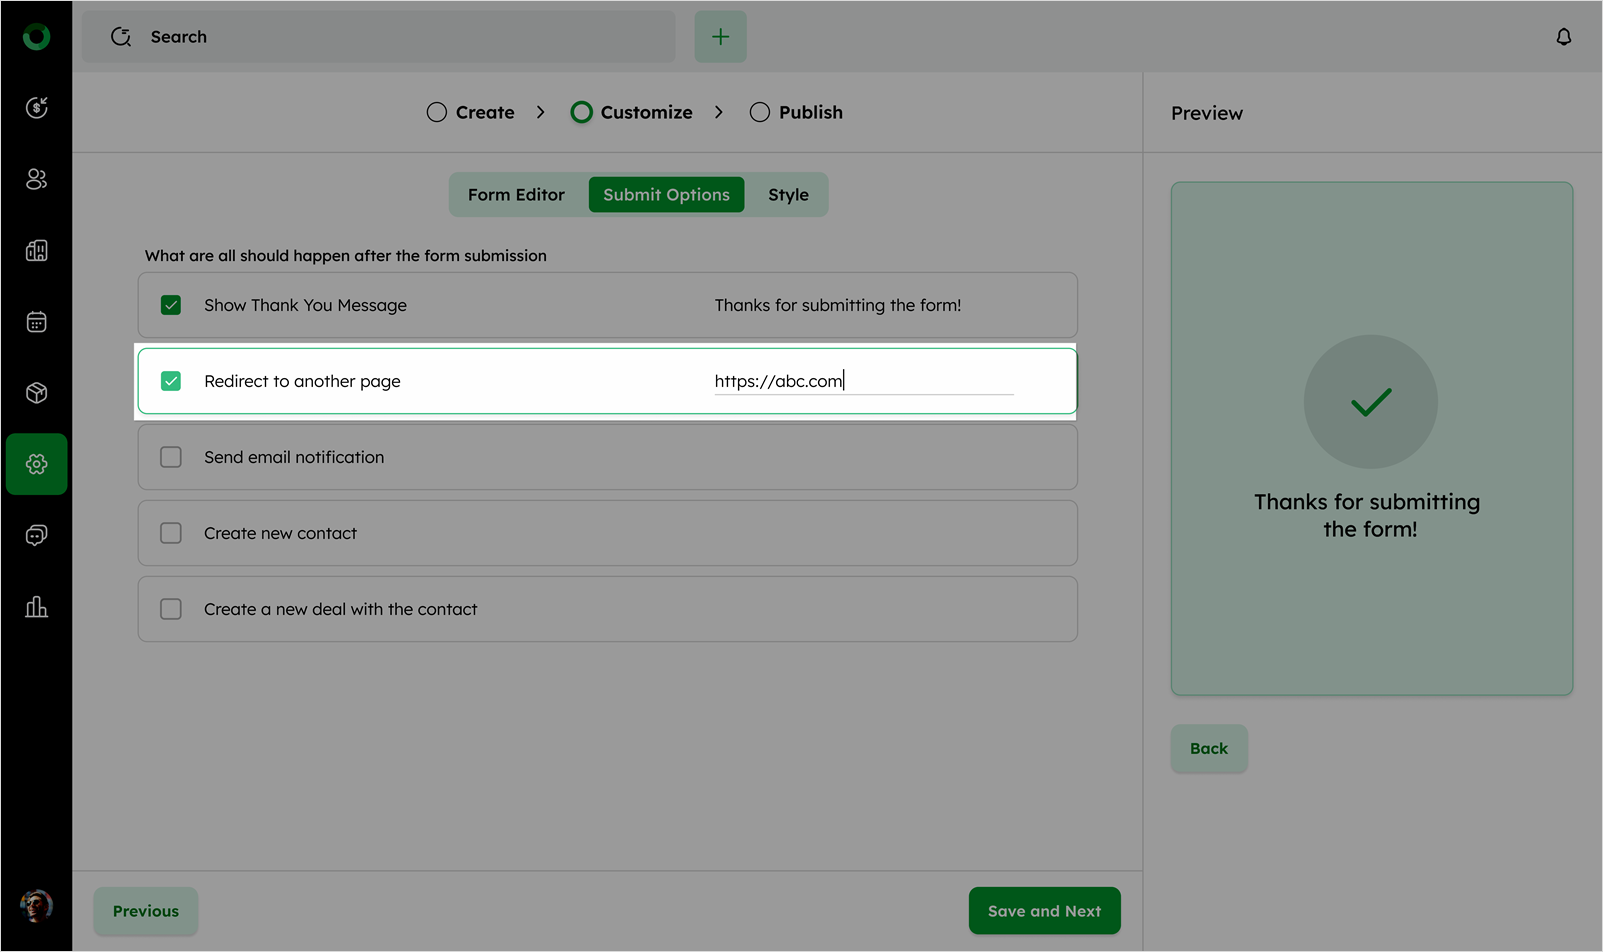
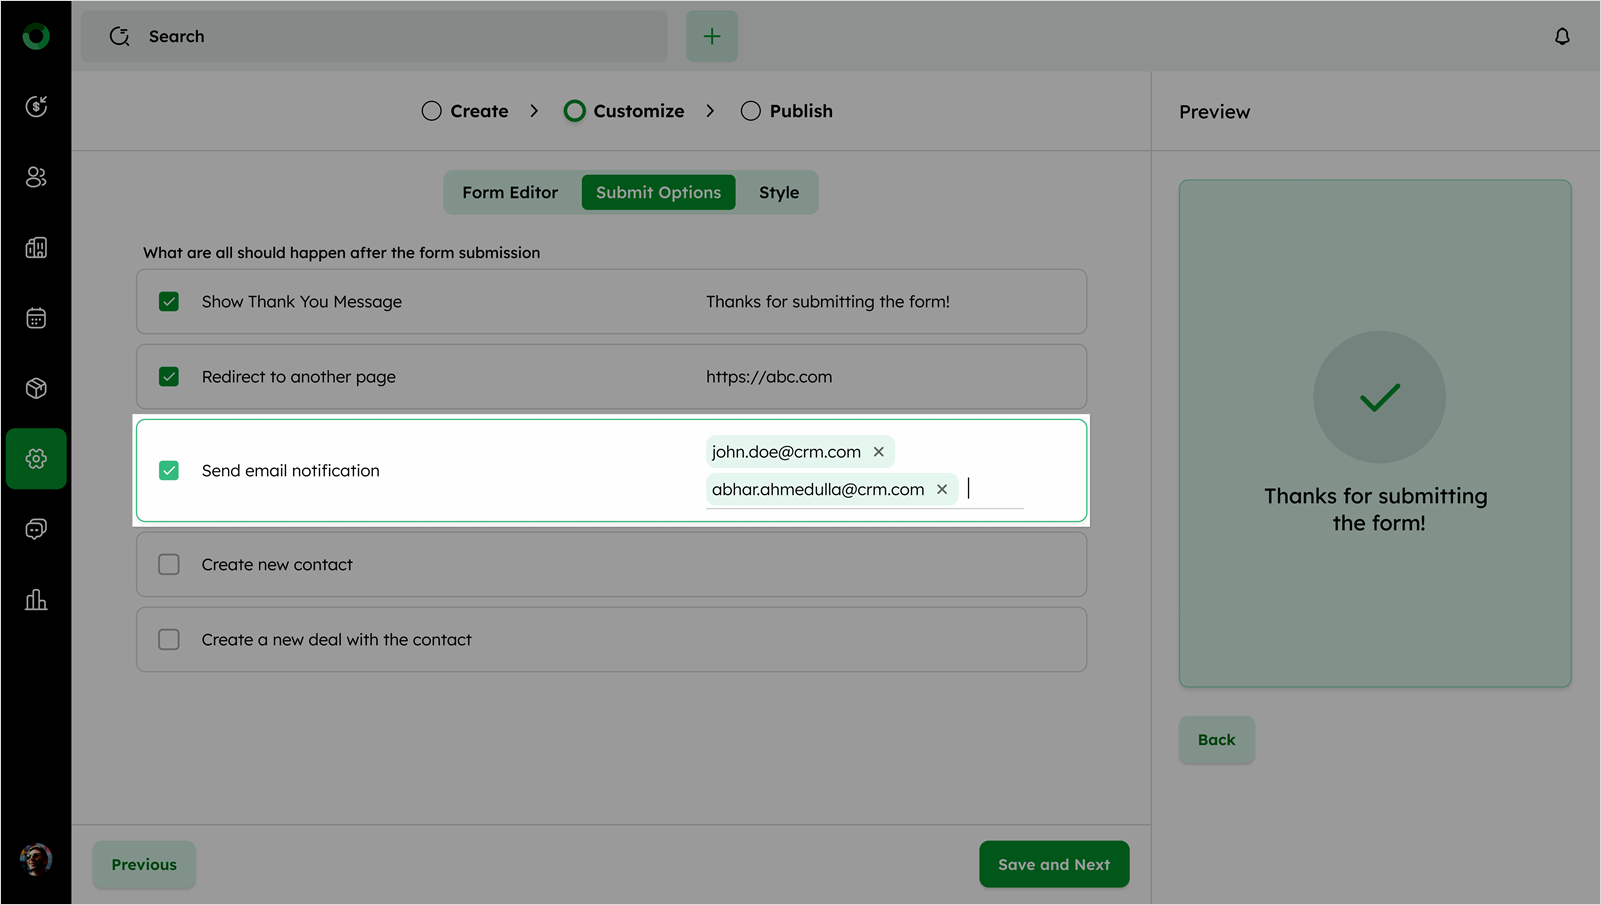
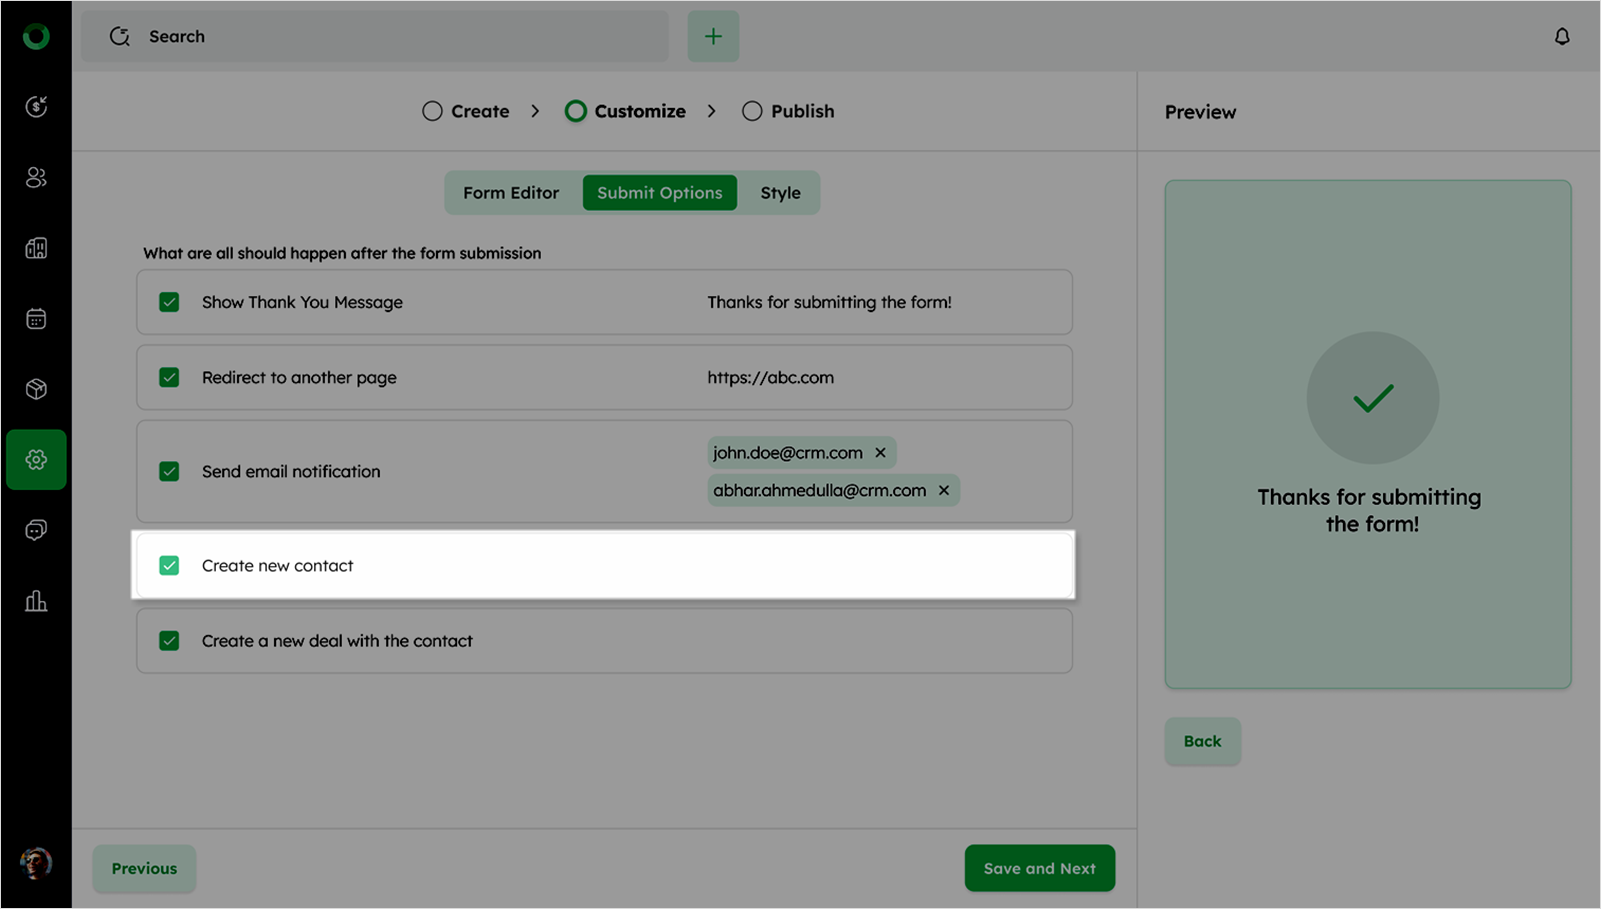
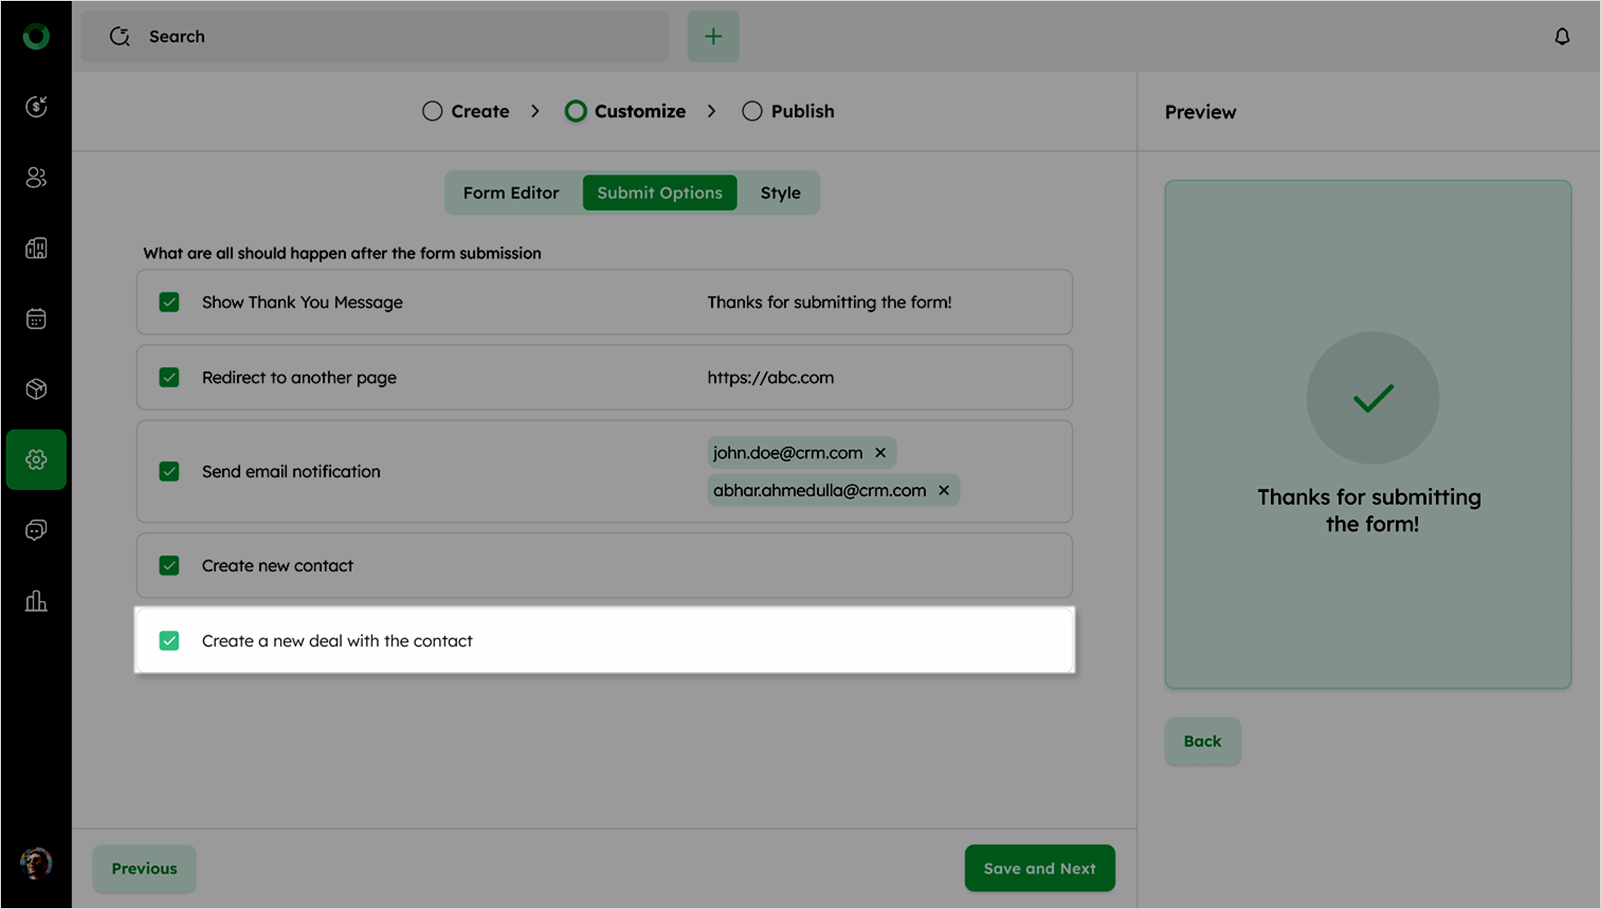
After configuring the form, decide what should happen after submission by enabling the following options:
- Show Thank You Message: Enable to show a default Thanks for submitting the form! message. Click the message to edit it.
- Redirect to another page: Enable and provide the URL for redirection after submission. Invalid URLs will trigger an error message.
- Send email notification: Enable and provide the recipient's email address. Invalid email addresses will trigger an error message.
- Create new contact: Enable this option to create a new contact with the submitted details.
- Create a new deal with a contact: Enable this option to create a new deal with the submitted details.
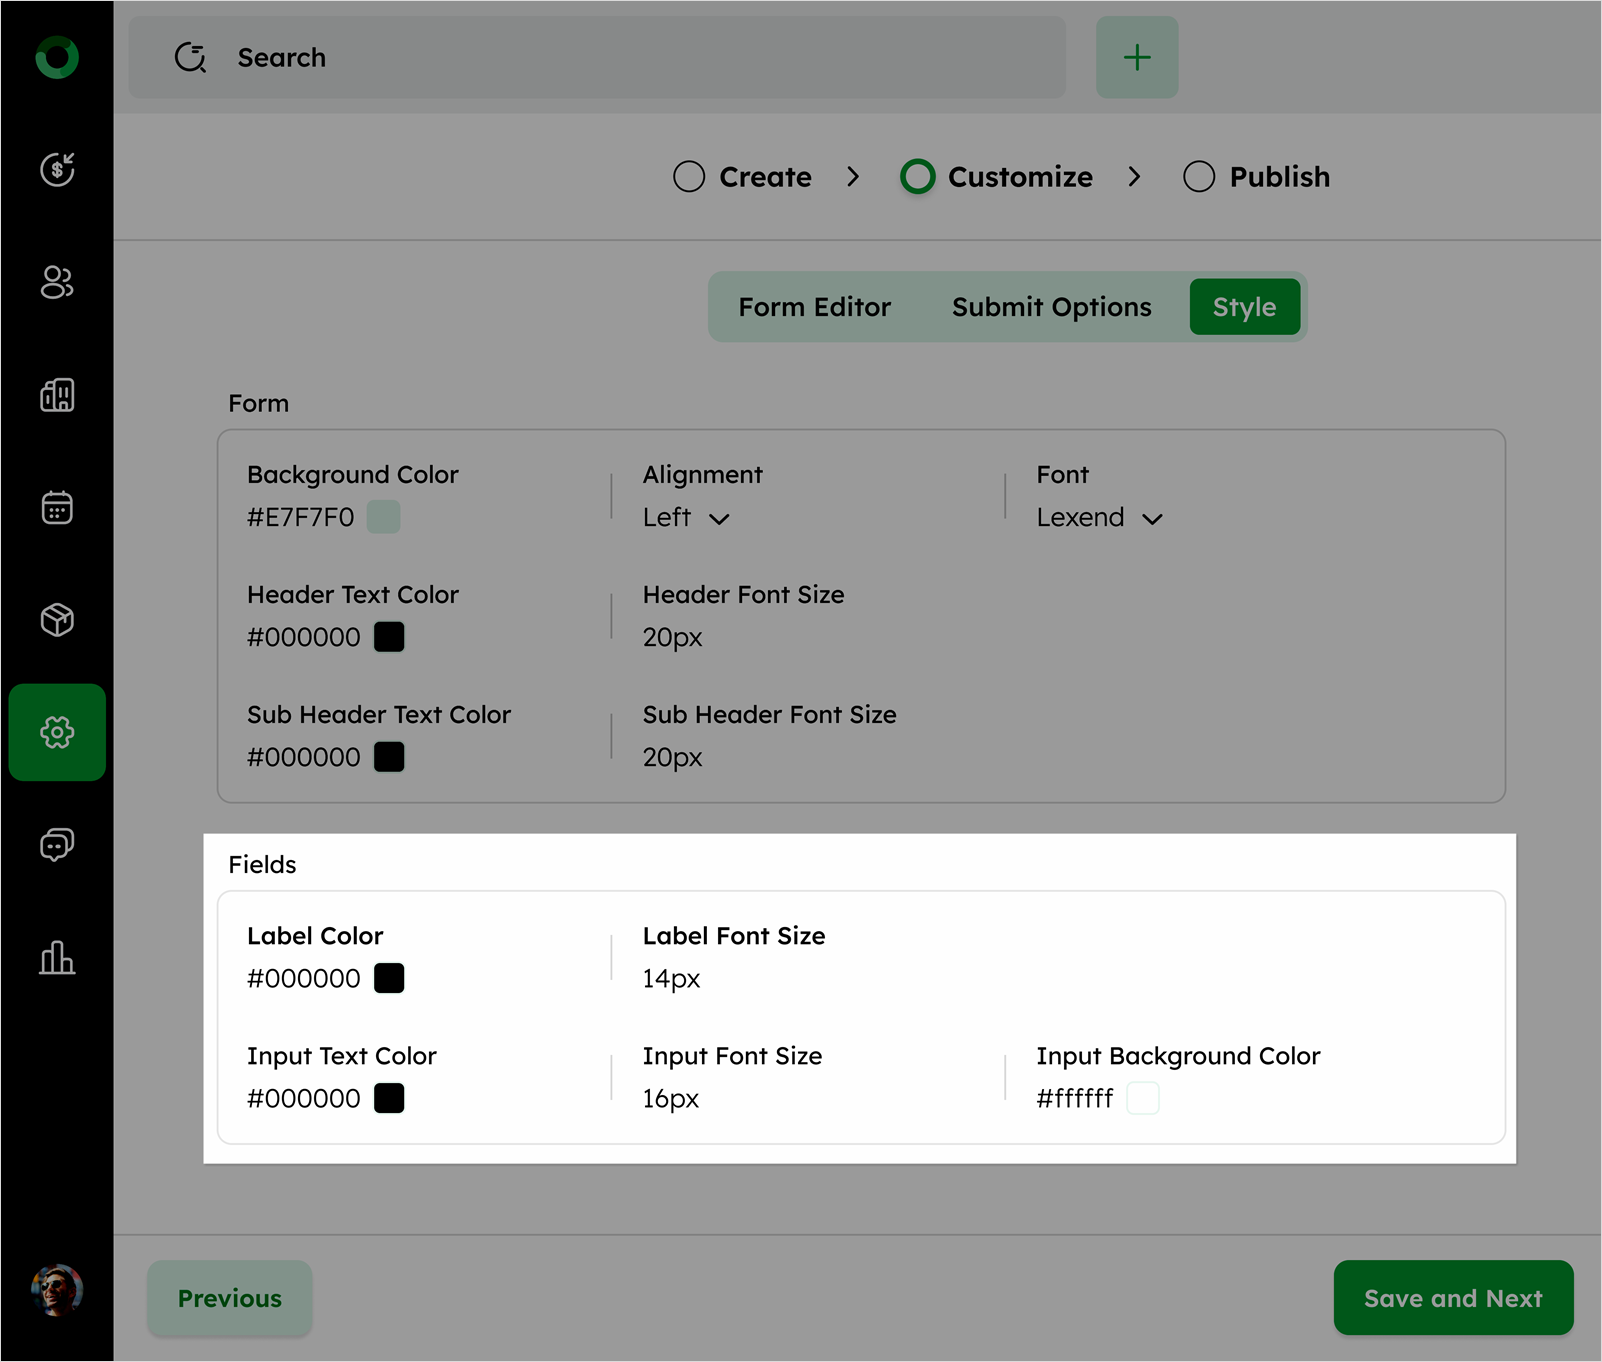
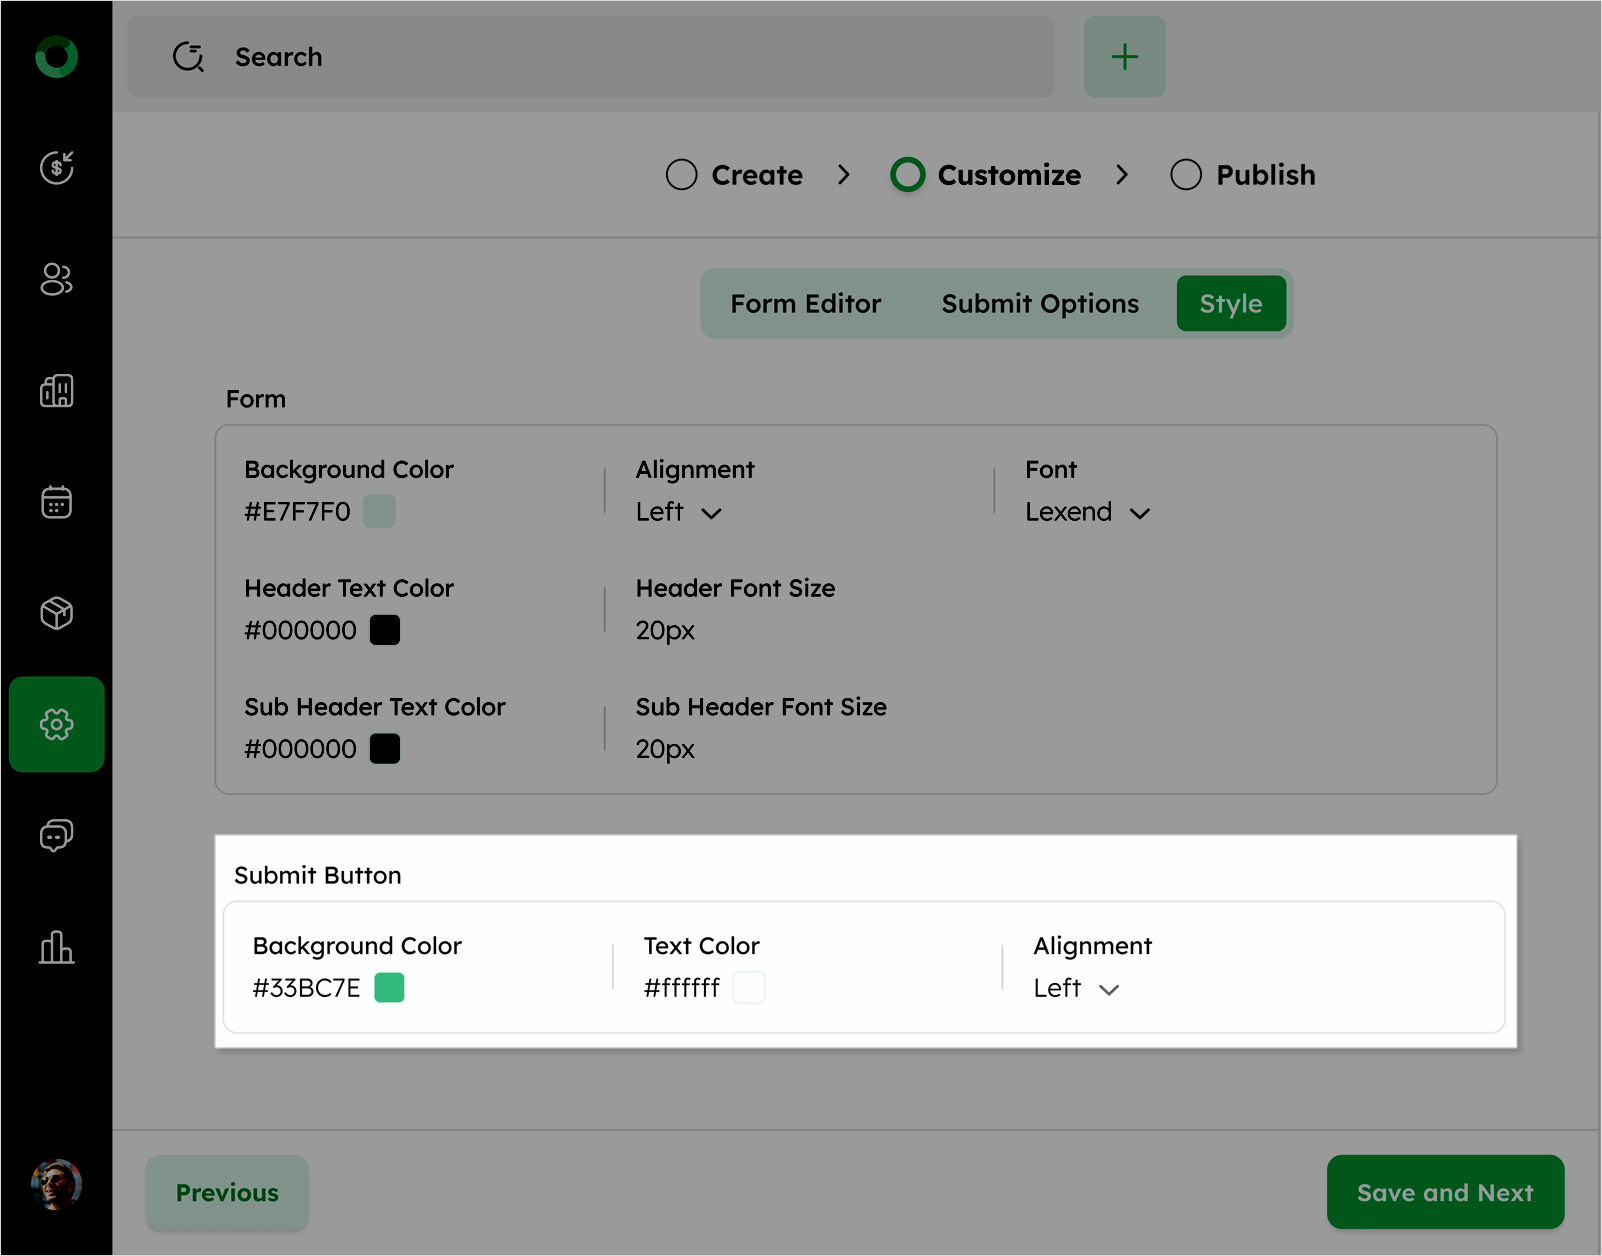
Style
To match your form’s look and feel with your brand, go to the Style tab:
Form Appearance
-
Background Color: Adjust the background color to match your branding.
-
Header & Sub-header Text Colors: Change the color of the main heading and sub-heading.
-
Font & Alignment: Select a font and adjust text alignment (Left, Center, or Right).
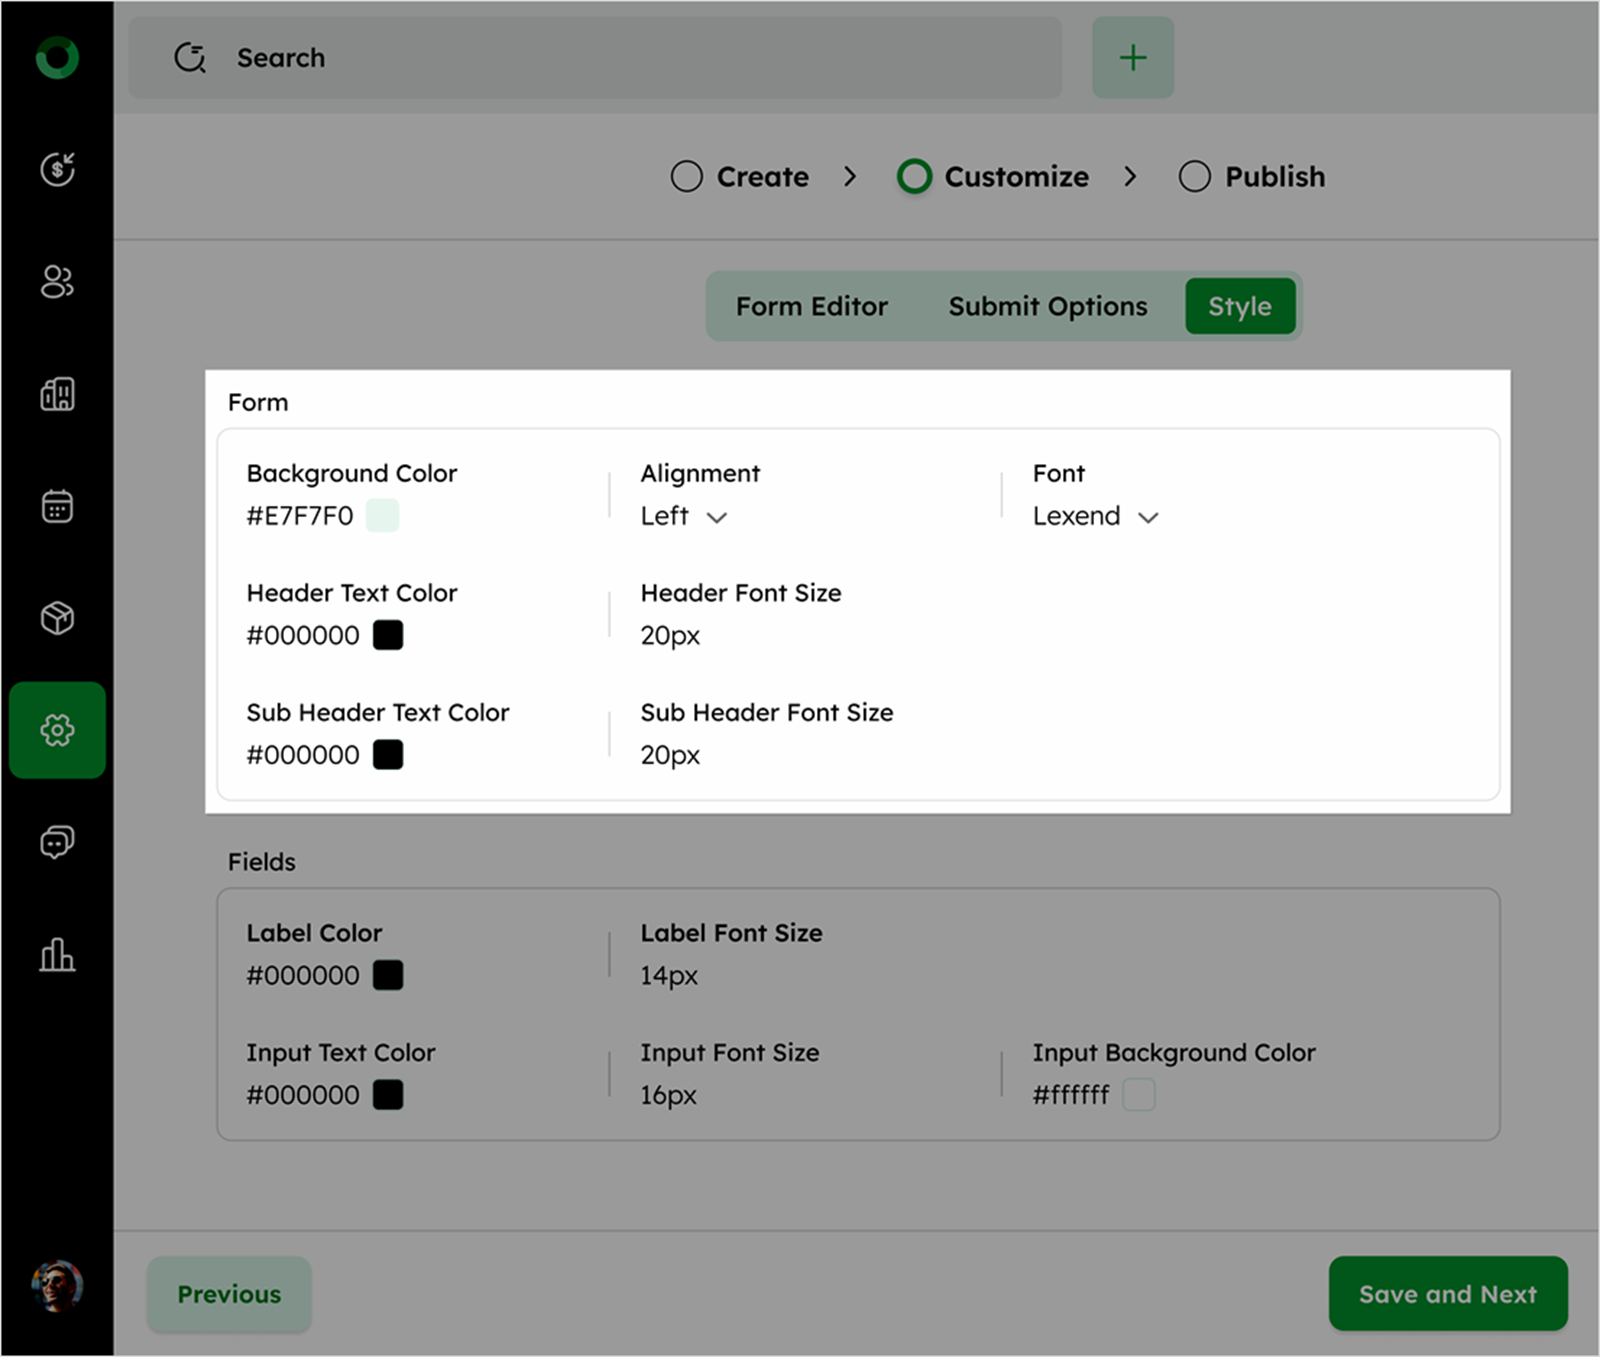
Field Styles
-
Label Color & Font Size: Modify Label color and font size for better visibility.
-
Input Text Color & Font Size: Adjust the text color and font inside the form fields.
-
Input Background Color: Customize the background color of the input fields.
Submit Button Styling
-
Background Color: Choose a color that stands out.
-
Text Color: Ensure the text on the button contrasts with the background for readability.
-
Alignment: Position the button (Left, Center, or Right) as needed.
The preview panel on the right side displays real-time updates of the webform. All modifications are instantly reflected in the preview panel.
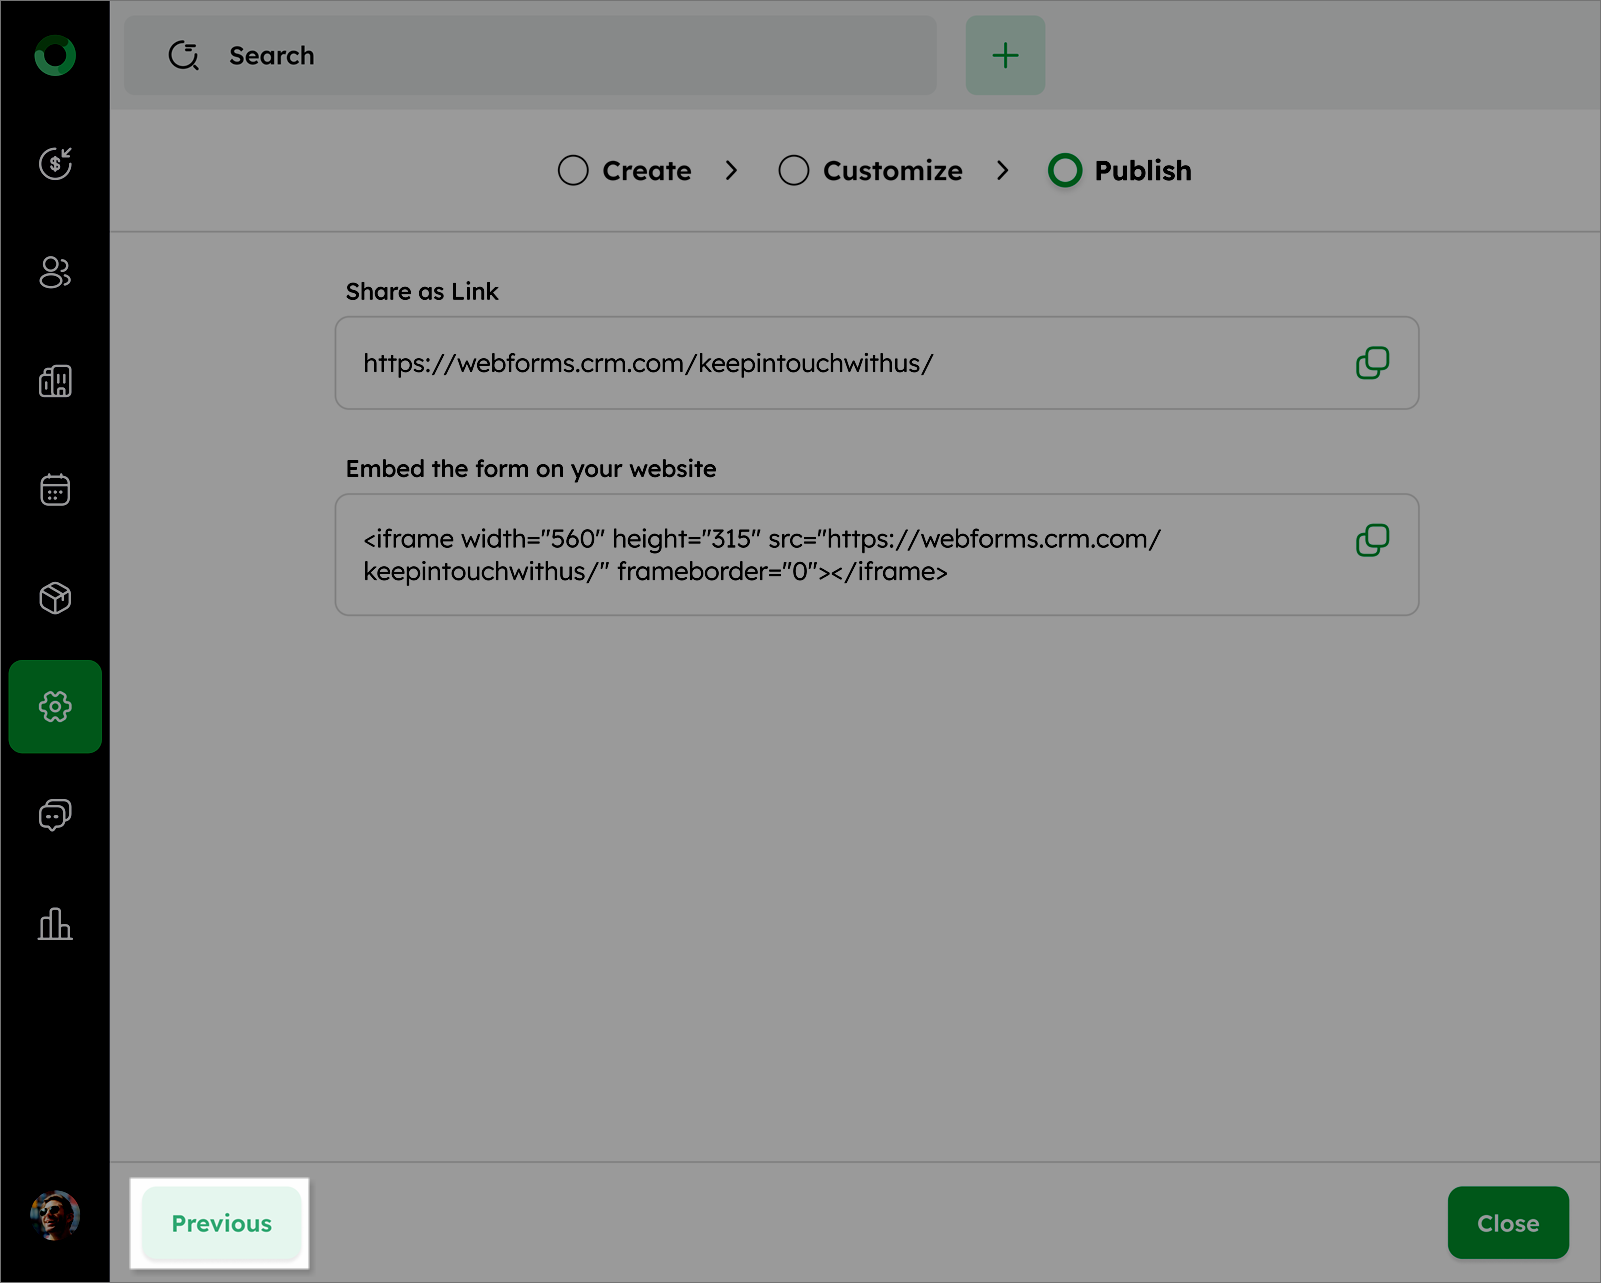
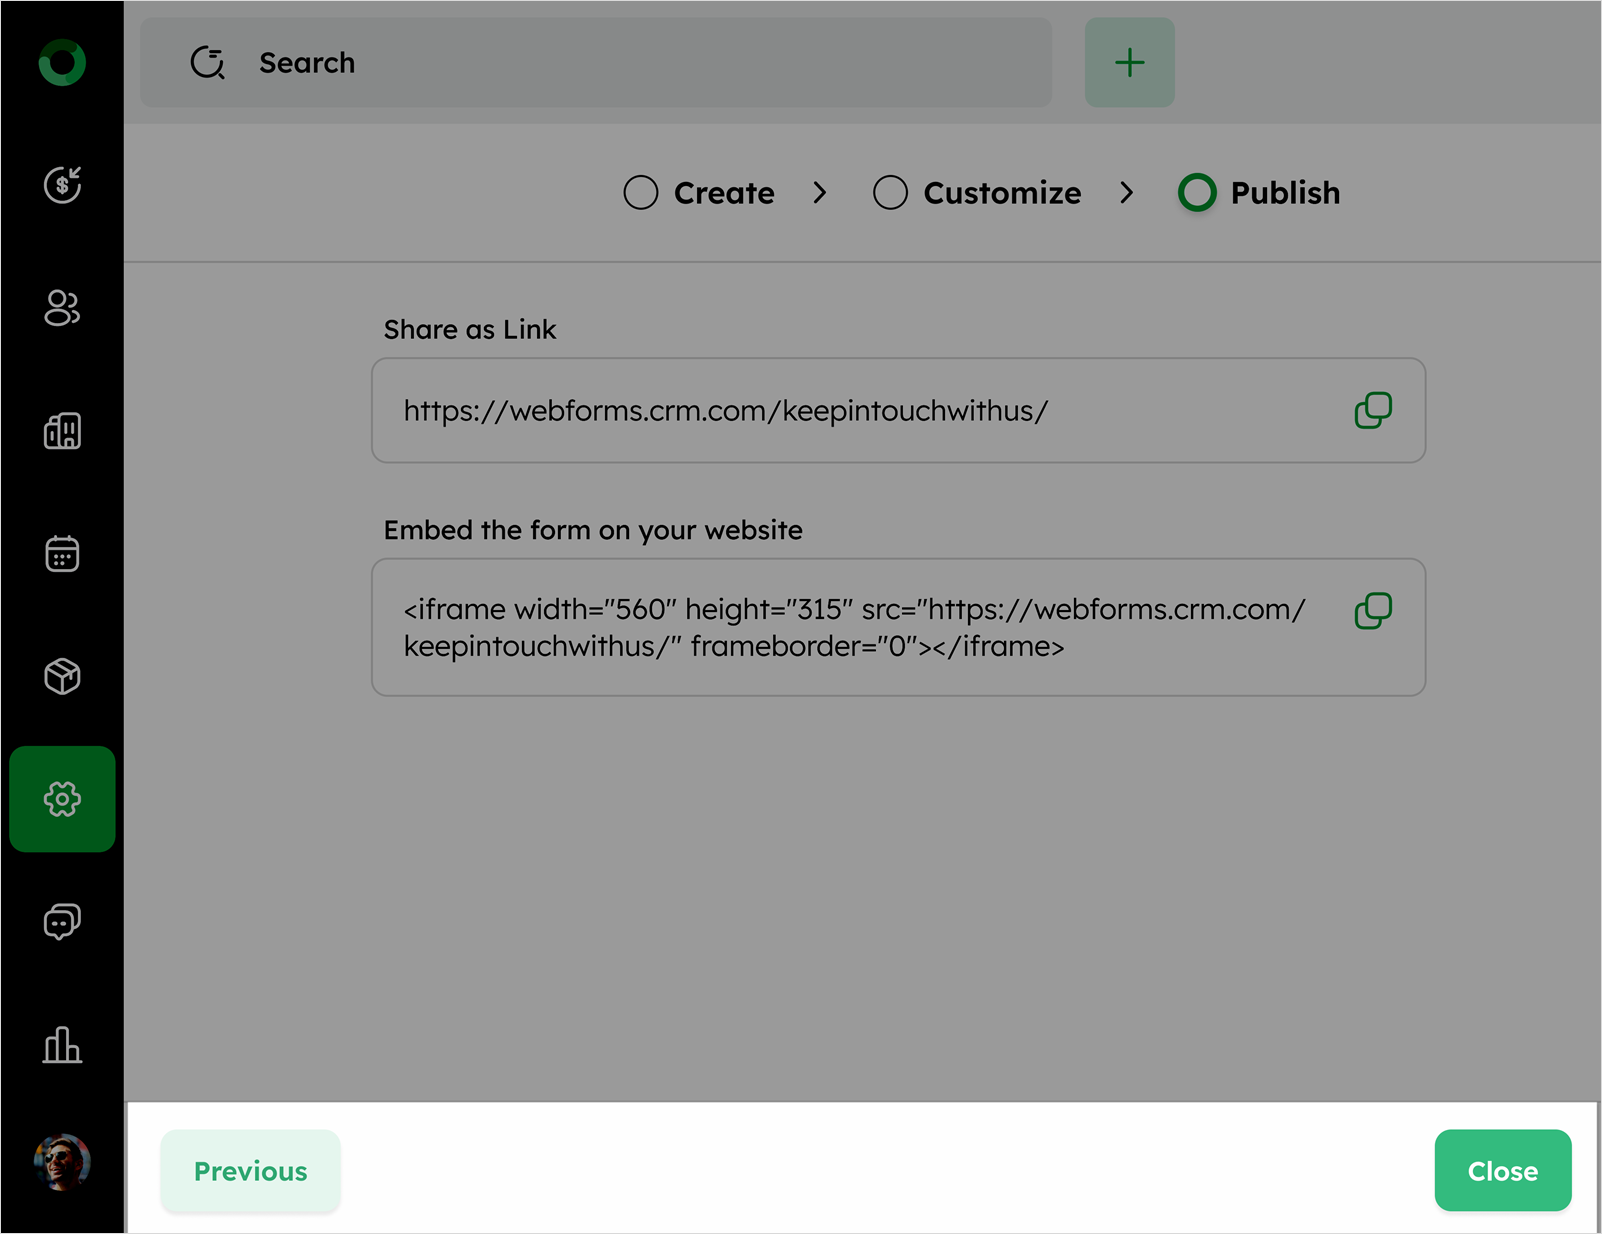
After completing the webform setup, click Save & Next to proceed to the Publish page.
Copy the sharing link for the webform and the embed link to integrate it into a website.
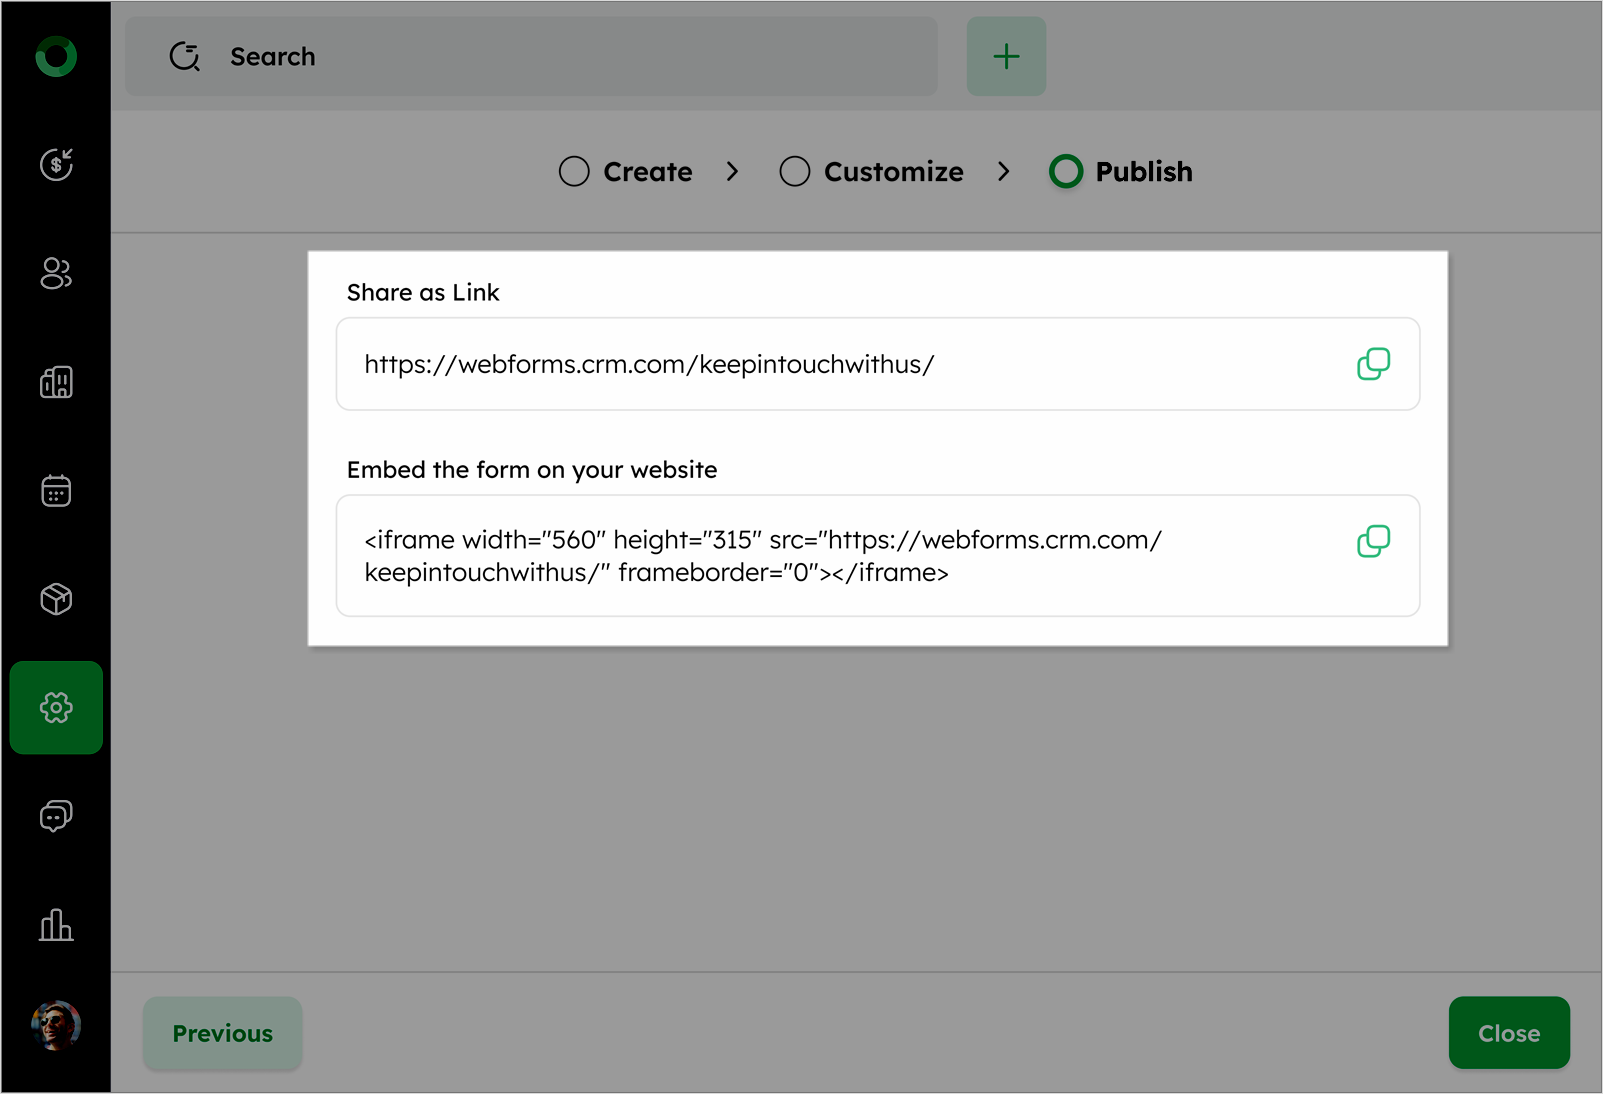
Click Close to finalize and publish the webform.
Click the Previous button if further changes are required.