User Management
A User is an assigned member with specific roles and permissions to manage tasks, records, and collaborations. Each user has defined profile details, role-based access, and activity tracking, to ensure seamless workflows and structured management.
Add User
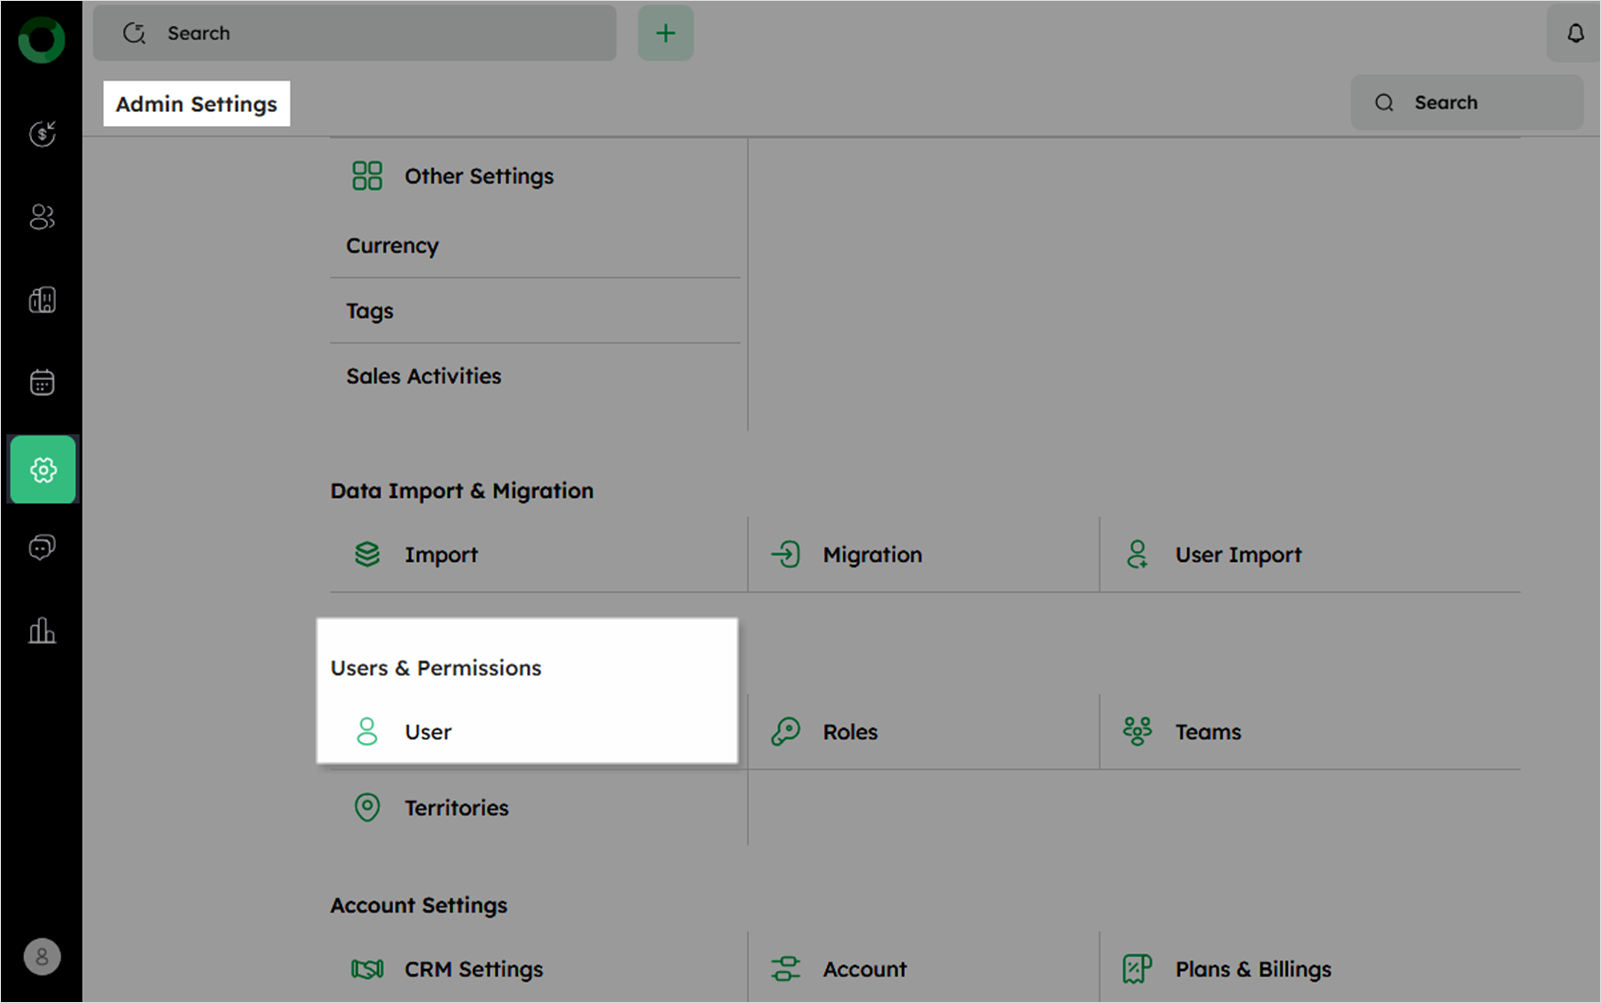
- Navigate to Admin Settings and select User under Users & Permissions to access the user setup page.
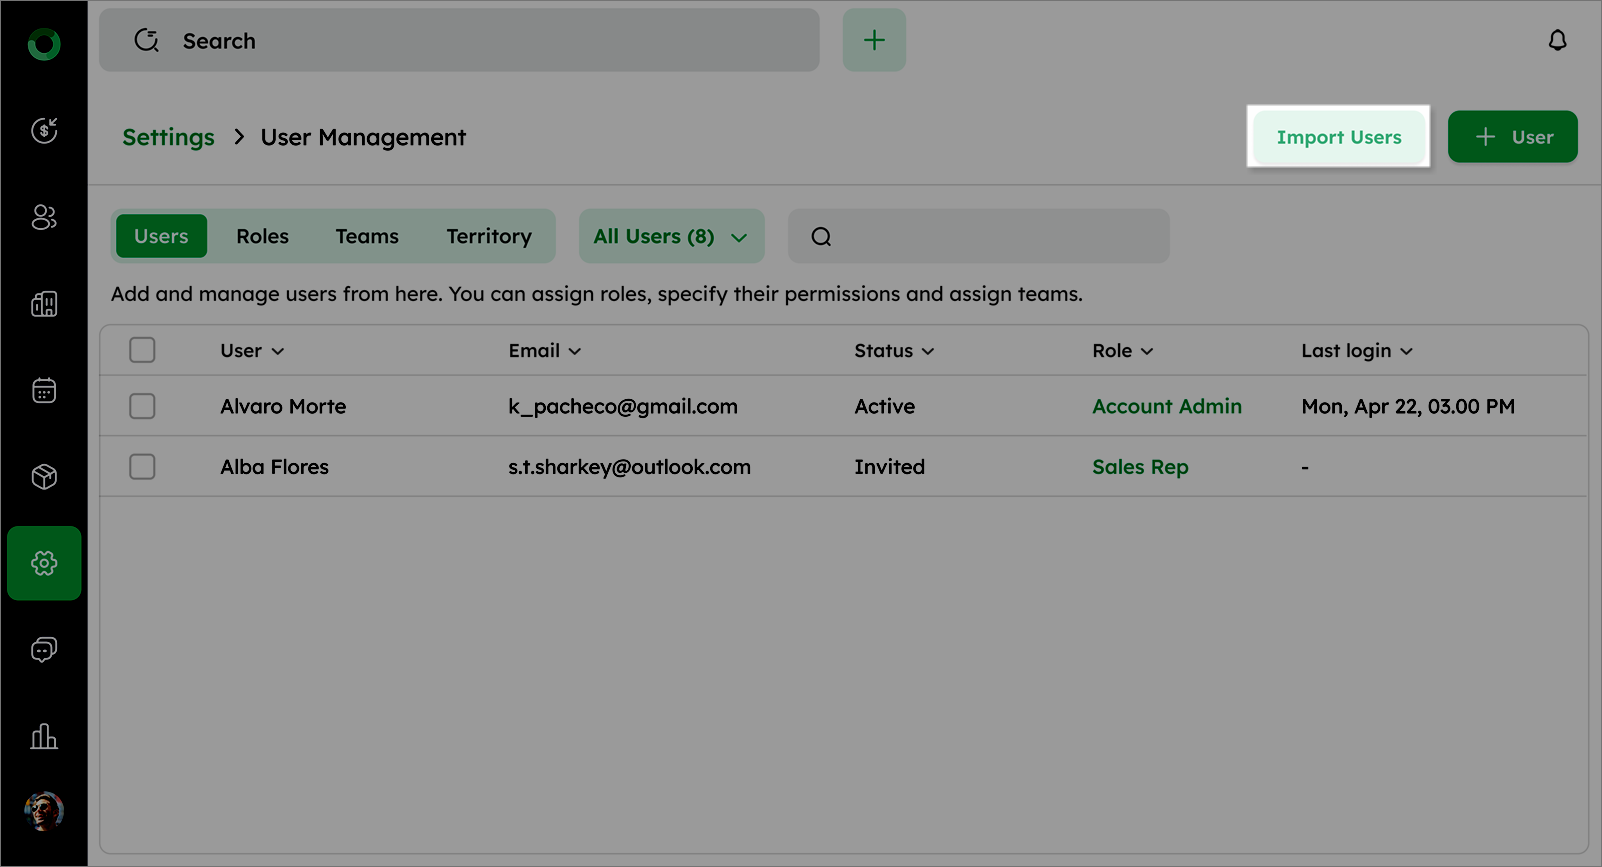
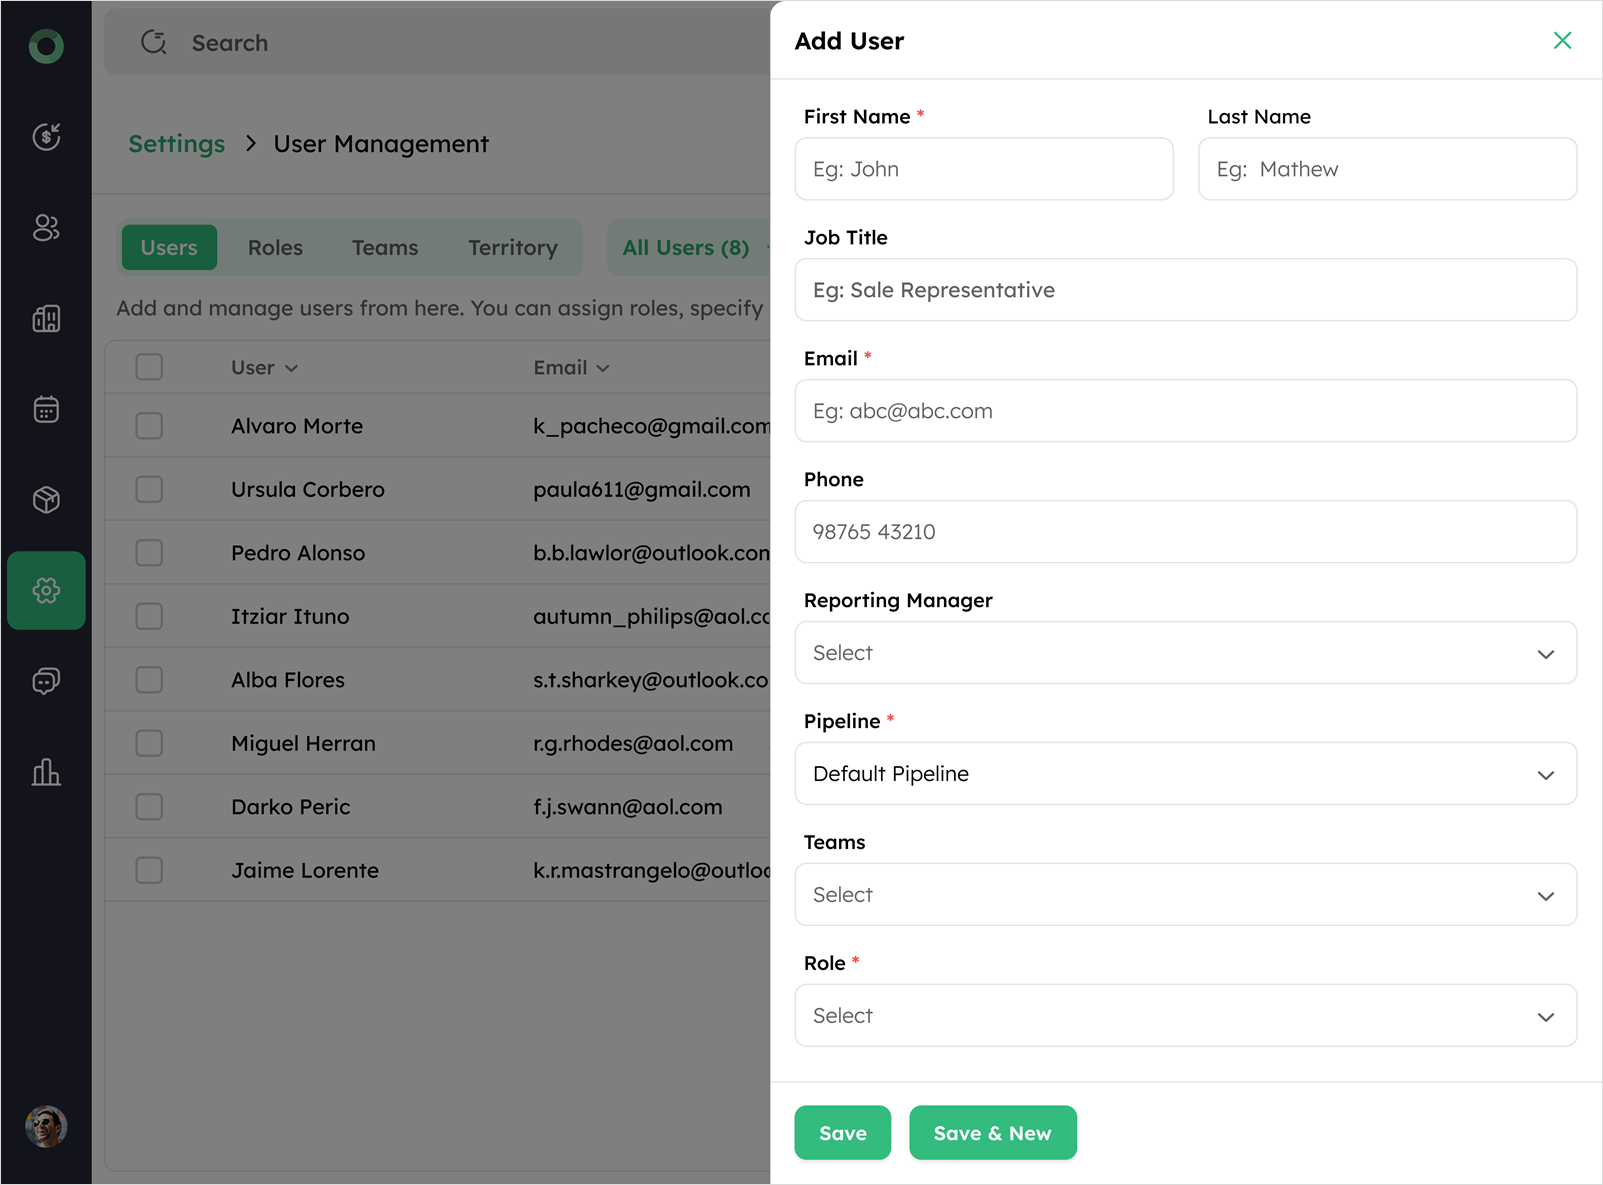
- Click + User button at the top right to open the Add User drawer.
-
Enter the required user details.
-
Click Save to add the user.
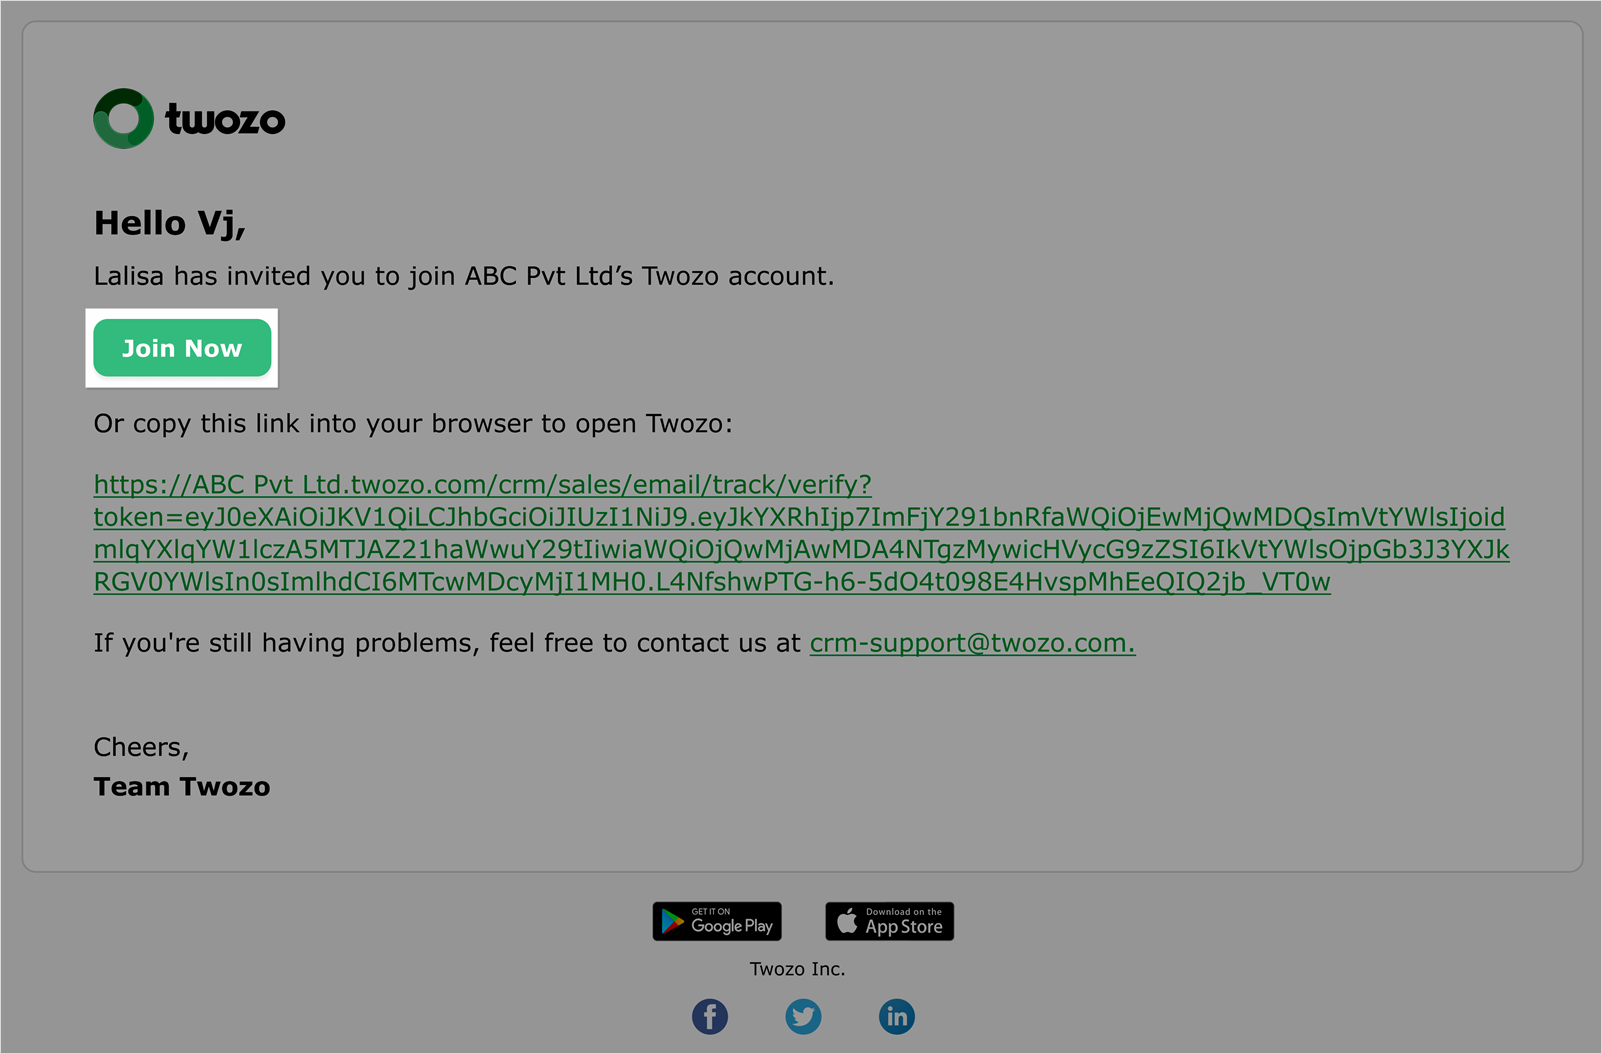
- An email invitation will be sent to the user to join the system.
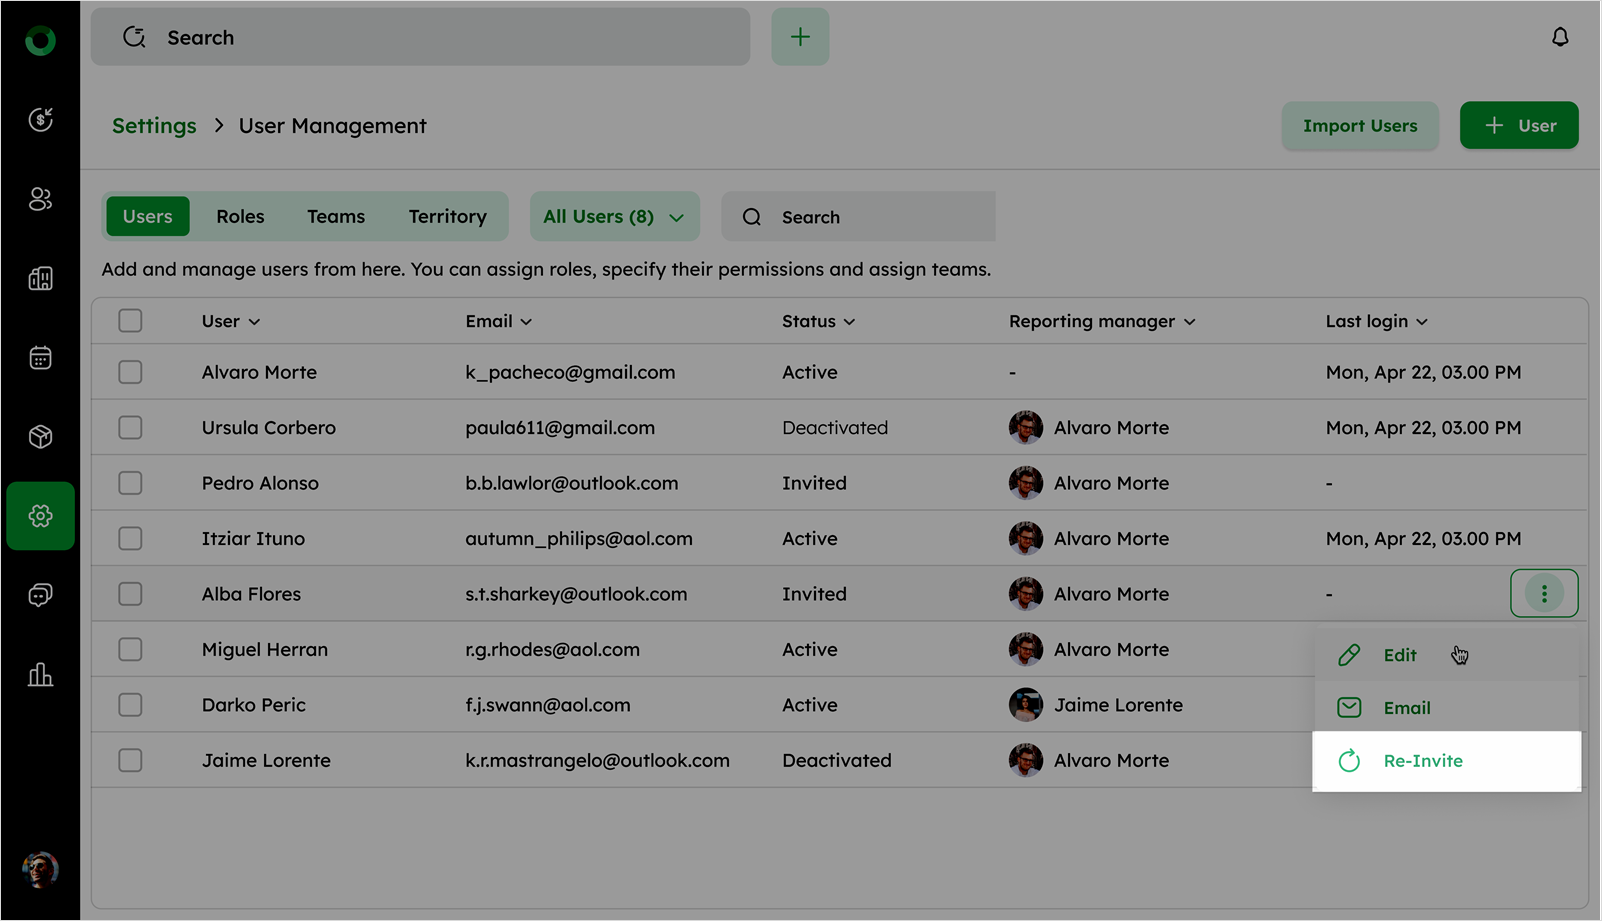
The user invitation is valid for 24 hours. If it expires, the user can click Reinvite to receive a new invitation.
- The user must open the email and click Join Now.
- The login page appears, prompting the user to set a preferred password.
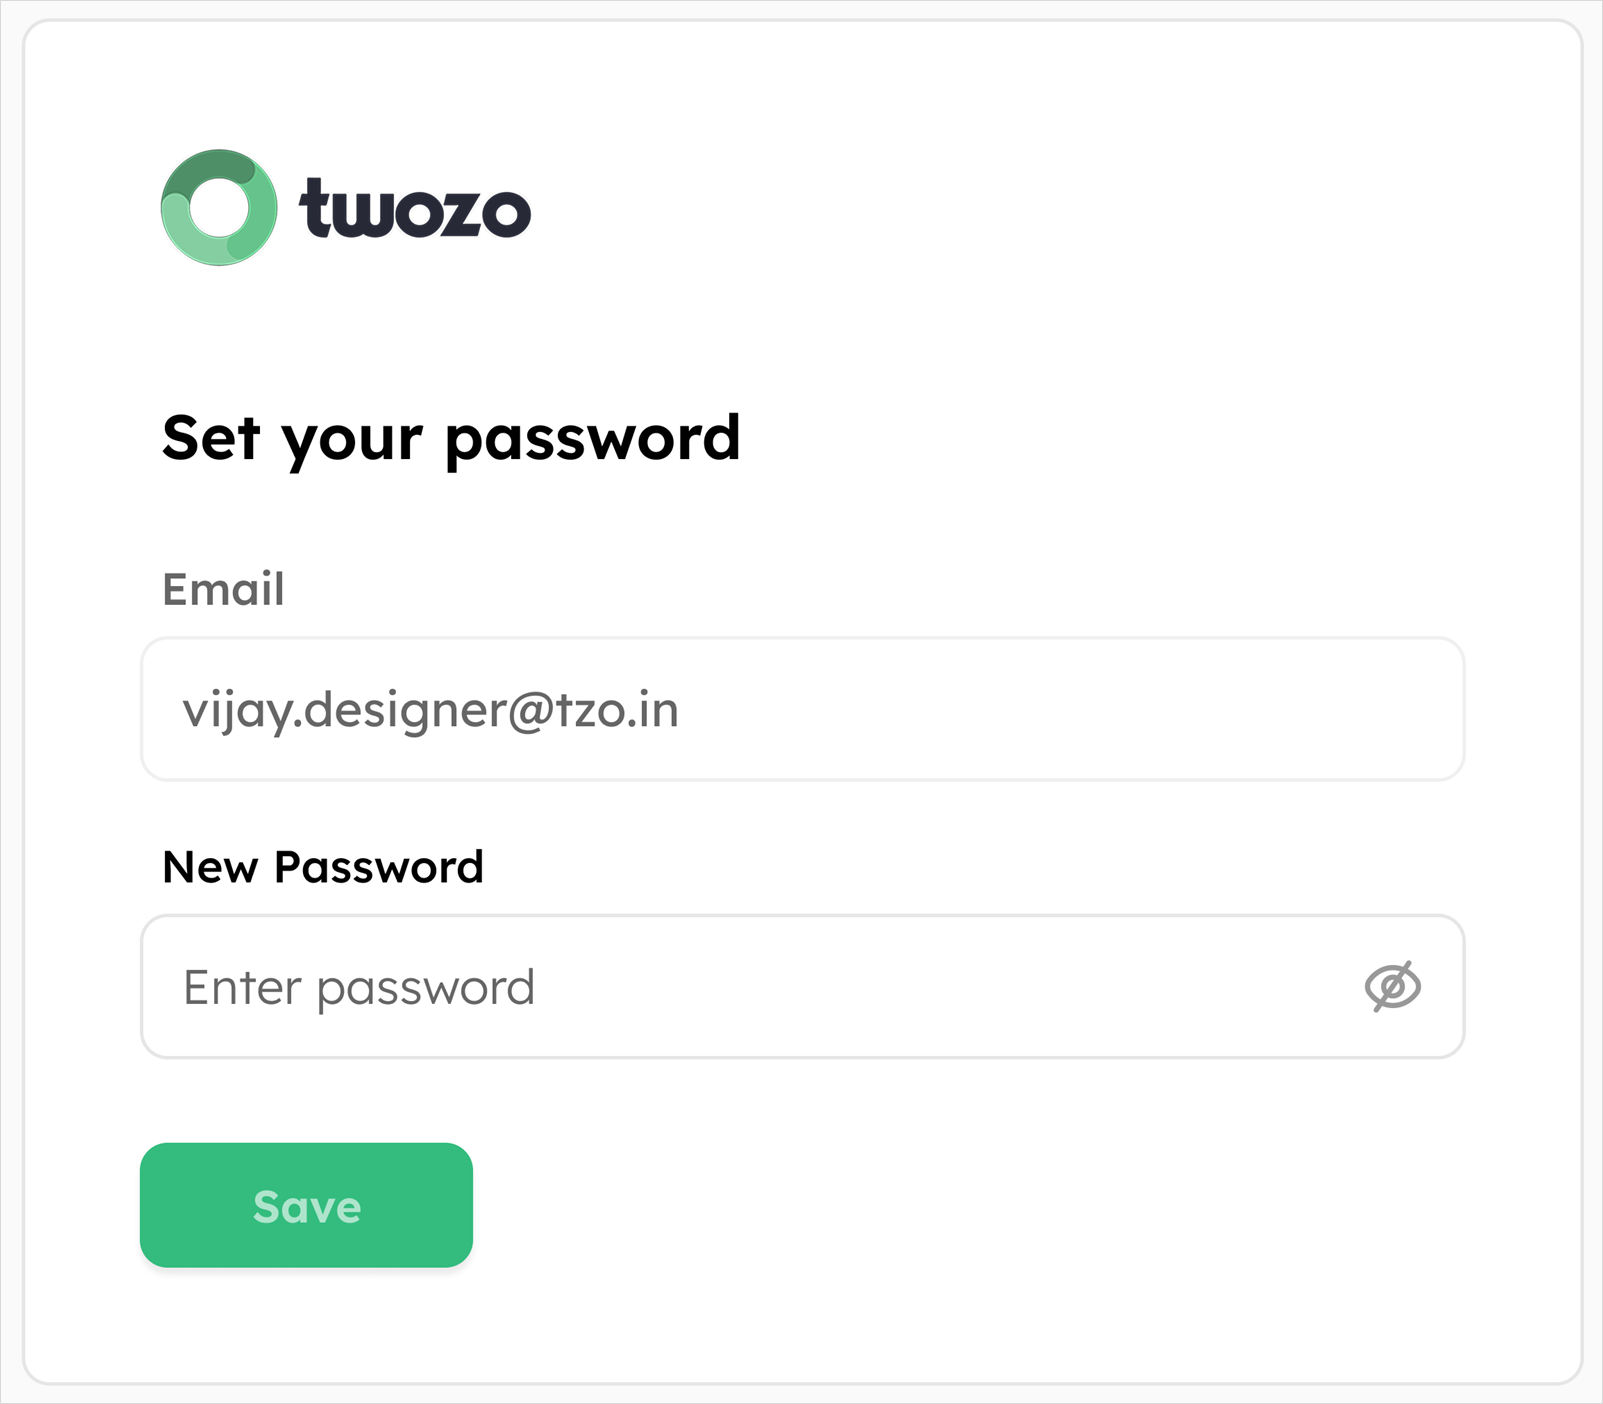
- Once the password is set, the user is logged into the CRM.
Once a user is added, deletion is not possible. However, the user can be deactivated if needed.
User List View
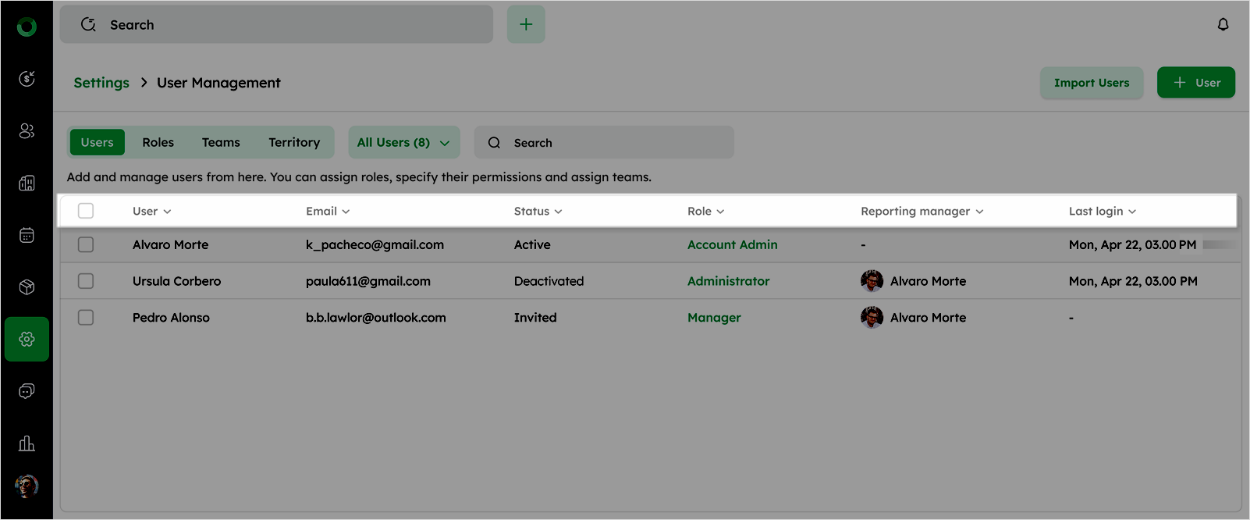
- The user list displays essential details for each user in the system.
| Field | Description |
|---|---|
| User Name | Displays the user’s name |
| Registered email address for the user | |
| Status | Indicates whether the user is Active, Deactivated, or Invited. |
| Role | Indicates the assigned role of the user |
| Reporting Manager | Shows the assigned reporting manager (not applicable for the admin user) |
| Last Login Time | Displays the most recent login time of the user |
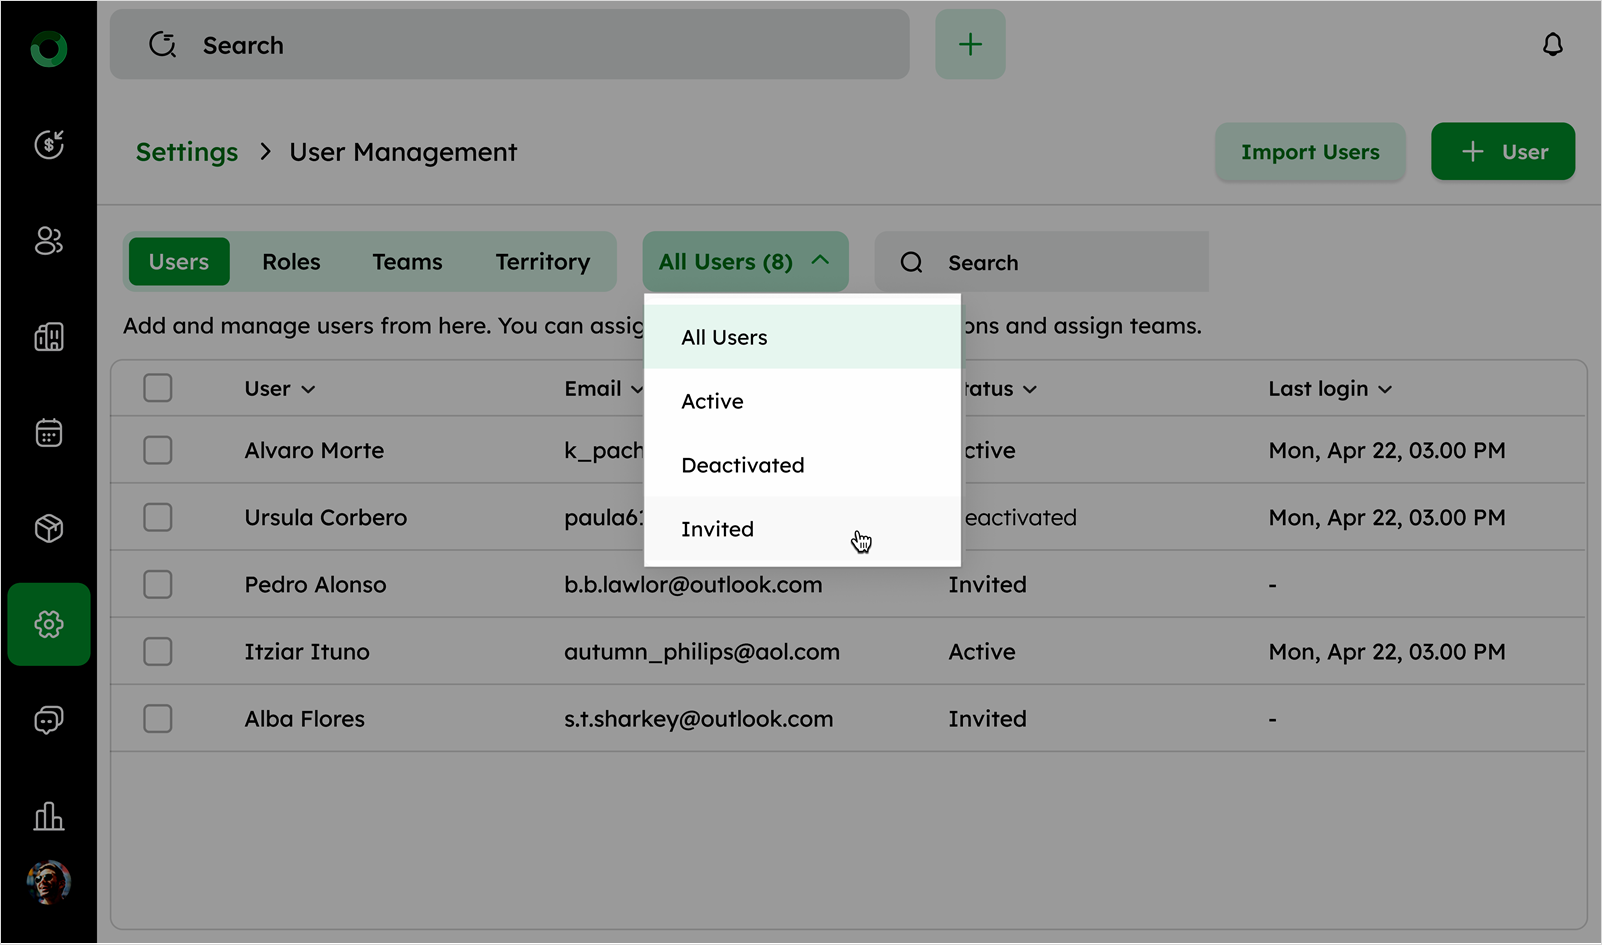
- Click the All Users dropdown to filter users by Active, Deactivated, or Invited status.
-
Active displays users who have access to the system.
-
Deactivated displays users who no longer have access.
-
Invited displays users invited via email but not yet joined.
- Click the column headers to sort users in ascending or descending order.
- Click the Ellipsis menu (three dots) next to a user to access additional actions.
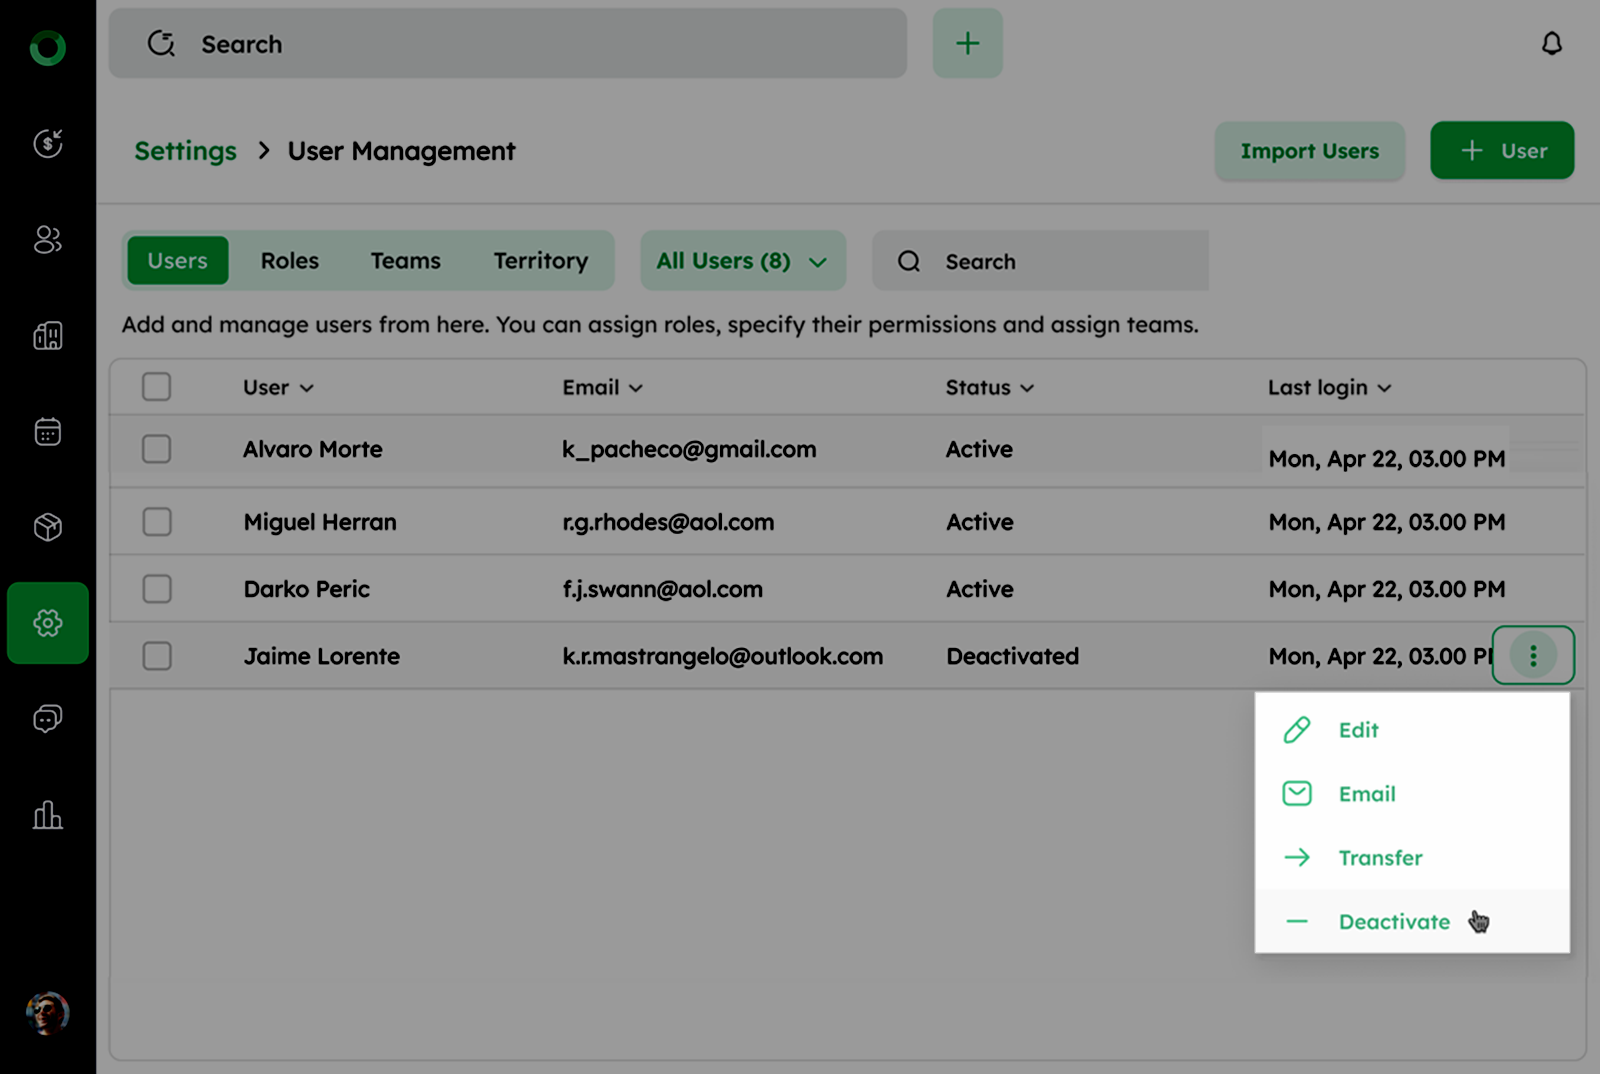
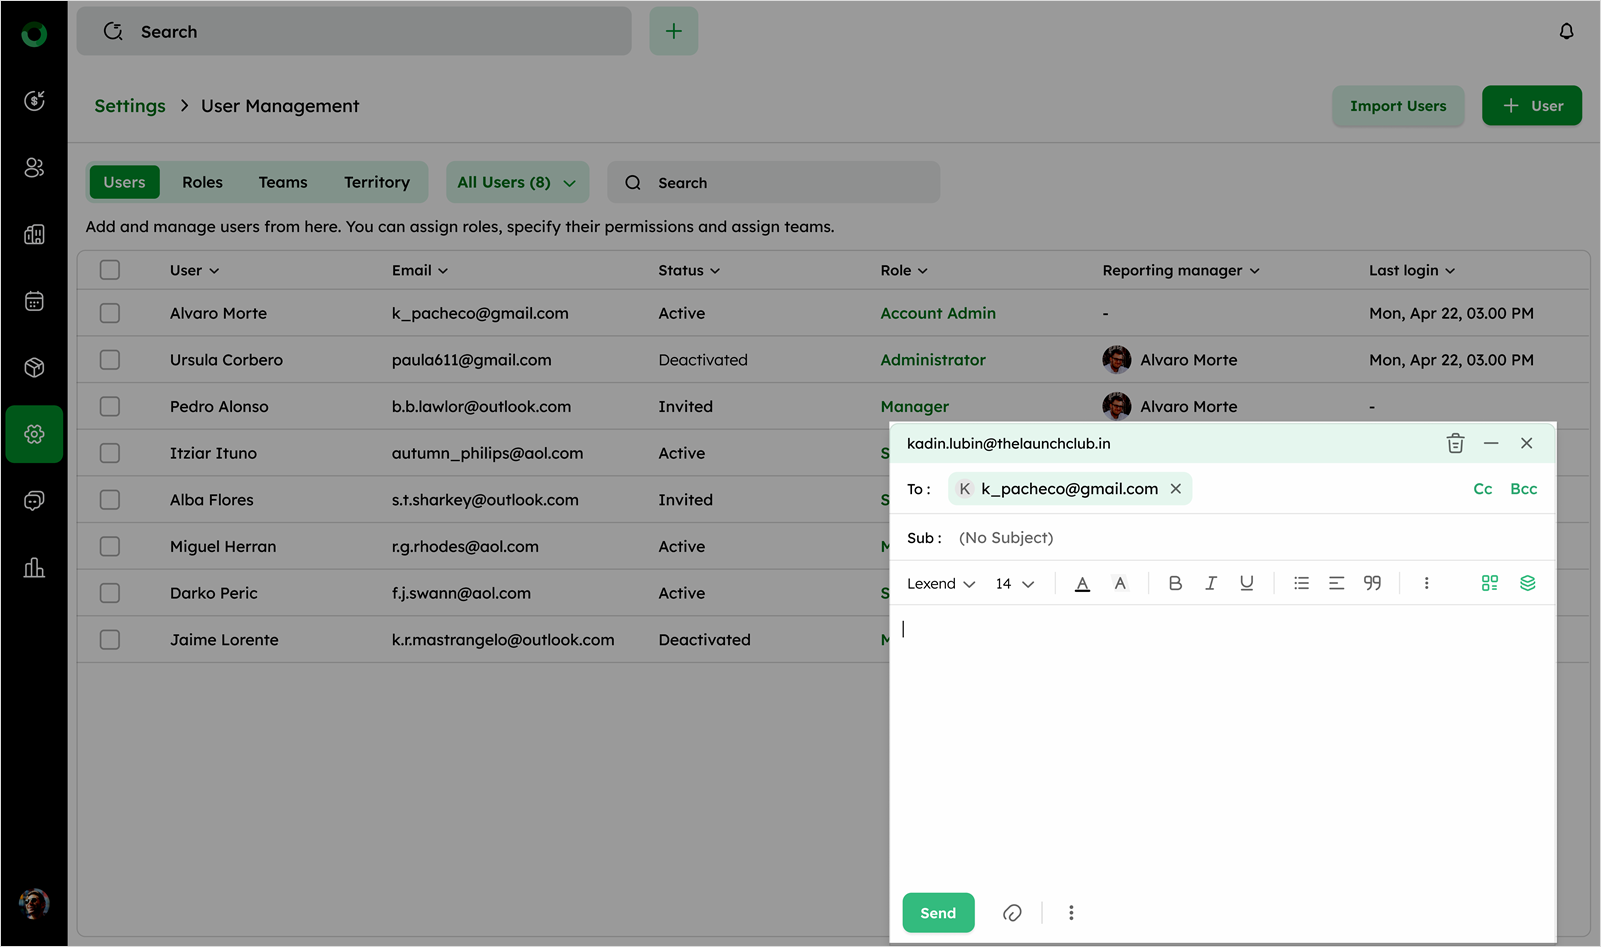
- Email – Sends and email to the selected user.
-
Edit User – Modifies user details such as name, role, or assigned reporting manager.
-
Transfer Data – Moves all records assigned to the selected user to another user.
![]()
- Deactivate User – Restricts the user from accessing the system. When a user is deactivated, records must be reassigned to another user; otherwise, they will remain under the deactivated user.
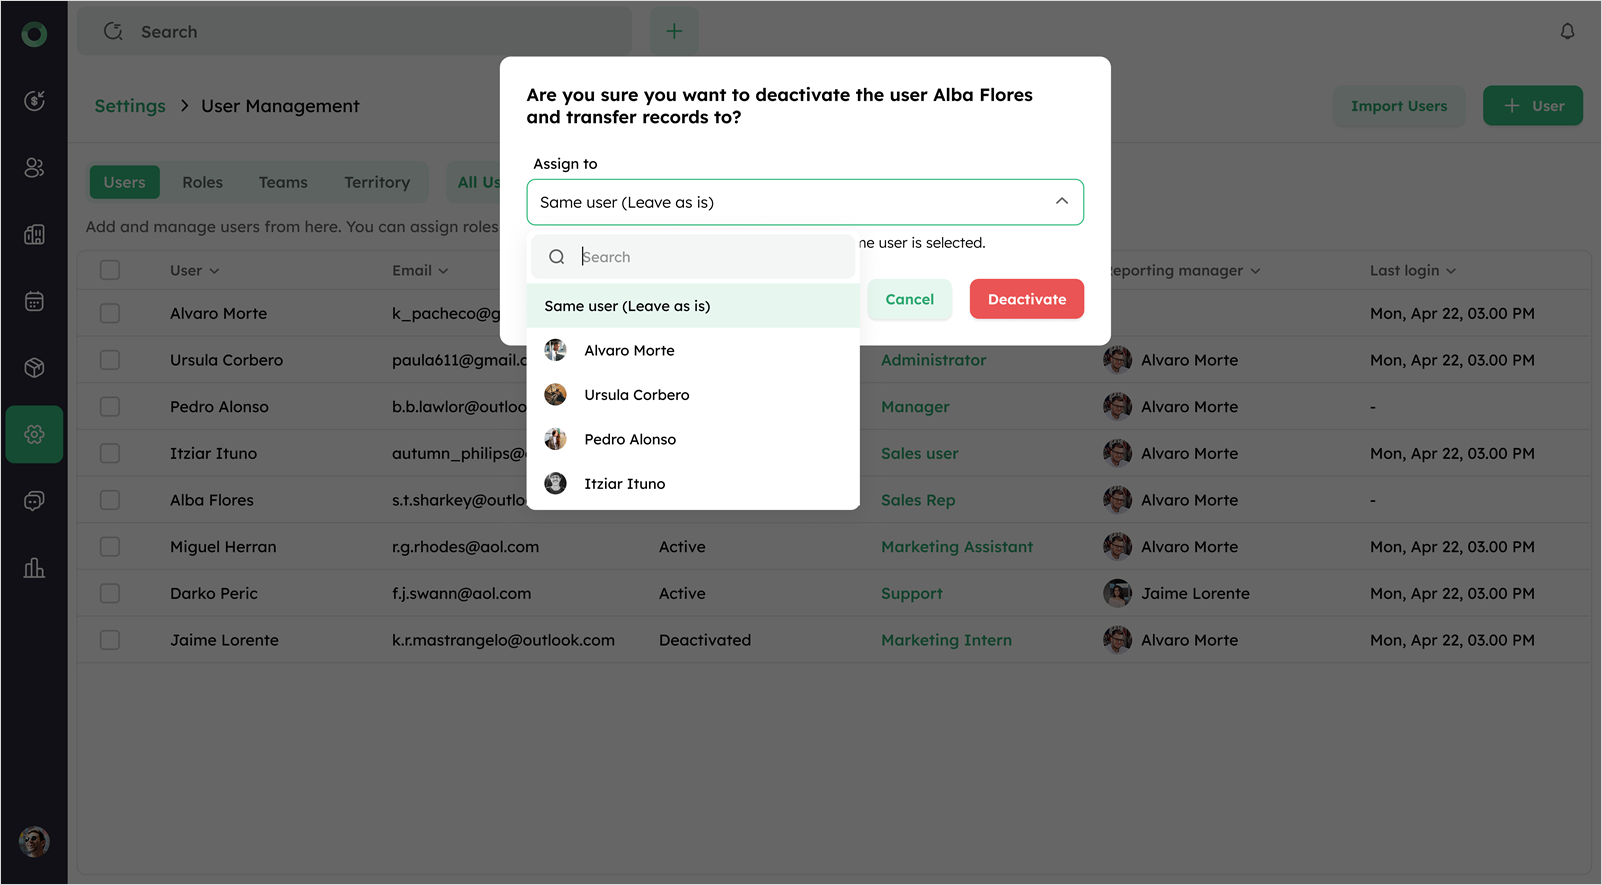
Only Admin users can transfer or deactivate users. These actions are not allowed for Admin users themselves.
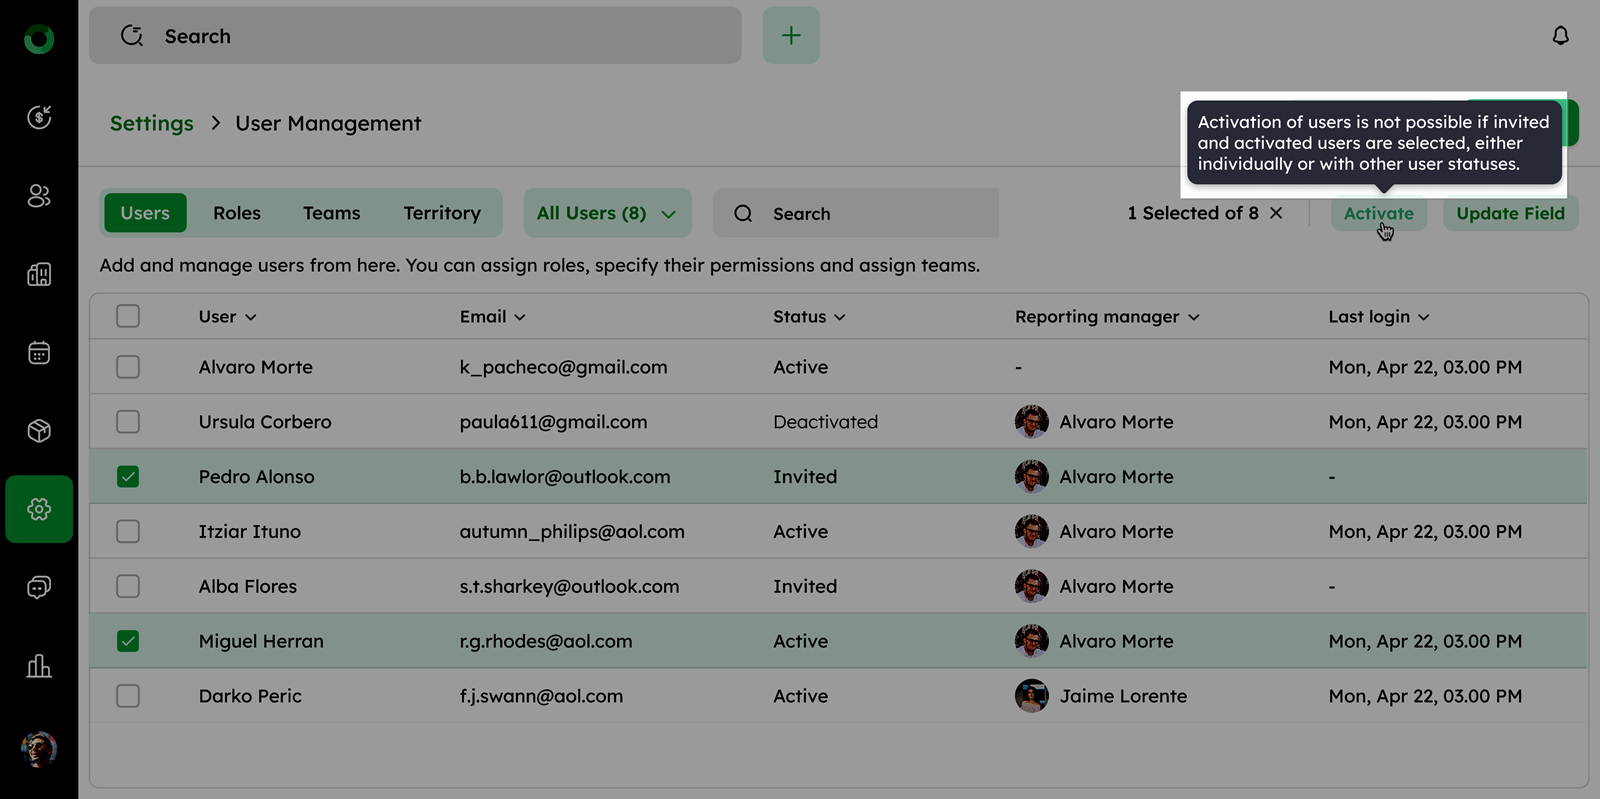
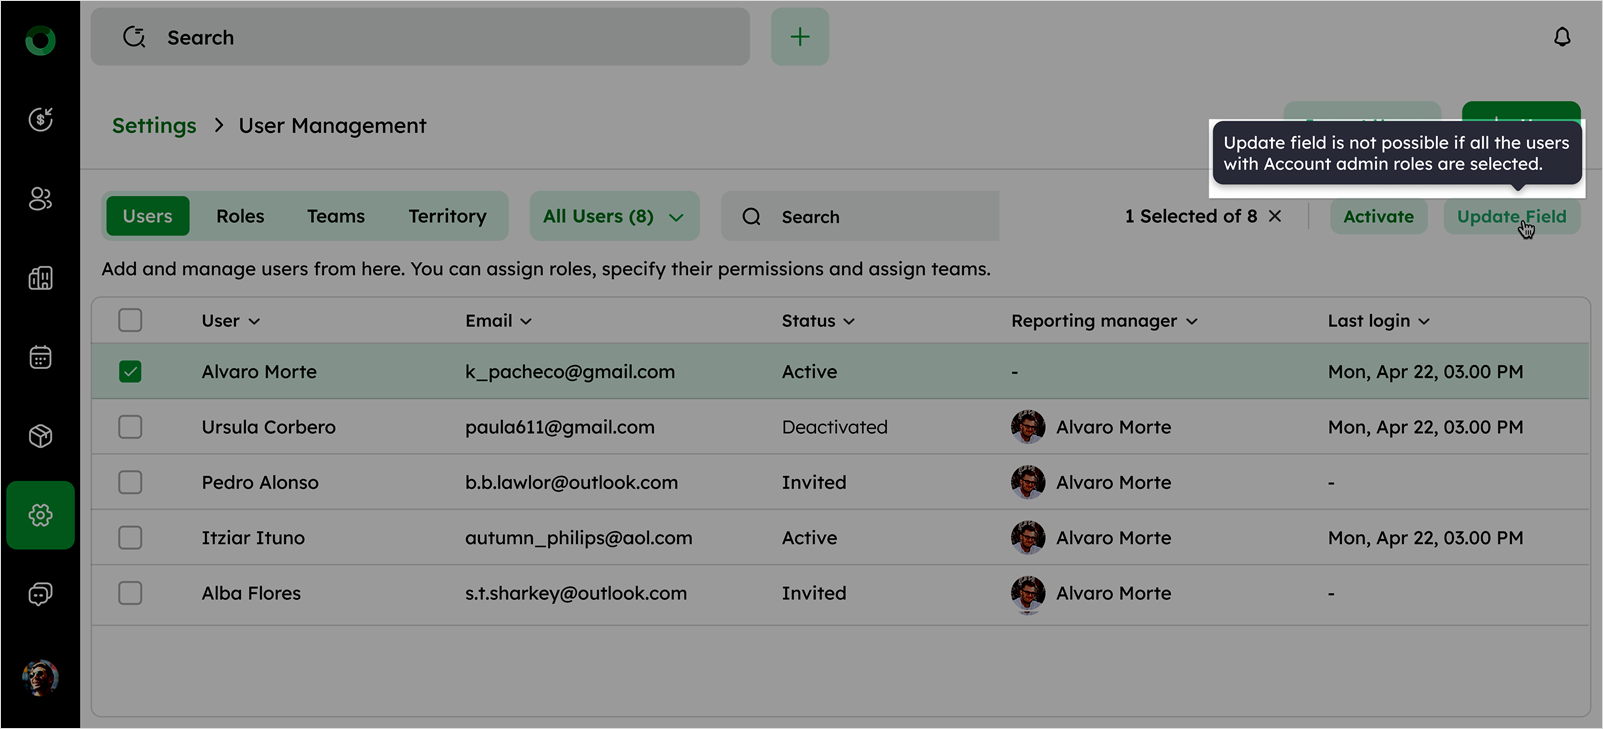
- Select multiple users using the checkboxes to enable bulk actions. Click the available bulk actions:
- Activate/Deactivate - Enable or disable user access as needed. Users cannot be activated if both invited and active users are selected together.
- Update Field - Modify specific fields for multiple users at once.
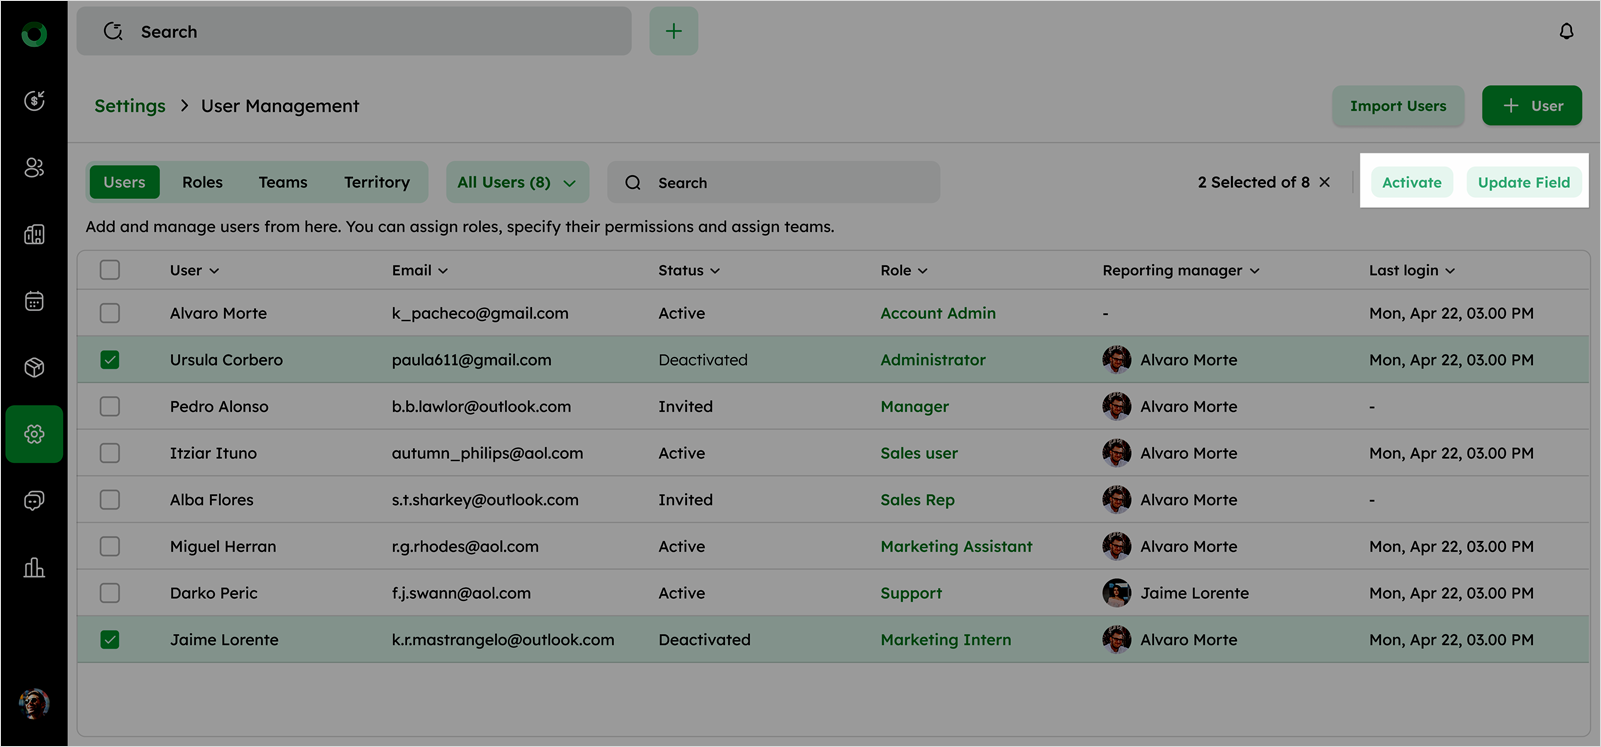
Note: The Update Field option is not available for the Admin user.
-
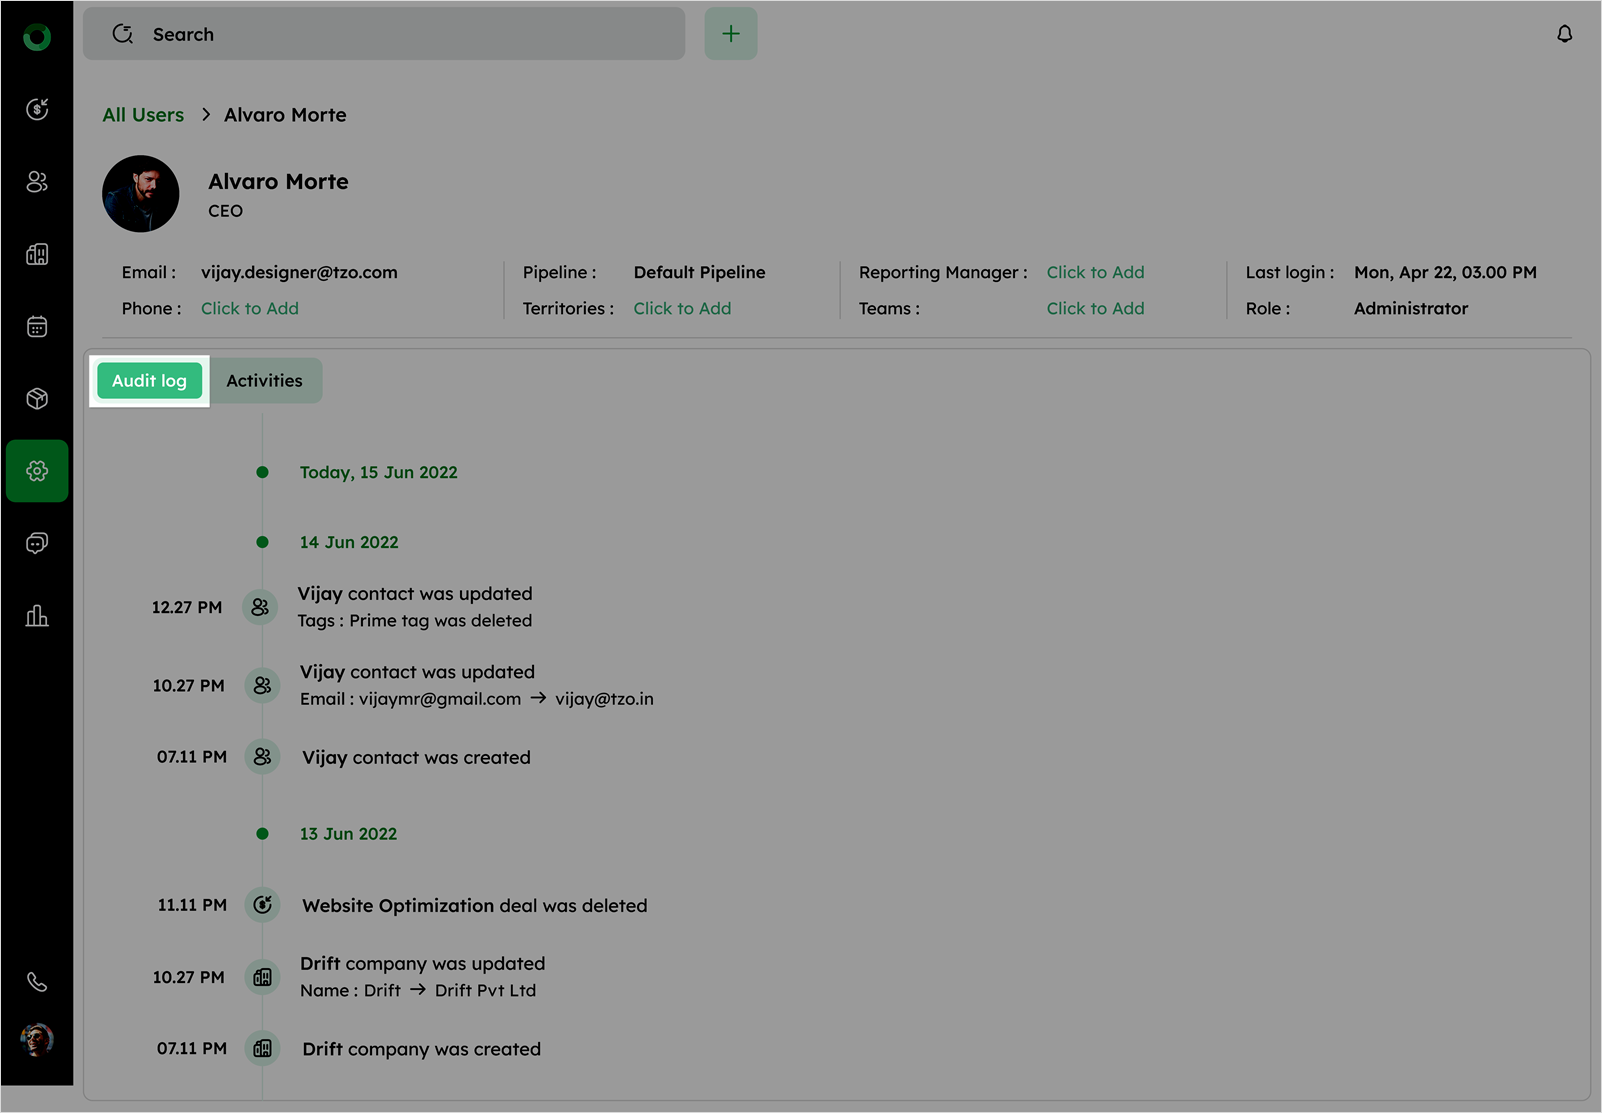
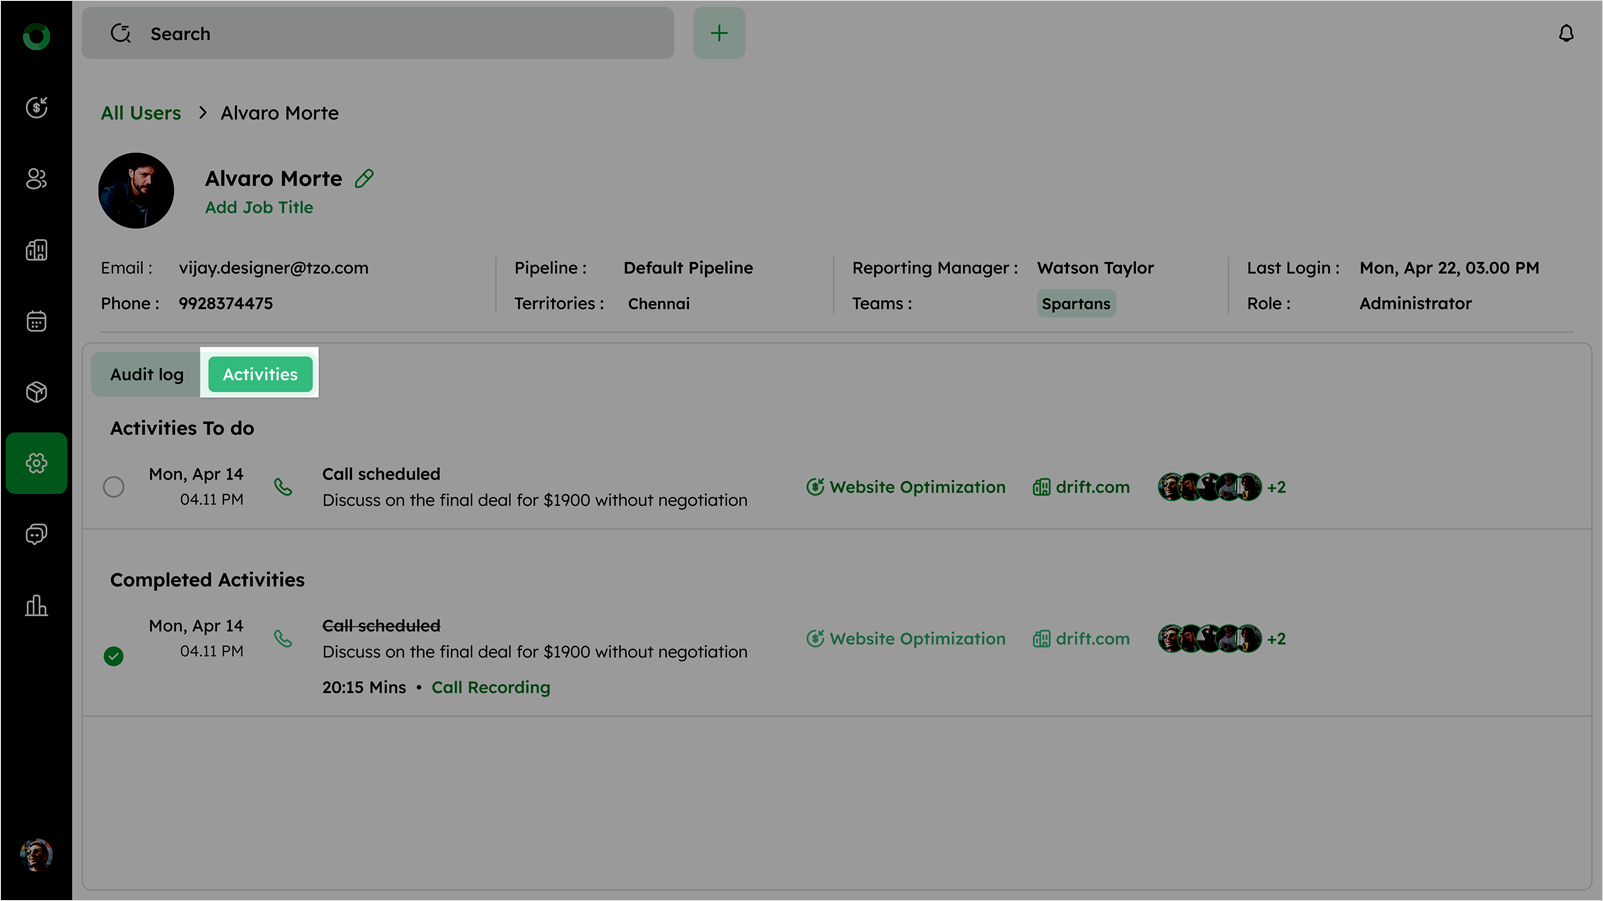
Click any user to open the User Detail Page.
-
Access user details, including User Profile, Email, Phone, Pipeline, Territories, Reporting Manager, Teams, Last Login, and Roles.
-
View the Audit Log to track all activities performed by the user.
- Click the Activities tab to monitor all user actions and interactions within the system.
In user detail page, you can update all user details except the email address.
