Managing and Setting Up the Company List View
The Company module lets you record and view organization details, keeping all related interactions, records, and associations available in one place.
How to Add a New Company to the List View?
Adding companies to Twozo helps you manage and track all your business accounts. Follow these steps to add a new company in Twozo:
-
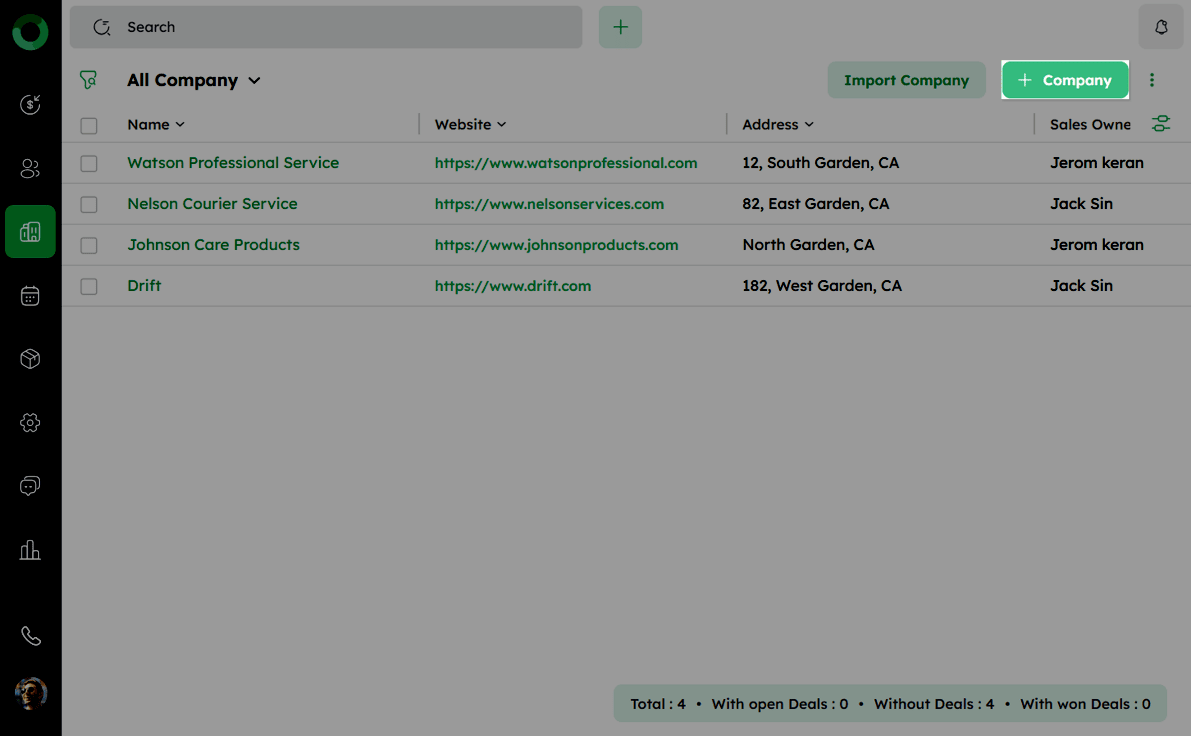
Click Company from the main navigation menu.
-
On the Company List View, click +Company at the top-right corner.
- Enter the required company details in the Add Company drawer.
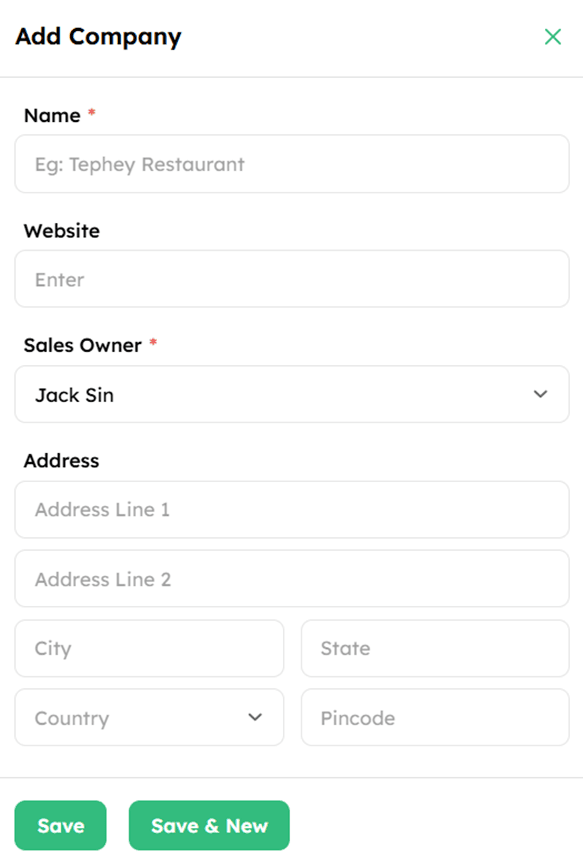
- The list of default fields is as follows: | |
| Field Name | Description |
|---|---|
| Name* | The company’s official name. |
| Website | The company’s website URL (e.g, https://www.example.com) |
| Sales Owner* | The individual responsible for managing the company’s account. |
| Address | Enter Address Line 1, Address Line 2, City, State, Country, and Pincode. |
| Note: Fields marked with asterisk (*) are mandatory. |
- Click Save to add the company to your CRM. Alternatively, click Save & New to save and immediately add another company.
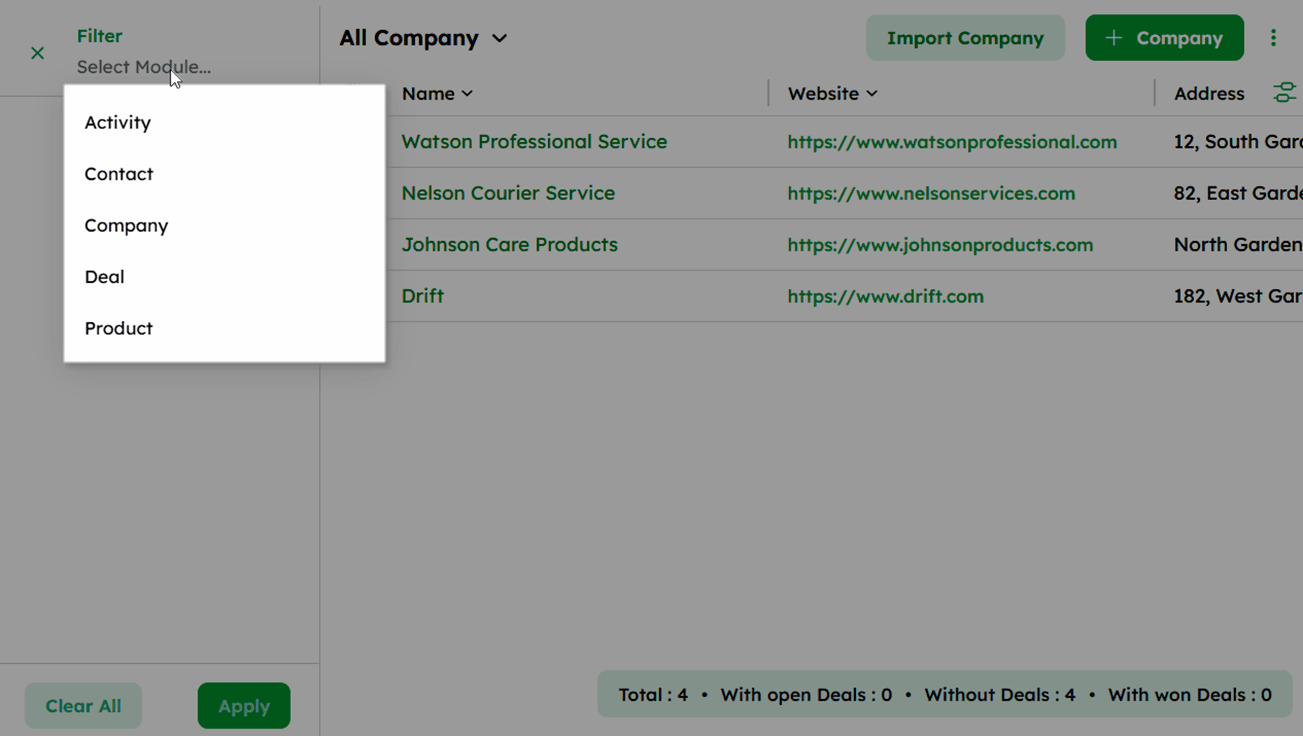
The Company List View displays a summary at the bottom showing Total, With Open Deals, Without Deals, and With Won Deals counts.
Customizing Display Columns in the Company List
The column settings in the Company List View allow you to show, hide, and reorder fields based on your preference.
-
From the main navigation, click the Company Module.
-
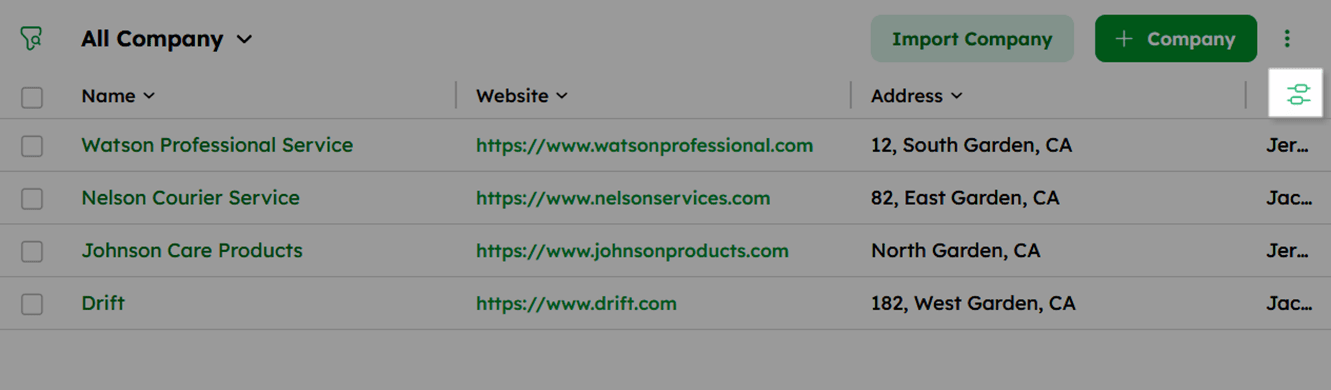
In the Company List view, click the column settings icon at the top-right corner.
-
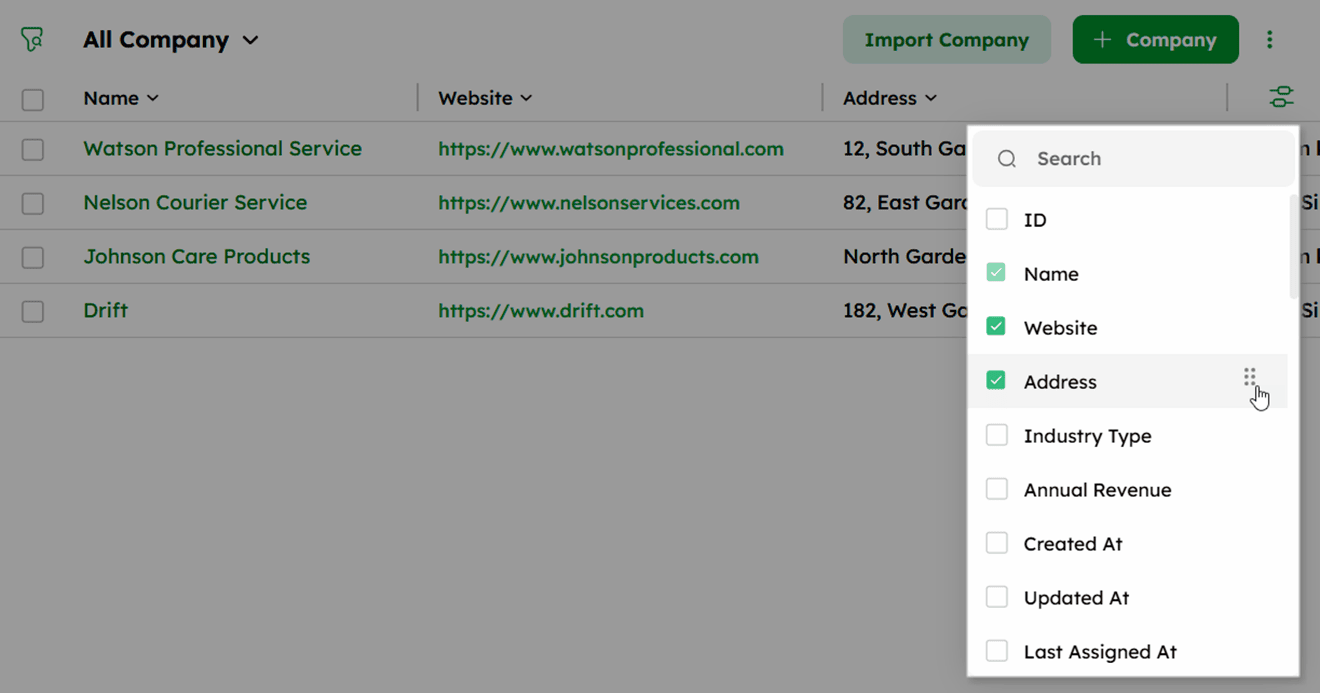
In the column settings panel, check or uncheck the fields you want to show or hide.
-
Drag and drop the fields to reorder them. Changes are reflected instantly in the list view .
How to Add and Arrange Custom Fields in the Company Module?
Add and organize custom fields in the Company module to capture additional company information beyond the default fields. Fields can be arranged based on how your team stores and views data.
To customize the fields in the Company Module, follow these steps:
- Navigate to Admin Settings > Modules & Fields > Company.
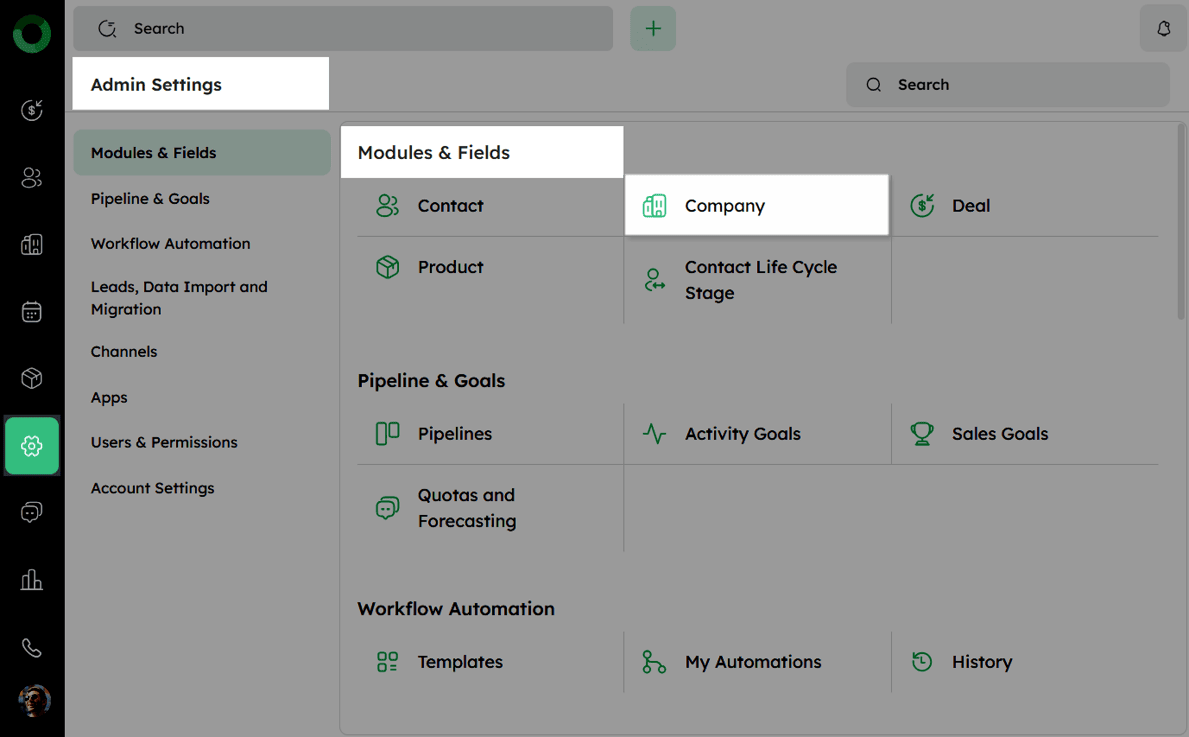
-
In the left menu, click Modules & Fields and select Company.
-
On the Data Fields page, click + Custom Field at the top.
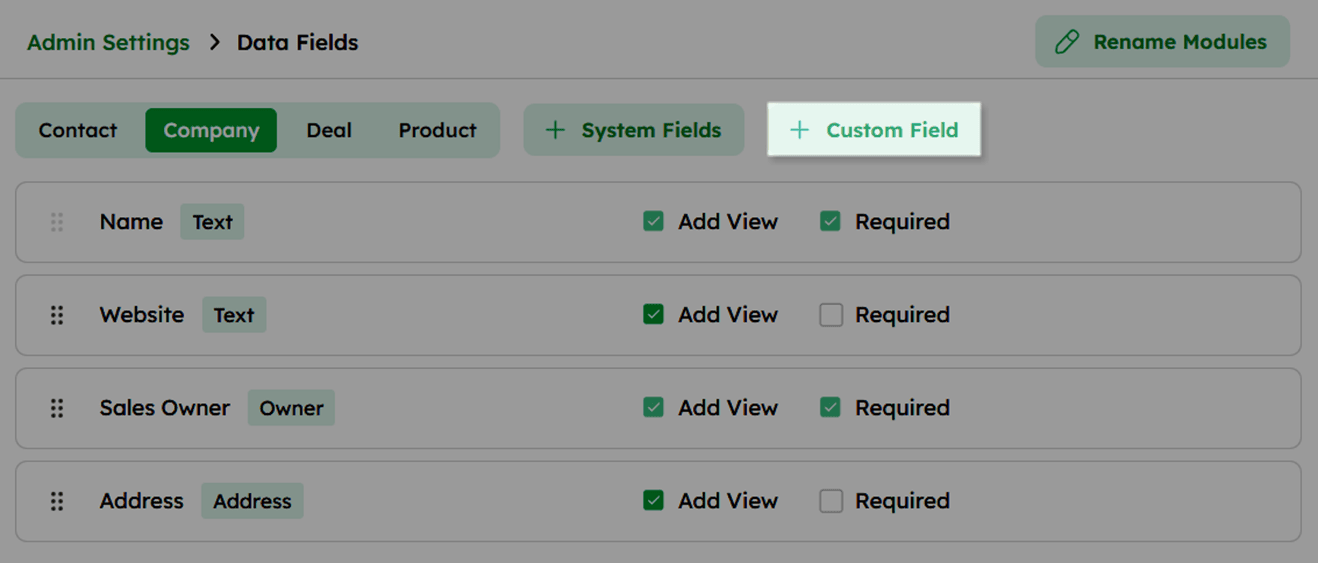
- In the Add Custom Field drawer, verify the Module Type (selected based on the currently active module tab), enter the Field Label, and choose the Field Type.

- Optionally, check the following:
Make this a required field - to make the field mandatory.
Show field in add view - to display the field in the company creation form.

-
Click Save to add the custom field.
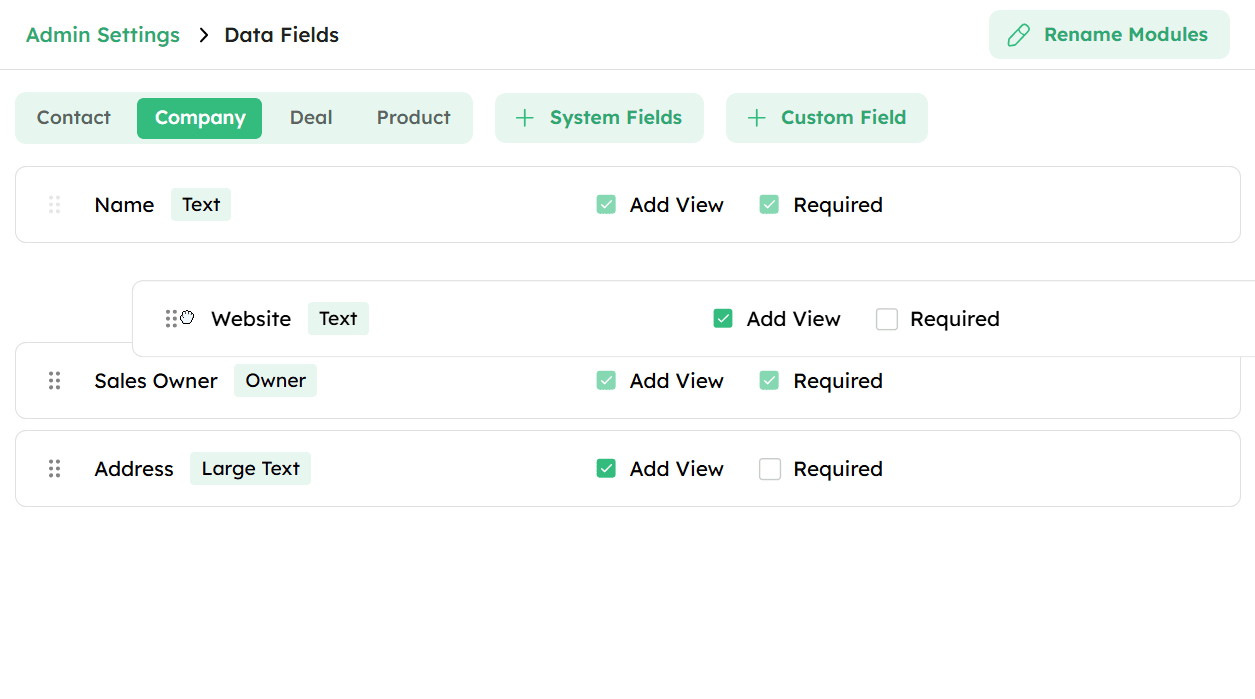
-
Once added, use drag and drop to reorder the fields as needed.
Sorting Companies for Efficient Viewing in the List View
Sorting companies in the list view helps you arrange records based on specific criteria and view them in your preferred order. Follow these steps to sort companies in Twozo:
-
From the main navigation, click the Company module.
-
Click the arrow next to a field name to sort by that field.

-
Use the upward arrow for ascending order and the downward arrow for descending order.
By default, companies are sorted by creation date, with the most recently added record appearing first.
Filtering Companies to Create Targeted Segments
Filters in the Company List View help you display companies that match specific criteria. They can be saved as custom views and combined using AND/OR conditions for more refined results. Follow these steps to filter companies in Twozo:
-
From the main navigation, click the Company module.
-
In the Company List View, click the filter icon at the top-left corner.
-
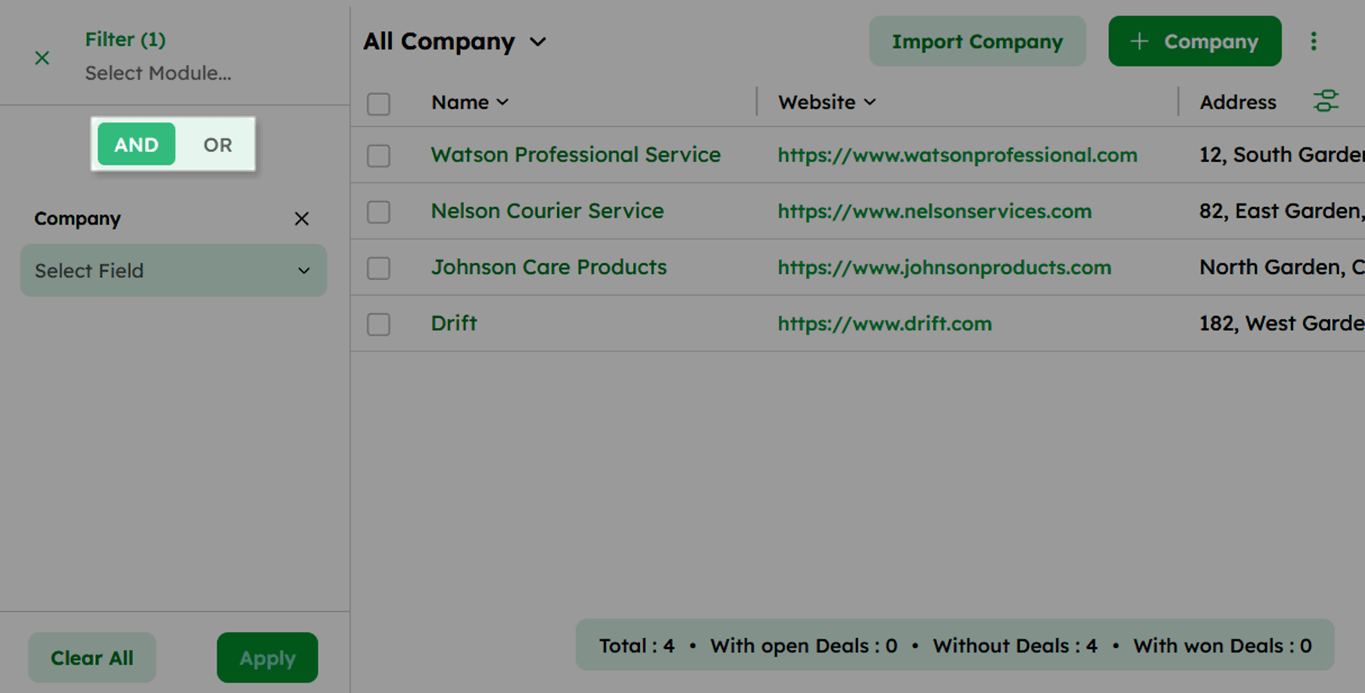
Select a module from the dropdown, Activity, Contact, Company, Deal, or Product, then select the field you want to filter by .
- Choose the condition type:
-
AND - displays companies that meet all the selected criteria.
-
OR - displays companies that meet at least one of the selected criteria.
-
Click Apply to view the filtered results.
-
To save the filter as a custom view, click Save View, enter a name, and set the visibility, Just Me, Everyone, or Selected.
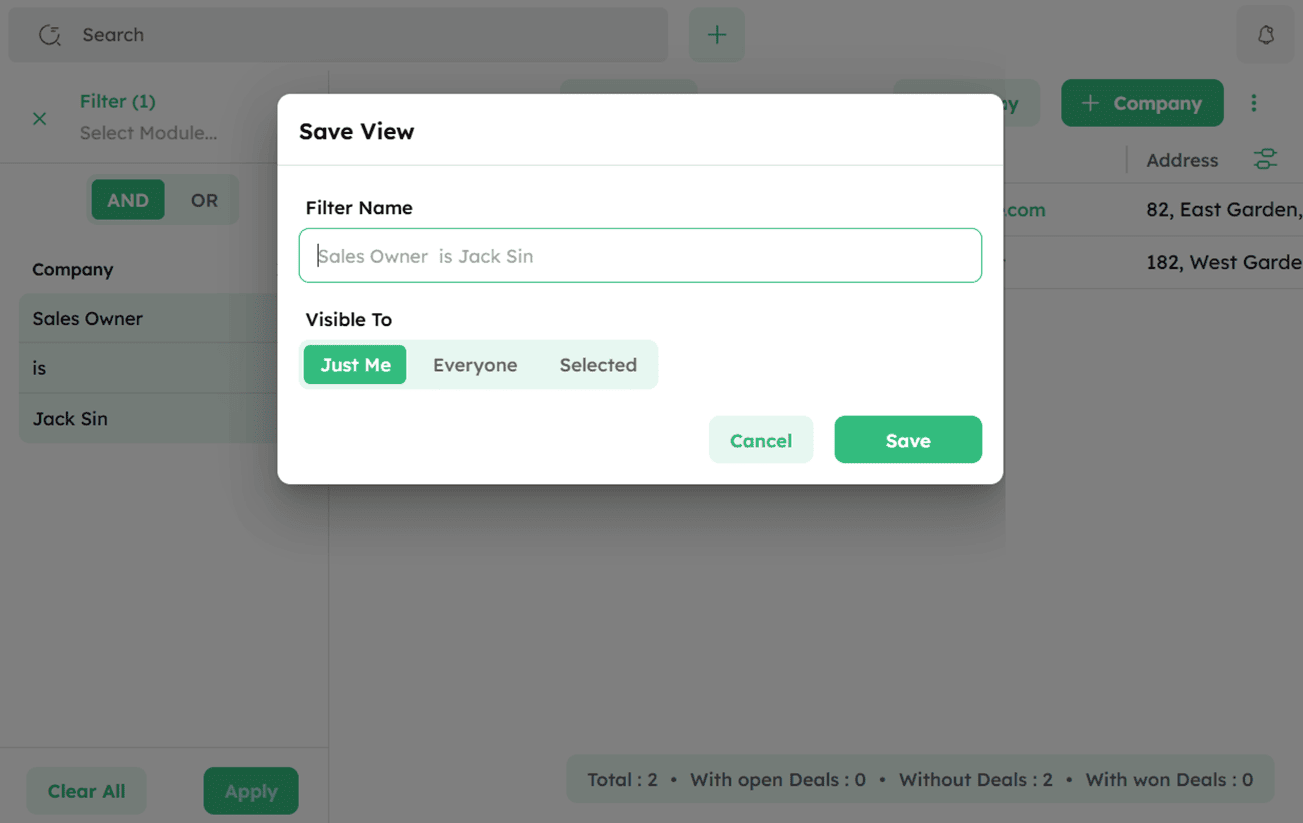
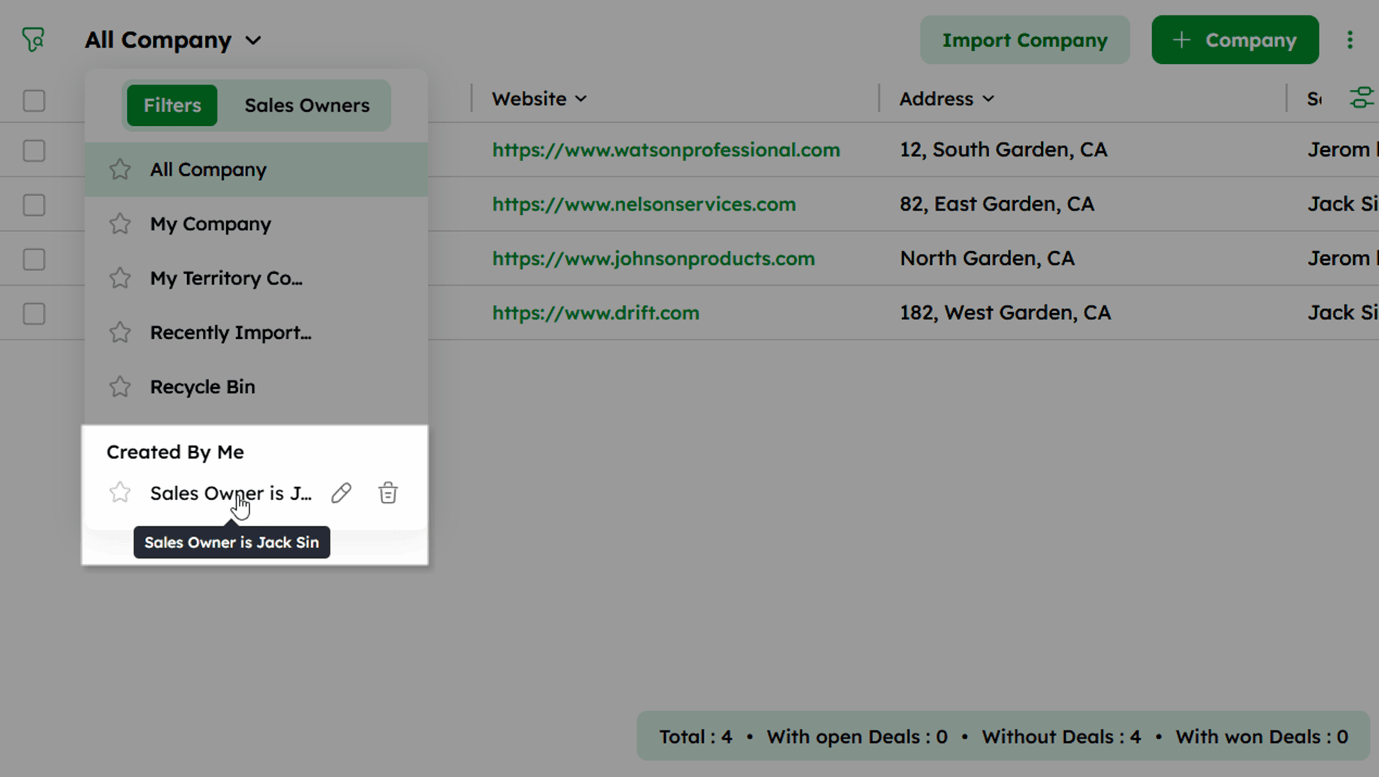
- Saved views appear under Created By Me in the All Company dropdown.
A maximum of 16 filters can be added in total, regardless of whether they are placed under AND or OR conditions.
To filter by predefined views or Sales Owner:
-
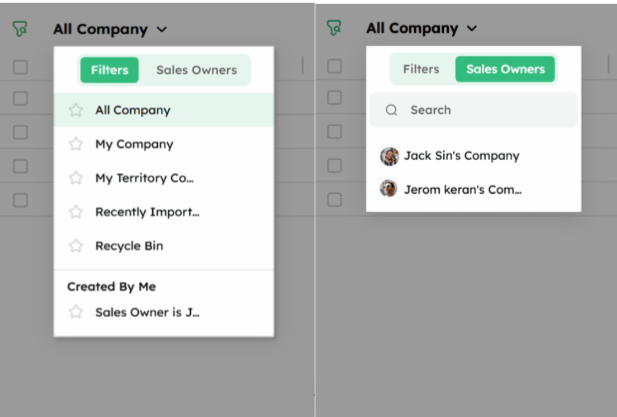
Click the company view dropdown at the top-left and select a predefined view - All Company, My Company, My Territory Company, Recently Imported, or Recycle Bin.
-
Click the Sales Owners tab to filter companies by a specific sales owner.
To delete a saved filter:
-
Click the company view dropdown at the top-left and hover over the saved view under Created By Me.
-
Click the delete icon next to the saved view.
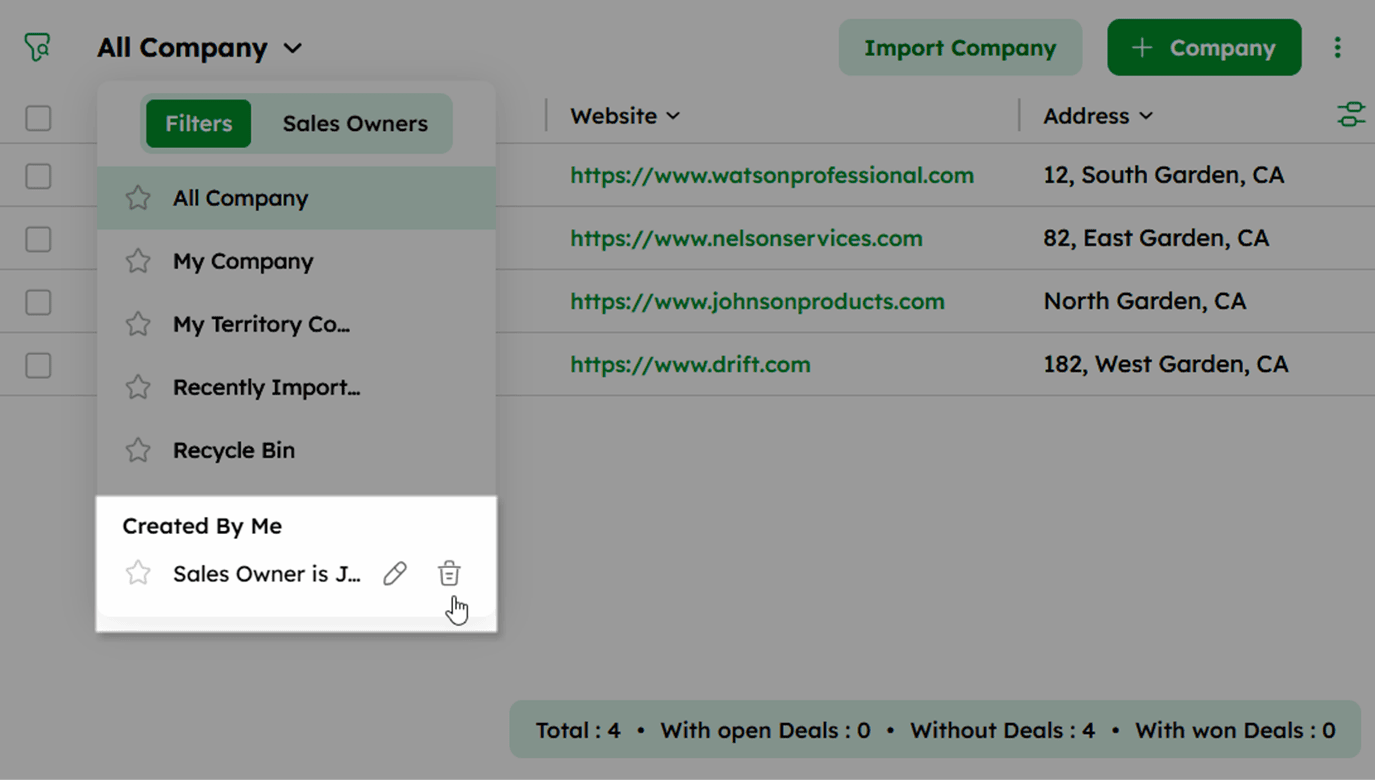
- Click Delete to permanently remove it.
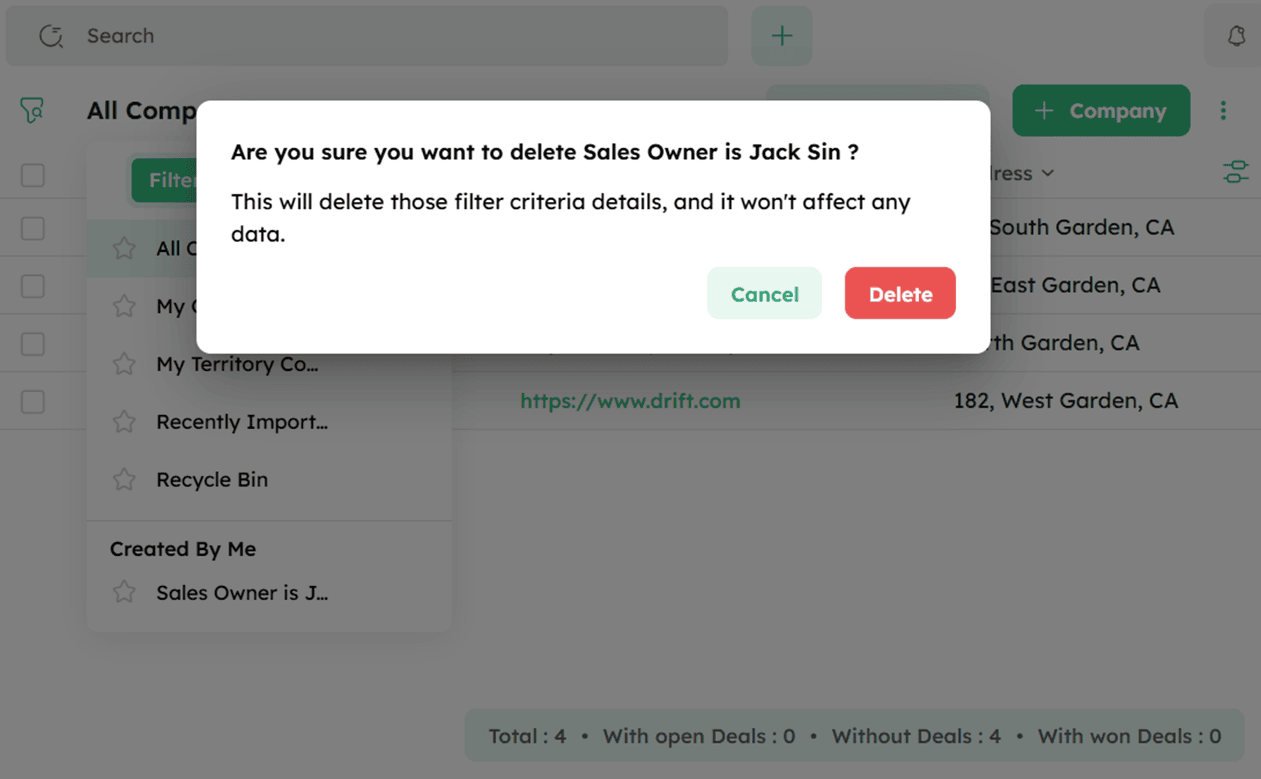
Deleting a saved filter only removes the filter criteria and does not affect any company data.
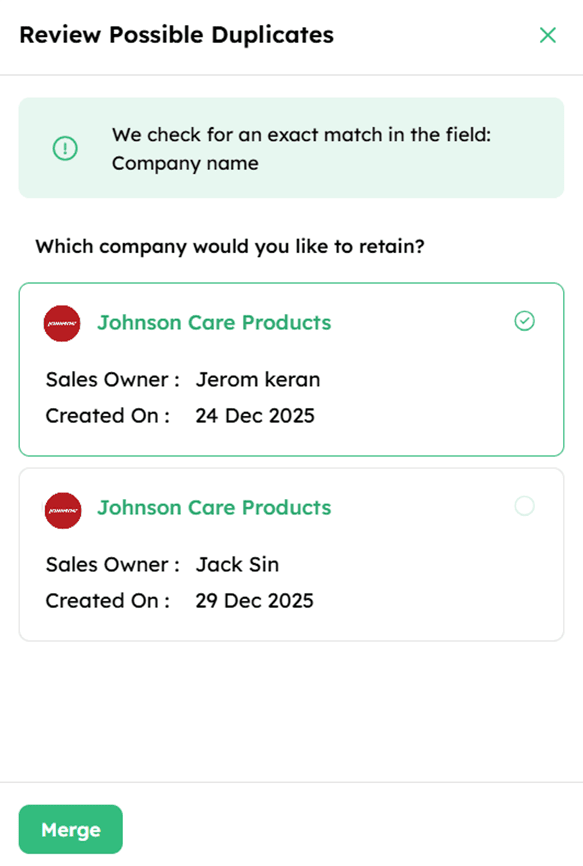
How to Identify and Merge Duplicate Company Records?
Noticing the same company name appearing twice? It might be a duplicate record.
Twozo helps you identify potential duplicates and lets you merge or remove records to keep your company data clean and organized.
Follow these steps to identify and manage duplicate company records:
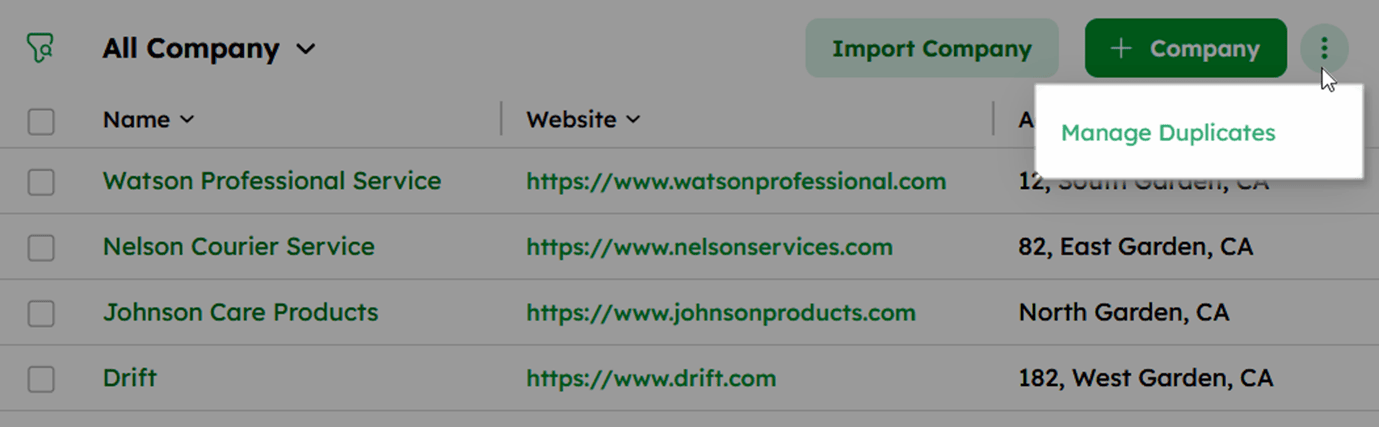
-
In the Company List View, click the ellipsis (⋮) icon at the top right corner.
-
Select Manage Duplicates from the dropdown menu.
- Click the Company tab to view identified duplicate records.
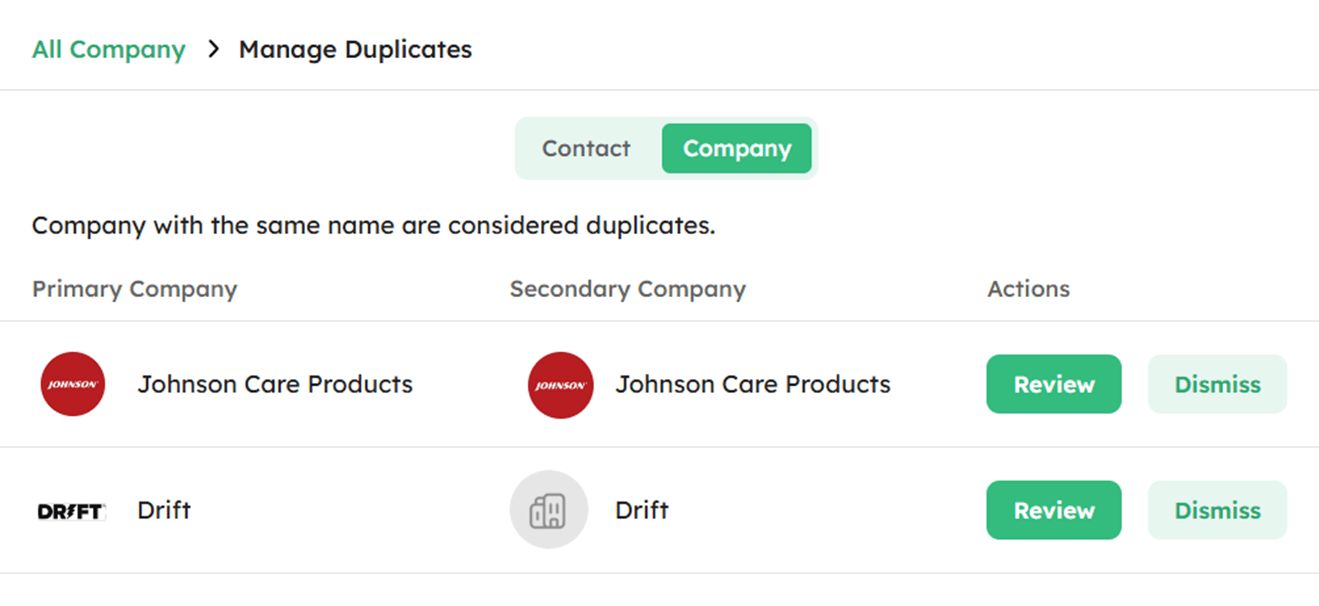
-
Click Review to compare the records and choose the data to keep.
-
Select the primary company and click Merge to combine the records.
- Click Dismiss to temporarily remove a record; it will reappear if another company with the same name is added.