Activity Creation and Setup
The activity in Twozo acts as a bridge to the user and the customer interaction. From calls, meetings, mails, and follow-ups, the activity tracks every milestone ensuring you stay aligned with your clients.
Steps to Schedule a New Activity
The Add Activity in Twozo provides a structured way to schedule, manage tasks, meetings, calls, and other important interactions. It helps track interactions, deadlines, follow-ups, and ensures an organized workflow.
-
Go to the Activity Module.
-
Click the + Activity button at the top-right corner.
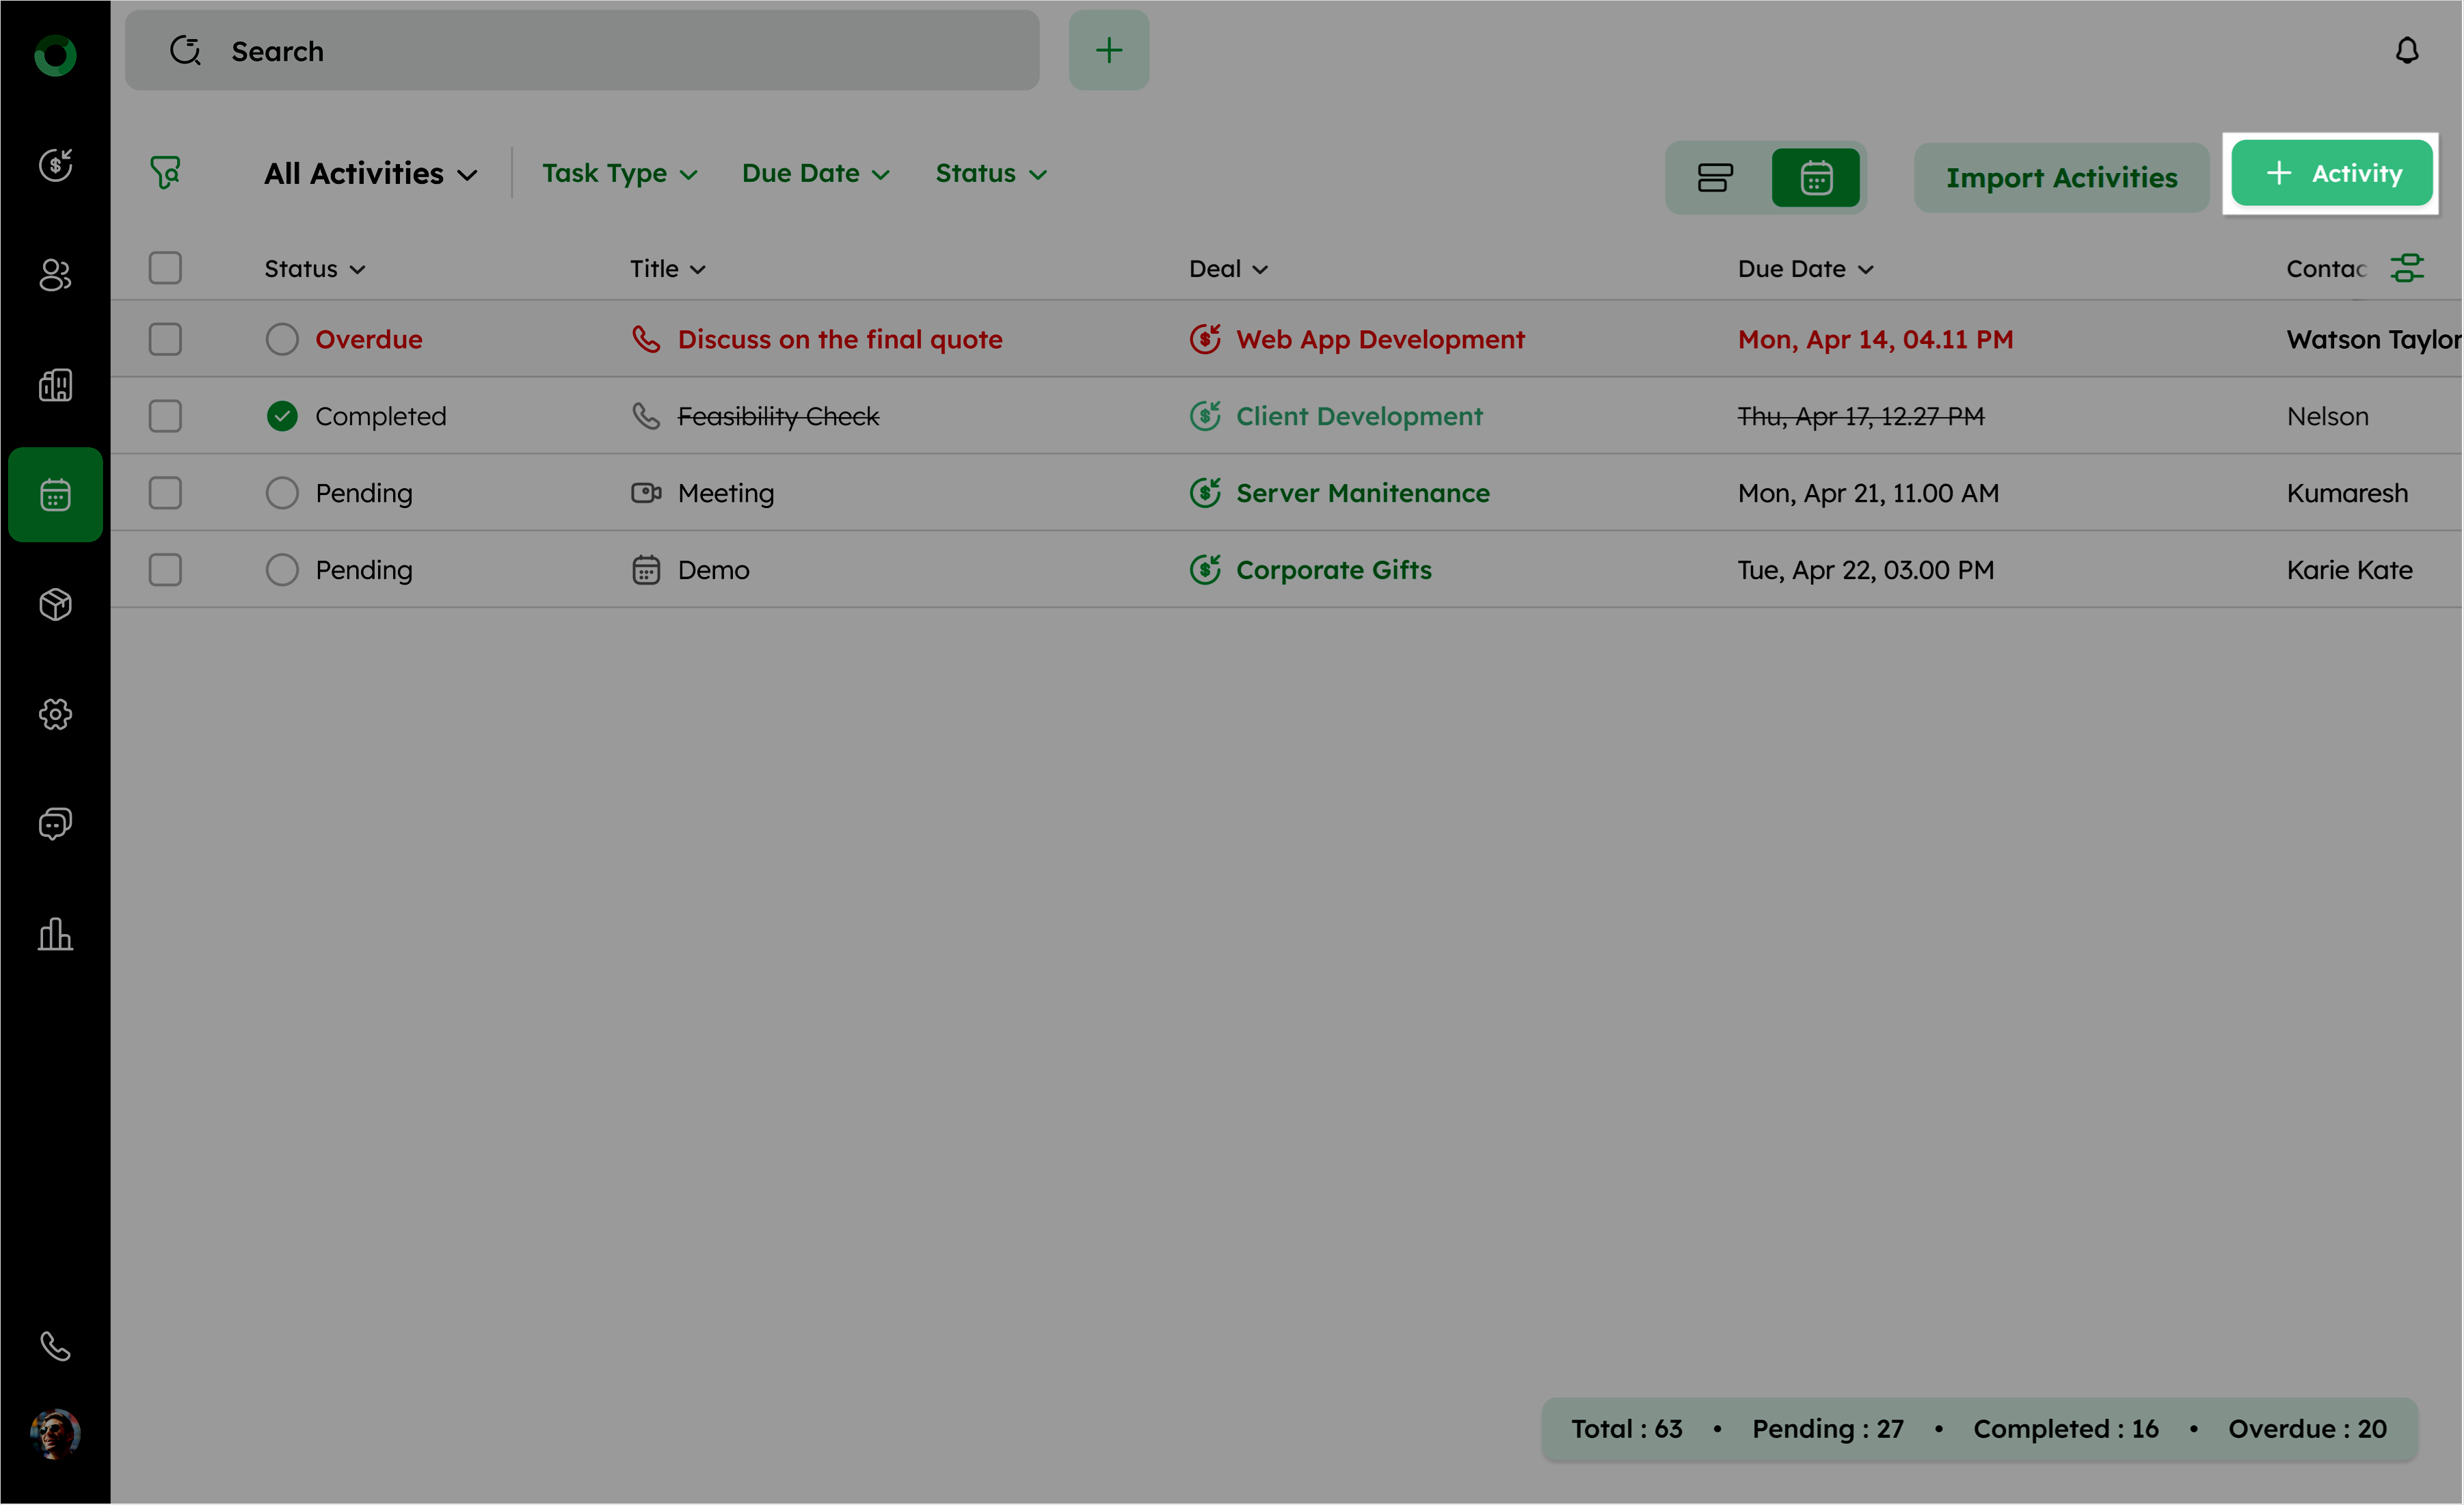
This button is available in both the List View and the Calendar View.
- In the Add Activity form, fill in the required details, such as Title, Type, Date and Time, Availability, Reminder, Priority, Sales Owner, Collaborators, Private Note, Deal, Contact, and Company.
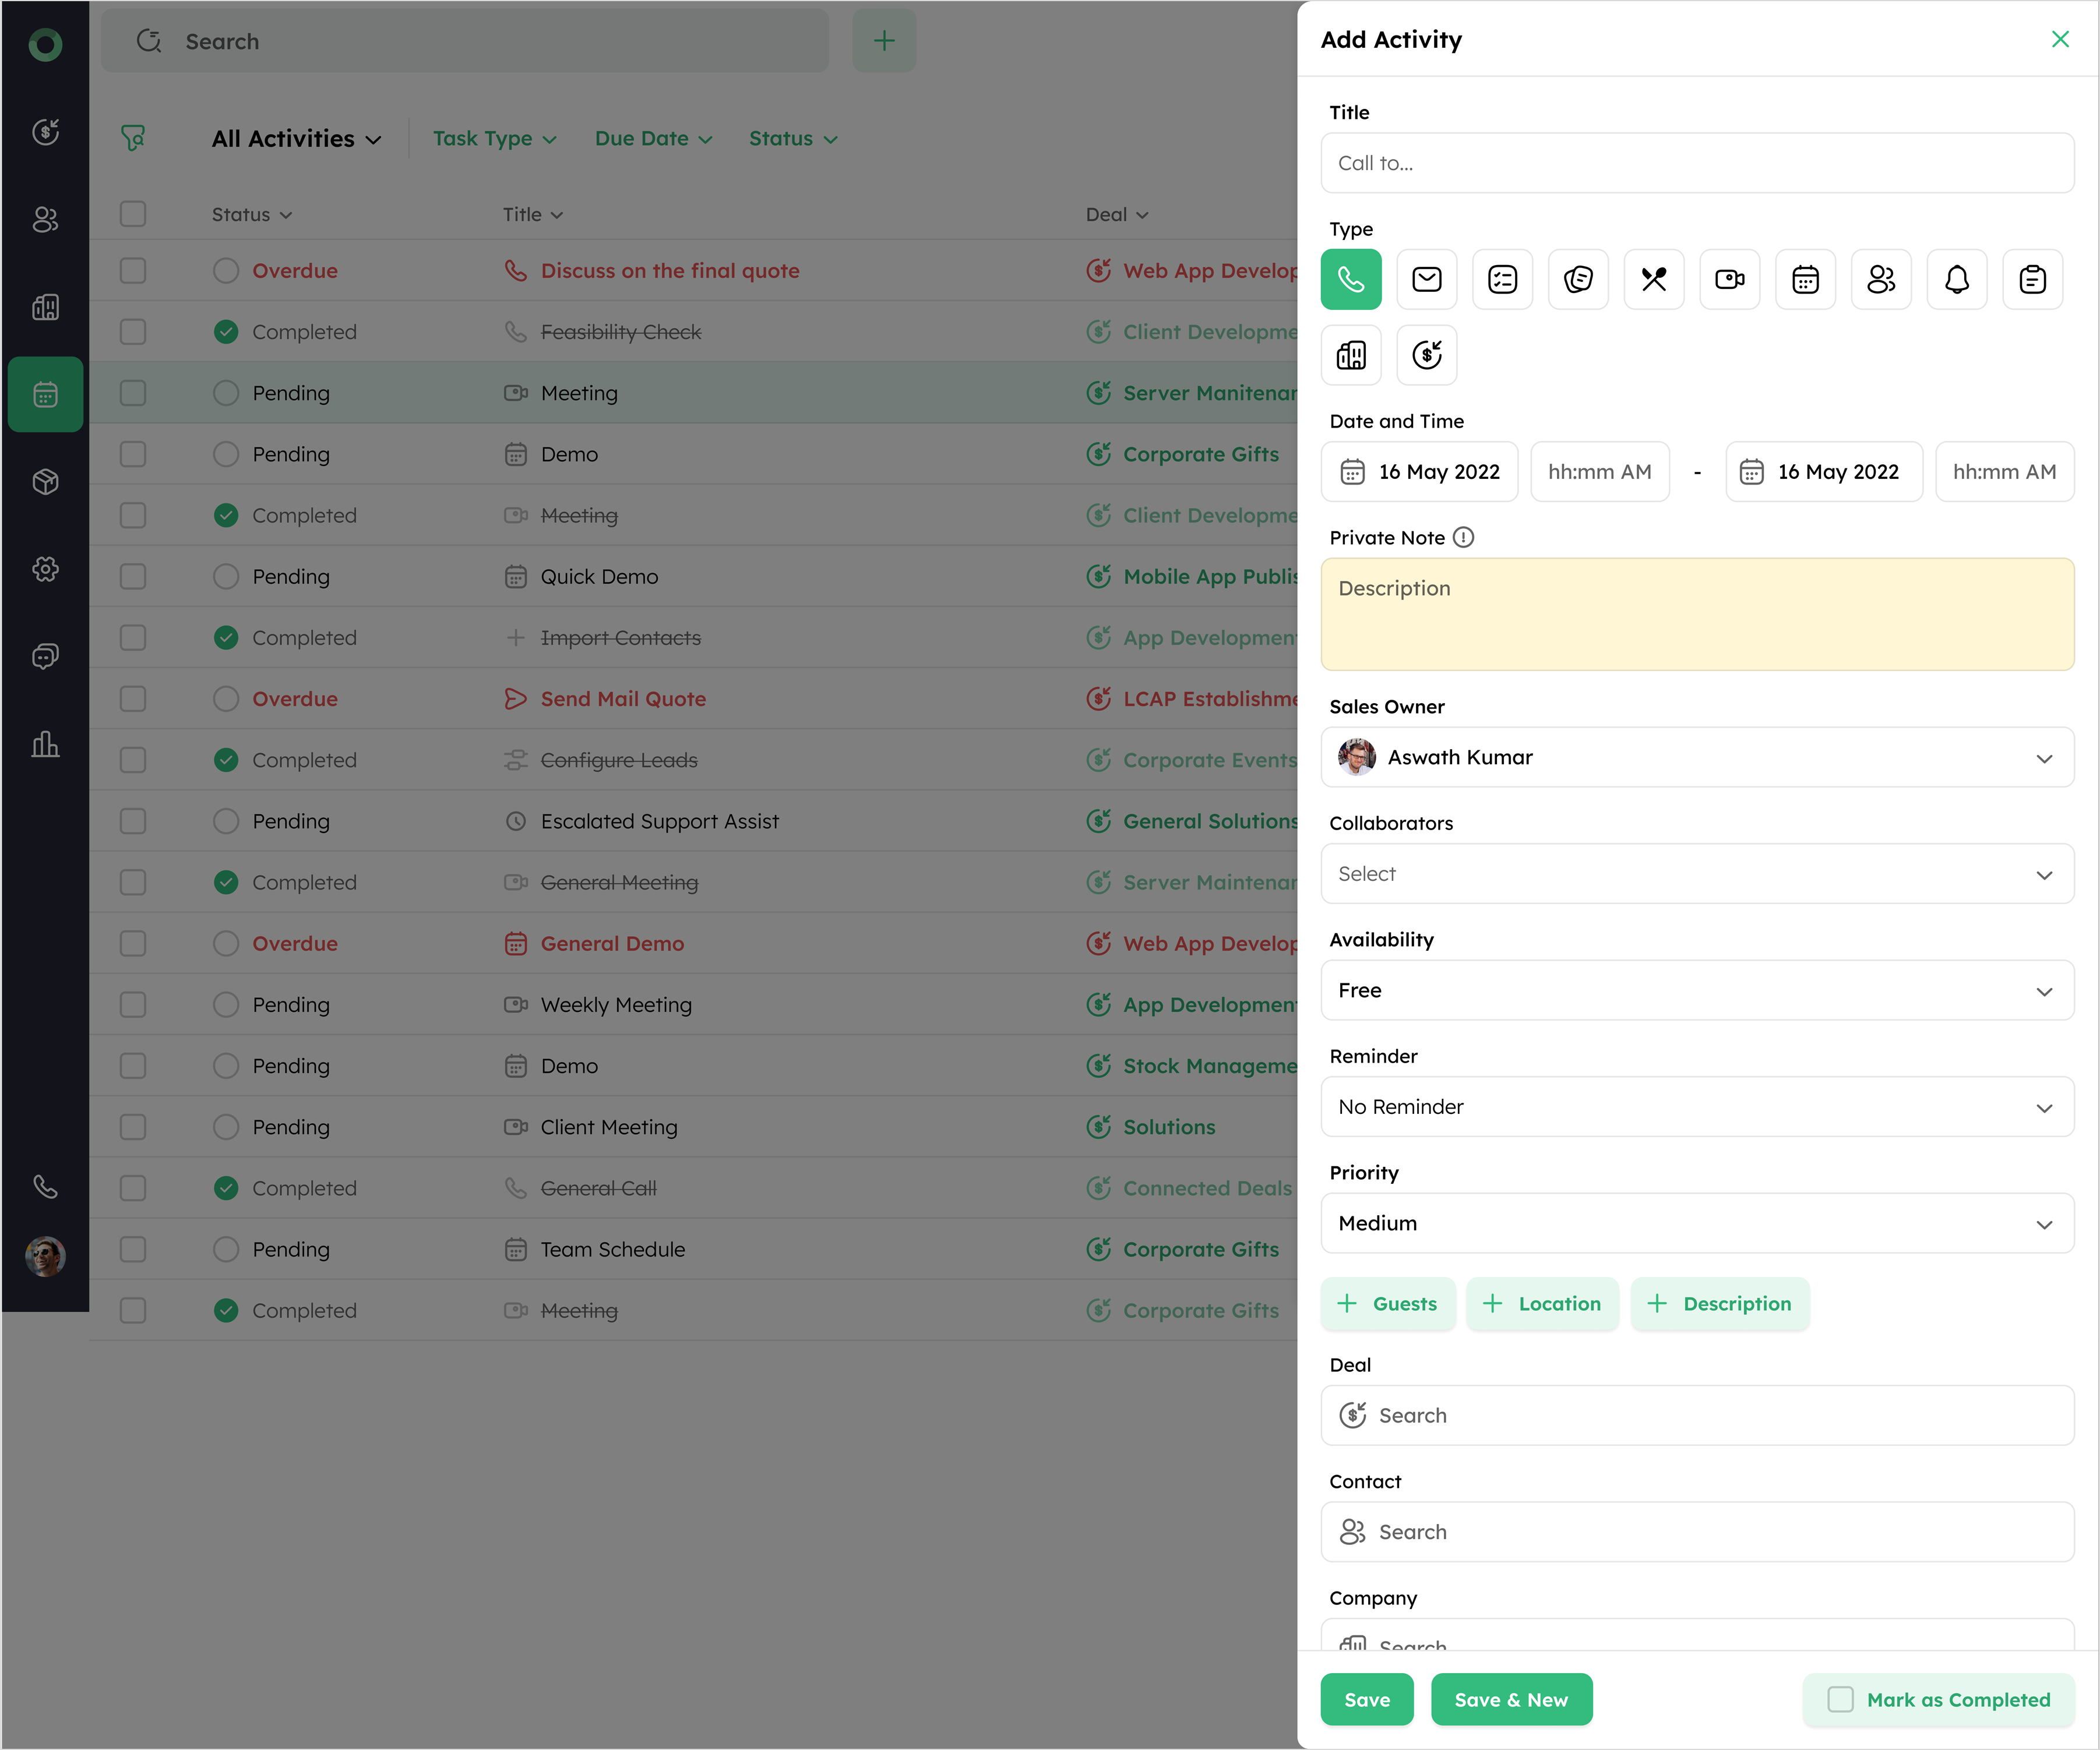
List of Fields and Descriptions:
| Field Name | Description |
|---|---|
| Title | The name or description of the activity. If not provided, the system will automatically use the Type name of the activity as the title, along with an activity icon. This ensures that each activity has a clear identifier even if the title field is empty. |
| Type | Defines the nature of the activity. |
| Date and Time | Sets the scheduled date and time for the activity. |
| Availability | Shows whether you are Busy or Free during the activity time. |
| Reminder | Sets alerts to ensure timely action of the activity. |
| Priority | Helps in focusing on urgent tasks by setting their priority level. |
| Sales Owner | Designates the person responsible for managing the sales-related aspects of the activity. |
| Collaborators | Includes additional users involved in or informed about the activity. |
| Private Note | Provides additional information about the activity and it remains visible only to you. The note is invisible in the invitations for the guests. |
| Deal | Connects the activity with a specific deal, integrating it into sales processes. |
| Contact | Associate the activity with multiple contacts for tracking interactions. |
| Company | Links the activity to a company for managing business-related tasks. |
- Once all the required details are entered, click Save to add the activity to your list.
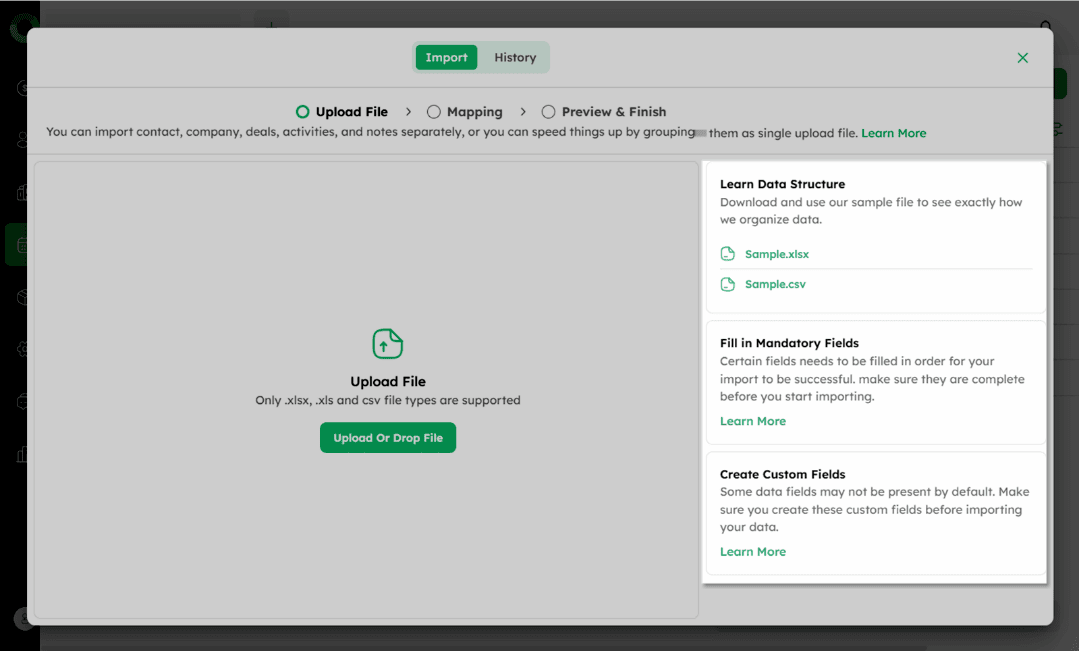
How to Import Activity Data into the Module?
Import activity allows you to bulk-upload large numbers of tasks into the system, eliminating manual data entry and reducing errors. This improves workflow management by ensuring all tasks are captured and tracked.
Steps to Import Activities:
-
Go to the Activity Module.
-
Click the Import Activities button located from the top right corner.
- In the Import page, click the Upload or Drop File button to upload your activity data file. The system supports file formats such as .xlsx, .xls, and .csv.
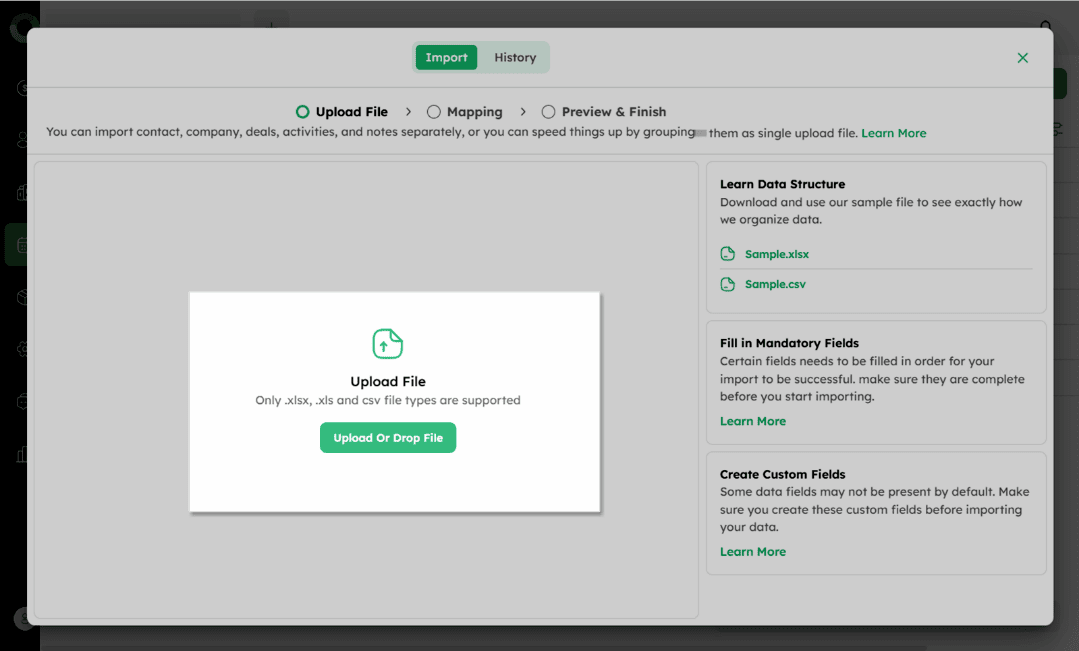
- If you're unsure of the format, download sample files from Learn Data Structure.
-
Ensure all mandatory fields are completed in your file before uploading. Missing required fields will prevent the import from being processed.
-
After uploading, map your file's fields to the system's field structure.
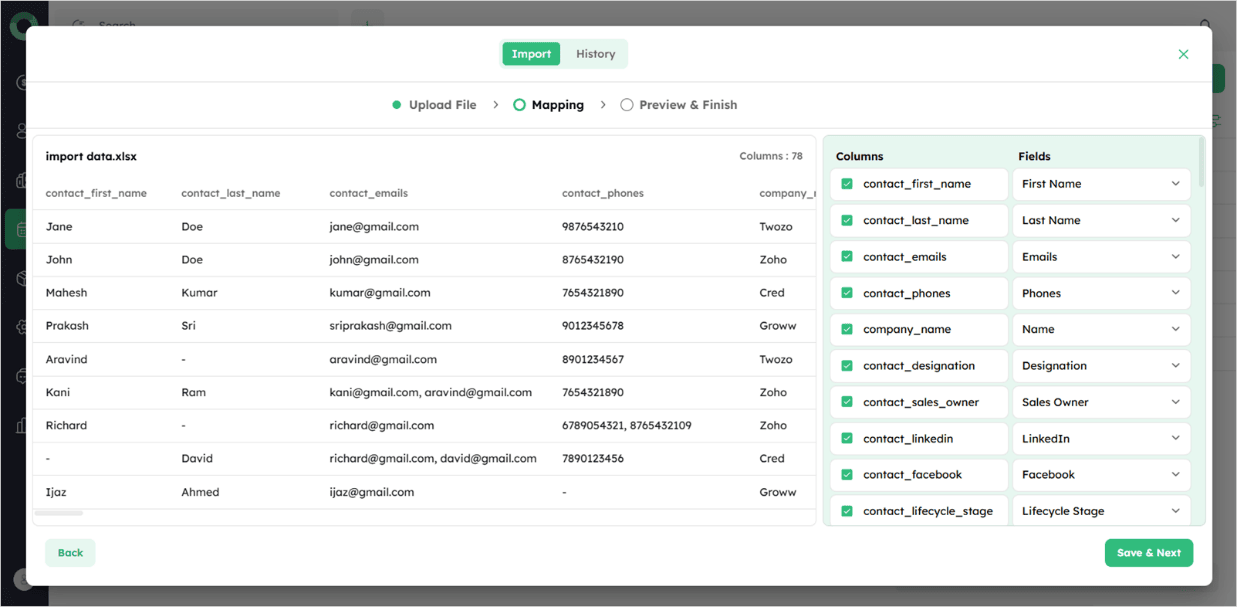
-
Review the mapped data, make necessary adjustments, and click Save & Next to move to the preview page.
-
In Preview Page, ensure all the data is correctly mapped to the appropriate modules, then select Start Importing to initiate the process.
Creating and Customizing New Activity Types
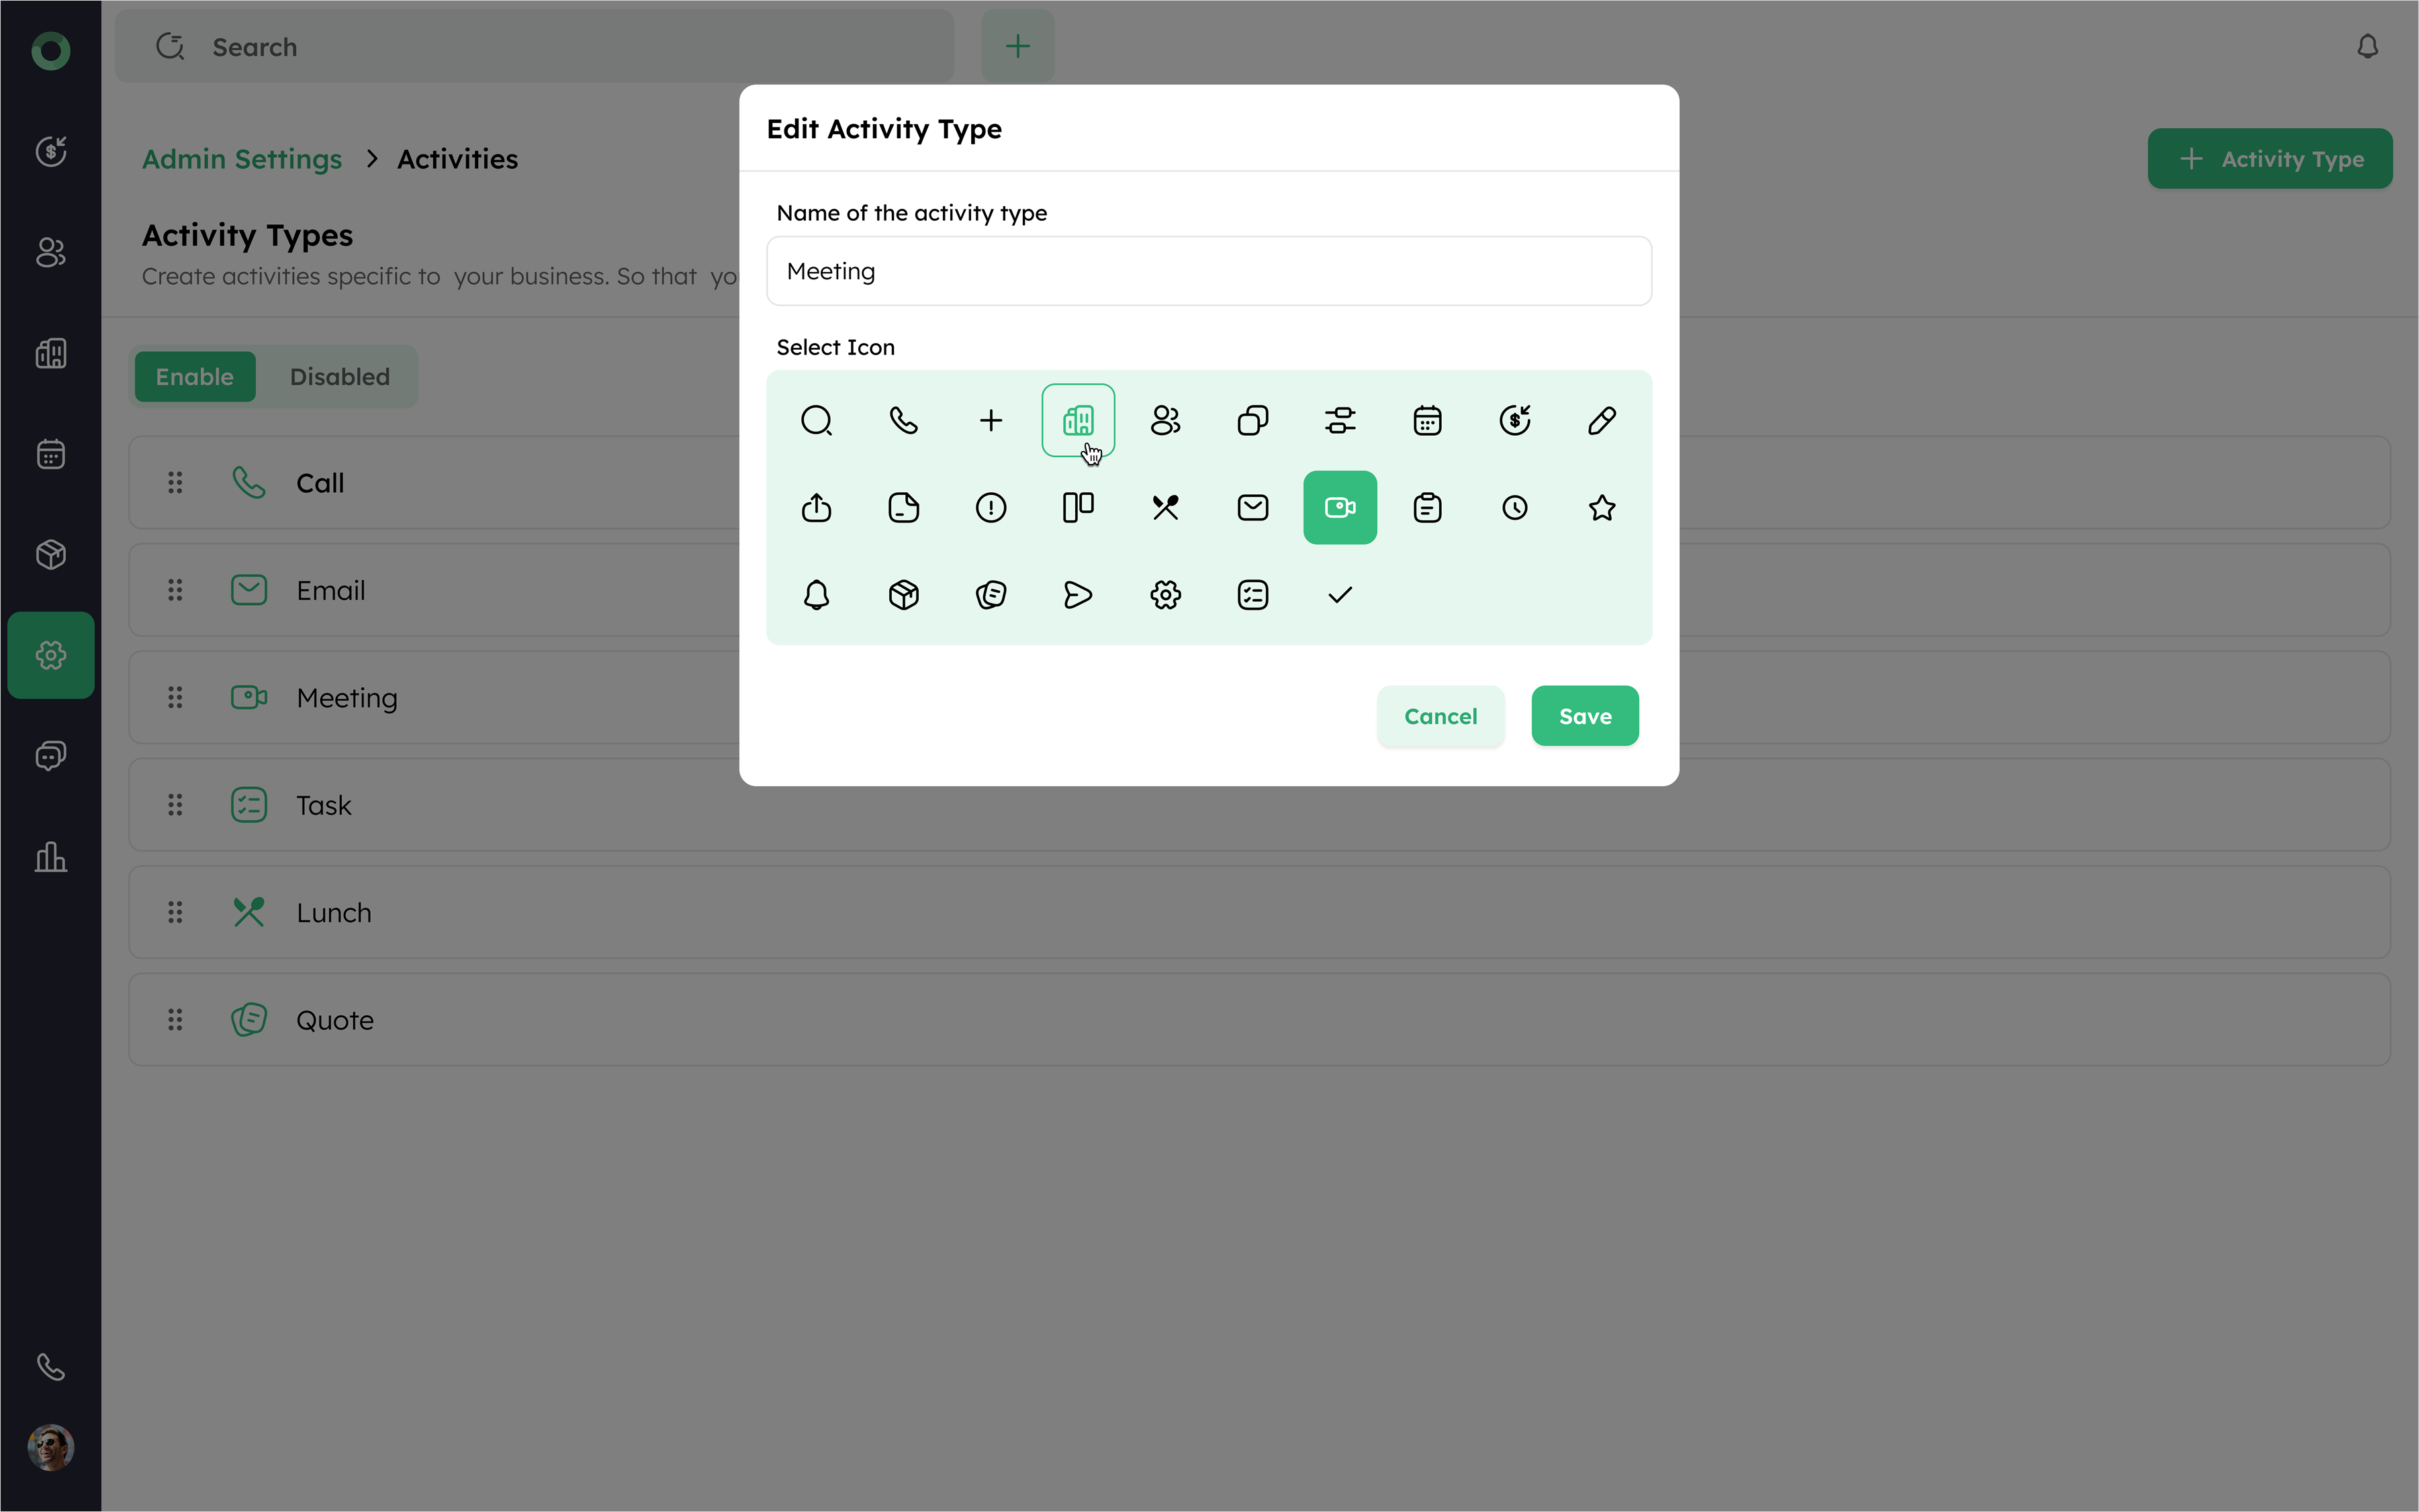
How to Add a New Activity Type?
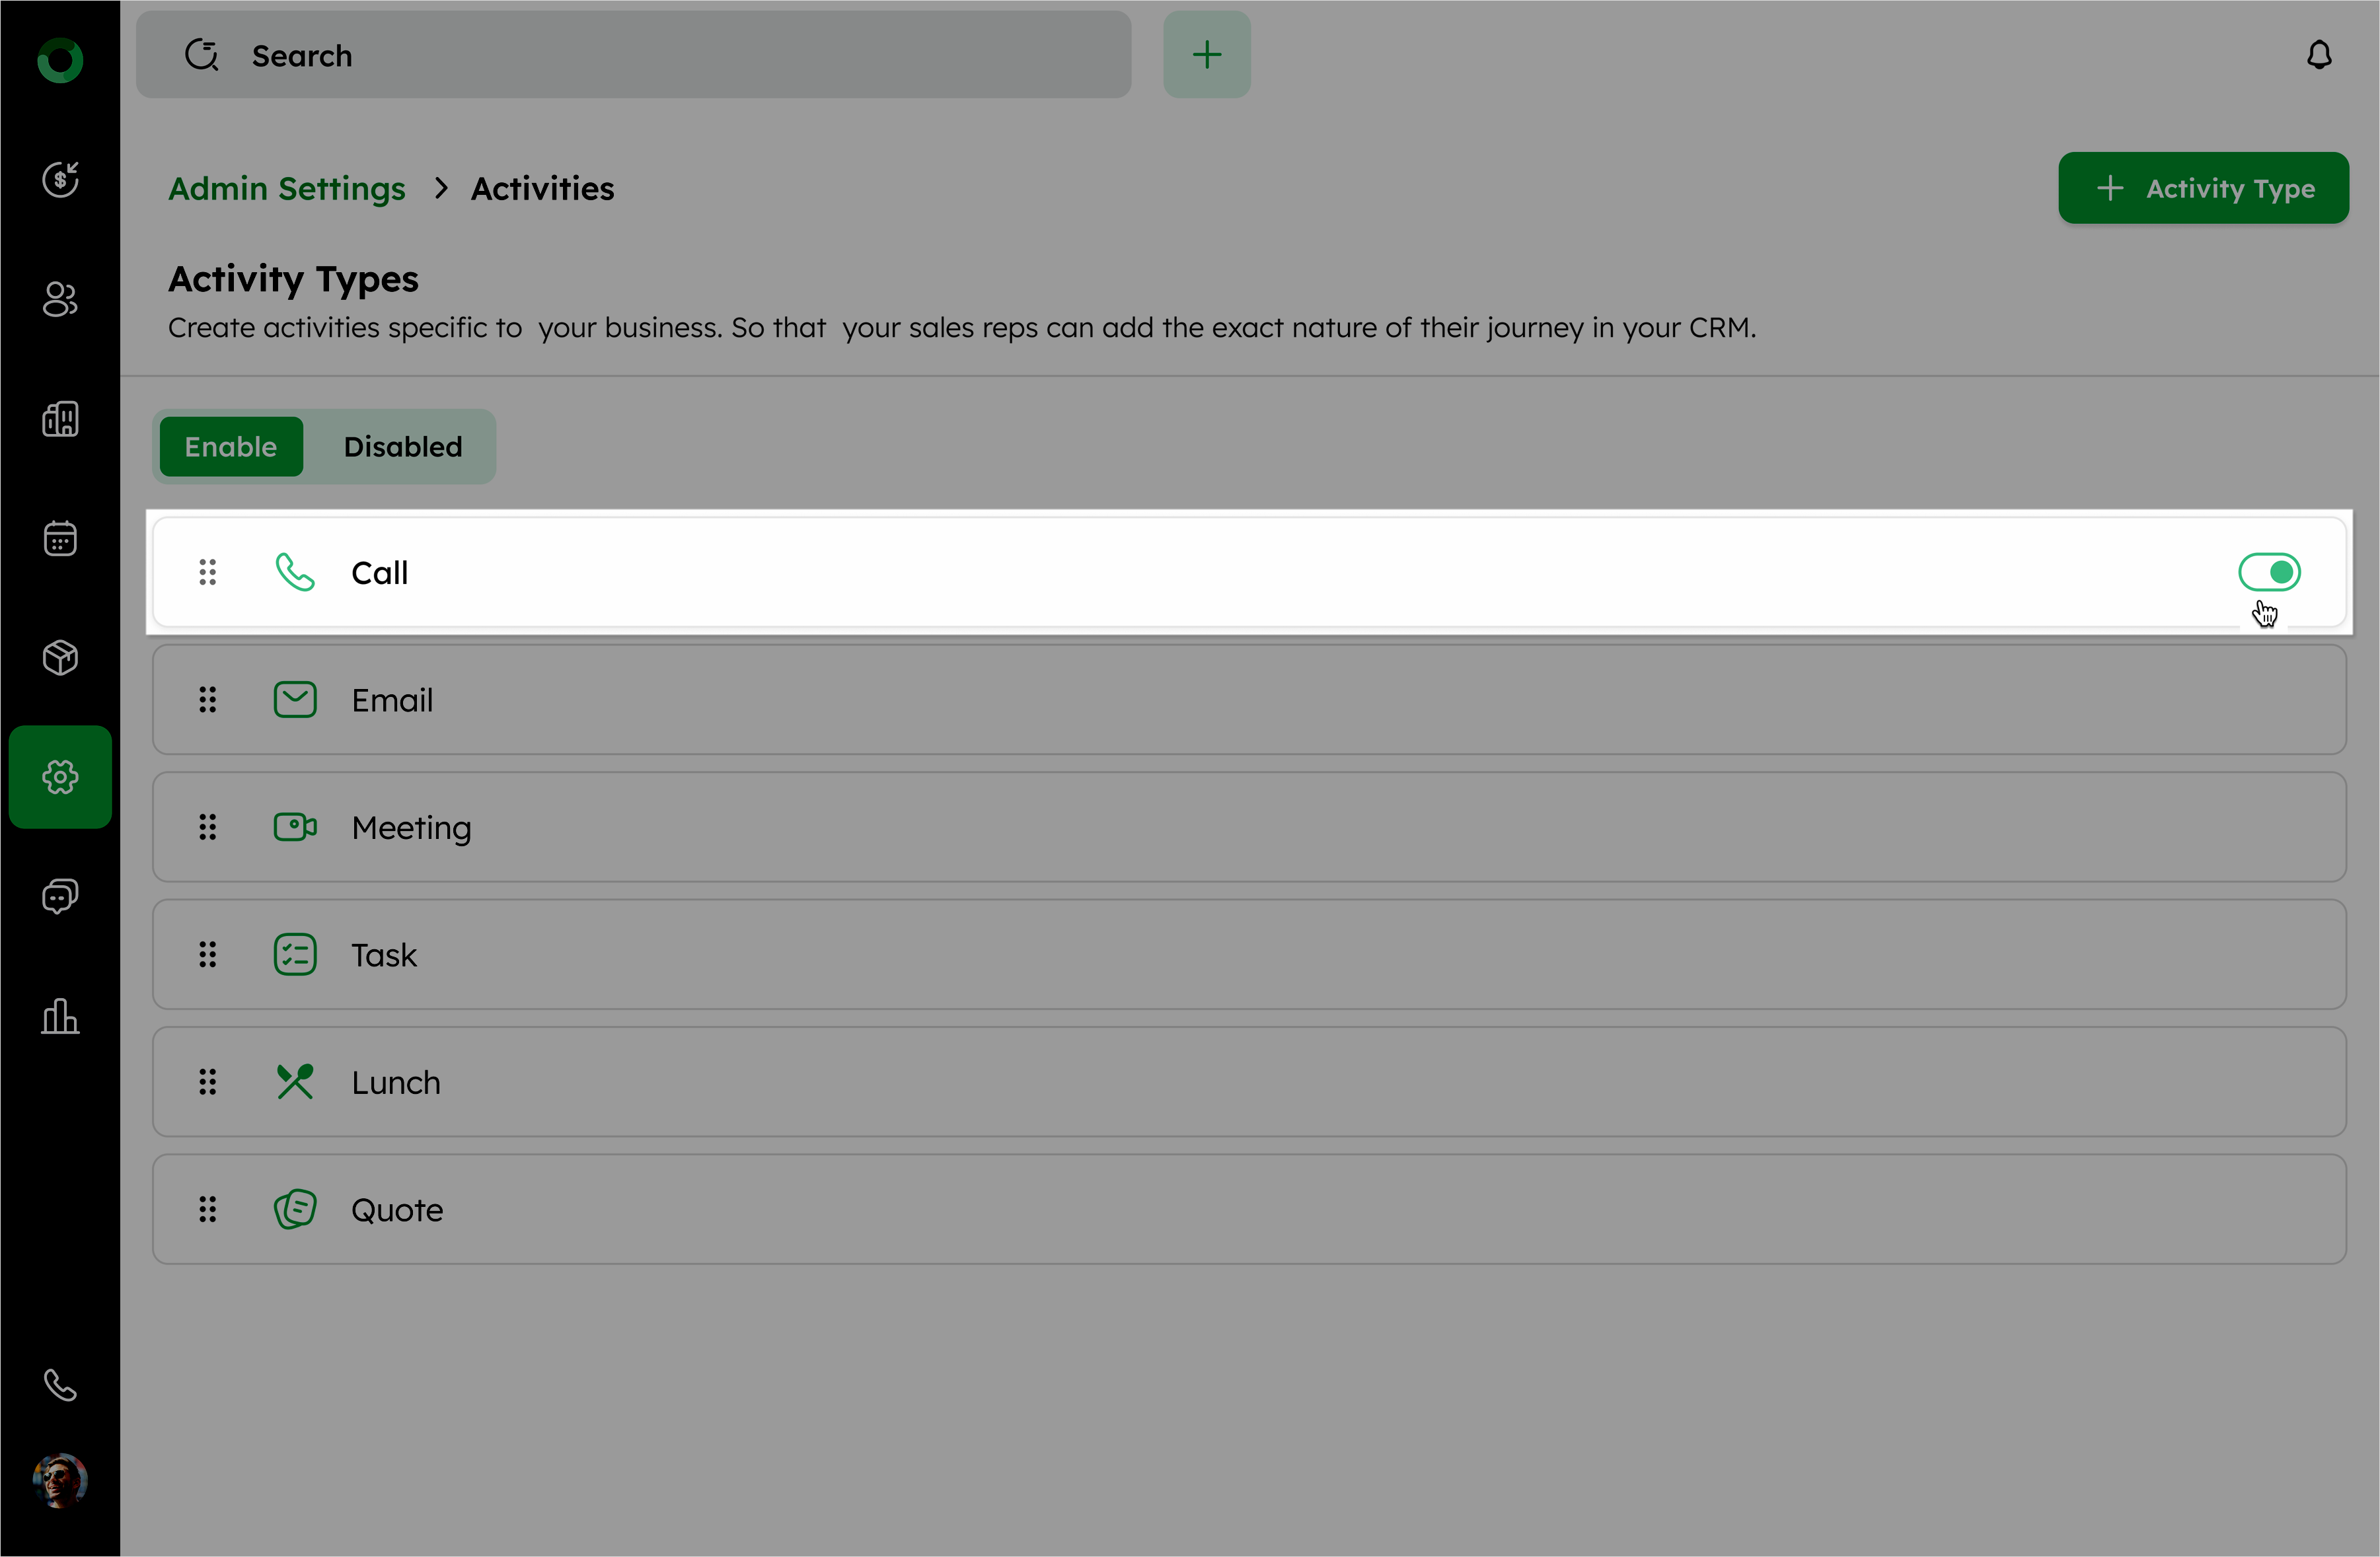
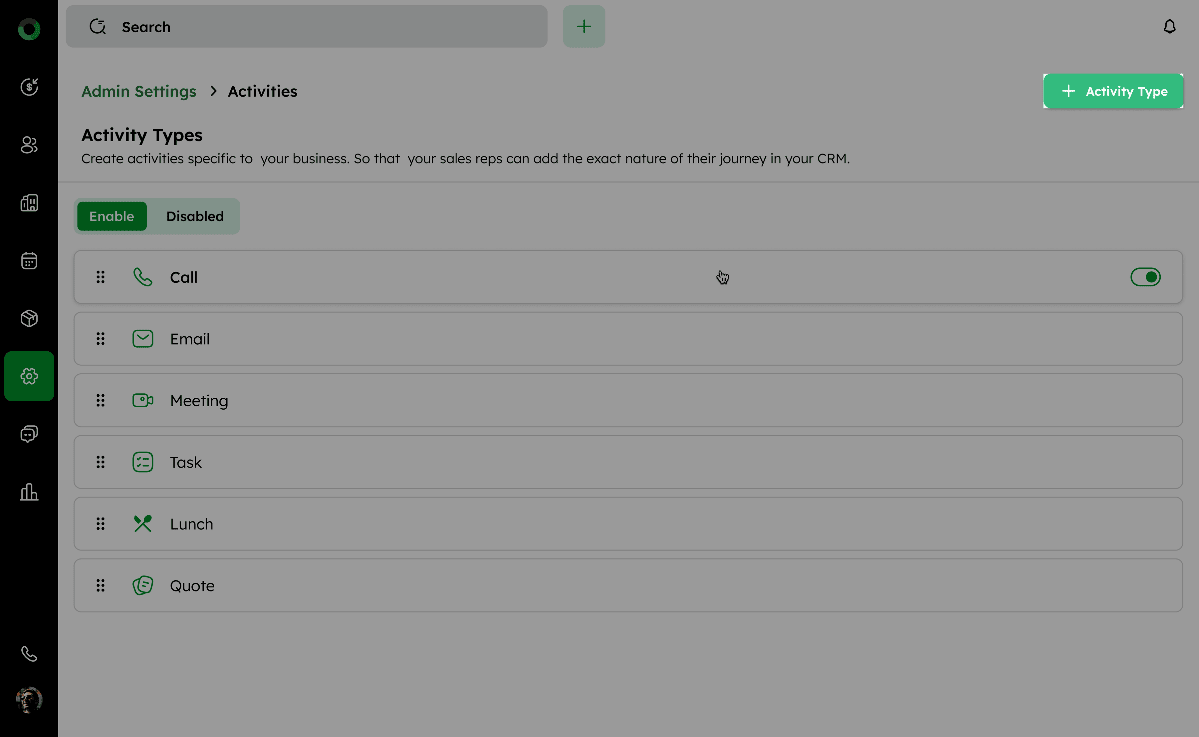
Adding a new activity helps categorize and track various activities effectively. Predefined activity types include Call, Email, Meeting, Task, Lunch, and Quote. This customization enhances the ability to manage and analyze various activities more effectively.
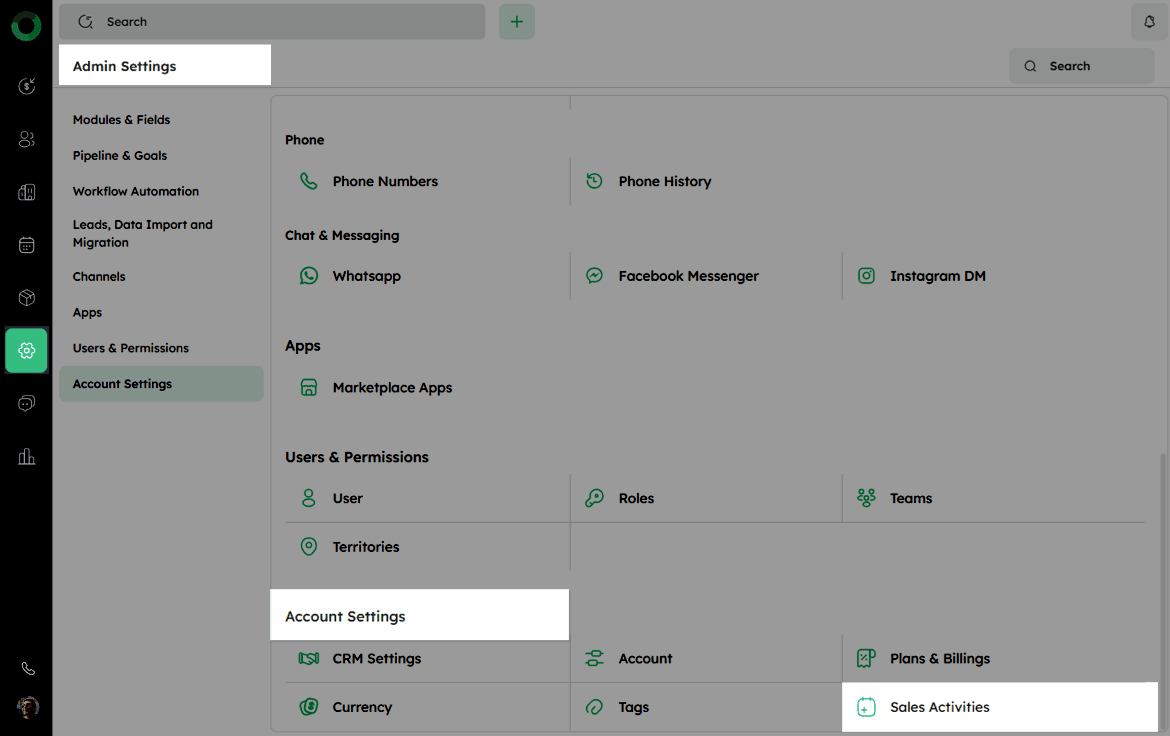
Adding an activity type via Admin Settings:
-
Click the settings icon on the navigation bar to access Admin Settings.
-
In the Account Settings section, select Sales Activities to open the configuration options for sales-related activities.
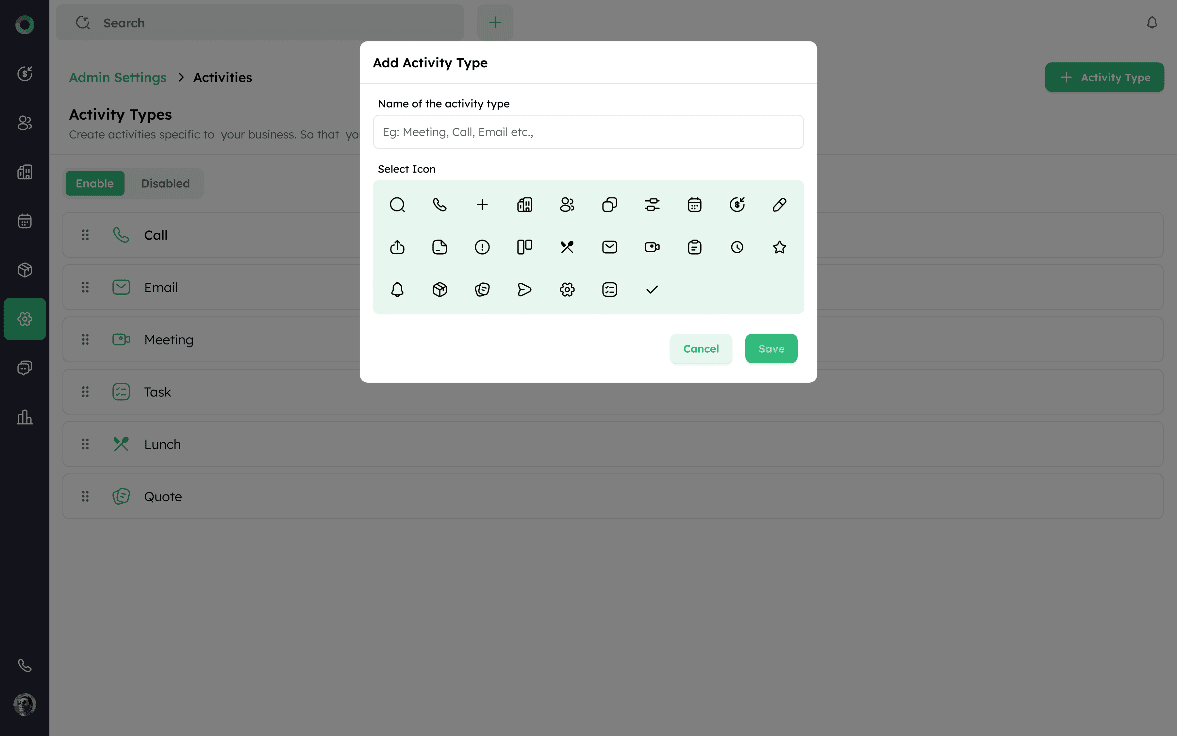
- In the Sales Activities page, click the + Activity Type button at the top-right corner to open the Add Activity Type drawer.
- In the drawer, enter a unique name in the Name of the Activity Type field.
Duplicate names are not allowed. The Save button remains disabled until this field is filled.
-
Select an icon to represent the activity type from the available options.
-
Click Save to add the new activity type.
Managing Activity Type Settings
Follow these steps to view, edit, reorder, enable/disable, and manage the activity types in your CRM system.
-
Go to Admin Settings.
-
Open Sales Activities under the Account Settings.
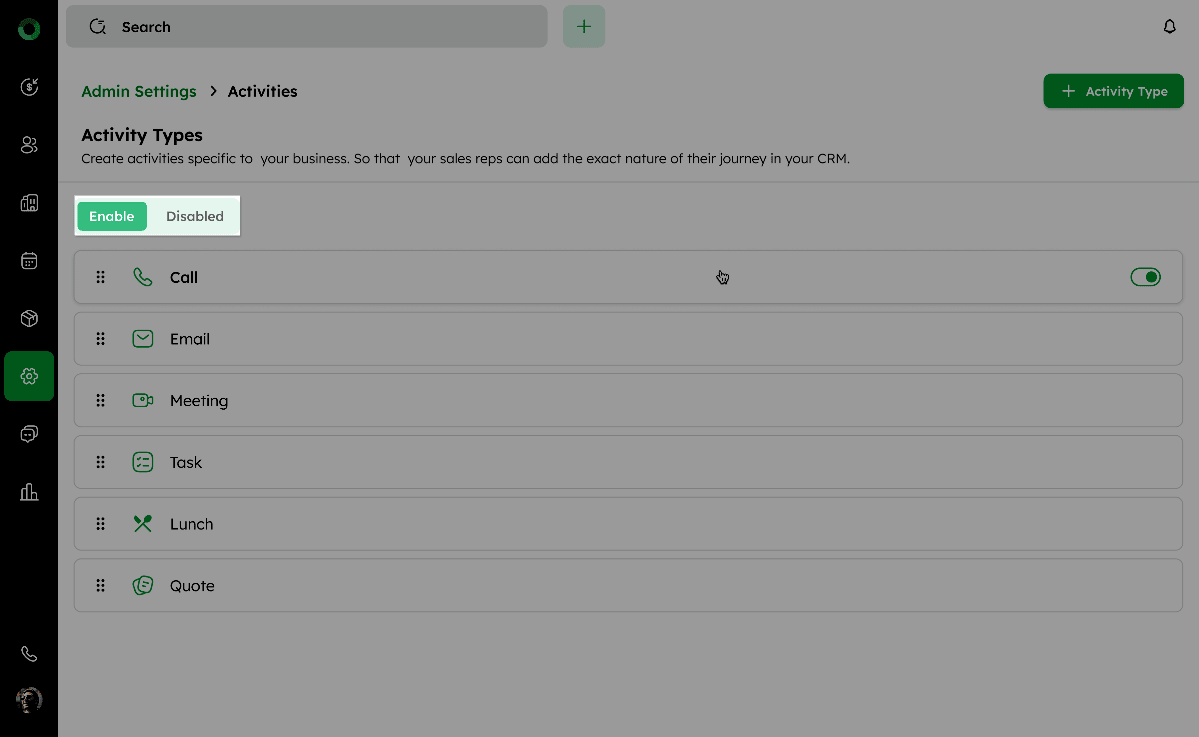
- Use the Enable/Disabled toggle at the top of the sales activities page to view activated and deactivated activity types respectively.
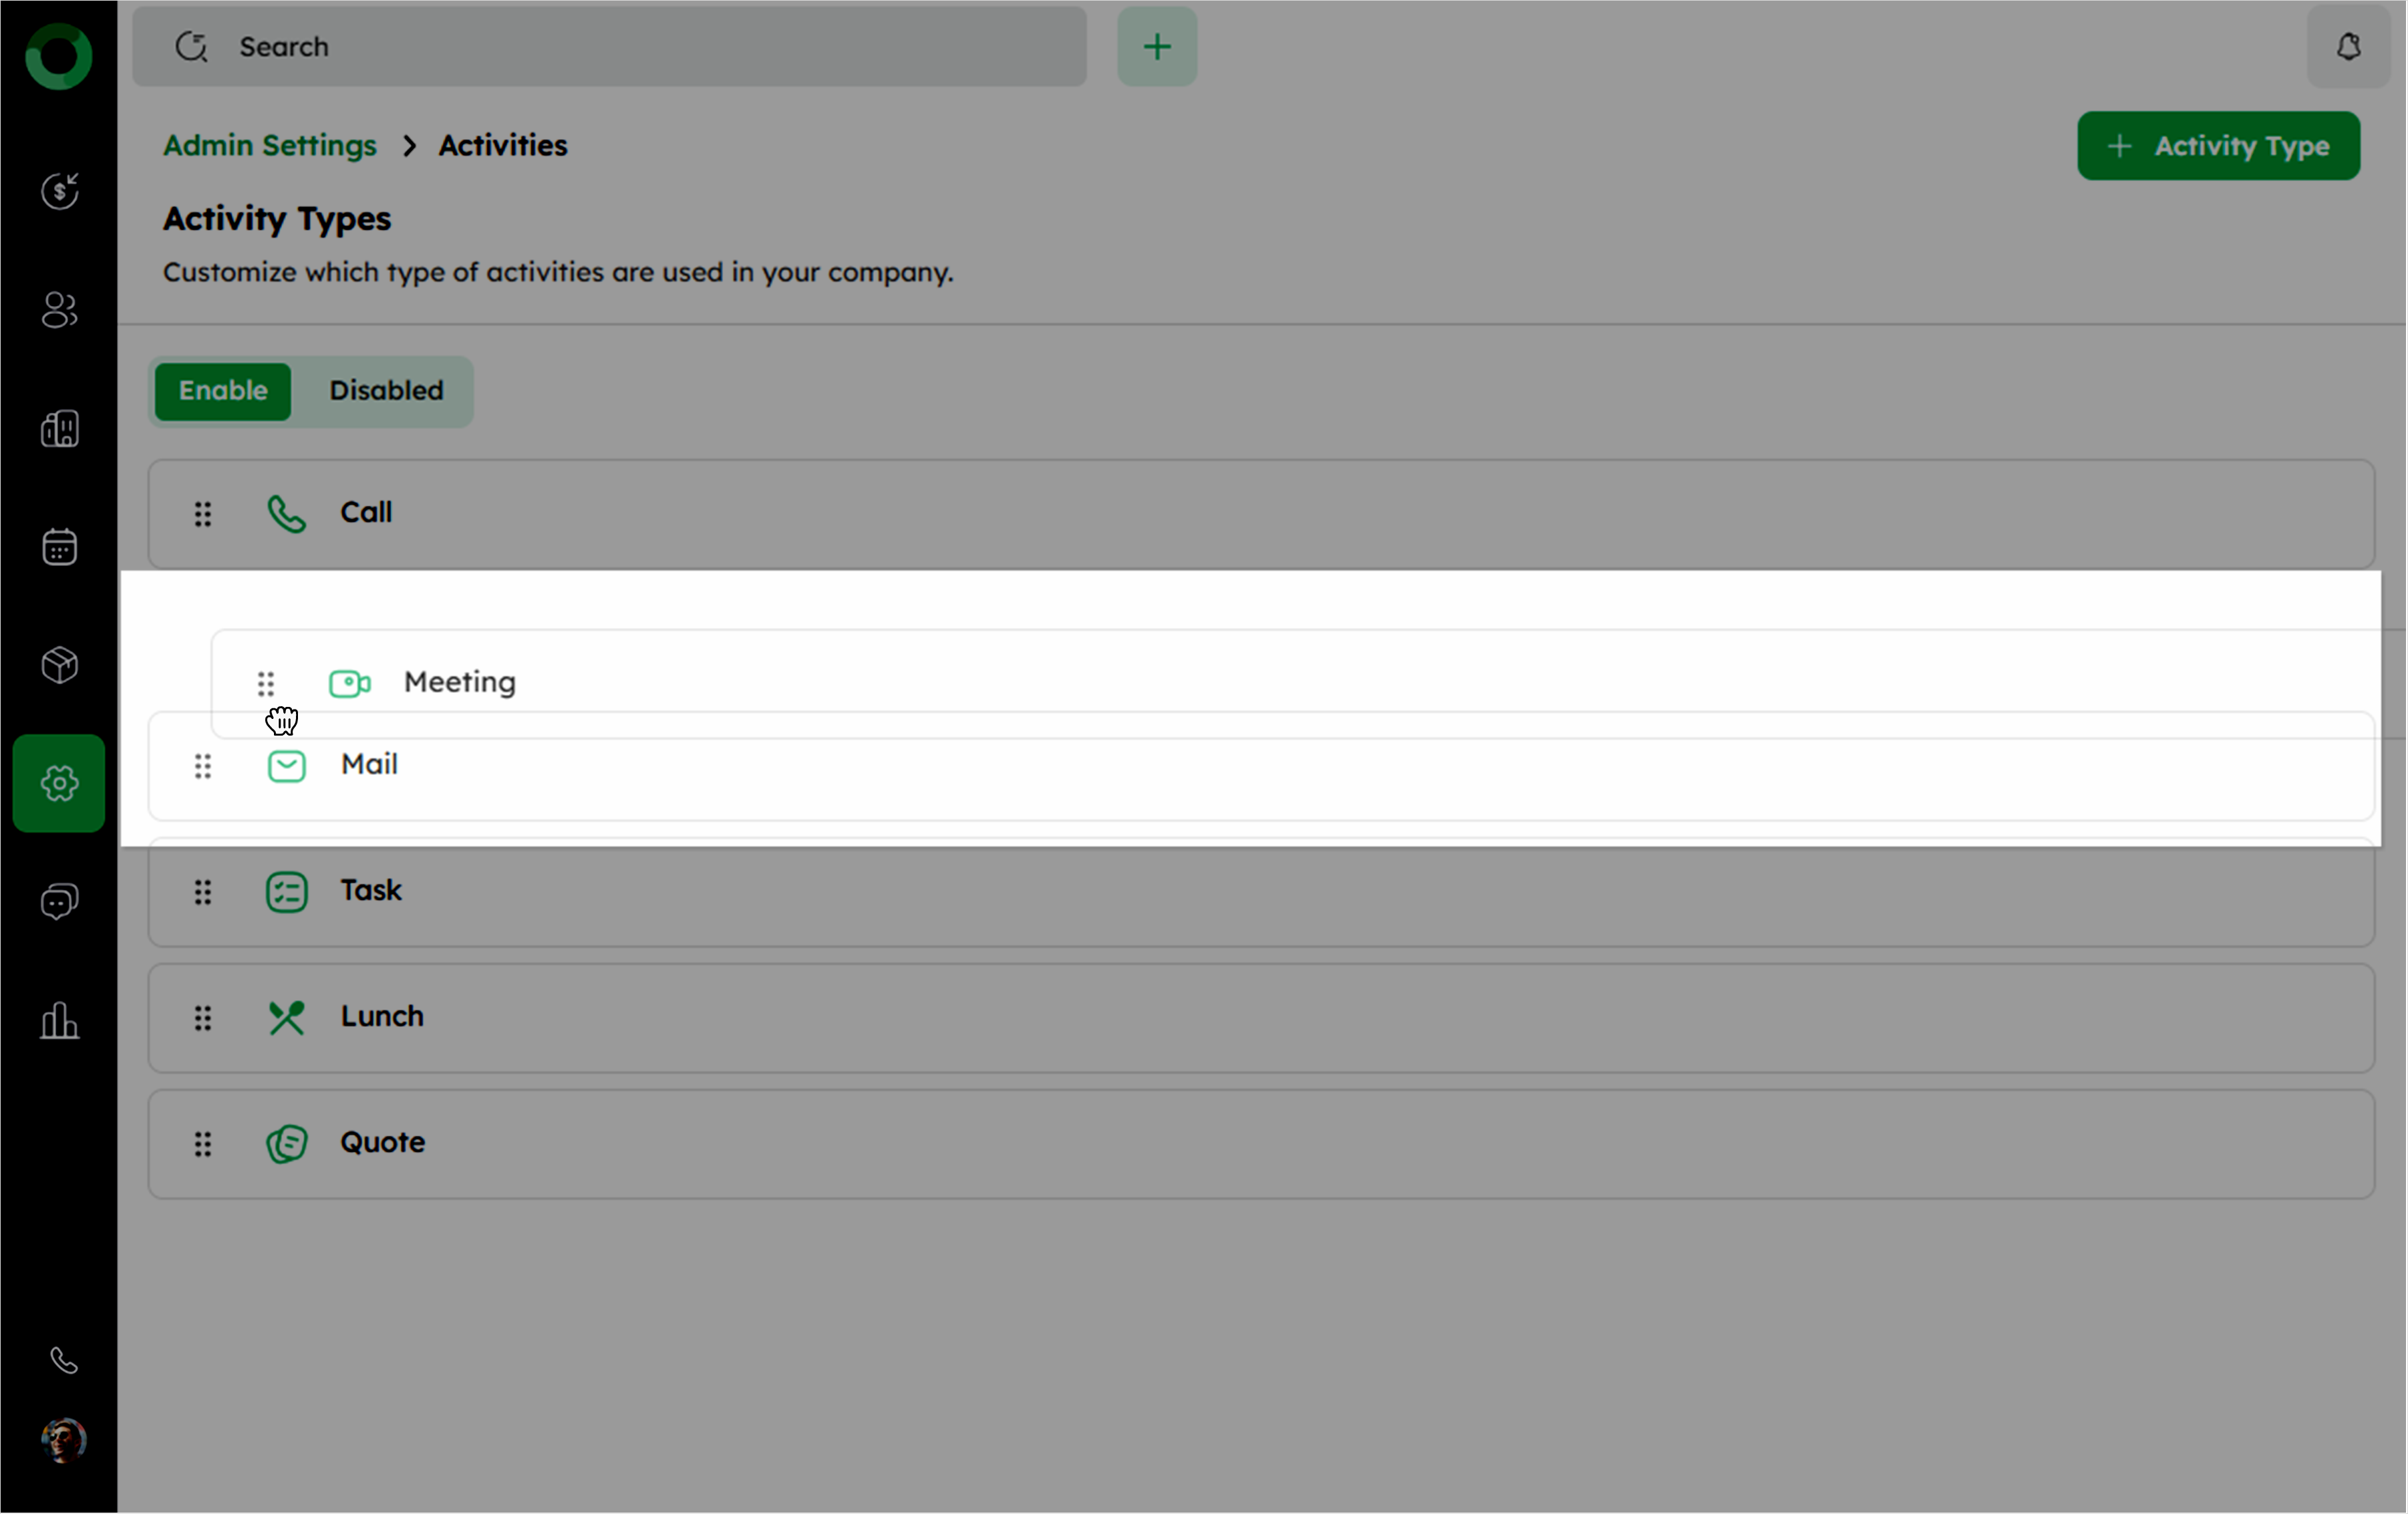
- To rearrange activity types, use drag-and-drop to adjust their order.
- To edit an activity type:
-
Click the activity name, modify it, and save changes.
-
Change its icon by selecting a new one.
6 Use the toggle next to an activity type to enable or disable it.
-
Enabled activity types remain active and available for use.
-
Disabled activity types will be moved to the Disabled section.
At least one activity type must always be enabled.