Configuring and Segmenting the Activity List View
List View Column Customization: Selecting, Showing, and Hiding Fields
Are you facing chaos with messed-up notifications?
The Activity List View in Twozo CRM enables you to organize and view activity data effectively. Customize displayed columns by selecting relevant fields to suit your needs.
-
Access the Activity List View. This will display the list of activities.
-
Review the default fields in the list, which include Status, Title, Deal, Contact, Company, Start Time, End Time, Duration, and Assigned To User.
-
Click the column settings icon in the right corner of the activity list. This displays a side panel with a list of available fields.
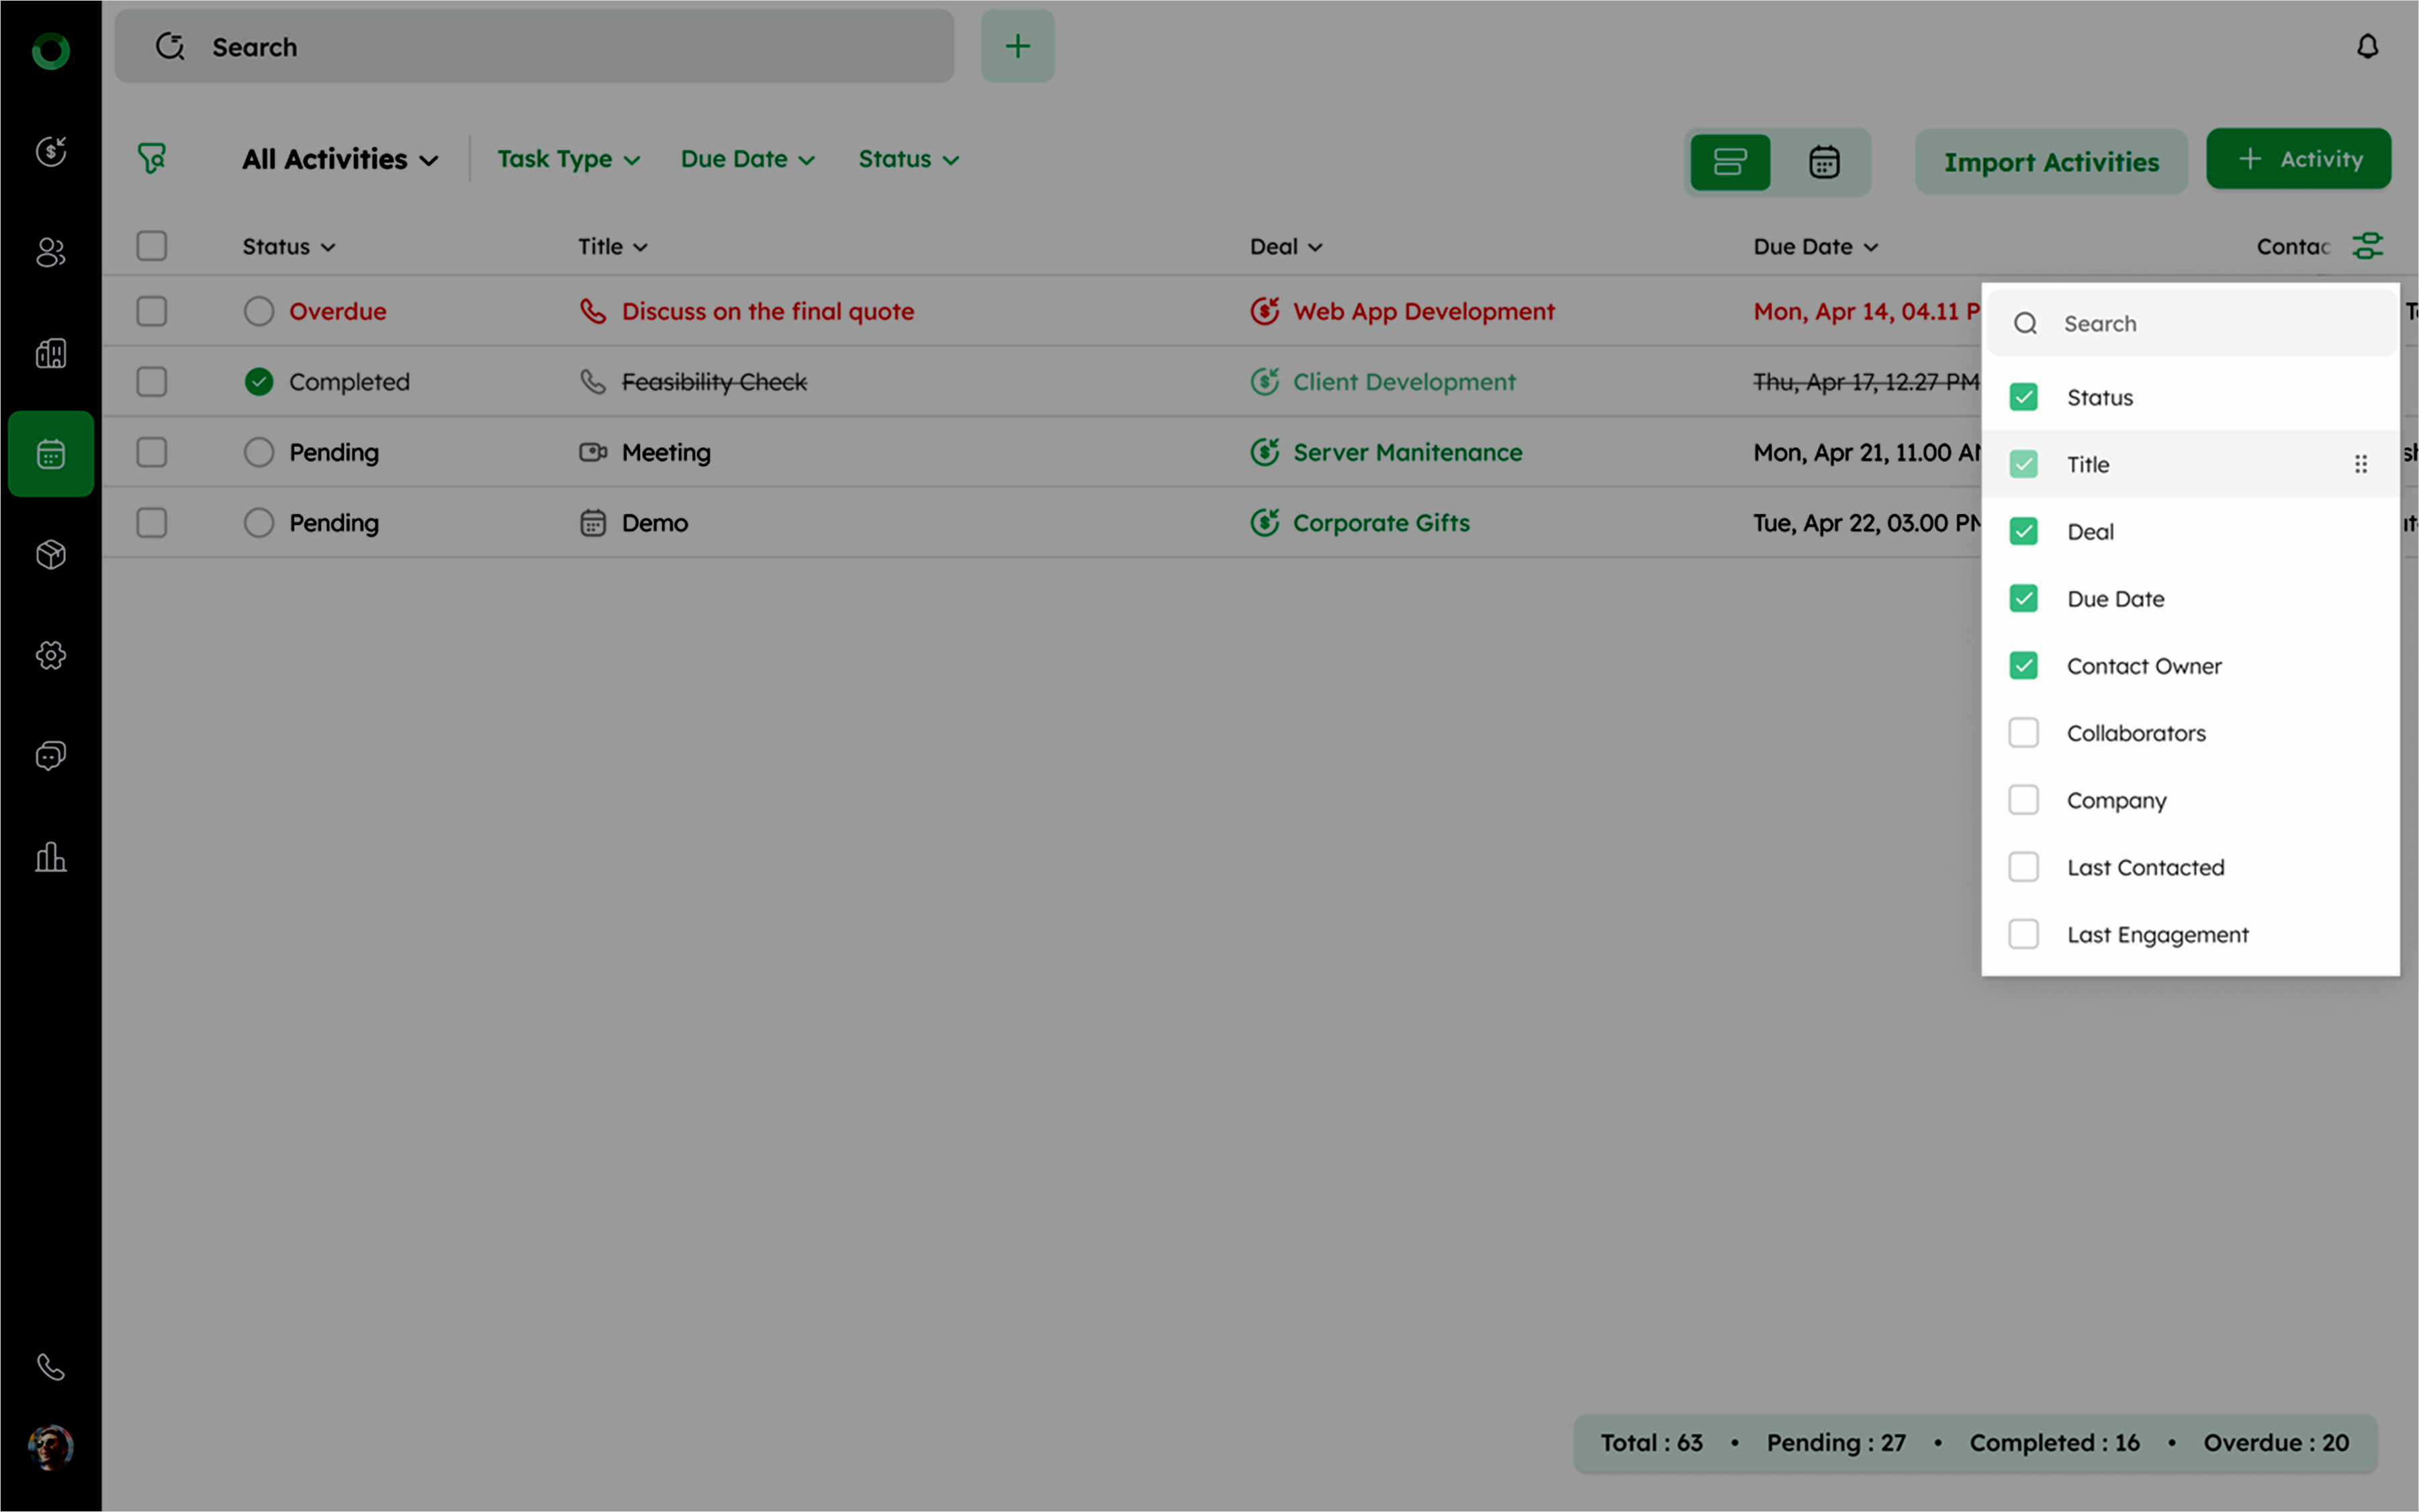
- To show or hide fields:
-
Select the checkbox next to the fields you want to display.
-
Unselect to hide fields.
- Rearrange columns using the drag-and-drop interface within the customization panel.
Now, the fields are arranged in your preferred order.
How to Rearrange and Sort Columns in the Activity List?
- The sort option is located at the top of the list (header).

- The respective fields will be displayed in the specific order of field values. For example, if the field contains alphabetical entries, the upward arrow, displays the ascending order (A-Z); and the downward arrow displays the descending order (Z-A).
How to Segregate Activities Using Filters and Logic?
Struggling with the chaos of data? Twozo's filtering feature allows you to refine and organize data based on specific criteria. Apply AND/OR conditions to easily retrieve relevant data.
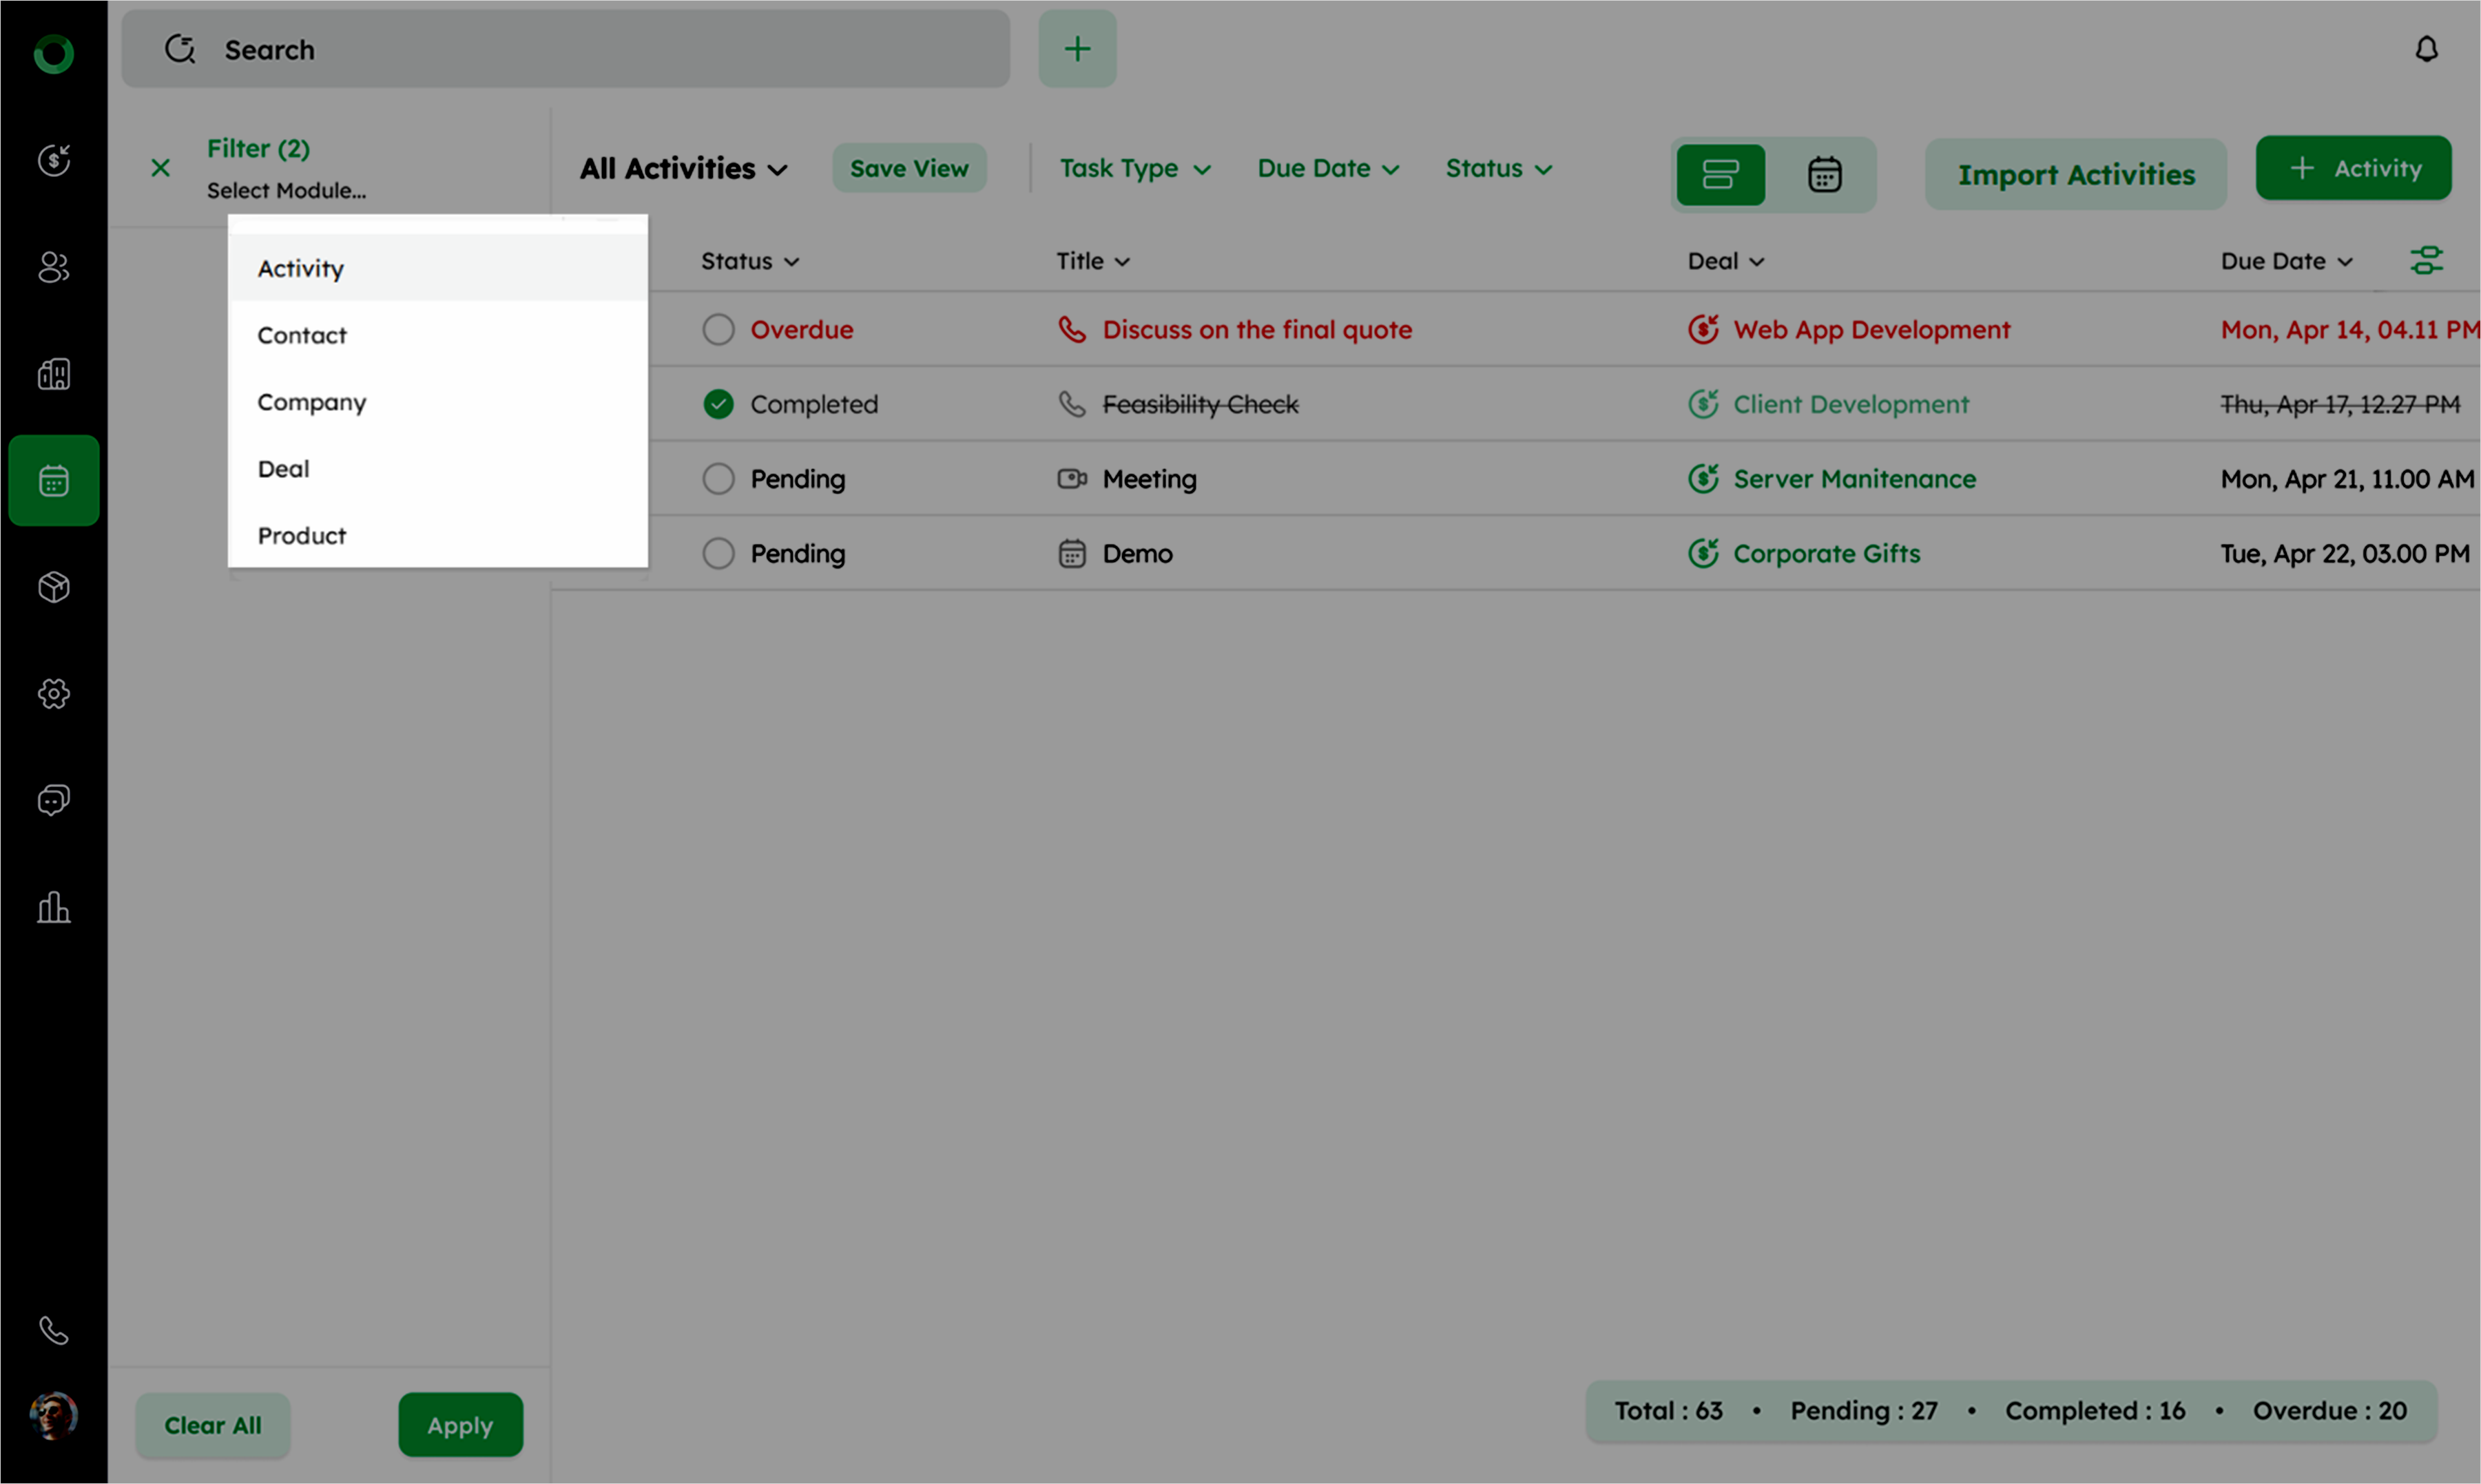
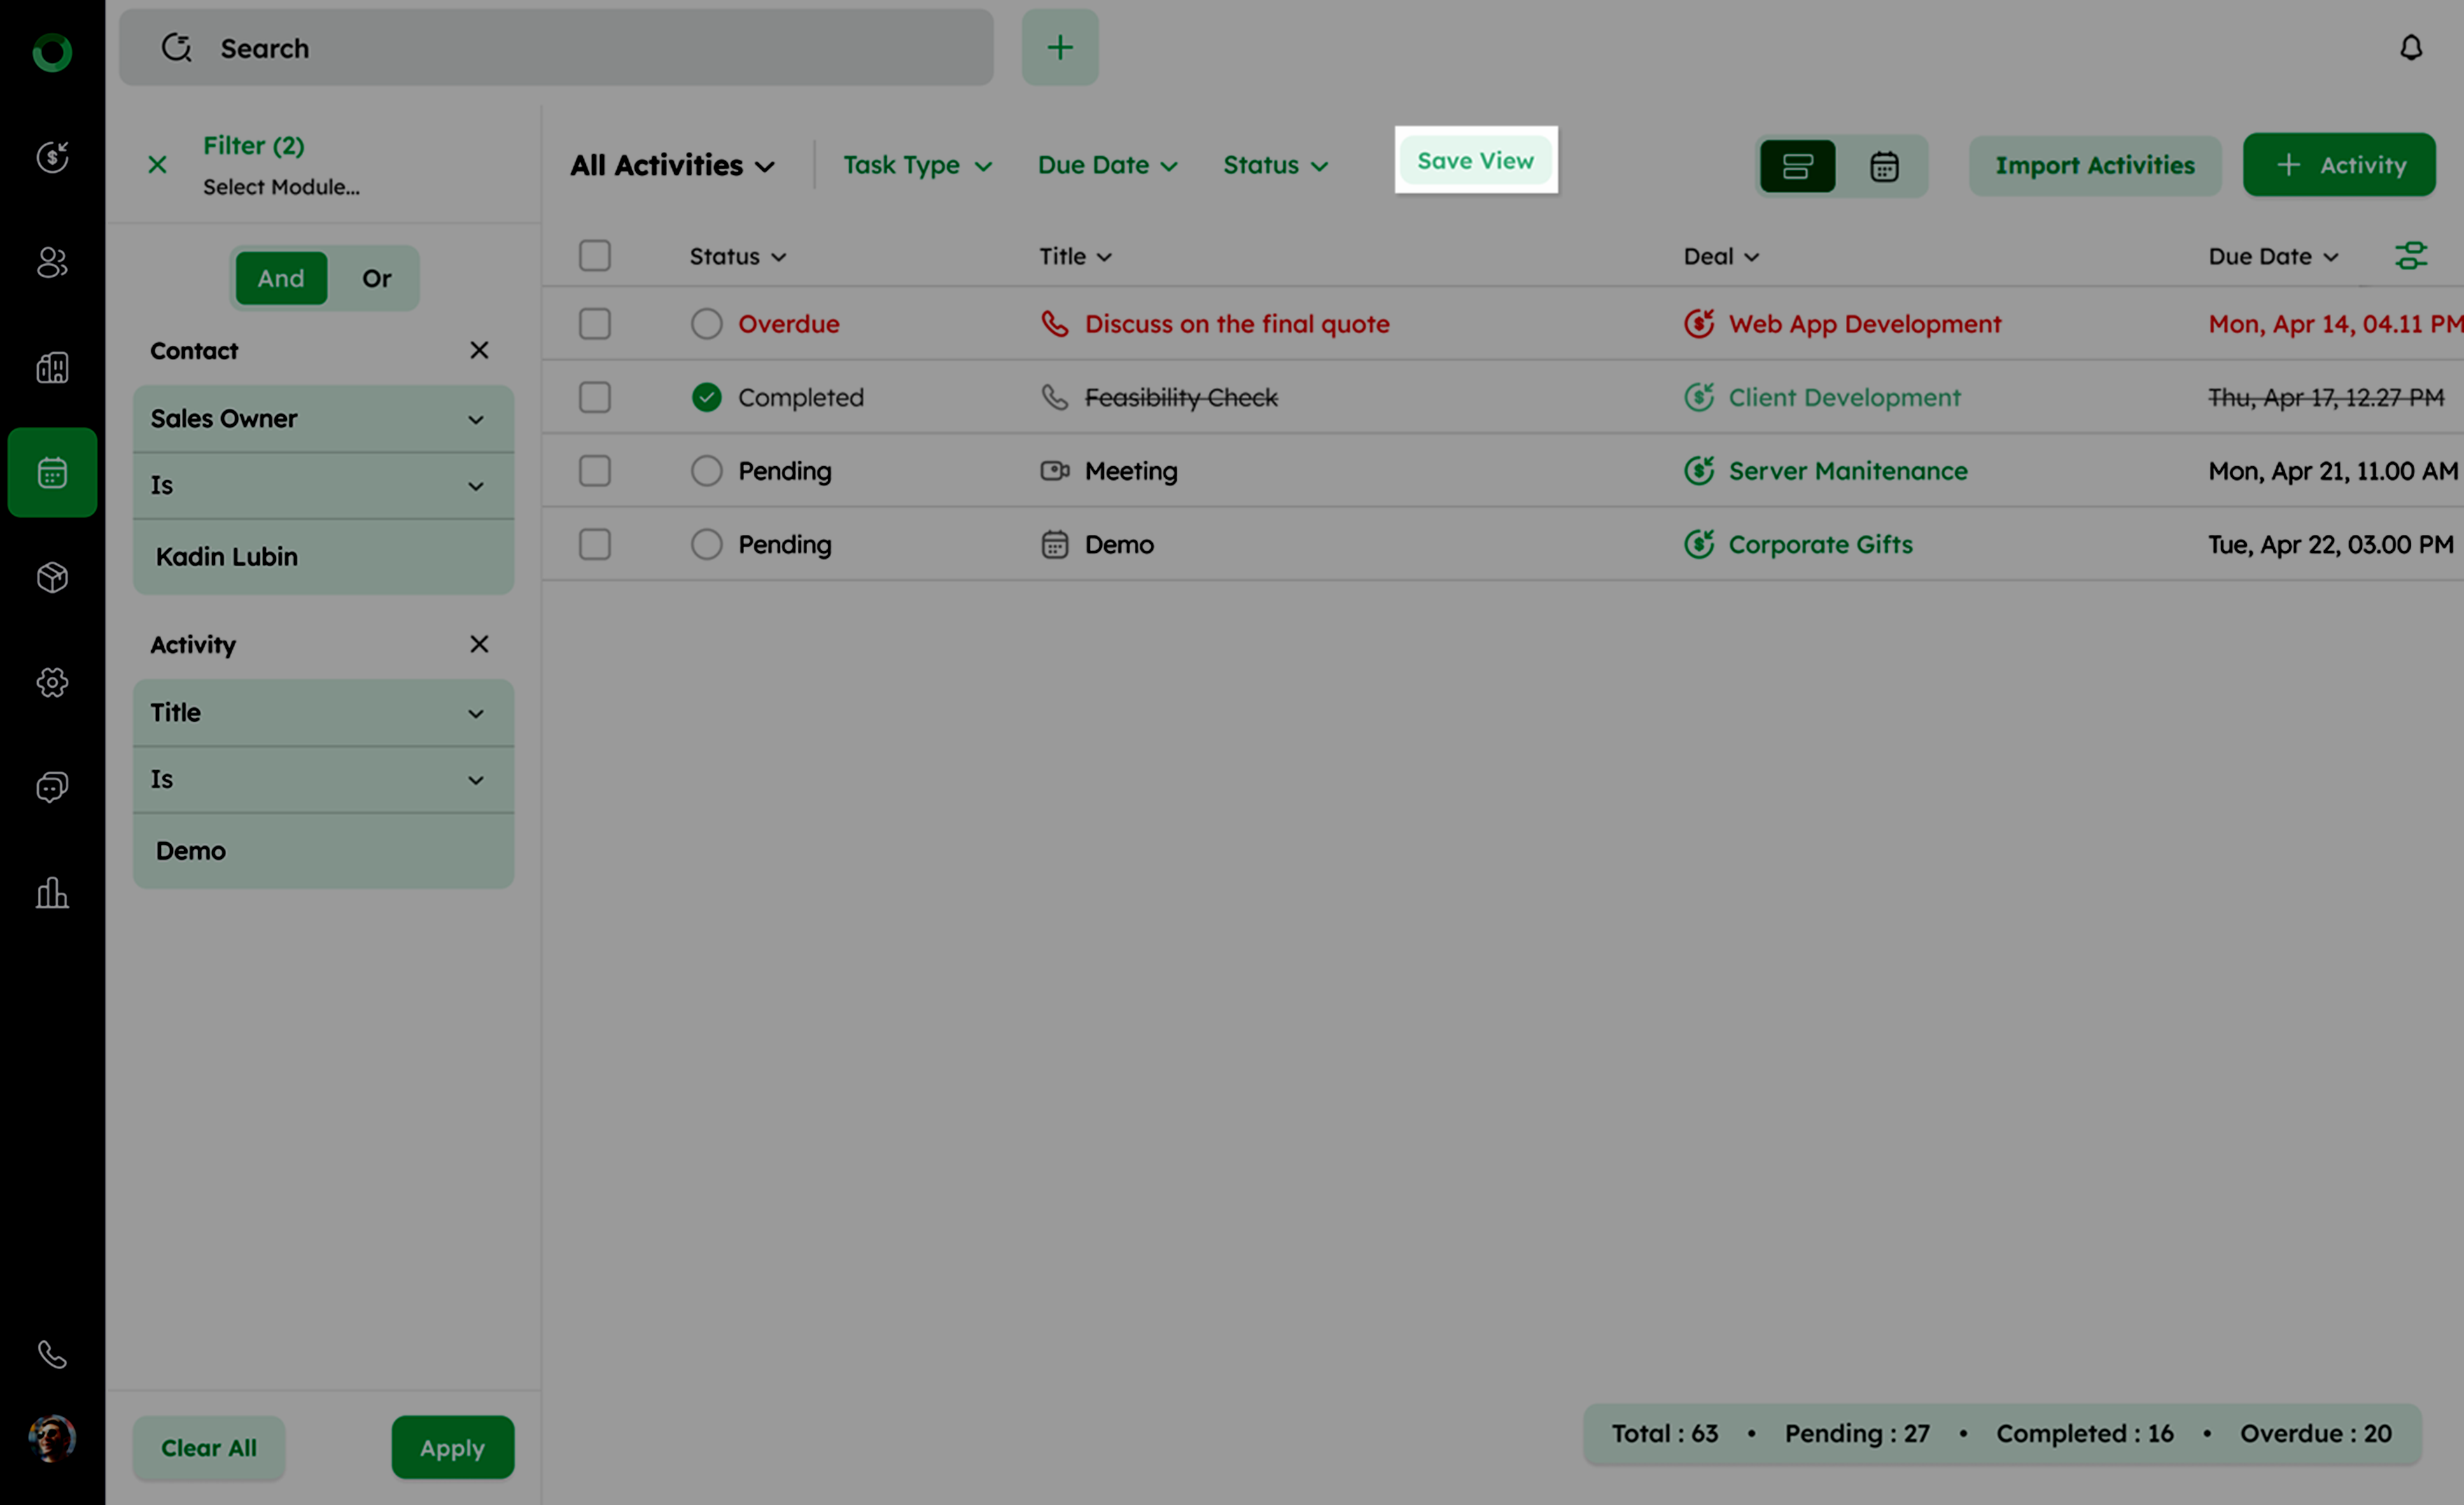
- Click the filter icon at the top-left corner to access the filter menu.
![]()
- Choose the option from the drop-down options like Contact, Company, Deal, Product, and Activity. Using these modules, you can establish conditions using AND and OR connectors.
- Define conditions using AND and OR connectors:
- AND:
The result is true only if all conditions are true.
-
If both Condition 1 and Condition 2 are true, the result is true.
-
If either or both are false, the result is false.

- OR:
The result is true if at least one condition is true.
-
If either Condition 1 or Condition 2 is true, the result is true.
-
If both are false, the result is false.
The Combinations of Conditions
Condition 1 AND Condition 2 OR Condition 3
The result is true if:
-
Both Condition 1 and Condition 2 are true.
-
If either Condition 1 or Condition 2 is false, it checks Condition 3. If Condition 3 is true, the result is true.
If none of the conditions are true, the result is false.
Condition 1 OR Condition 2 AND Condition 3 OR Condition 4
-
Evaluate records to see if they meet both Condition 1 and Condition 3. This subset of records satisfies the combination of these two conditions.
-
Independently, evaluate records to see if they meet Condition 2 or Condition 4.
-
Combine results using OR: The final result will be true if either the result of Condition 1 AND Condition 3 is true, or the result of Condition 2 OR Condition 4 is true, or both.
The filter will first ensure that the AND conditions are satisfied, and then it will check if any of the OR conditions are true to determine the final result.
- Click Select Field to display available fields.
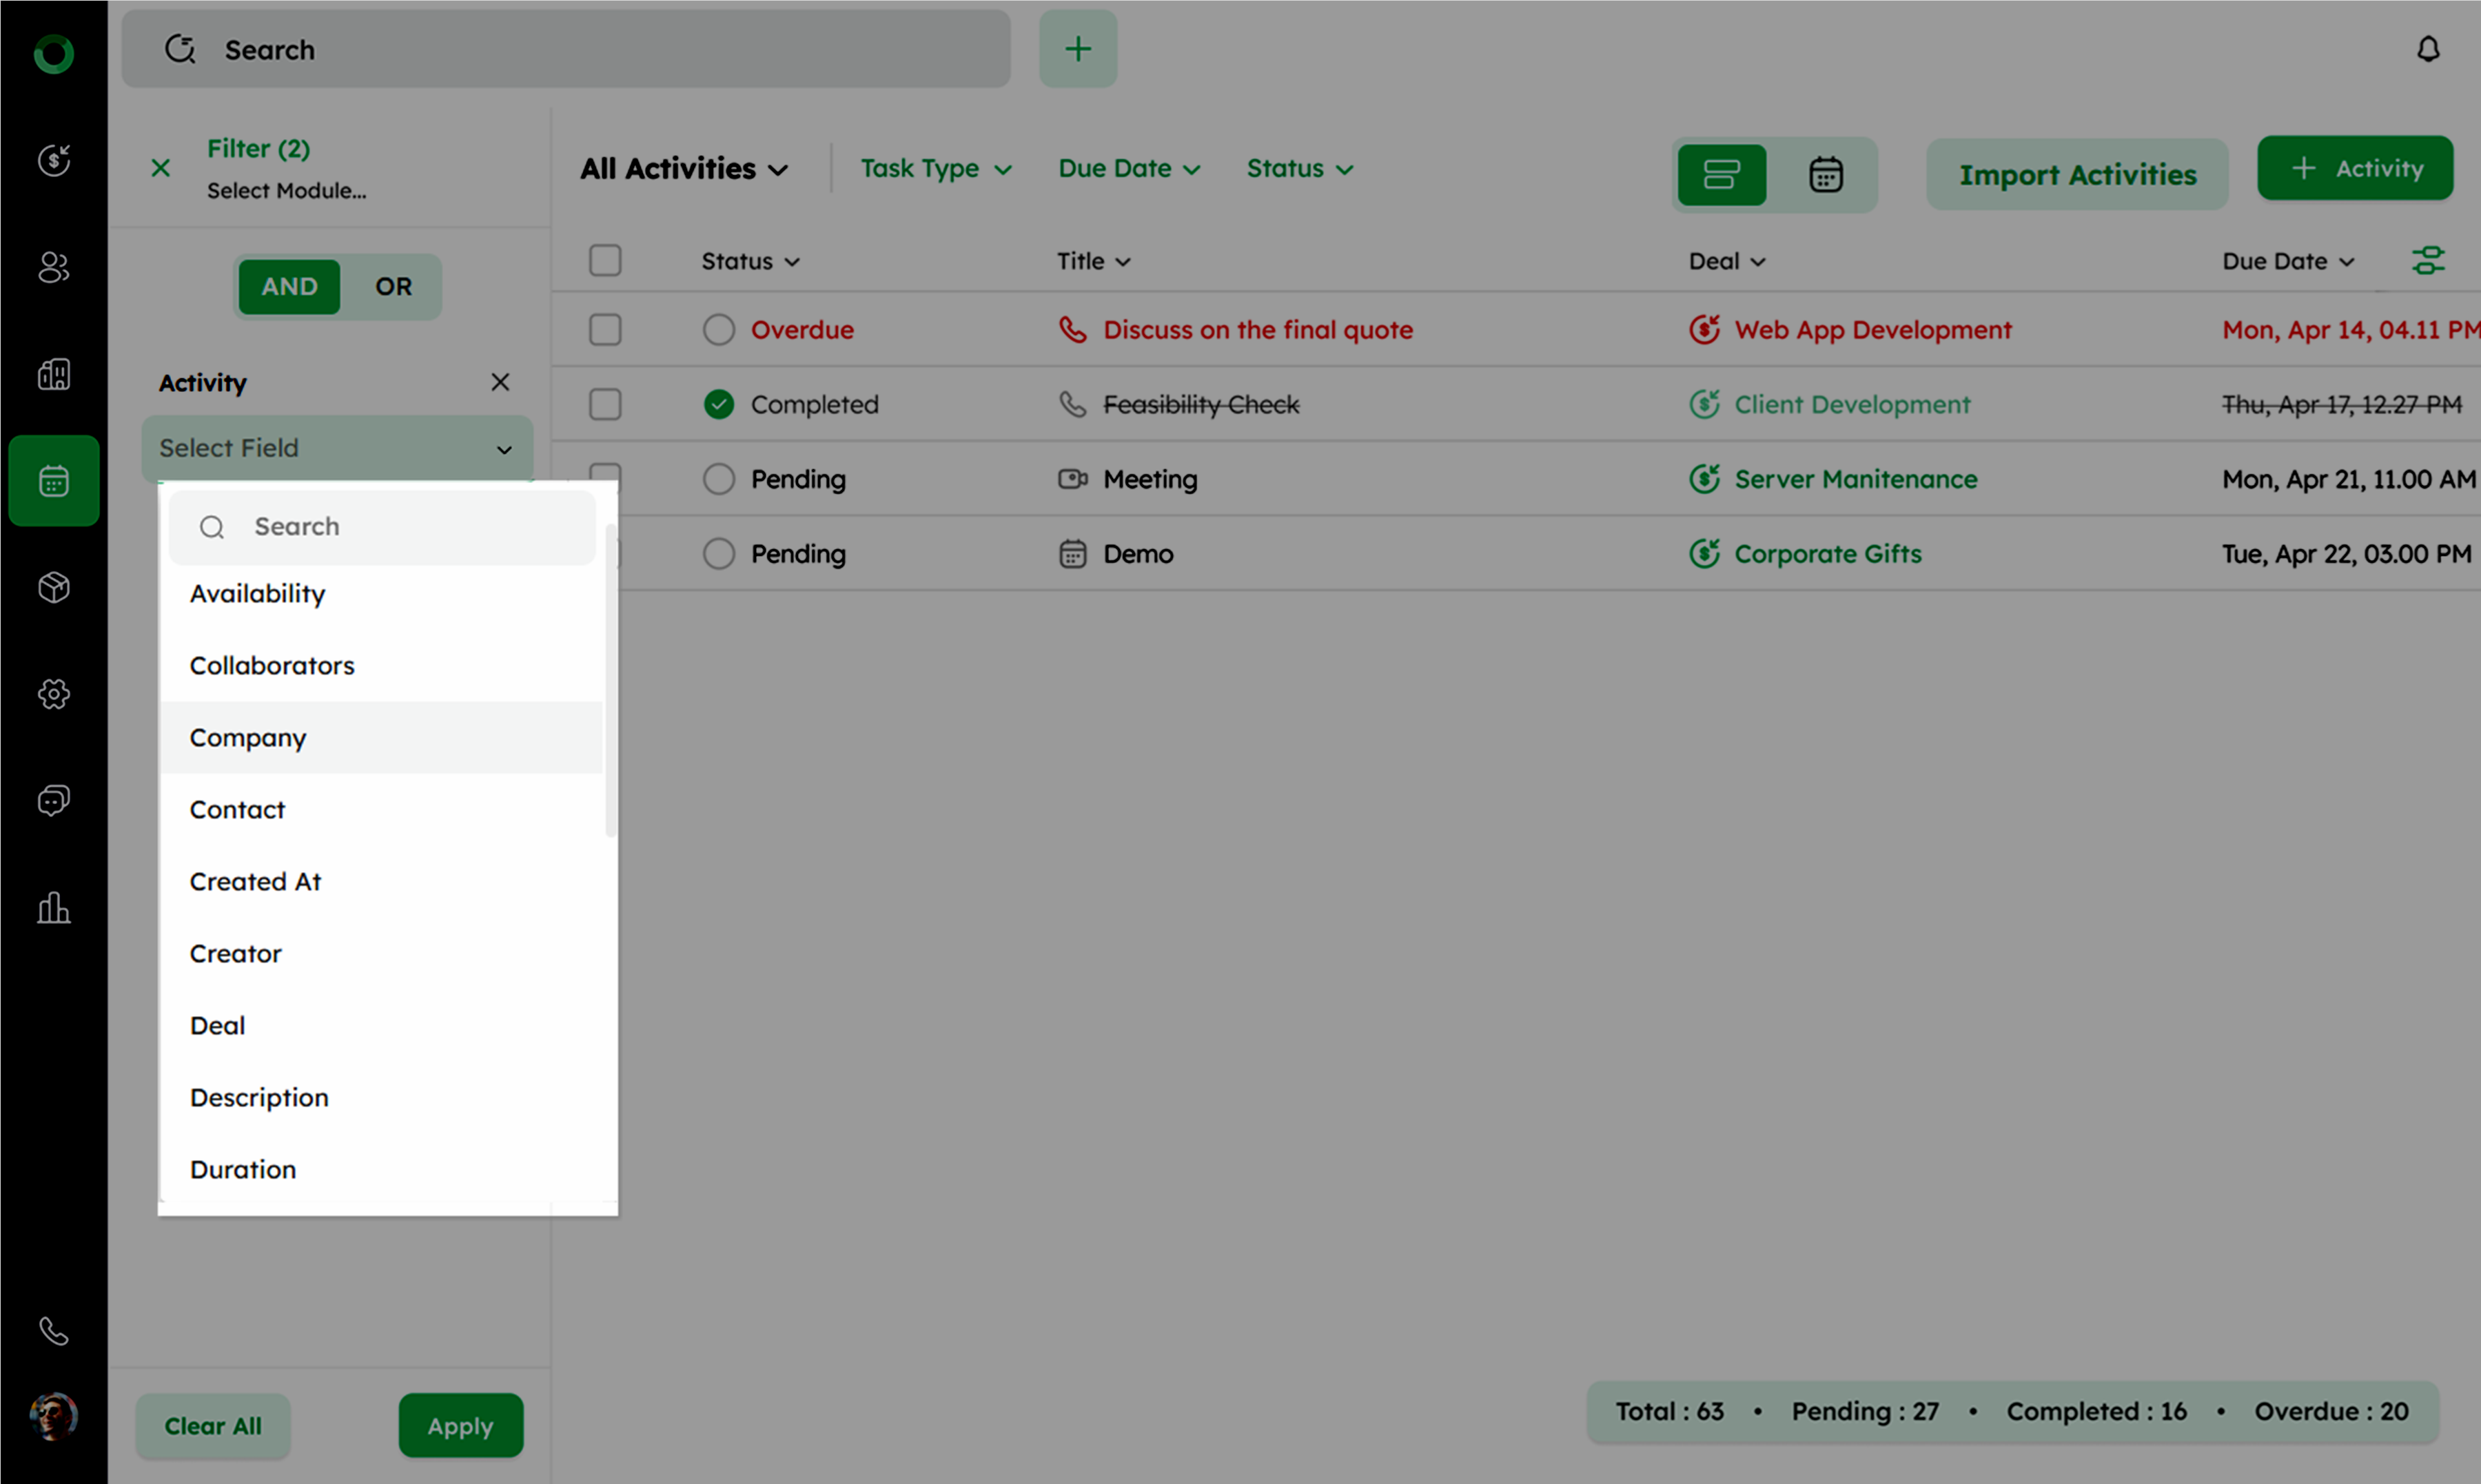
-
Select an operator such as is, is not, is empty, or is not empty, depending on the field type.
-
Provide values for the selected fields. If needed, add additional conditions.
The count increases next to the filter header whenever a source is selected.
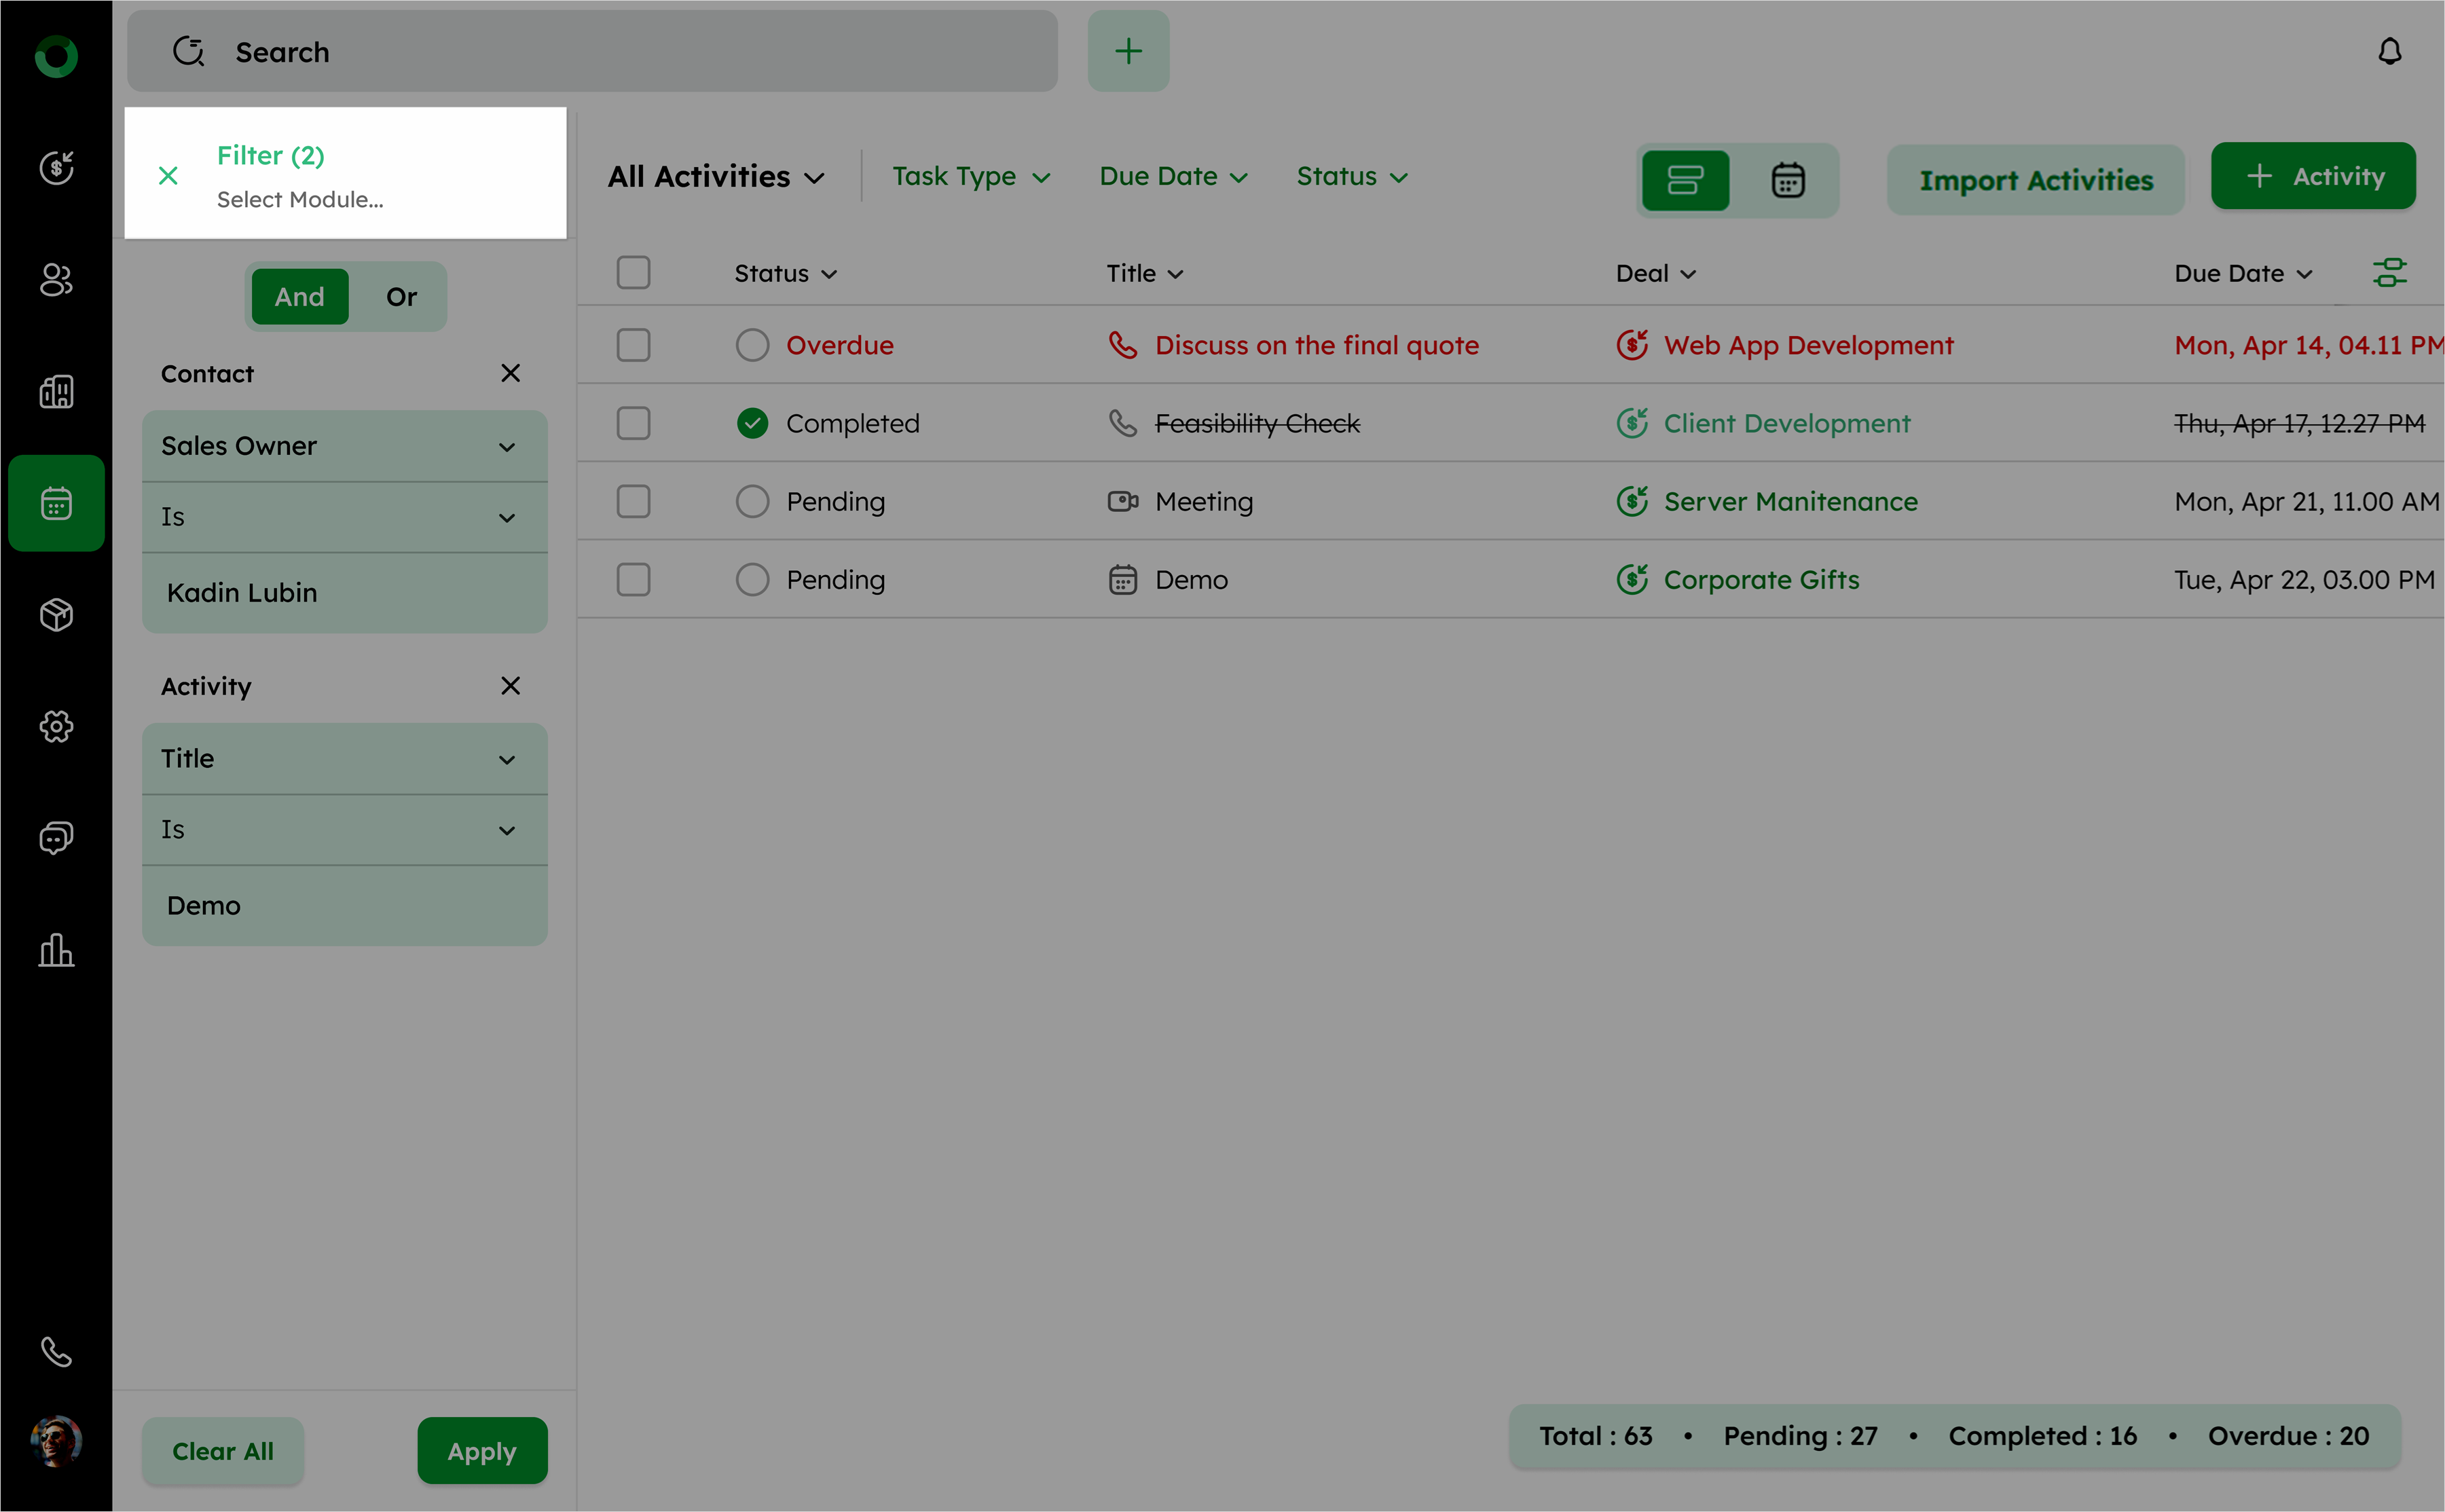
- Click Apply to filter the data based on selected criteria. To remove all filters, click Clear All.
Saving and Sharing Custom Filter Views
- After applying filters, click the Save View button at the top.
- In the dialog box:
- Enter a name for the view.
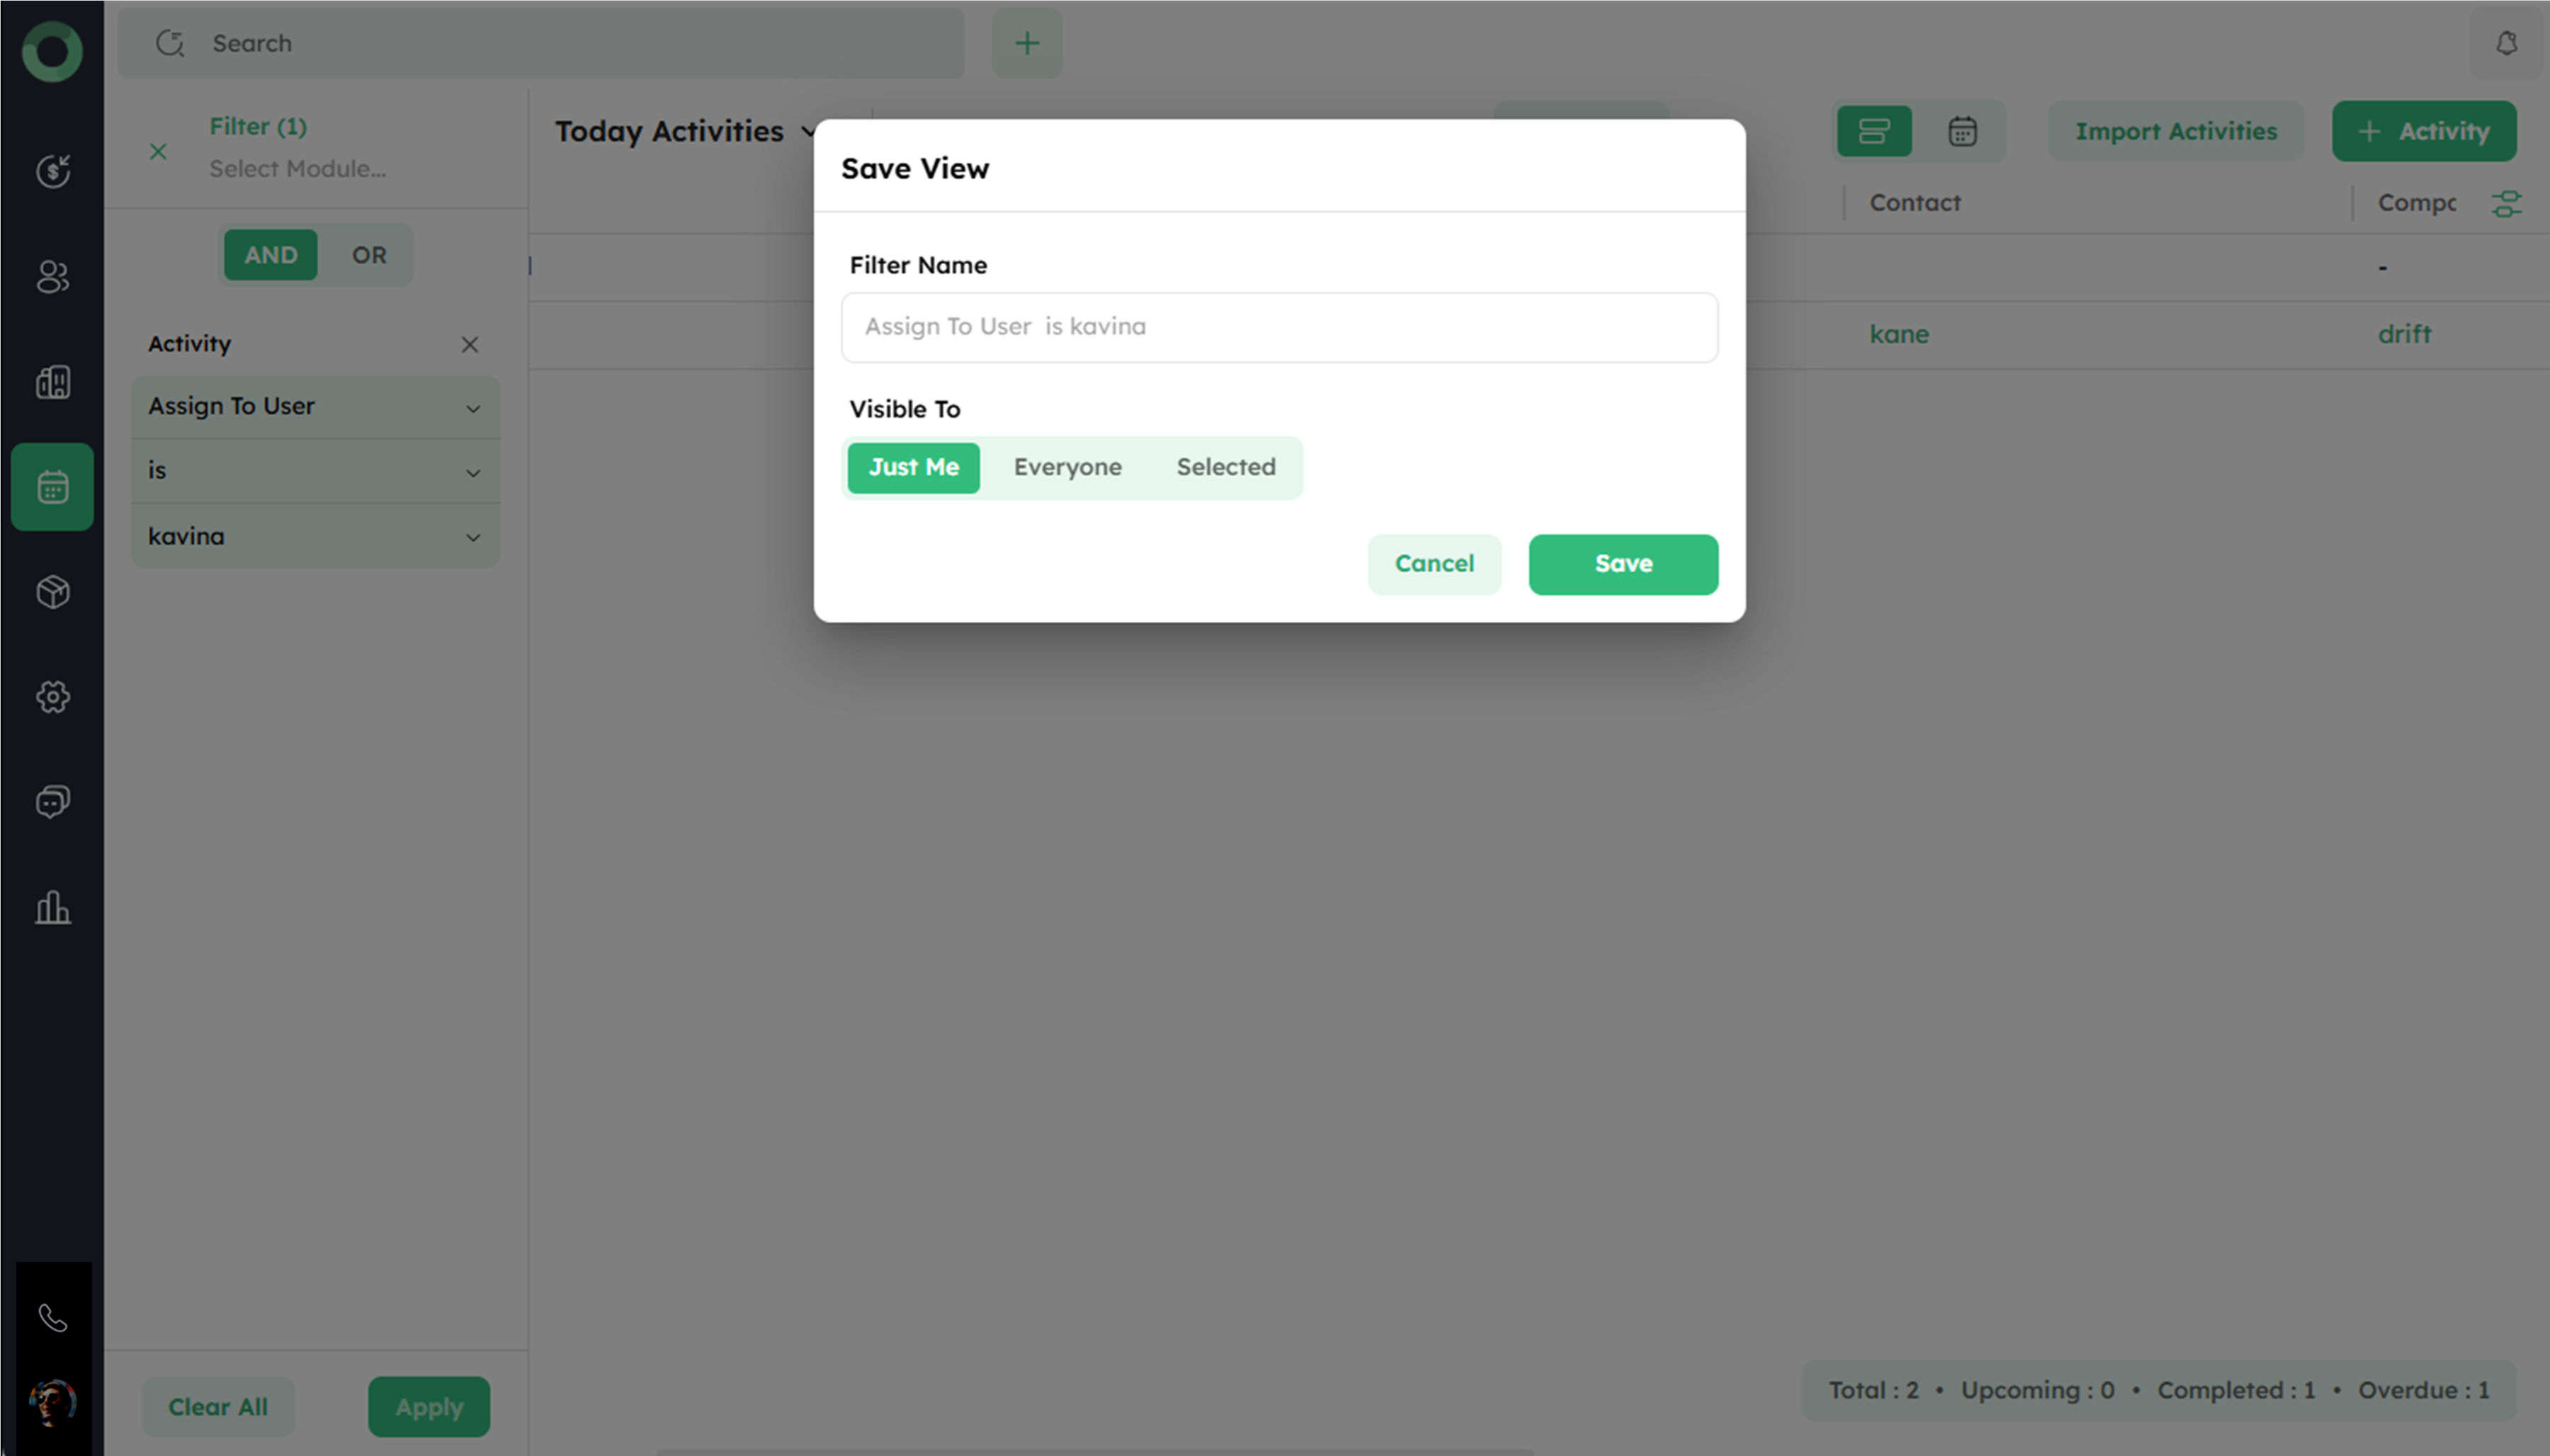
-
Set visibility: Select Just Me, Everyone, or Specific Users/Teams/Territories.
-
Set permissions: Choose between Can View or Can View and Edit.
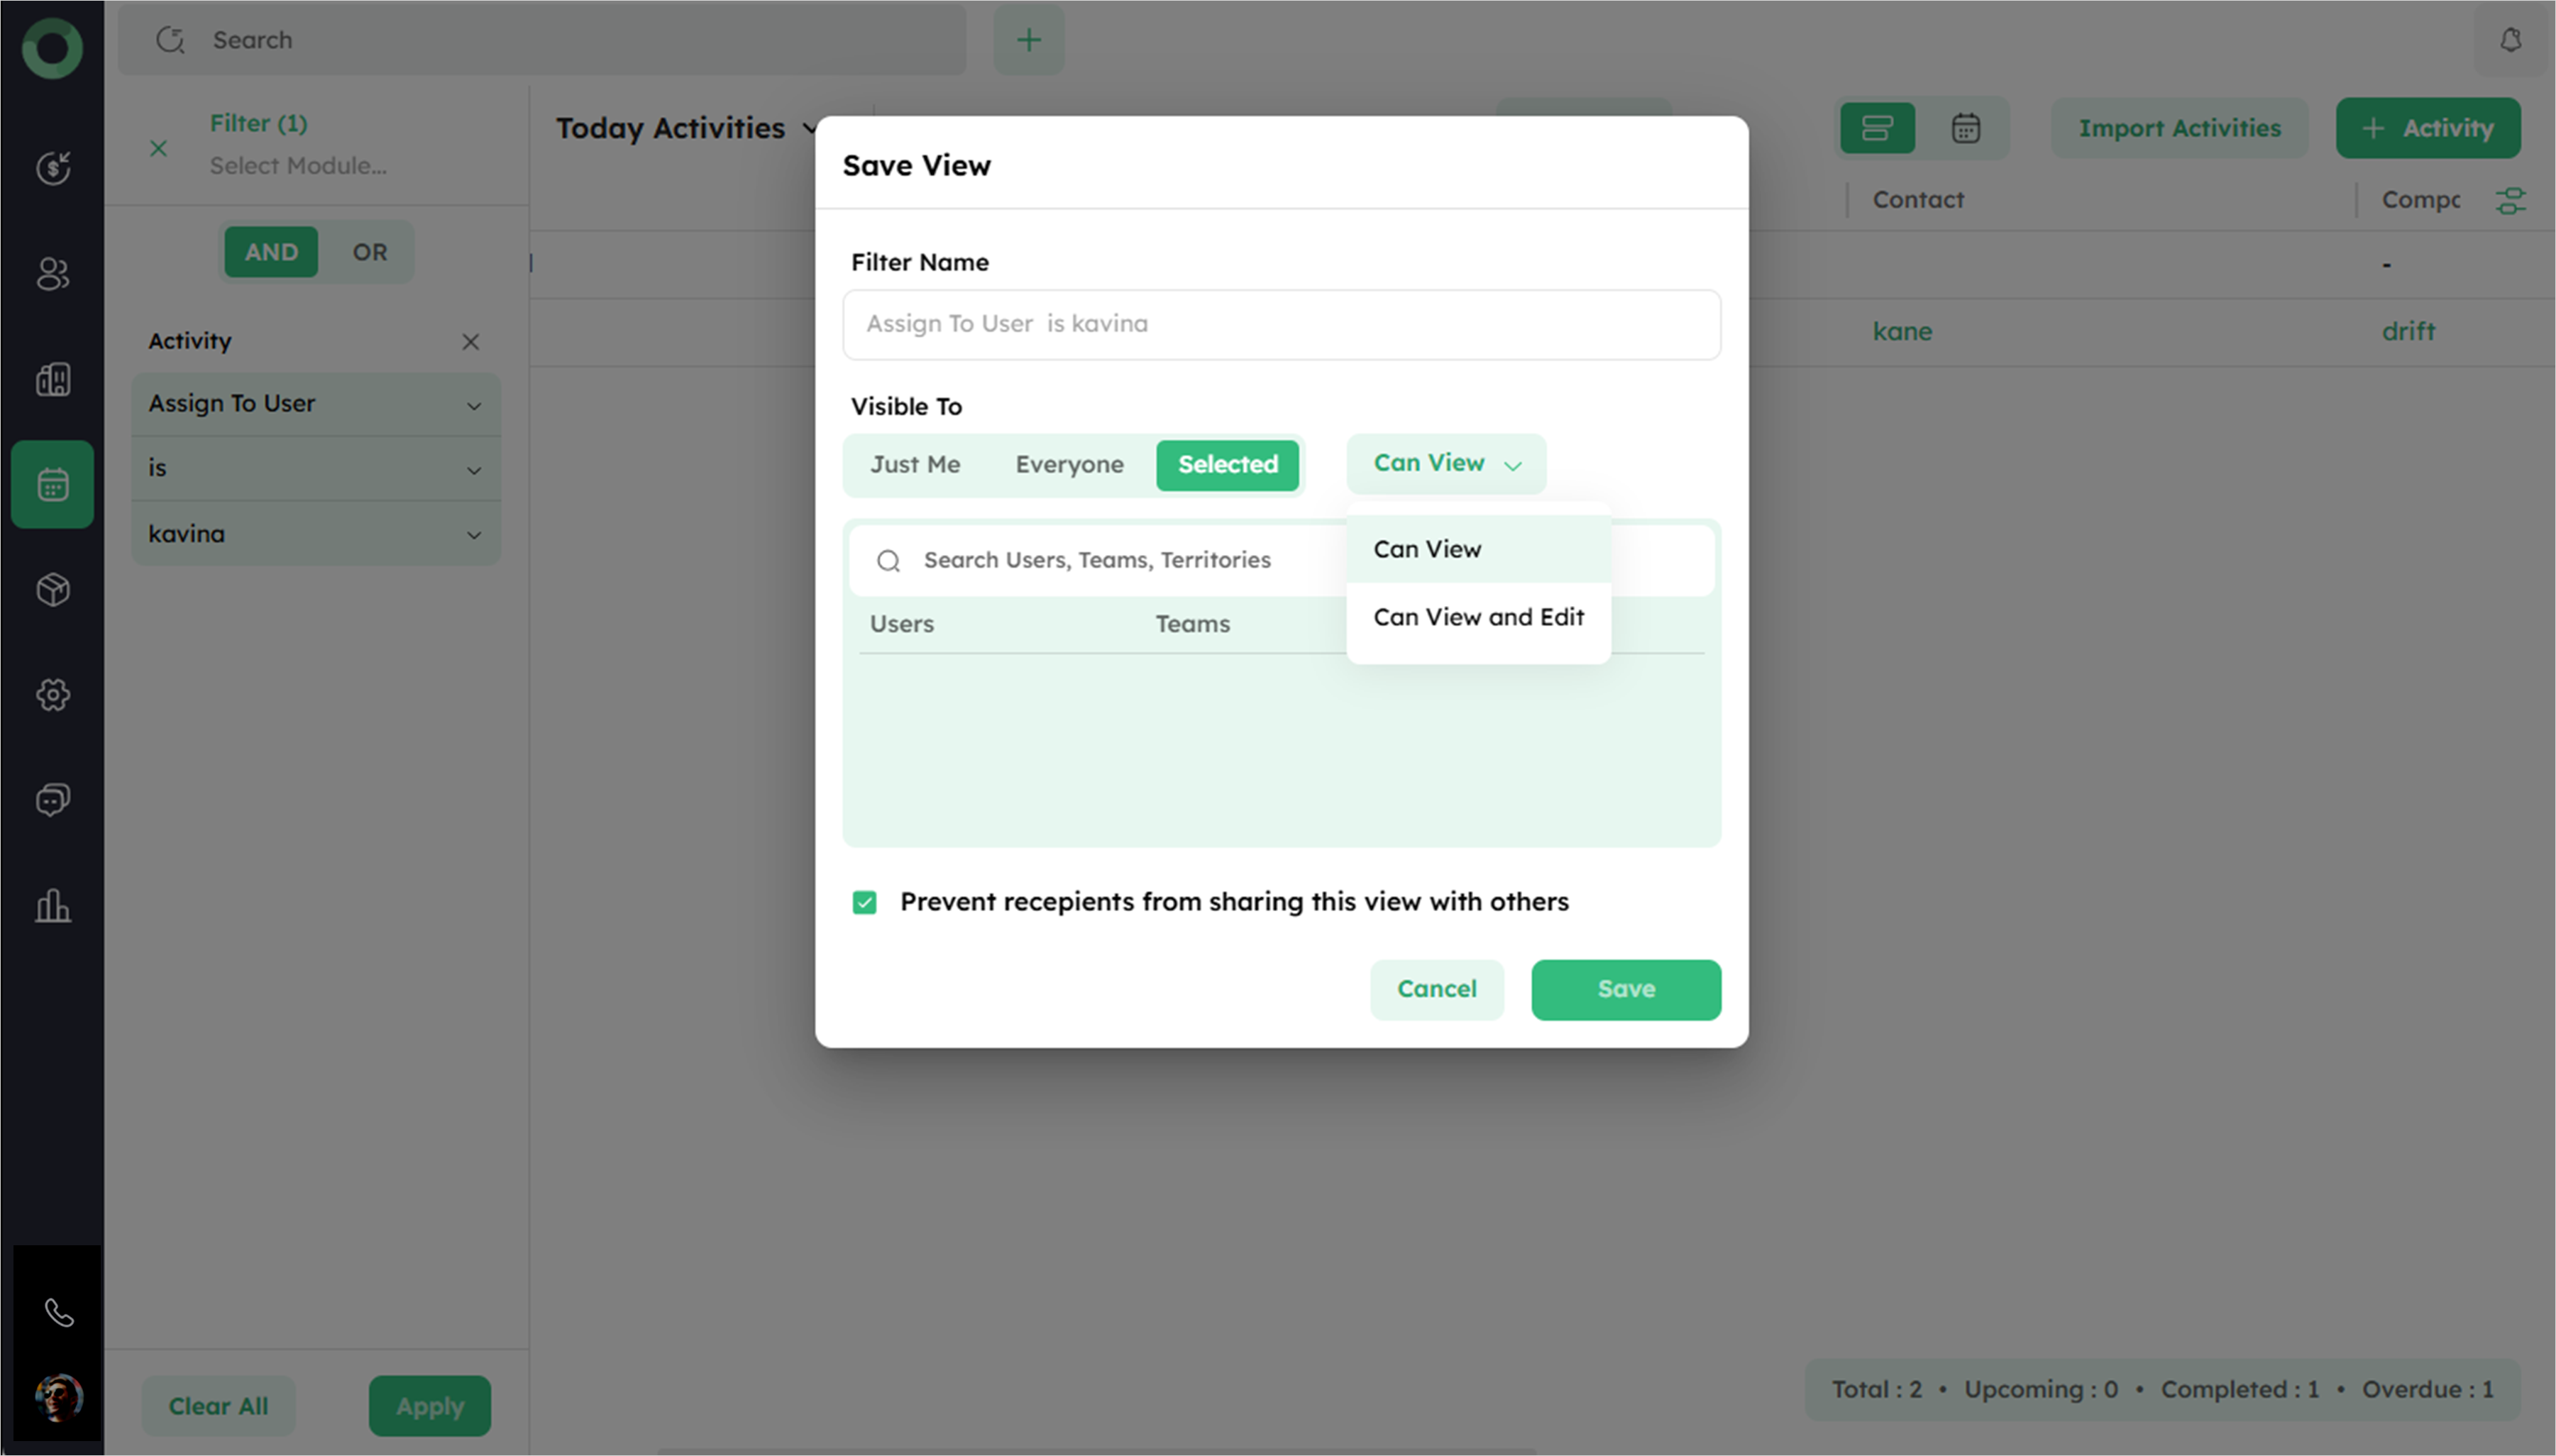
- Optionally, check Prevent recipients from sharing this view with others.
- Click Save to confirm.
Viewing the Default and Shared Filters
- Click All Activities at the top-left of the Activity List View to view the list of default filters, including Shared With Me and Created By Me filters.
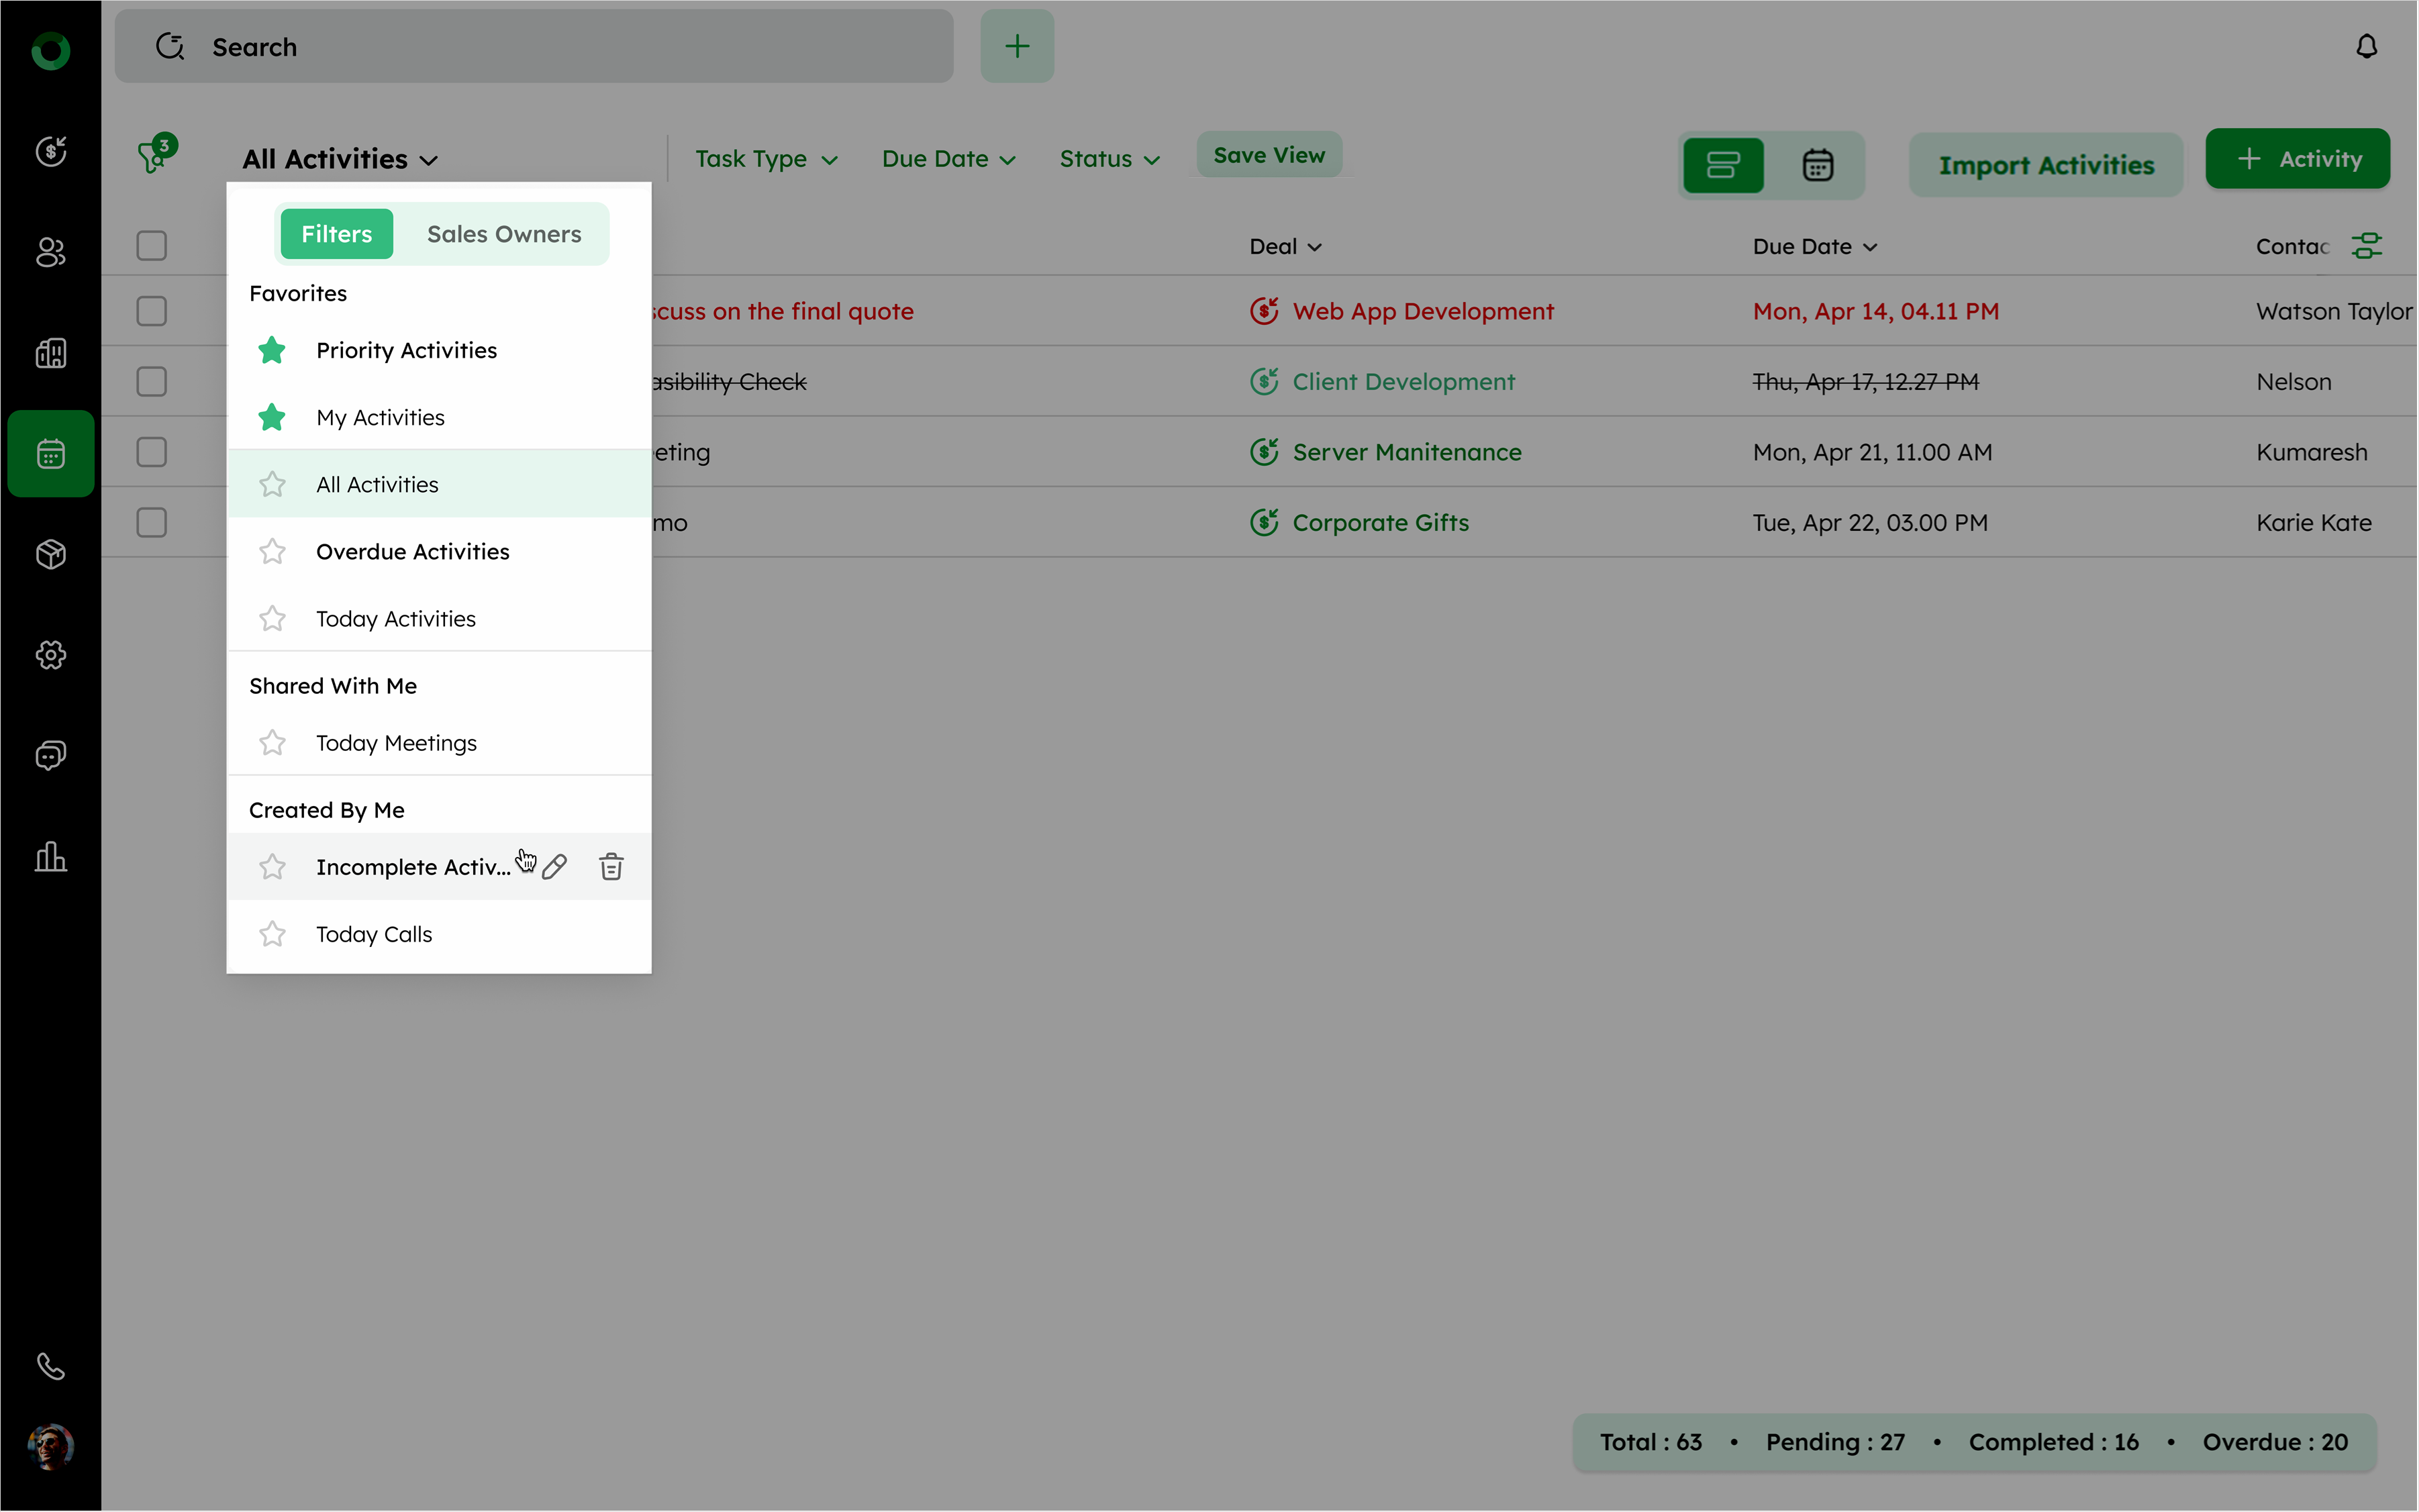
-
Shared With Me: This category contains filters shared with you by other users.
-
Created by Me: This category includes filters that you have created by yourself.
- Default Saved Filters:
| Filter | Definition |
|---|---|
| All Activities | Lists all activities |
| My Activities | List of activities assigned to you |
| Today Activities | List of activities that are scheduled for today. |
| Overdue Activities | Displays all activities that have not been completed by their due dates. |
| Priority Activities | Shows all activities marked with high priority status. |
- Manage Filters
- Click the star icon to add an activity as Favorites.
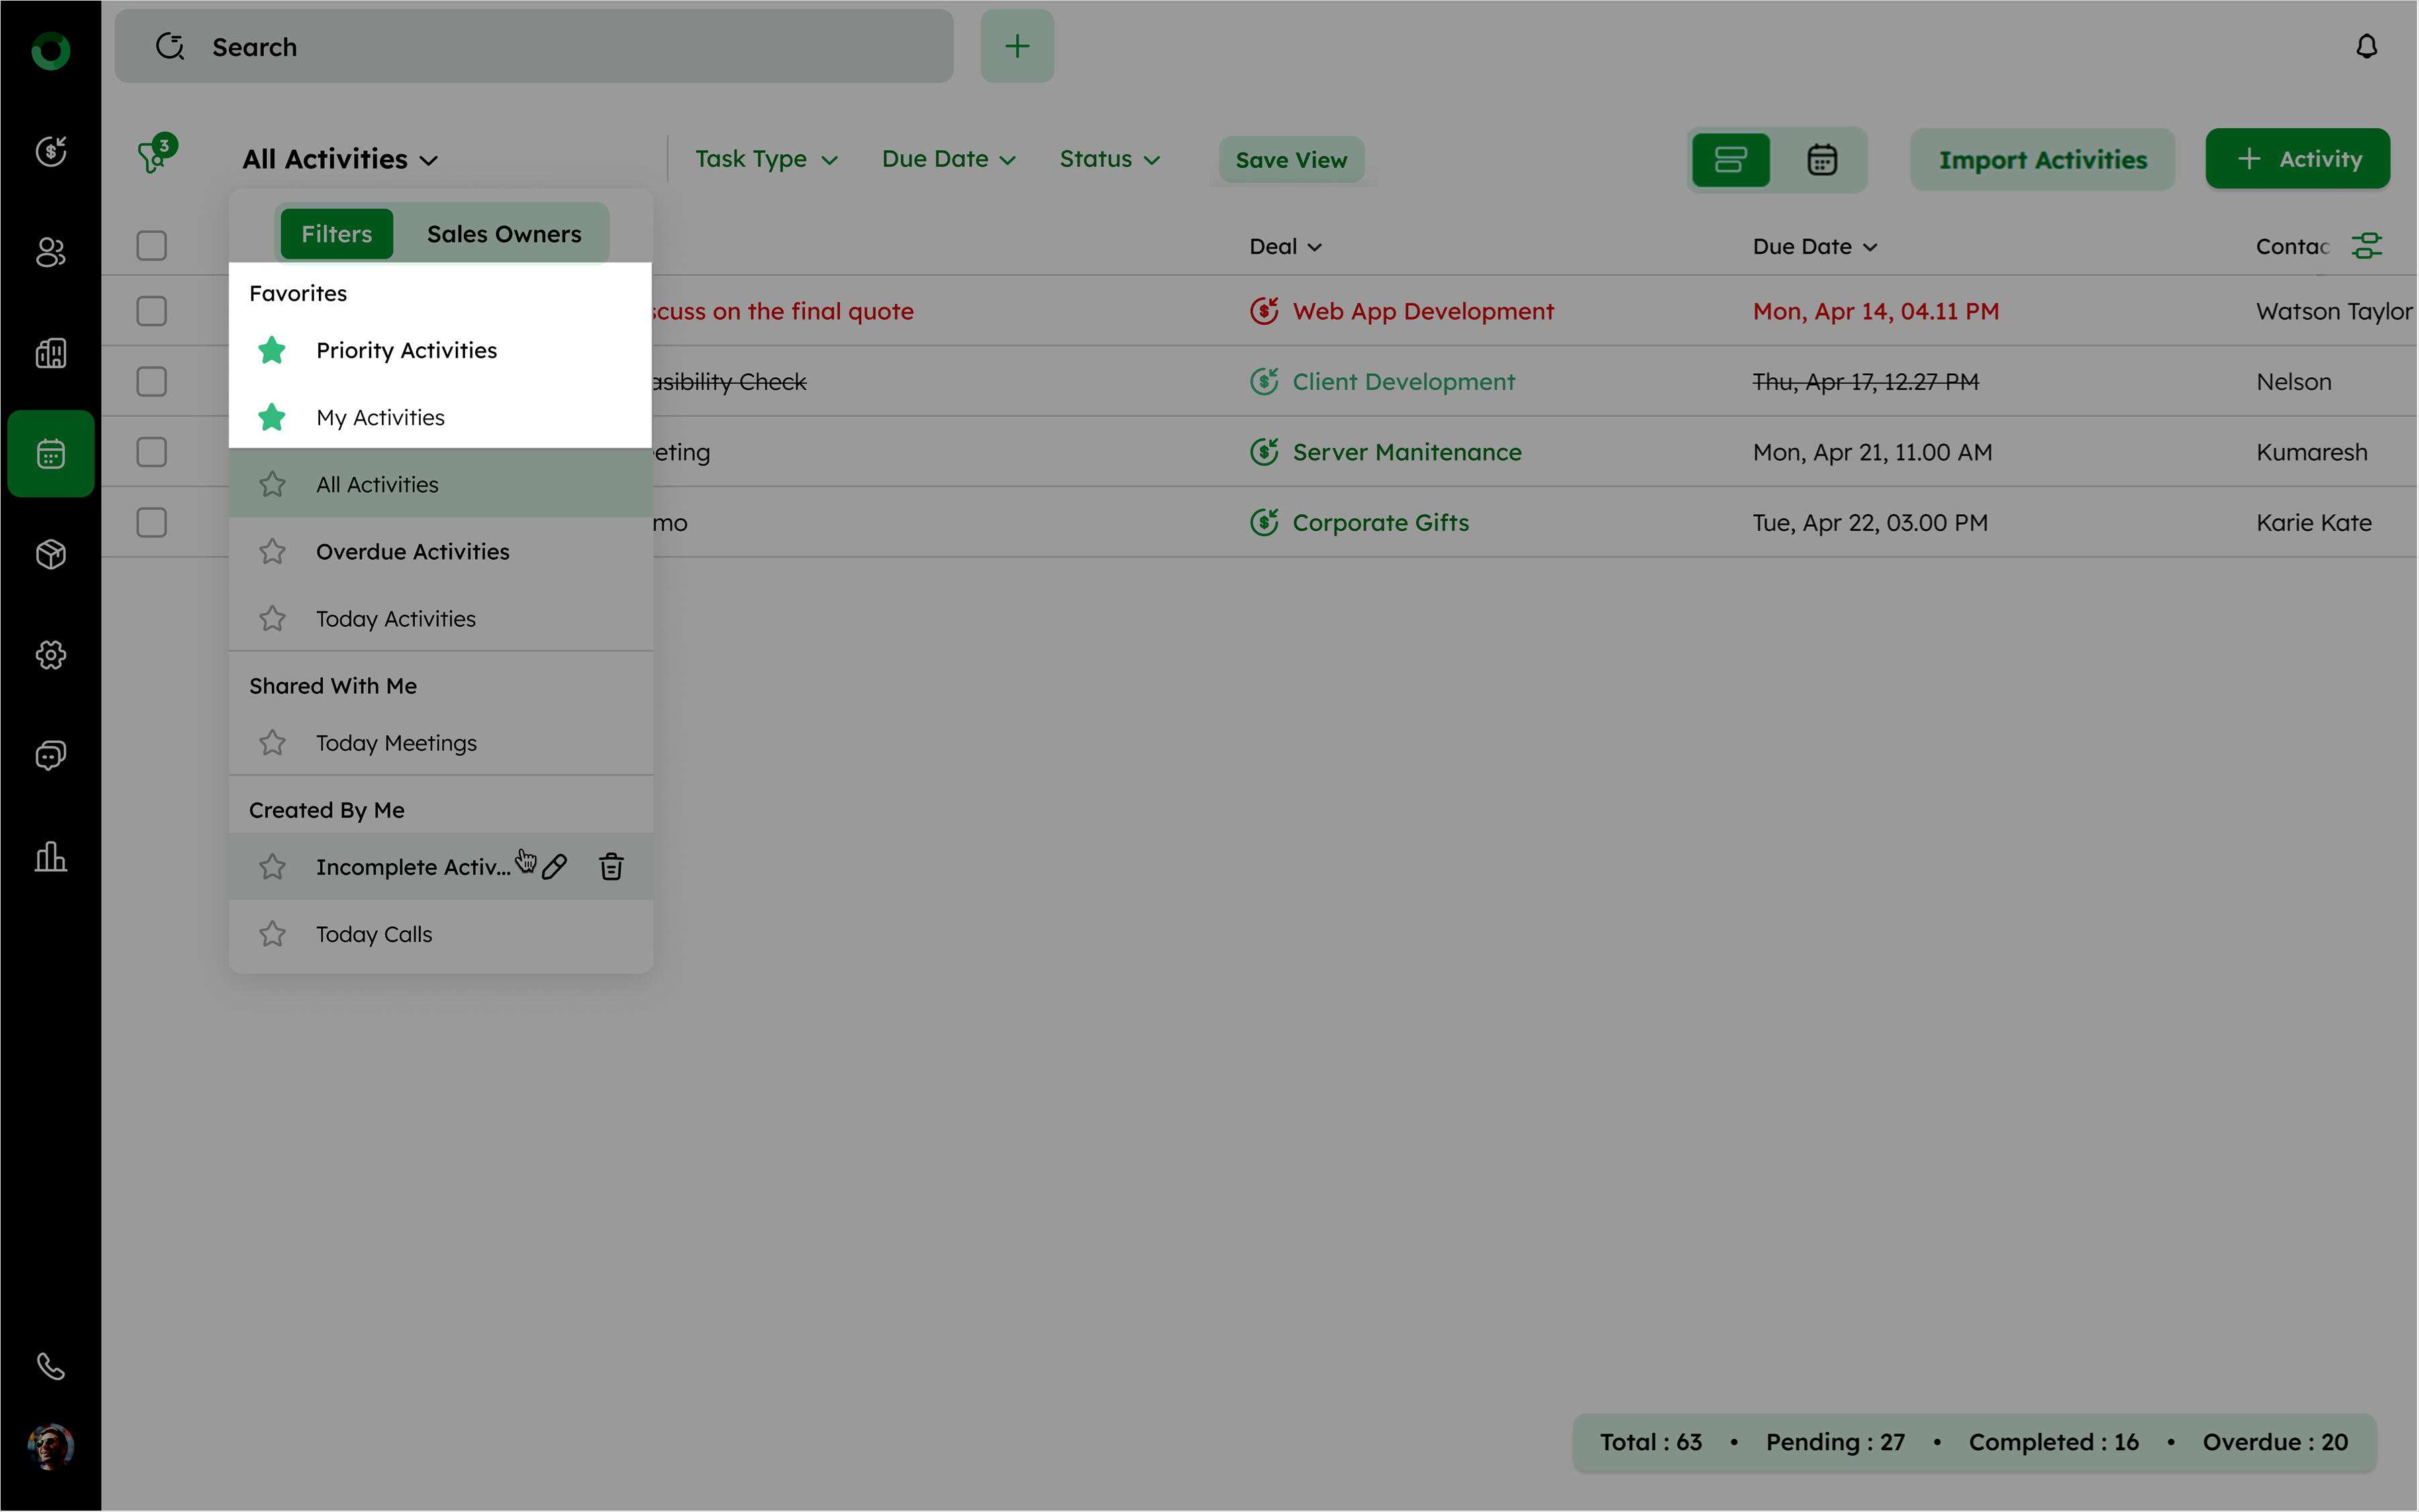
- Hover over filters to see edit and delete icons.
To edit a shared filter, you must have edit access. Without it, the edit icon will not be visible.
- Sales Owners Tab
- Click on the Sales Owners tab to view activities assigned to specific sales owners.
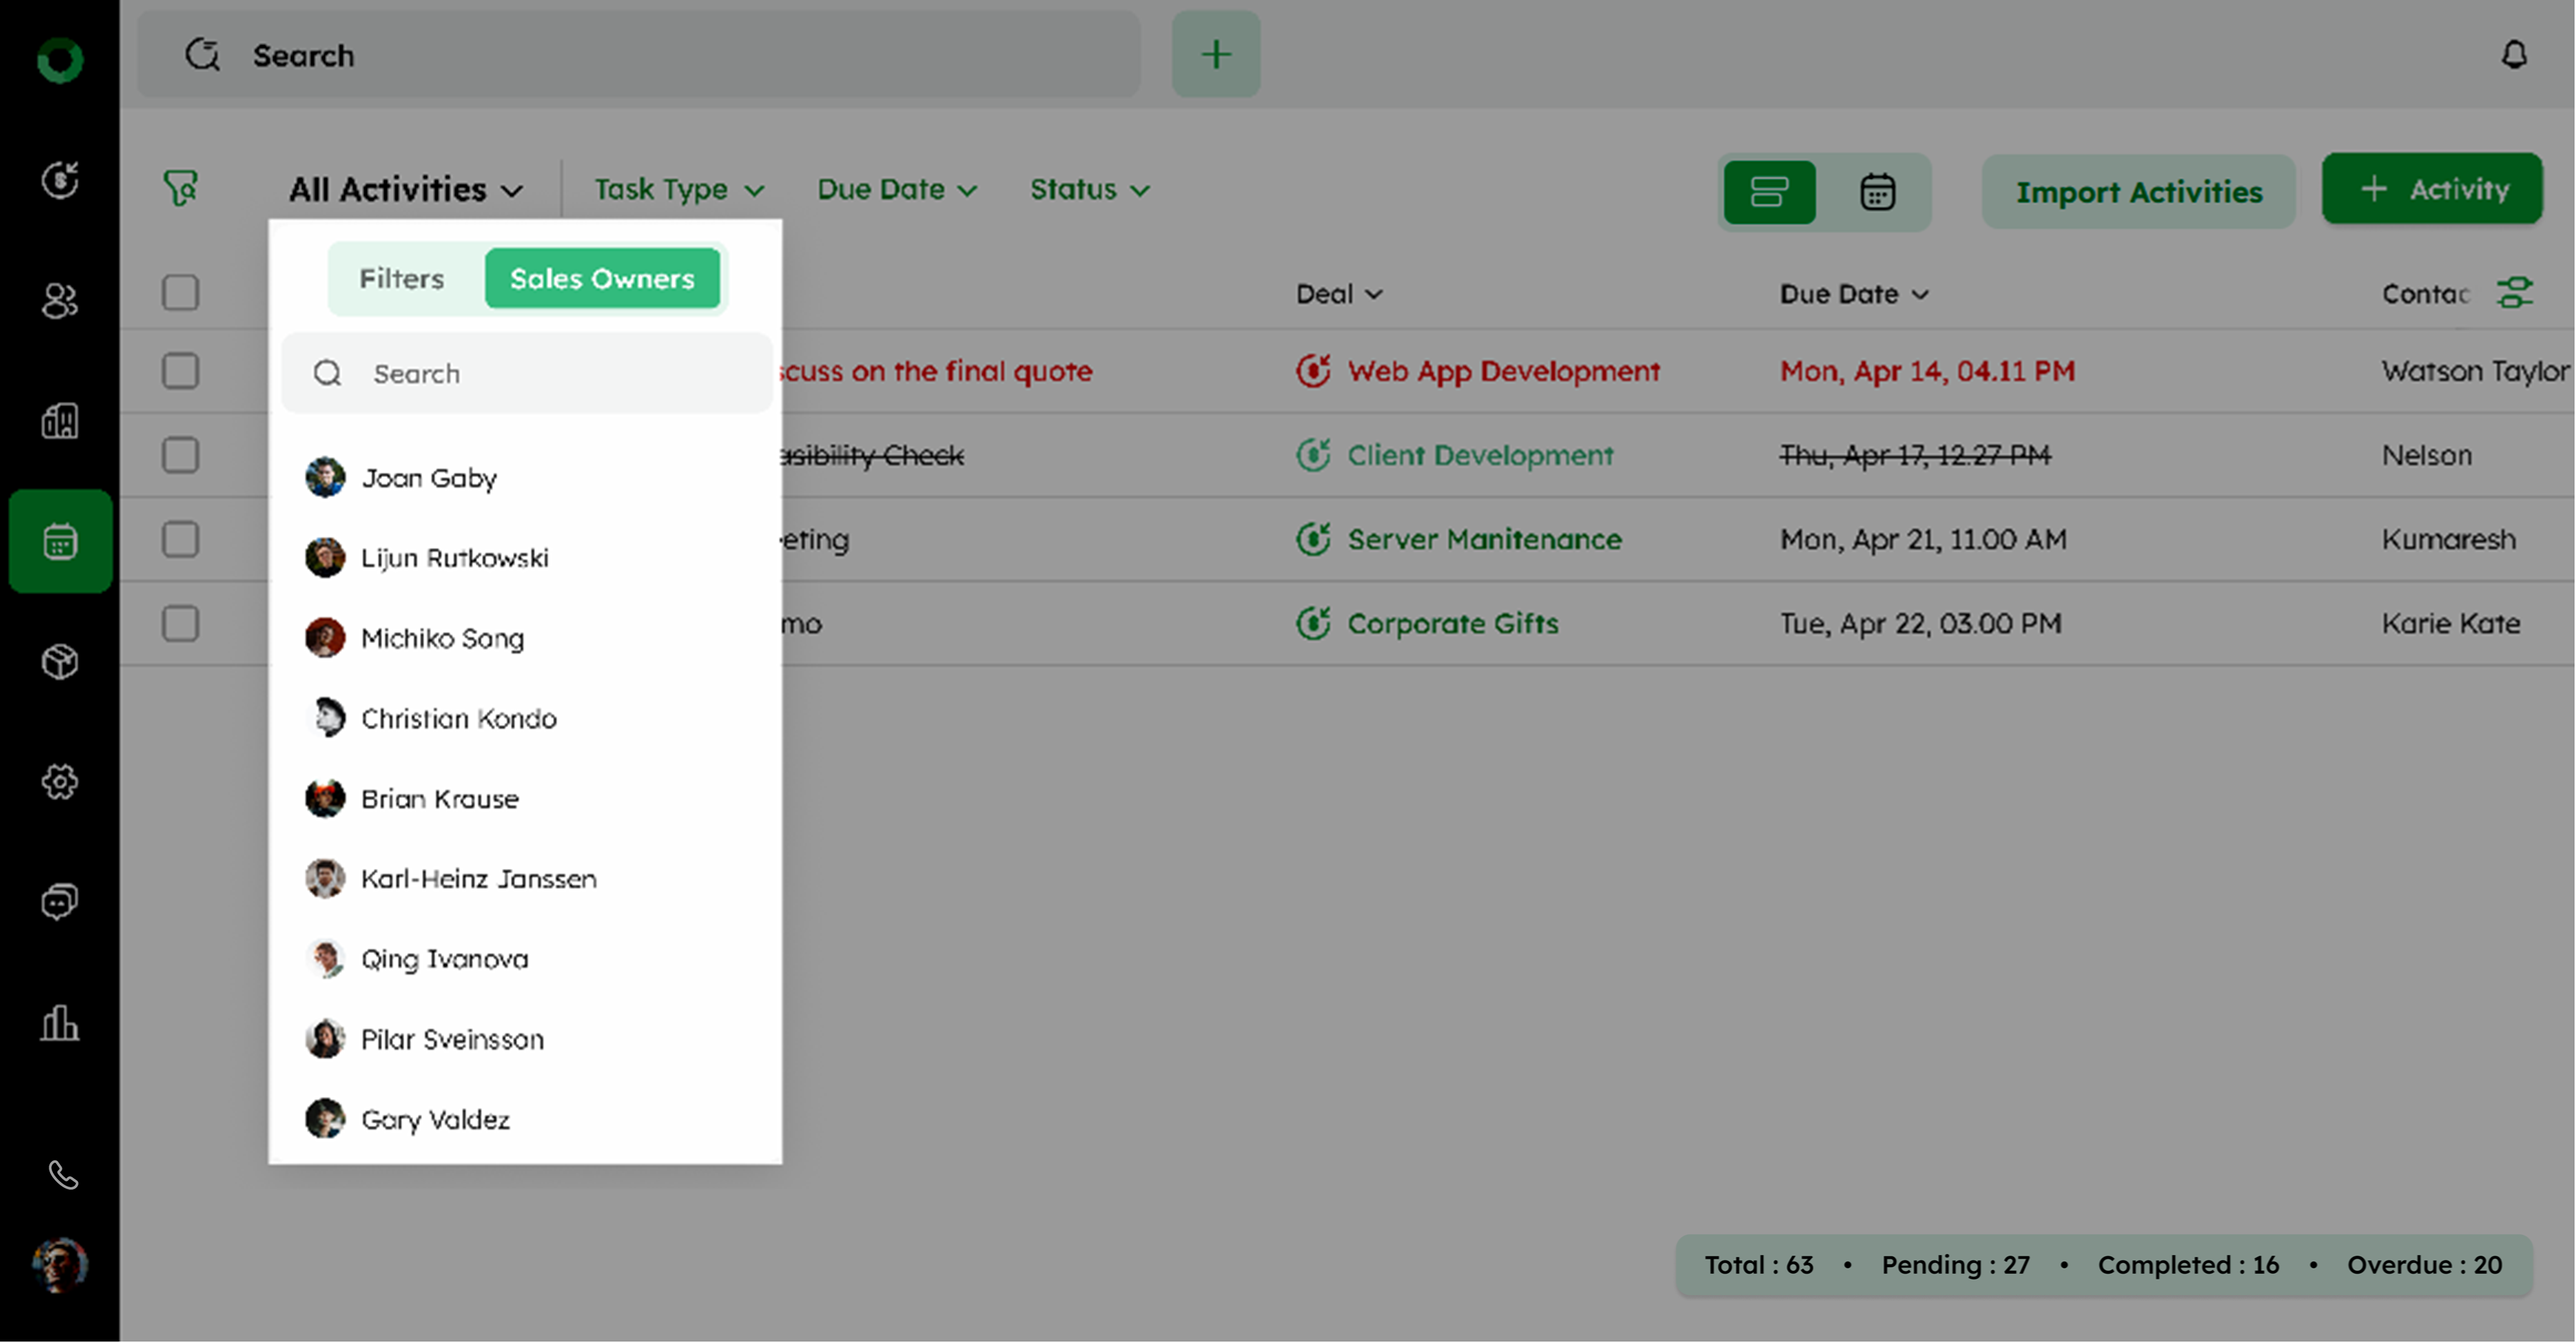
-
Choose the sales owner from the list to view the activities associated with them.
-
Use the search bar to quickly find an activity associated with a particular sales owner.
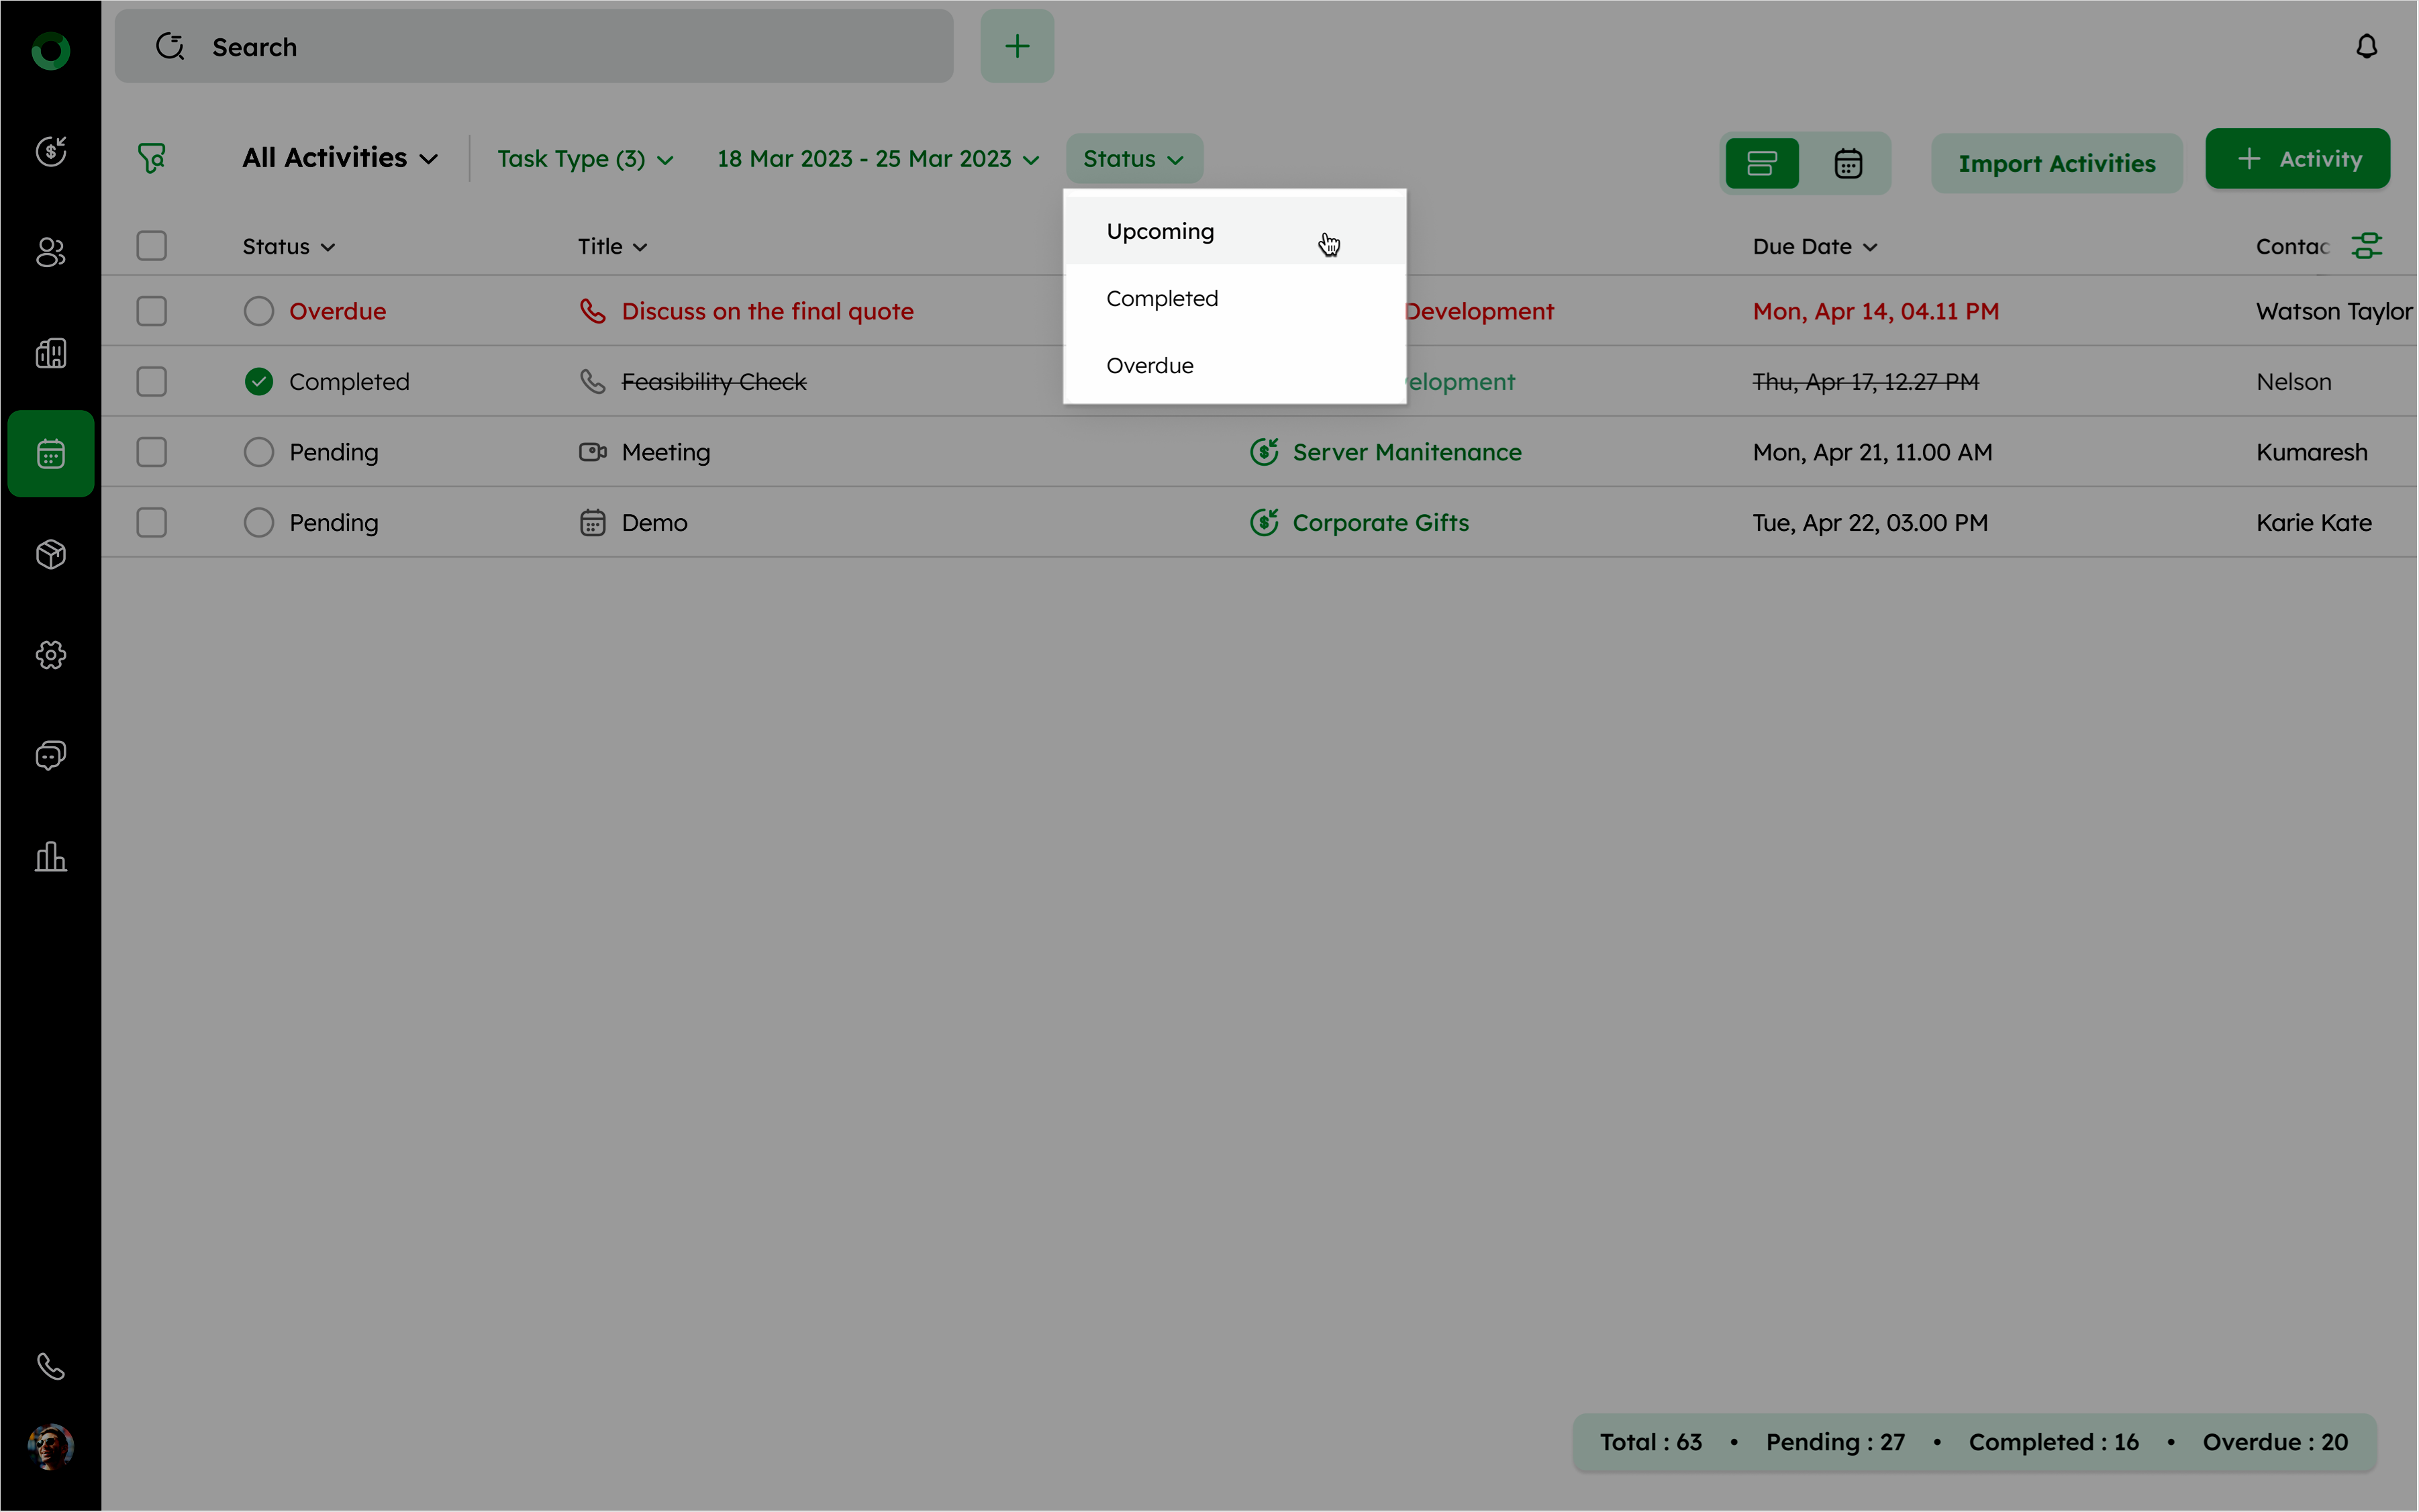
Drop-Down Filters: Sorting by Task Type, Due Date, and Status
Drop-down filters let you sort activities by criteria like type, due date, or overdue status. They're available in both list and calendar views for easier tracking and prioritization.
-
Access the Activity List View in the activity management interface.
-
Locate the drop-down filters at the top of the screen. Featured with filters like Task Type, Due Date, and Status.
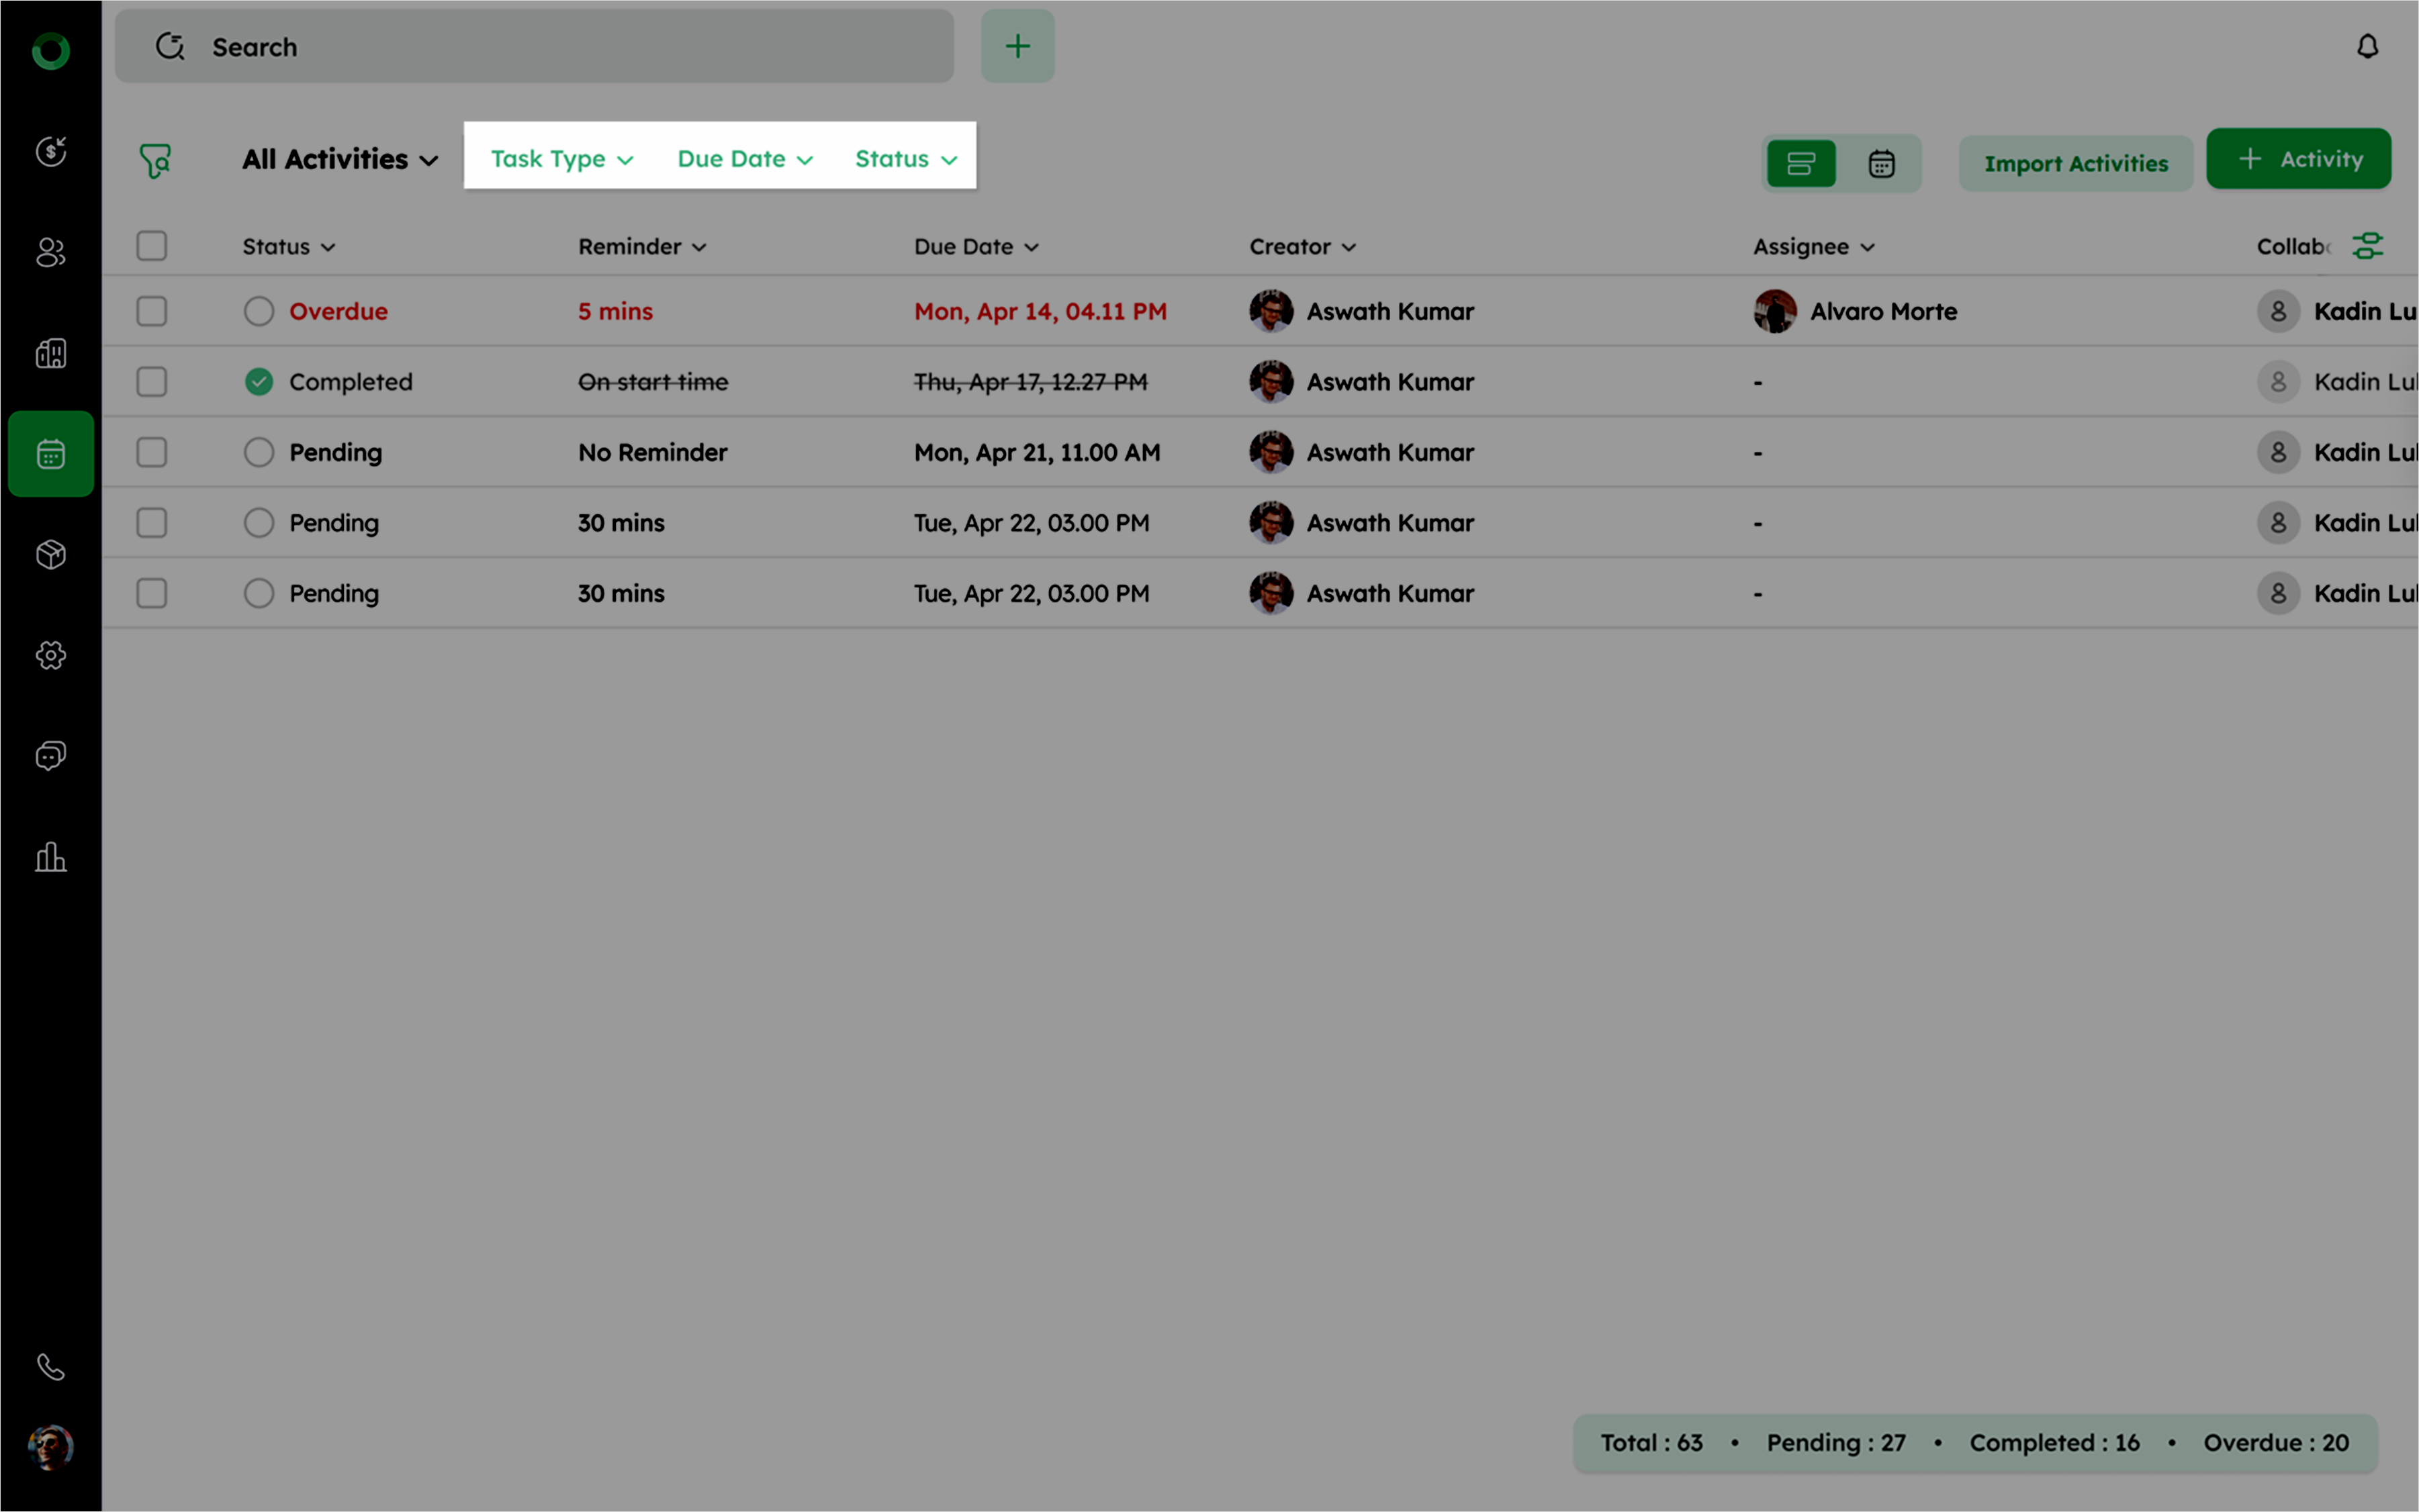
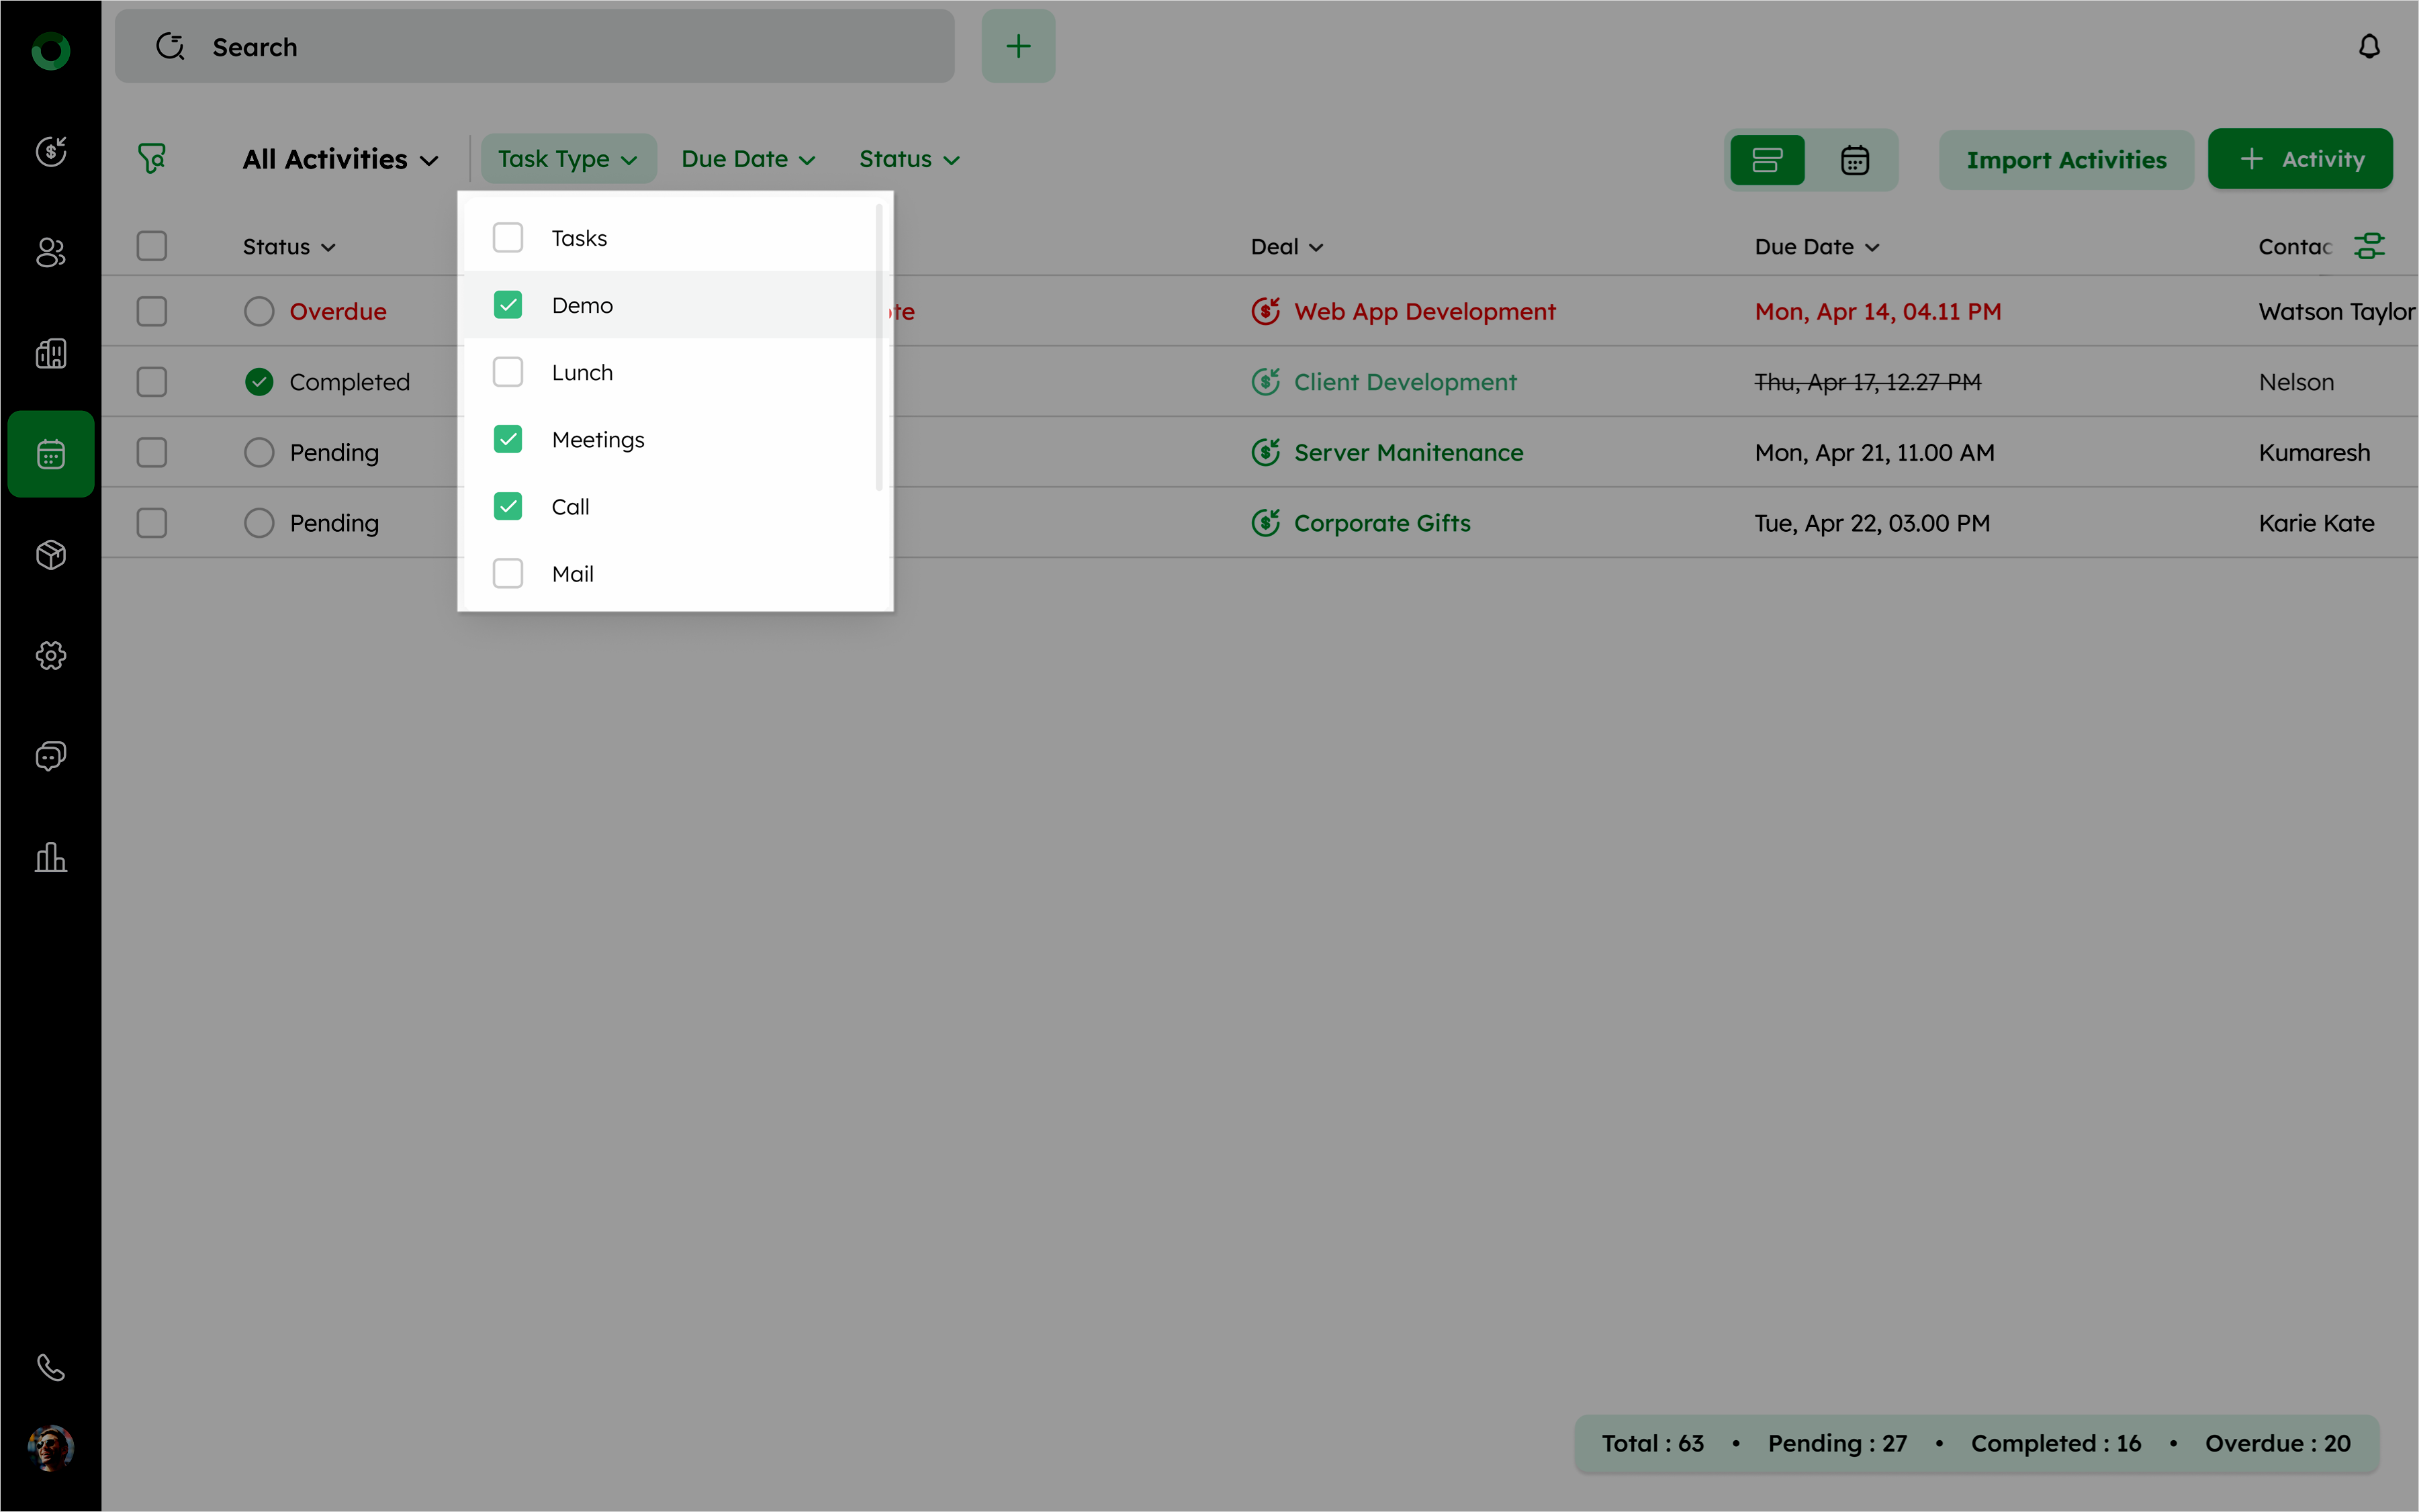
- Task Type: This filter allows you to sort based on the type of task such as Call, Email, Meeting, Task, Lunch, and Quote.
- Due Date: This filter enables you to organize the tasks by their due dates. Filter tasks by timeframes like Today, Tomorrow, This week, Last week, This month, Last month, or Custom Range.

- Status: This filter displays tasks that are past their due date. Selecting this option can filter the task by status, including Pending, Completed, and Overdue.
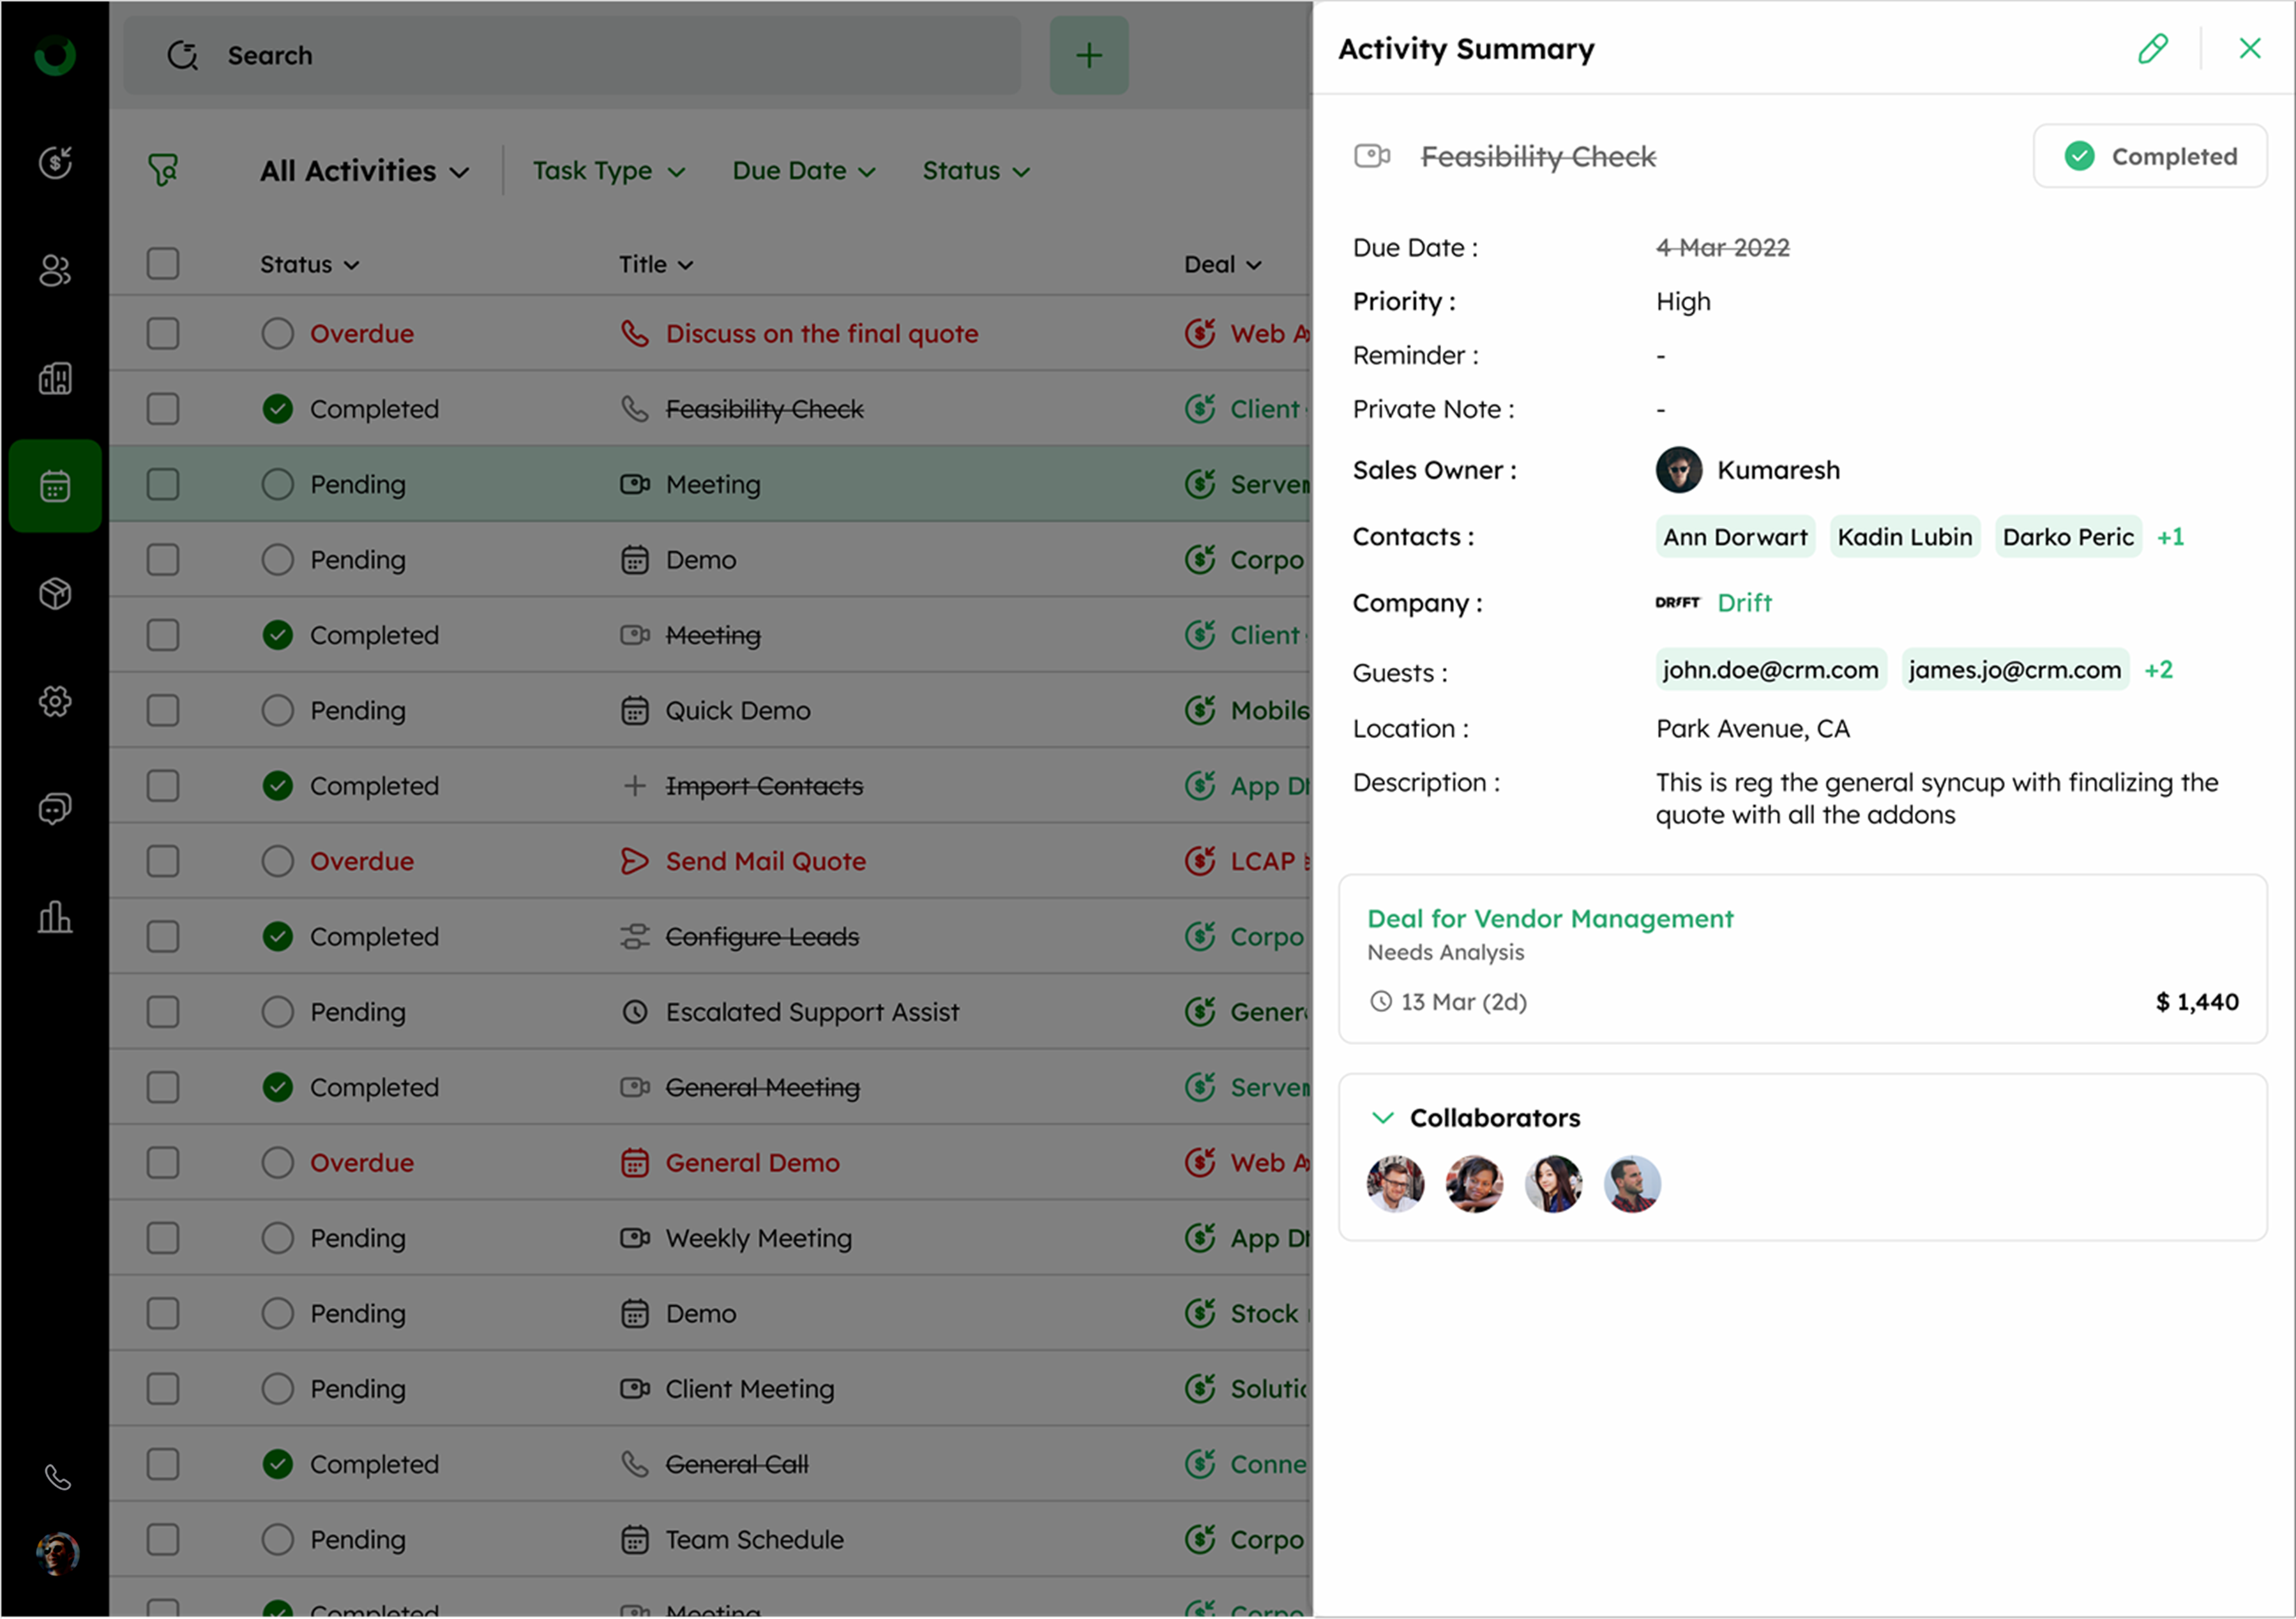
Reviewing Activity Details via the Activity Summary Drawer
The Activity Summary gives a quick view of all essential details of an activity, helping you review and update without leaving the List View.
-
Click any activity in the Activity List View to open the Activity Summary drawer.
-
Review key details like activity name, type, due date, priority, reminder, notes, owner, contacts, company, guests, location, and description.
-
Click the edit icon to update details.
-
Change status to Pending or Overdue as needed.
-
Manage collaborators at the bottom by adding or reviewing team members.
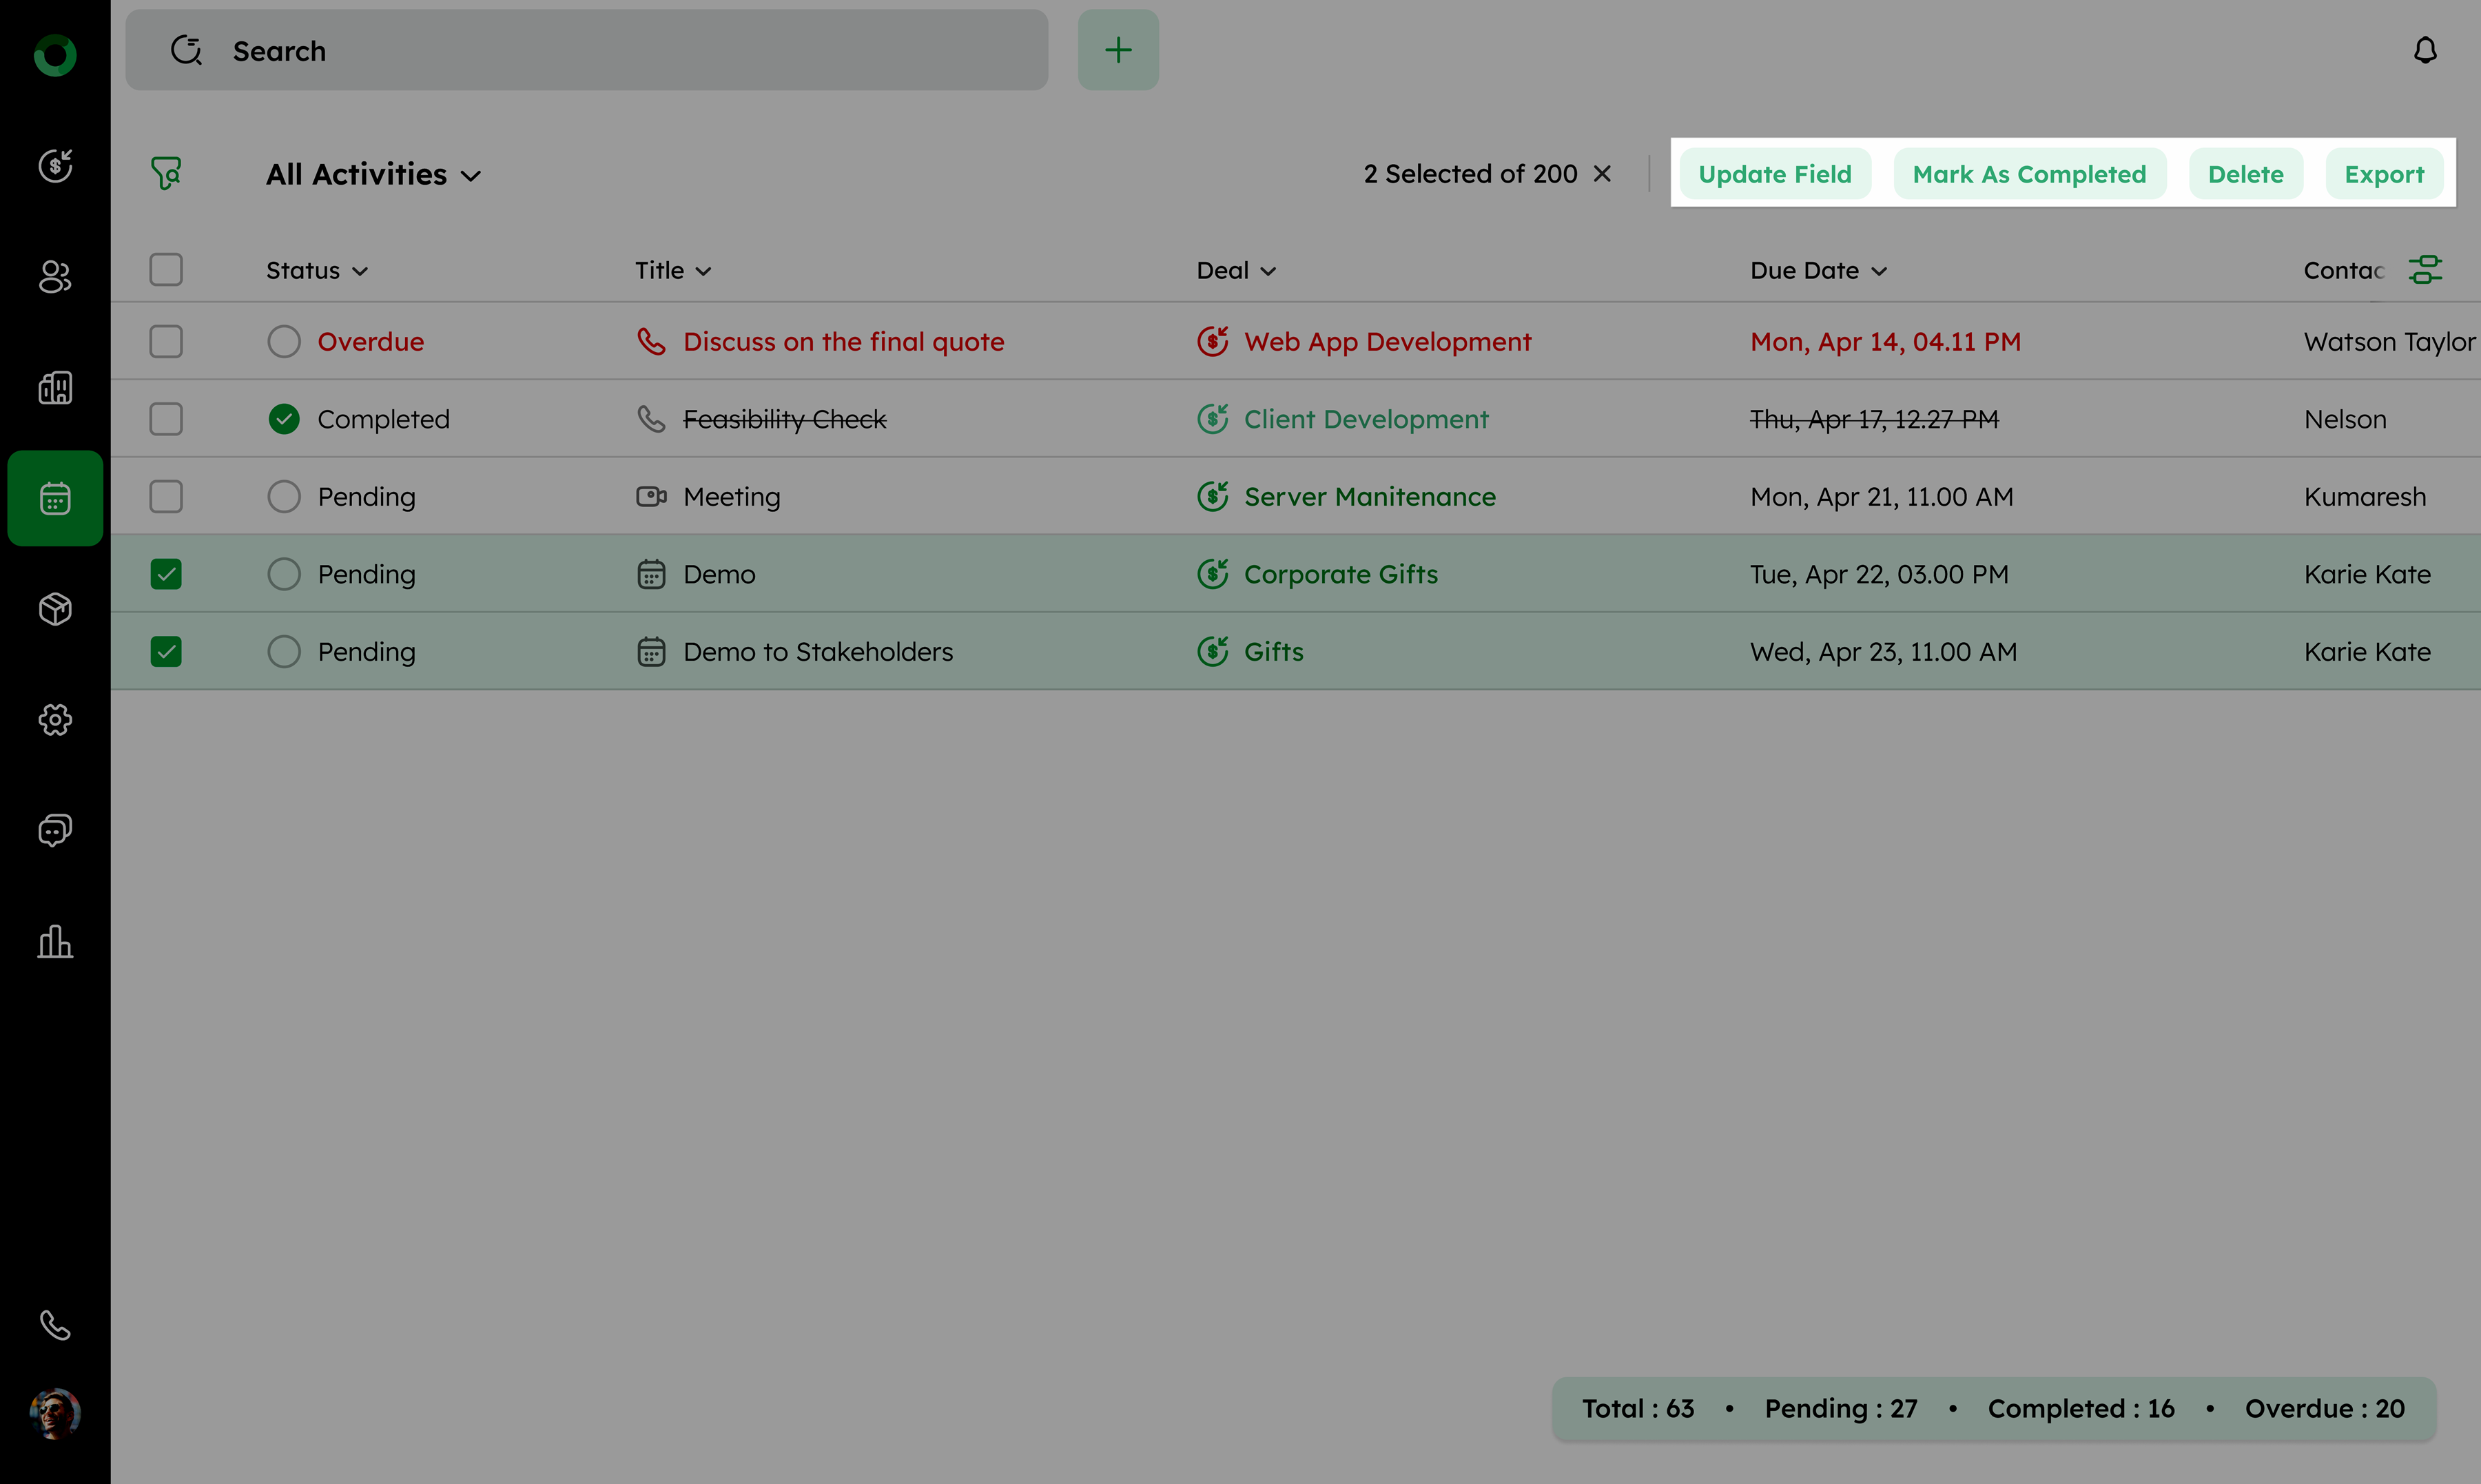
Bulk Actions
The bulk actions in Twozo allows to manage multiple activities by saving your time and streamlining the workflow. You can perform various access to the group of activities in the list view, such as Update Field, Mark As Completed, Delete, and Export.
Bulk Updating Activity Field Values
Bulk editing ensures consistency, reduces errors, and saves time by updating multiple activities at once.
-
In the Activity List View, check the boxes you want to edit.
-
Click the Update Field in the toolbar. It will open the Update Field drawer .
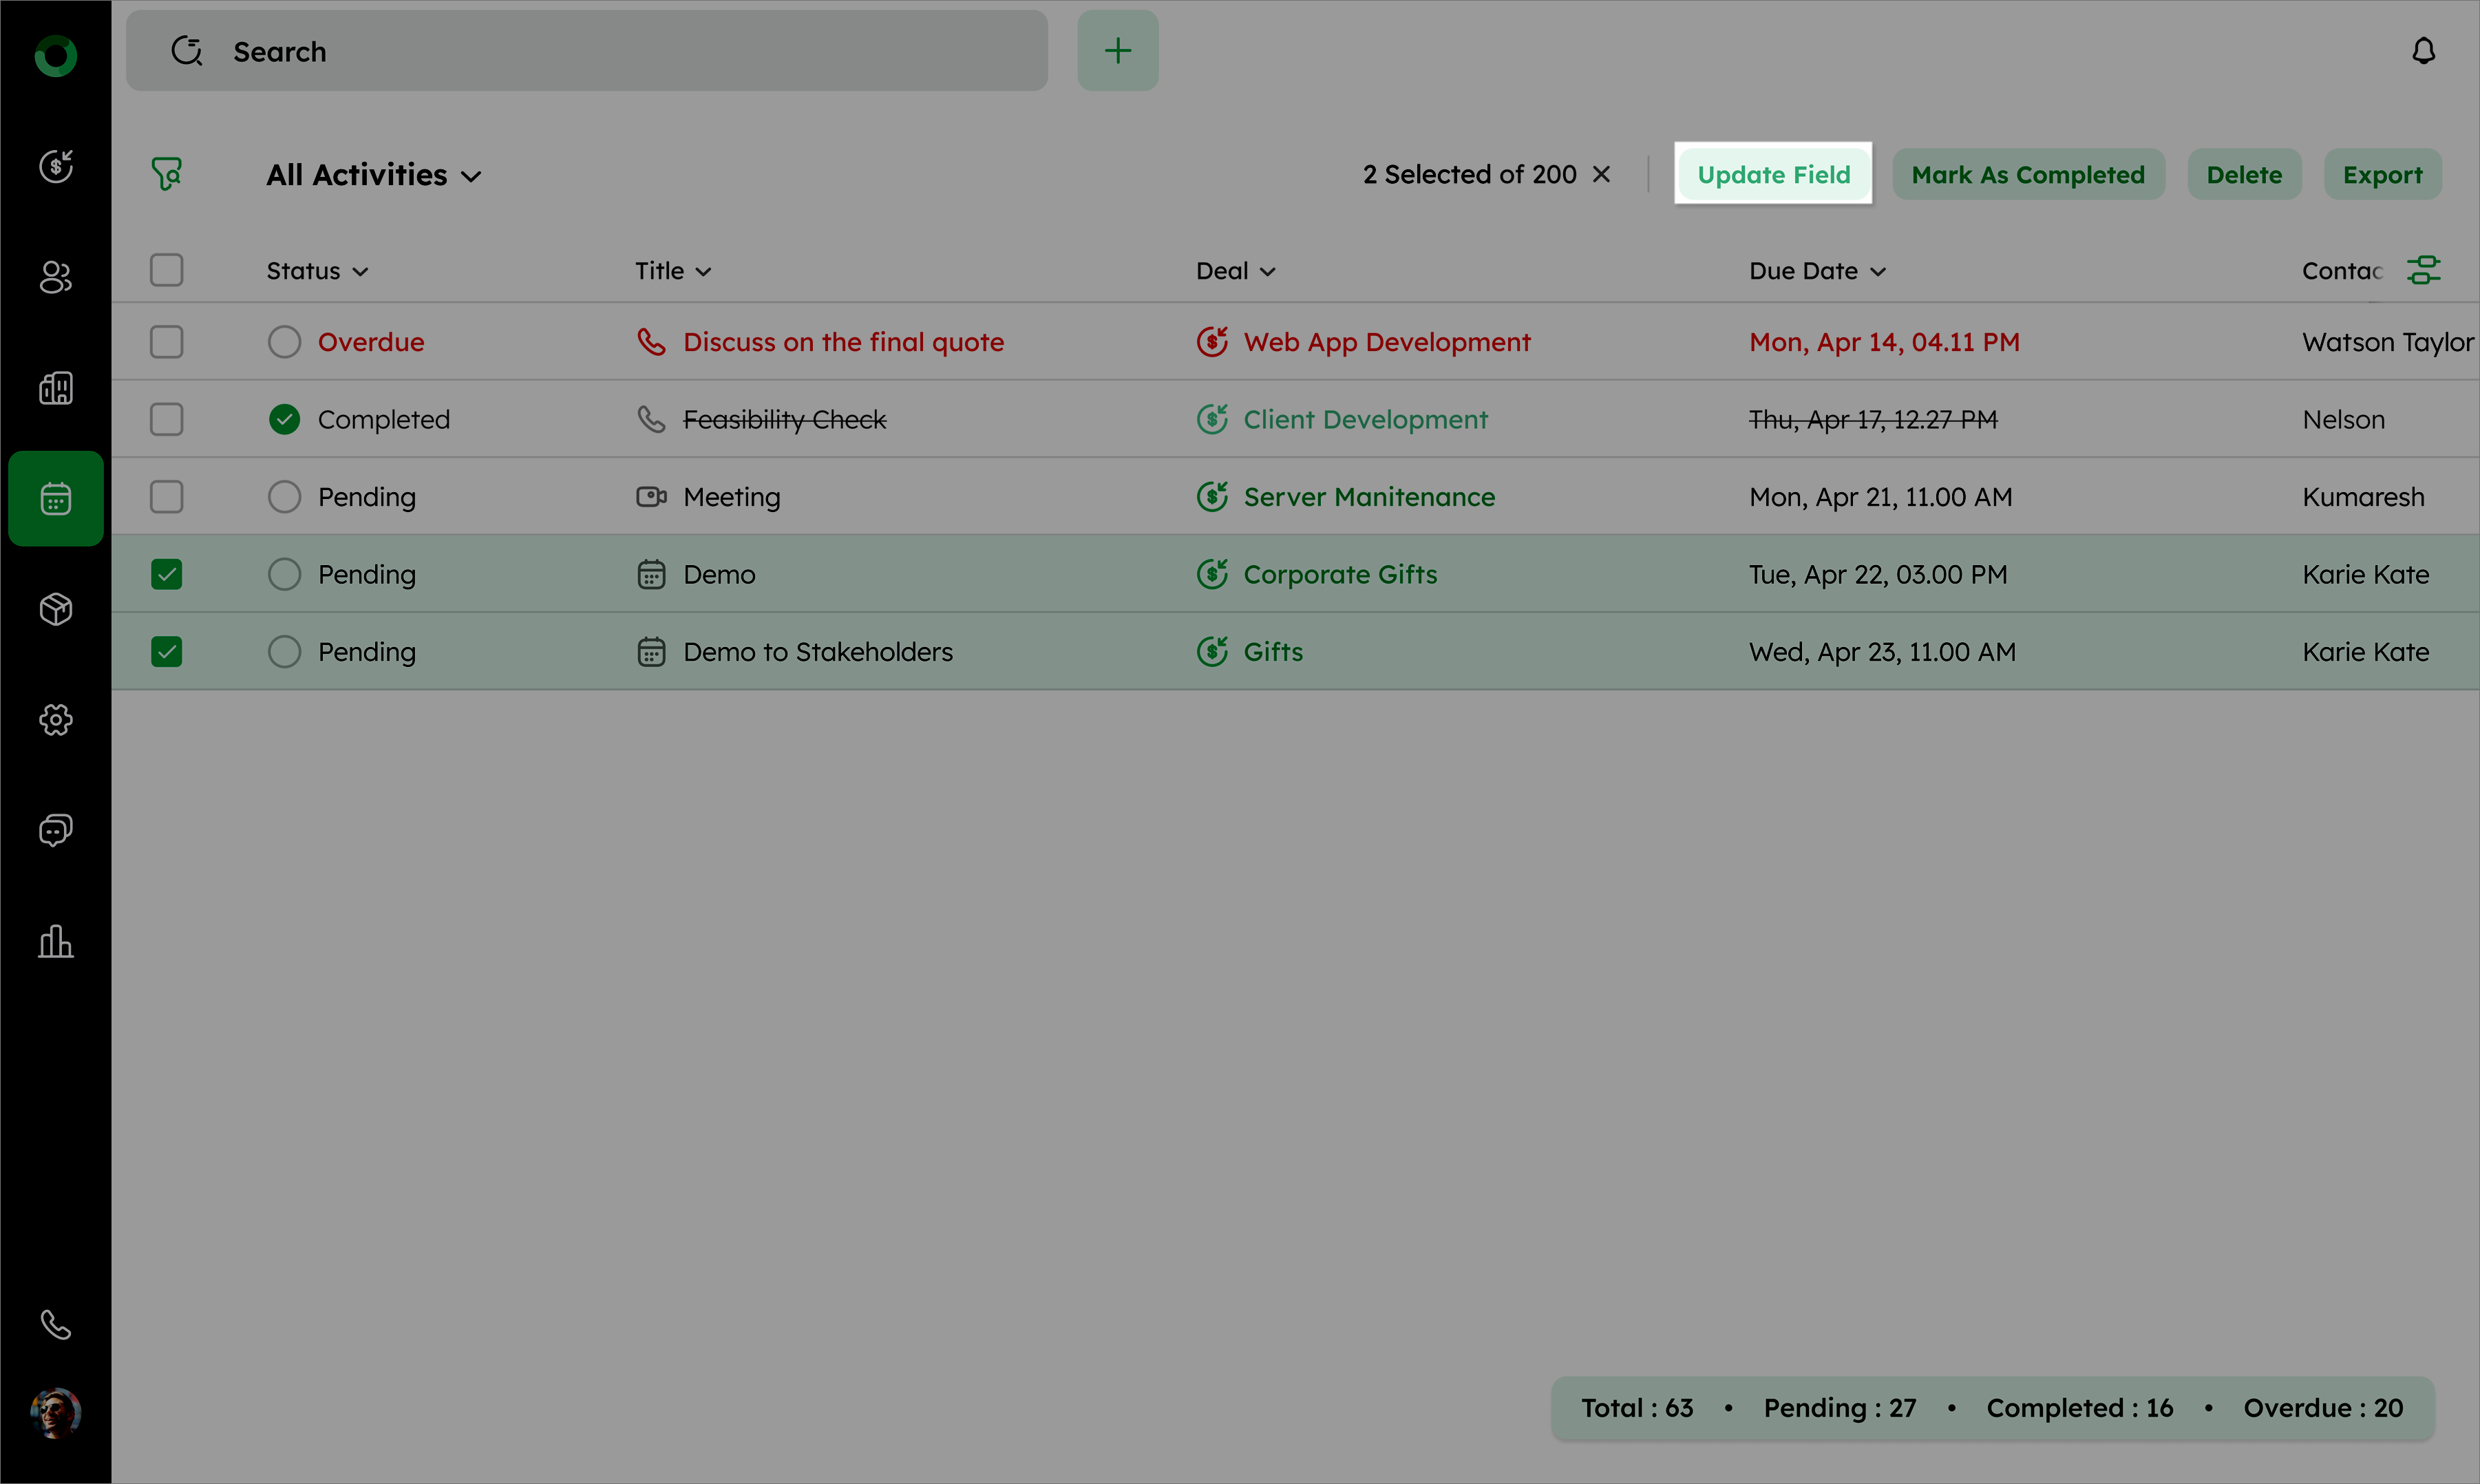
- Click on the dropdown list under the Select Field drawer. Choose the field you want to update from the available field names and custom fields.

-
Fields marked with a star icon require values to be provided.
-
Save non-required fields without a value to remove the existing value.
-
Open the dropdown to view all activity fields. Auto-generating and dependable fields will not be displayed.
-
If values are unselected:
-
Clicking Add More Field or Save will display a red validation line.
-
If a required field is marked after activity creation and you attempt to update other fields, a validation message will appear.
- Enter the new value and click Save to apply the changes.
Bulk Marking Activities as Completed
To mark activities as completed in bulk, select the activities you want to update and click the Mark As Completed button in the toolbar. This feature helps save time and keeps your records up to date.
For more information, refer to this article for detailed steps on using bulk actions.
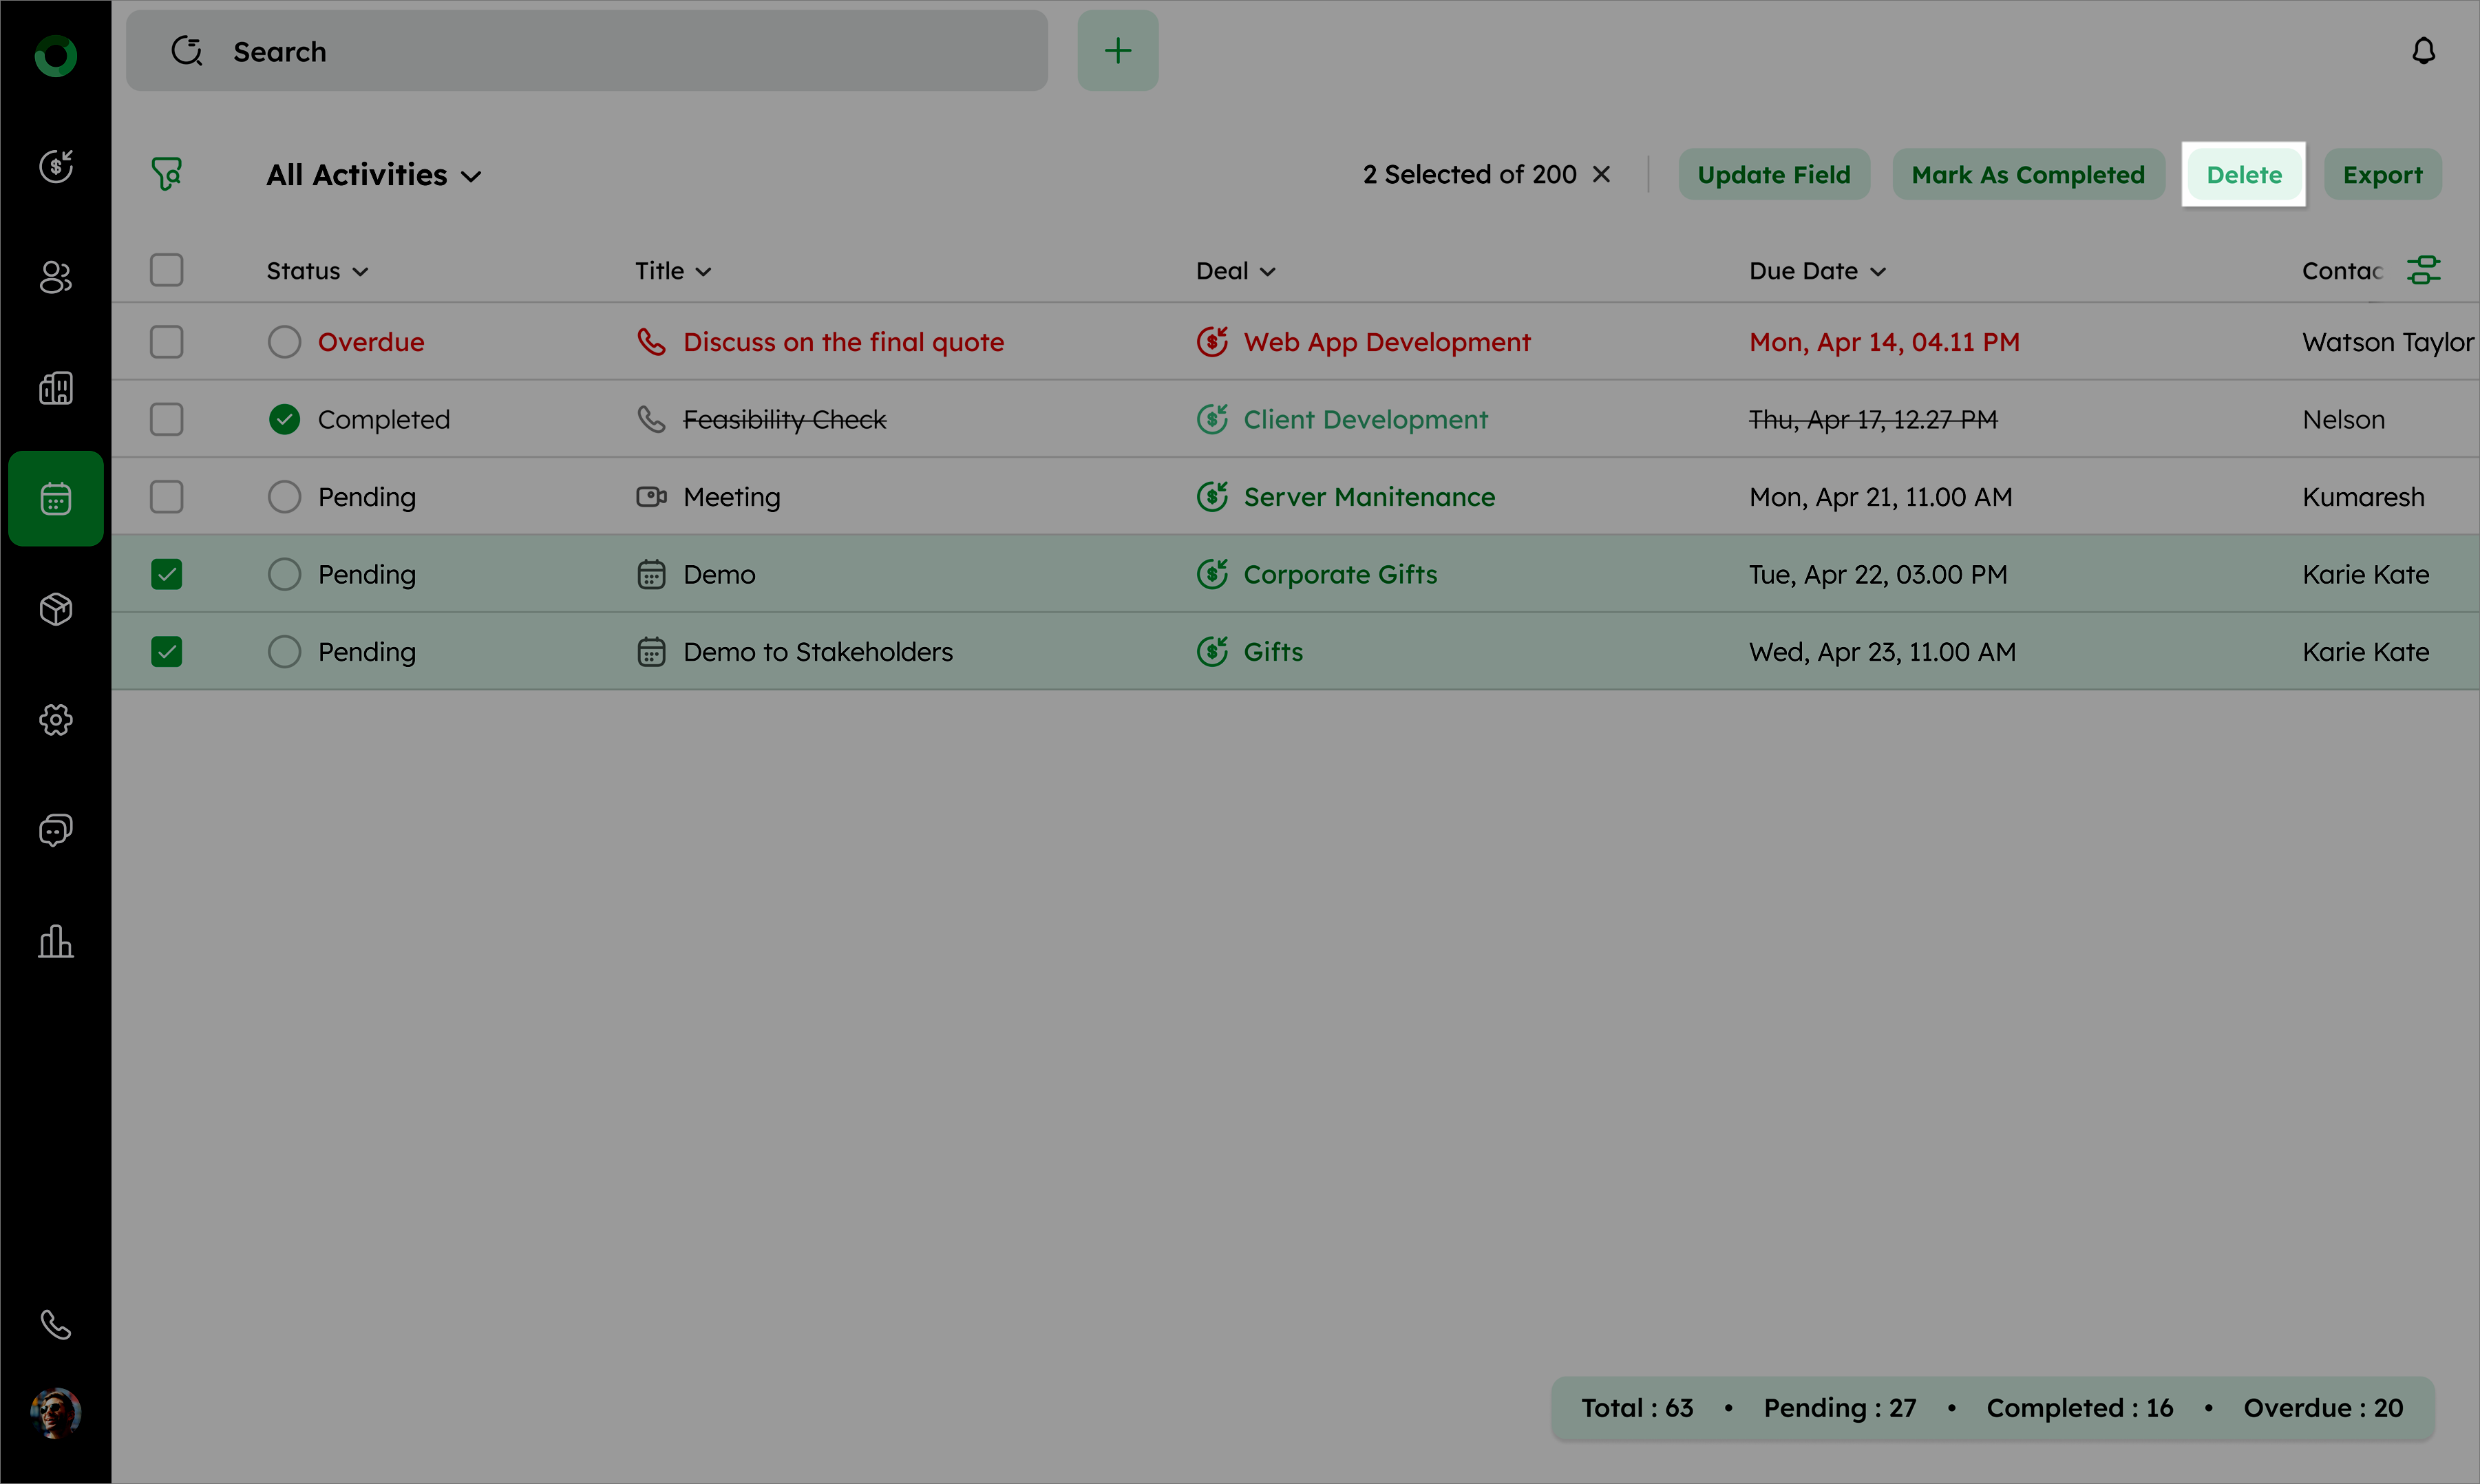
Bulk Deletion of Activity Records
Bulk deleting helps in quickly removing outdated or duplicate activities, improving the overall quality of your activity list. It simplifies the cleanup process, ensuring that only relevant and current activities remain.
-
Access the Activity List View. Select the activities to delete by checking their boxes.
-
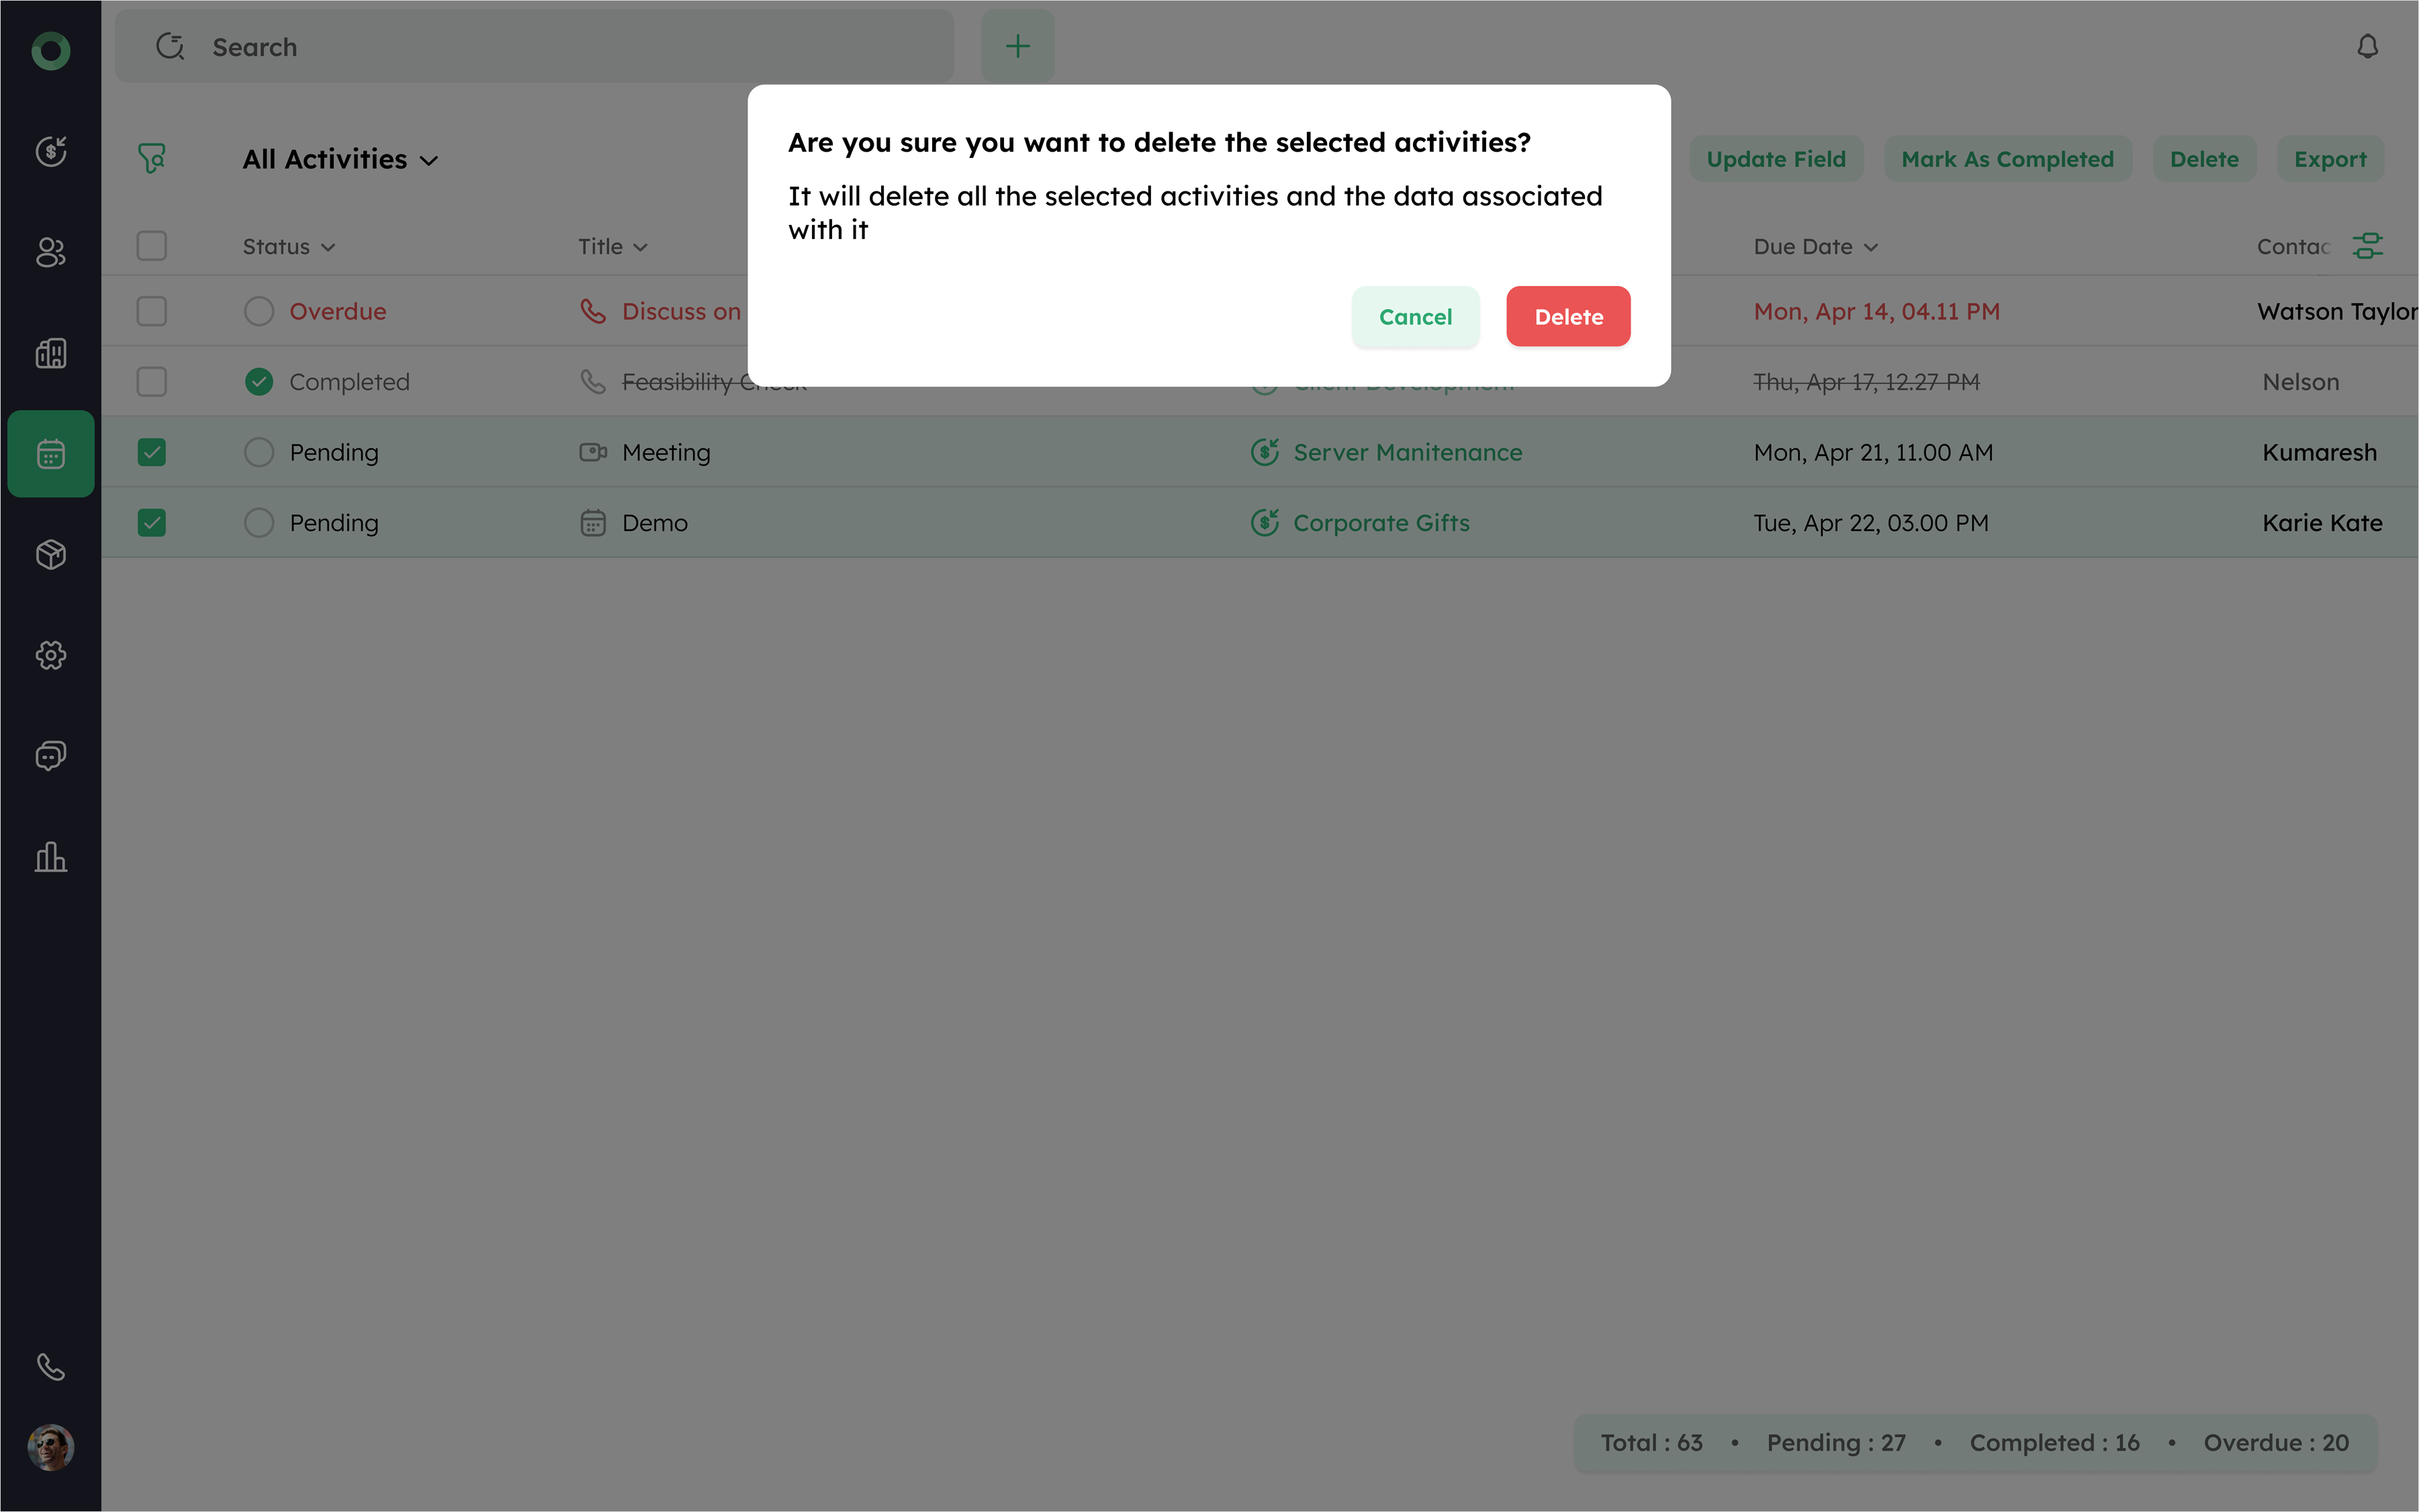
Click the Delete button in the toolbar.
- To confirm the deletion in the dialog box. Click the Delete option to permanently remove the selected activities from the list.
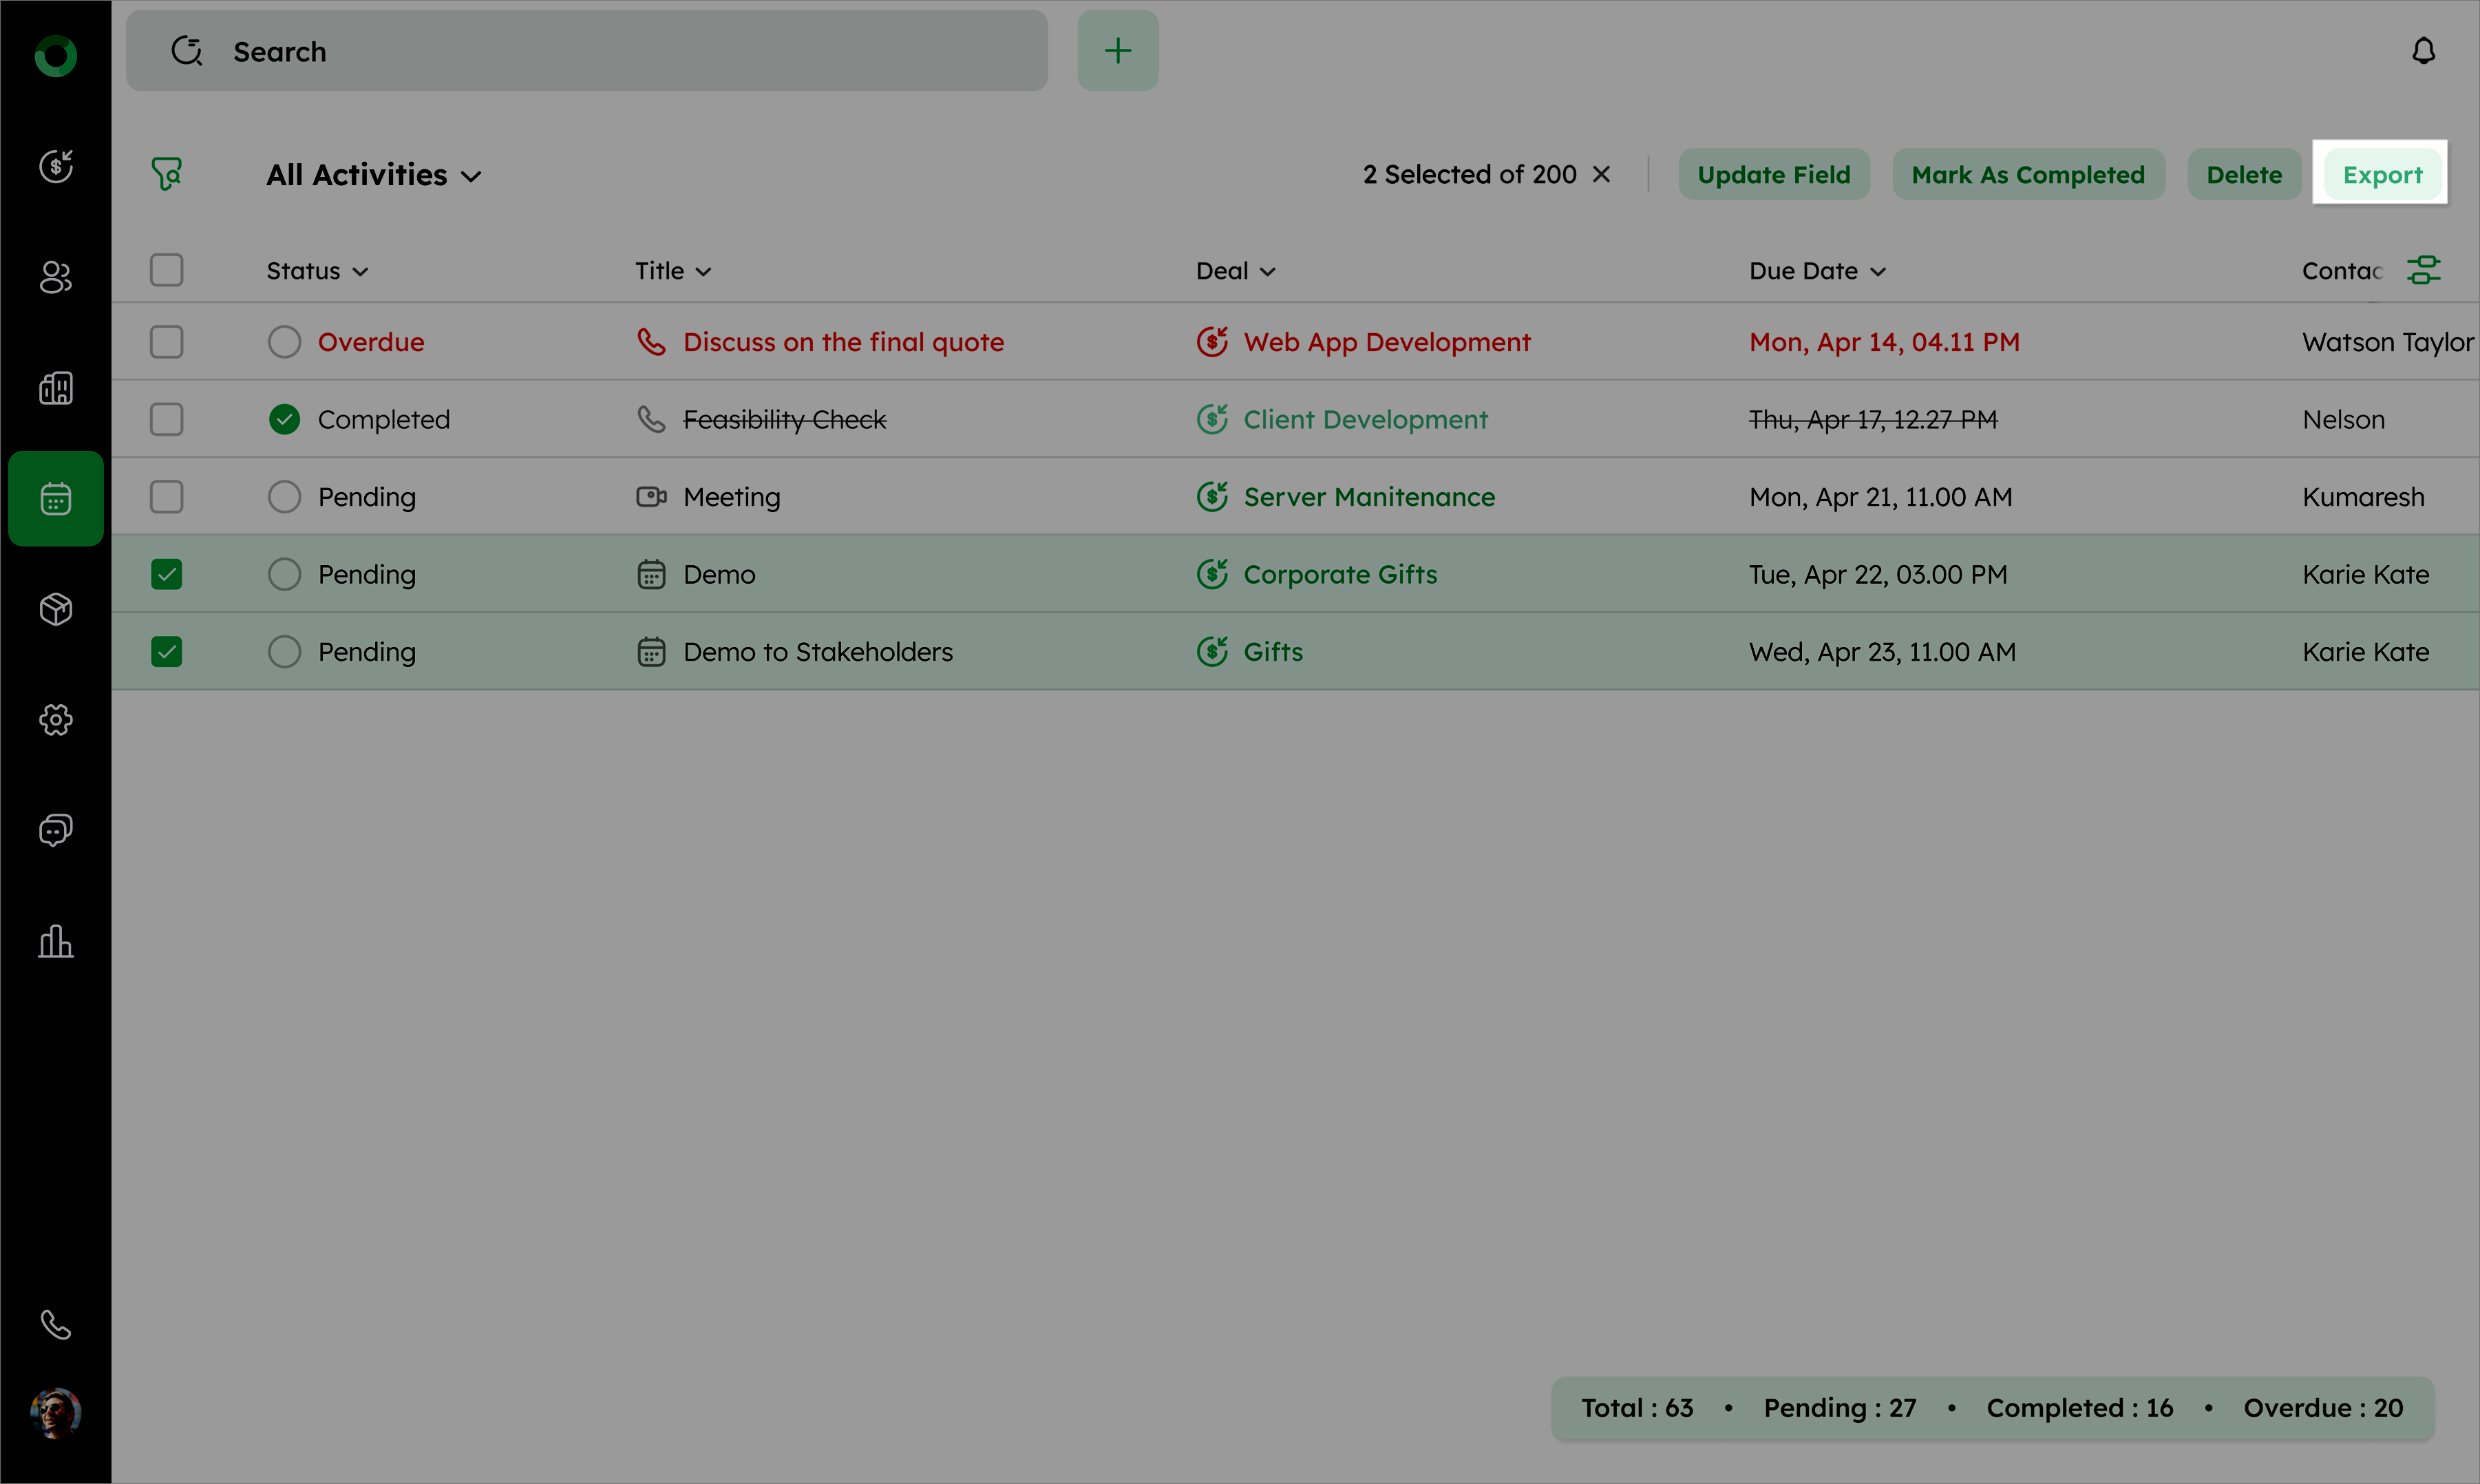
Bulk Export of Activity Data for Reporting
Bulk exporting activities are useful for creating backups, preparing reports, or transferring activity information to other systems.
-
Access the Activity List View. Select the activities to export by checking their boxes.
-
Click the Export button in the toolbar.
- Choose the desired export format, such as XLSX, XLS, or CSV.
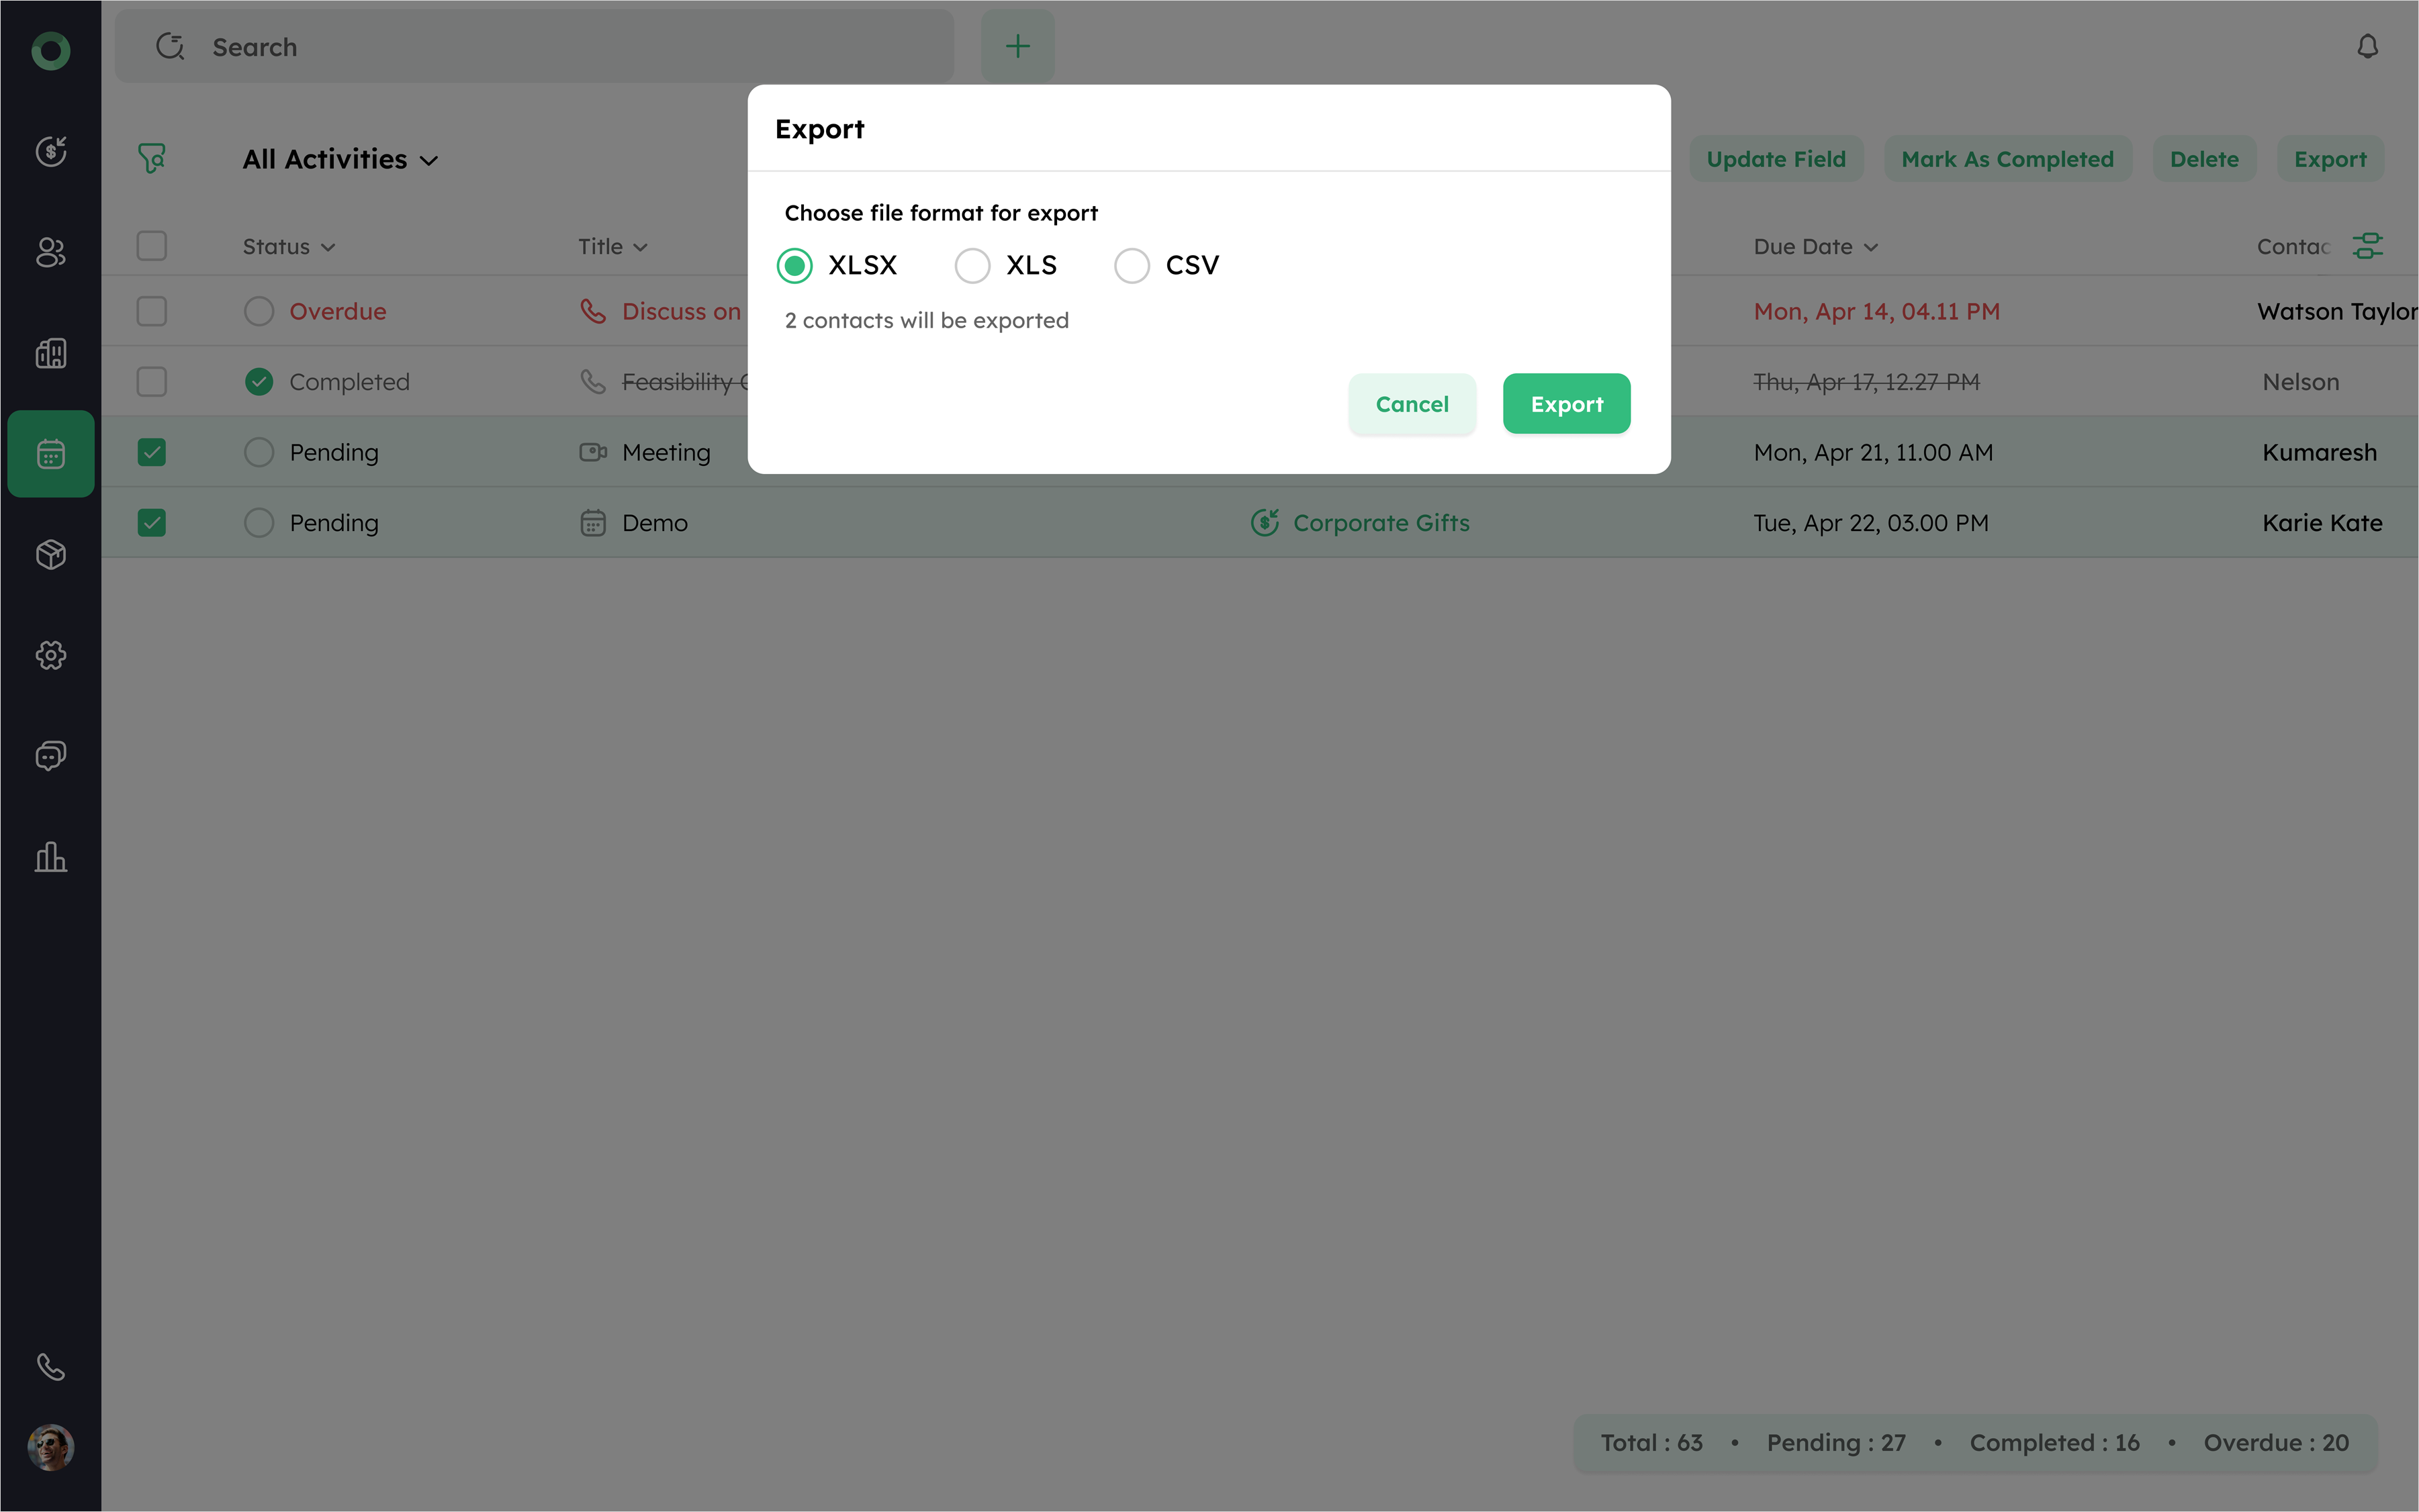
- Click Export to initiate the download process.
Once the export is complete, a download option will appear.
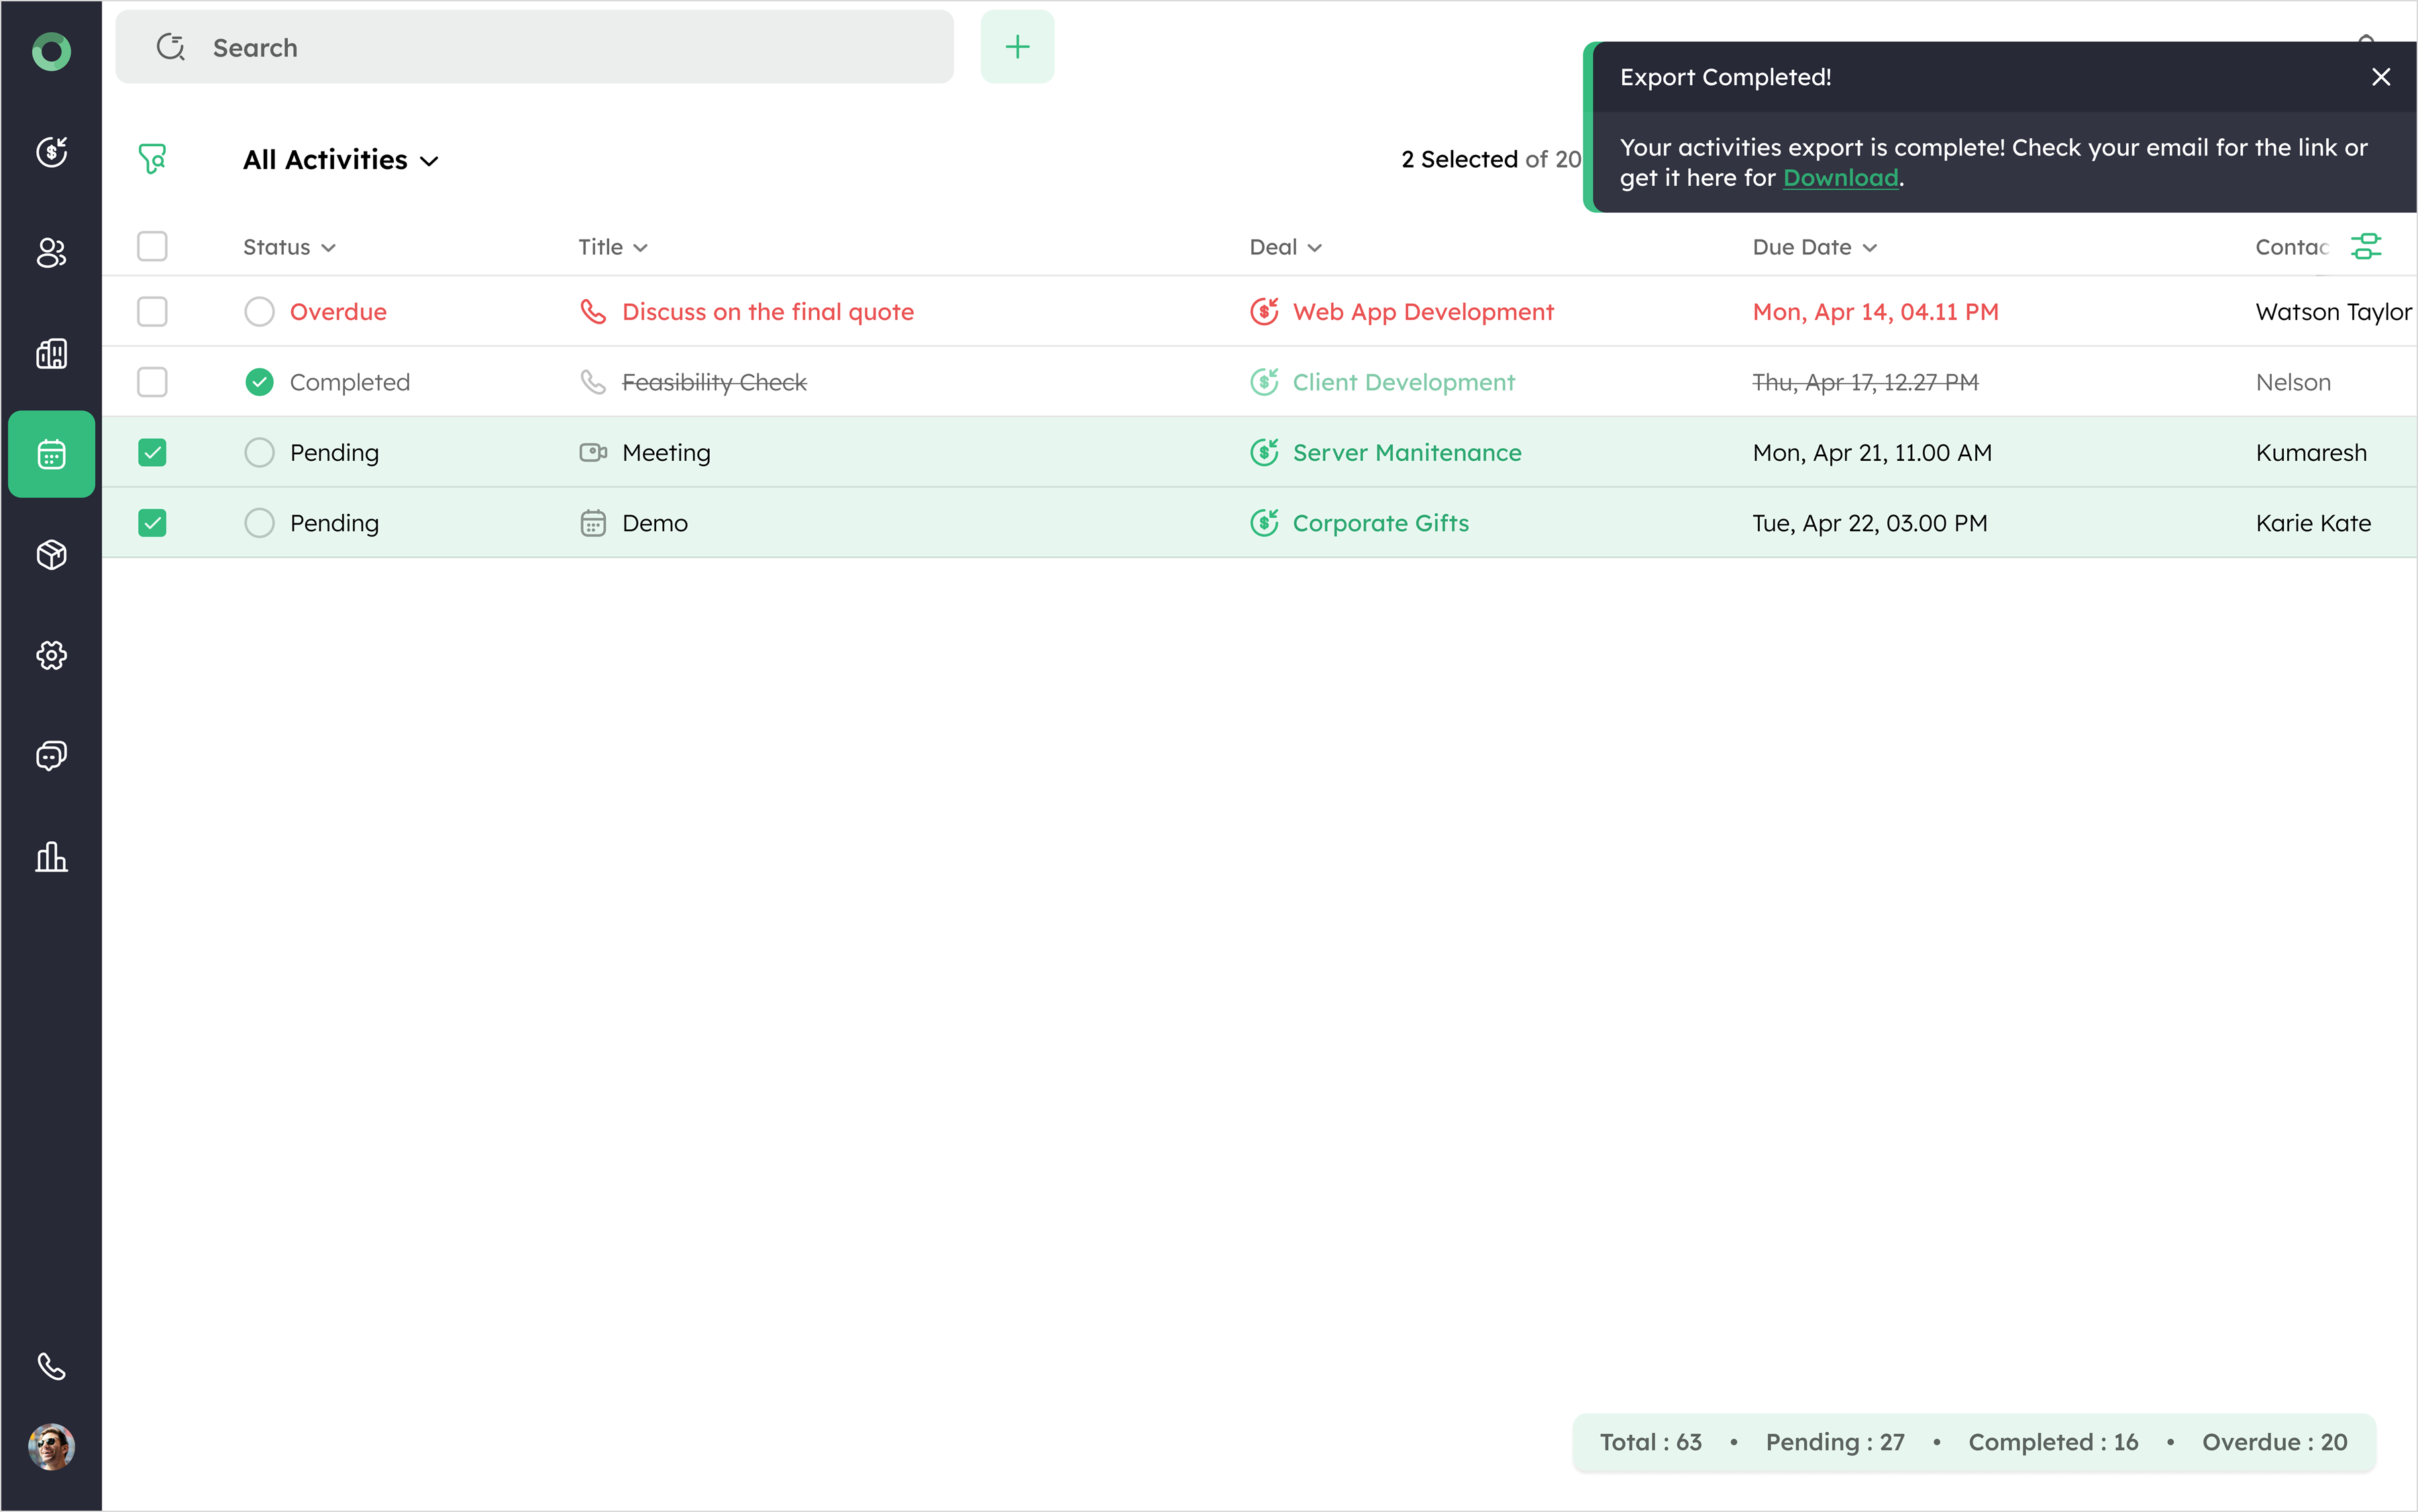
- Click Download to retrieve the exported file and save it to your device.