Exploring the Contact Detail View
The Contact Detail View provides a complete picture of a contact, including essential information, interactions, and connected records, making it easier to understand and manage relationships effectively.
Accessing the Contact Detail Profile
-
Go to the Contacts module.
-
Click any contact in the List View to open their Contact Detail Page.
-
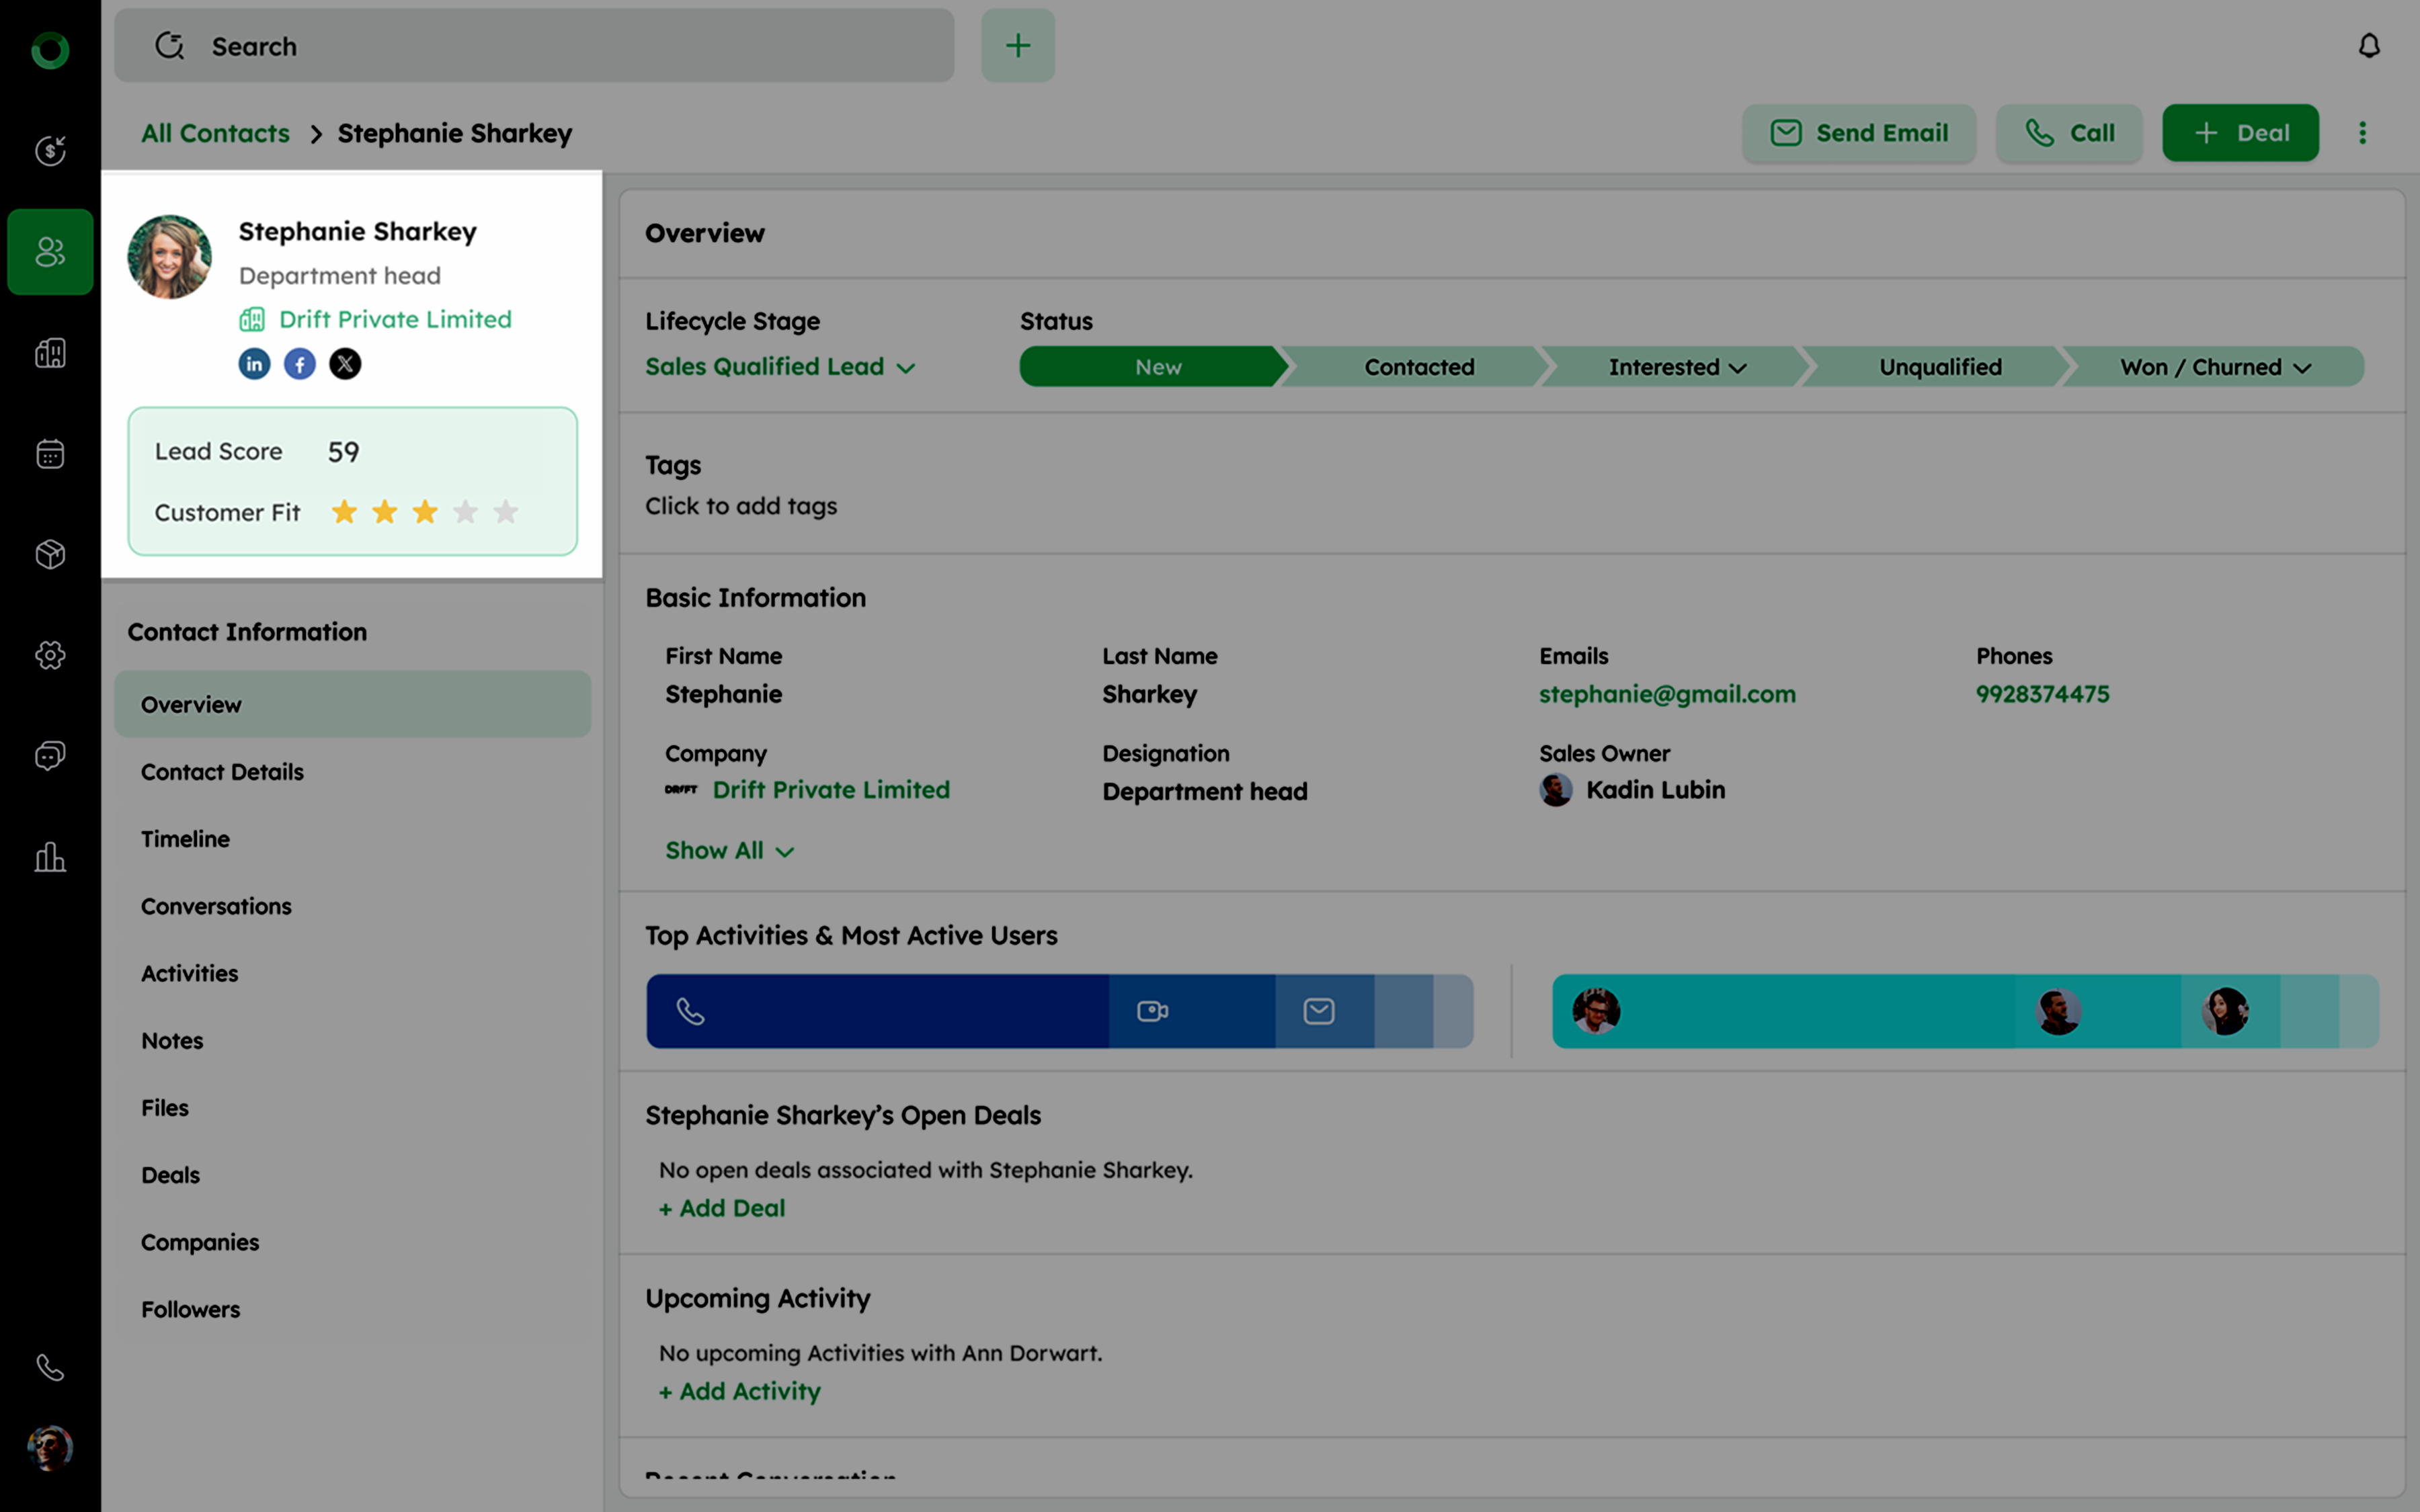
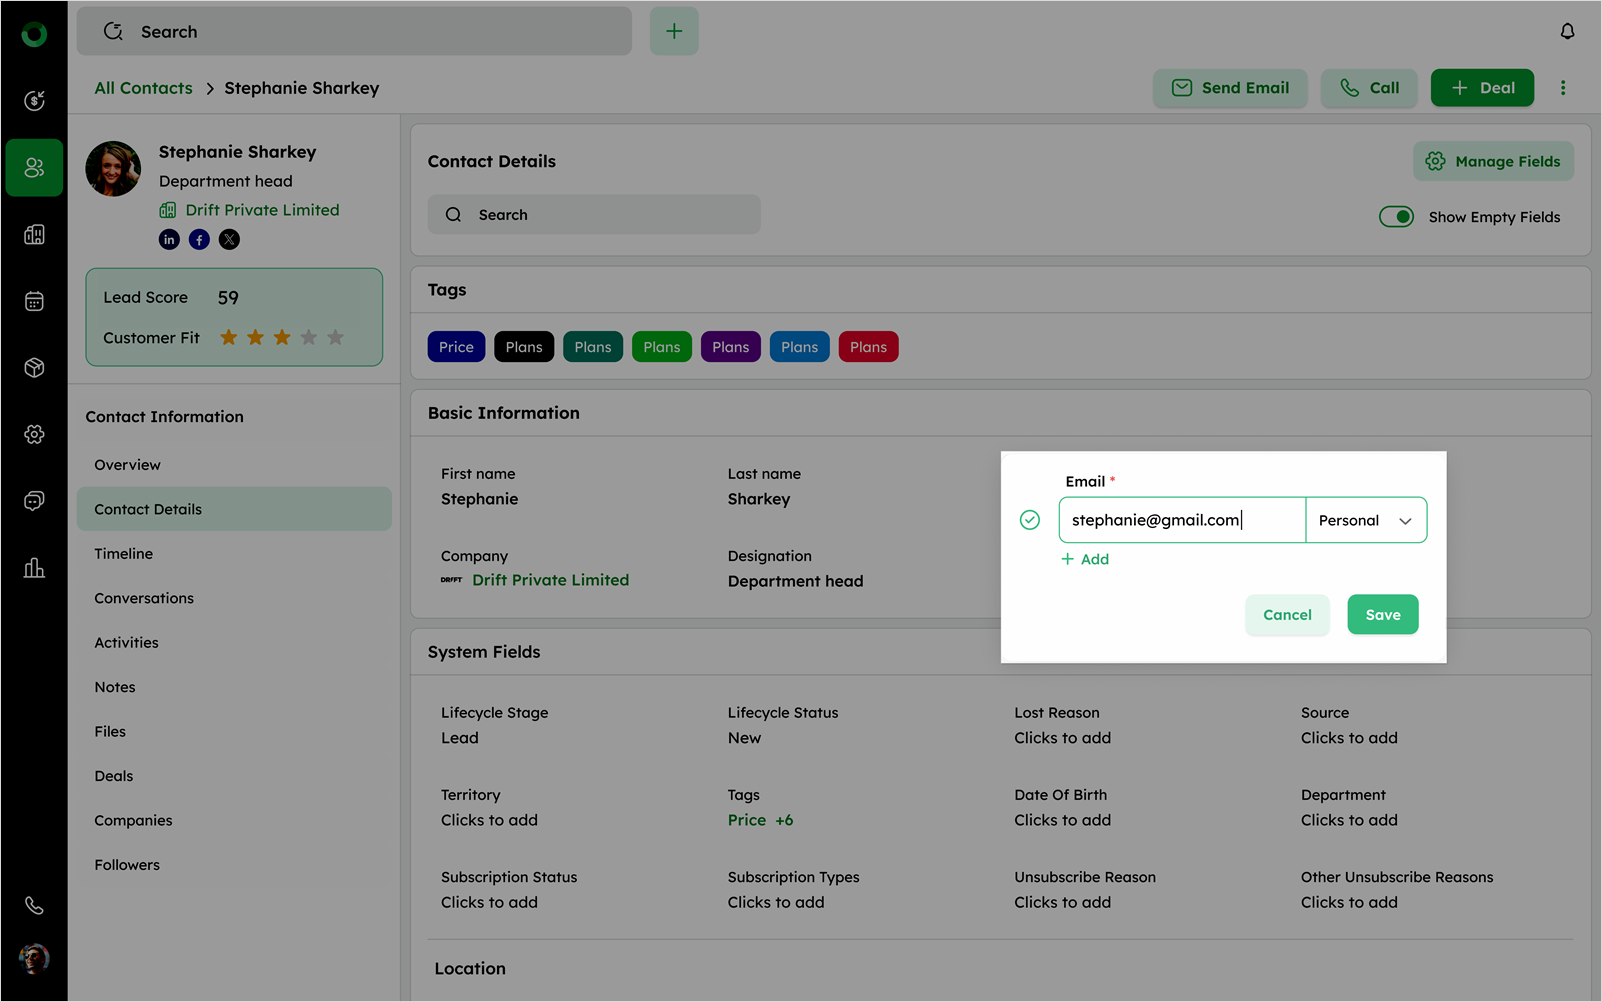
On the Contact Detail page, the profile section displays essential details such as name, designation, company, lead score, customer fit, and linked social profiles.
- To edit the profile, click the edit icon next to the profile to open the edit drawer.
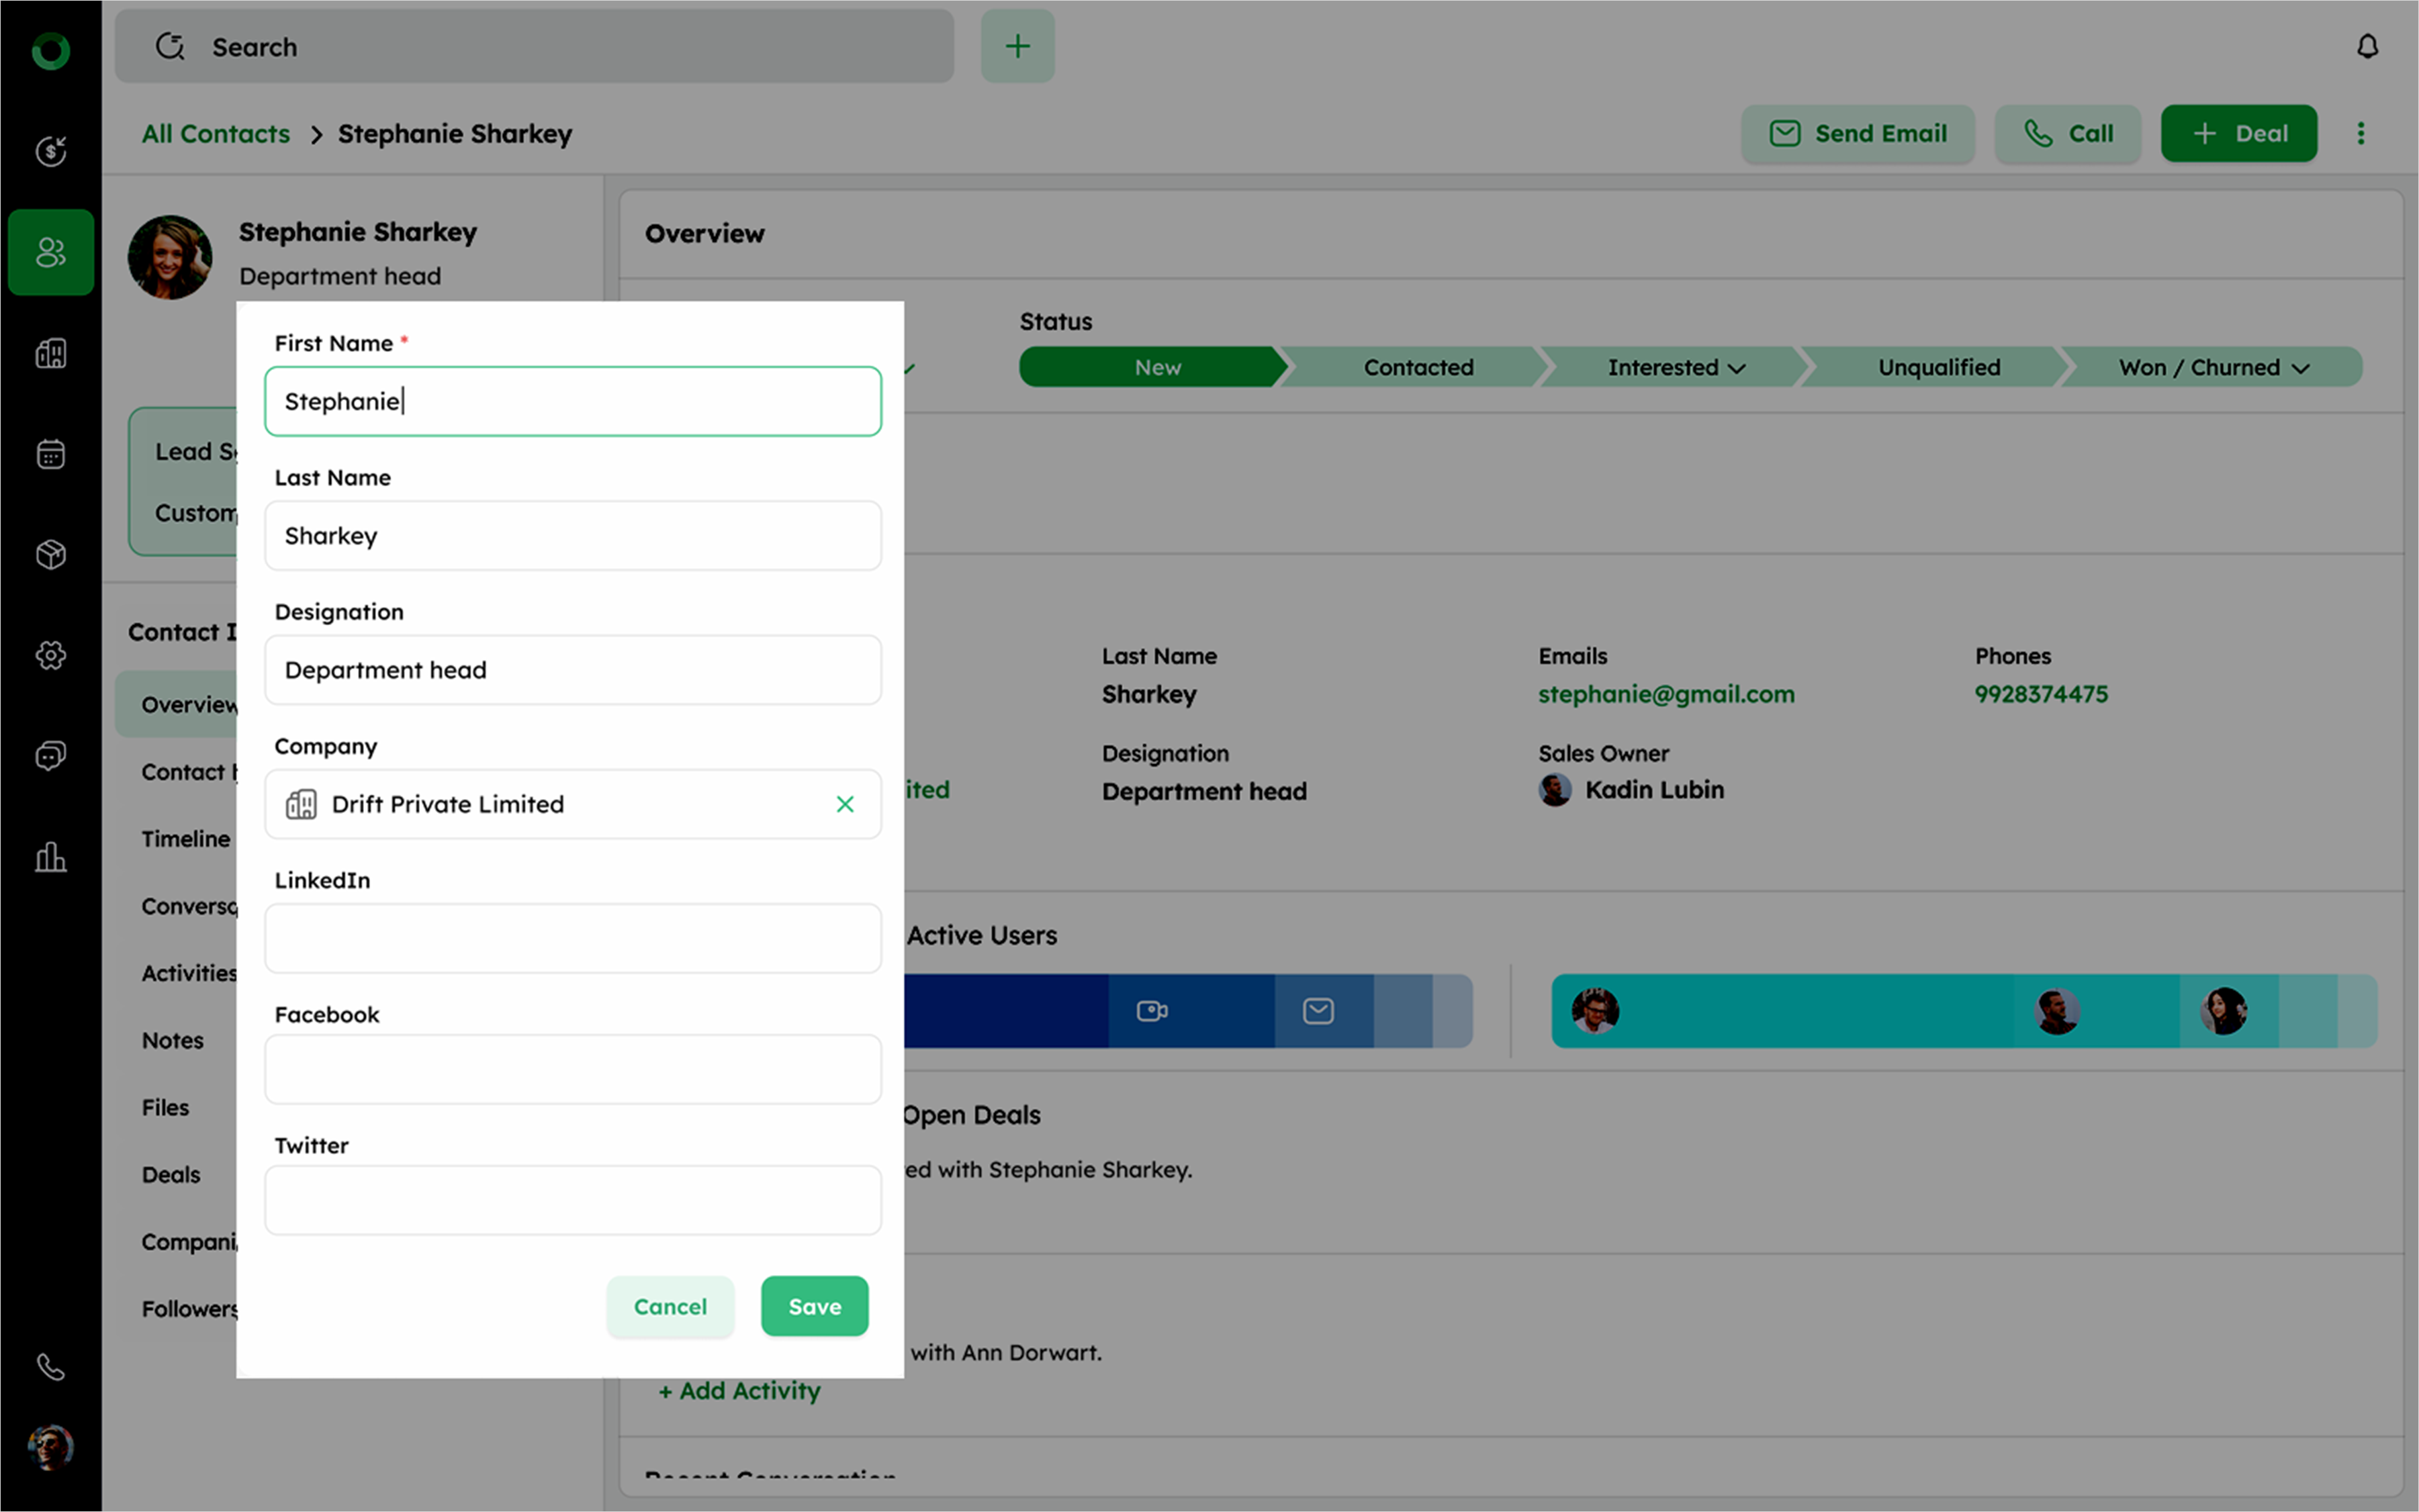
The primary email or phone number cannot be removed from the list.
-
Make any necessary changes, then click Save to apply the updates. changes.
-
Below the profile Section:
- Lead Score: Indicates the likelihood of the contact converting.
- Customer Fit Score: Shows how well the contact aligns with your ideal customer profile.

Both scores are powered by NIRA AI, based on the contact's data and engagement.
Tip: Review the scores regularly to prioritize high-value contacts and tailor your engagement strategies.
All Contact-Linked Details and Insights in One View
The left panel provides quick access to all relevant modules connected to the contact. It helps you manage every aspect of the relationship in one place. Below is a breakdown of each section:
Overview Tab: Key Metrics and Summary
- In the Overview section, view the Lifecycle Stage and Status using the progress bar to understand the contact's current journey.
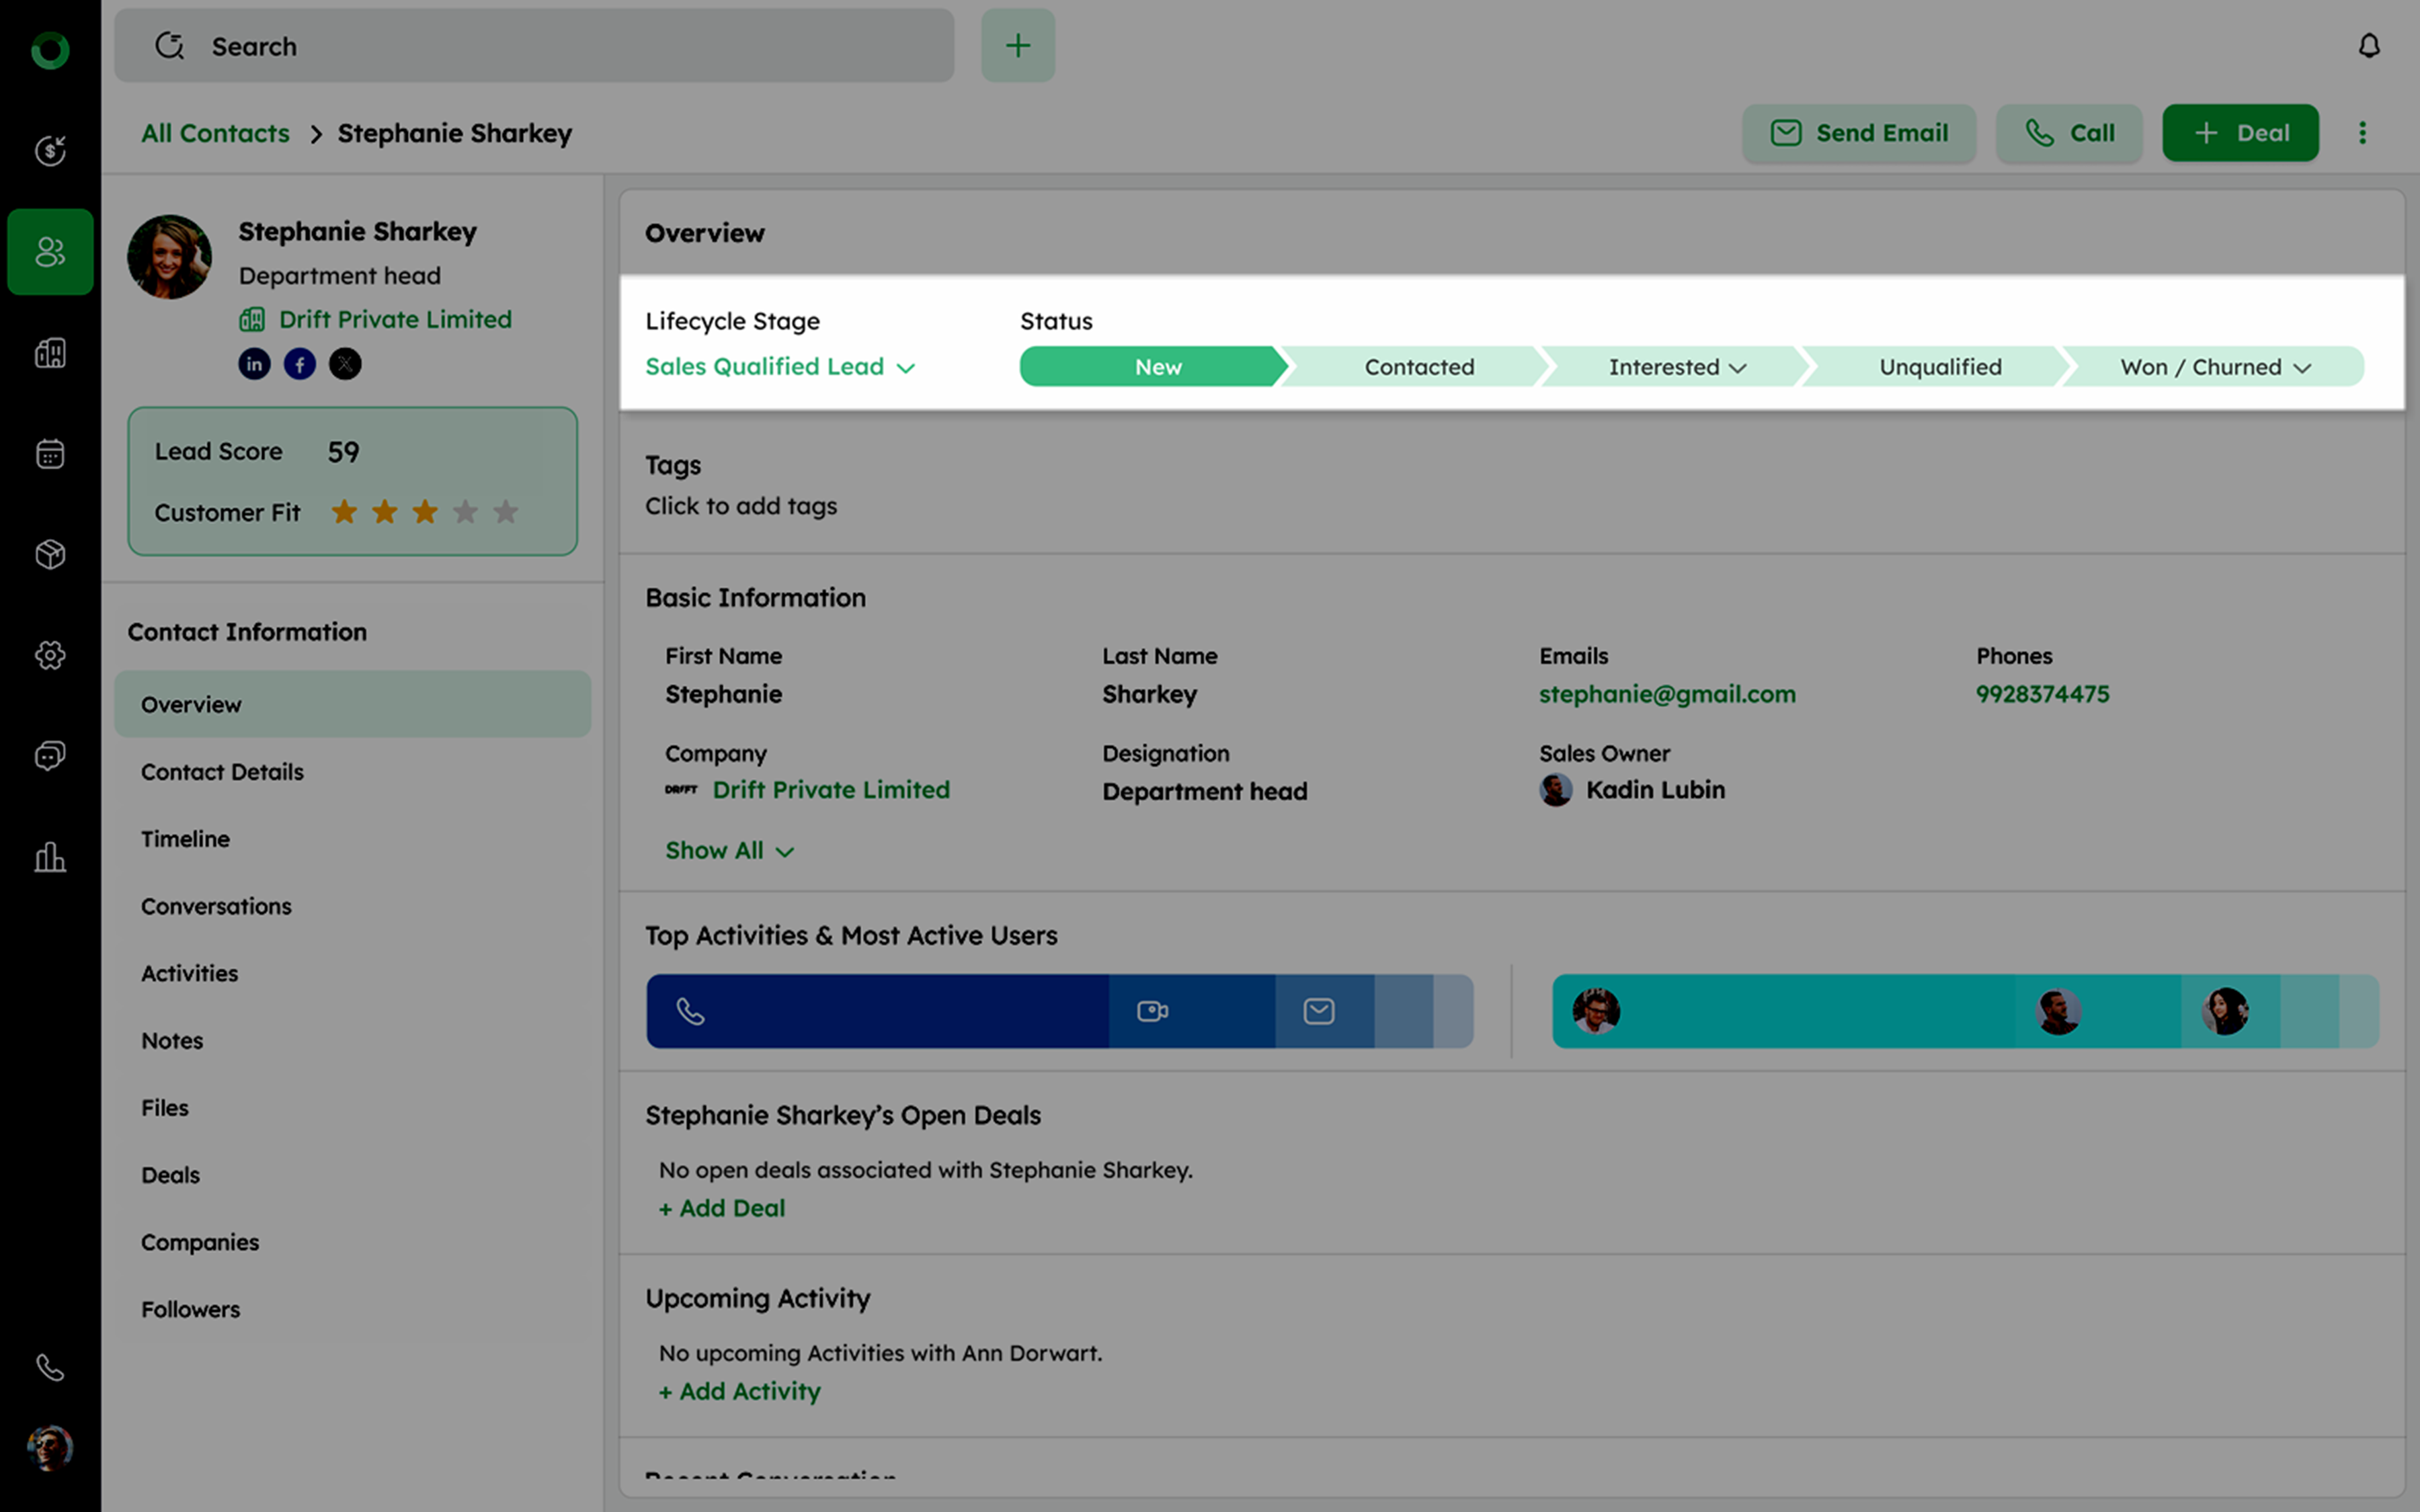
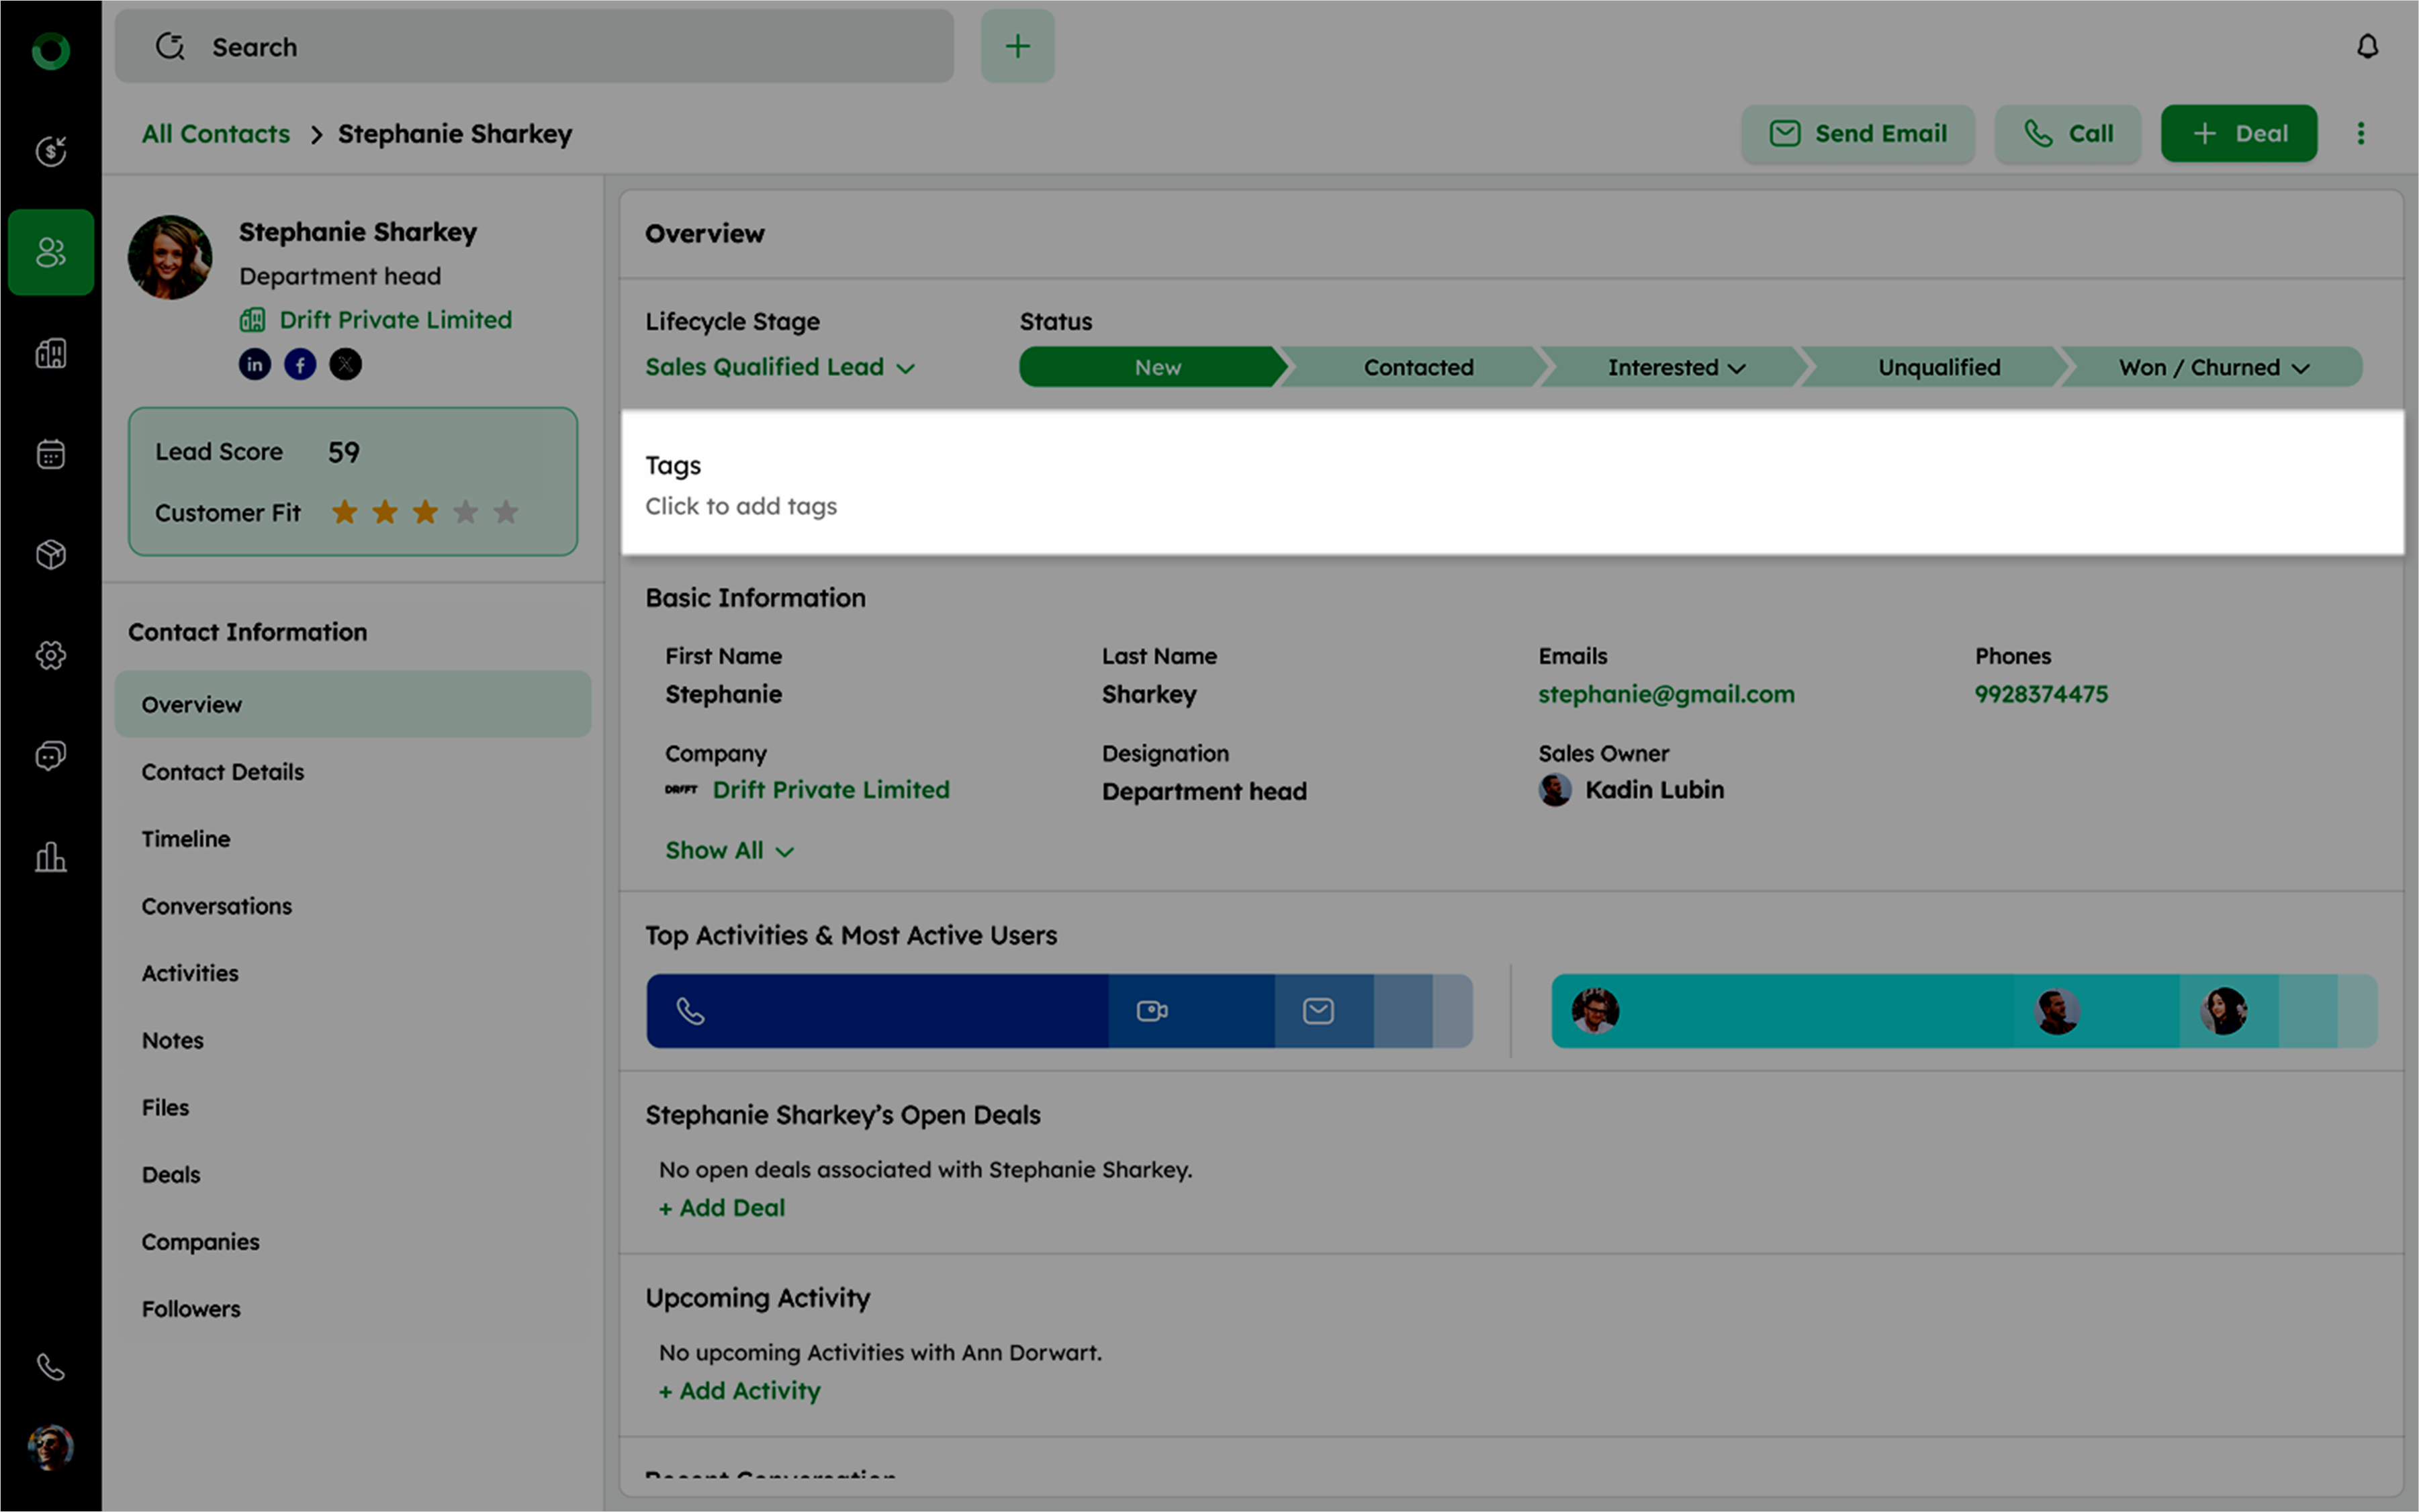
- Add and manage Tags below the scale bar to categorize the contact.
- Scroll to the Basic Information section to view essential contact details.
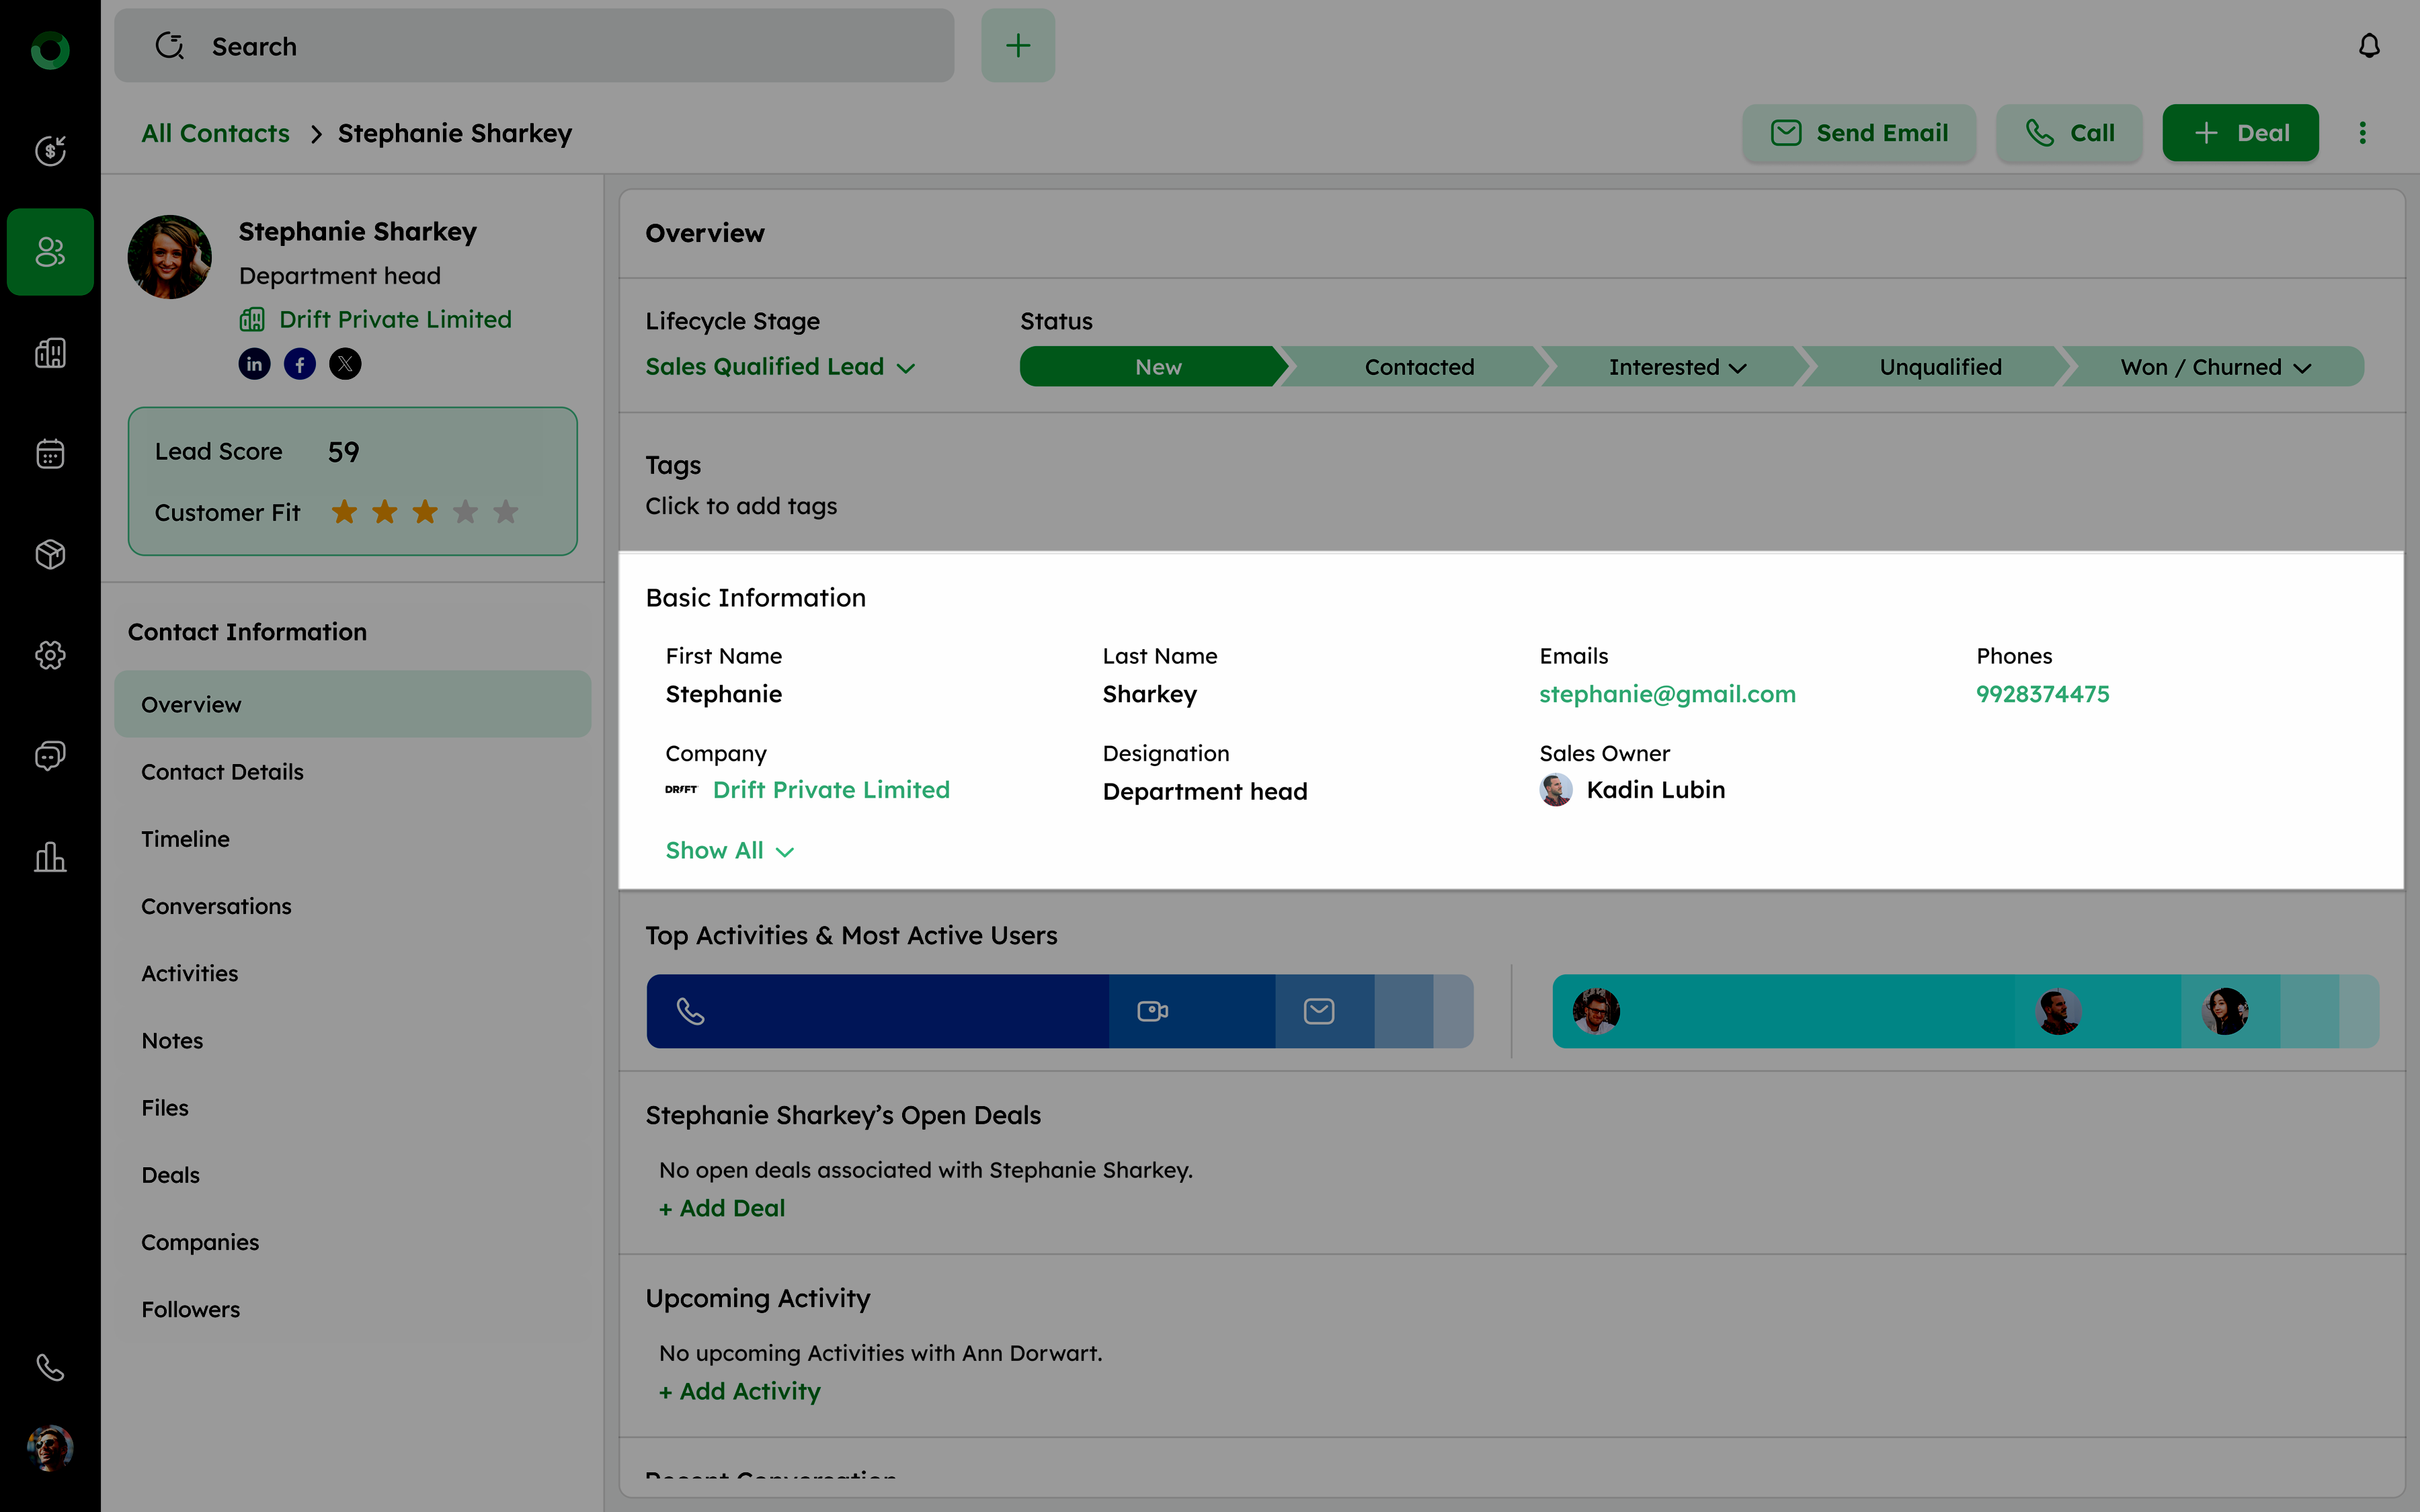
-
Click See More to access the complete Contact Details section.
-
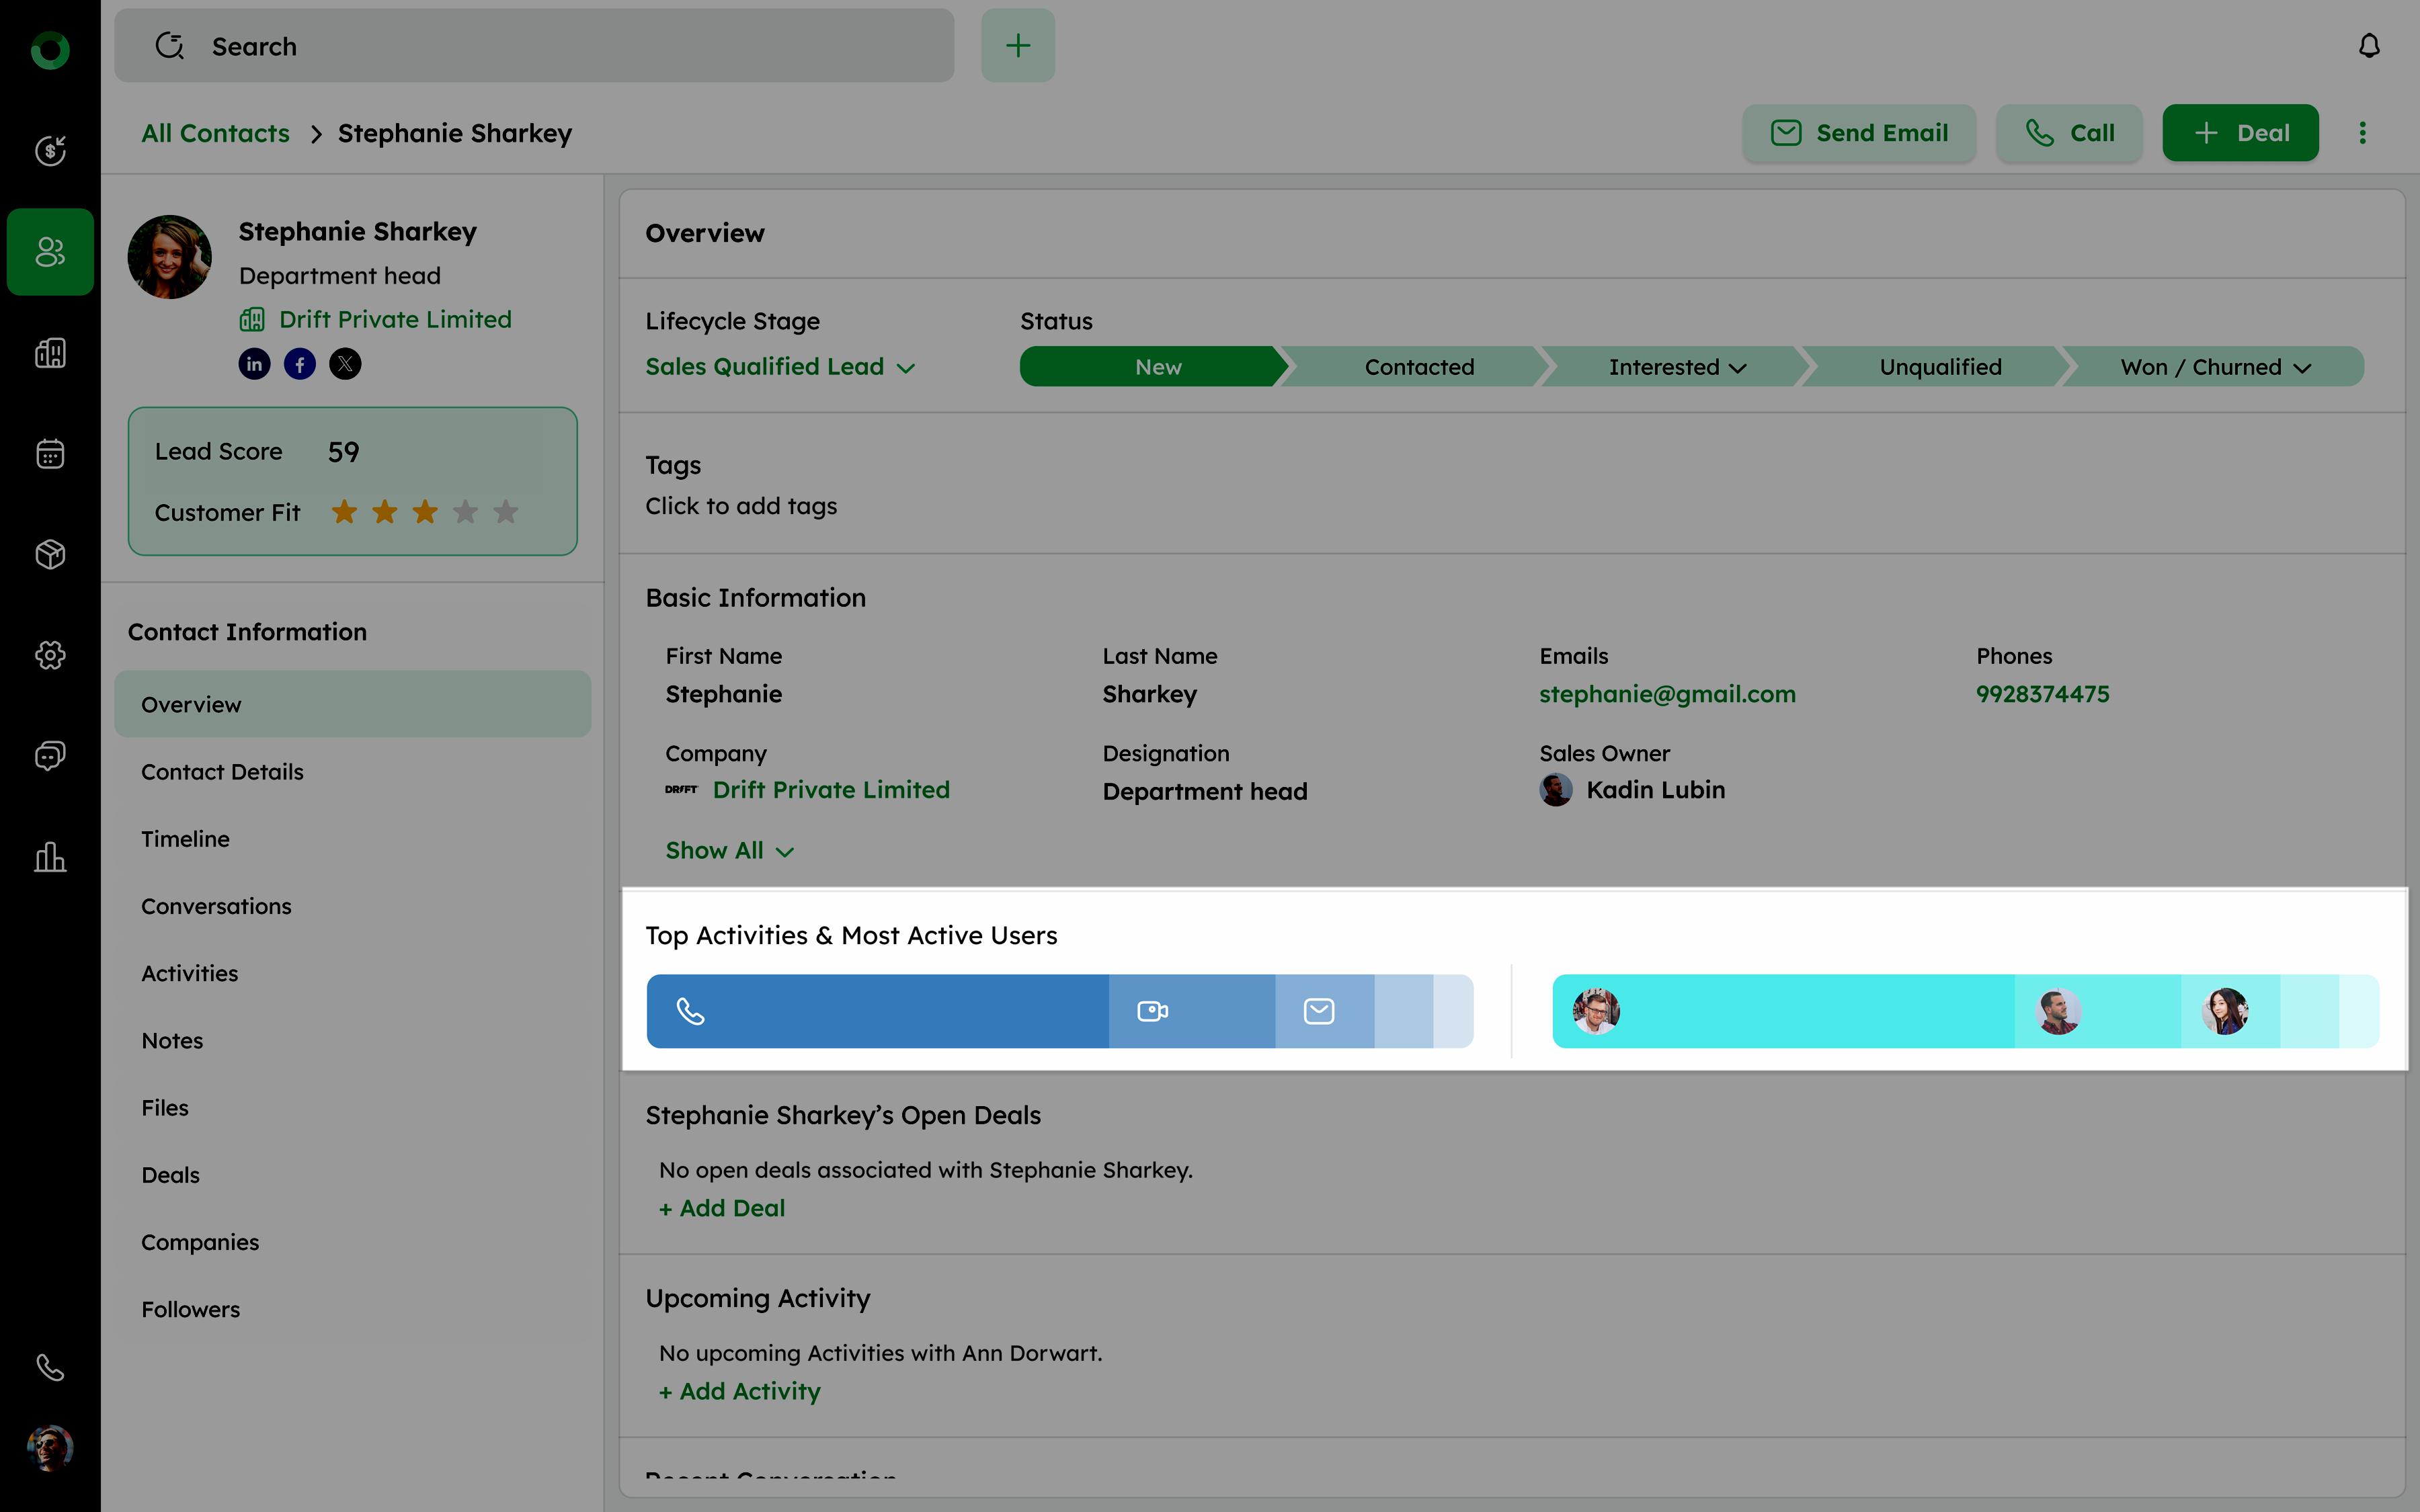
Check activity and engagement through visual bars for Top Activity and Most Active Users.
- Top Activity: Displays the most frequent activity types for the contact.
- Most Active Users: Shows users with the highest engagement levels.
-
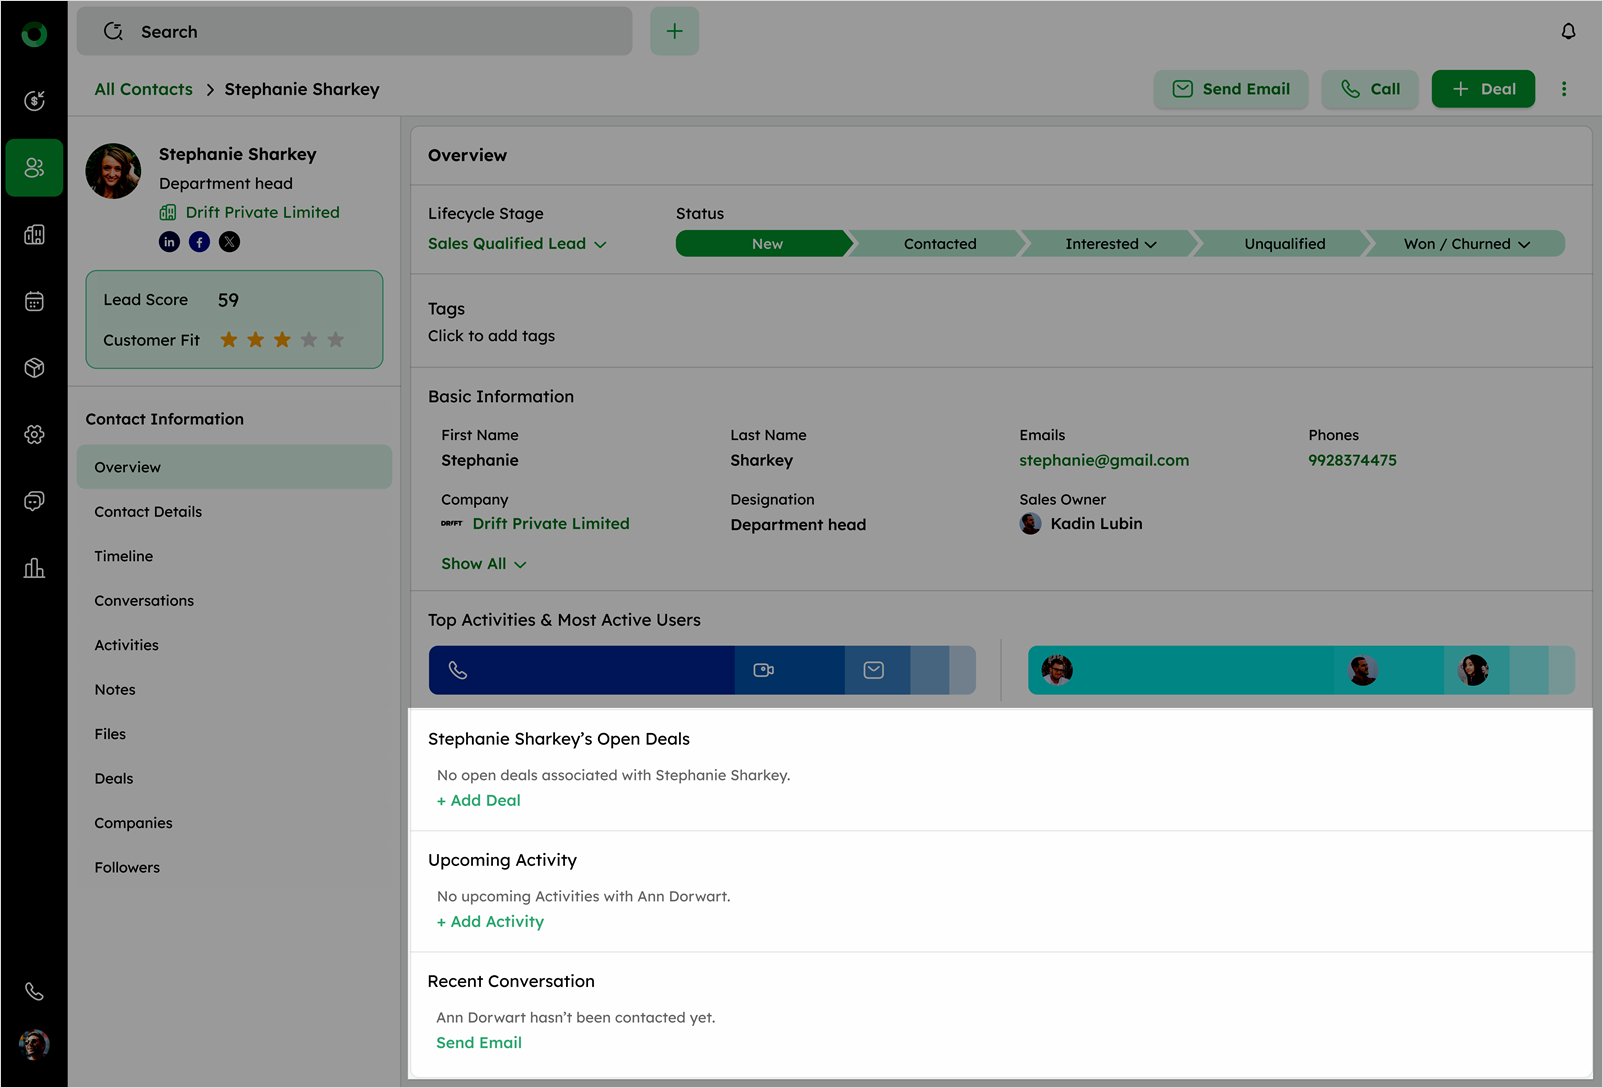
Check the open deals section to see all deals associated with the contact.
-
Go to the Upcoming Activity section to review scheduled tasks or add an activity for the contact.
-
Visit the Recent Conversation section to view the latest communications with the contact.
Contact Details Tab: Viewing All Field Information
The Contact Details tab provides a comprehensive view of all contact-related fields, allowing you to view, manage, and edit contact information in one place.
-
Click on the Contact Details tab to access a comprehensive view of all contact-related fields.
-
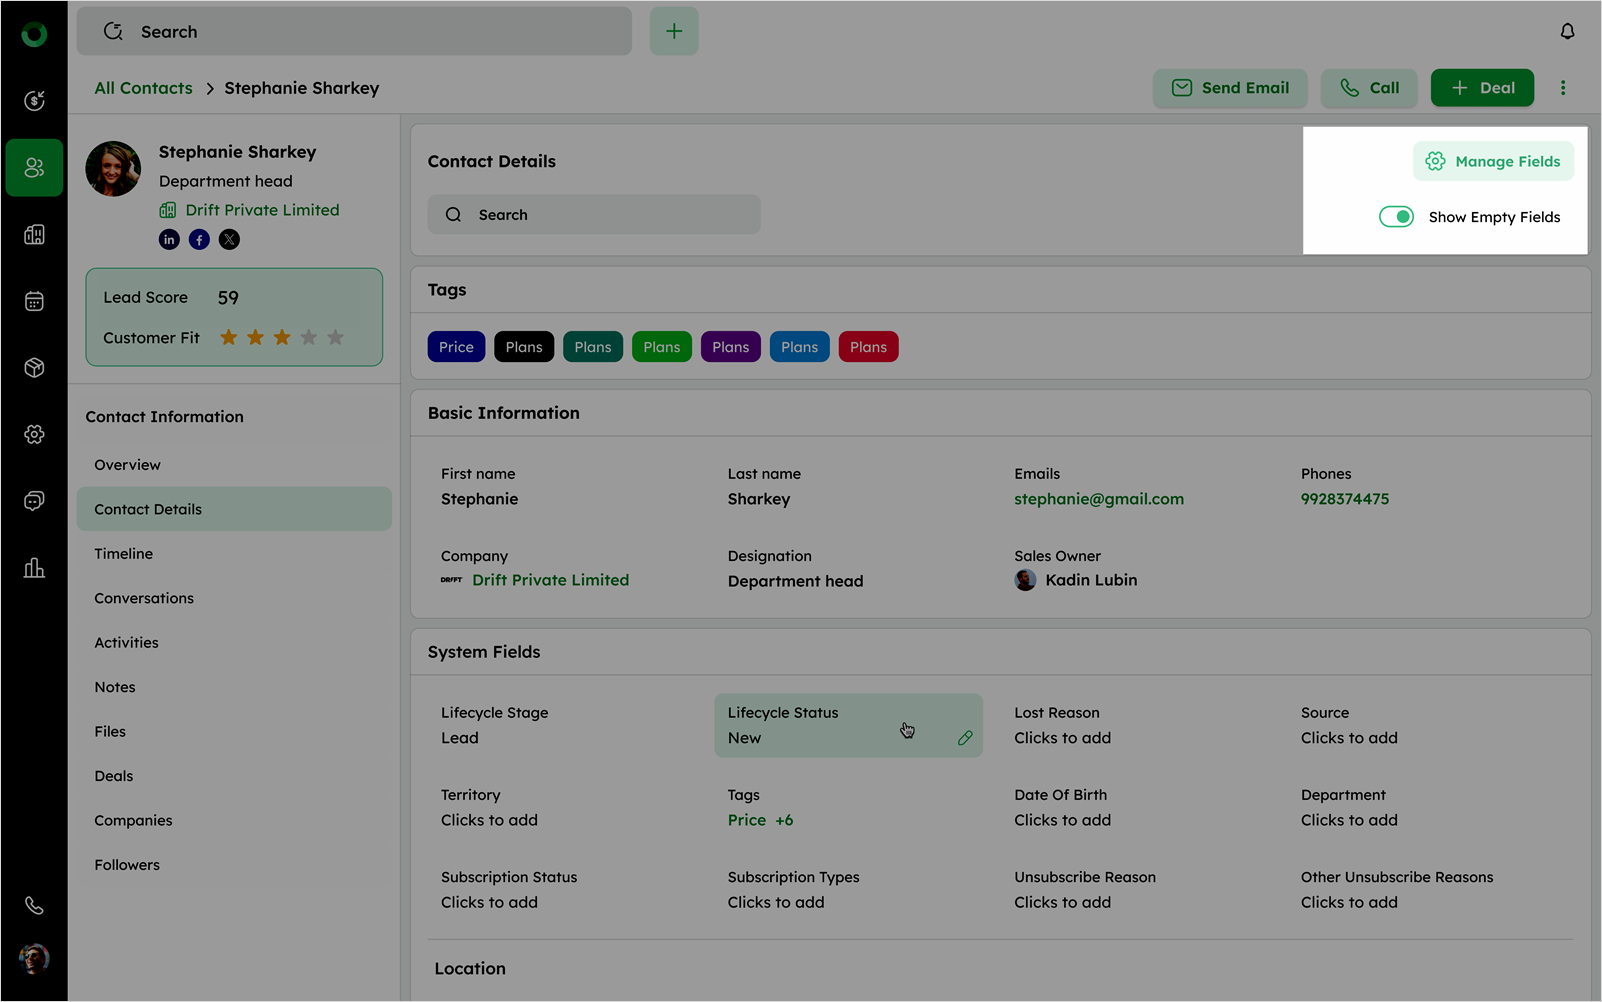
On the top right, click the Manage Fields to view and edit the available contact data fields.
-
Toggle Show Empty Field To:
- Enable - Display all fields, including those without values.
- Disable - Show only fields with existing data.
- Review fields grouped under the following sections:
-
Basic Information: View default fields such as First Name, Last Name, Emails, Phones, Company, Designation, and Sales Owner.
-
System Fields: View system-generated fields like Tags, Location, and Social Profile fields (excluding auto-generating ones).
-
Location: View fields like Address, City, State, Country, and Zipcode.
-
Social Profiles: Access linked profiles such as LinkedIn, Twitter(X) and Facebook.
-
System Information: View auto-generated fields.
-
Custom Fields: View all user-created custom fields.
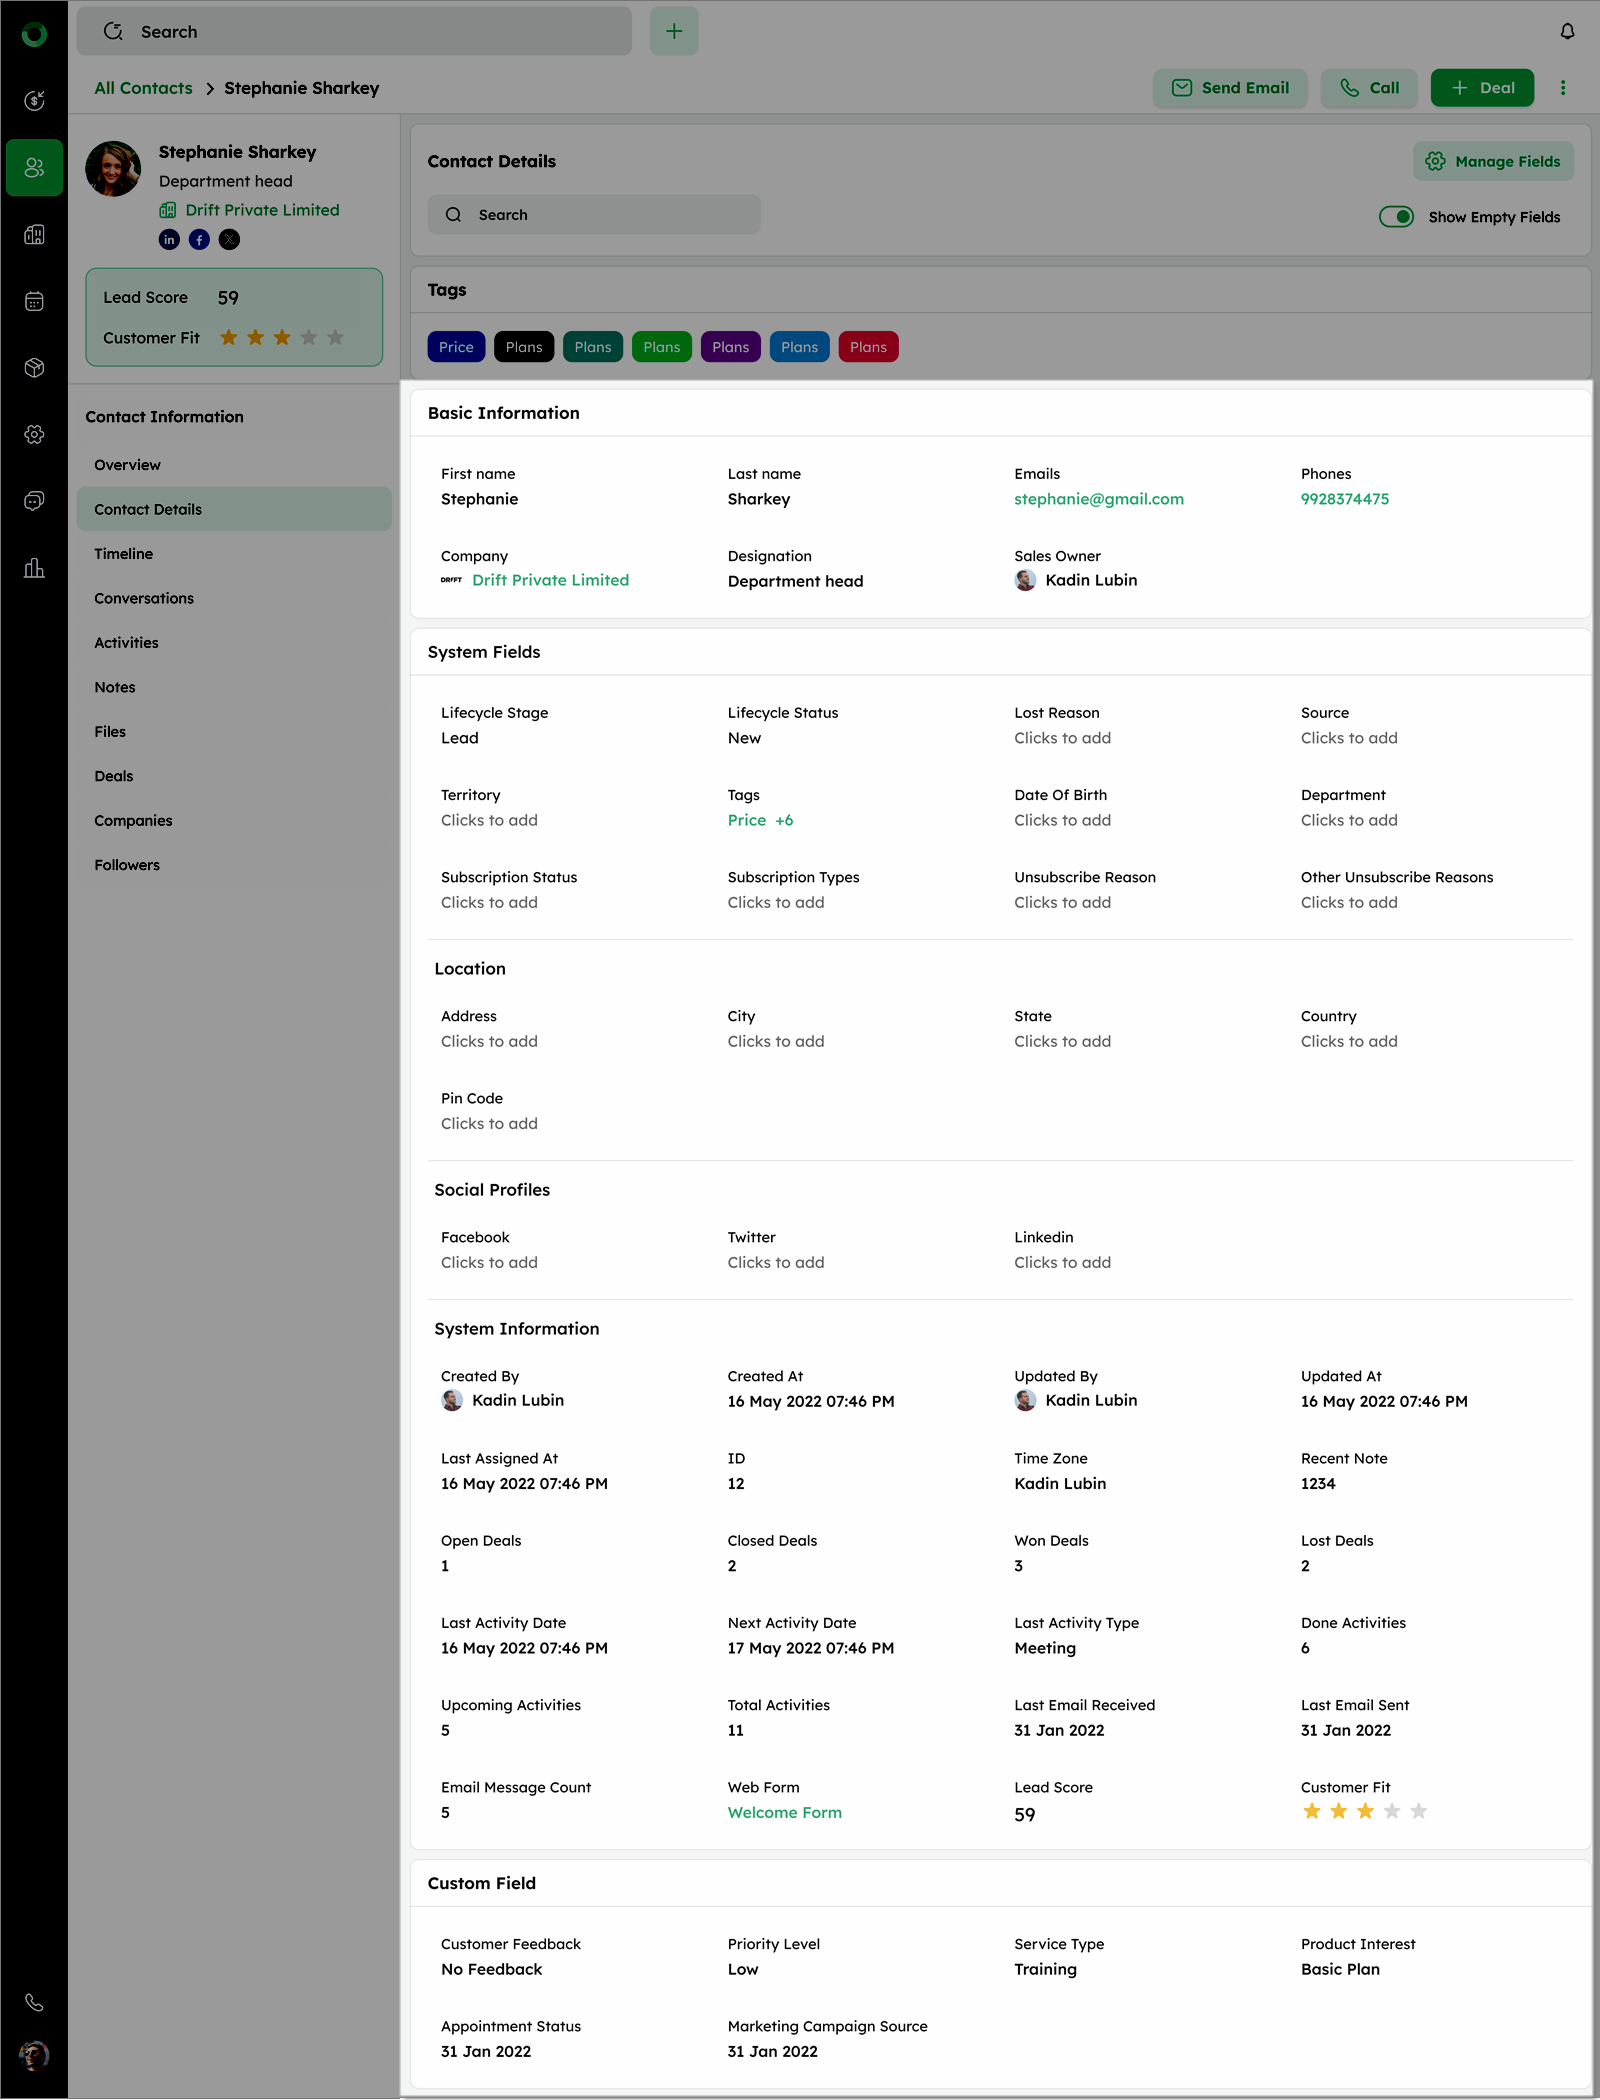
- Hover over any field to reveal the edit icon then click it to update the field's value.
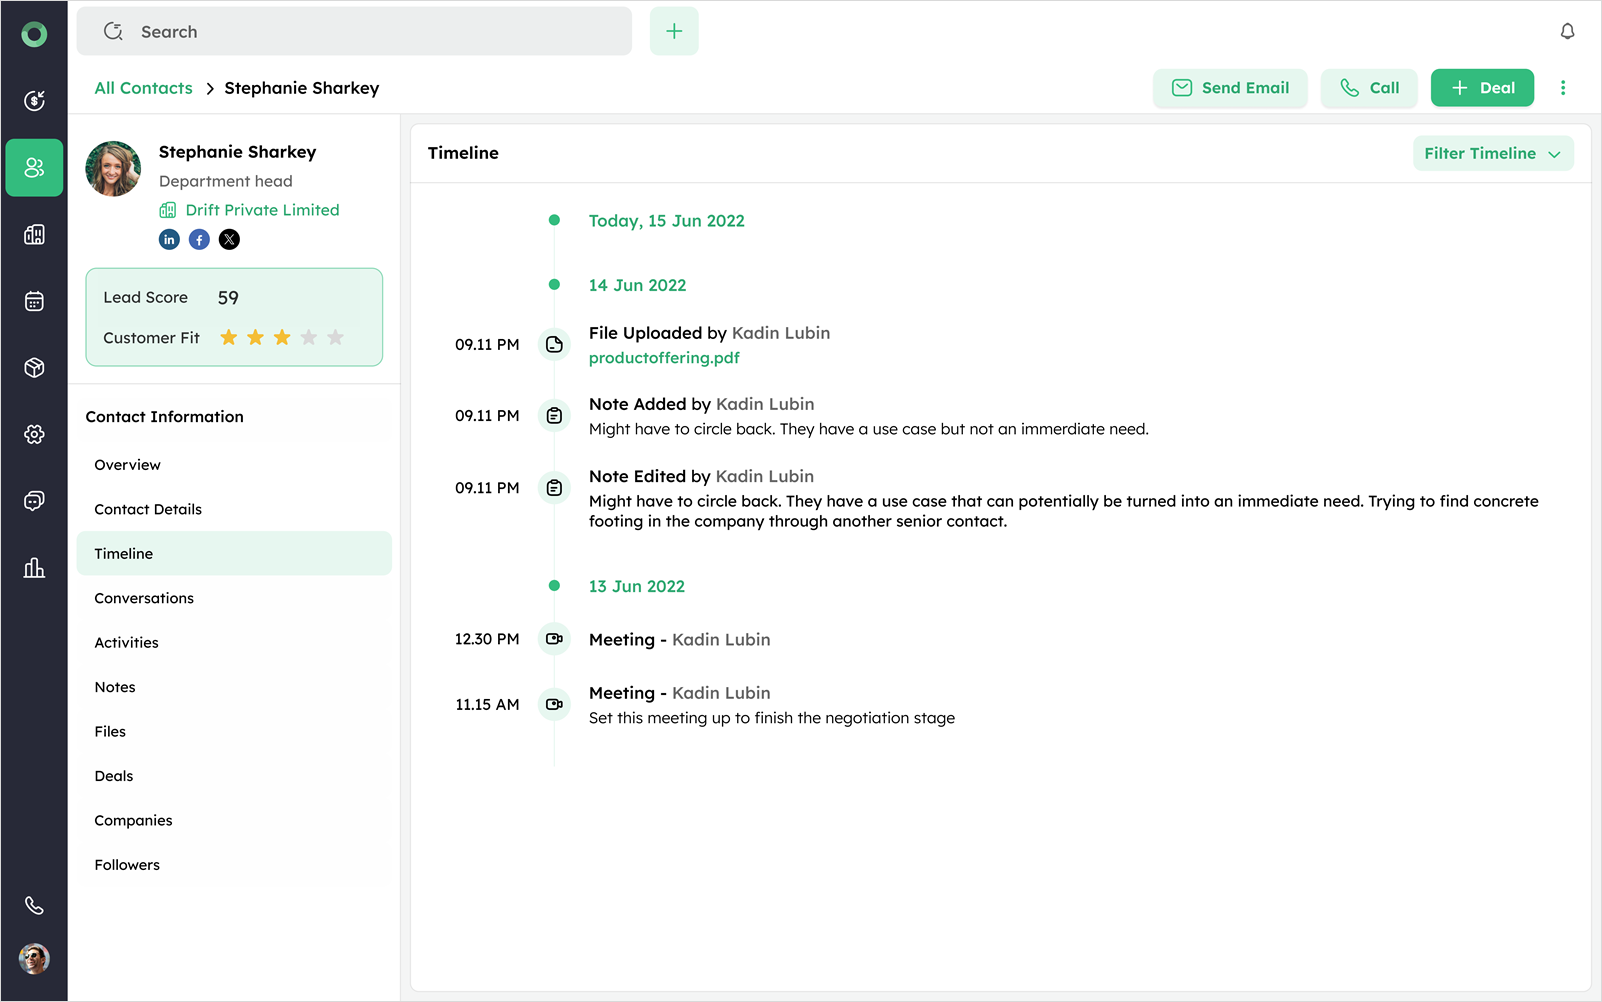
Timeline: Reviewing Full Interaction History
The timeline provides a comprehensive and chronological view of all interactions and updates related to a contact, helping you track the history and evolution of engagements.
- Navigate to the Timeline section on the contact's detail page to view the chronological log of actions and updates related to the contact.
Activities are grouped by date for easy reference.
-
Use the Filter dropdown on the top right to filter entries by type (e.g., Calls, Emails, Notes, Activities, Files, or Updated).
-
Select multiple checkboxes in the filter to display multiple entry types together.
The actions mapped to the timeline are as follows:
| Fields | Definition |
|---|---|
| Contact created | Displays when the contact was added and the responsible owner. |
| Contact Name Change | Shows previous and updated names of the contact, along with the owner who made the change. |
| Lifecycle Change | Indicates the new lifecycle stage of the contact. |
| Lifecycle Stage - Lost Reason | Provides the reason for marking the contact as lost and the owner who set it. |
| Lifecycle Stage - Lost Reason Update | Shows the updated reason for the contact being marked as lost and the owner who made the update. |
| Deal Associated | Displays the name of the associated deal and the owner who linked it. |
| Deal Title Change | Lists the old and new deal titles and the owner who updated them. |
| Form Submission | Shows the name of the submitted form. |
| Merge | Indicates the contact was merged with another contact to prevent duplicates. |
| Inbound Mail | Details of emails received from the contact, including date, time, and content summaries. |
| Outbound Mail | Details about** emails sent to the contact, including date, time, and content summaries. |
| Call Failed | Records calls that failed to connect are indicated in red, including the date and time of the attempt. |
| Voice Note | Details of voice messages left by the contact, including dates and content summaries. |
| Call Record | Audio recordings of phone calls with the contact, including date, time, and call duration. |
| Call Logged | Information about phone calls made or received, including dates and summaries of the conversation. |
| Email Logged | Records emails sent or received, including dates and content summaries |
| Deal value updated | Shows updates made to the deal value by the sales owner. |
| Expected Closing Date Assigned | Displays the expected closing date assigned by the owner. |
| Expected Closing Date Changed | Shows the expected closing date updated by the owner. The owner changed the expected close date |
| Form Submission | The contact submitted the form on the specified page. |
| File Uploaded | A file relevant to the contact was uploaded by the owner. |
| Note Added | A note regarding the contact was added with additional information. |
| Note Edited | An existing note about the contact was updated with revised details. |
| Meeting Scheduled | A meeting was scheduled by the owner |
| Activity Title Changed | Owner changed the title of an activity. |
| Activity Note Added & Edited | The owner added or updated a note with details or updates about the activity. |
Conversations: Tracking Email and Messaging History
The Conversation section maintains a comprehensive record of all communications, including emails and call information. It tracks send and received emails, as well as call logs, providing a clear history of interactions.
- Select the Conversations section on the Contact Detail Page.
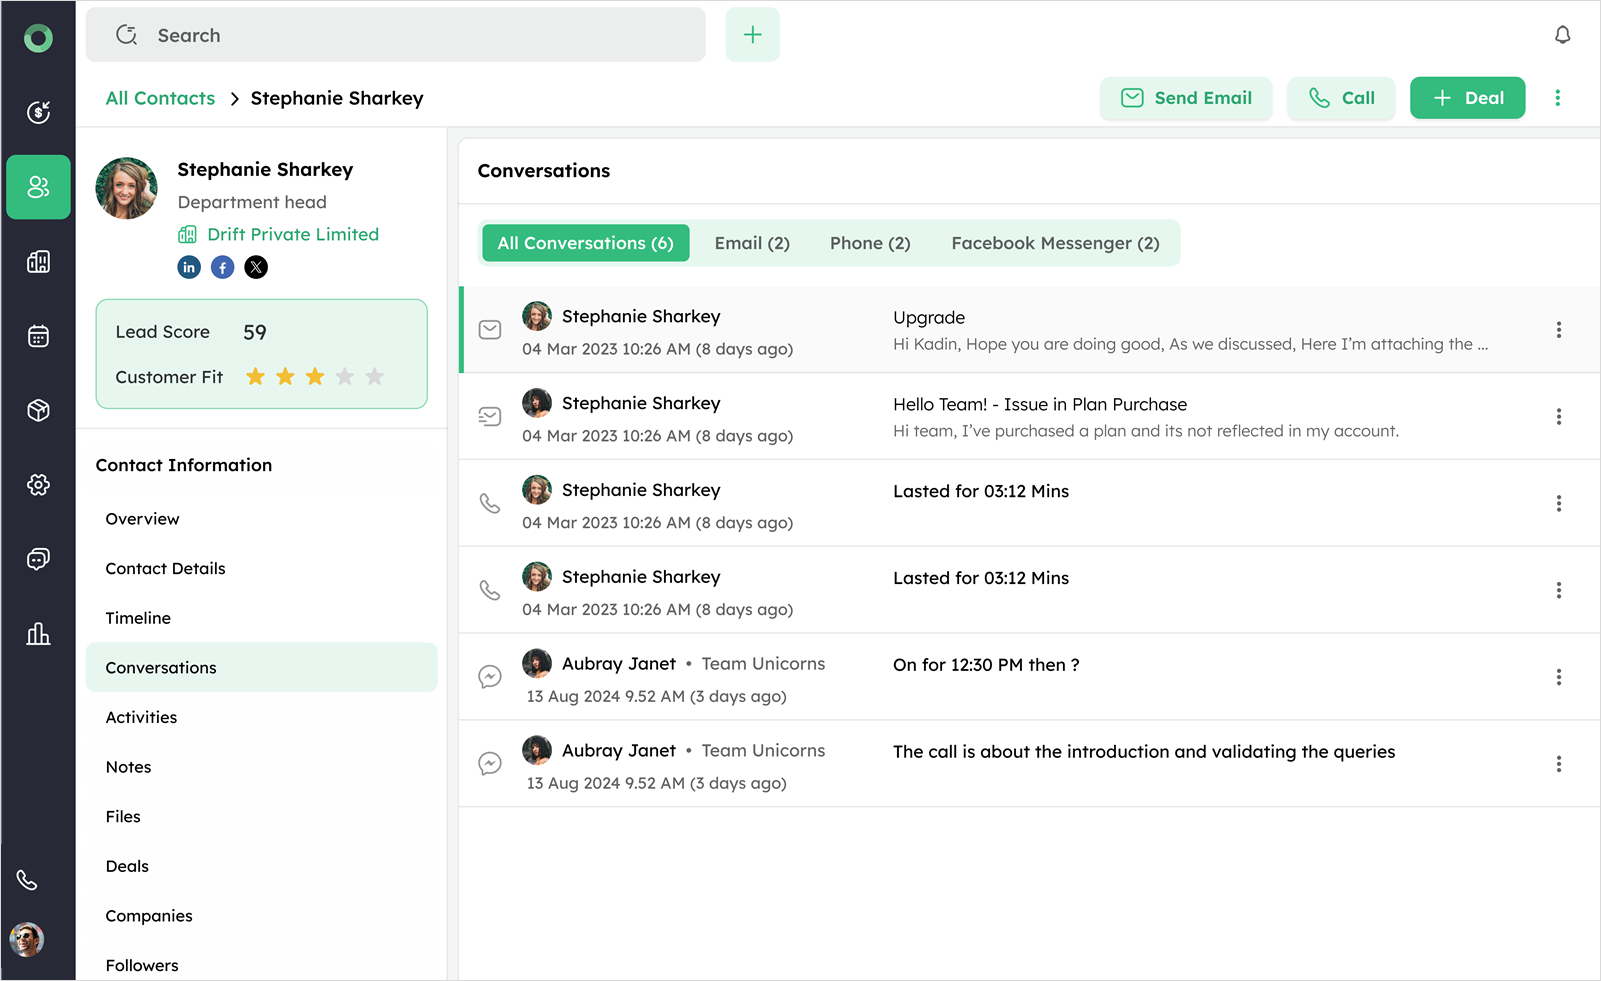
- Use the toggles at the top to switch between different communication channels, such as, All Conversations, Email, Phone, and Facebook Messenger.
Each toggle displays the total count of conversations for that channel.
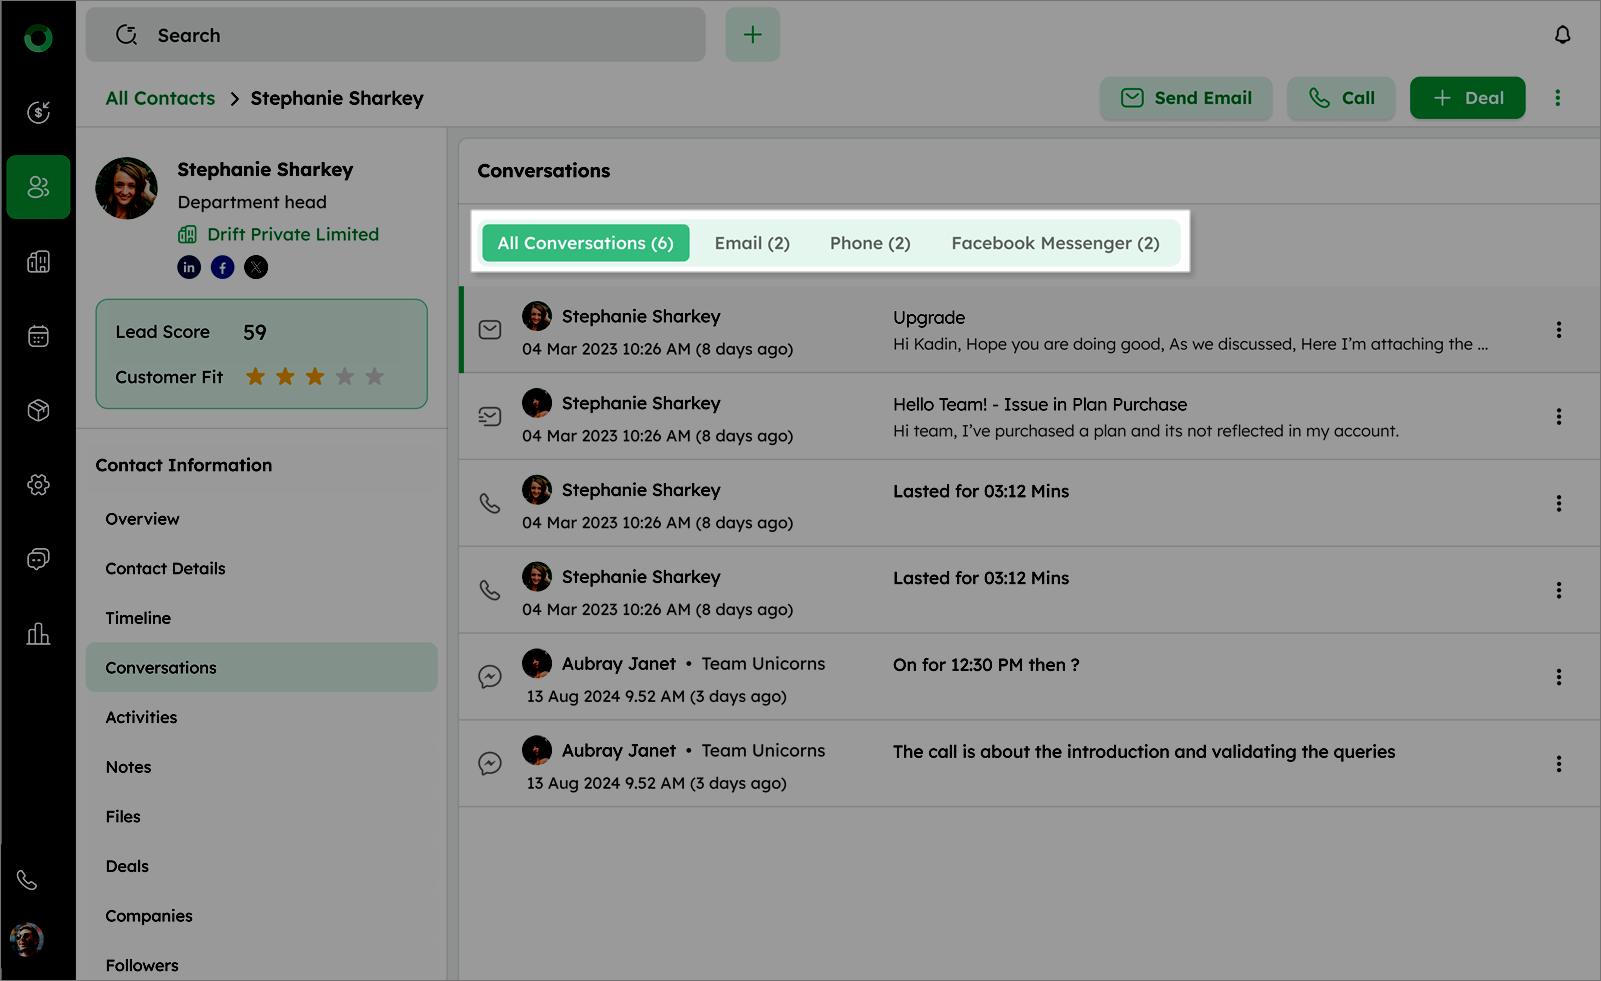
- Click on any conversation to view its full content.
Here are the mappings for the conversations:
| Fields | Definition |
|---|---|
| Inbound Mail | Details of emails received from the contact, including date, time, and content summaries. |
| Outbound Mail | Information about emails sent to the contact, including date, time, and content summaries. |
| Draft Emails | Emails that are saved as drafts, indicated with Draft in brackets, showing subject and body. |
| Scheduled Emails | Emails scheduled to be sent in the future, displaying the user's name, scheduled sending time, subject, and body. |
| Reply Mail | Responses within email threads, marked with Re, including replies and forwards to or from the contact. |
| Call & Recordings | Phone call details and recordings, including date, time, duration, and recording playback (if available). |
| Call Logged | Details of phone calls made to or received from the contact, including the date, time, and any associated agenda. |
Link and Unlink Conversation
This setting controls whether an email conversation is associated with a contact's record.
If Enabled:
The conversation appears in both the Timeline and Conversations sections.
The contact's name is displayed in the email folder, along with the email address.
If Disabled:
The conversation does not appear in the Timeline or Conversations sections.
Only the email address is displayed in the email folder, without the contact's name.
If the configuration, link to contact is disabled during an ongoing conversation, previously linked conversations will remain in the timeline, but new ones will not be added.
Activities: Managing Scheduled and Completed Tasks
The Activities section in the Contact Module displays all scheduled and completed tasks related to a contact.
- Go to the Activities section to view scheduled and completed tasks related to the contact.
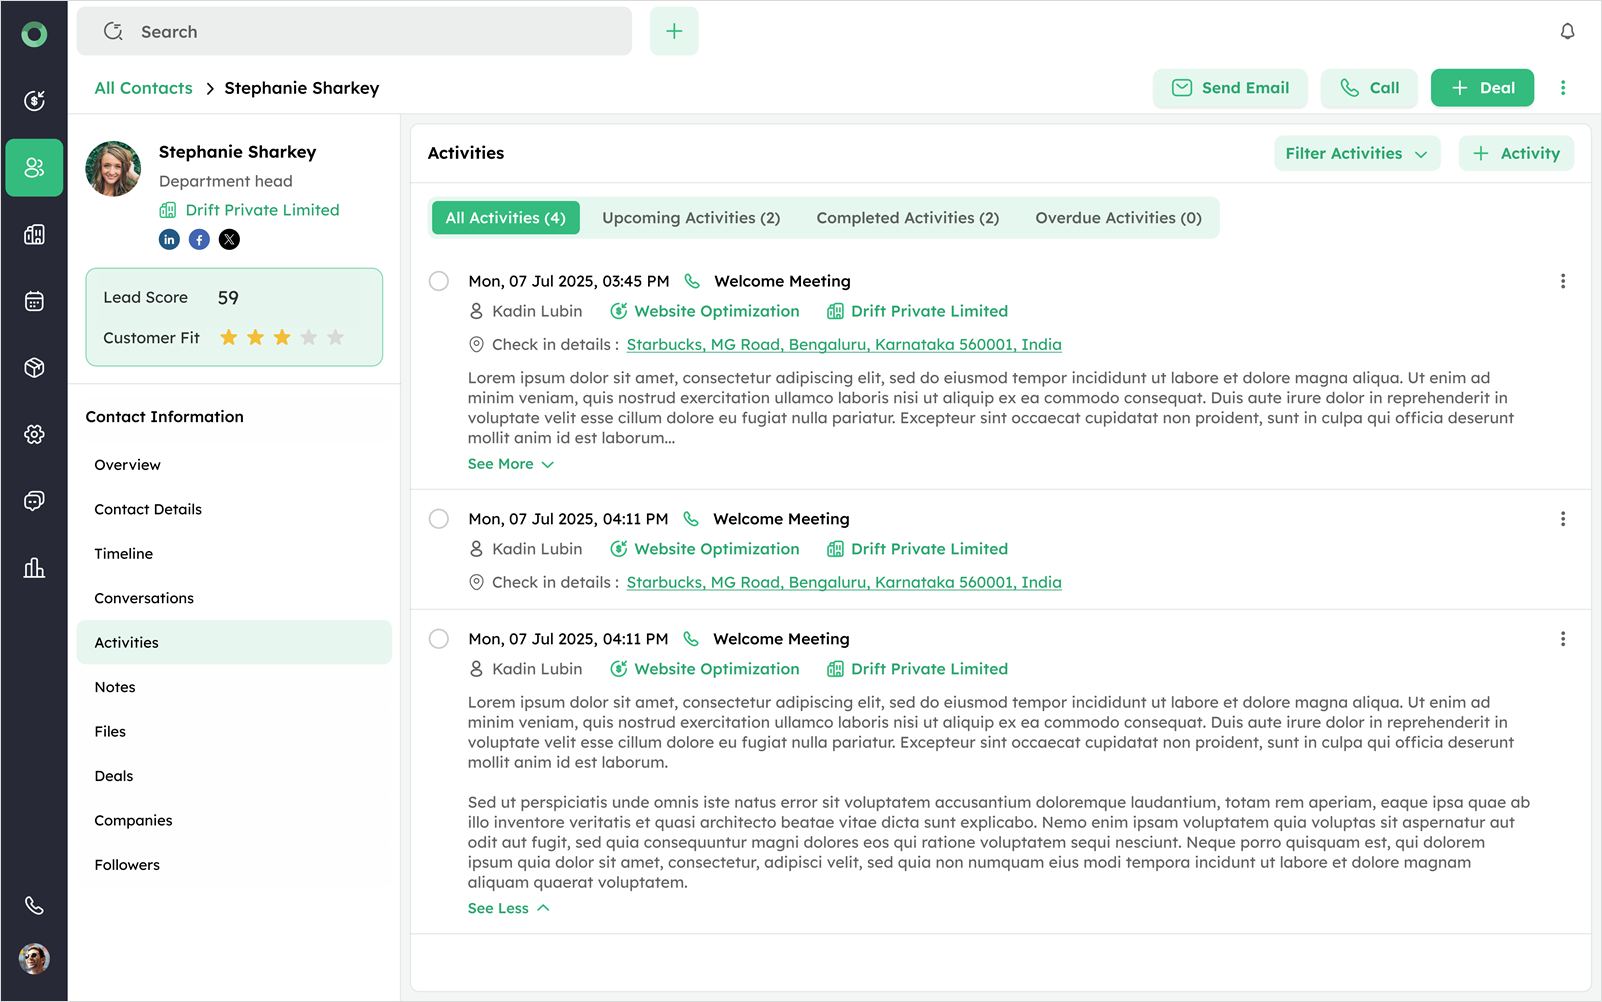
- Use the following toggles to navigate: All Activities (Displays tasks in the order: Overdue, Upcoming, Completed), Upcoming, Completed, and Overdue.
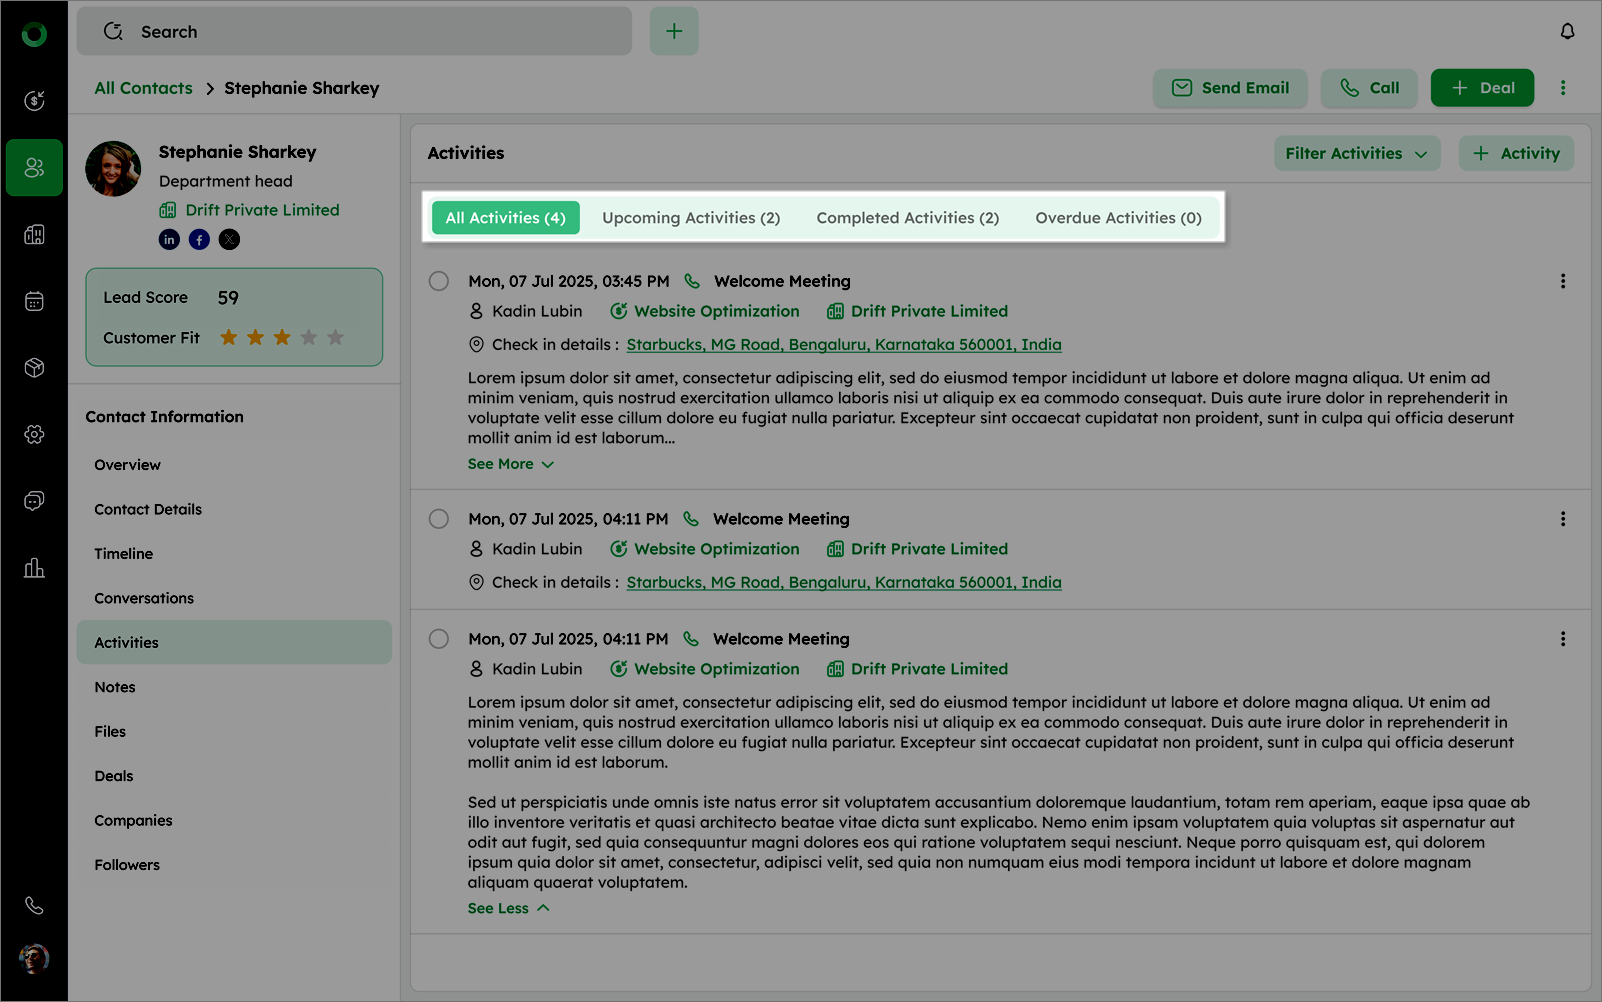
Activities within each toggle are sorted by start date and time in ascending order.
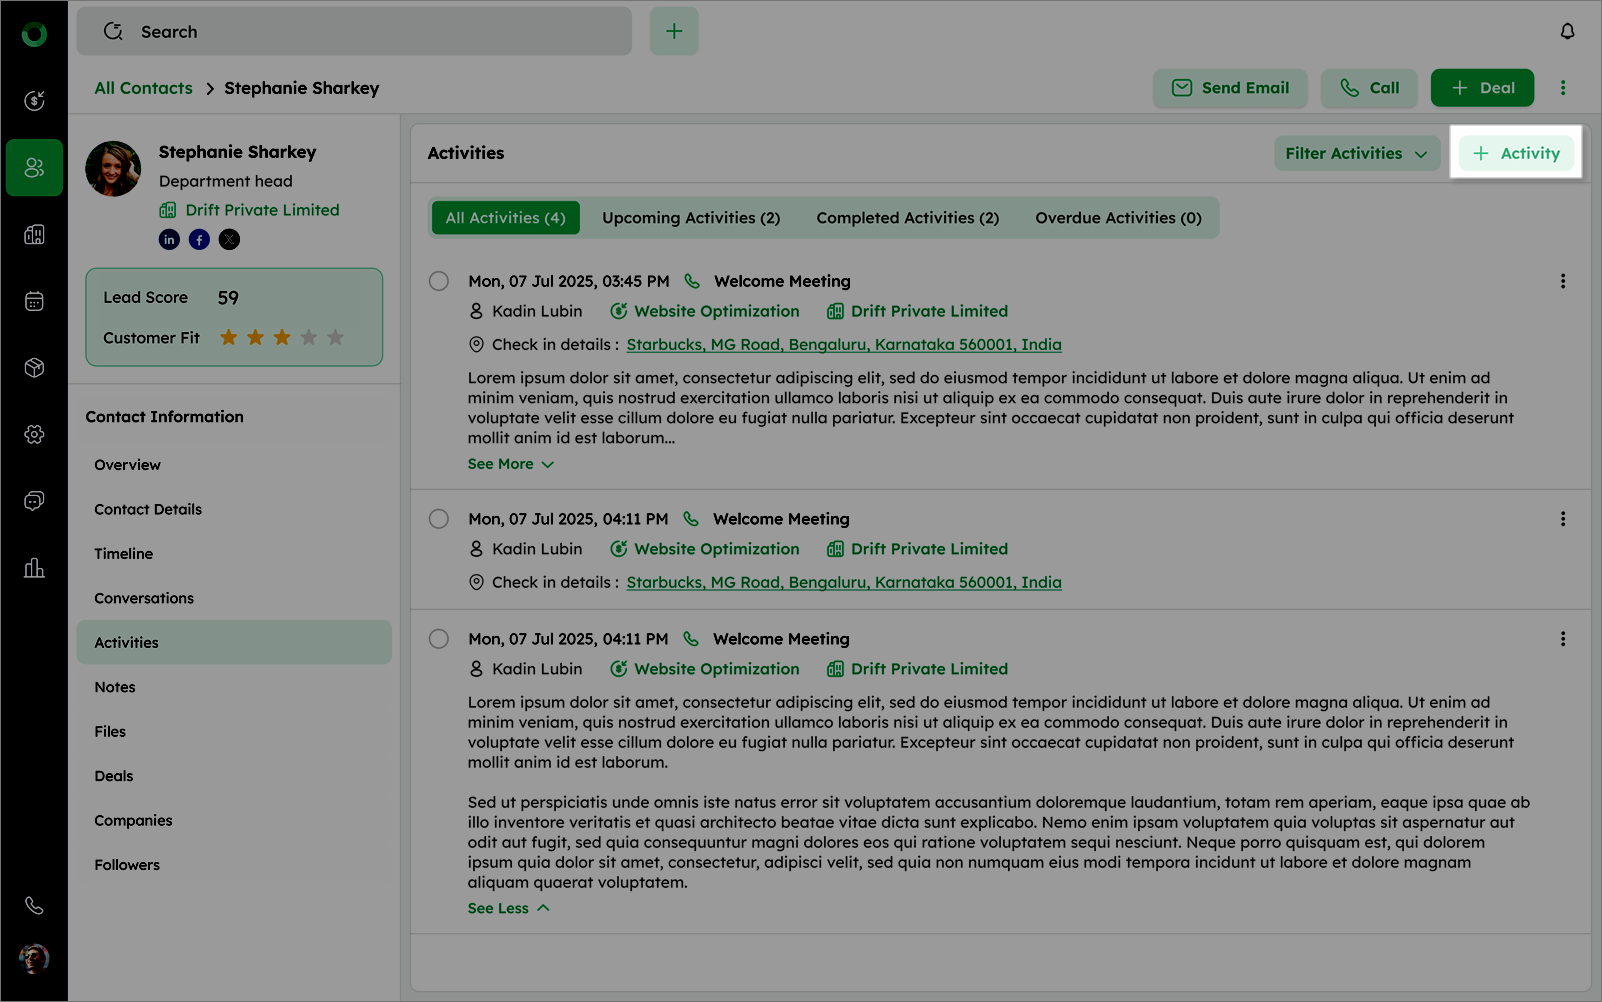
- Use the Filter option on the top right to filter by activity type.

- Click the + Activity button to schedule a new activity.
How to Add Notes and Internal Comments?
The Notes section allows you to document and store key updates about a contact.
-
Click Notes from the side menu.
-
Type directly in the input field with the placeholder.
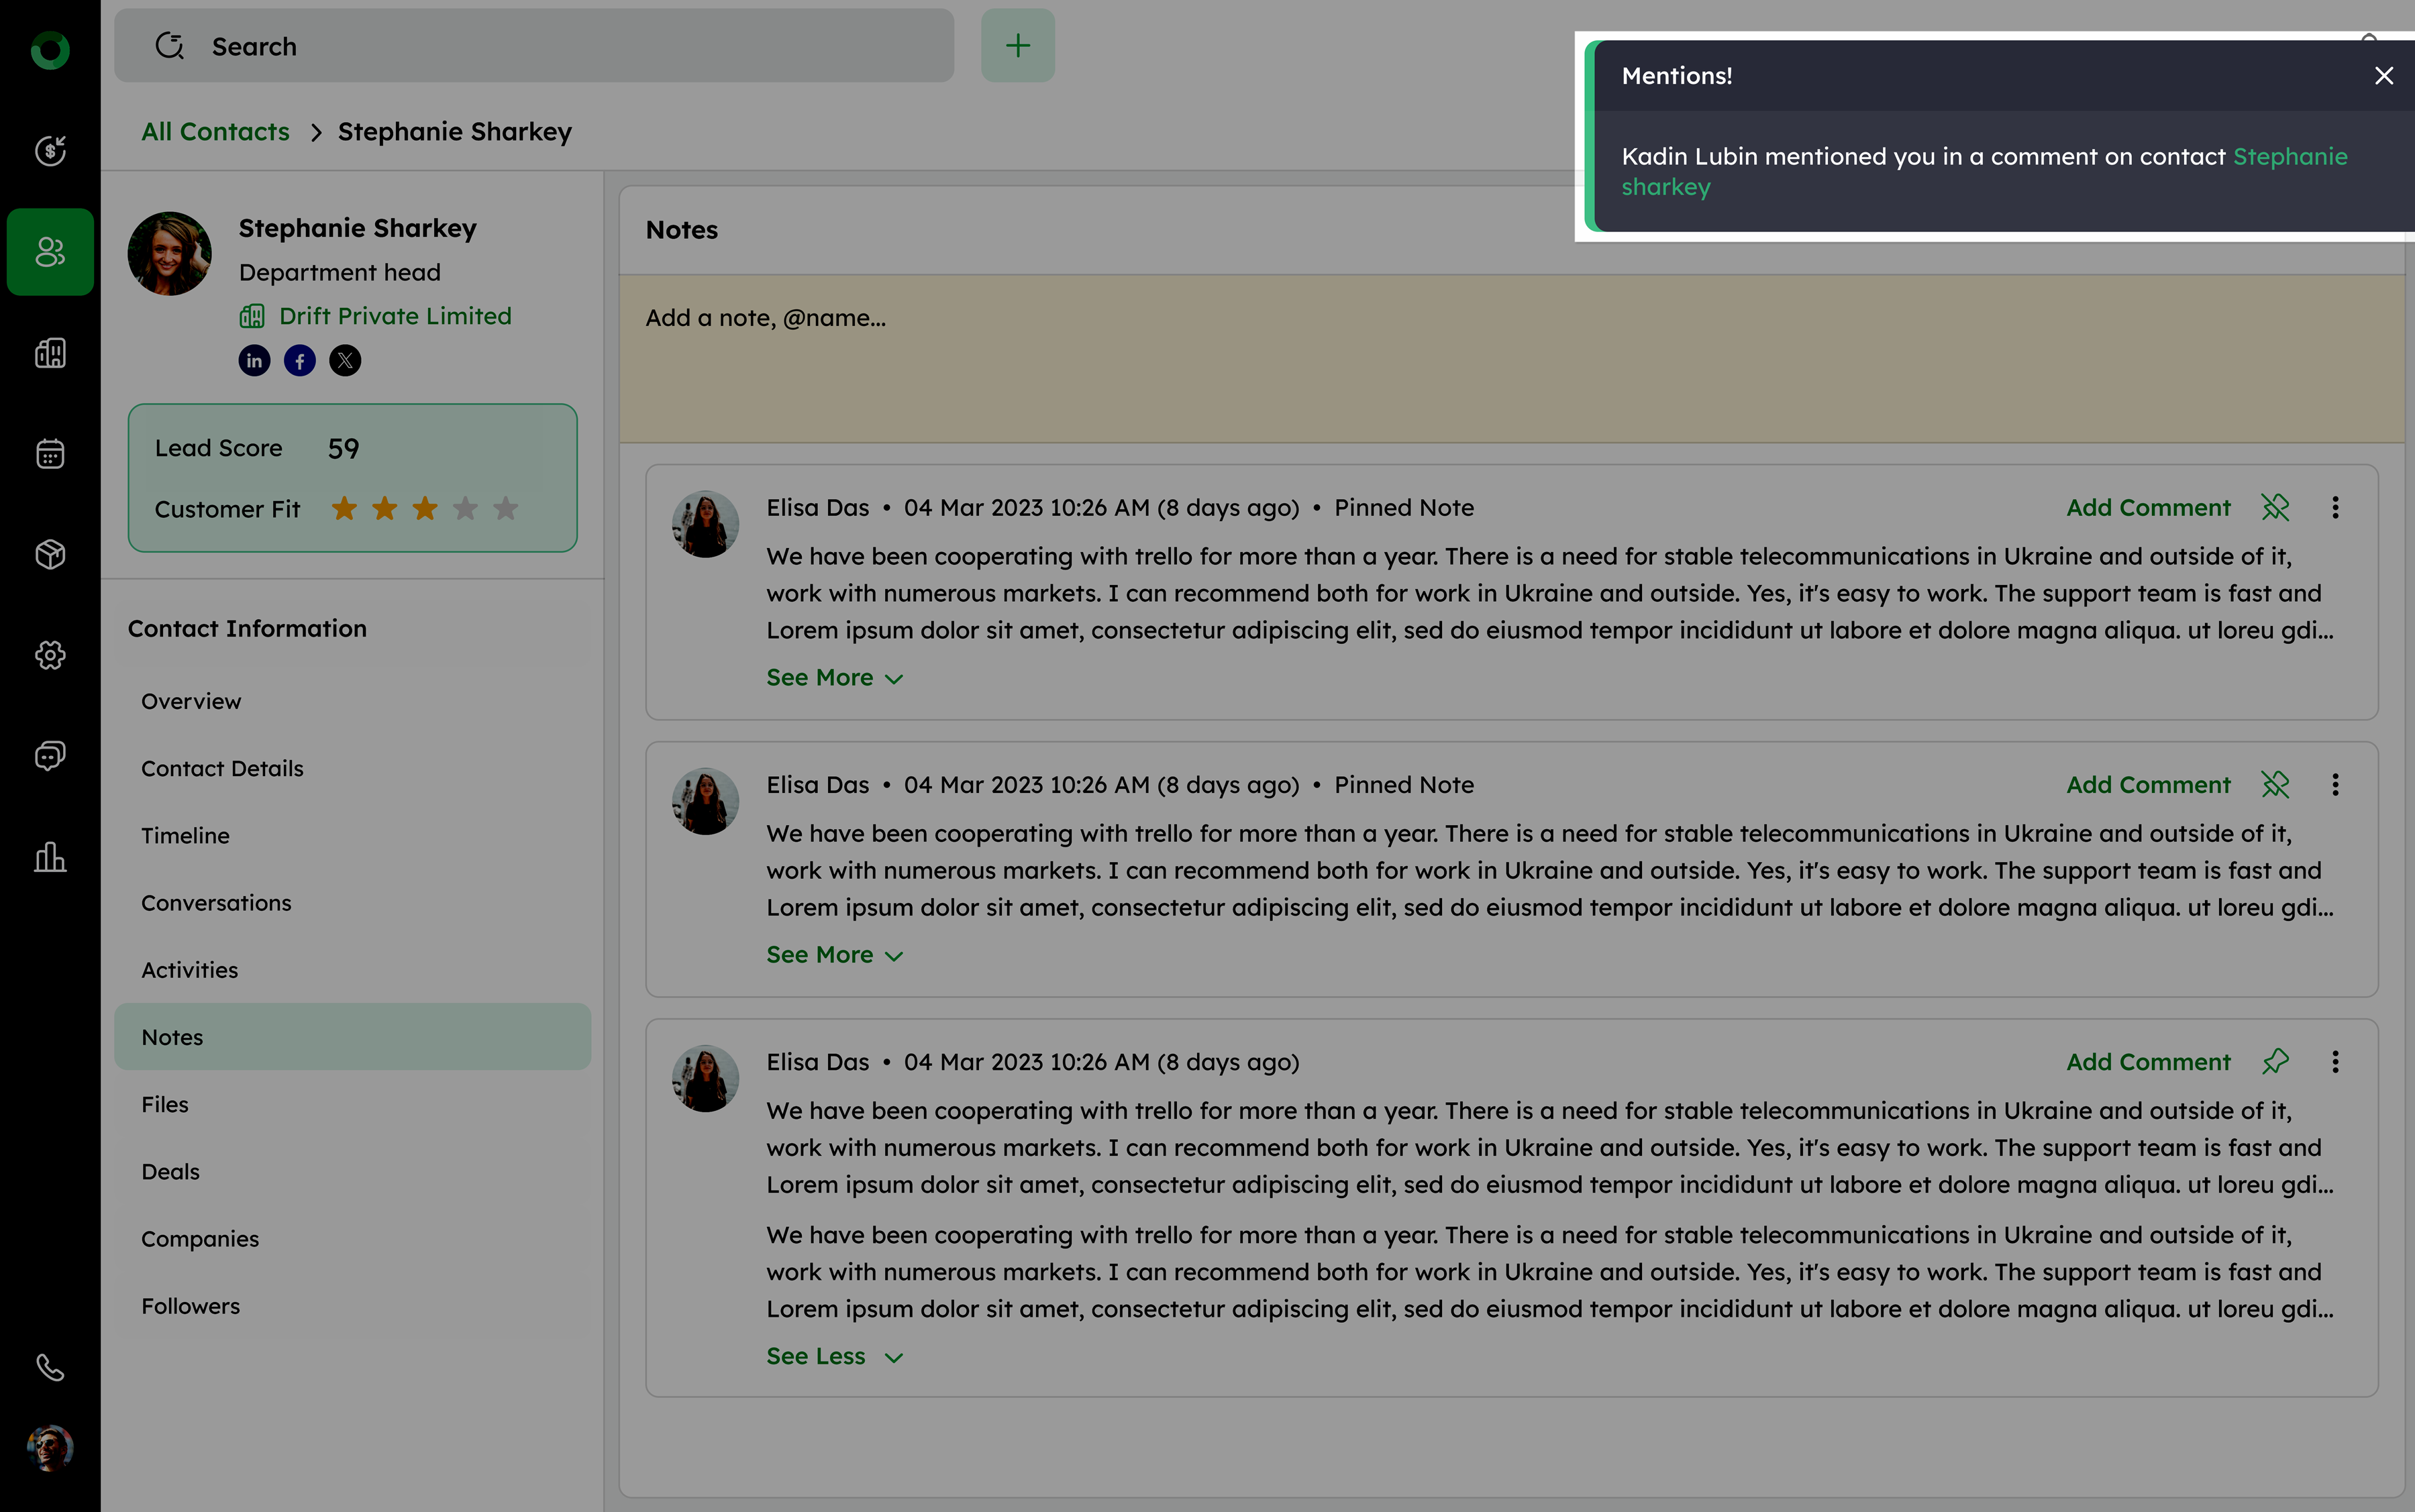
- Mention teammates using @name in the note and add your doubt or comment for them.
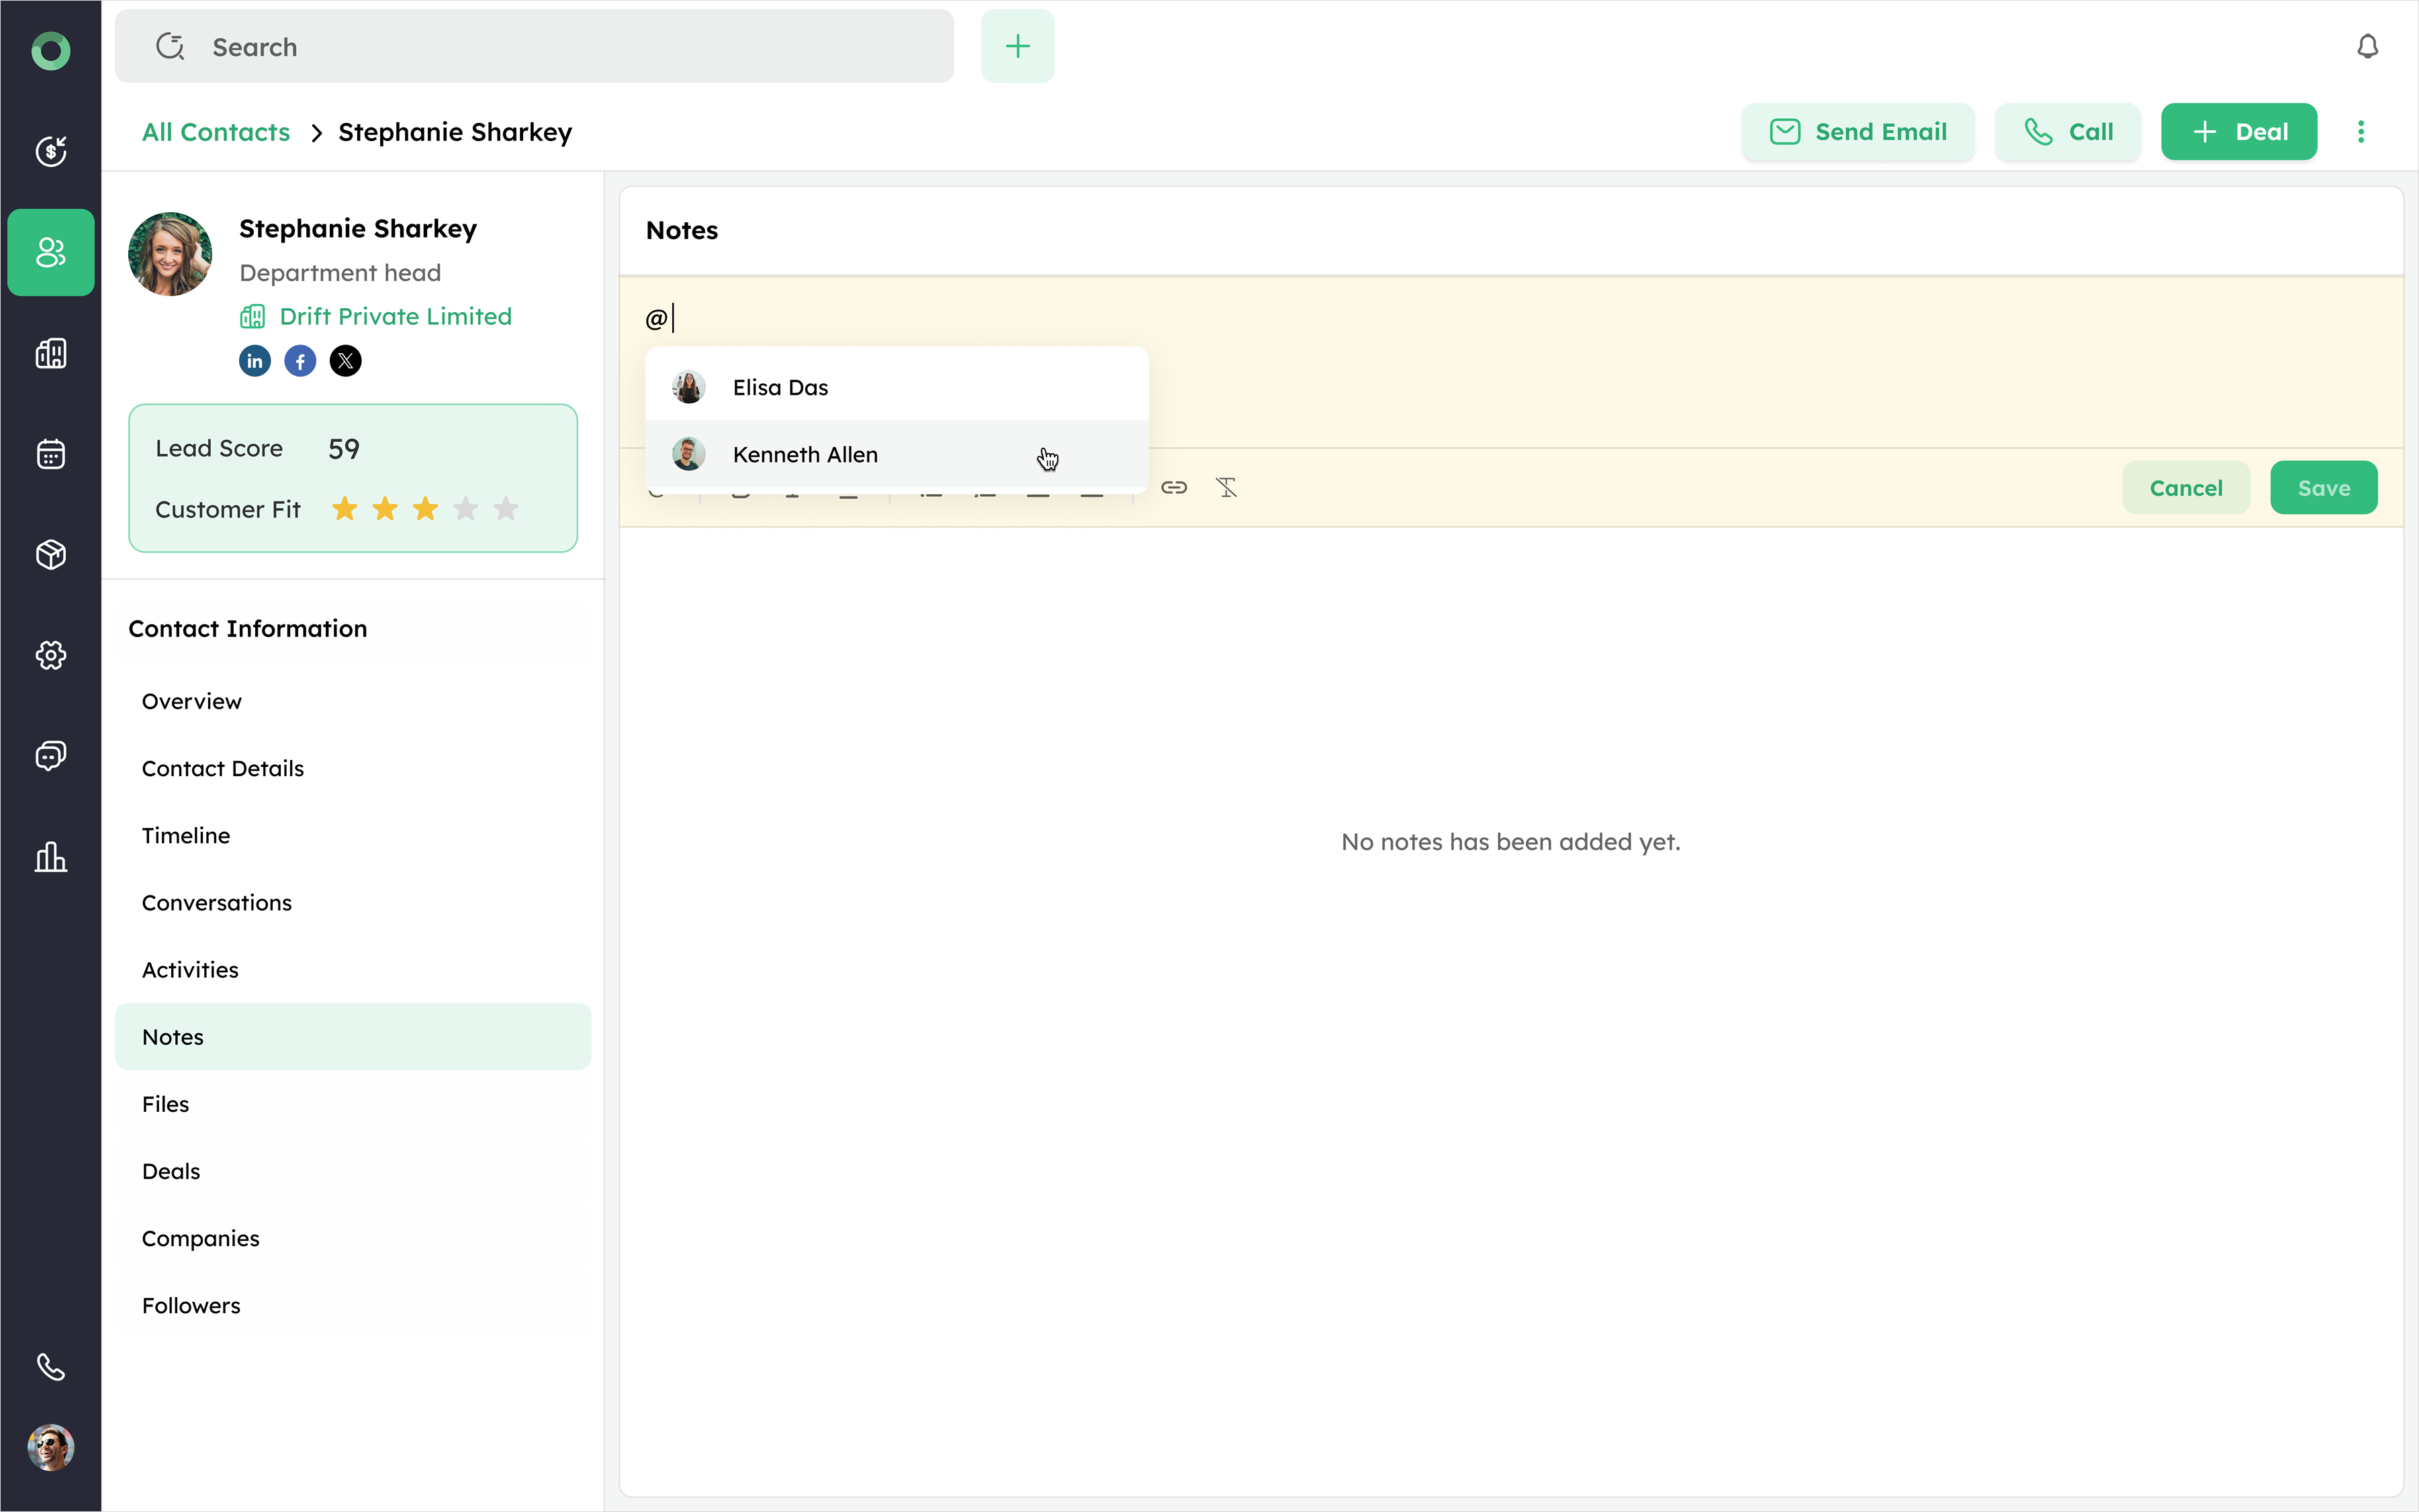
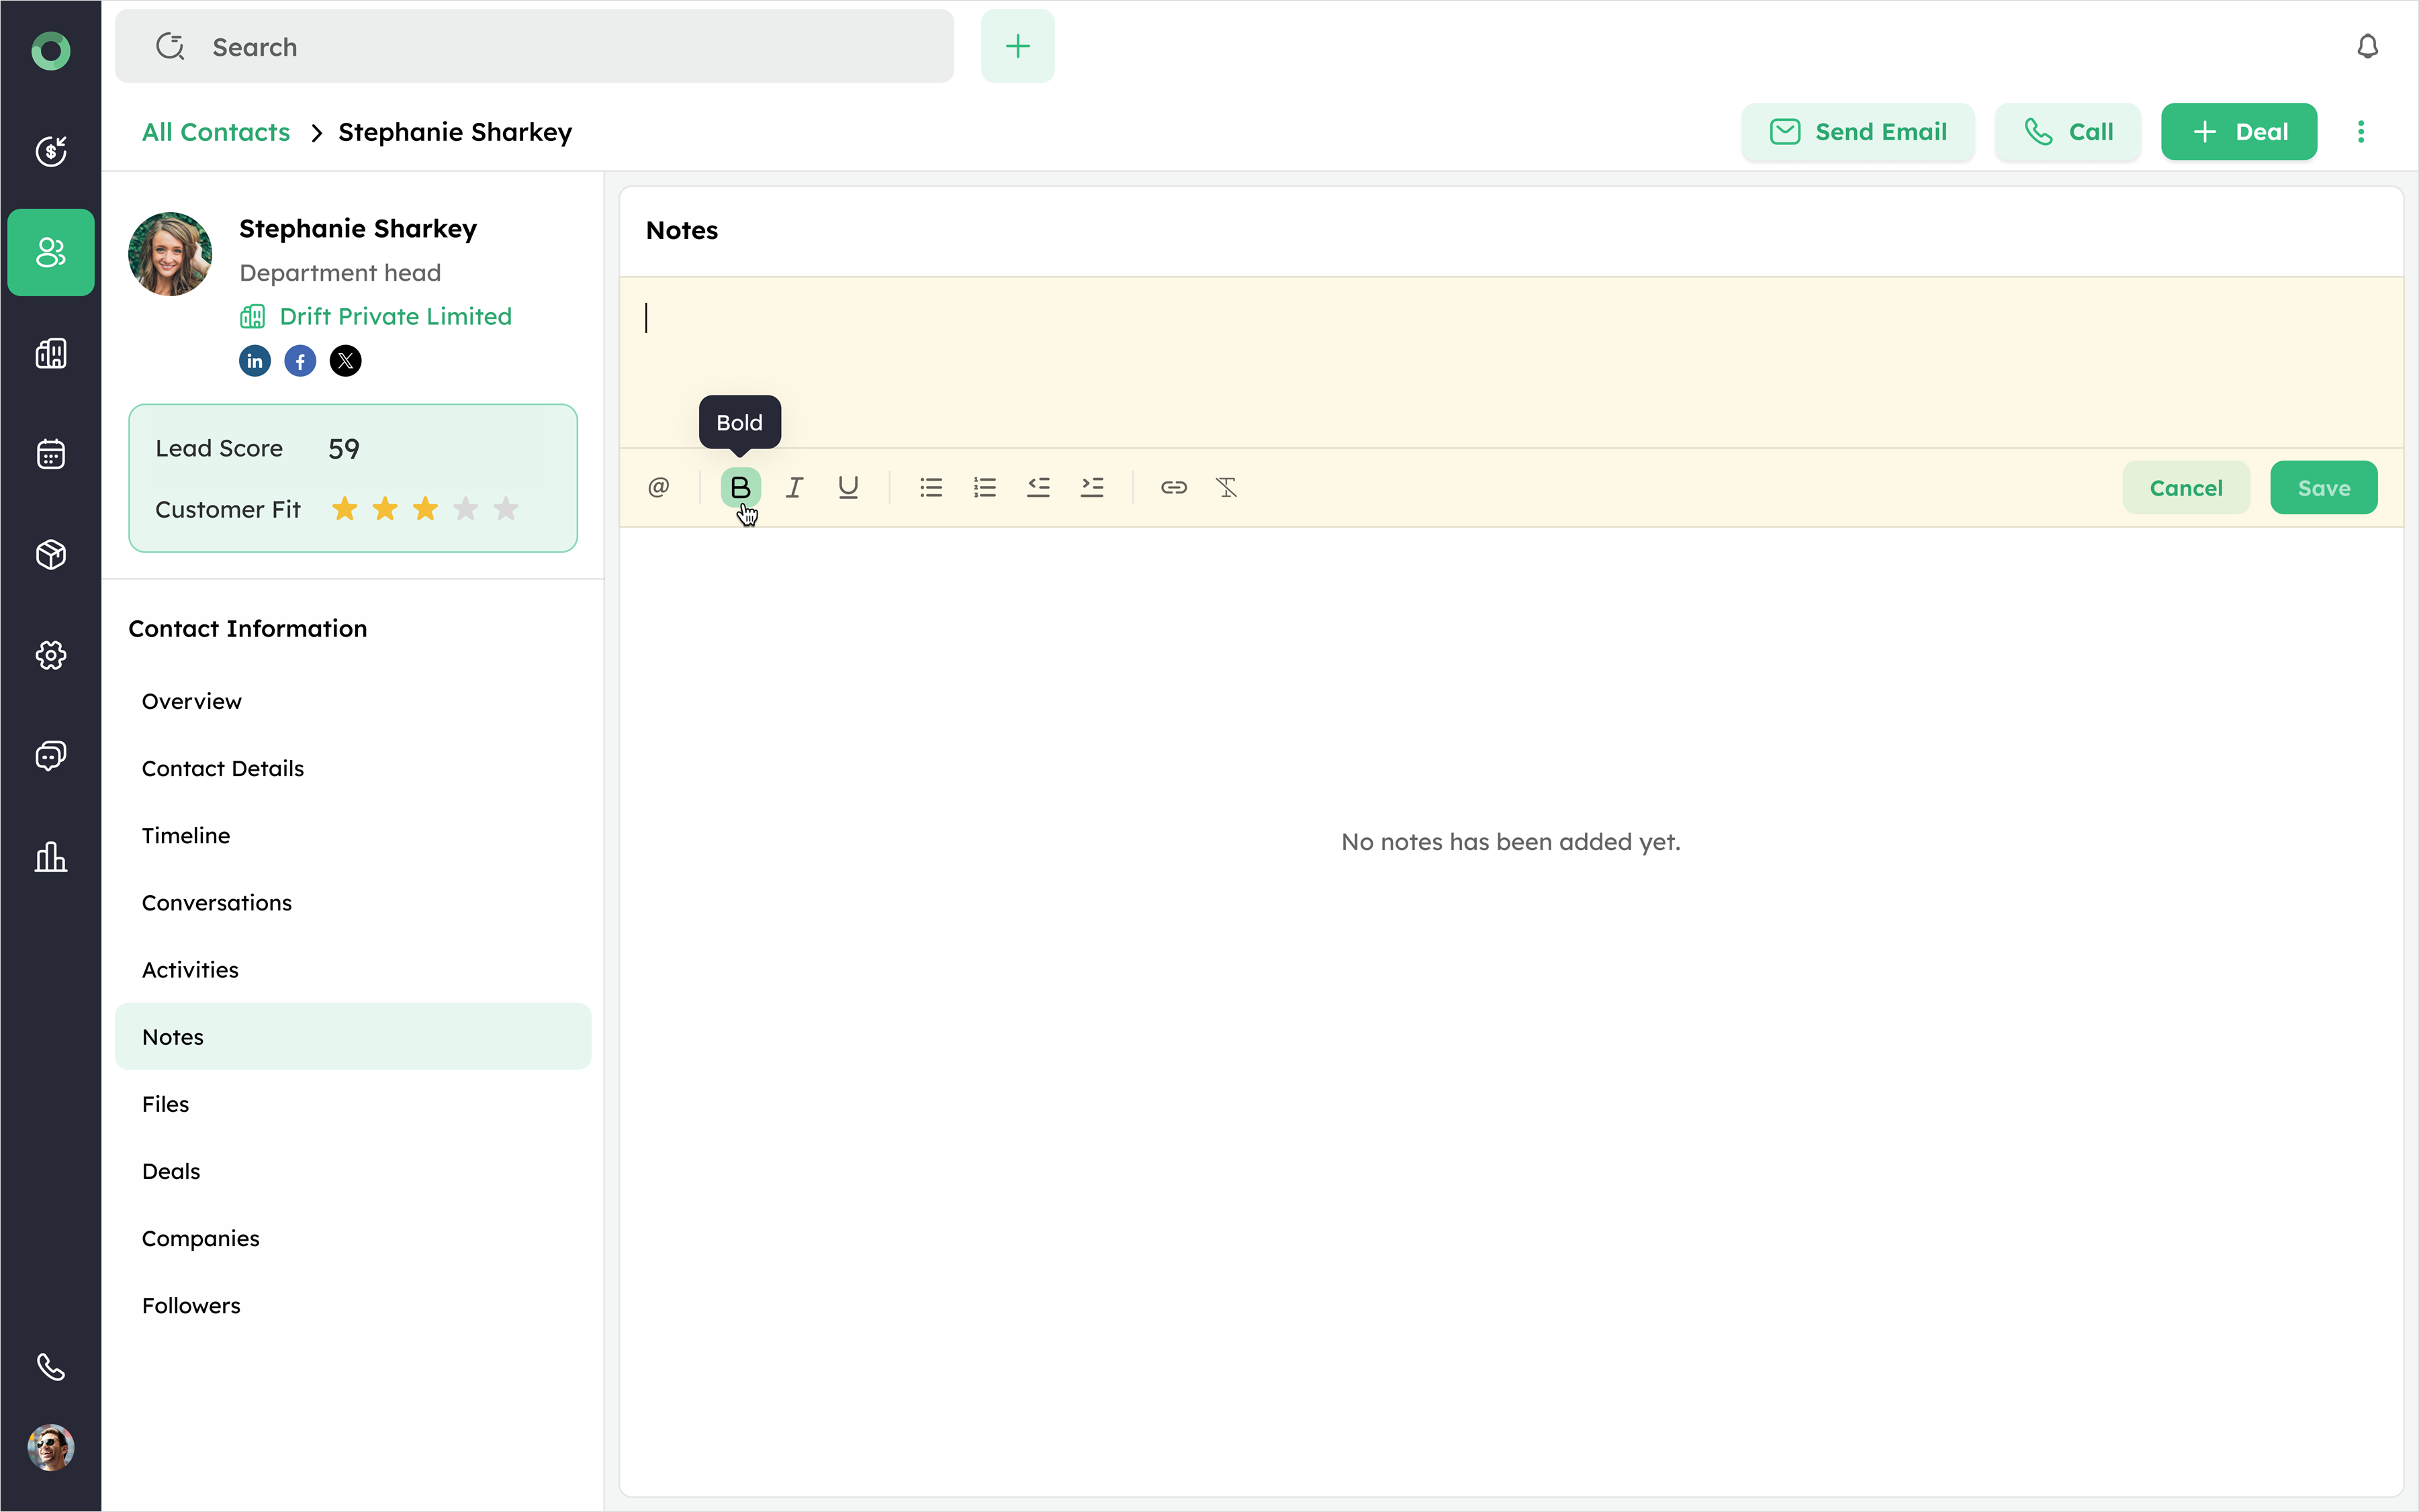
- Format the text as needed using options like bold, italic, underline, lists, or links.
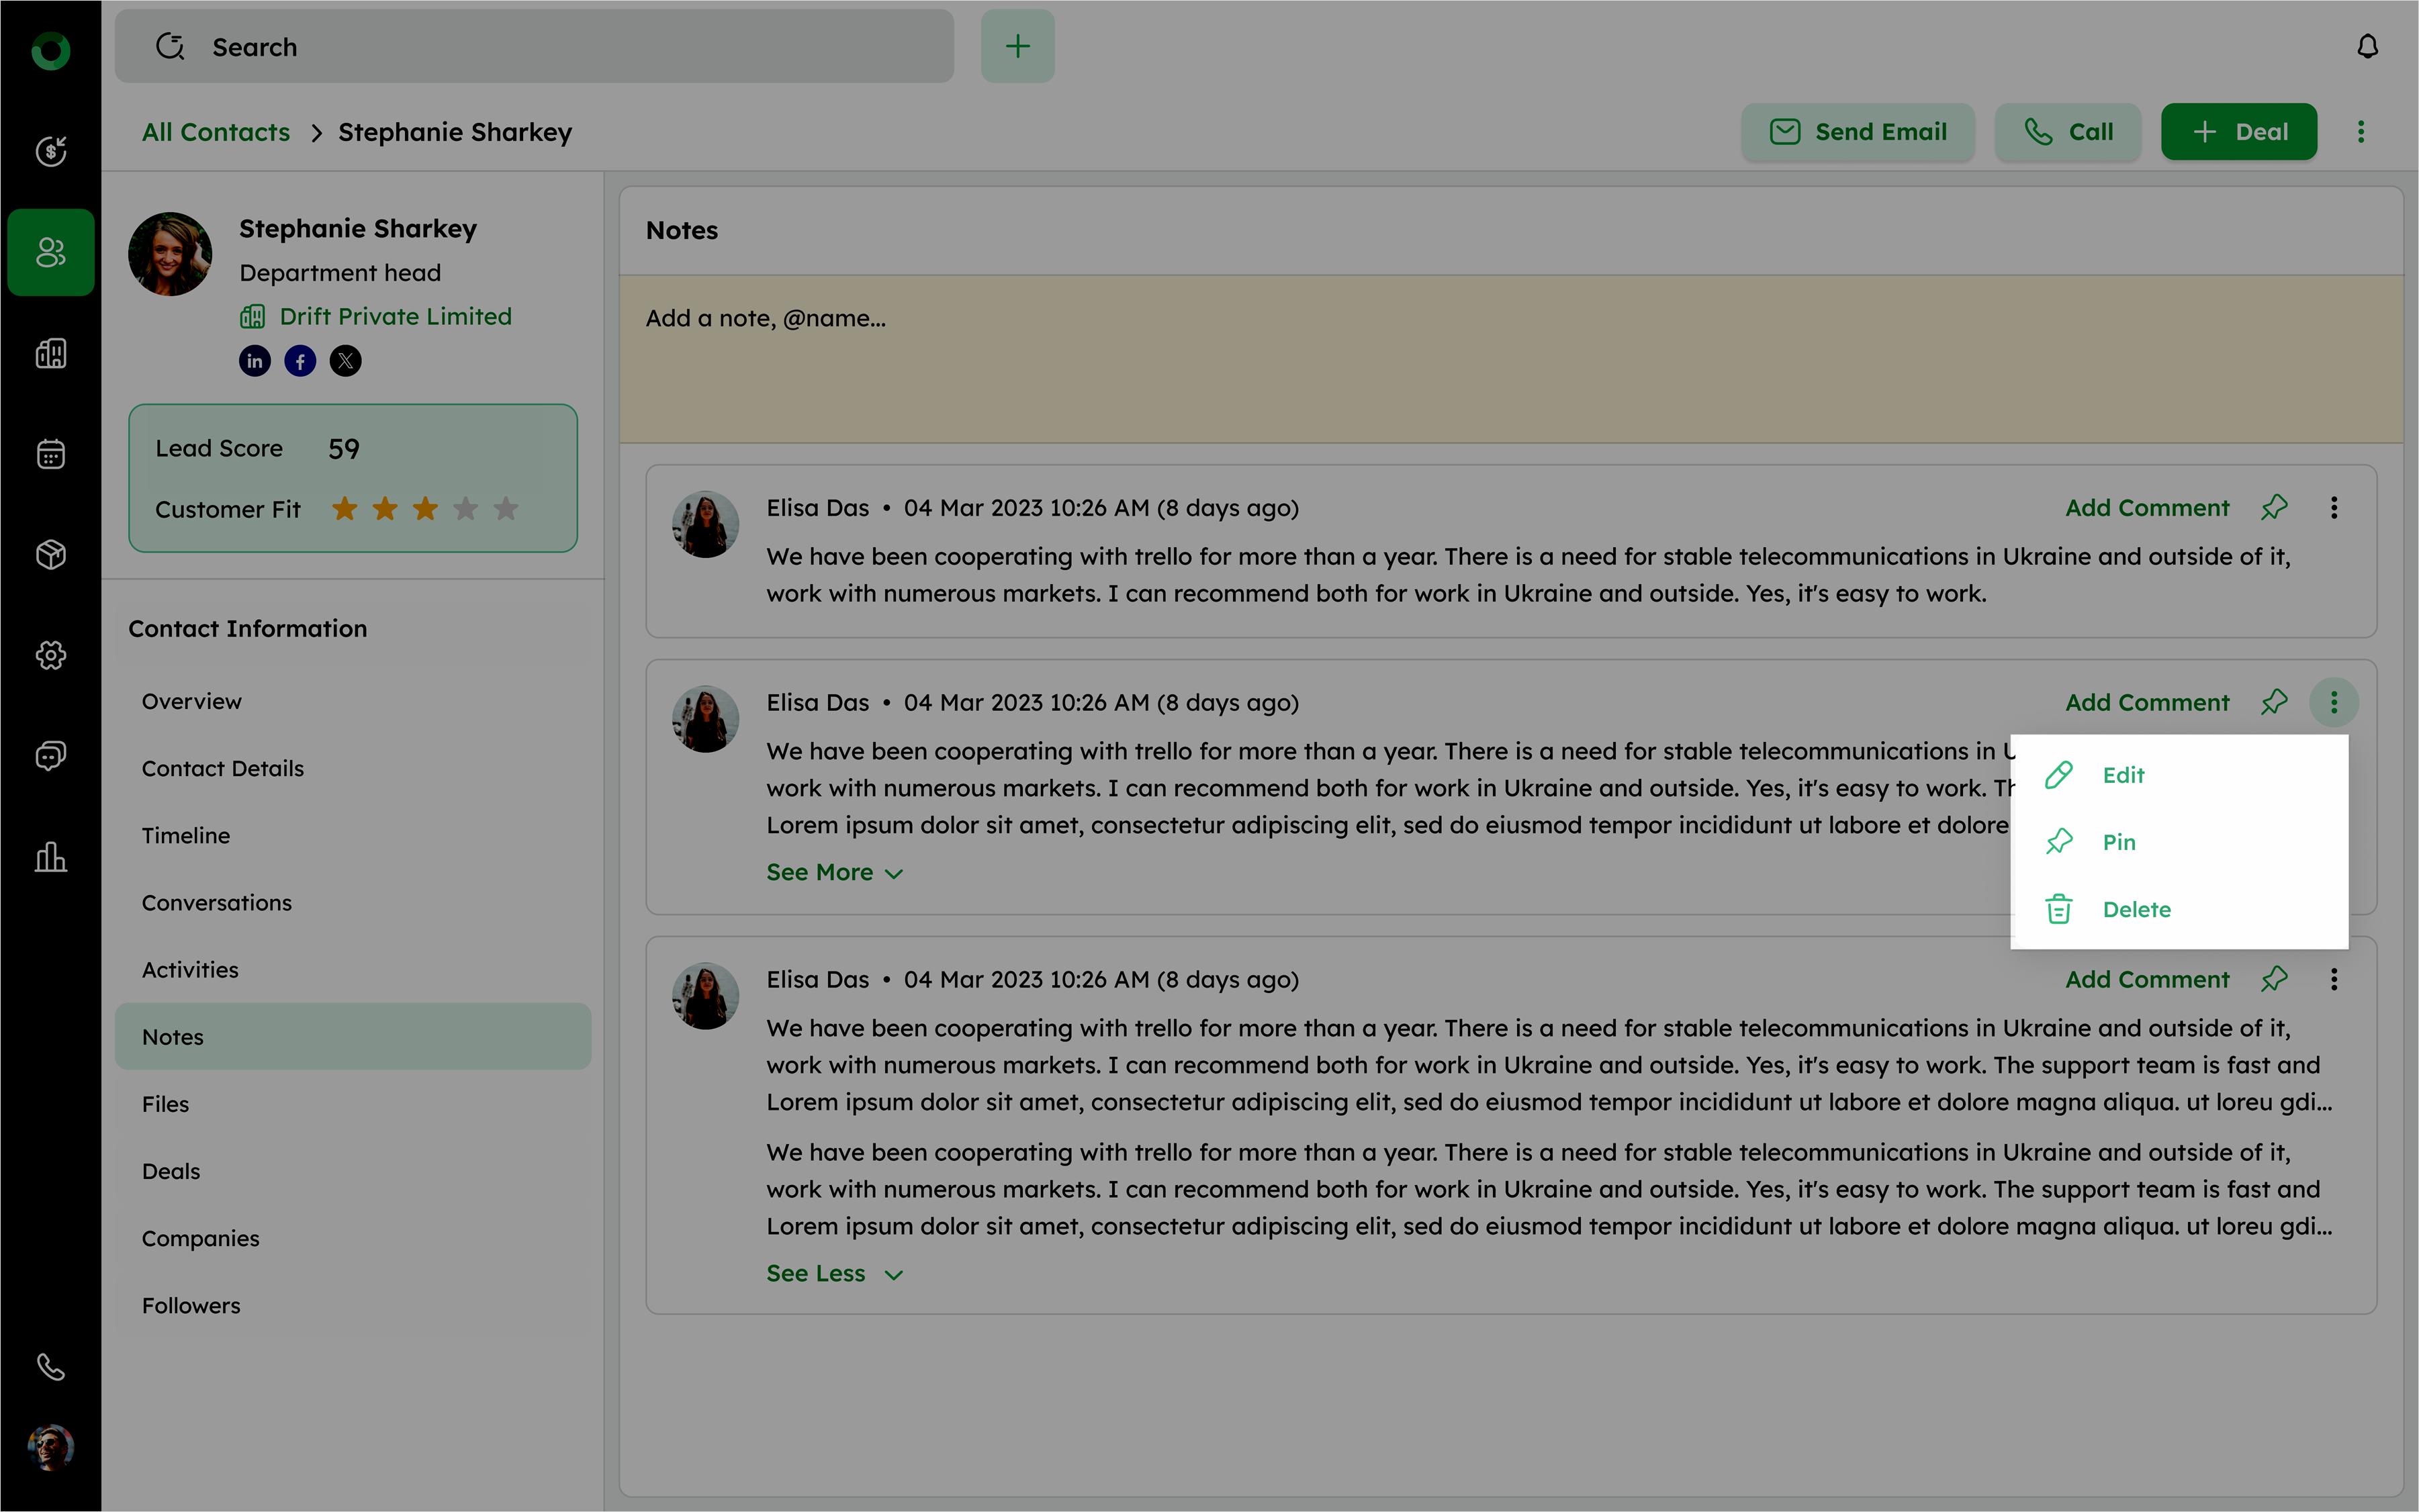
- Notes can be edited, pinned, or deleted as needed.
- Mentioning a teammate sends them a notification, if they have access to the contact.
Files: Managing Associated Documents
The Files section allows you to upload, view, and manage documents associated with a contact.
-
Click Files from the side menu to open the Files section.
-
Use the +File option at the top right to upload a file (maximum size 50 MB).
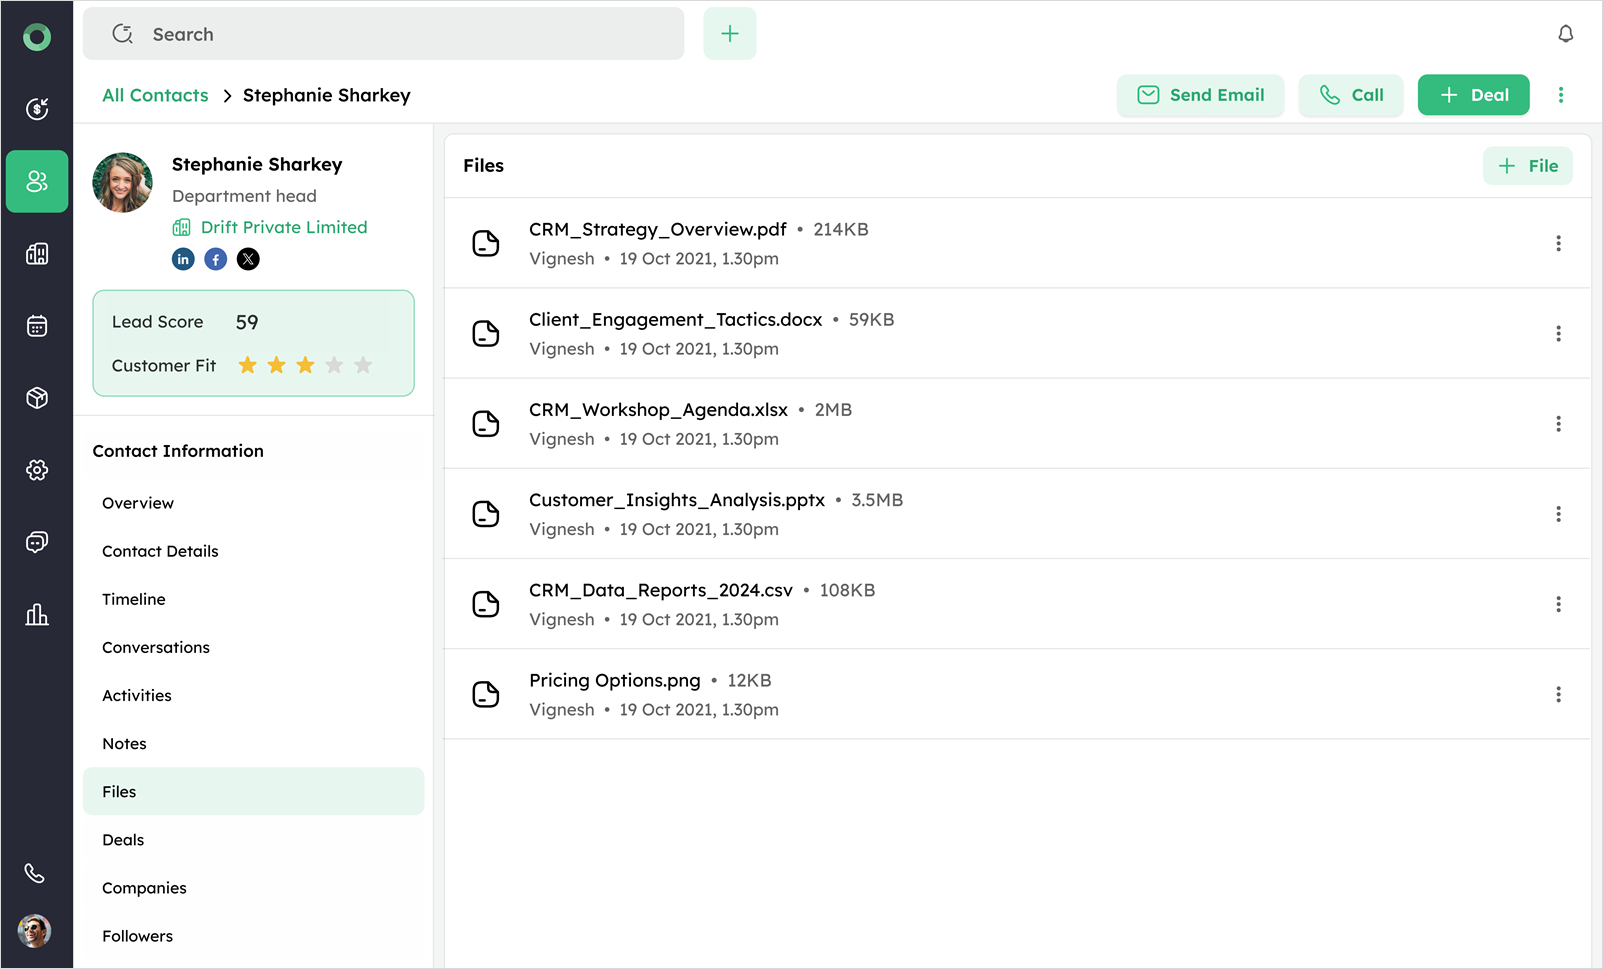
- You can upload files in the following supported formats: DOCX, DOC, PDF, PPT, PPTX, XLS, CSV, XLSX, TXT, HTML, GIF, JPG, JPEG, PNG.
File name including extension can contain up to 255 characters.
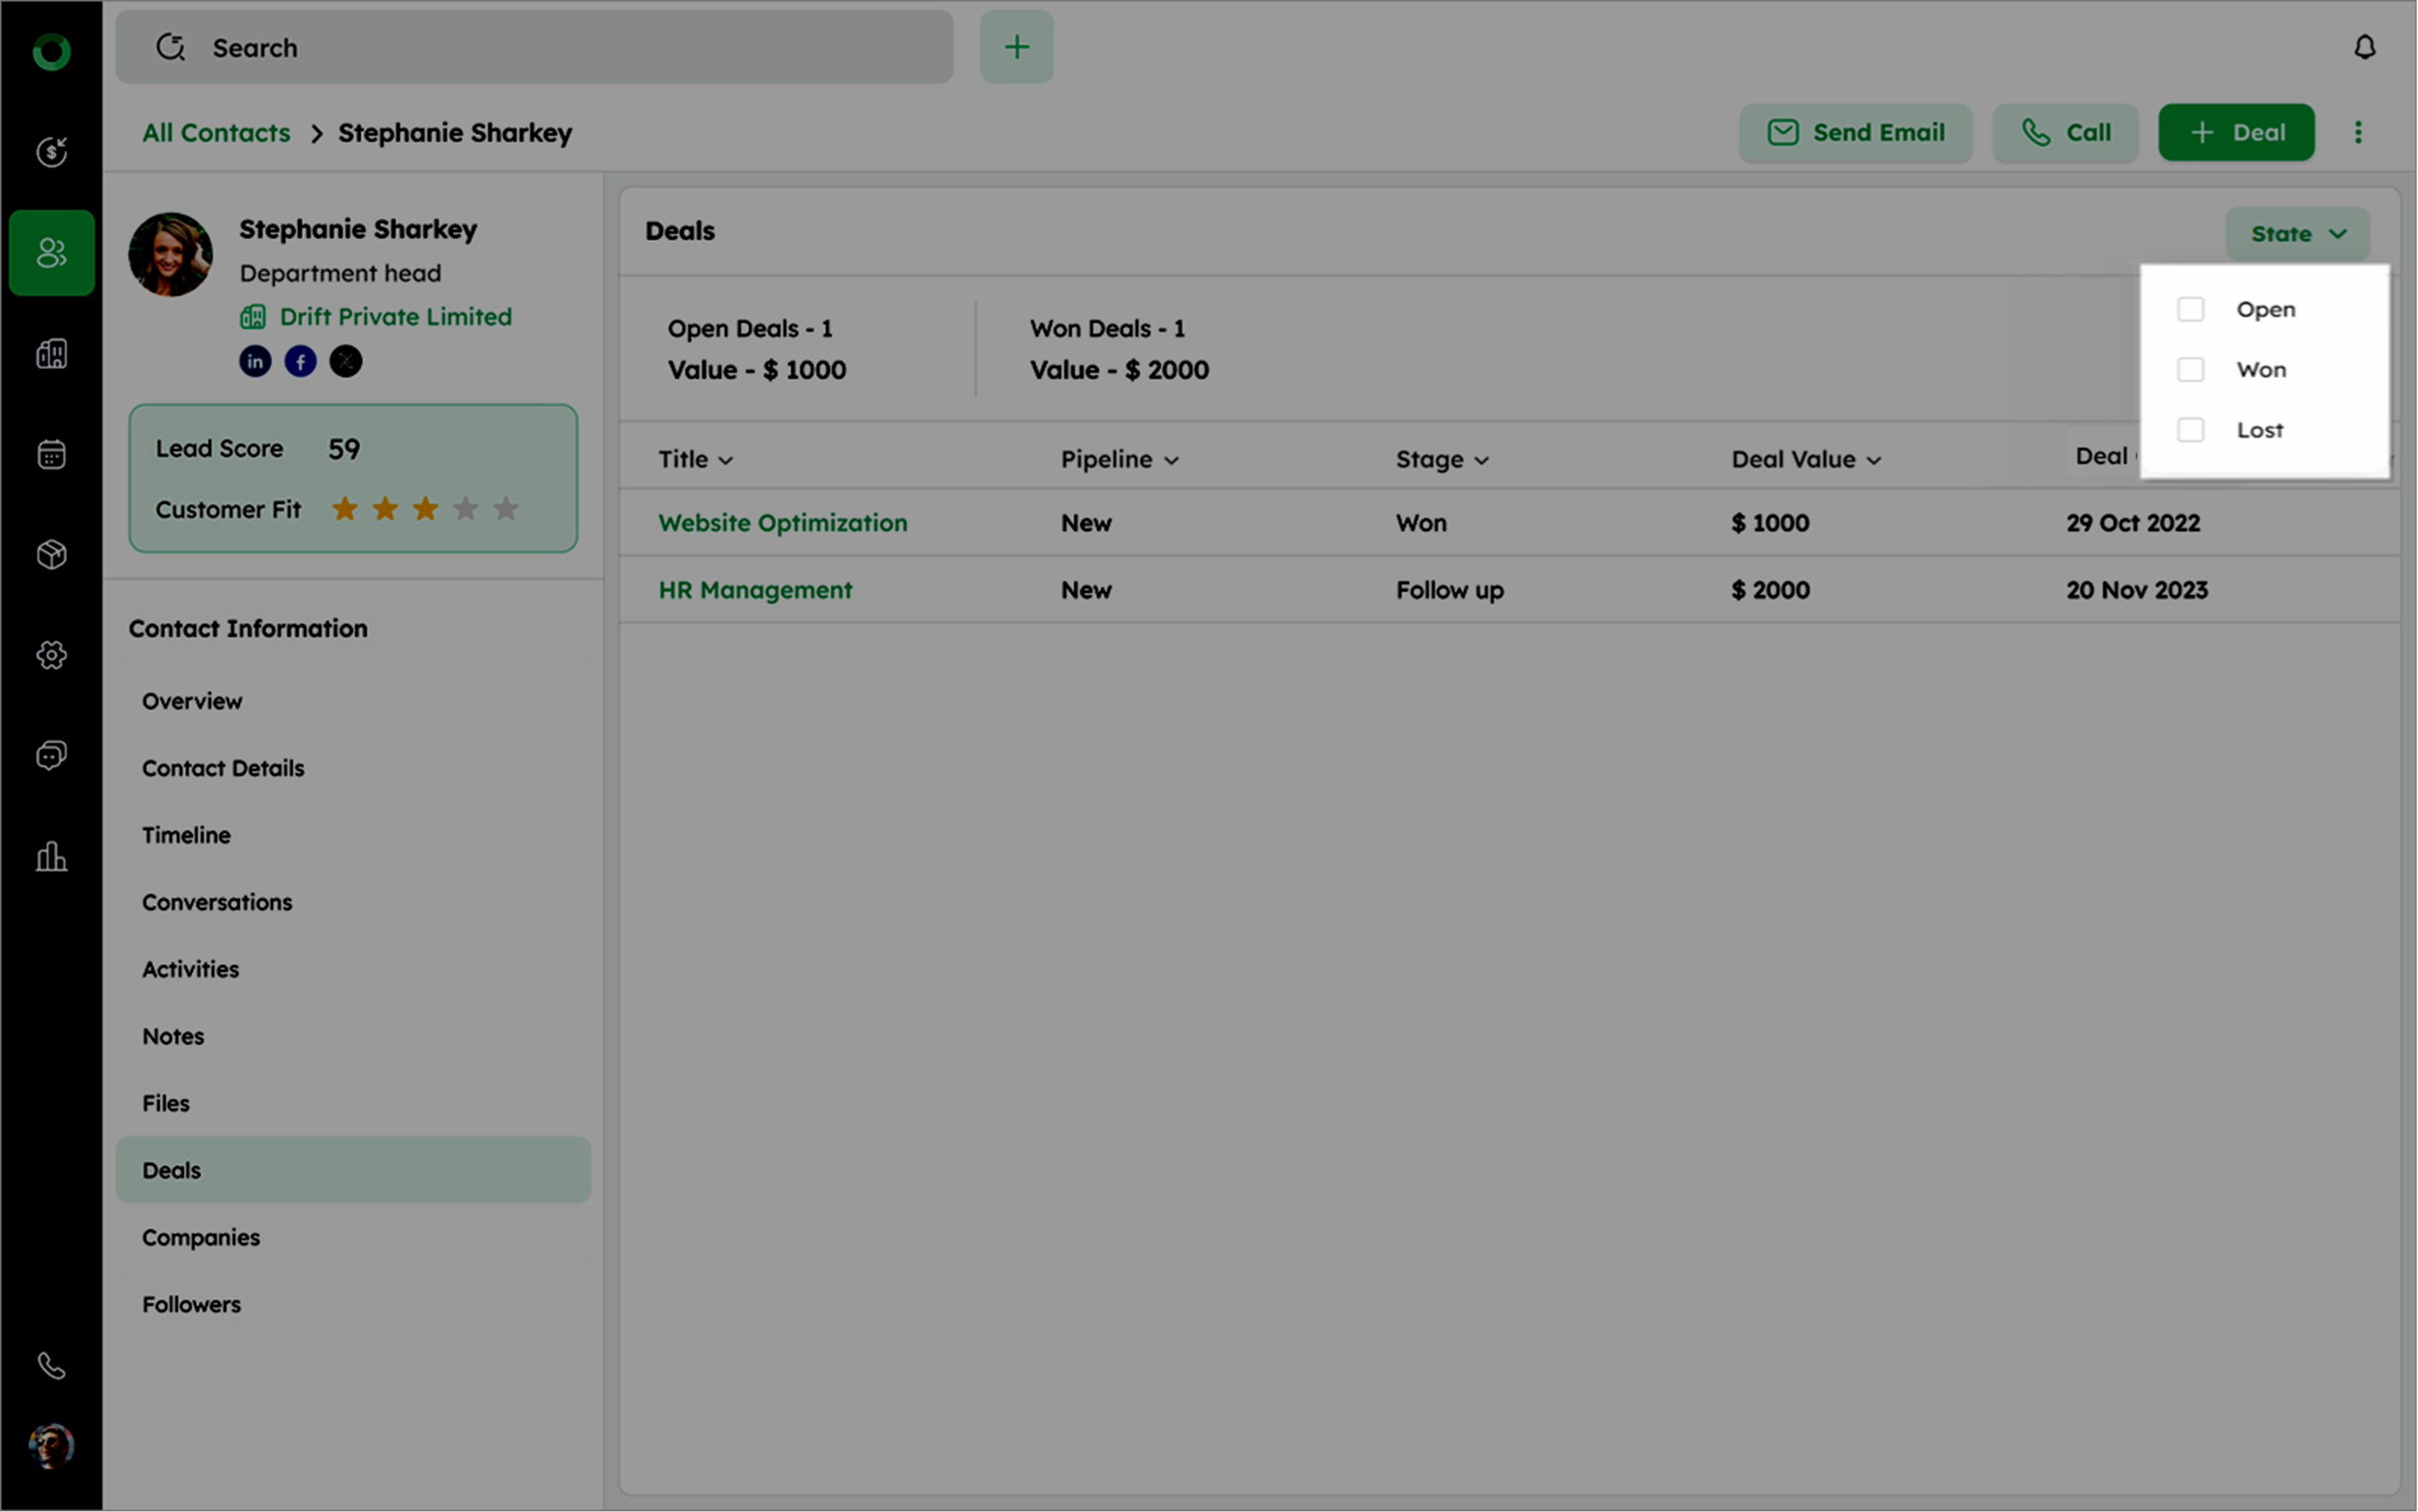
Deals: Tracking Associated Sales Opportunities
The Deals section displays all opportunities associated with a contact, helping you track progress and outcomes.
- Select the Deal section on the Contact Detail page to view the associated deals linked to the contact.
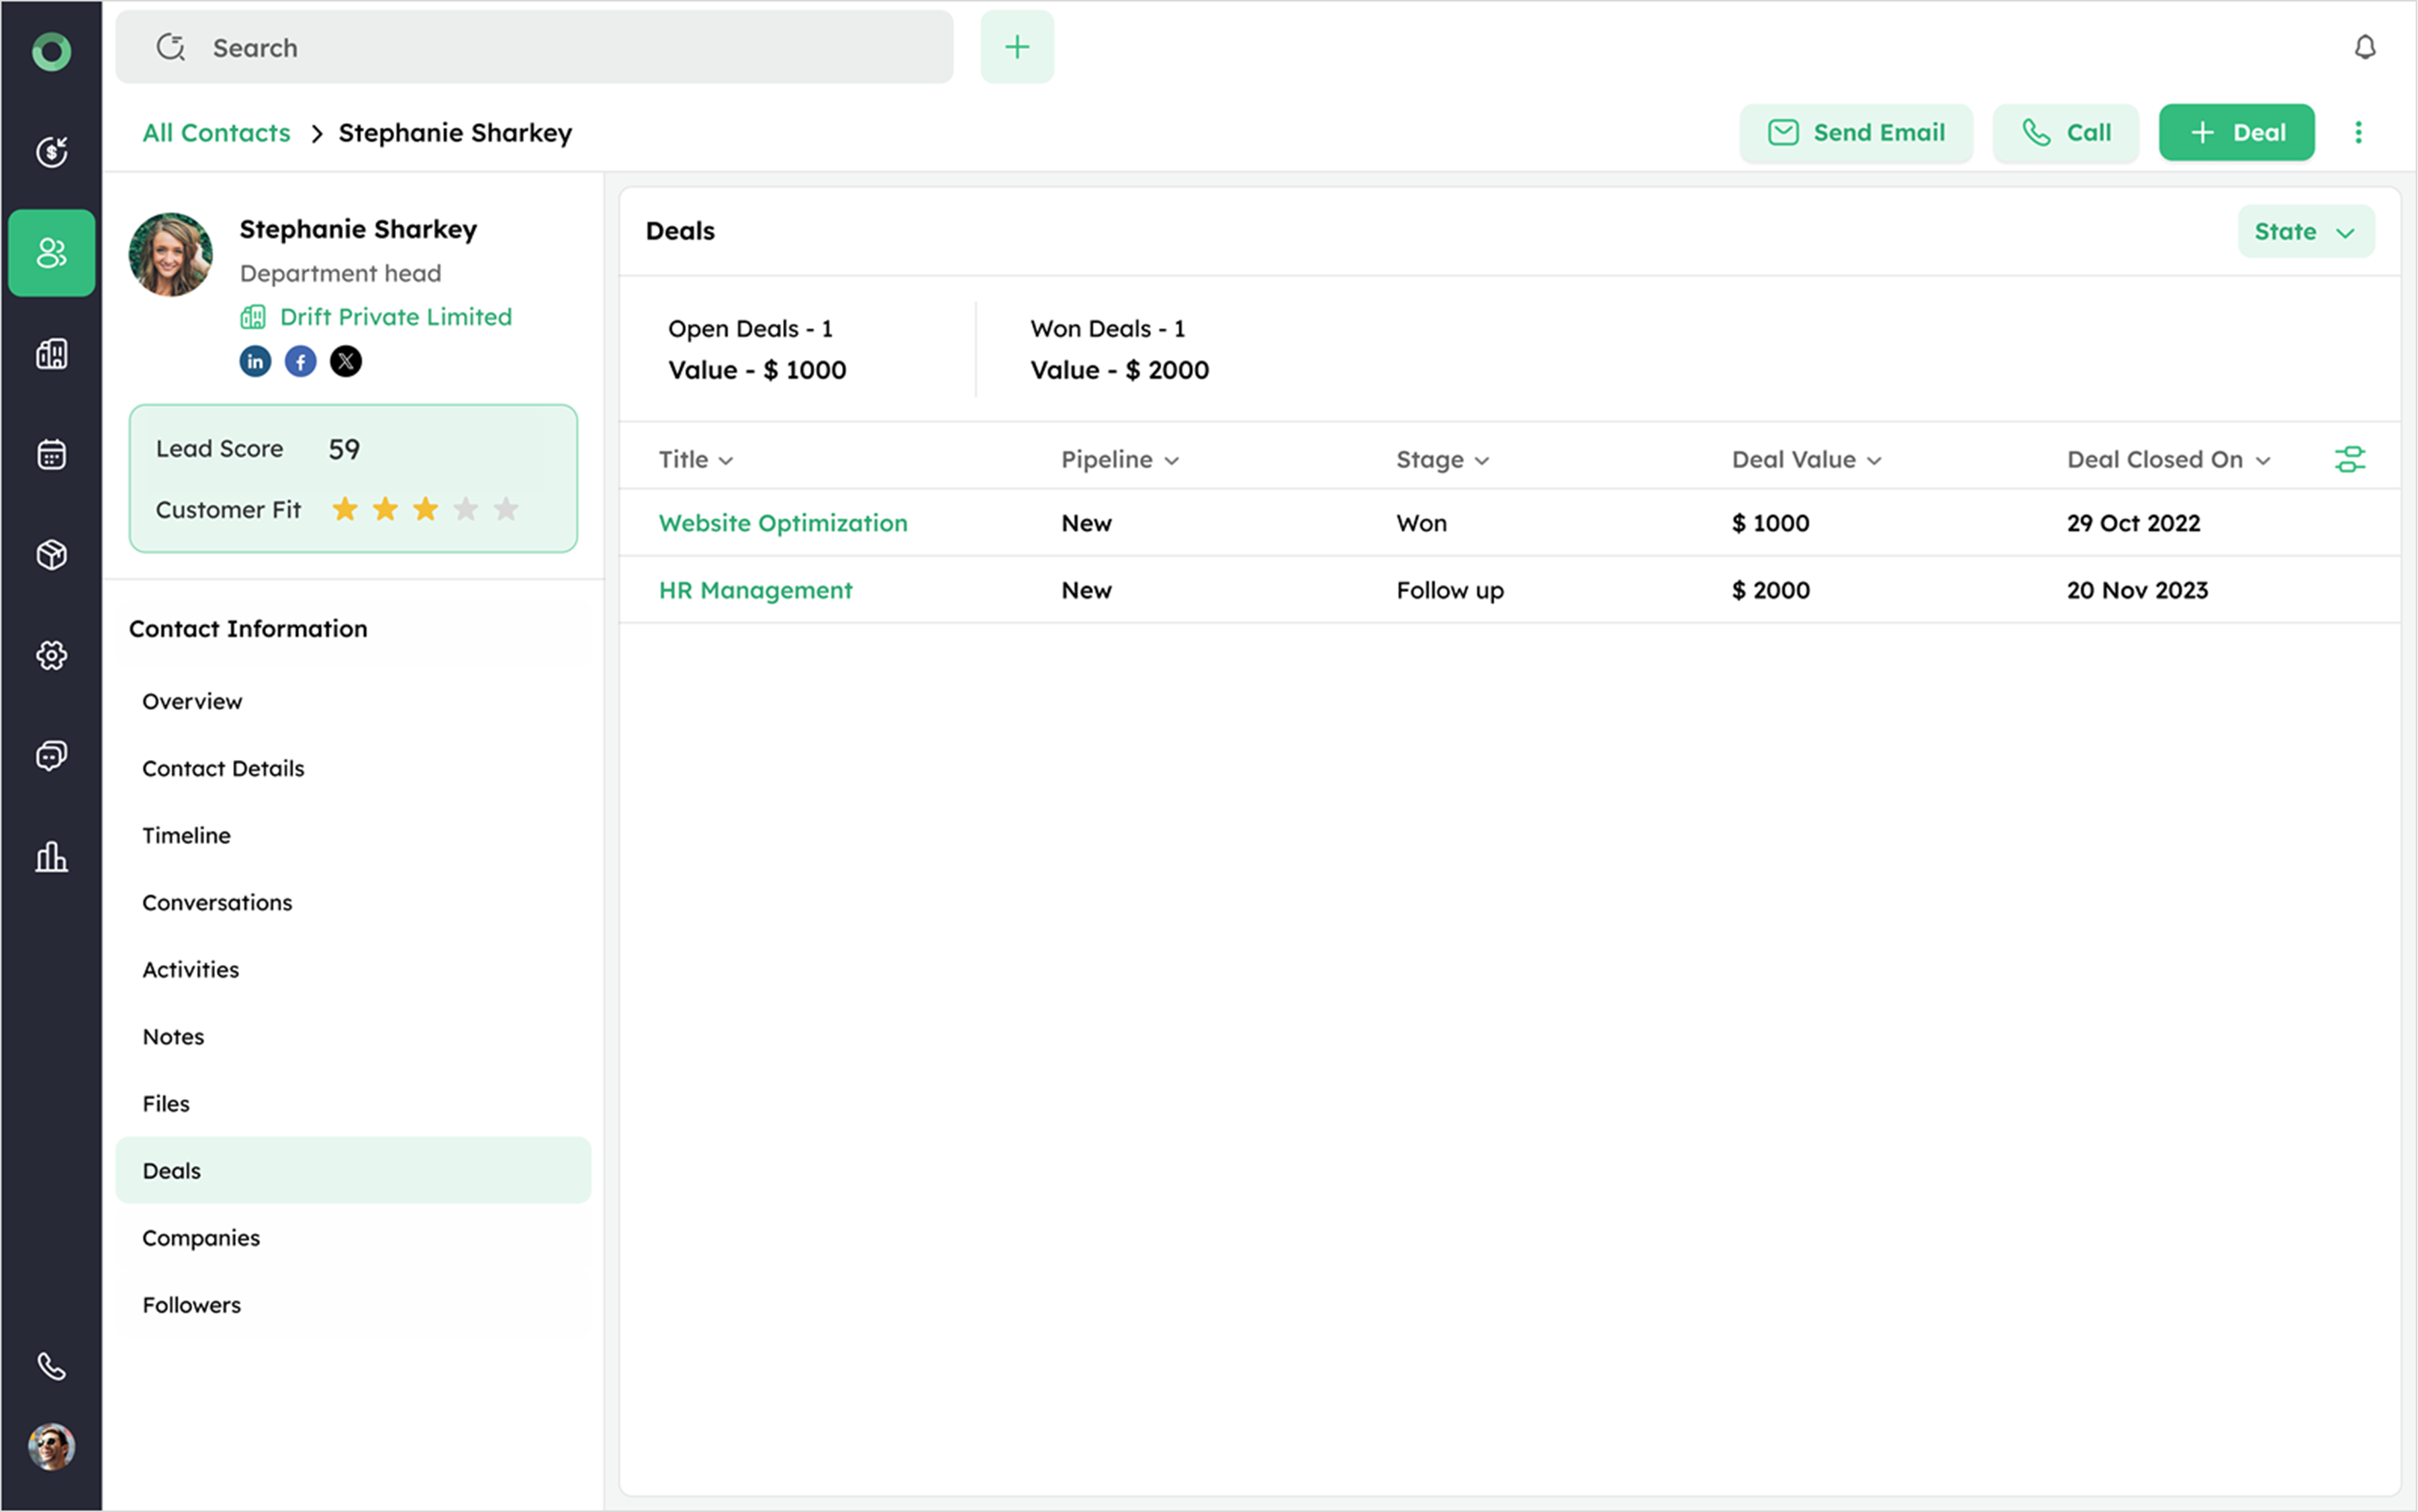
-
Click +Deal in the top right corner to create a new deal.
-
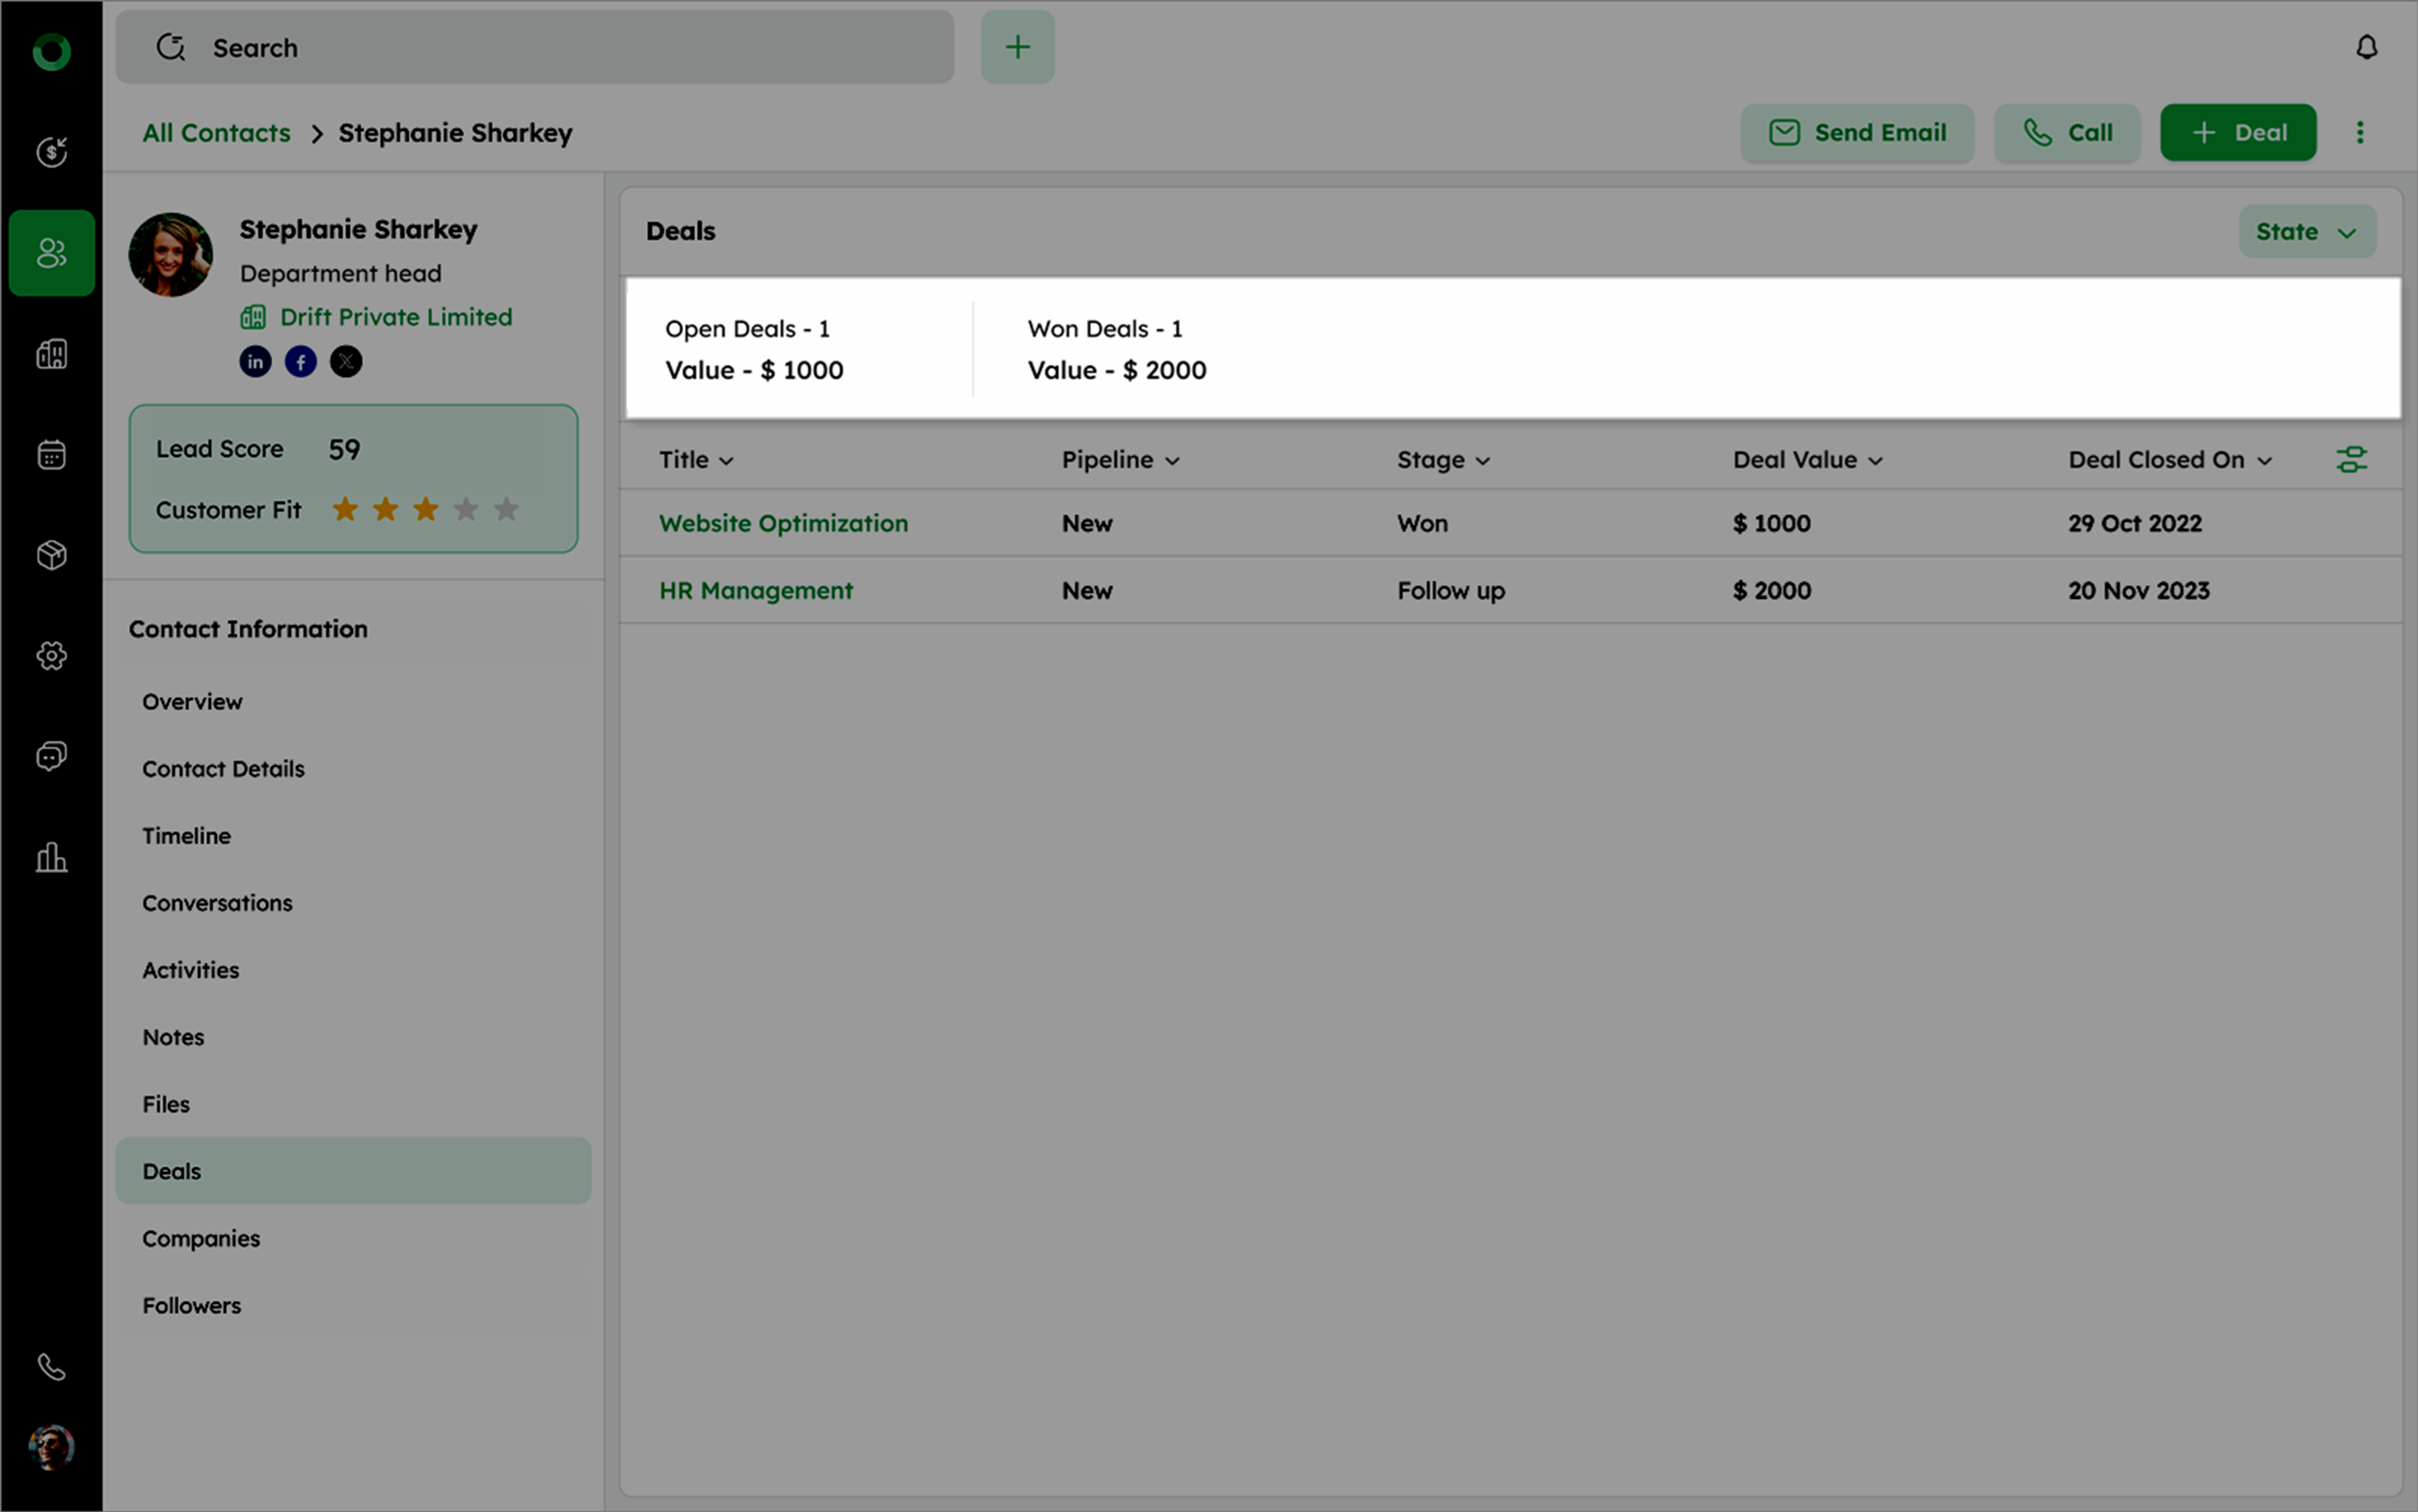
View two categories, Open Deals and Won Deals, each with its count and total value.
- View all associated deals in a structured list view, showing key details such as title, value, and stage.
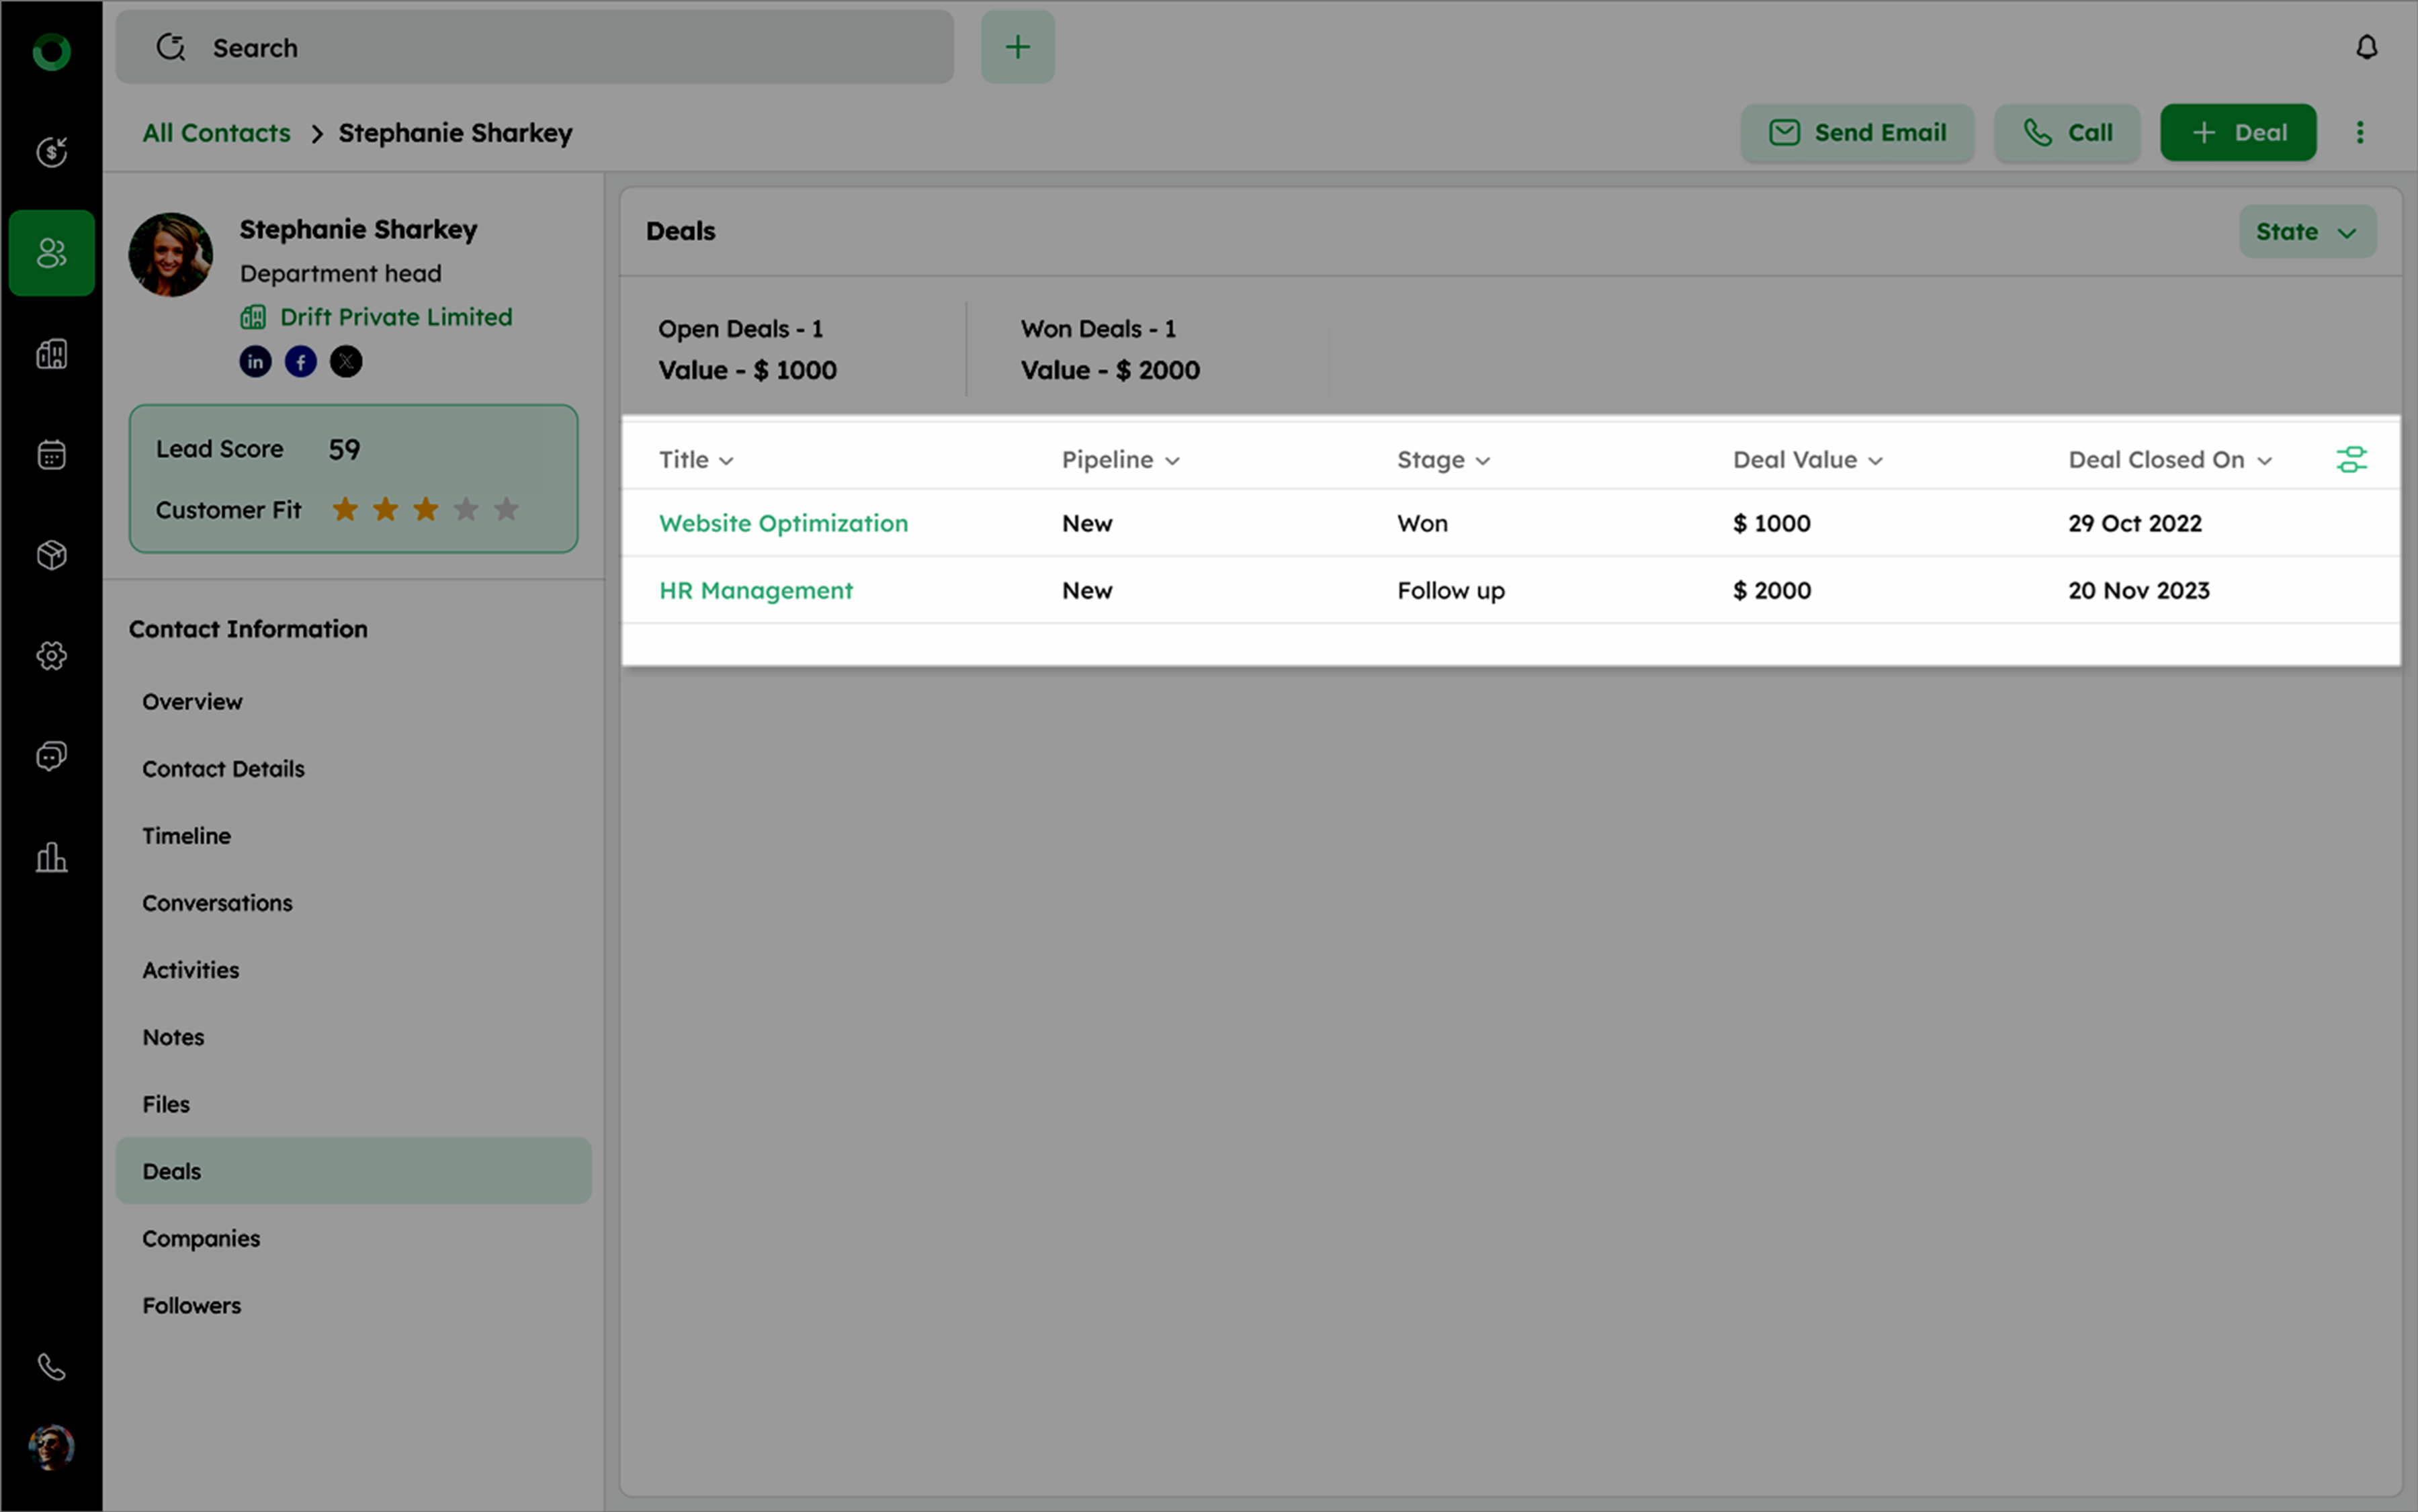
-
Use the Column Settings icon to customize visible fields in the list.
-
Apply the State Filter to view deals by status (Open, Won, Lost). Multiple selections are supported.
When a contact is linked to deals either as Primary, Secondary, or Tertiary (related contacts), it will be displayed in the Contact Detail page.
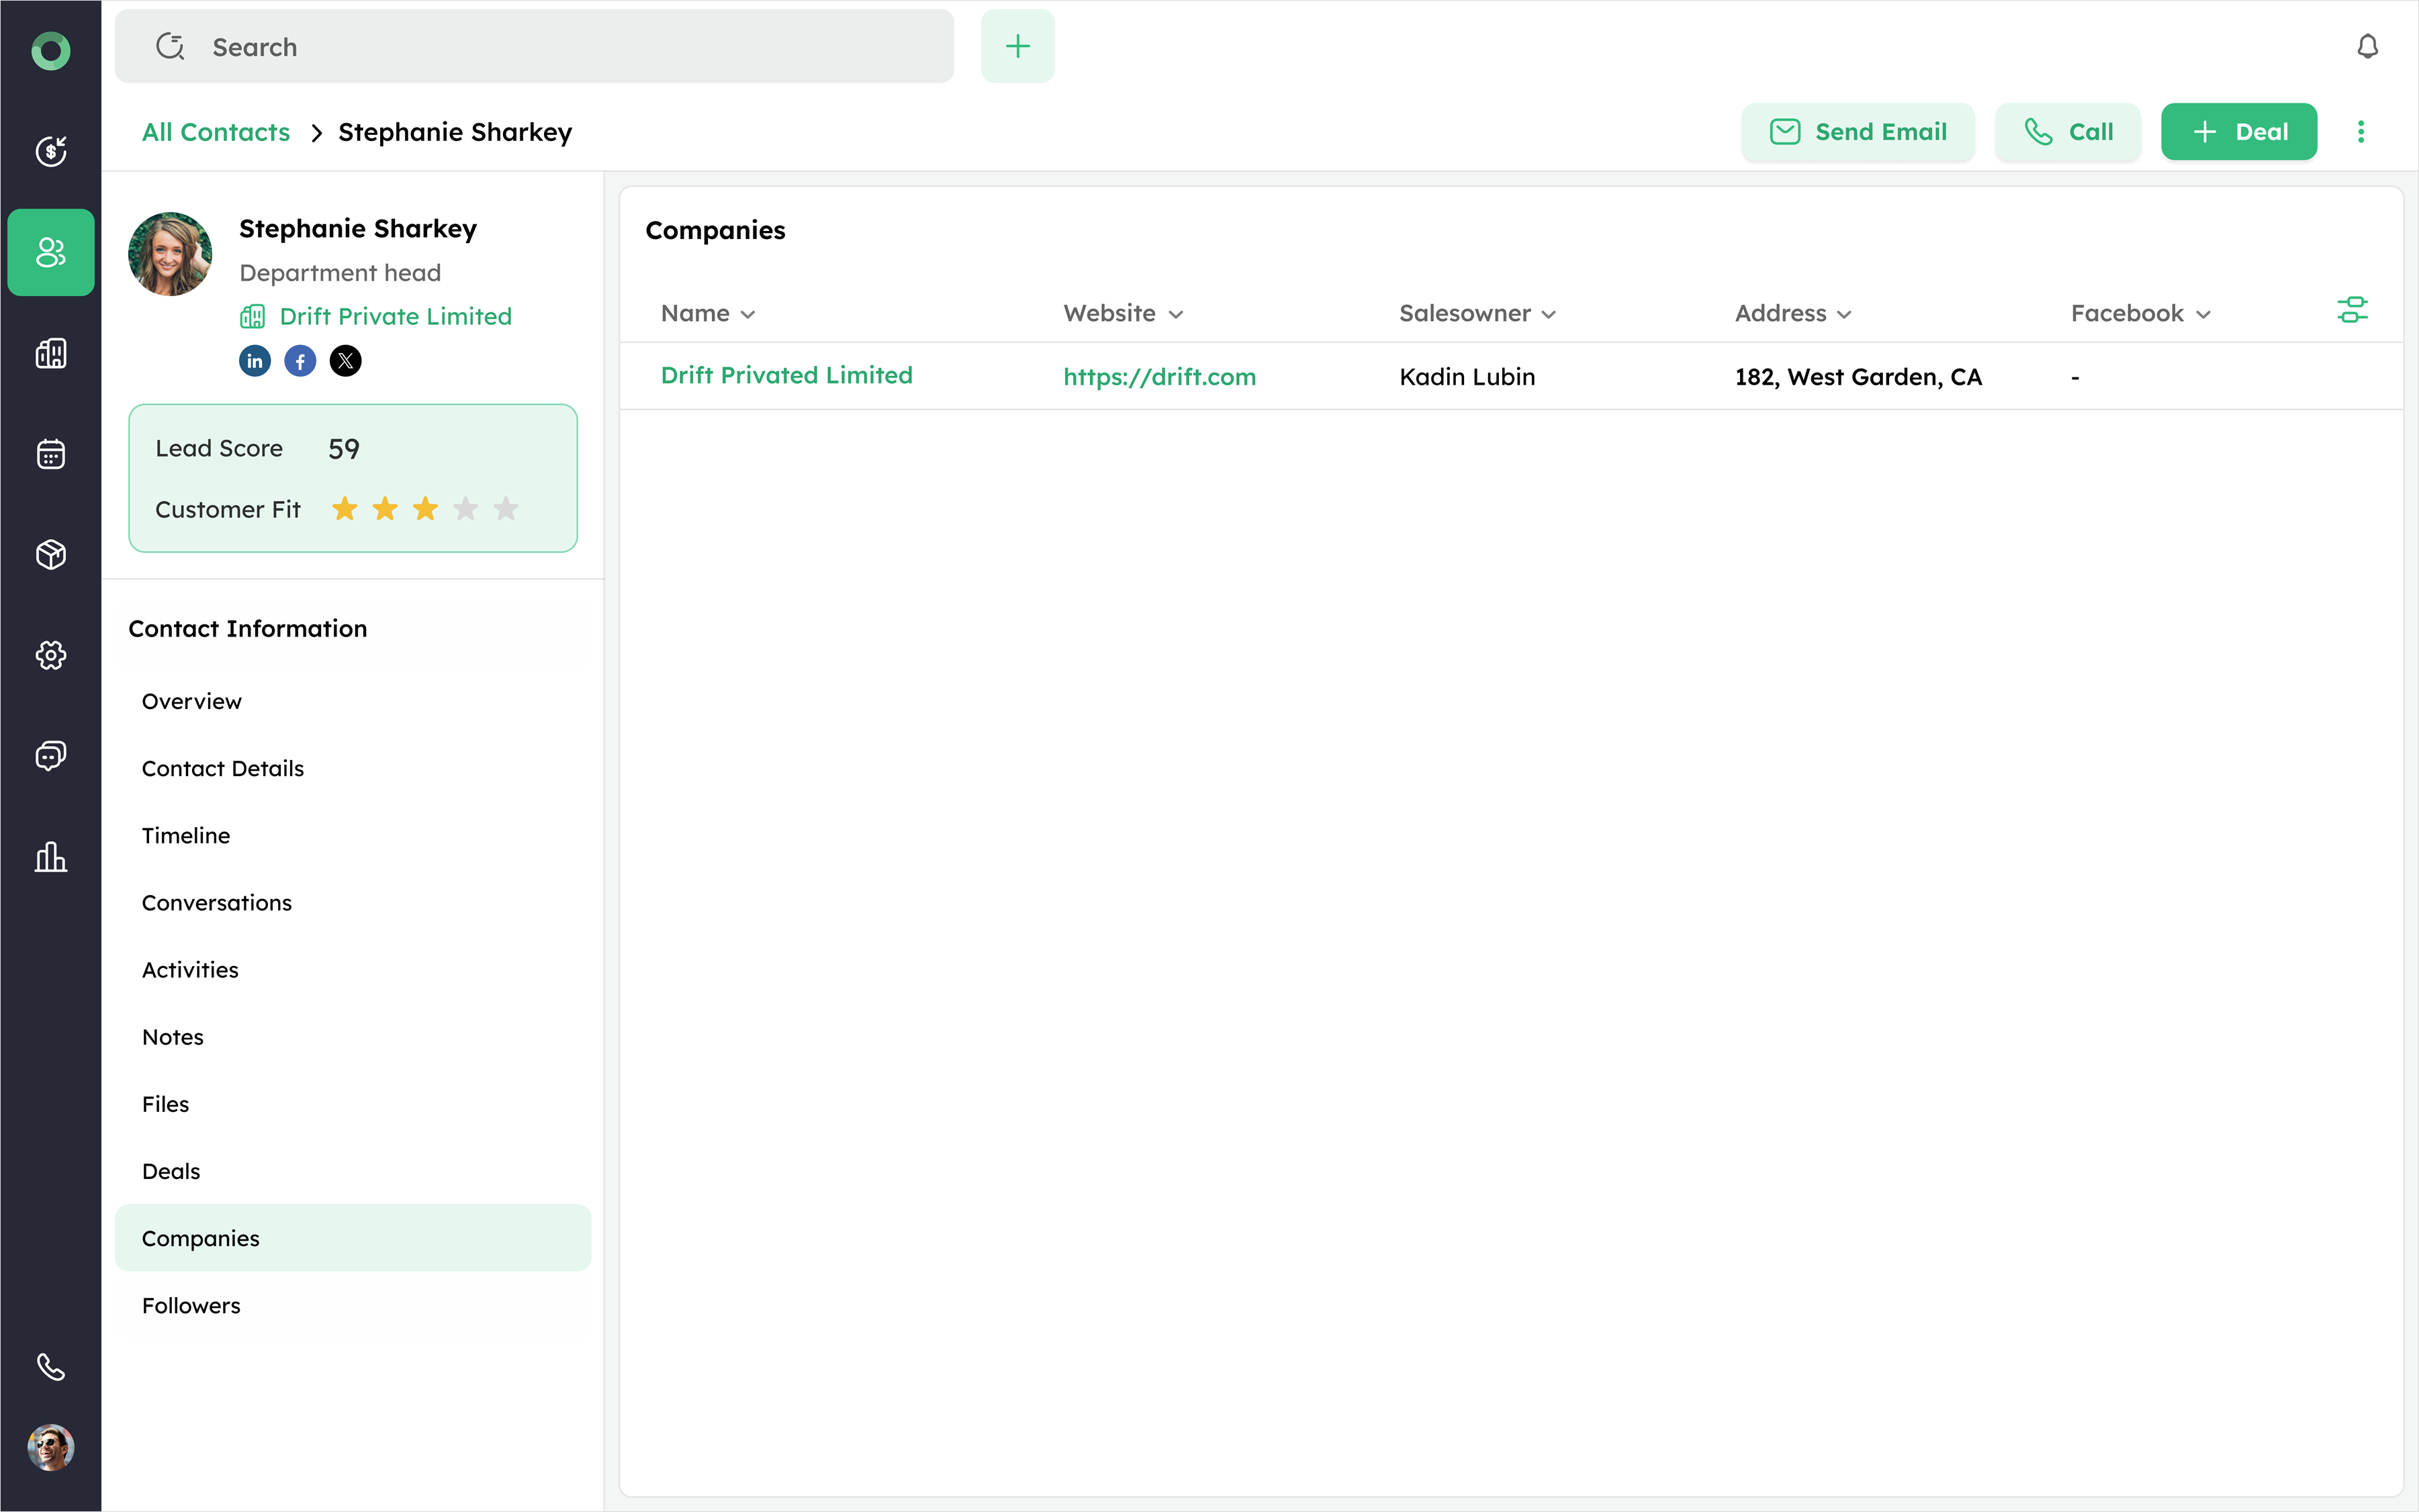
Companies: Linking to the Parent Organization
The Companies section displays all organizations linked to a contact.
- Go to the Companies section to view or add organizations to a contact.
-
View all associated companies in a structured list format, showing key details such as name, website, address, and linked profiles.
-
Use the column settings icon to customize visible fields in the list.
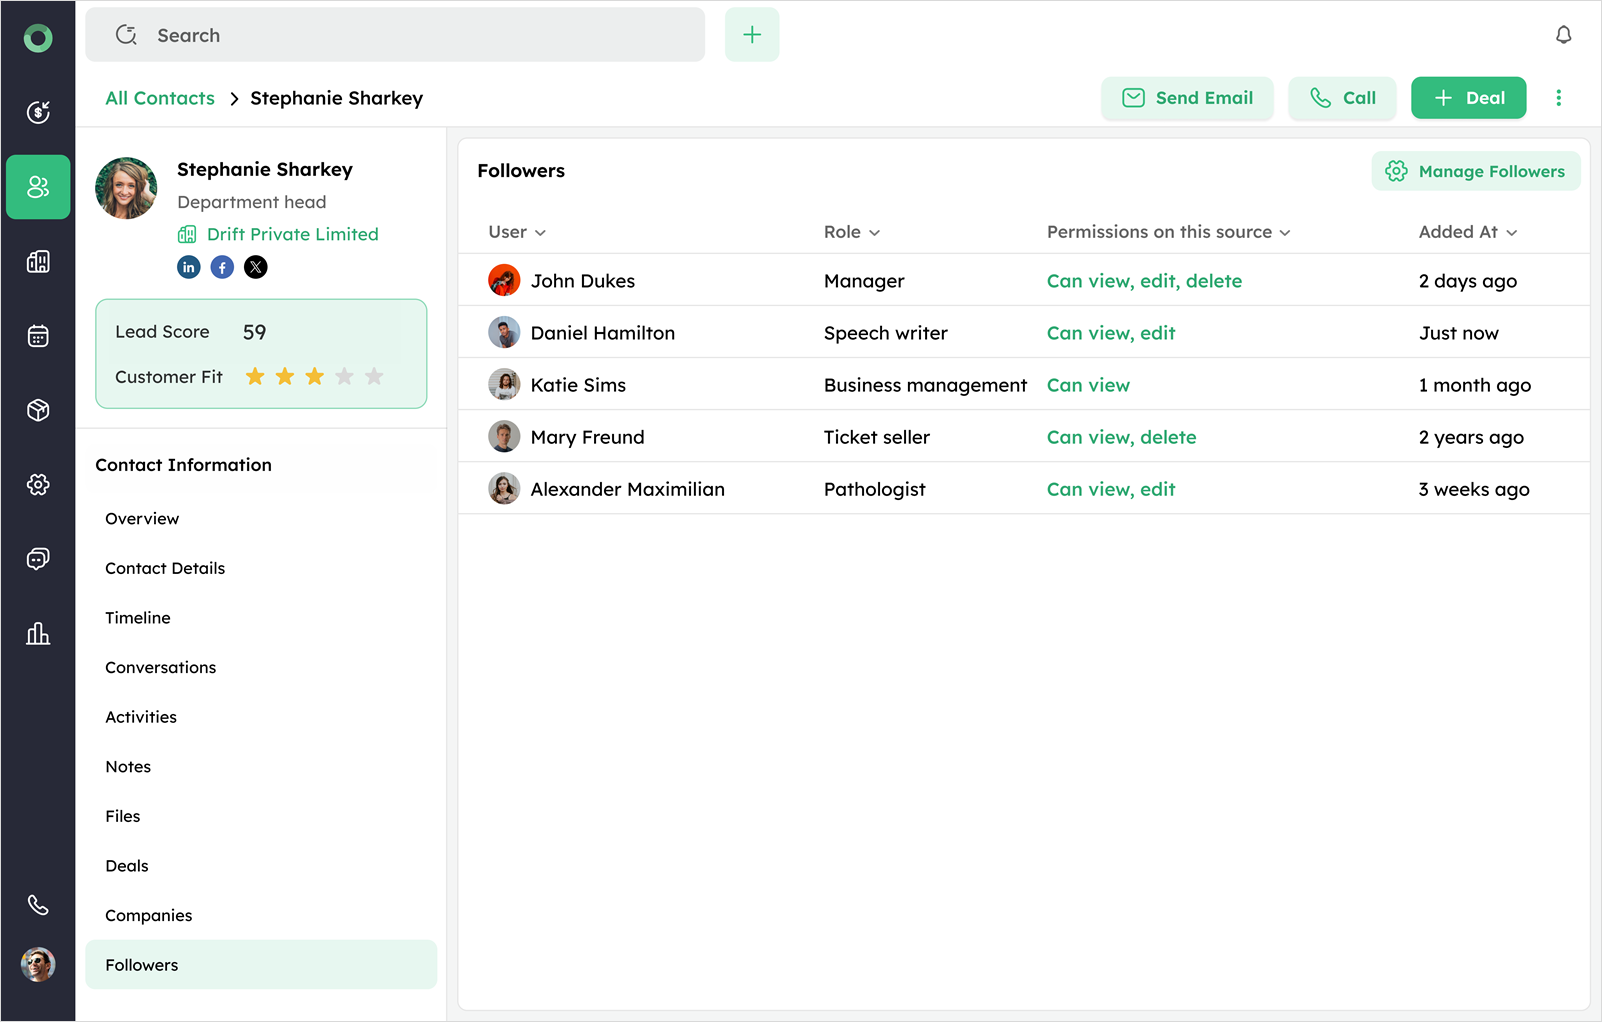
Followers: Tracking Subscription to Contact Updates
The Followers section shows all users who are following a contact to stay updated on its activities.
-
Open Followers section to view the list of users following the contact.
-
Use the Manage Followers button to add or remove followers as needed.
Quick Actions and Utilities for Contacts
In the Contact Detail Page, at the top right corner, you can access quick action buttons and the ellipsis menu for various functionalities. These features are designed for quick navigation and efficient management of contact information.
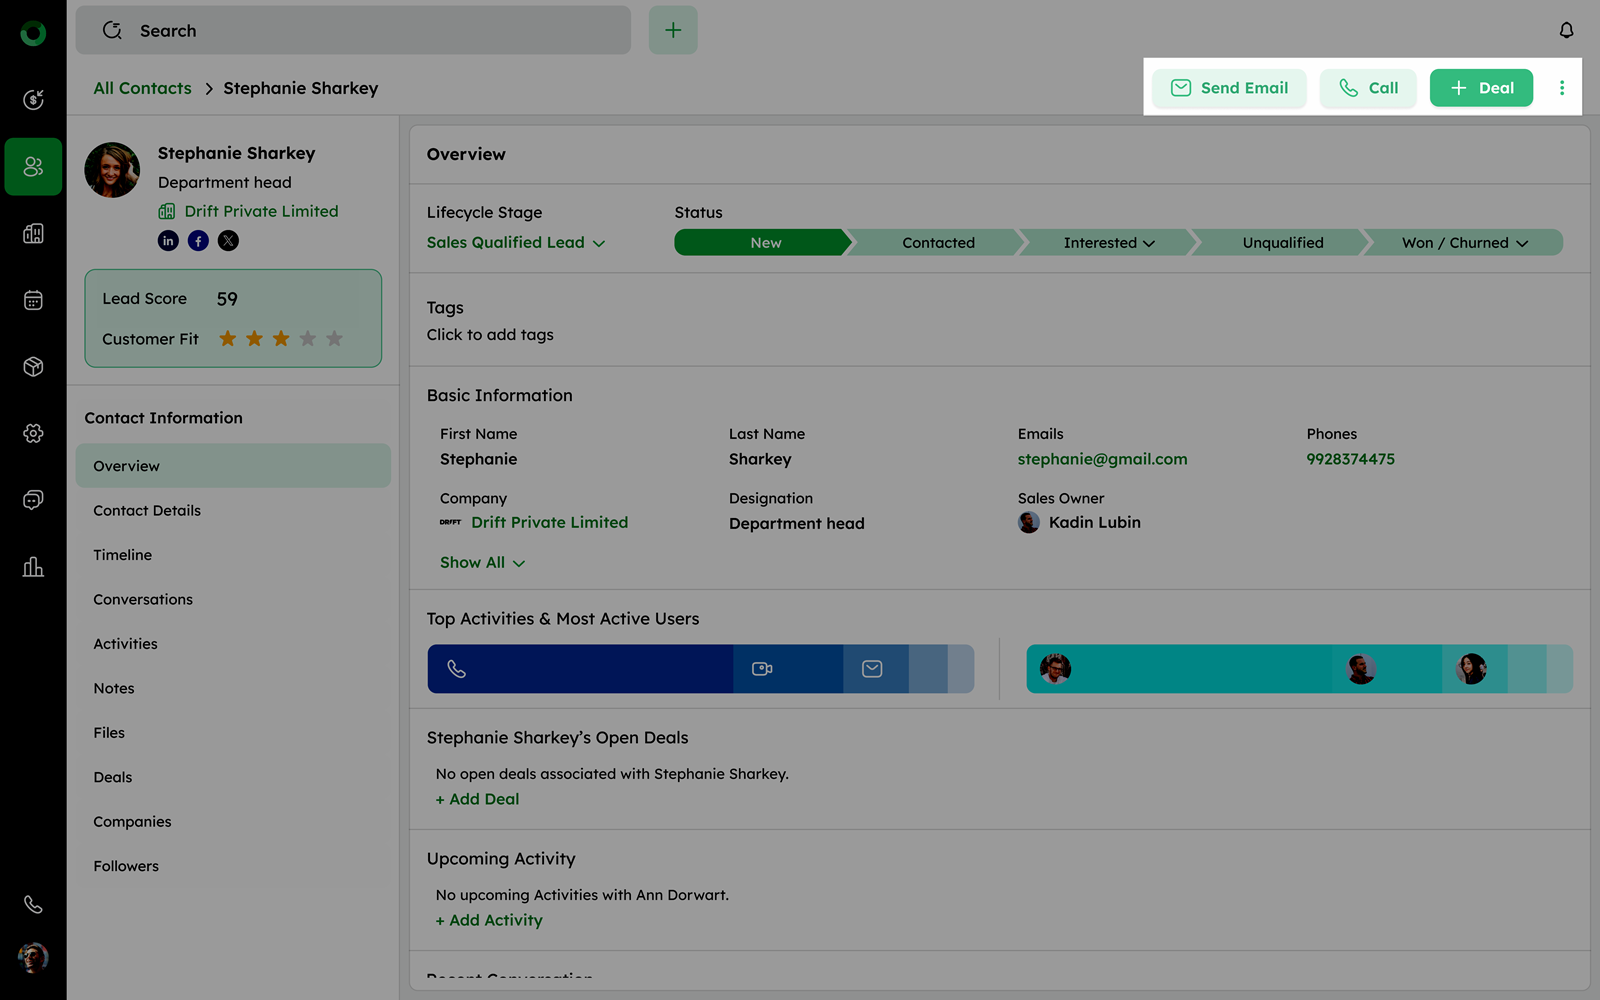
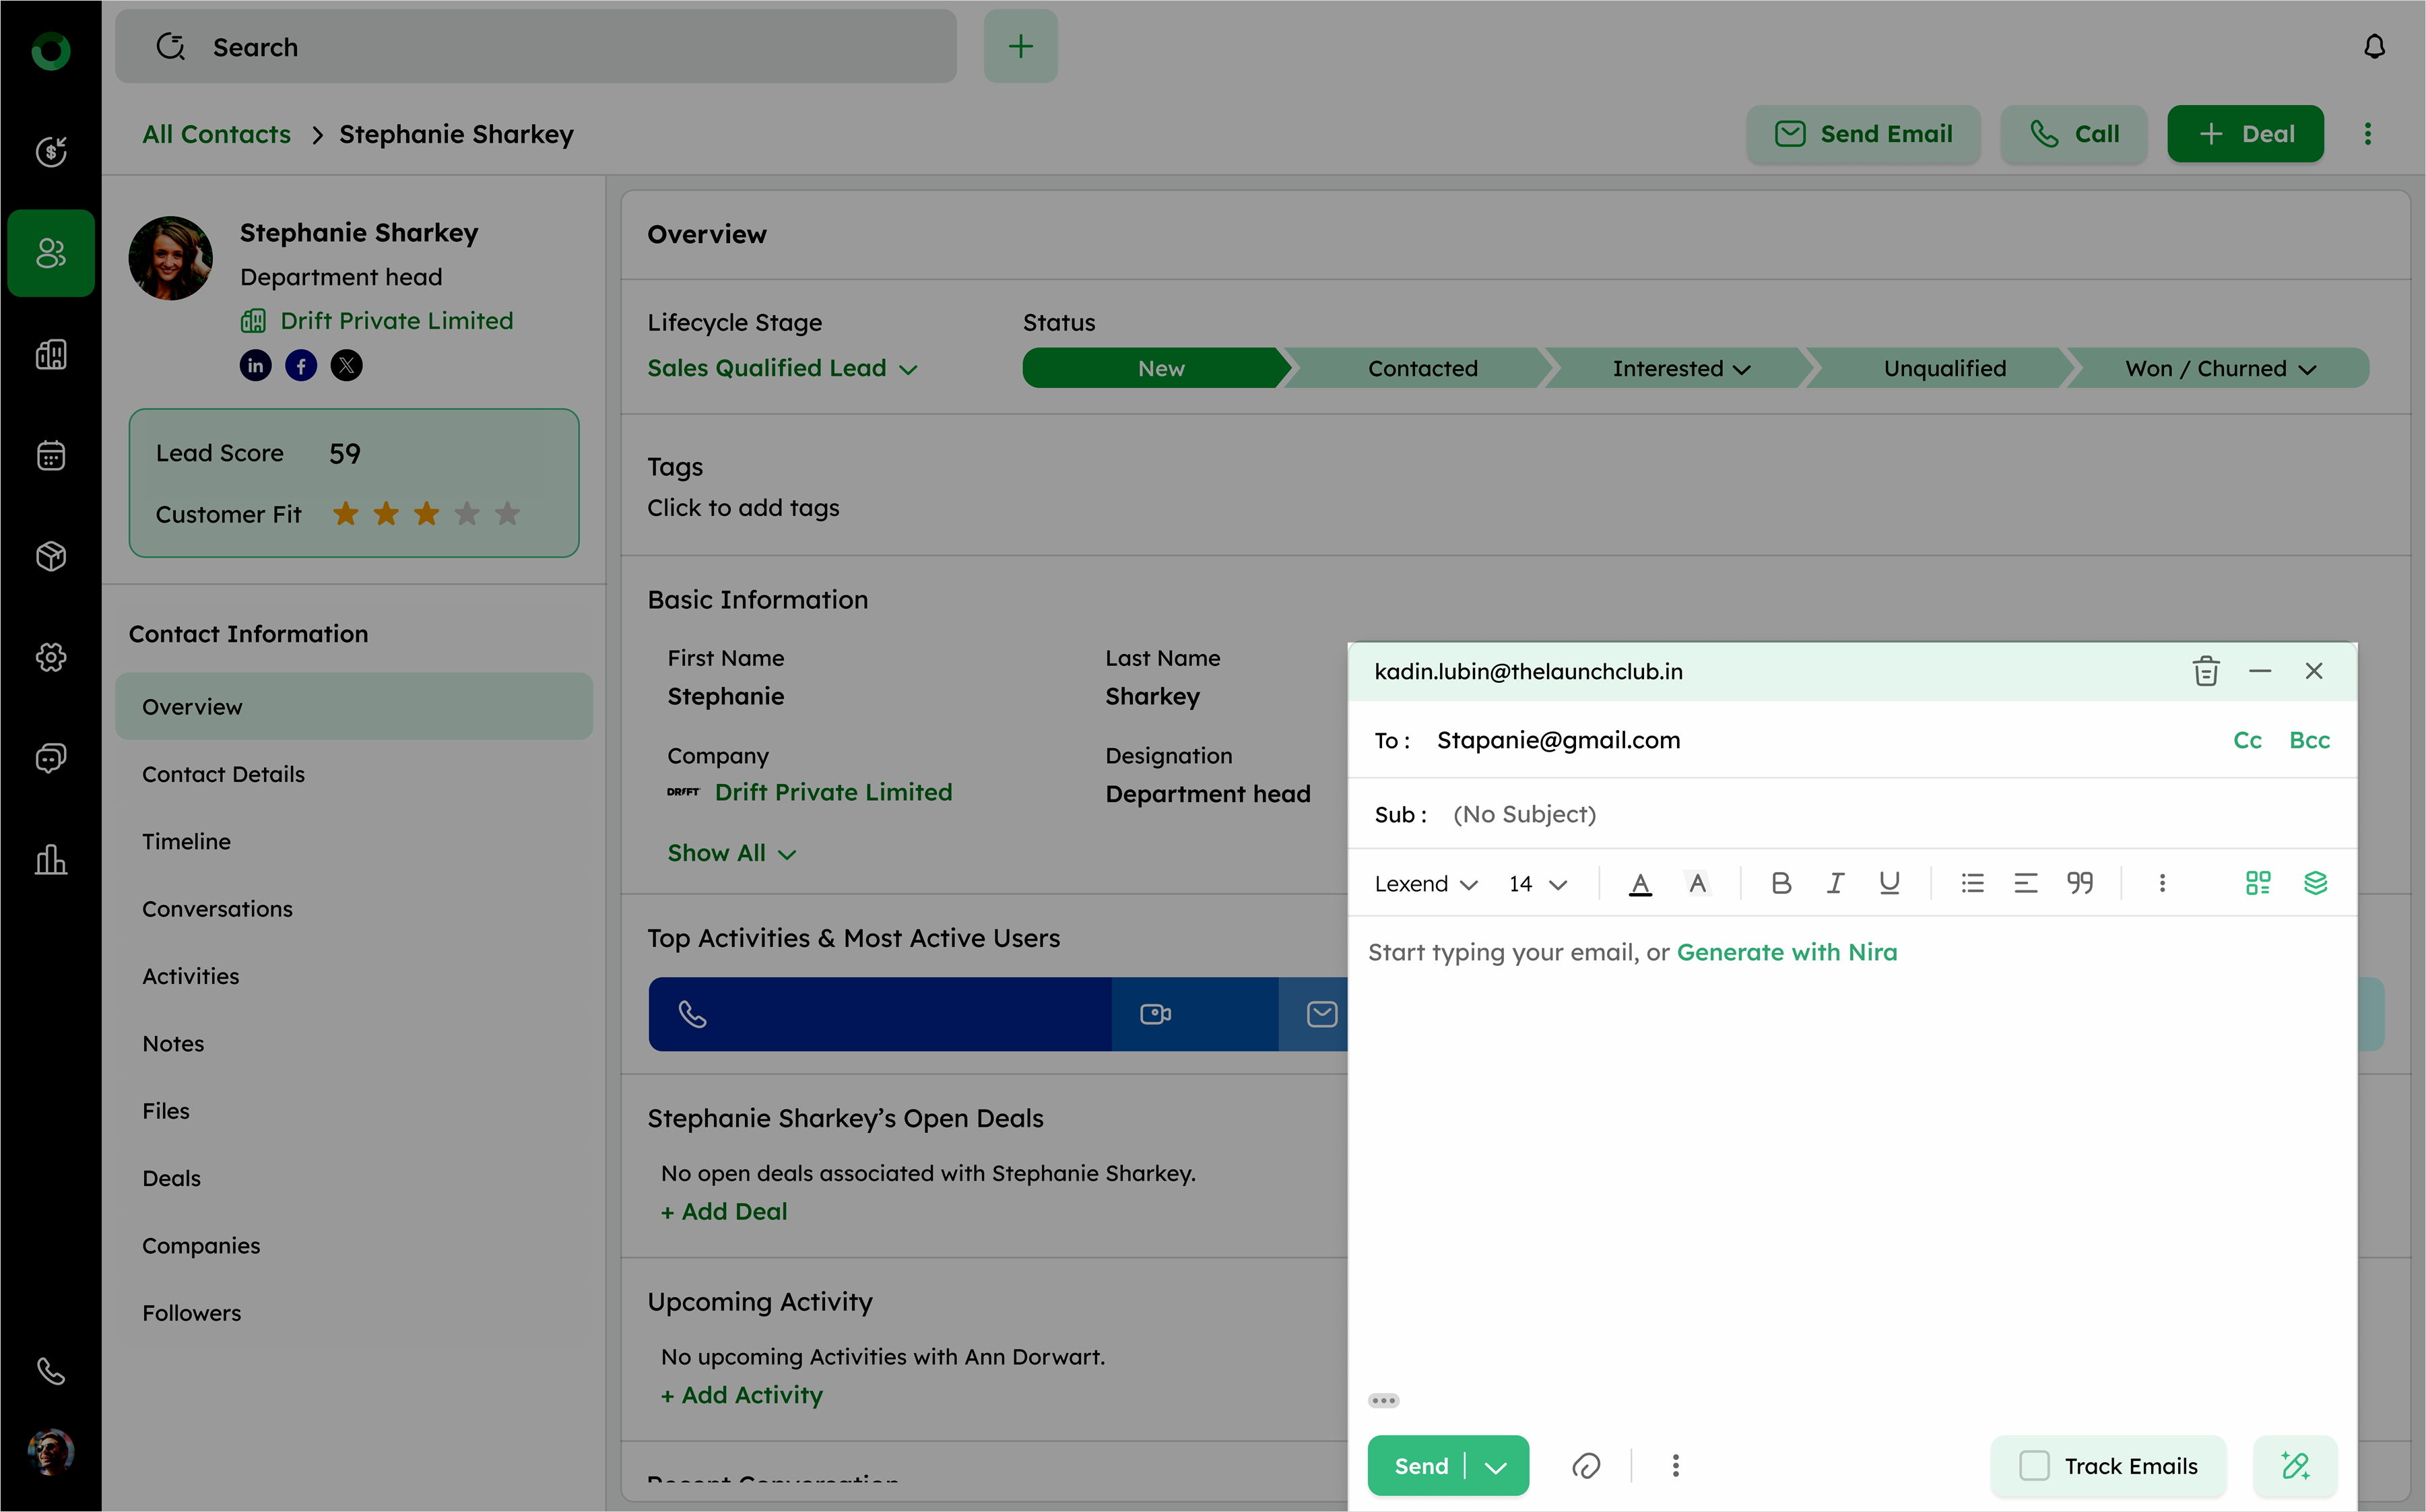
Quick Action: Sending an Email�
Click Send Email to open the compose tab. The contact's primary email address is automatically pre-filled in the To field. This feature allows for quick communication with the contact without having to manually enter their email address.
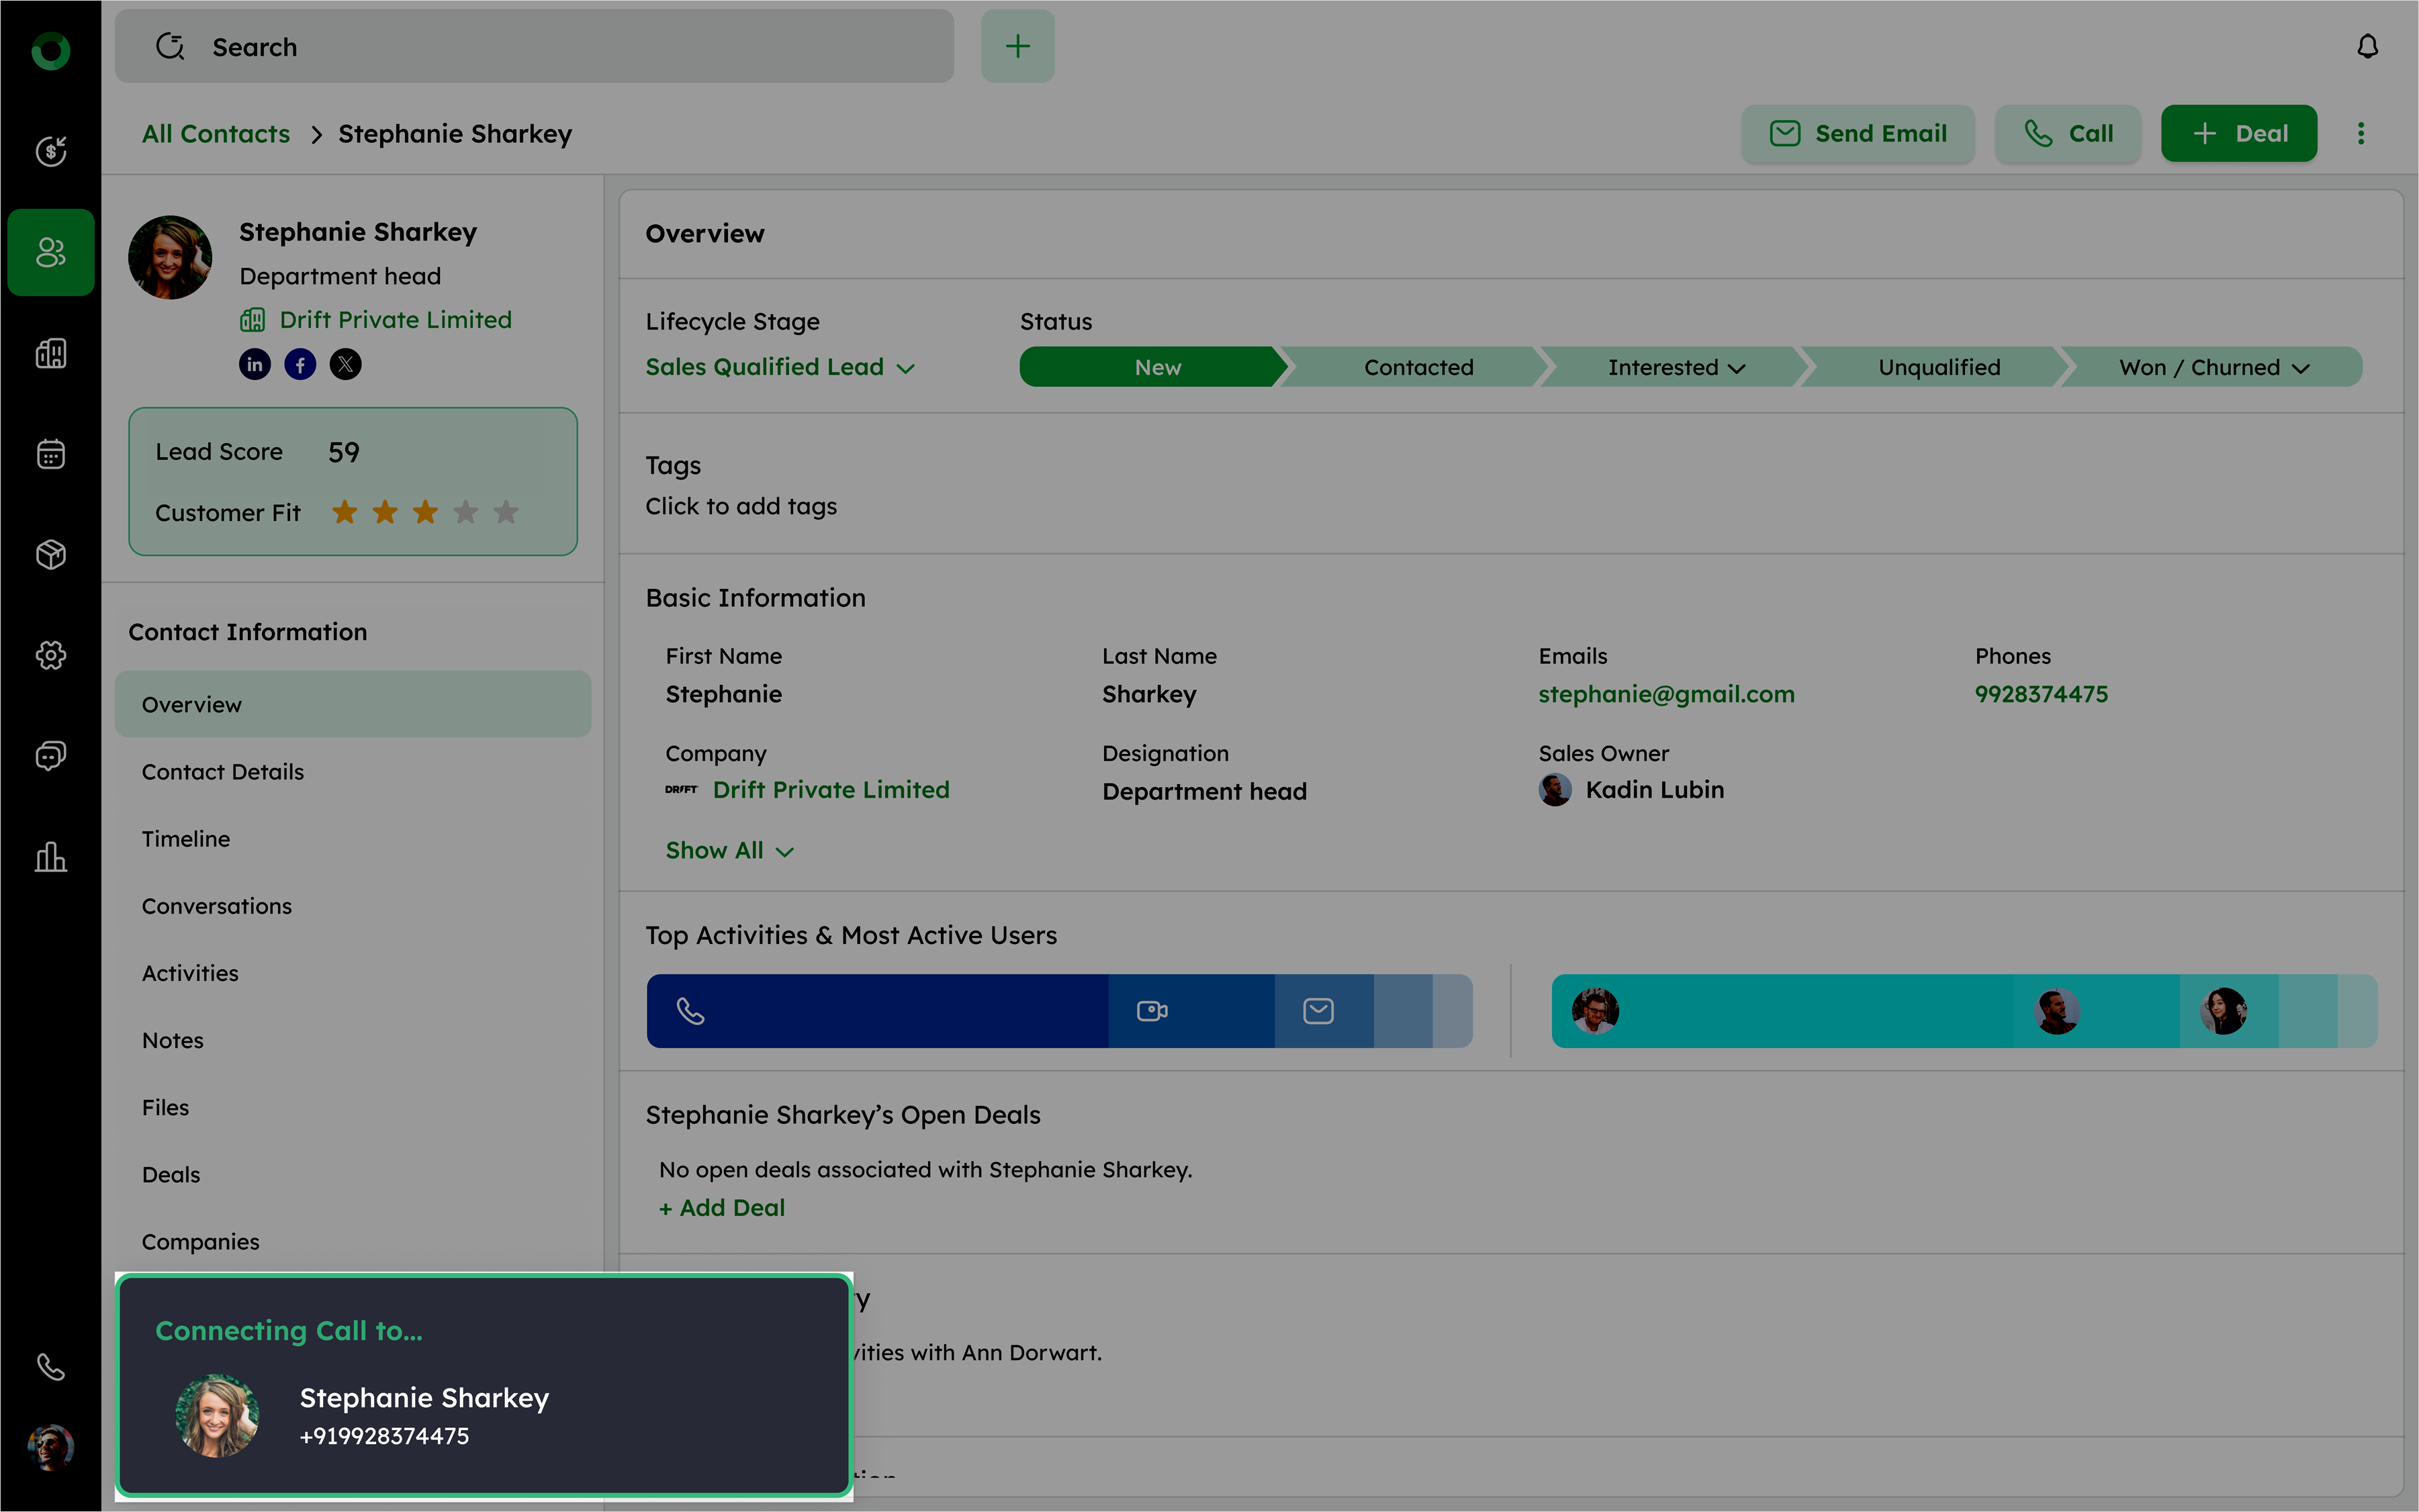
Quick Action: Initiating a Call
Click Call to open the Twozo Caller window. The contact's primary phone number is automatically pre-filled, making it easy to initiate a call without manually entering the number. This feature enables quick, seamless voice communication with the contact directly from the system.
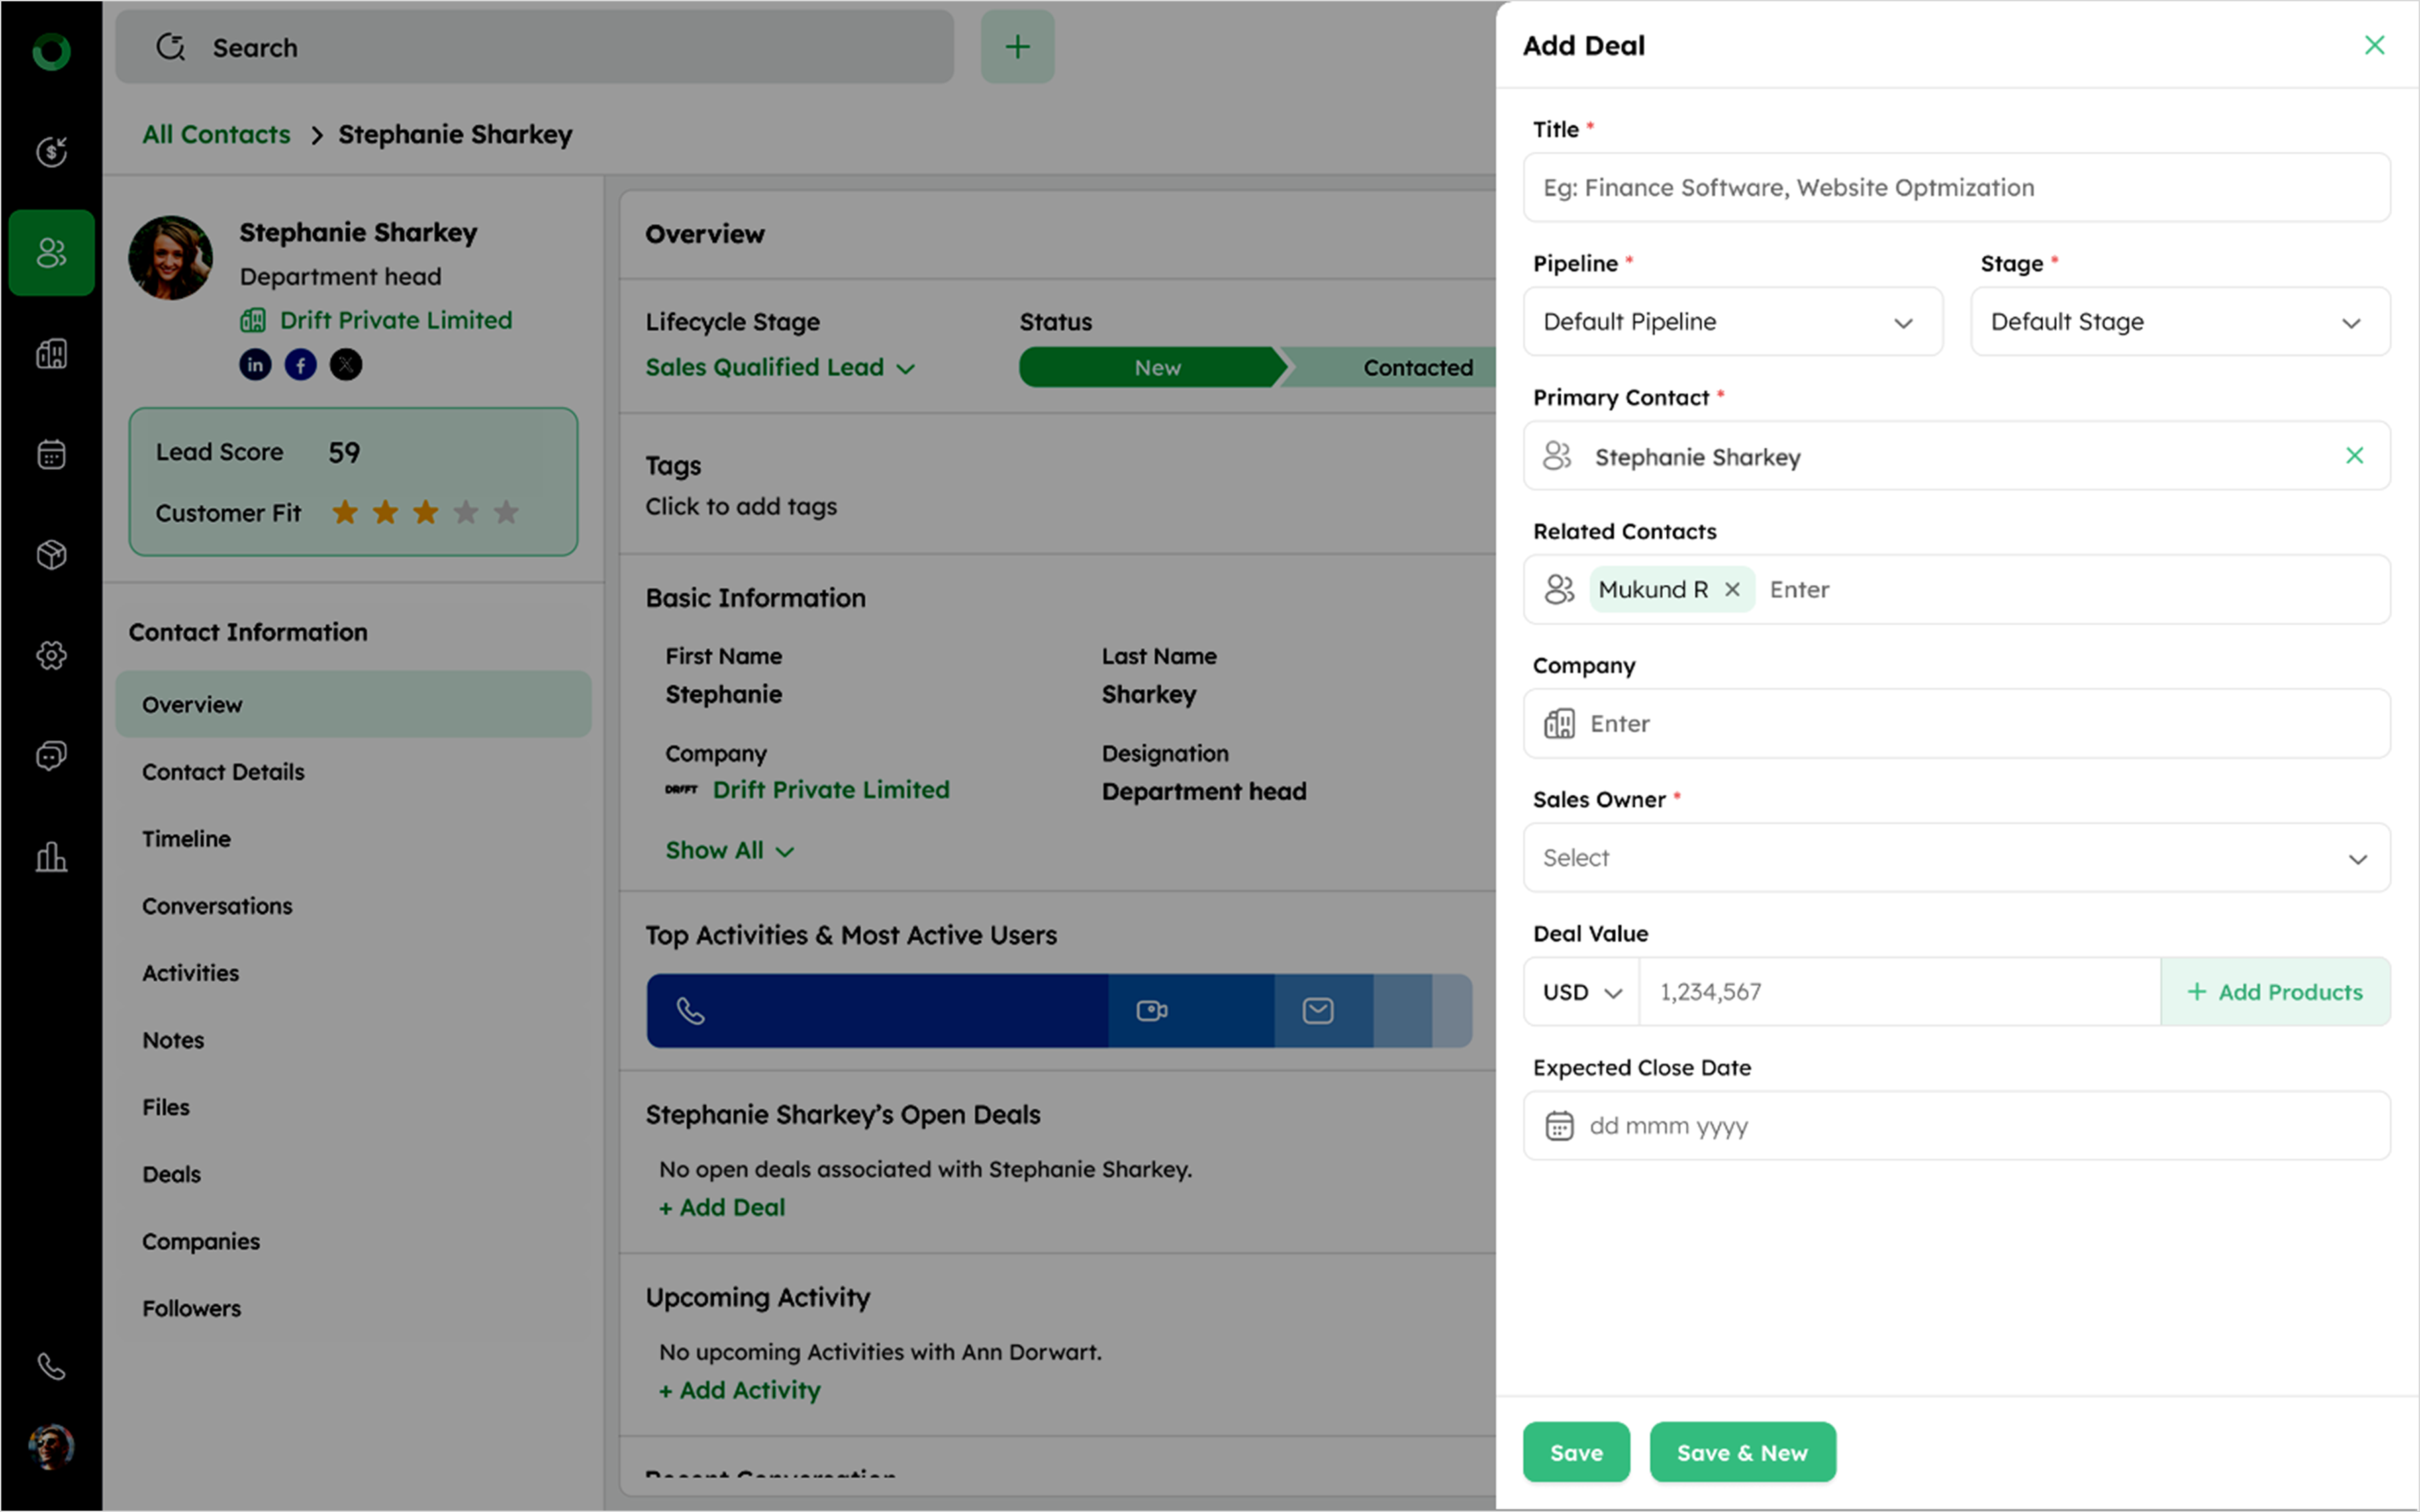
Quick Action: Creating a New Deal
Click +Deal to open the Add Deal drawer. The contact's name will be automatically filled in the primary contact field. You can then fill in additional details to add the contact to a new deal. This streamlines the process of creating a new deal involving the contact.
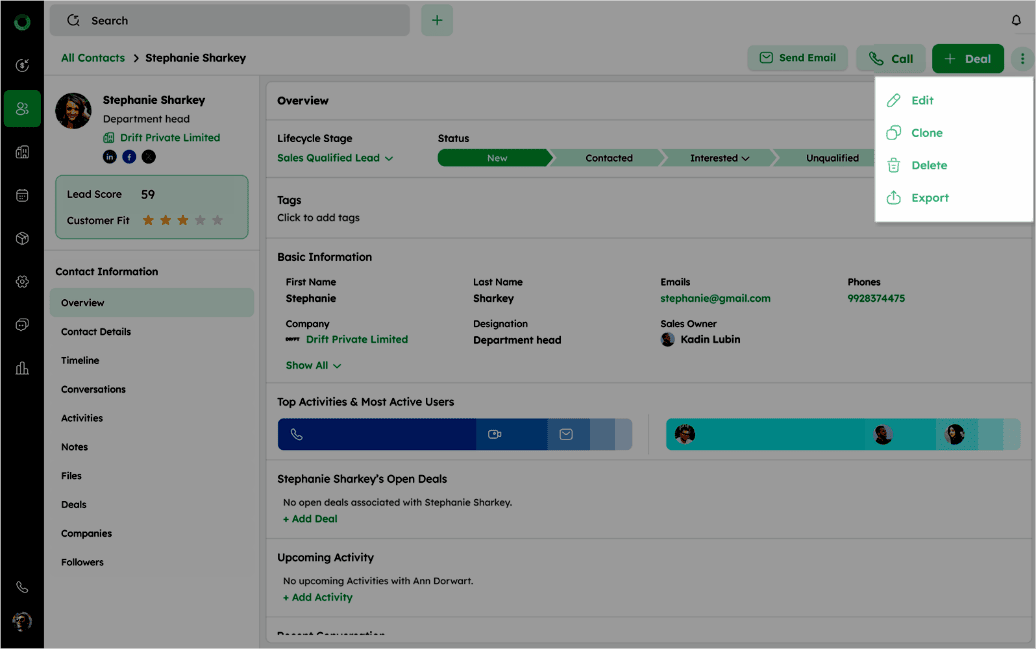
Guide to the Ellipsis Menu (More Actions)
Click the ellipsis (⁝) icon to access additional options for managing the contact. These include:
How to Edit a Contact?
- Select Edit in the ellipsis (⁝) icon to open the Edit Contact drawer.
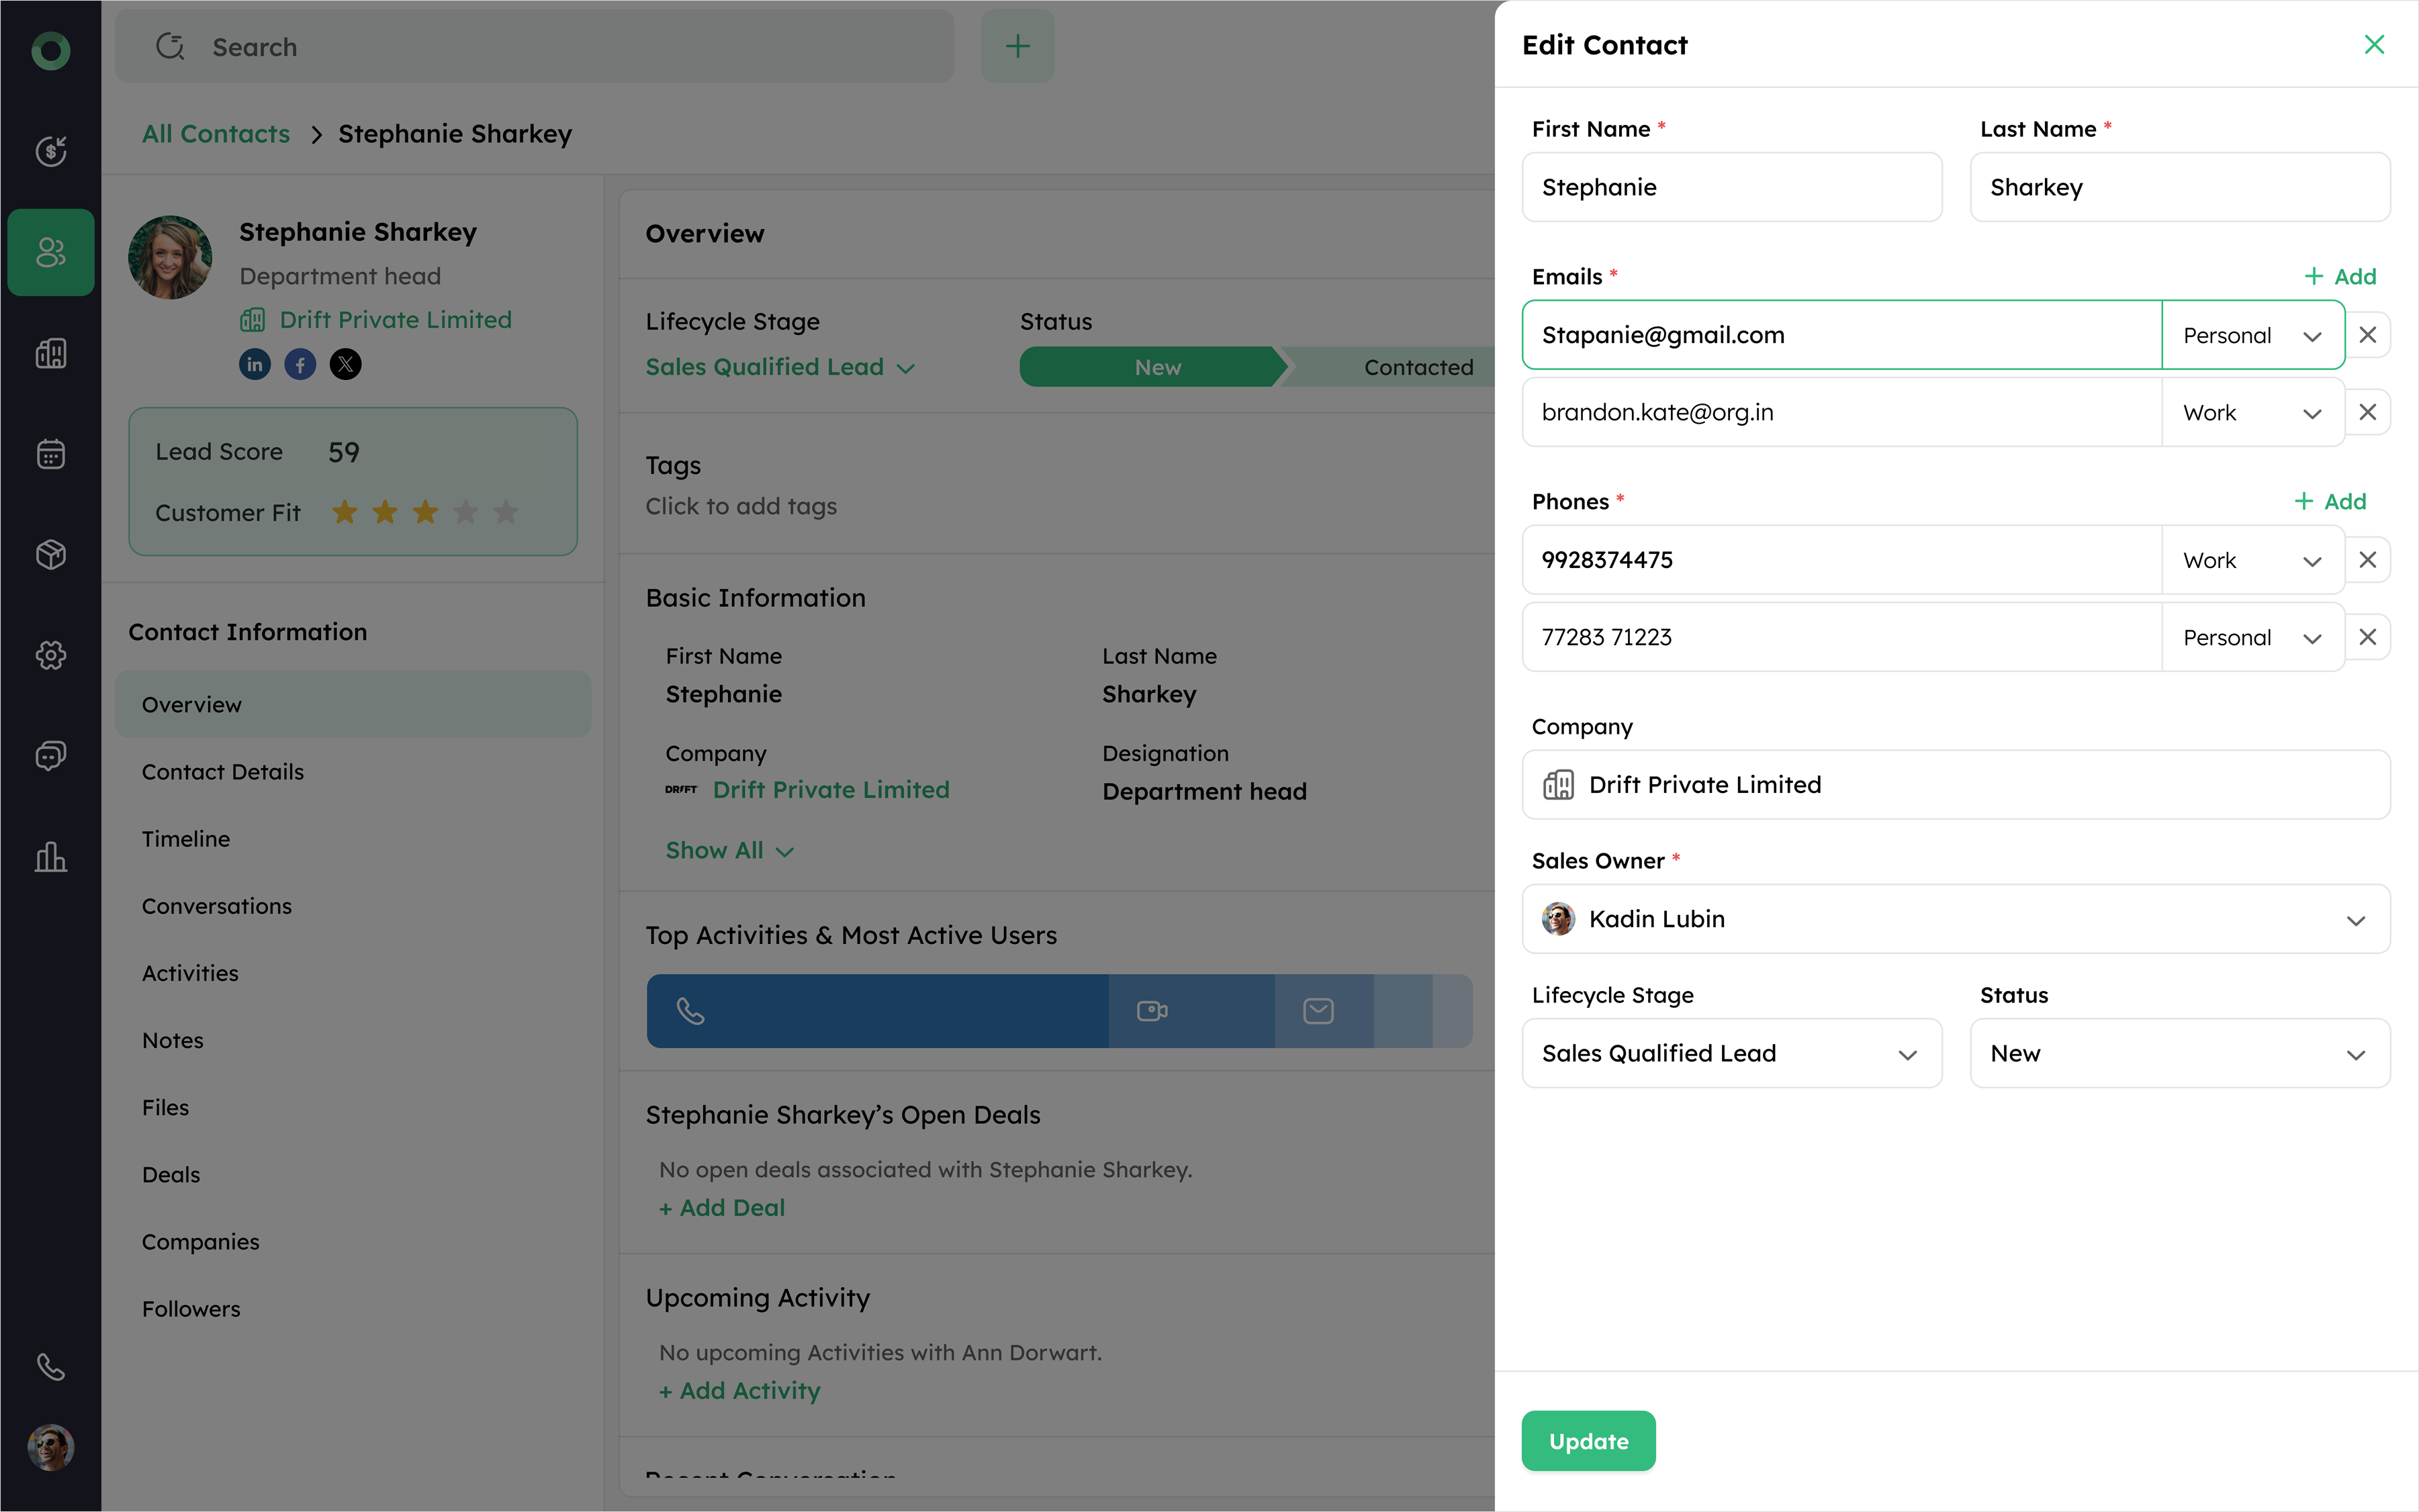
-
The drawer displays all contact fields pre-filled with existing information.
-
You can update details such as names, phone numbers, email addresses, company, designation, or sales owner.
-
Click Update to apply changes and update the contact record.
How to Clone a Contact?
- Select Clone in the ellipsis (⁝) menu to open the Clone Contact drawer, where fields automatically populate with the current contact's information, including name, phone number, email address, company, designation, sales owner, and other associated details.
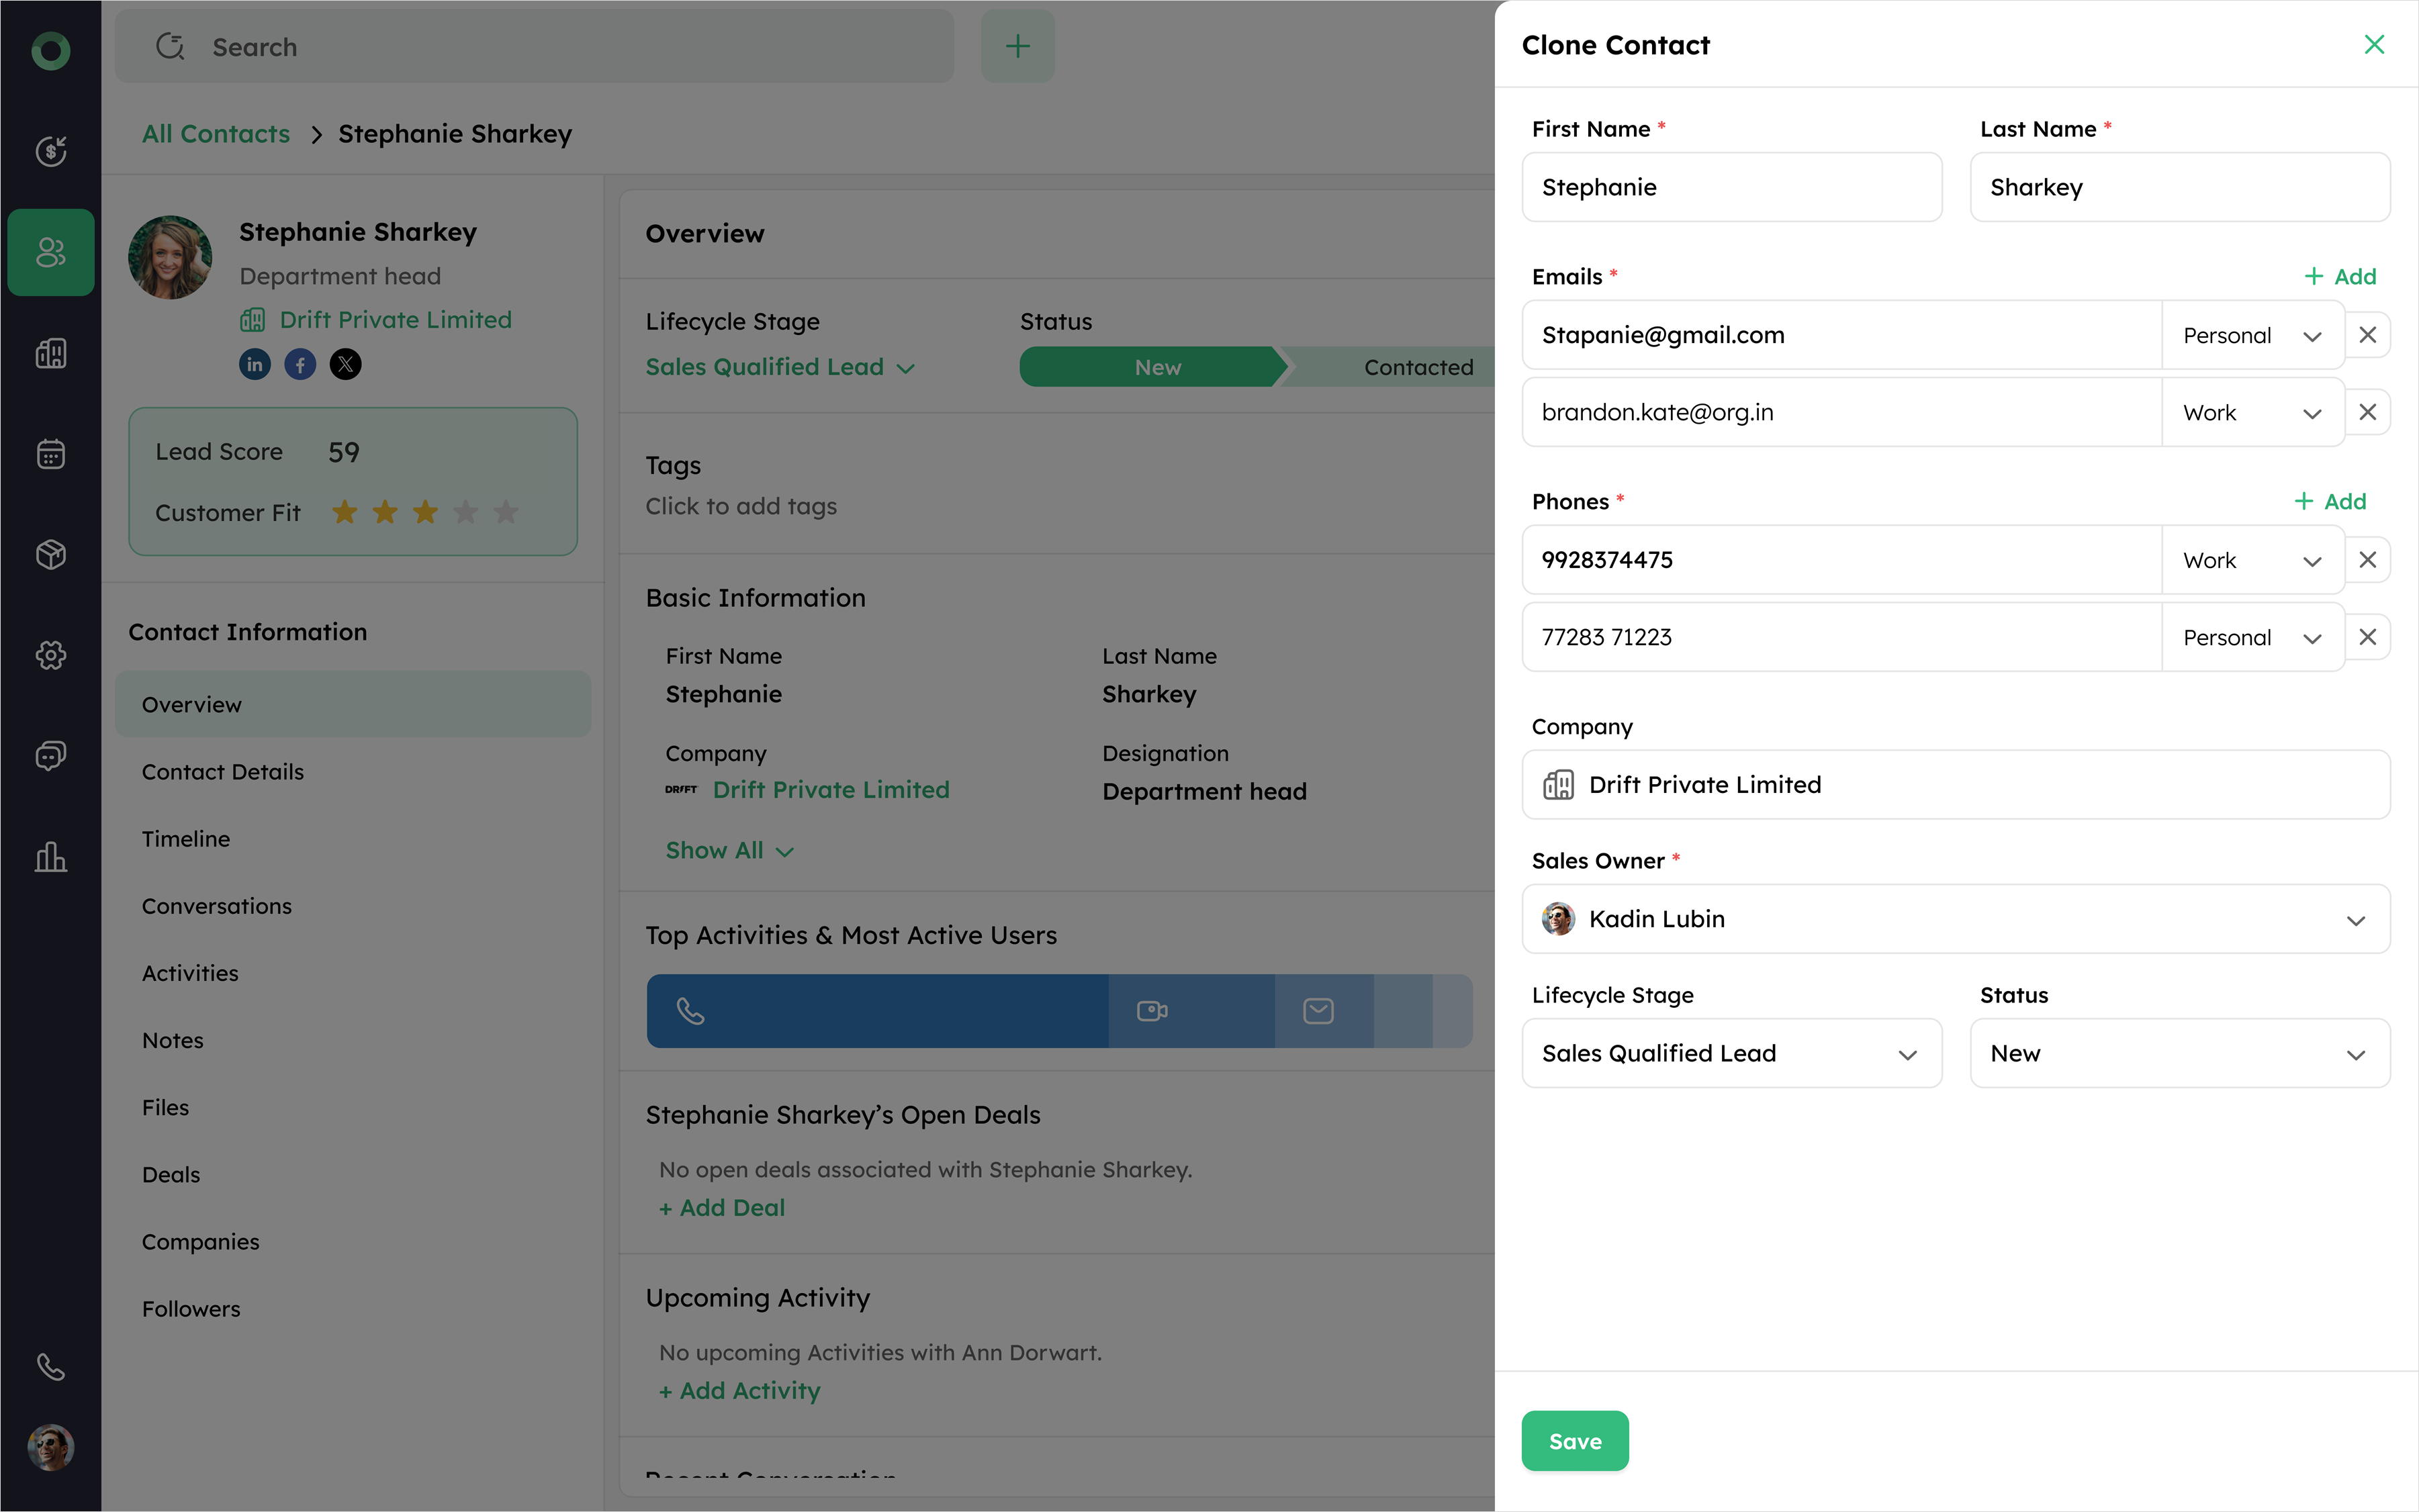
-
The CRM fills certain fields based on existing values, while auto-generated fields do not appear in the Clone drawer, simplifying the process of adding similar contacts without manual data entry.
-
Review or modify the pre-filled information before saving. Once saved, an exact copy of the original contact is created, which is useful for quickly adding similar contacts without re-entering all information.
How to Export a Contact Report?
- Select Export to choose a file format for download, such as XLSX, XLS, or CSV.
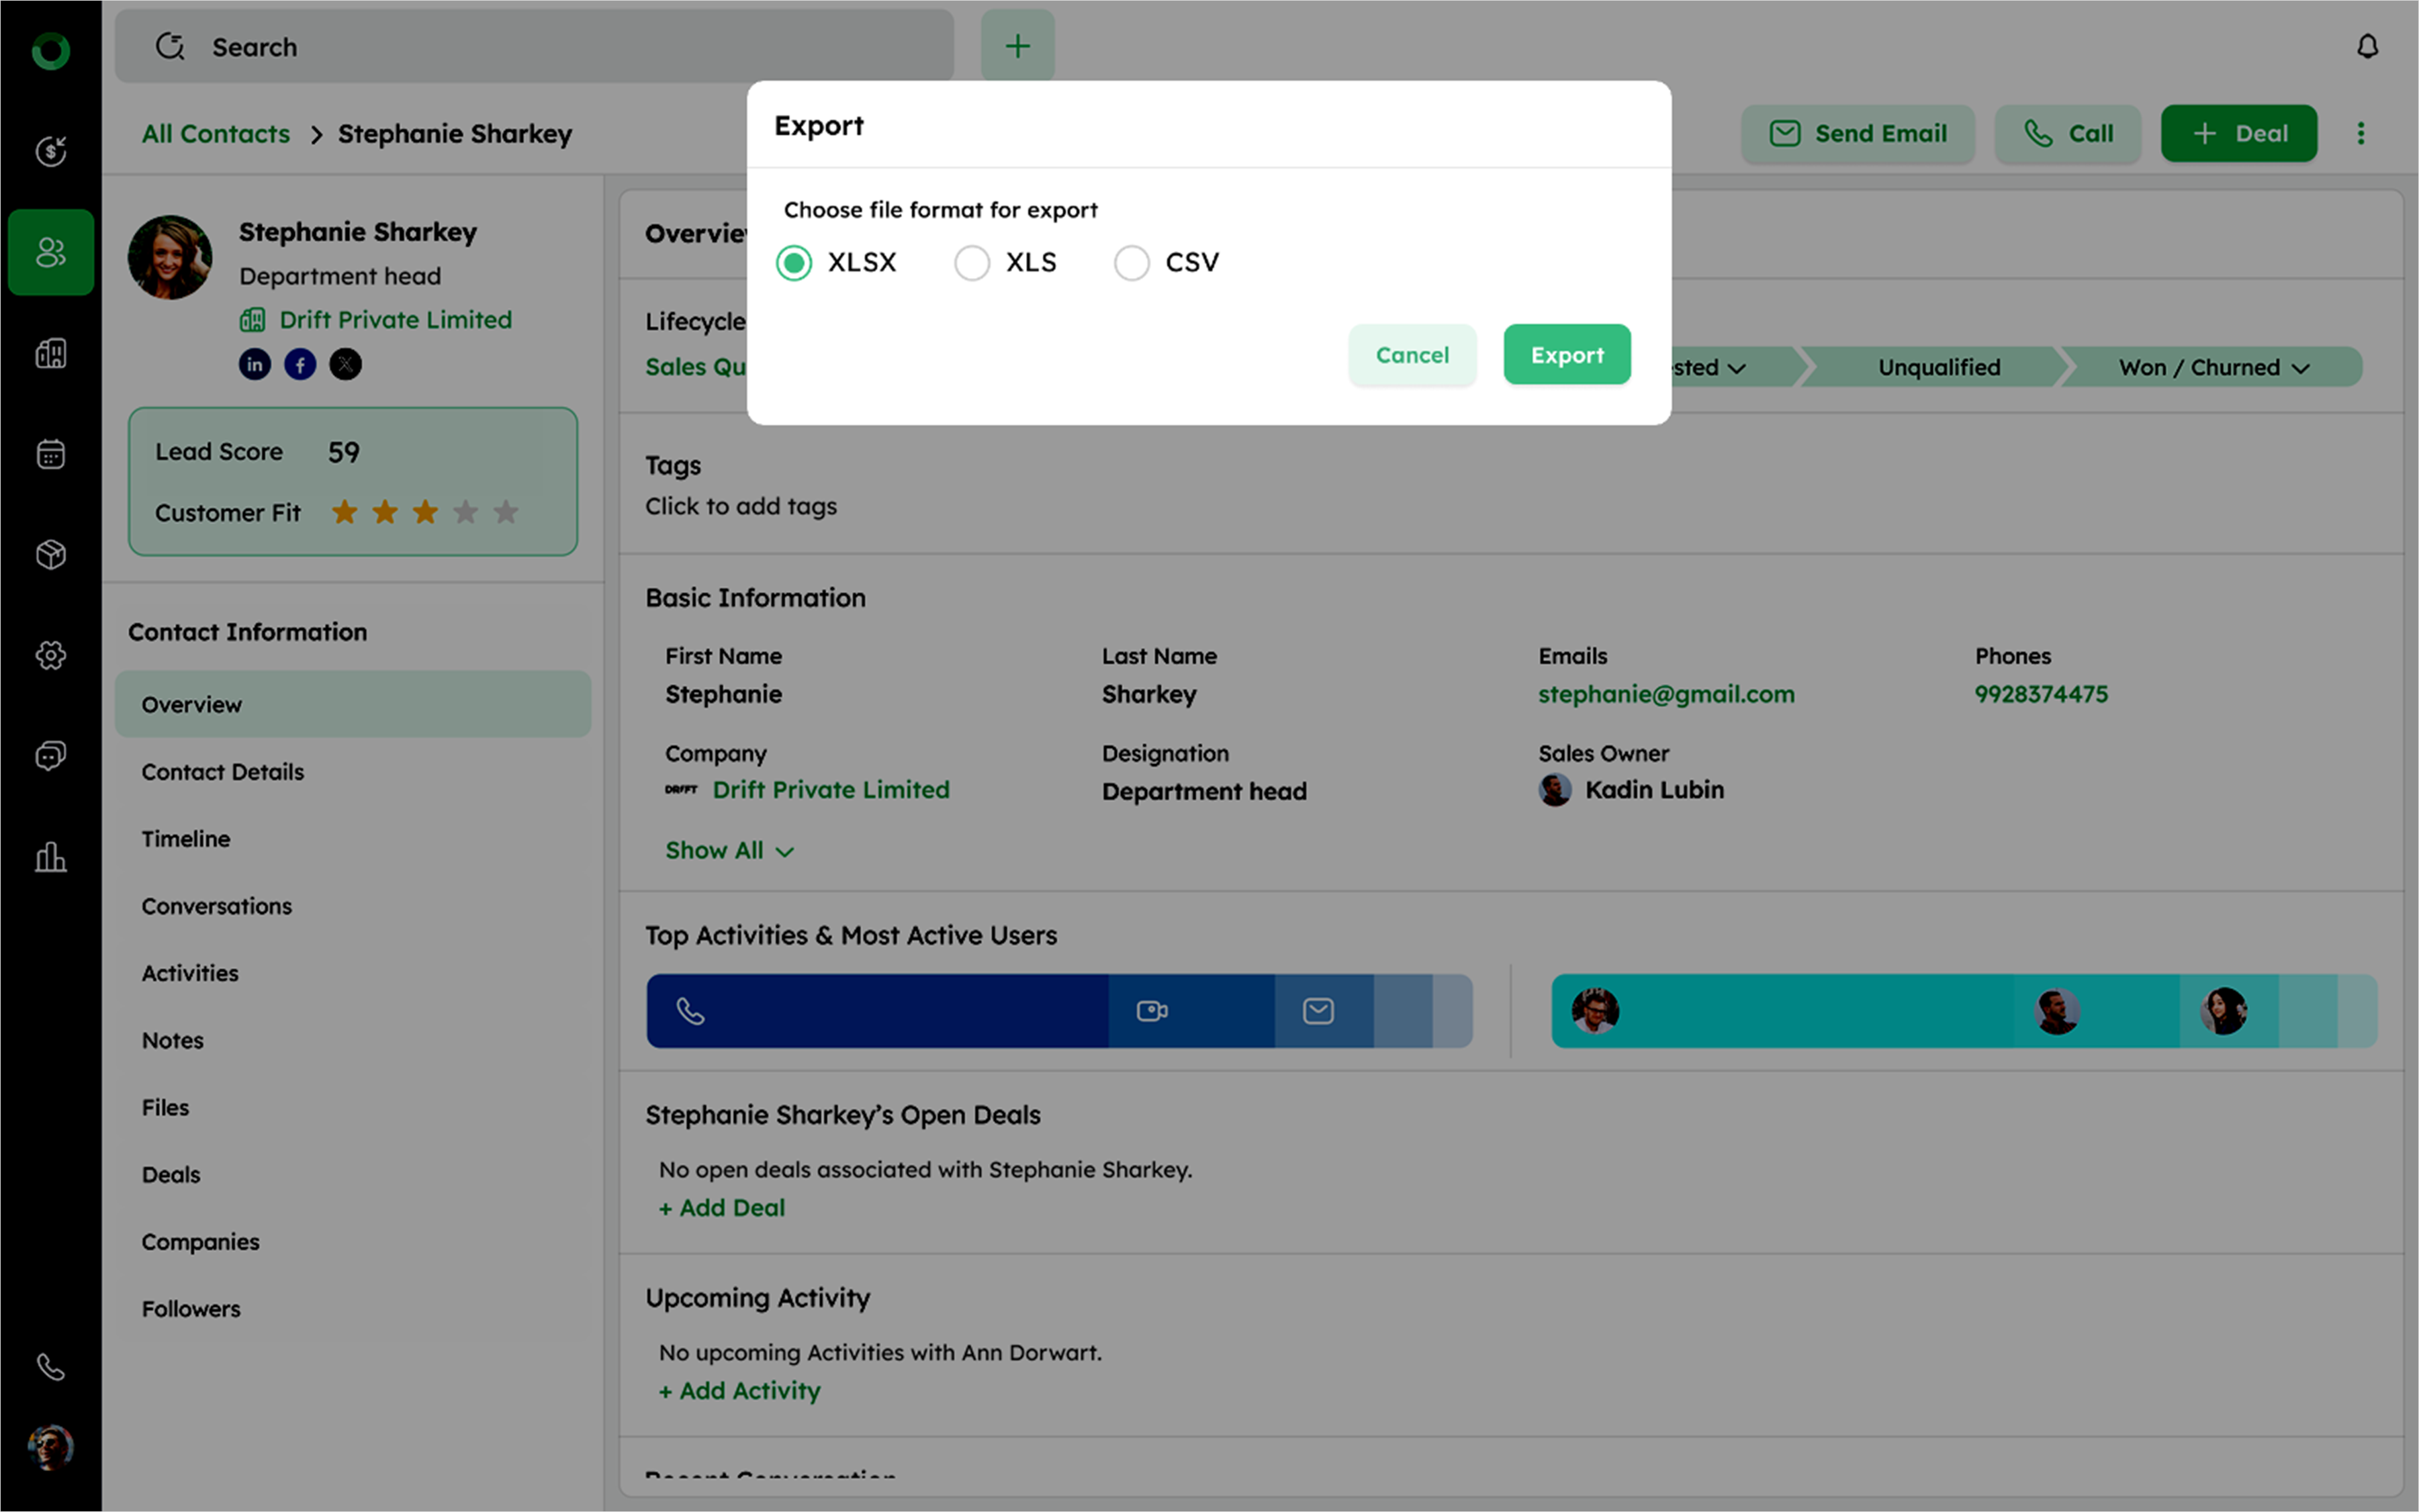
-
After selection, click the Export button to generate the file in the desired file format.
-
Once ready, click the Download button to save the file to your device.
How to Delete a Contact?
- Select Delete opens a confirmation pop-up.

- Confirm the deletion by clicking Delete, which removes the contact and moves it to the Recycle Bin. This feature aids in managing and cleaning up contact lists.