Filter Management: Segmenting Your Contact Data
How to Use Filters with AND/OR Logic to Segment Contacts?
The Filter option allows for precise sorting of contacts based on specific criteria to streamline your search.
- Locate the filter icon at the top left of the Contact List View.
![]()
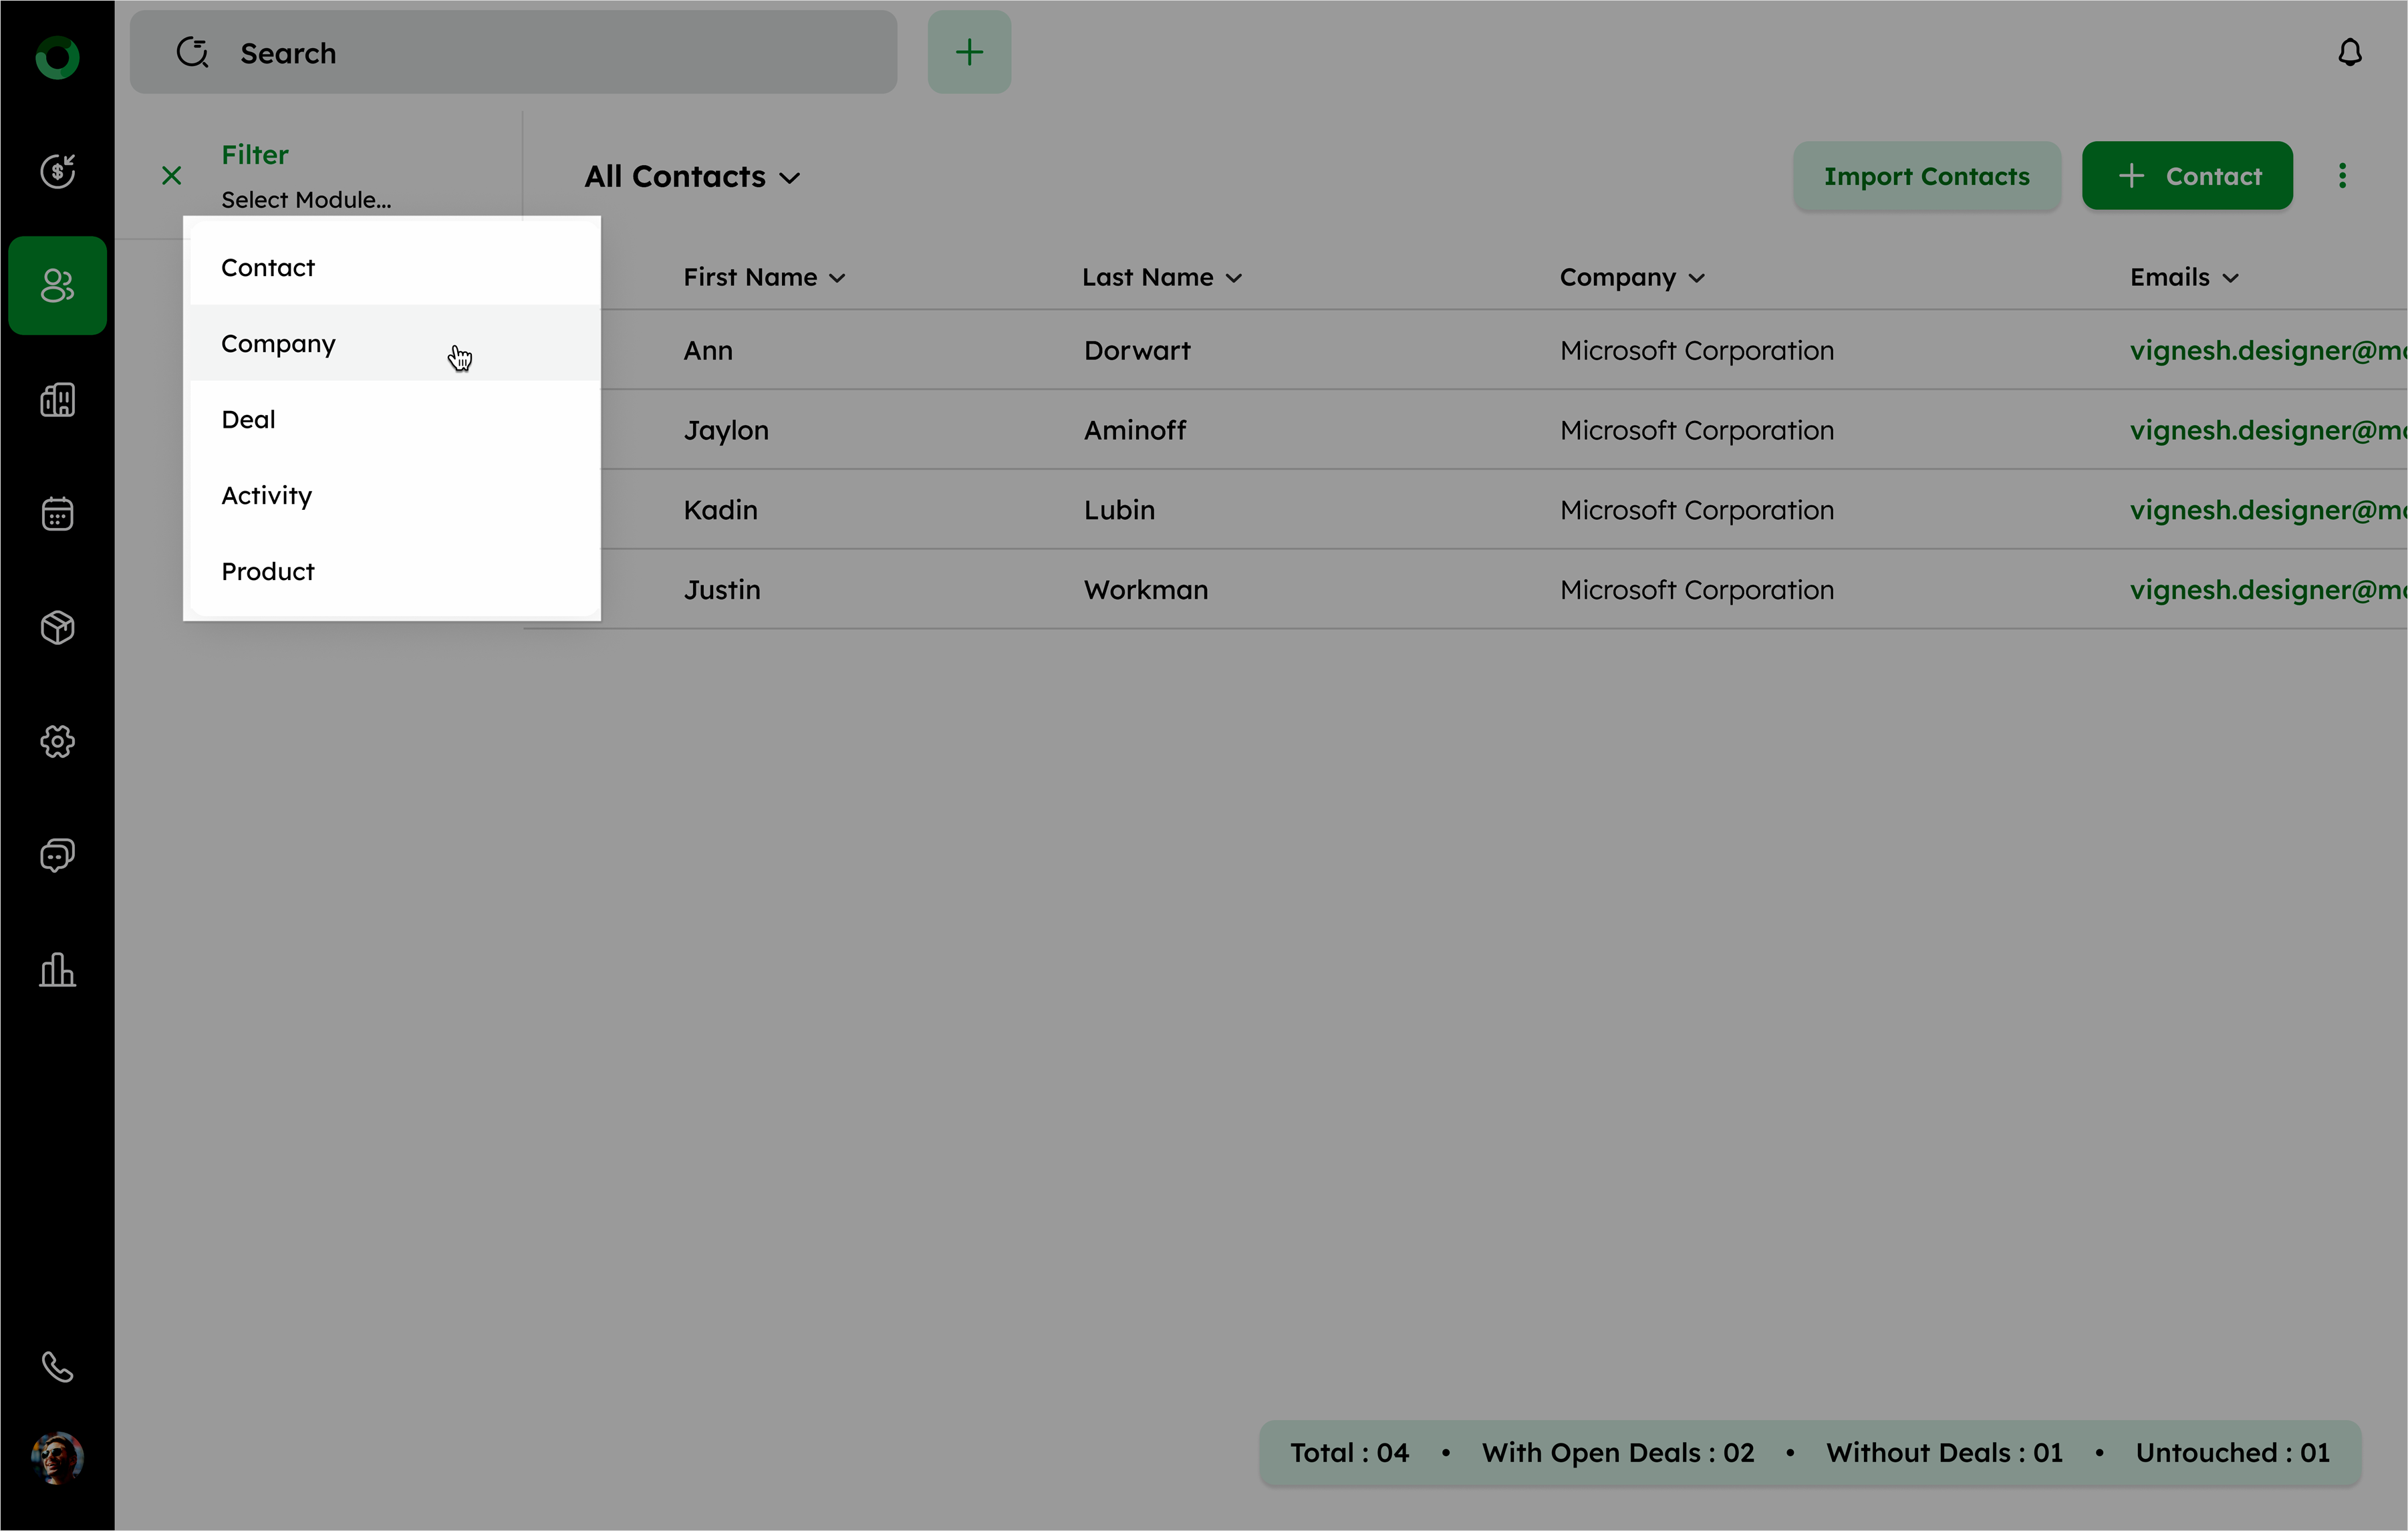
- Click the icon to access the filter menu, where you can define your criteria.
- Choose the option from the drop-down options like Contact, Company, Deal, Product, or Activity. Using these modules, you can establish conditions using And & Or connectors.
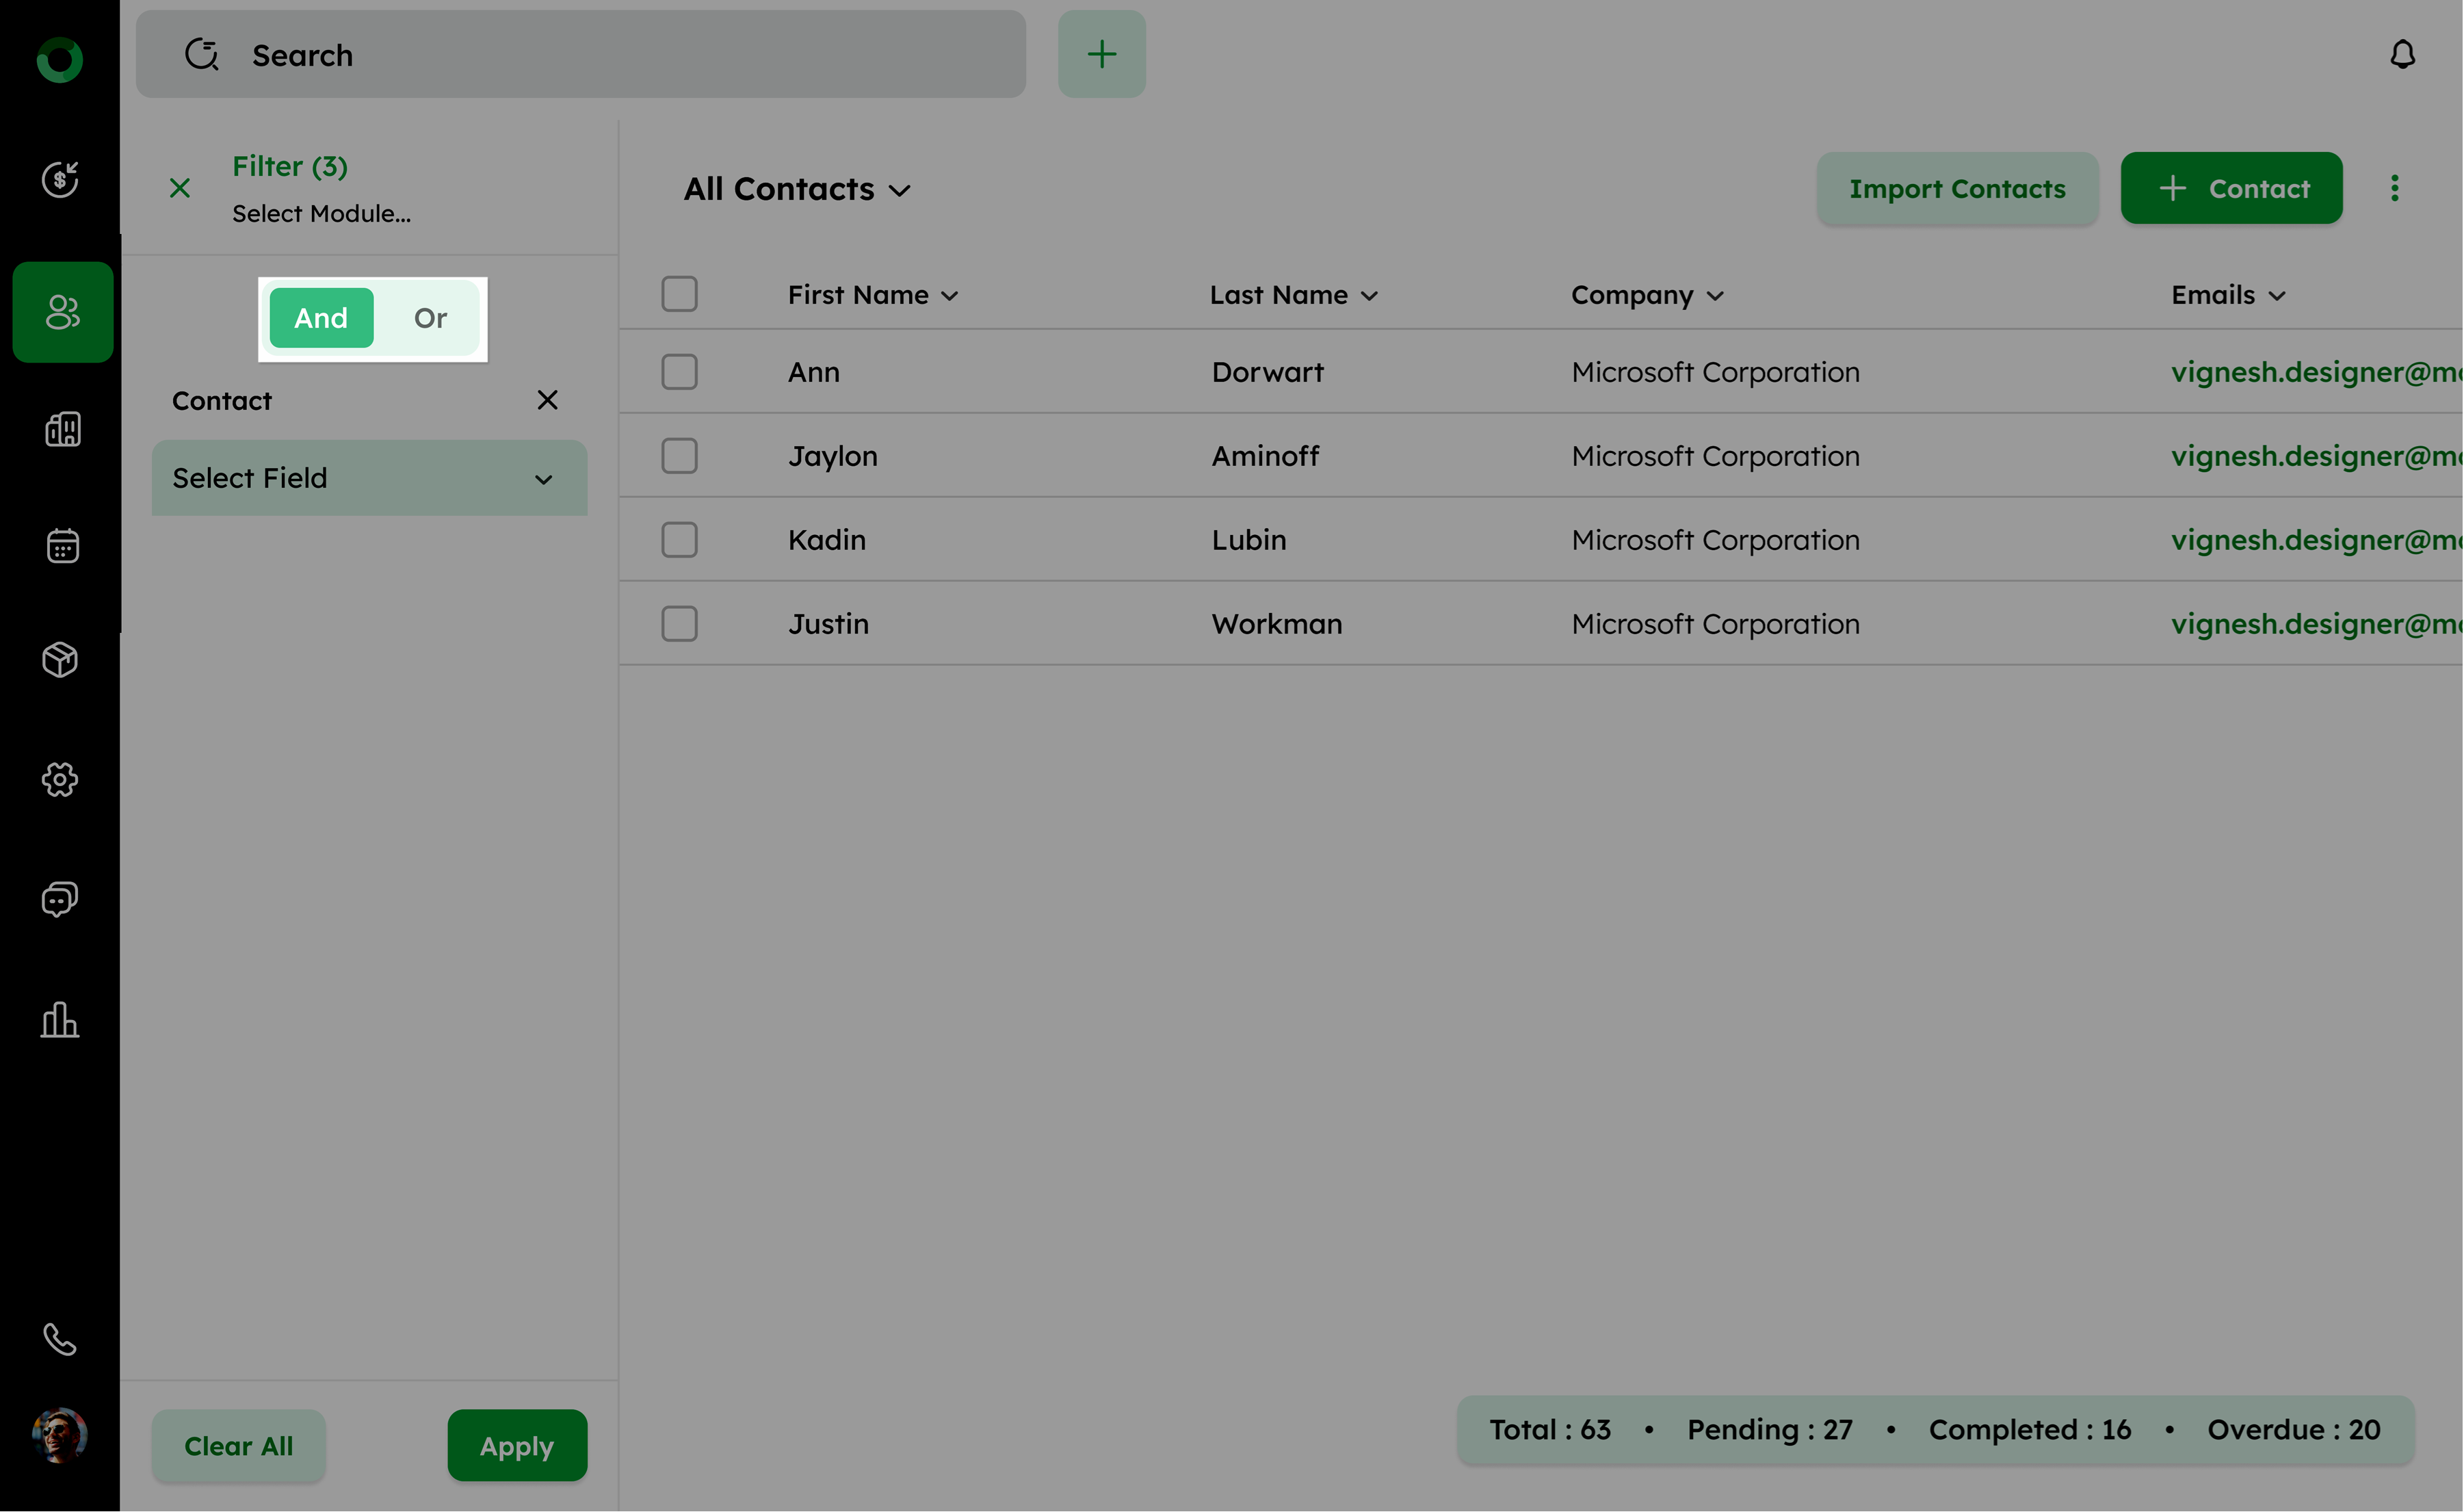
The AND & OR options in filters allow for exact criteria combinations.
AND:
- The result is true only if all specified conditions are true.
- For instance, if both Condition 1 and Condition 2 are true, then the result will be true. If either or both conditions are false, the result will be false.
- If Condition 1 is true and Condition 2 is false, the result will be false. Both conditions must be true for the result to be true.
OR:
- The result is true if at least one of the specified conditions is true.
- If either Condition 1 or Condition 2 is true, the result will be true. The result is only false if both conditions are false.
- If Condition 1 is true and Condition 2 is false, the result will be true. At least one condition needs to be true for the result to be true.
The Condition Combinations:
Condition 1 AND Condition 2 OR Condition 3
- Evaluate records to see if they meet both Condition 1 and Condition 2. If a record satisfies both conditions, it qualifies under this part of the filter.
- And separately evaluate records to see if they meet Condition 3.
- The final record includes those meeting both Condition 1 and Condition 2, as well as those meeting Condition 3, evaluated separately.
Condition 1 OR Condition 2 AND Condition 3 OR Condition 4
- Evaluate records to see if they meet both Condition 1 and Condition 3. This subset of records satisfies the combination of these two conditions.
- Independently, evaluate records to see if they meet Condition 2 or Condition 4.
- Combine results using OR: The final result will be true if either the result of Condition 1 AND Condition 3 is true, or the result of Condition 2 OR Condition 4 is true, or both.
Note:
The filter will first ensure that the AND conditions are satisfied, and then it will check if any of the OR conditions are true to determine the final result.
- Click Select Field to display available fields.
- Choose an operator such as is, is not, is empty, or is not empty, depending on the field type.
- Provide values for the selected fields and add additional filters as needed.
The filter count increases alongside the filter header when a source is selected.
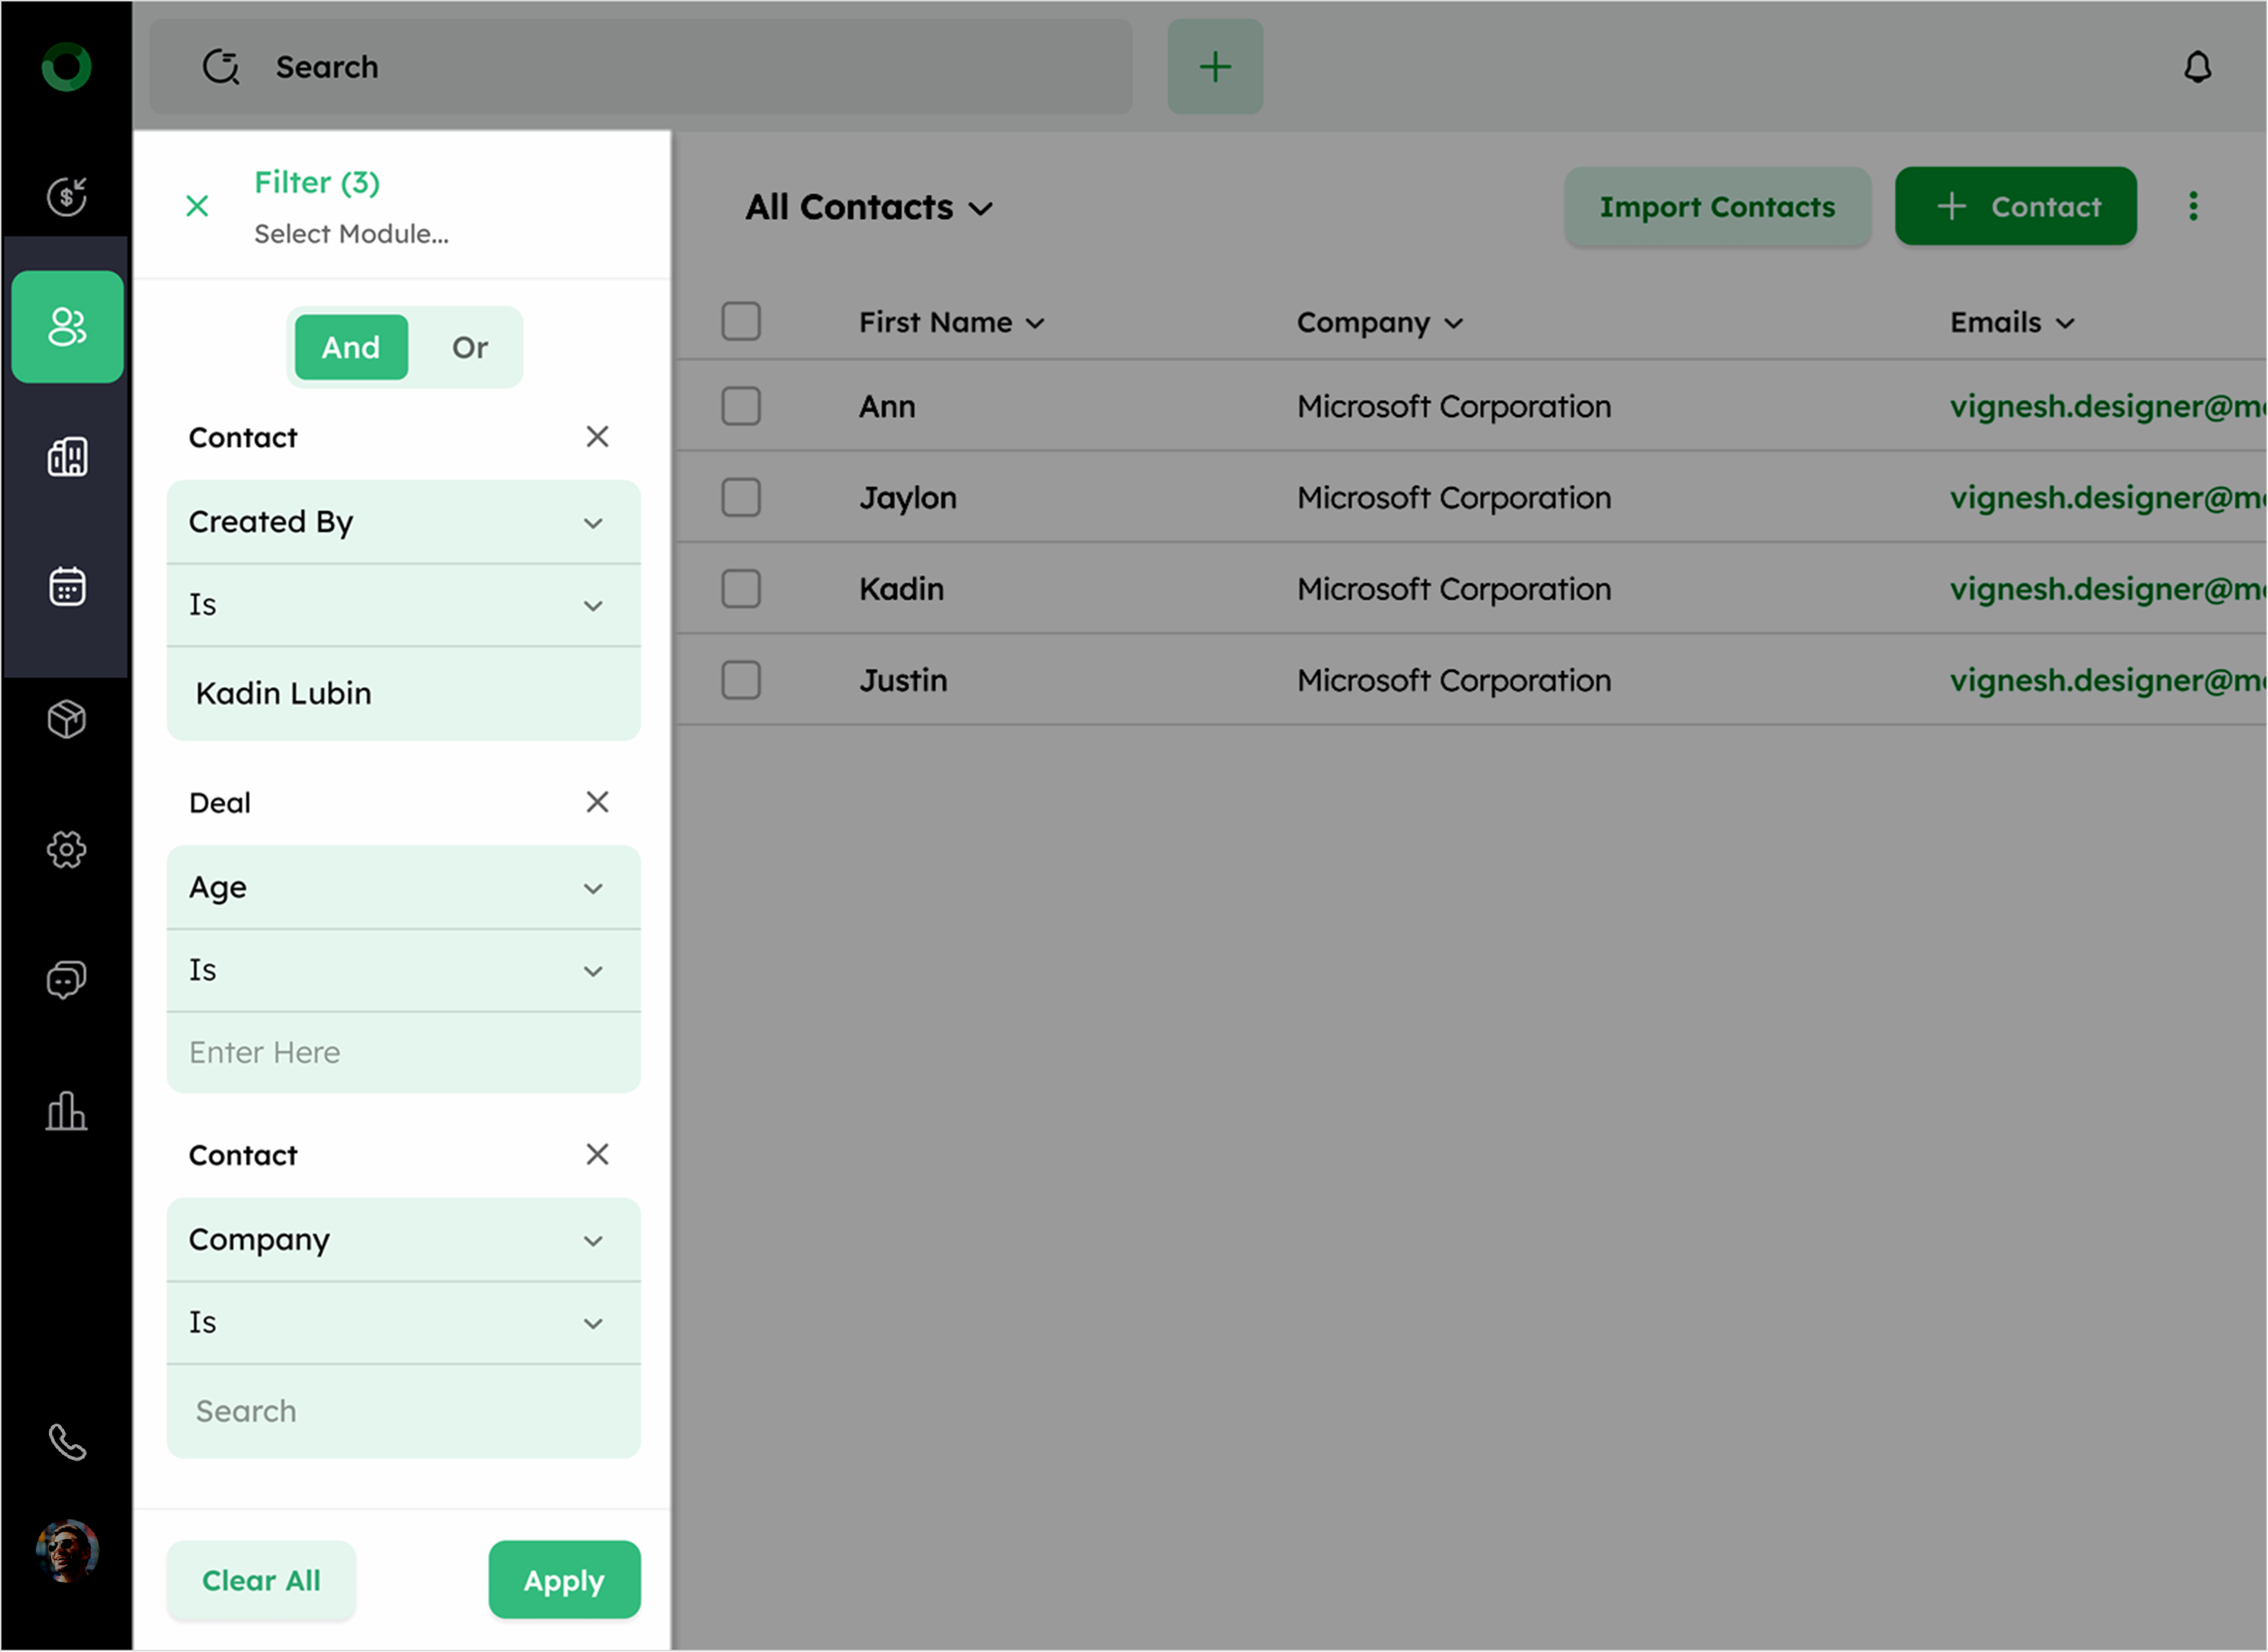
- Now tap the Apply option to proceed with the action or to discard changes, click Clear All next to the Apply button.
How to Save a Custom View?
- After applying a selected filter, a Save View button appears at the top of the Contact List View.
- Click Save View to open a dialog box where you can enter the following details:
- The first condition's name will serve as the default field name. You can either modify it or leave it unchanged.
- Choose whether the filter Can View only or both Can View and Edit.
- You can control access using the Visible To field, which offers options such as Just Me, Everyone, or Selected Users, Teams, or Territories. Selected items are shown below and can be removed with the remove icon.
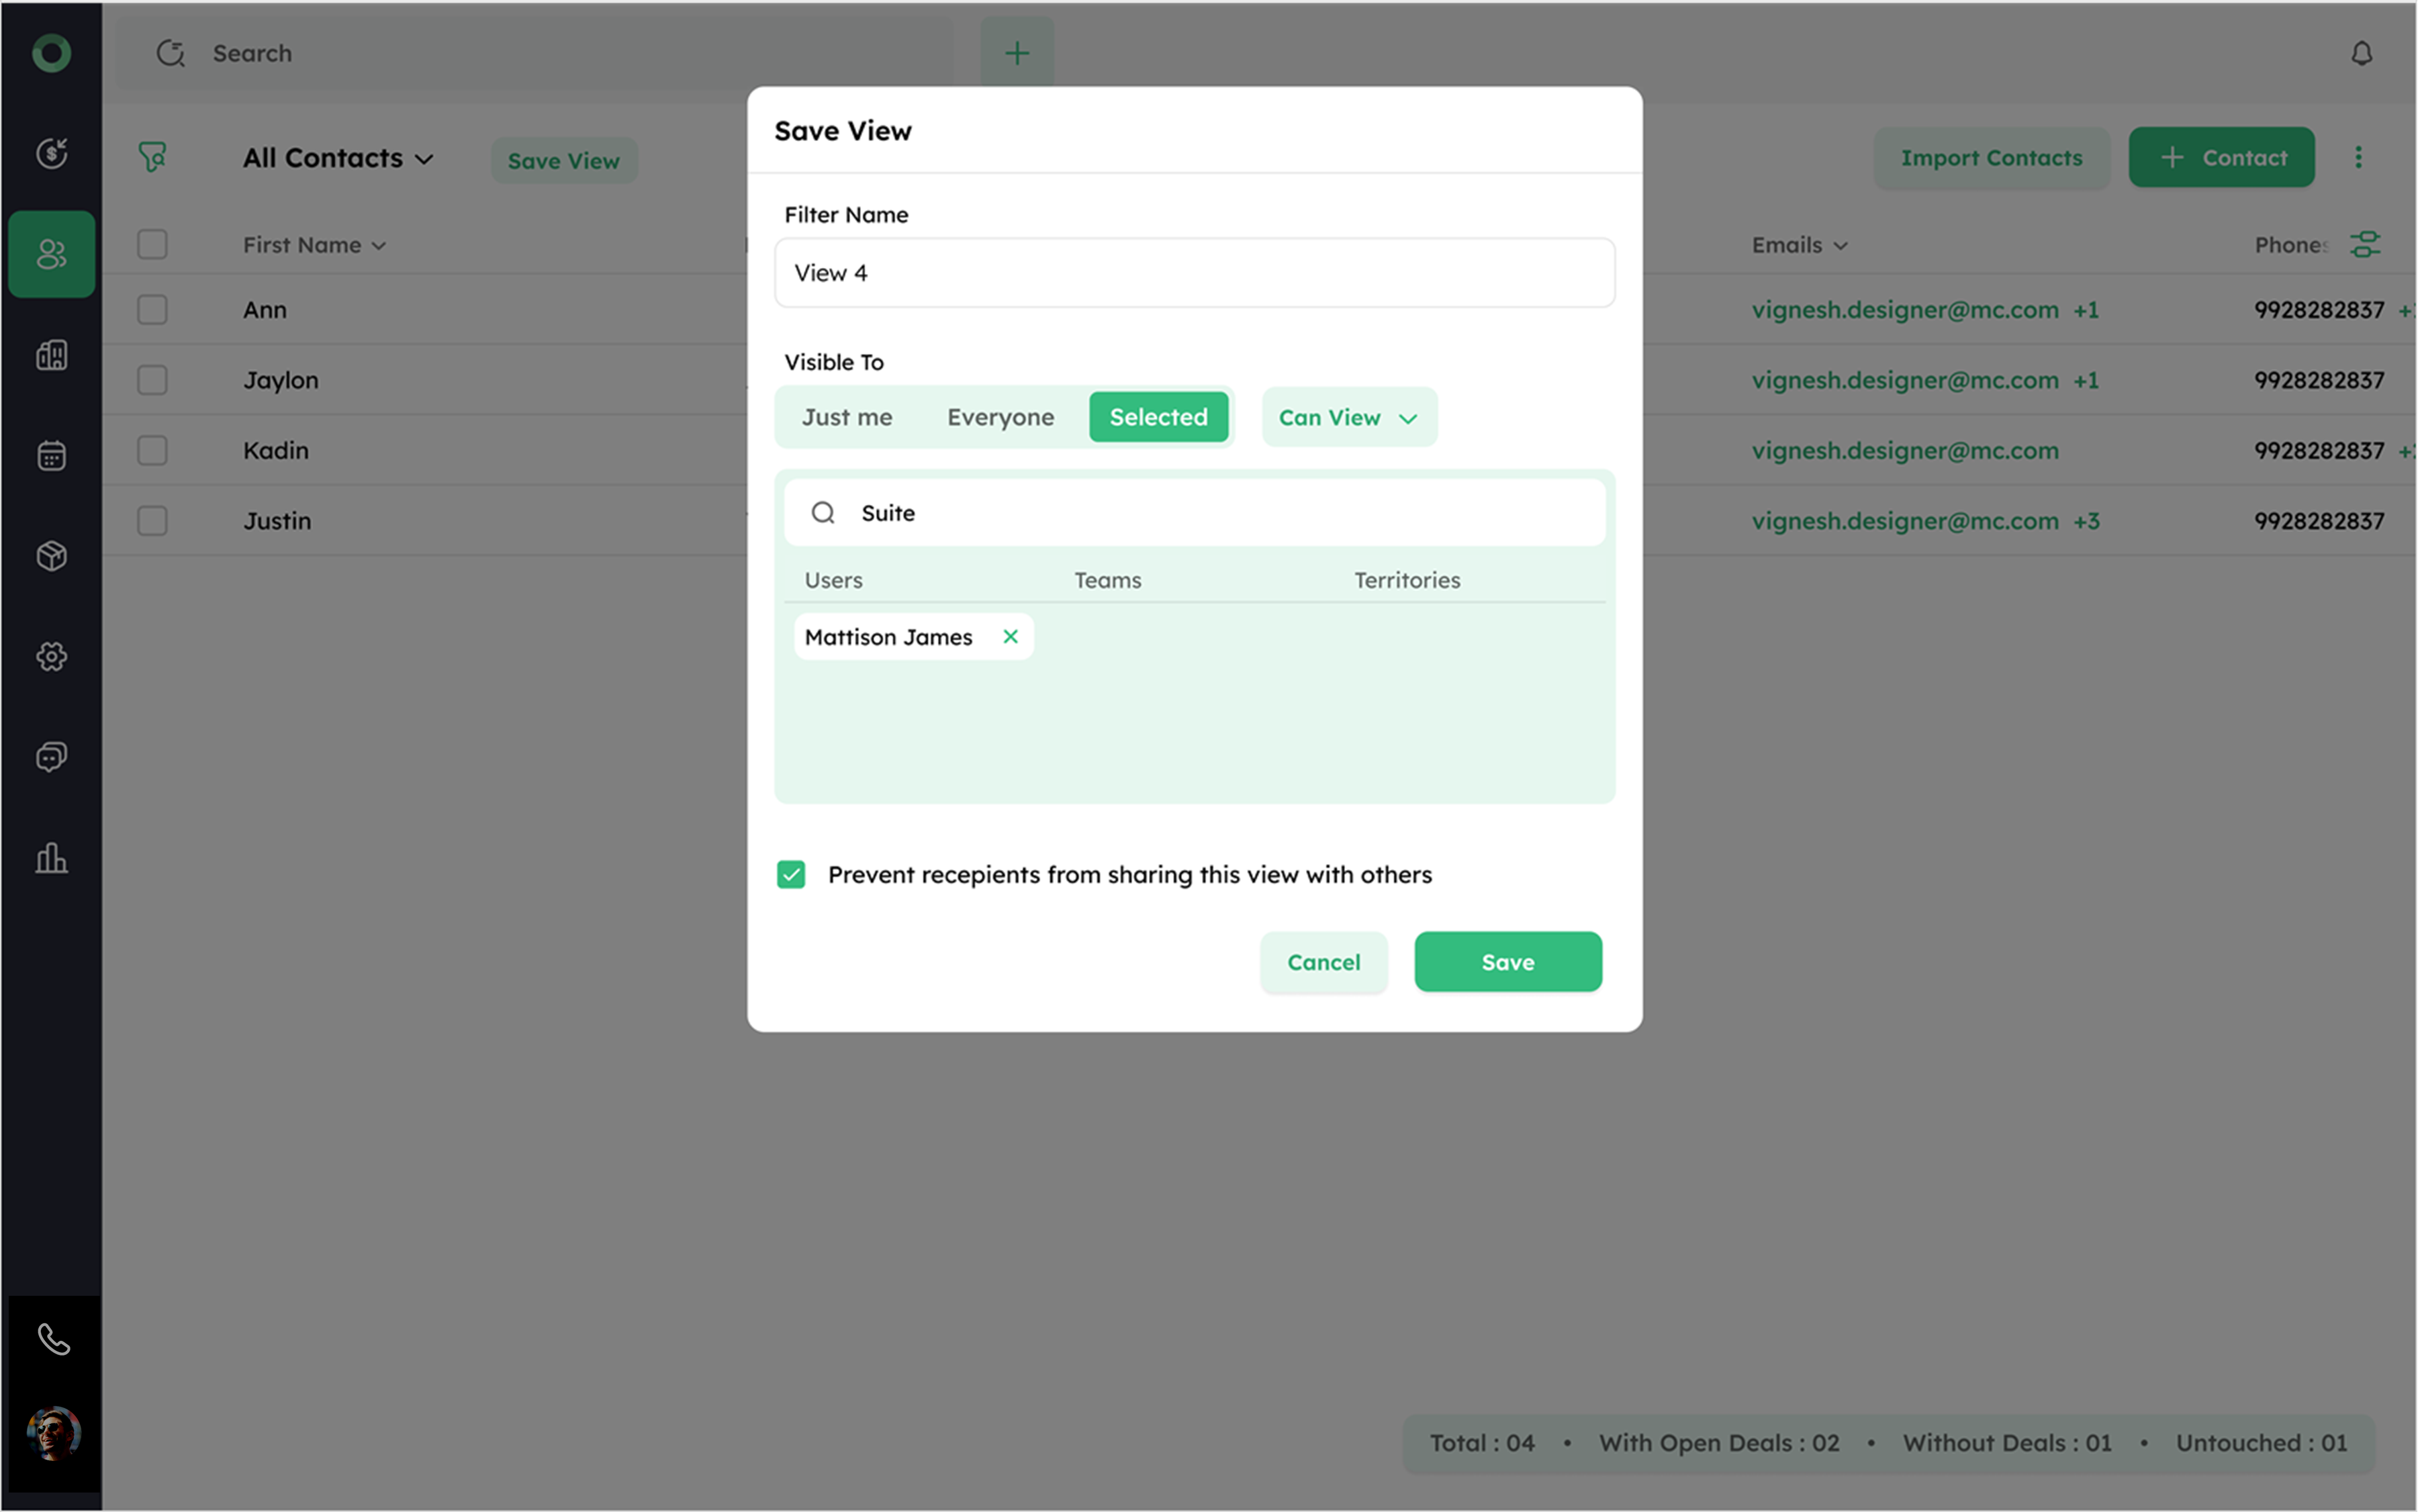
- There is a checkbox labelled Prevent recipients from sharing this view with others. If unchecked, the filter can be re-shared by the recipient.
- Click Save to finalize and store the view.
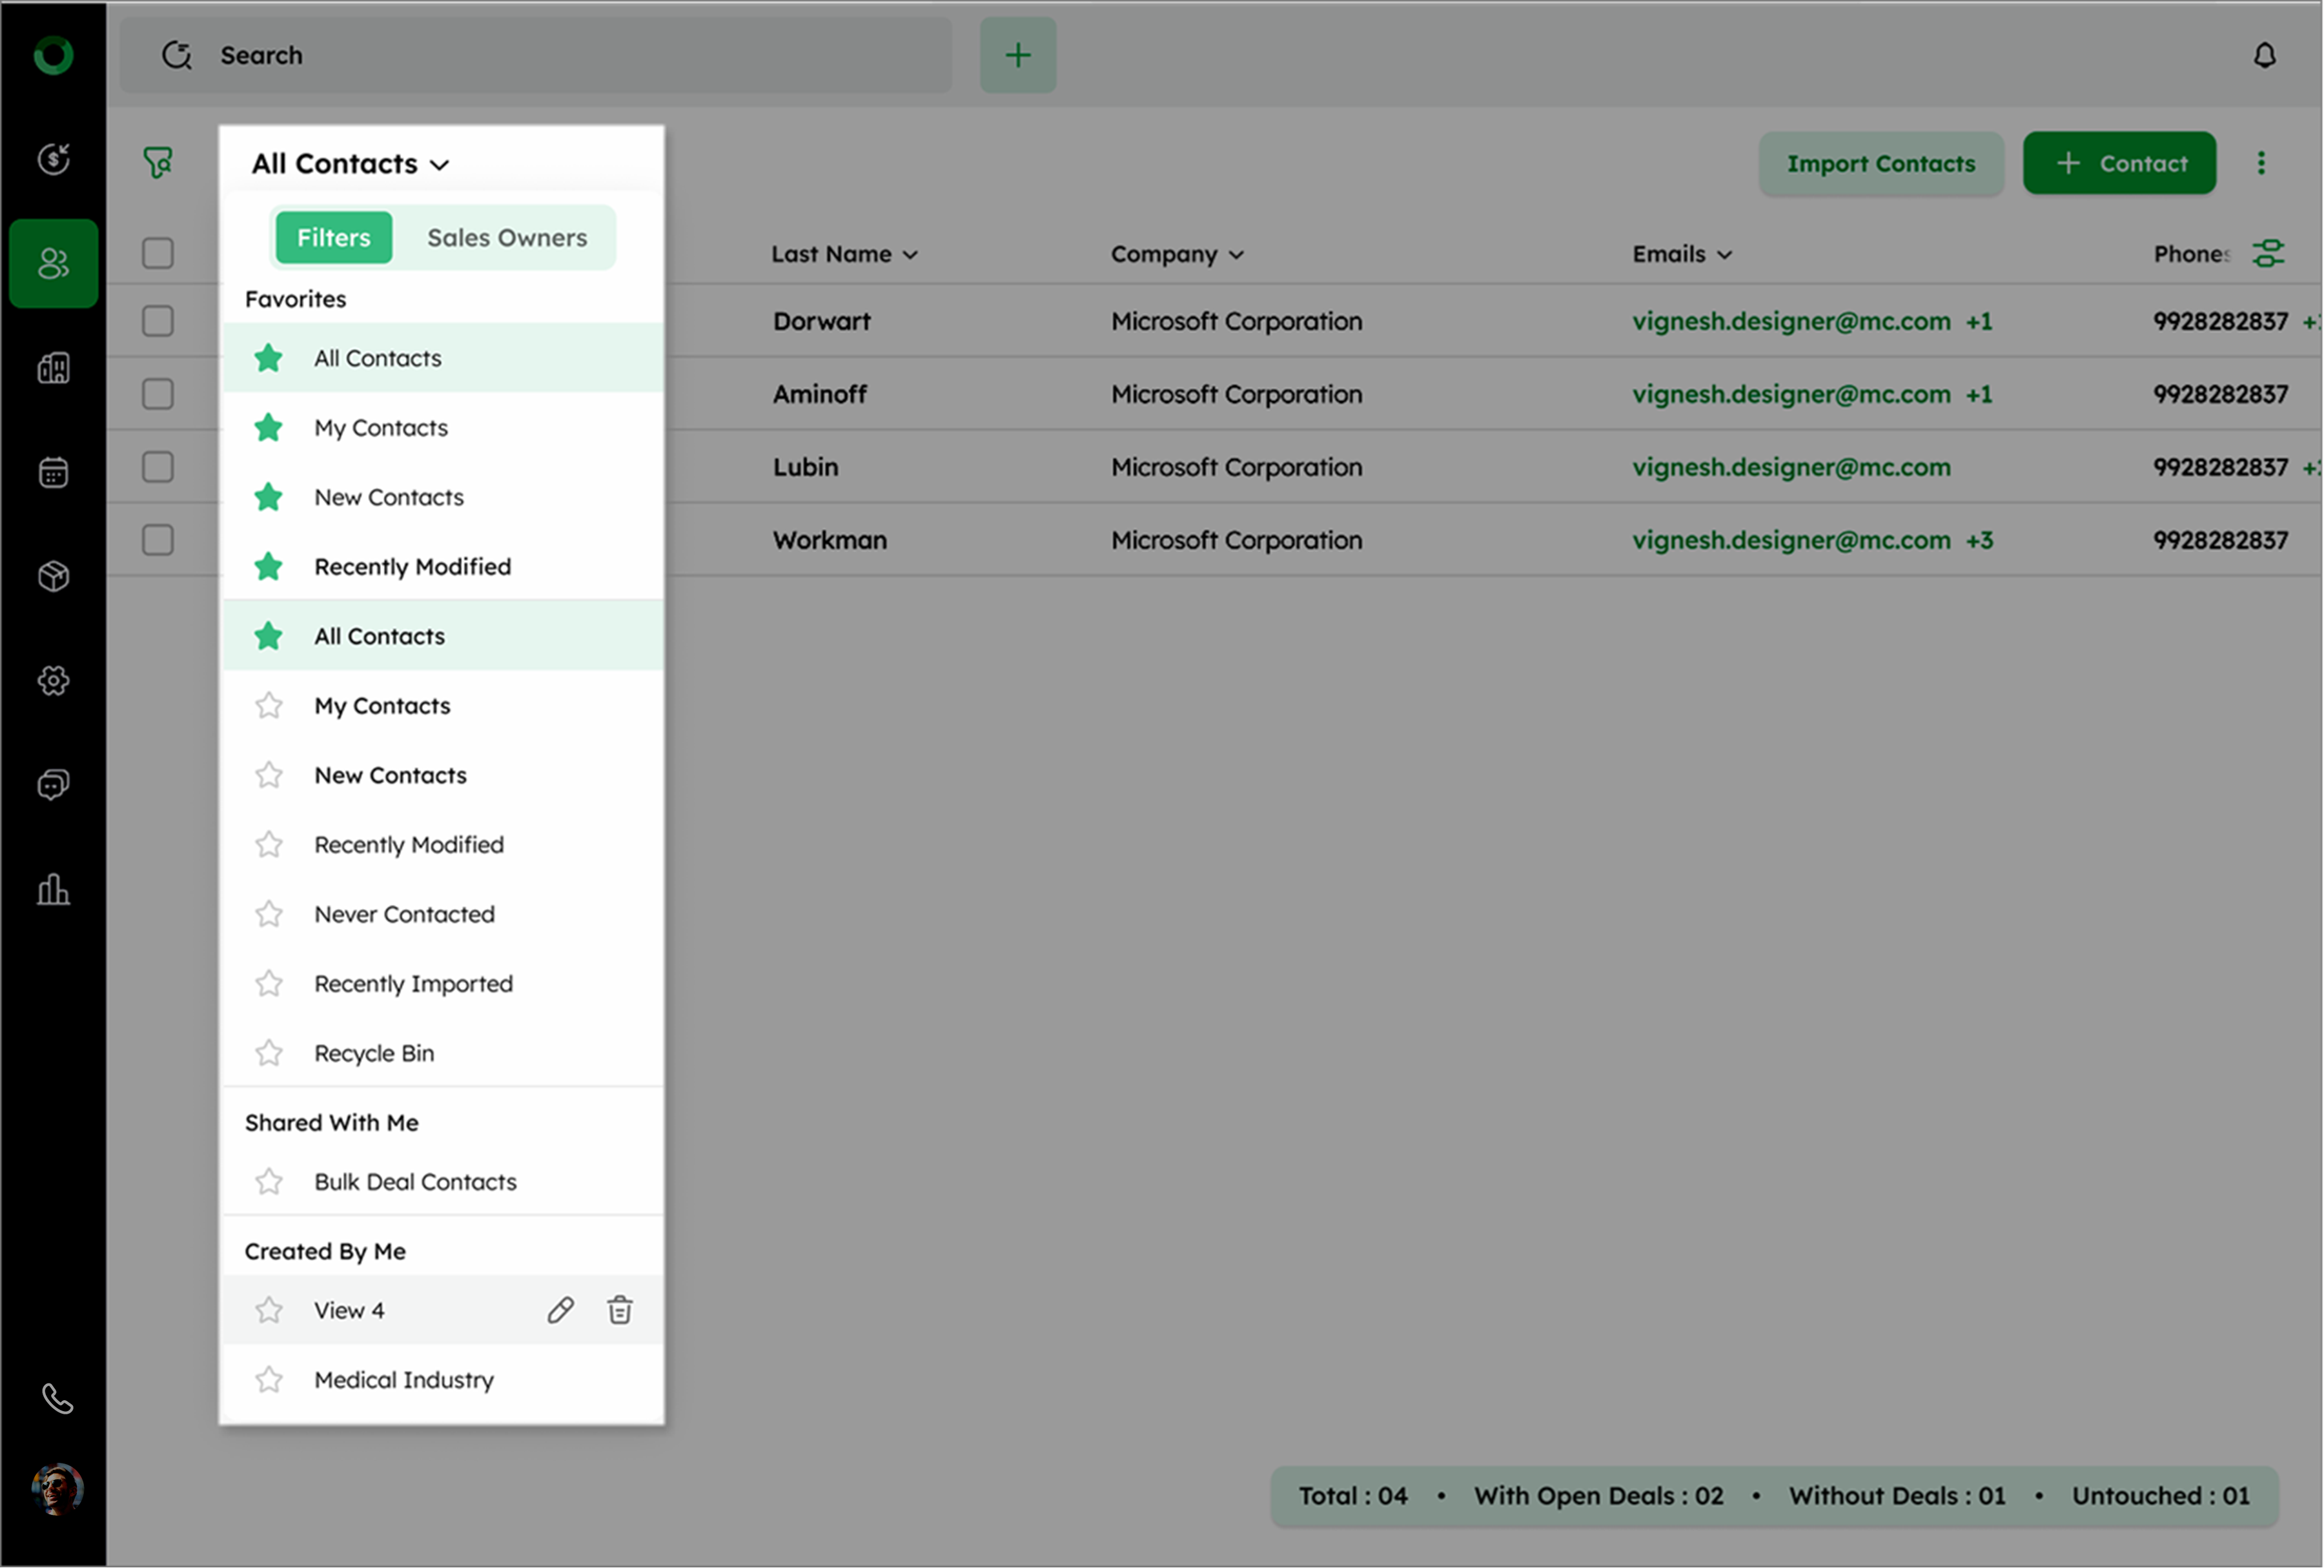
Organizing and Managing Your Saved Filters
- Click All Contacts located at the top left of the list view page.
- Click the dropdown to see a list of default filters including Shared With Me and Created By Me filters.
- Shared With Me: This category contains filters that other users have shared with you. These filters might be relevant to your work or specific contact, allowing you to view and use them as needed.
- Created by Me: This category includes filters that you have created yourself. These filters are personalized based on your criteria and needs, allowing for tailored views of your data.
Managing Favorites and Editing Filters
- Click the star icon to add a contact to Favorites.
- Hover over created or shared filters to see edit and delete icons.
- To edit a shared filter, ensure that edit access was provided during sharing; otherwise, the edit icon will not be visible.
Understanding Default Saved Filters (Pre-set Views)
| Filter | Definition |
|---|---|
| All Contacts | List all contacts |
| My Contacts | List of contacts assigned to you |
| New Contacts | Lists contacts created in the last 24 hours |
| Recently Modified | List contacts edited or updated in the last 24 hours |
| Never Contacted | Lists contact never contacted |
| Needs Follow-Up | List of contacts need immediate attention |
| Recently Imported | Lists recently imported contacts |
| My Territory Contacts | Lists contacts assigned to your territory |
| Contacts with Me in Team | Lists contacts assigned to your team |
| Recycle Bin | Lists contacts moved to the recycle bin (stored for 90 days) |
Viewing Contacts by Sales Owners
- Click the Sales Owners tab to view contacts assigned to specific sales owners.
- Select a sales owner from the list to filter and view only the contacts assigned to that individual.
- Use the search bar to quickly find a contact associated with a particular sales owner.