Working with the Contact List View
Customizing Columns and List View Settings
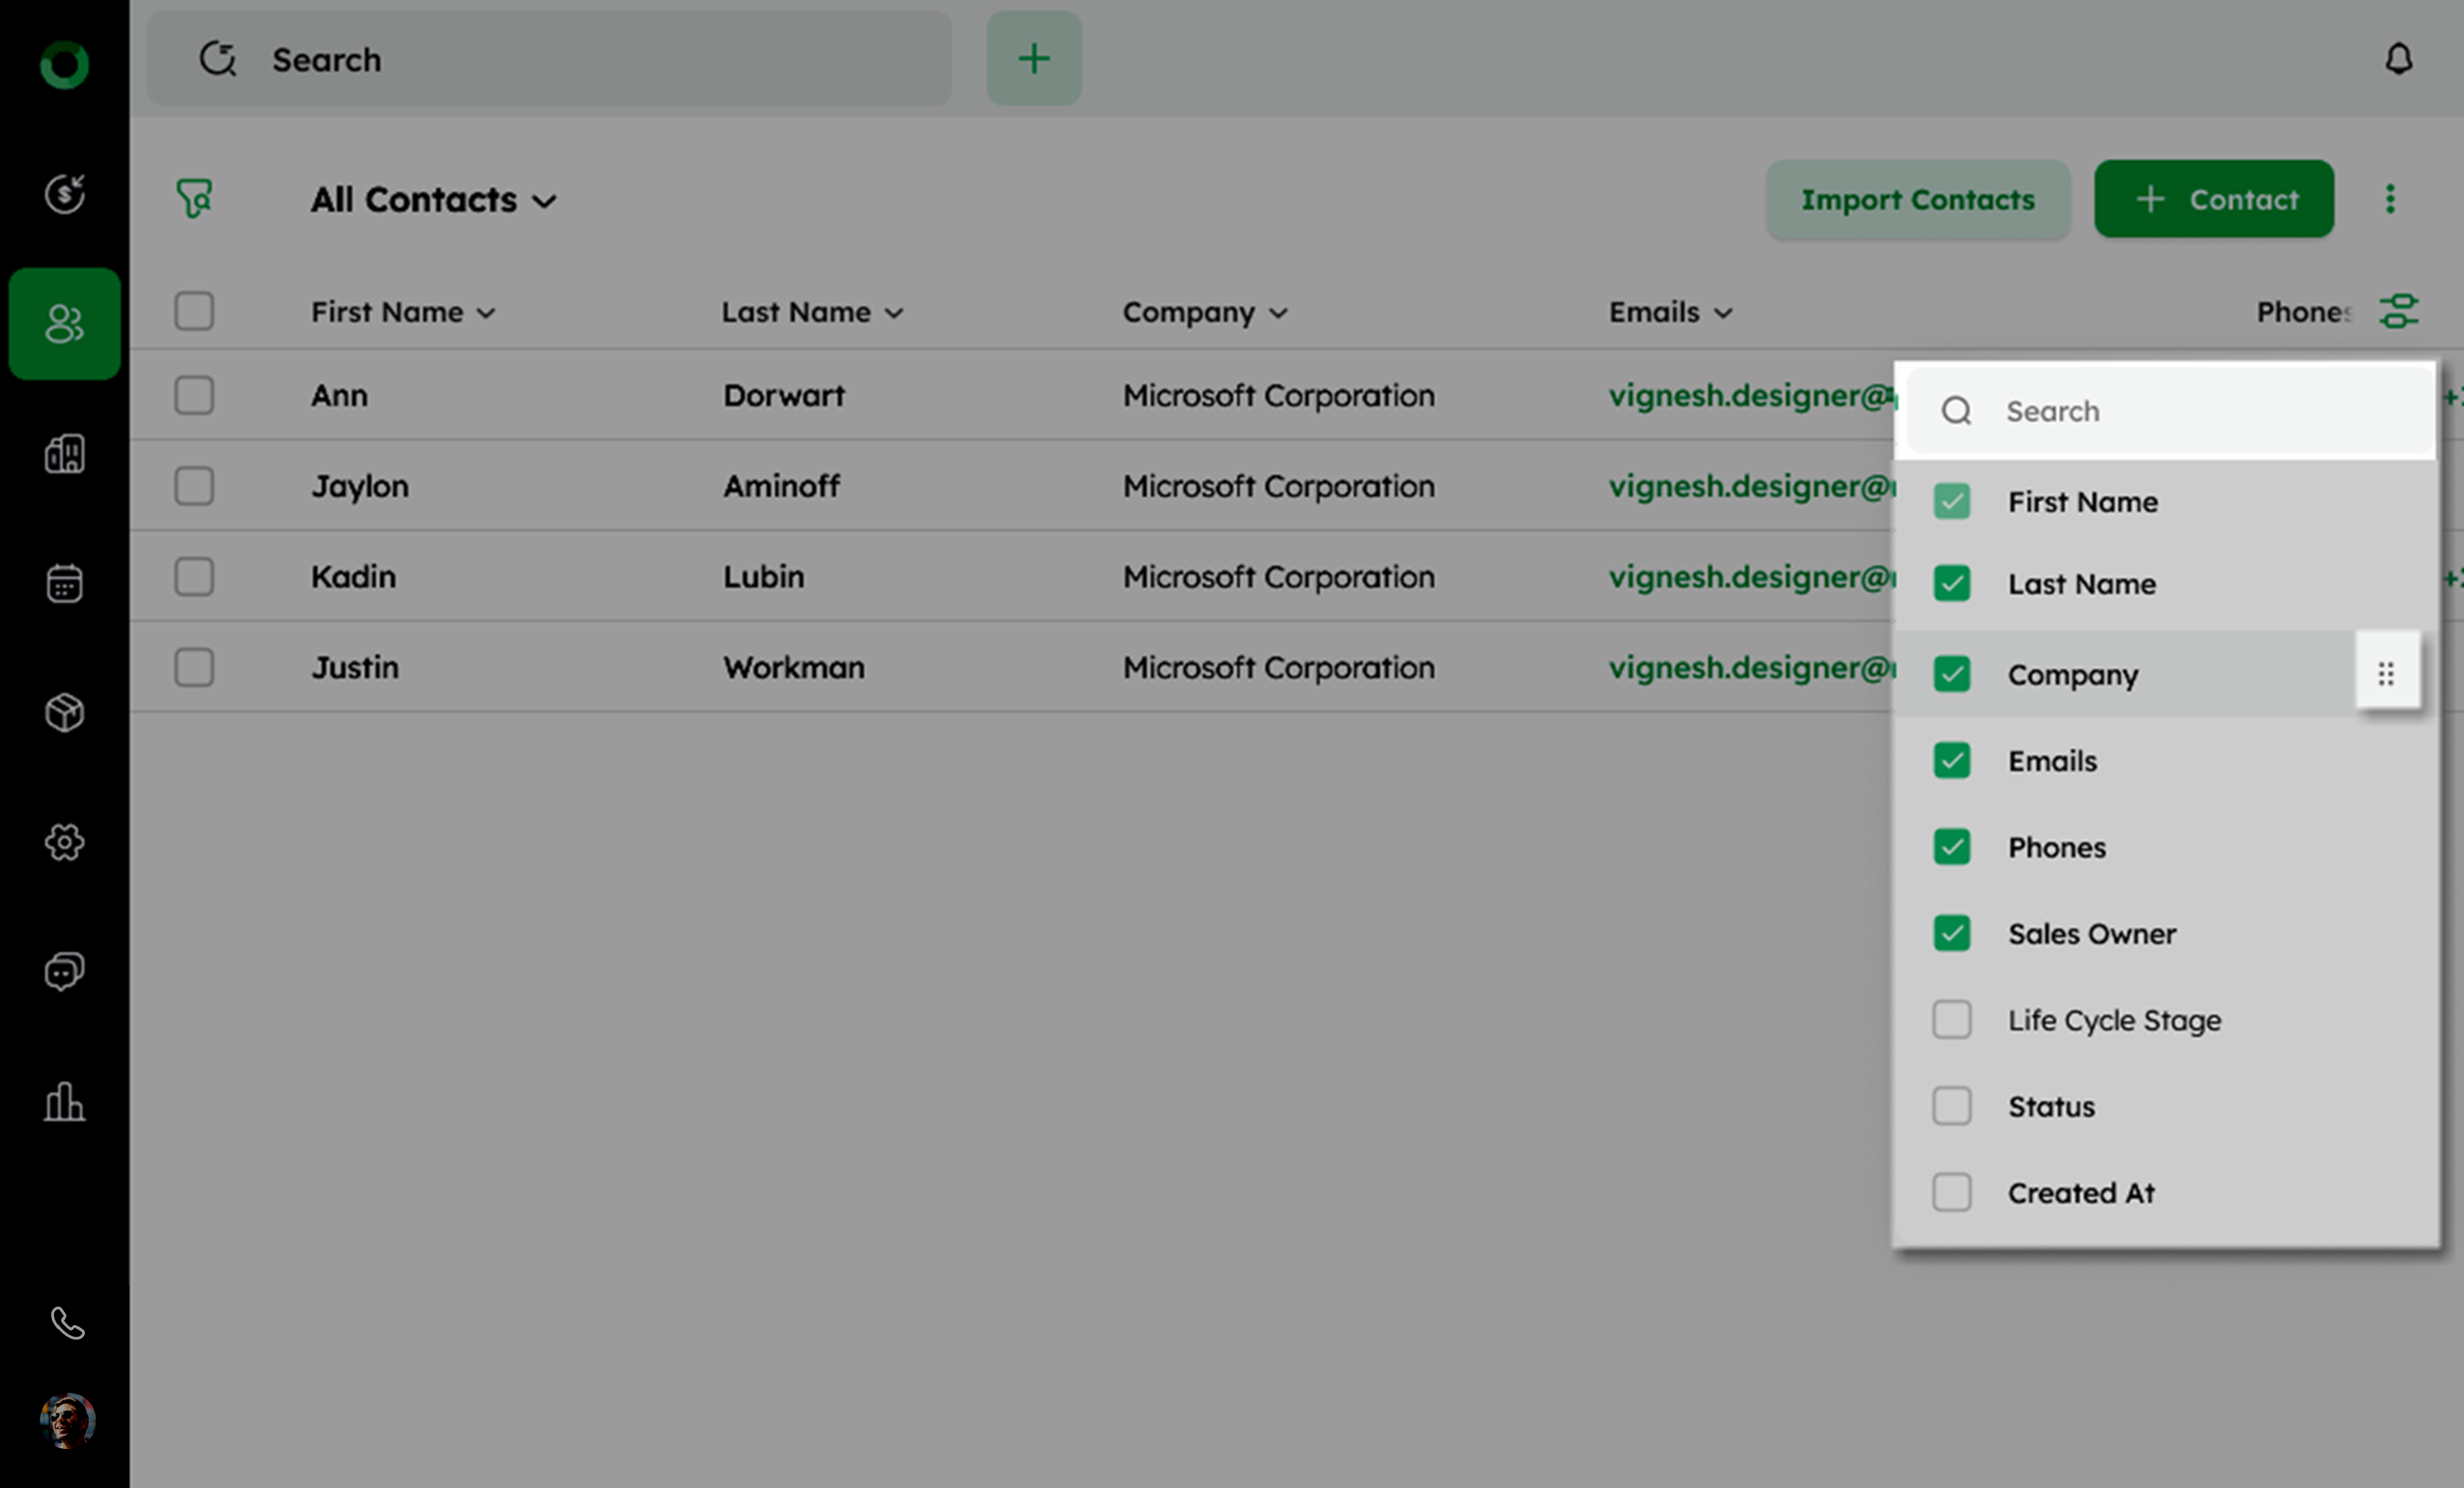
The contact list view centralizes all contact information for easy access. You can sort, filter, organize, and customize the displayed fields to streamline management and communication.
- Open the Contact List View, where all contacts are organized and displayed.
- Click the column settings icon from the right side.
A list of all system and custom fields will appear.
- Select or deselect columns by checking the available options.

- Use the search bar to quickly locate specific fields if needed.
- Drag and drop columns to arrange them in your preferred order.
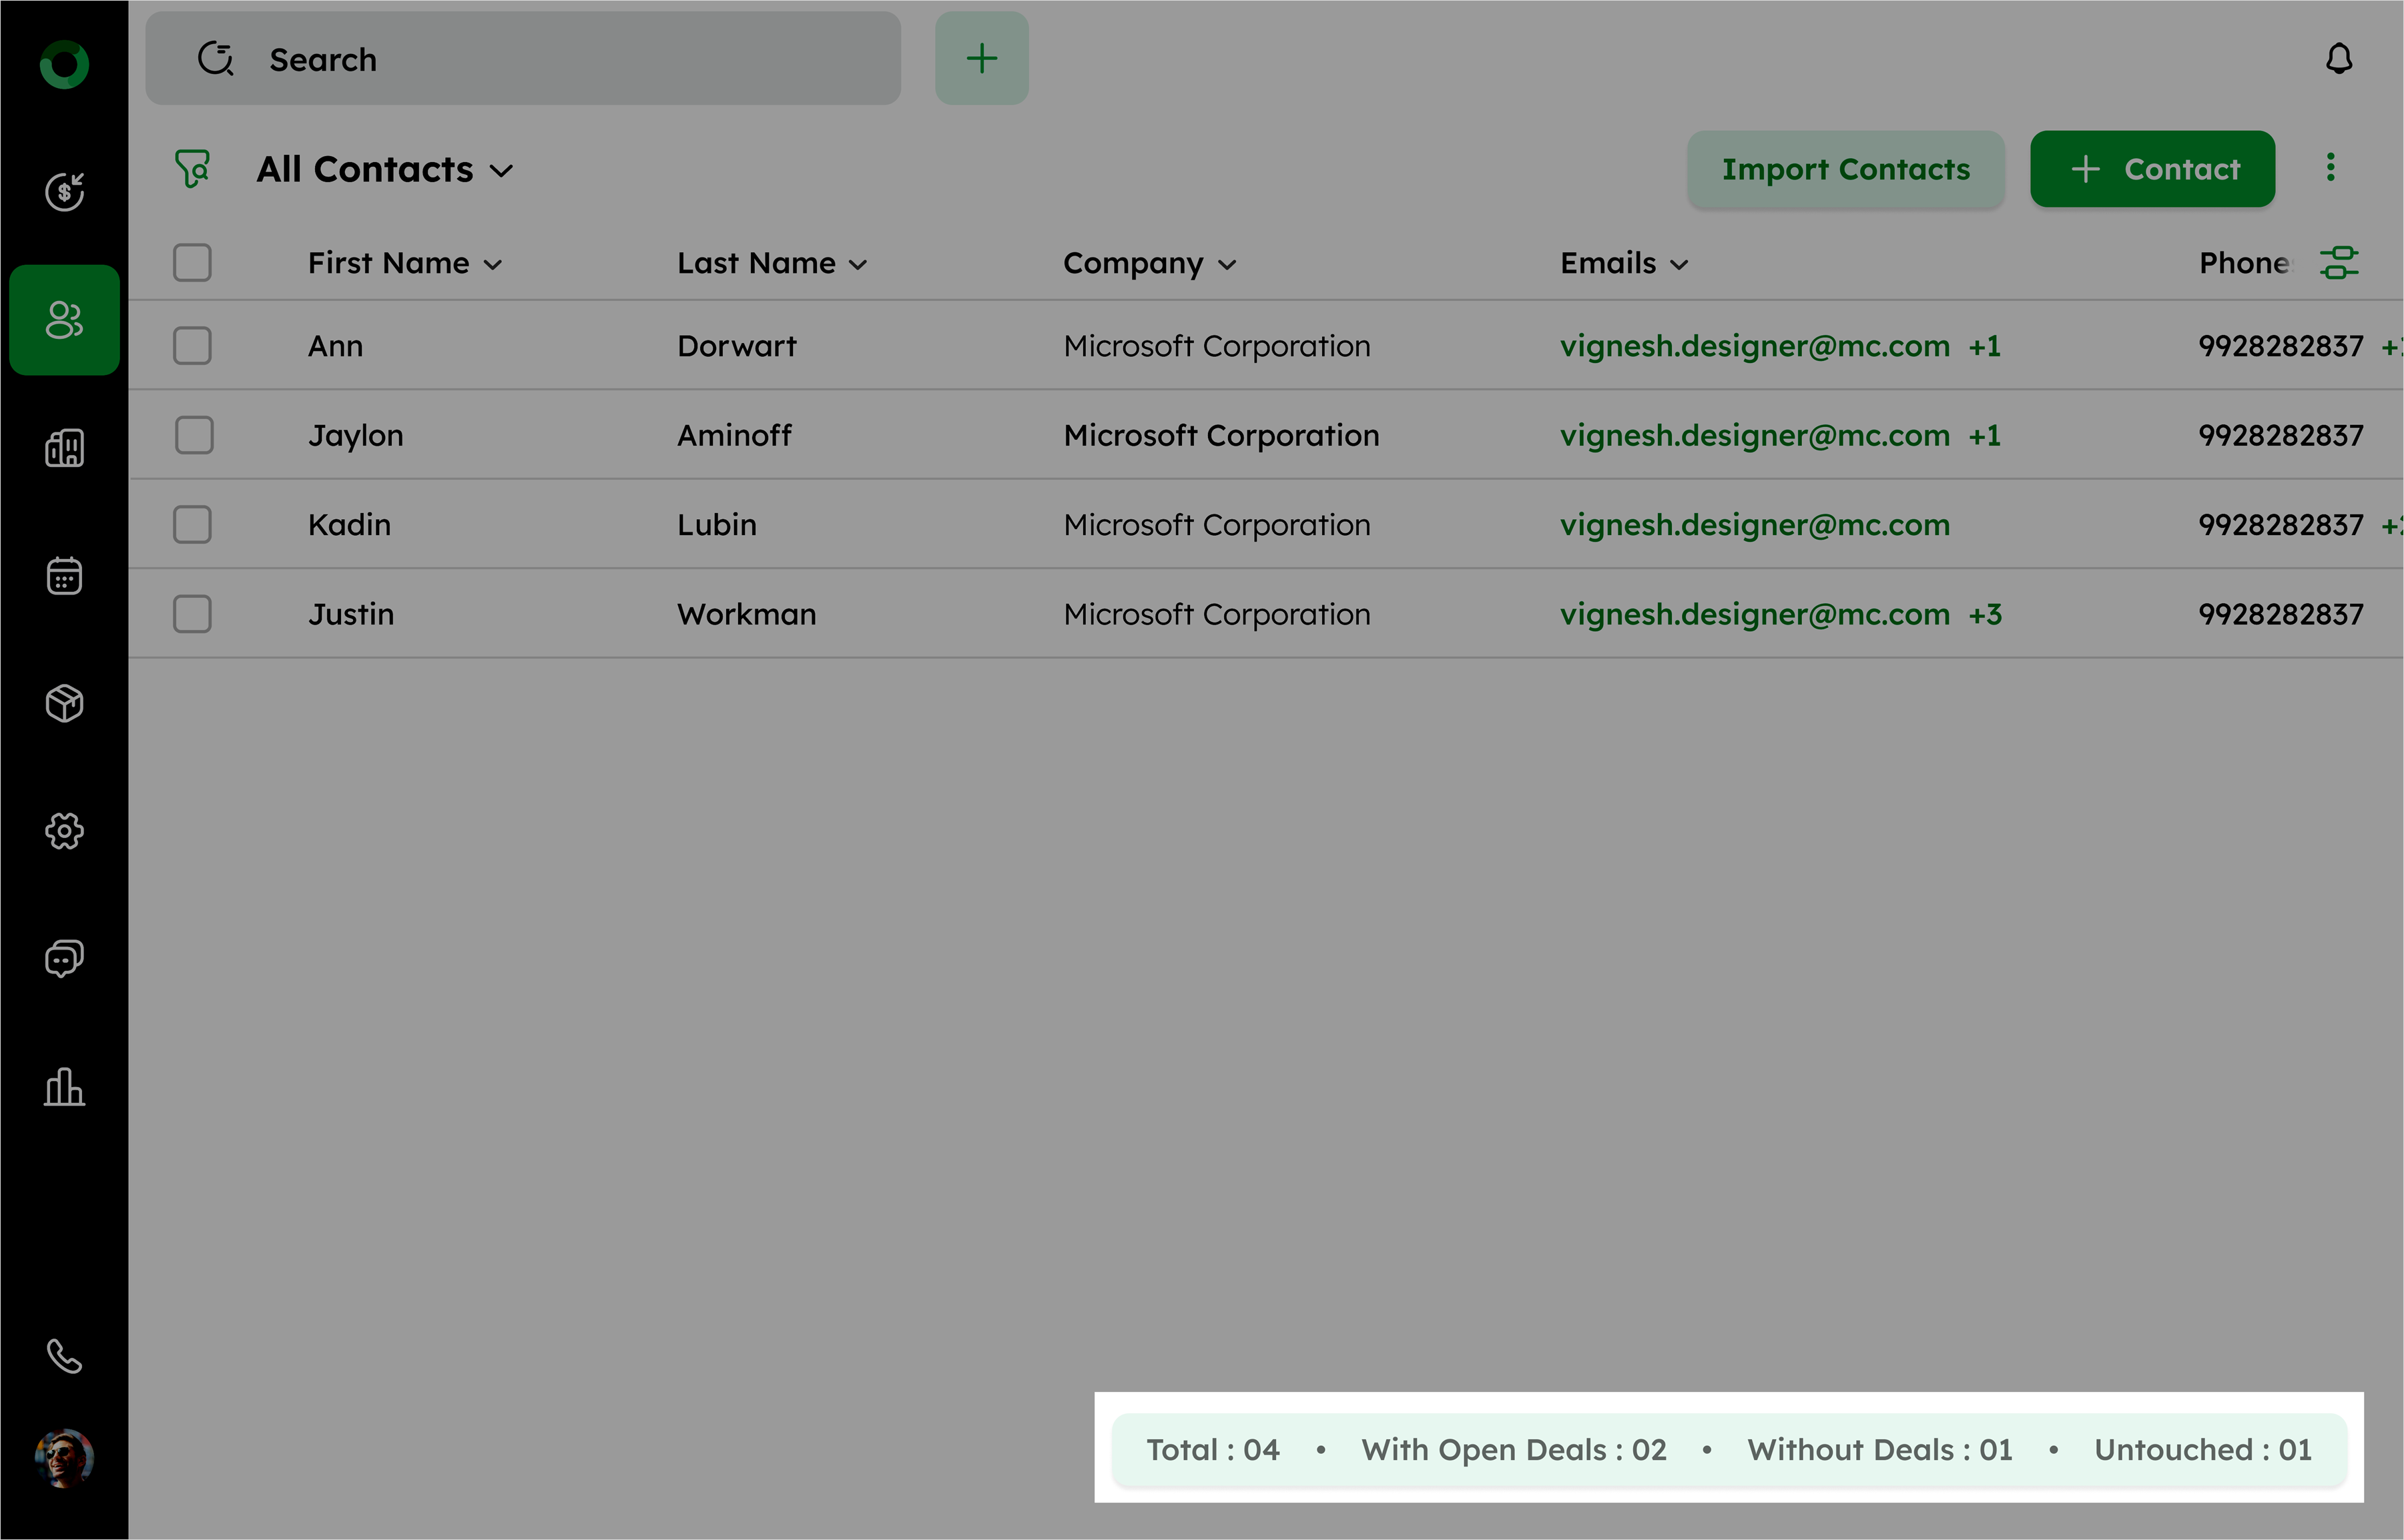
FOOTER SECTION TOTALS
In the footer section of the list view, you will find:
| Category | Description |
|---|---|
| Total | The total number of contacts. |
| With open deals | The number of contacts linked to ongoing deals. |
| Without deals | The number of contacts not associated with any deals. |
| Untouched | The number of contacts with no upcoming scheduled activities. |
Bulk Actions for List Efficiency
Bulk actions let you perform operations on multiple records at once, saving time and reducing repetitive tasks. This feature is especially useful for managing large datasets and ensuring consistent data.
How Do I Send a Bulk Email Using AI and Scheduling?
Bulk emailing lets you send the same email message to multiple contacts at once. This feature saves time by reaching a broad audience with consistent information.
- Go to the Contact List View and select the checkboxes next to the contacts you want to email.
- Click the Send Email option in the toolbar. The compose mail window will open.

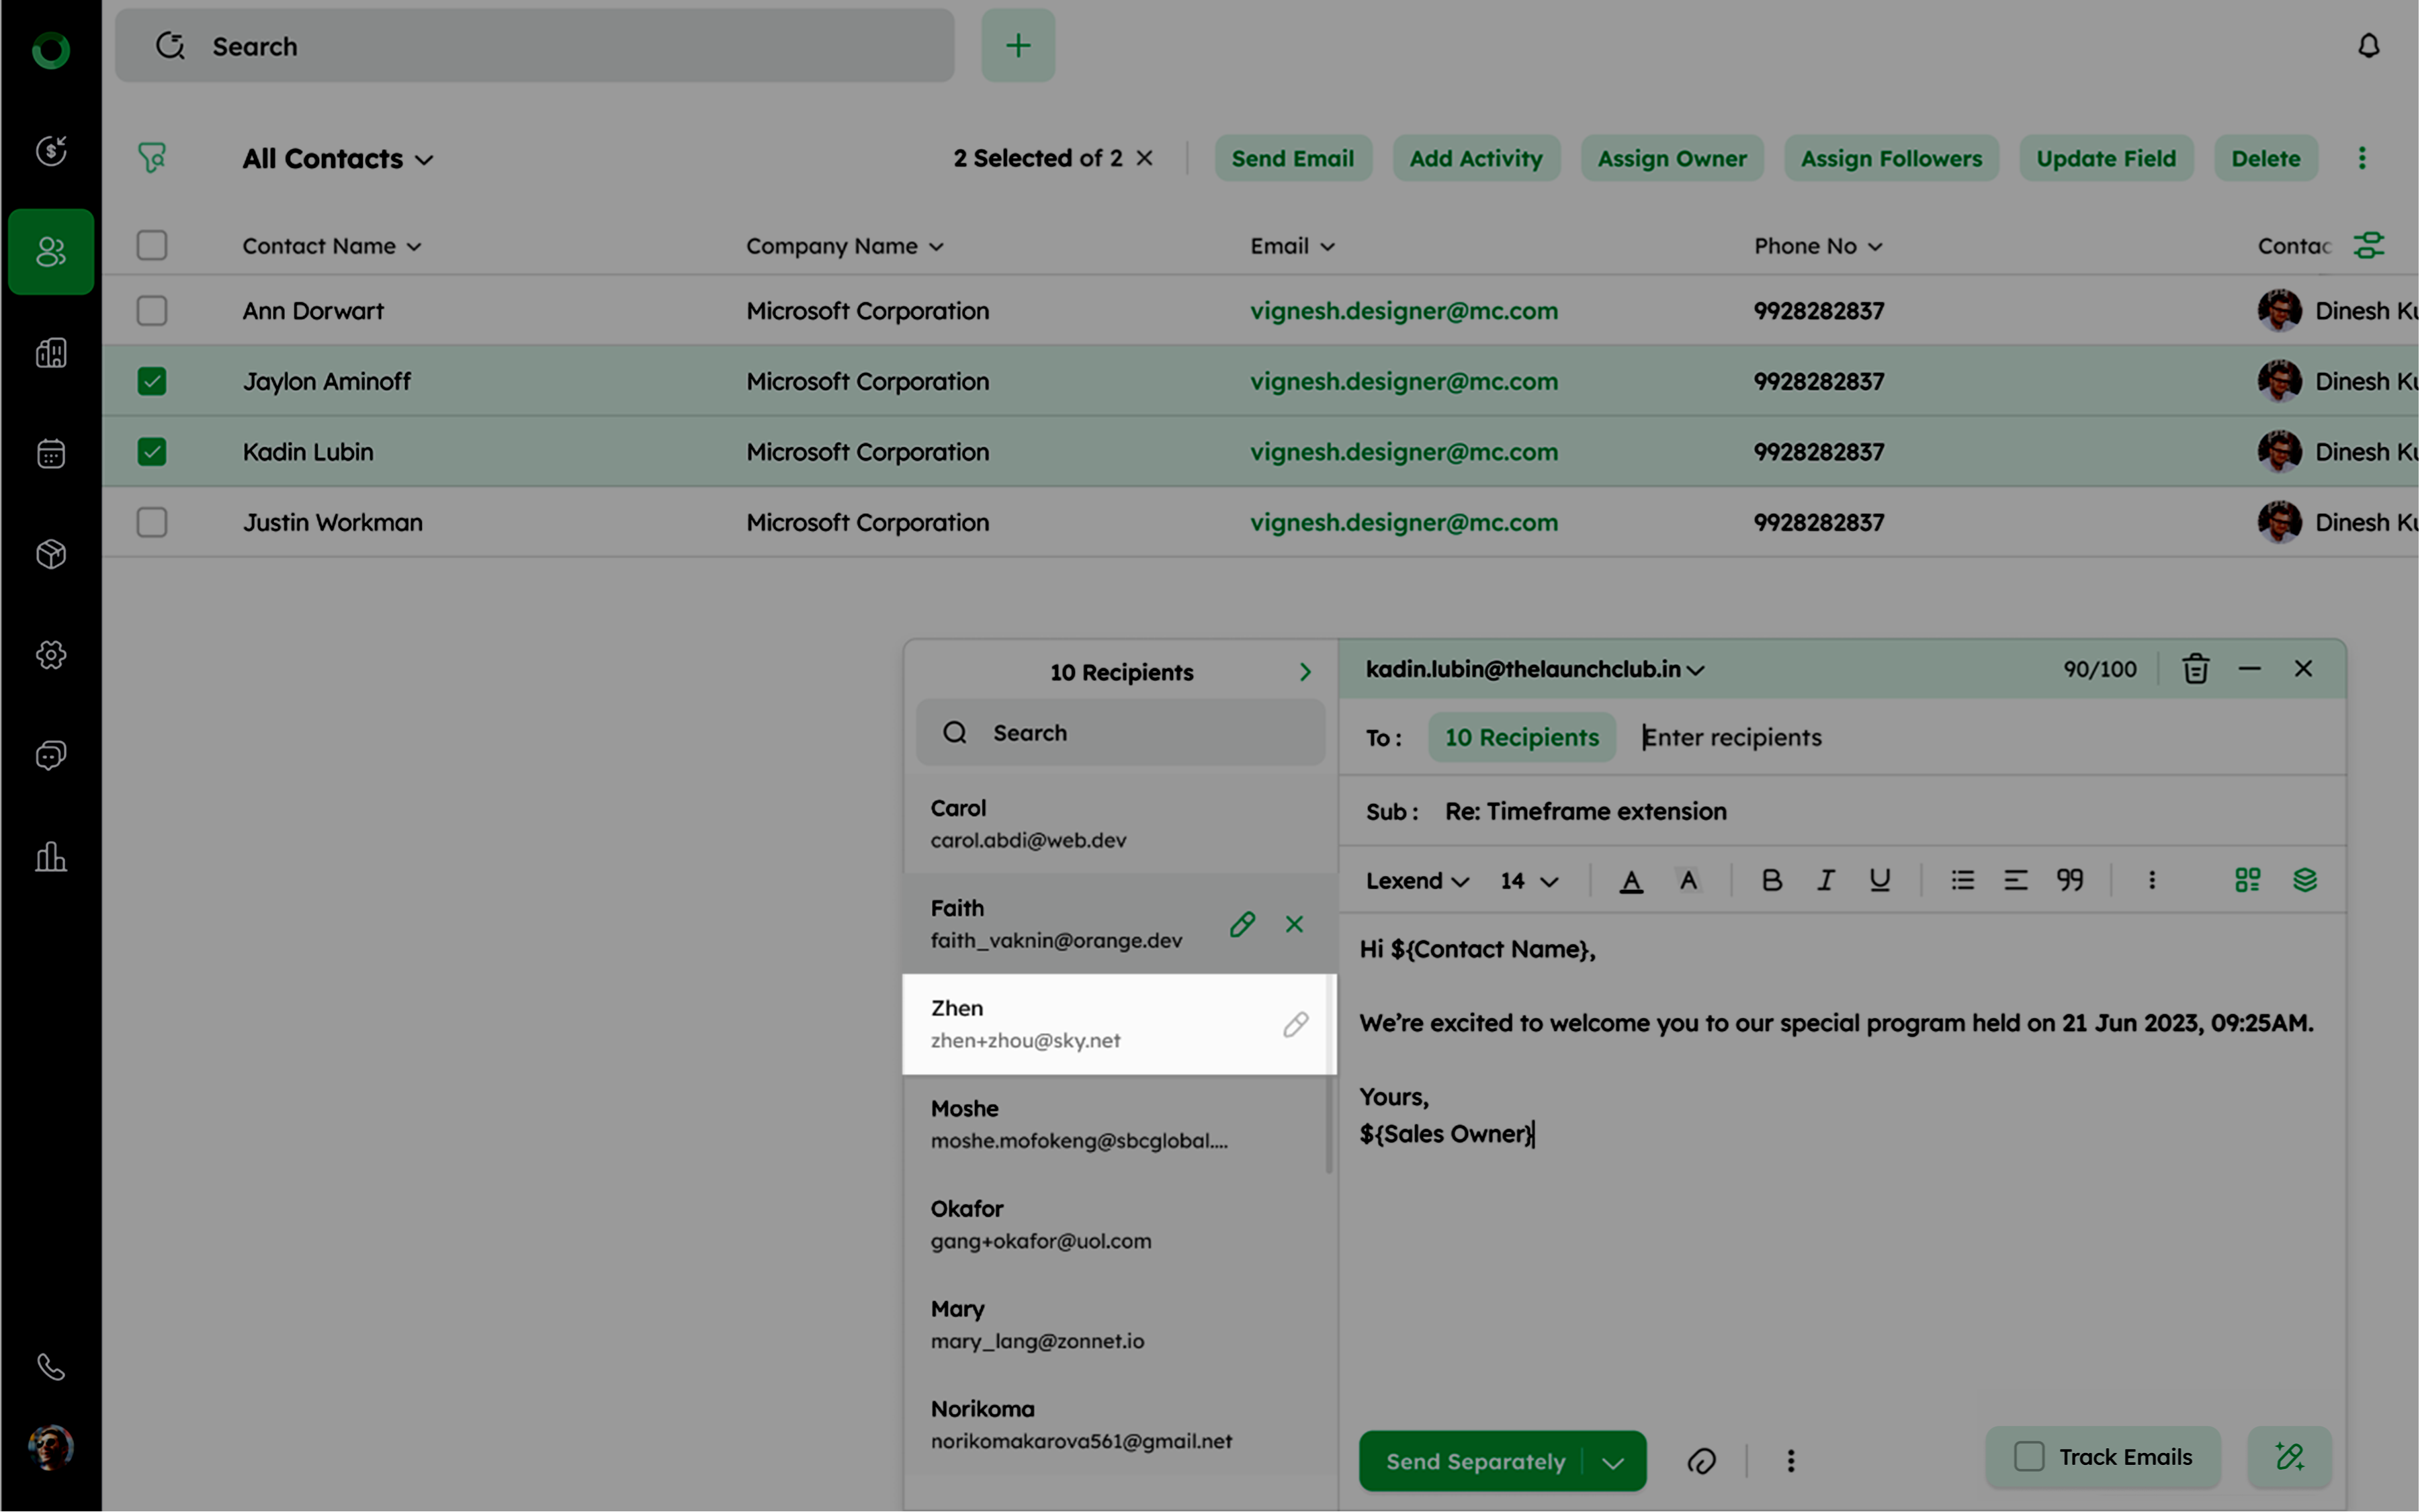
- Click the TO field**,** to open a drawer with the full list of contacts.
- Use the search bar to find recipients by name or email. if a contact has no email, Invalid Email Address will appear.
- Search bar allows searching for contacts by name or email address with a minimum of two characters.
- Search results display contact names and email addresses. If an email is missing, it shows an Invalid Email Address.
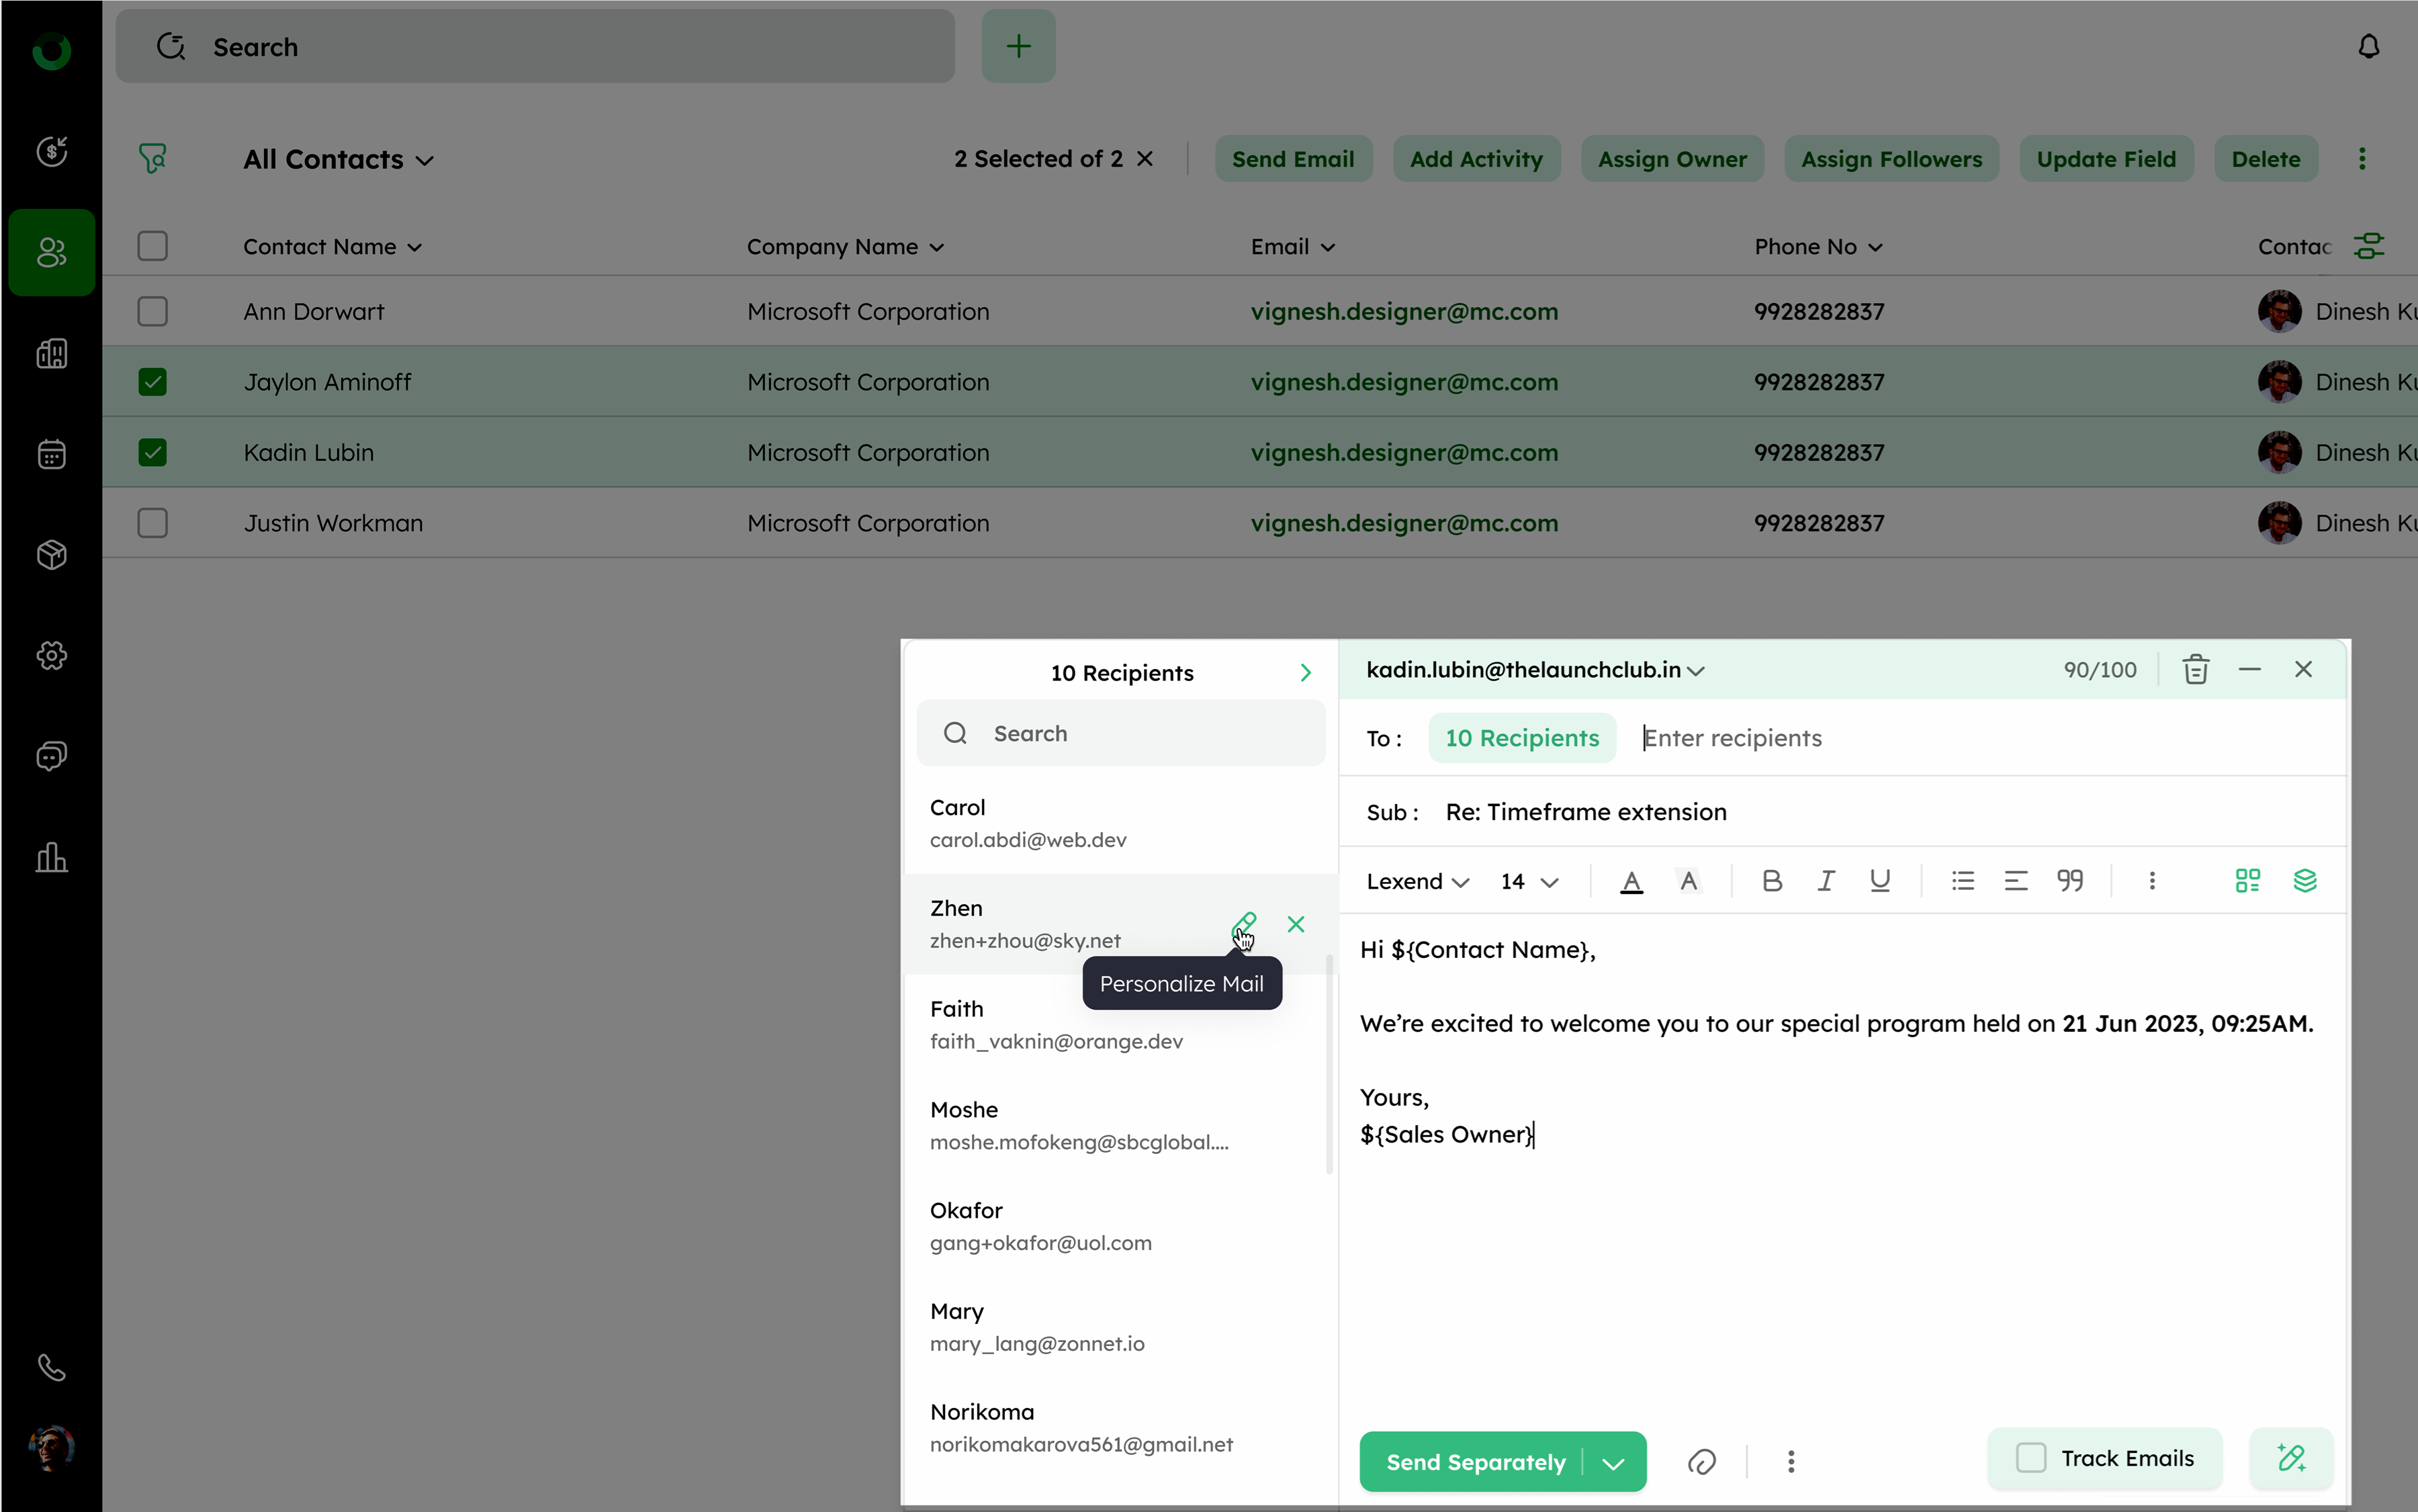
- The Personalize Mail feature allows you to edit and personalize content for specific contacts. Personalized contacts appear grayed out in the TO field.
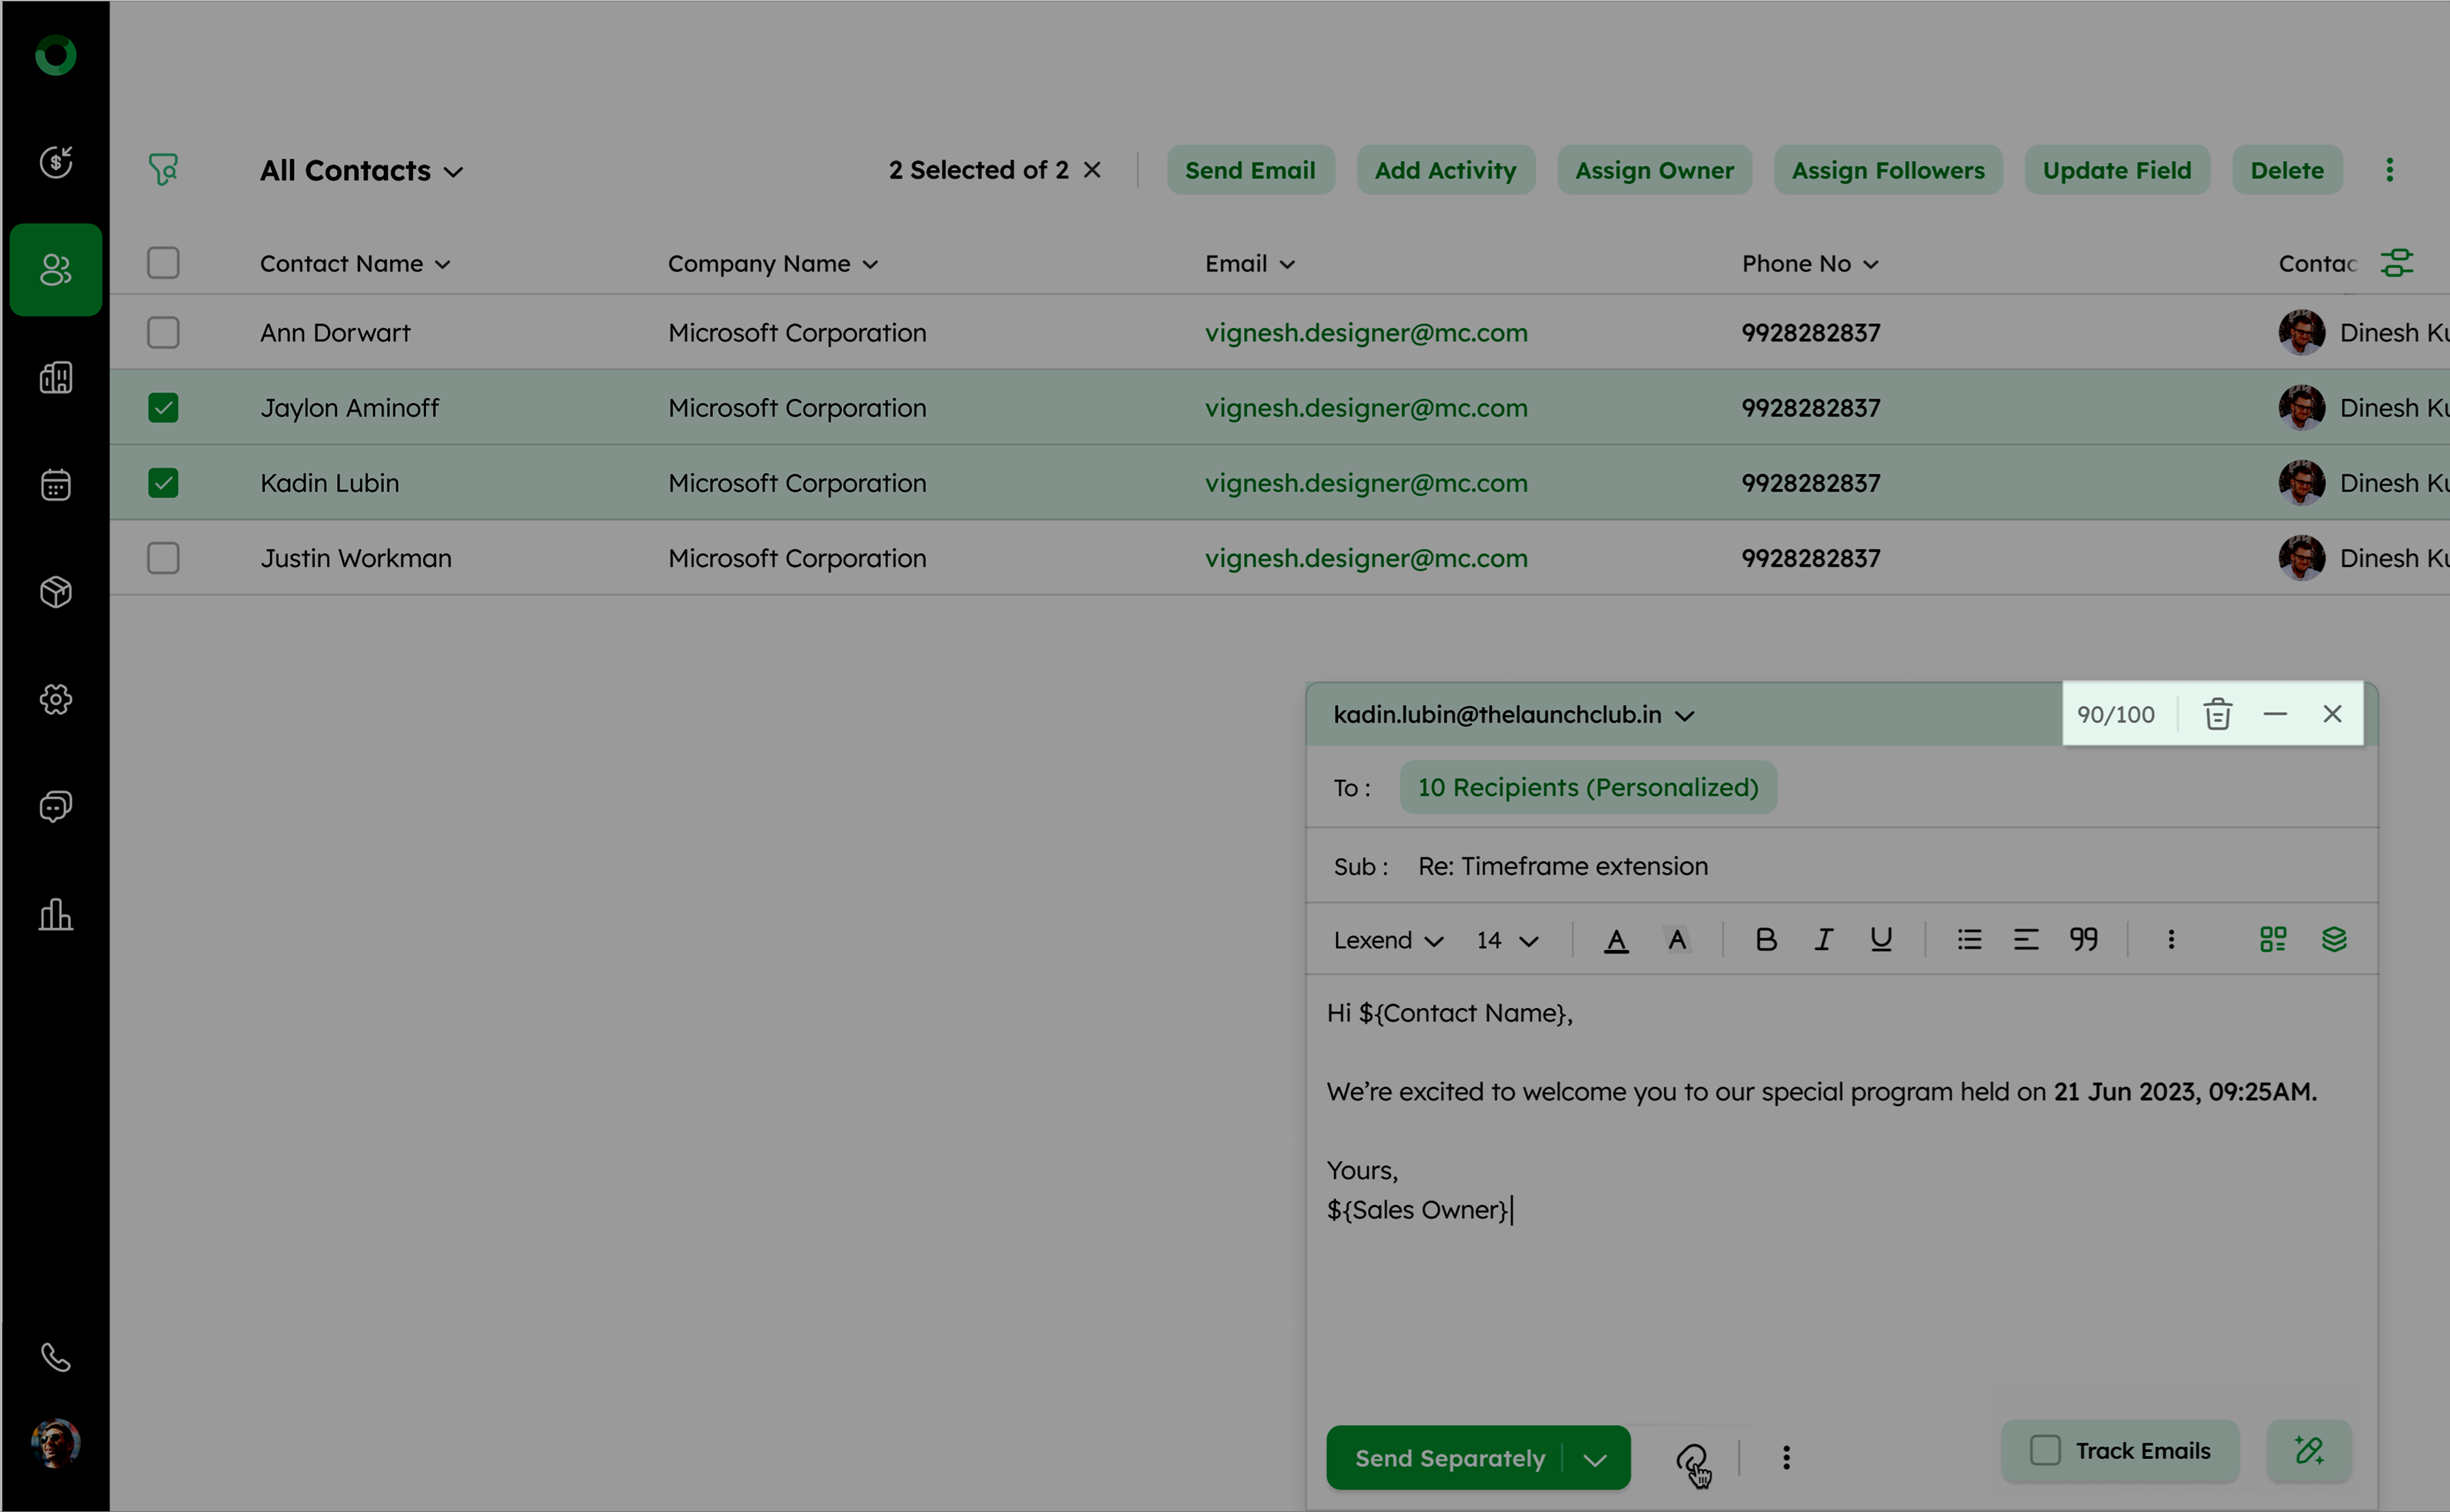
- After personalizing, the TO field shows the total number of recipients and indicates if any contacts were personalized. The edit icon next to those contacts will be grayed out, meaning their details can't be modified from the TO field.
- To modify personalized details, you would need to reopen the drawer to edit them.
- Removing contacts by clicking the remove icon deletes a contact from the recipient list.
- On the top of the compose mail, you'll find options to:
- Bin Icon: Located beside the email usage count. Clicking this permanently deletes the unsent email from the draft folder.
- Minimize Icon: Reduces the compose tab to a smaller window at the bottom of the interface. Clicking the expand icon restores it to its normal size.
- Remove Icon: Closes the tab or window, saving the content as a draft for later use.
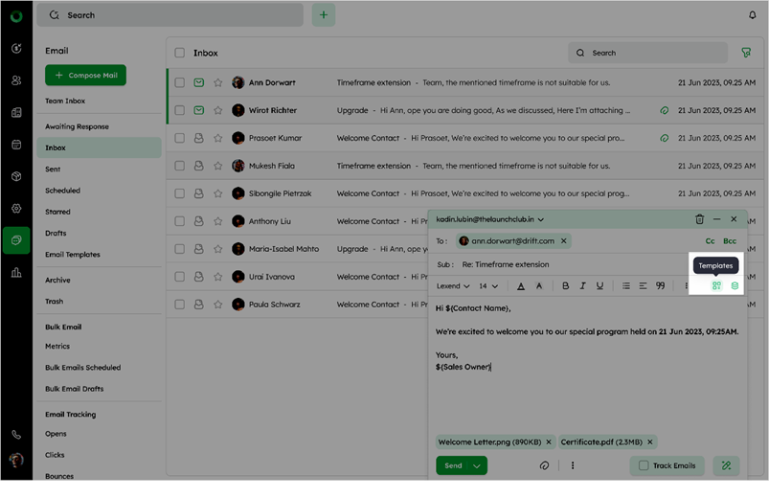
- You can compose your email or select a pre-made template from the Compose Tab.
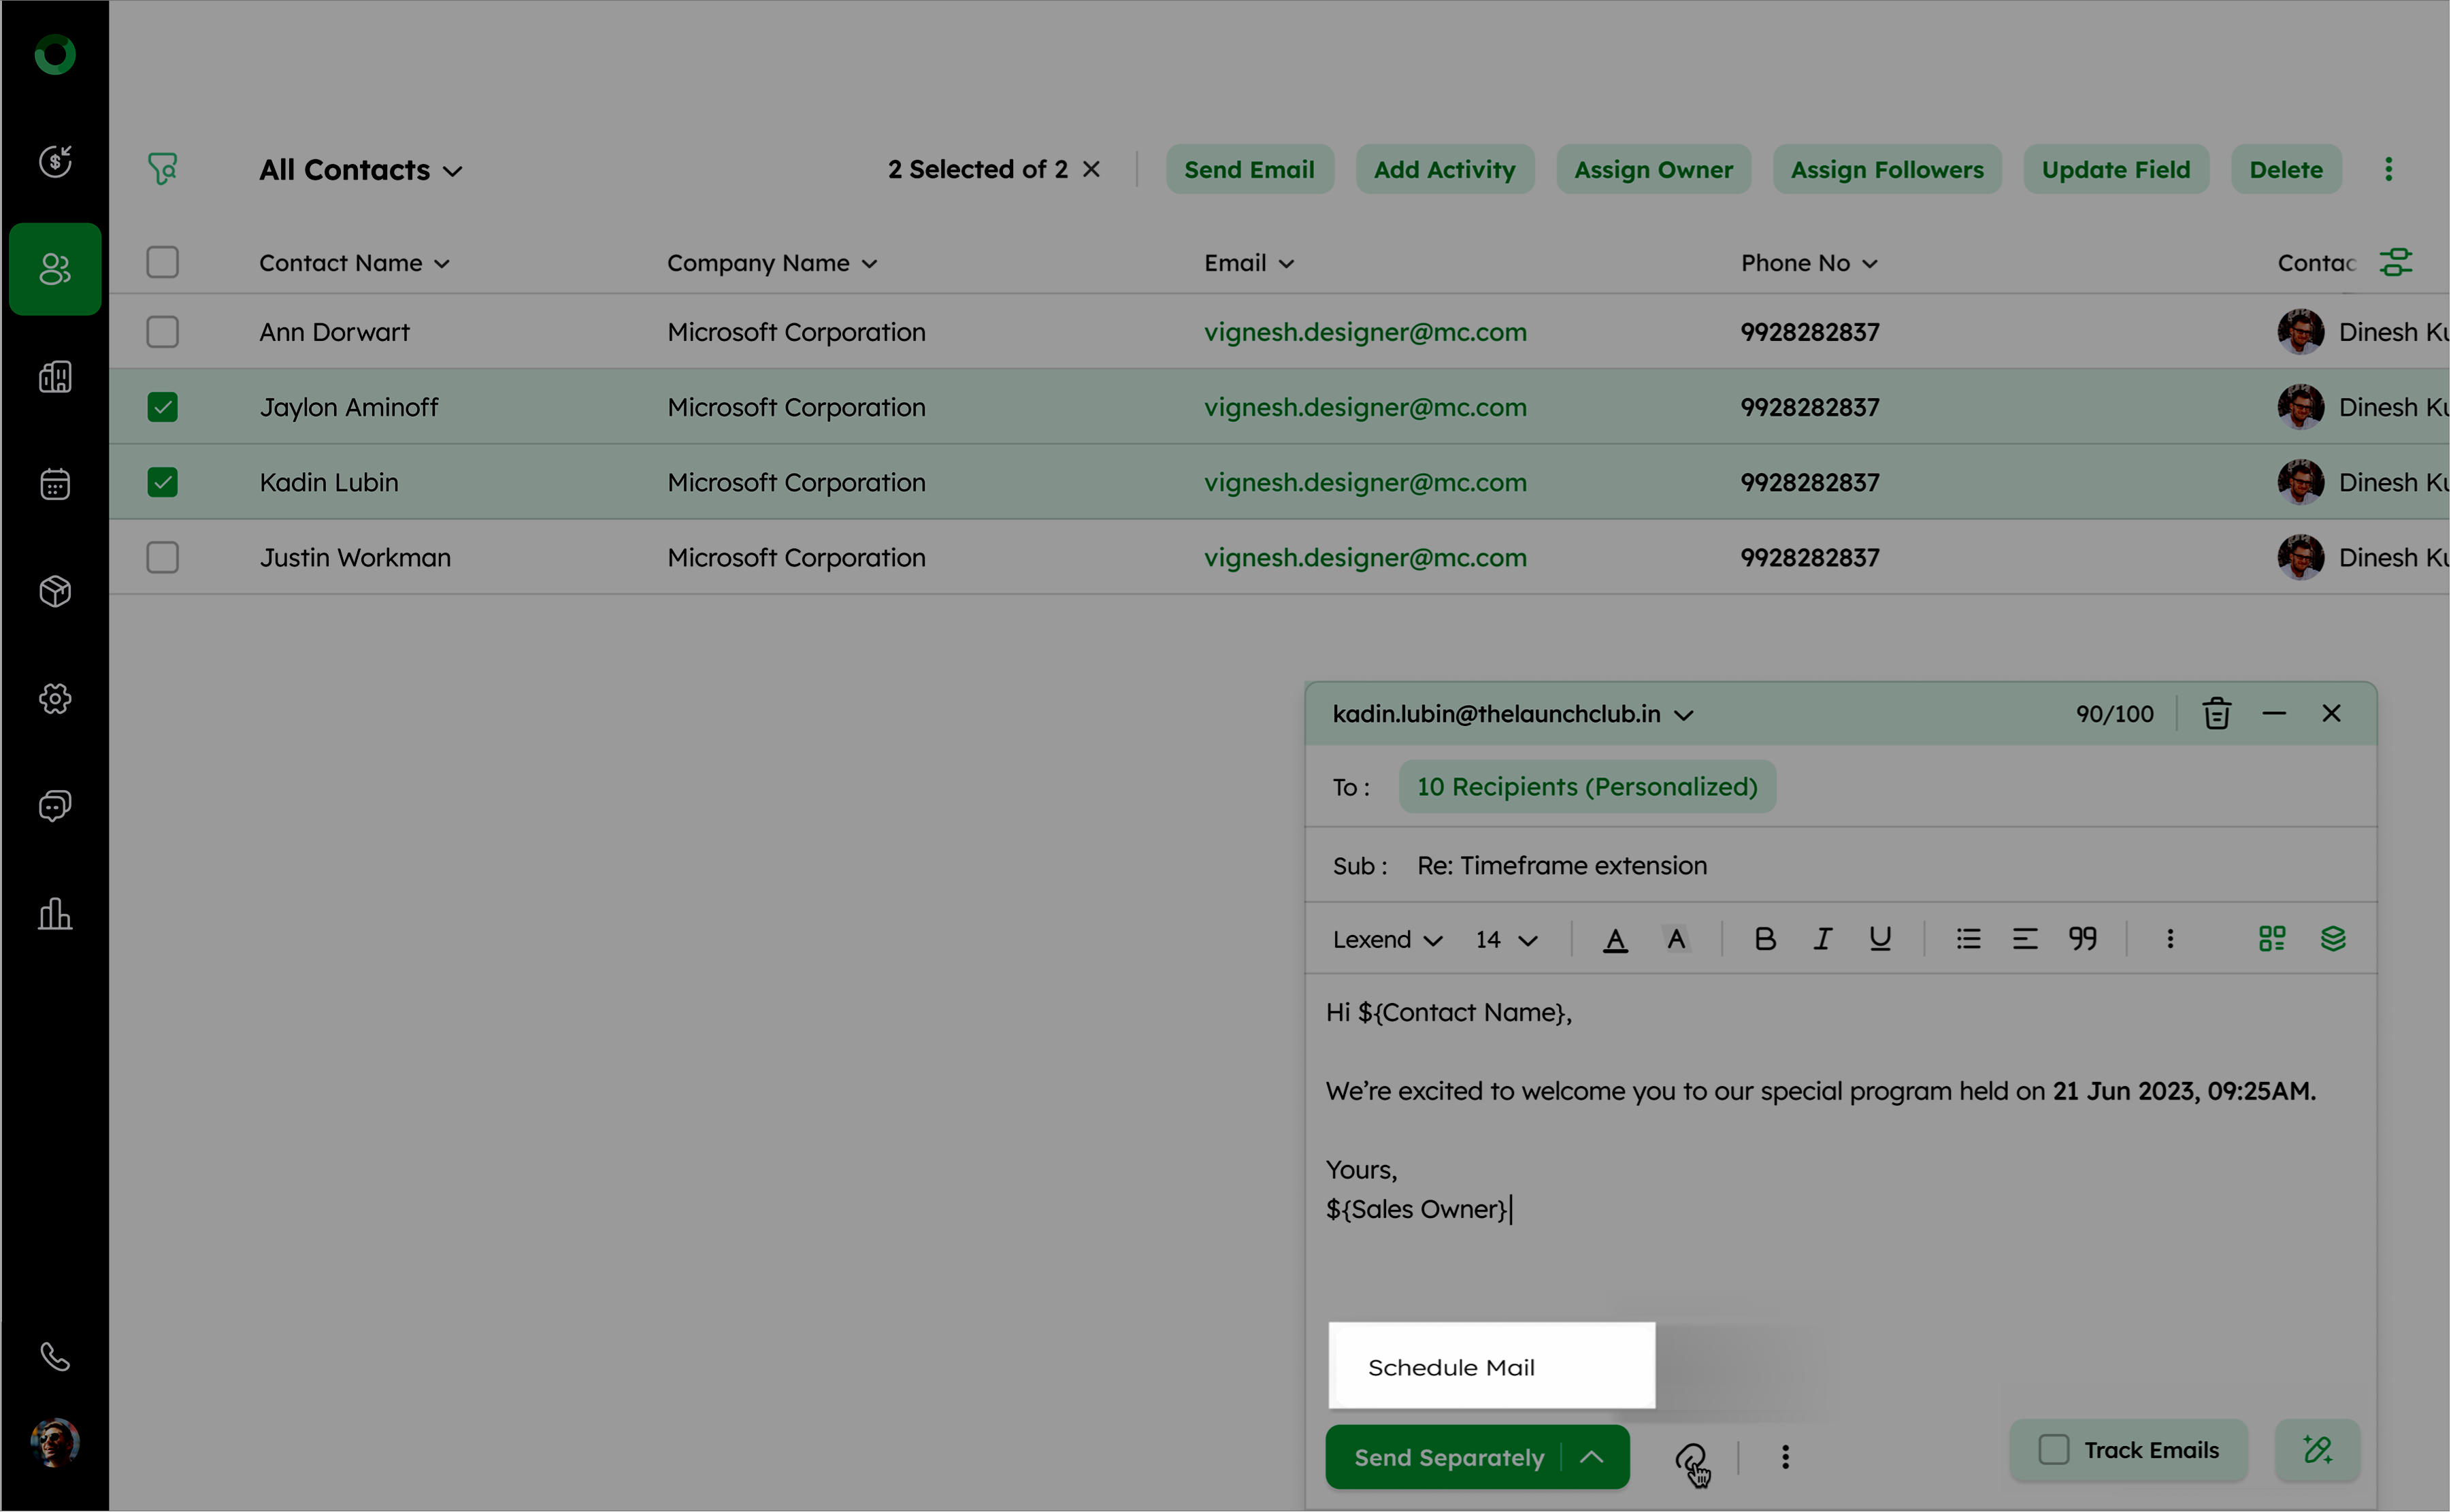
- Review and click Send Separately to distribute the email to all selected contacts individually.
- Next to the Send Separately option, click the drop-down to show the Schedule Mail option, which allows you to schedule the emails to be sent at a specific time.
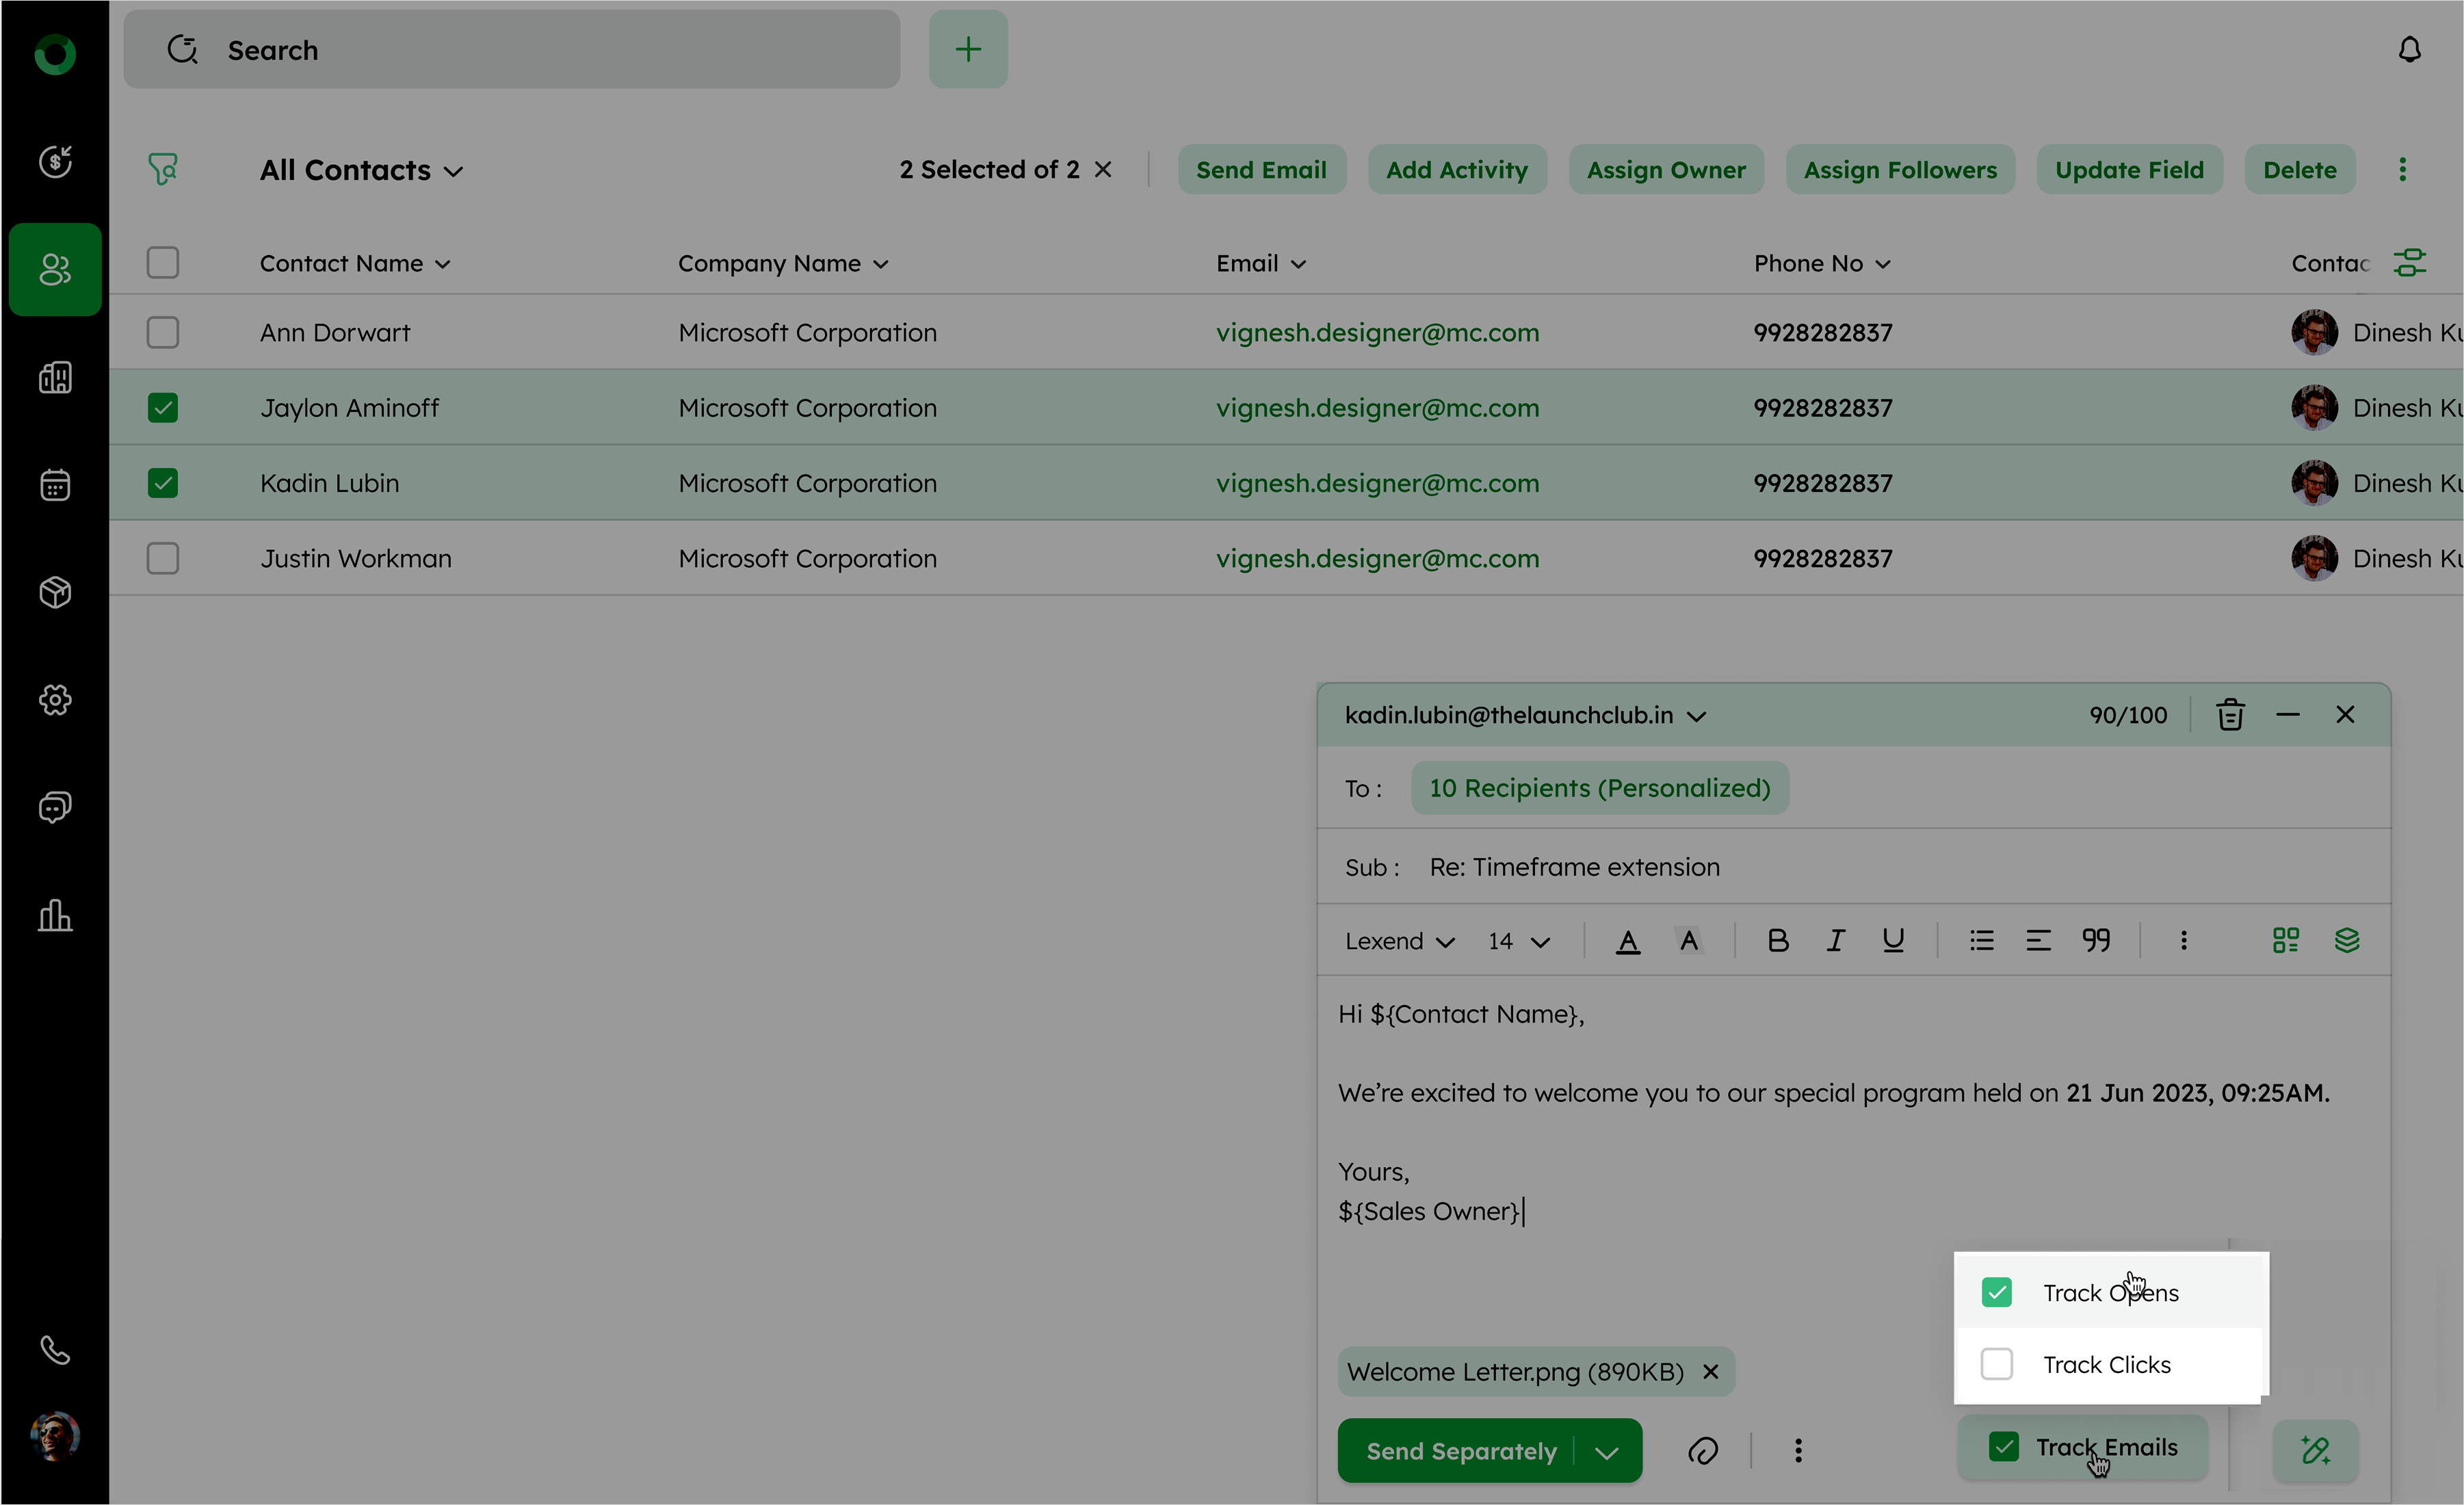
- You can track emails by selecting the Track Emails checkbox and attaching files if needed.
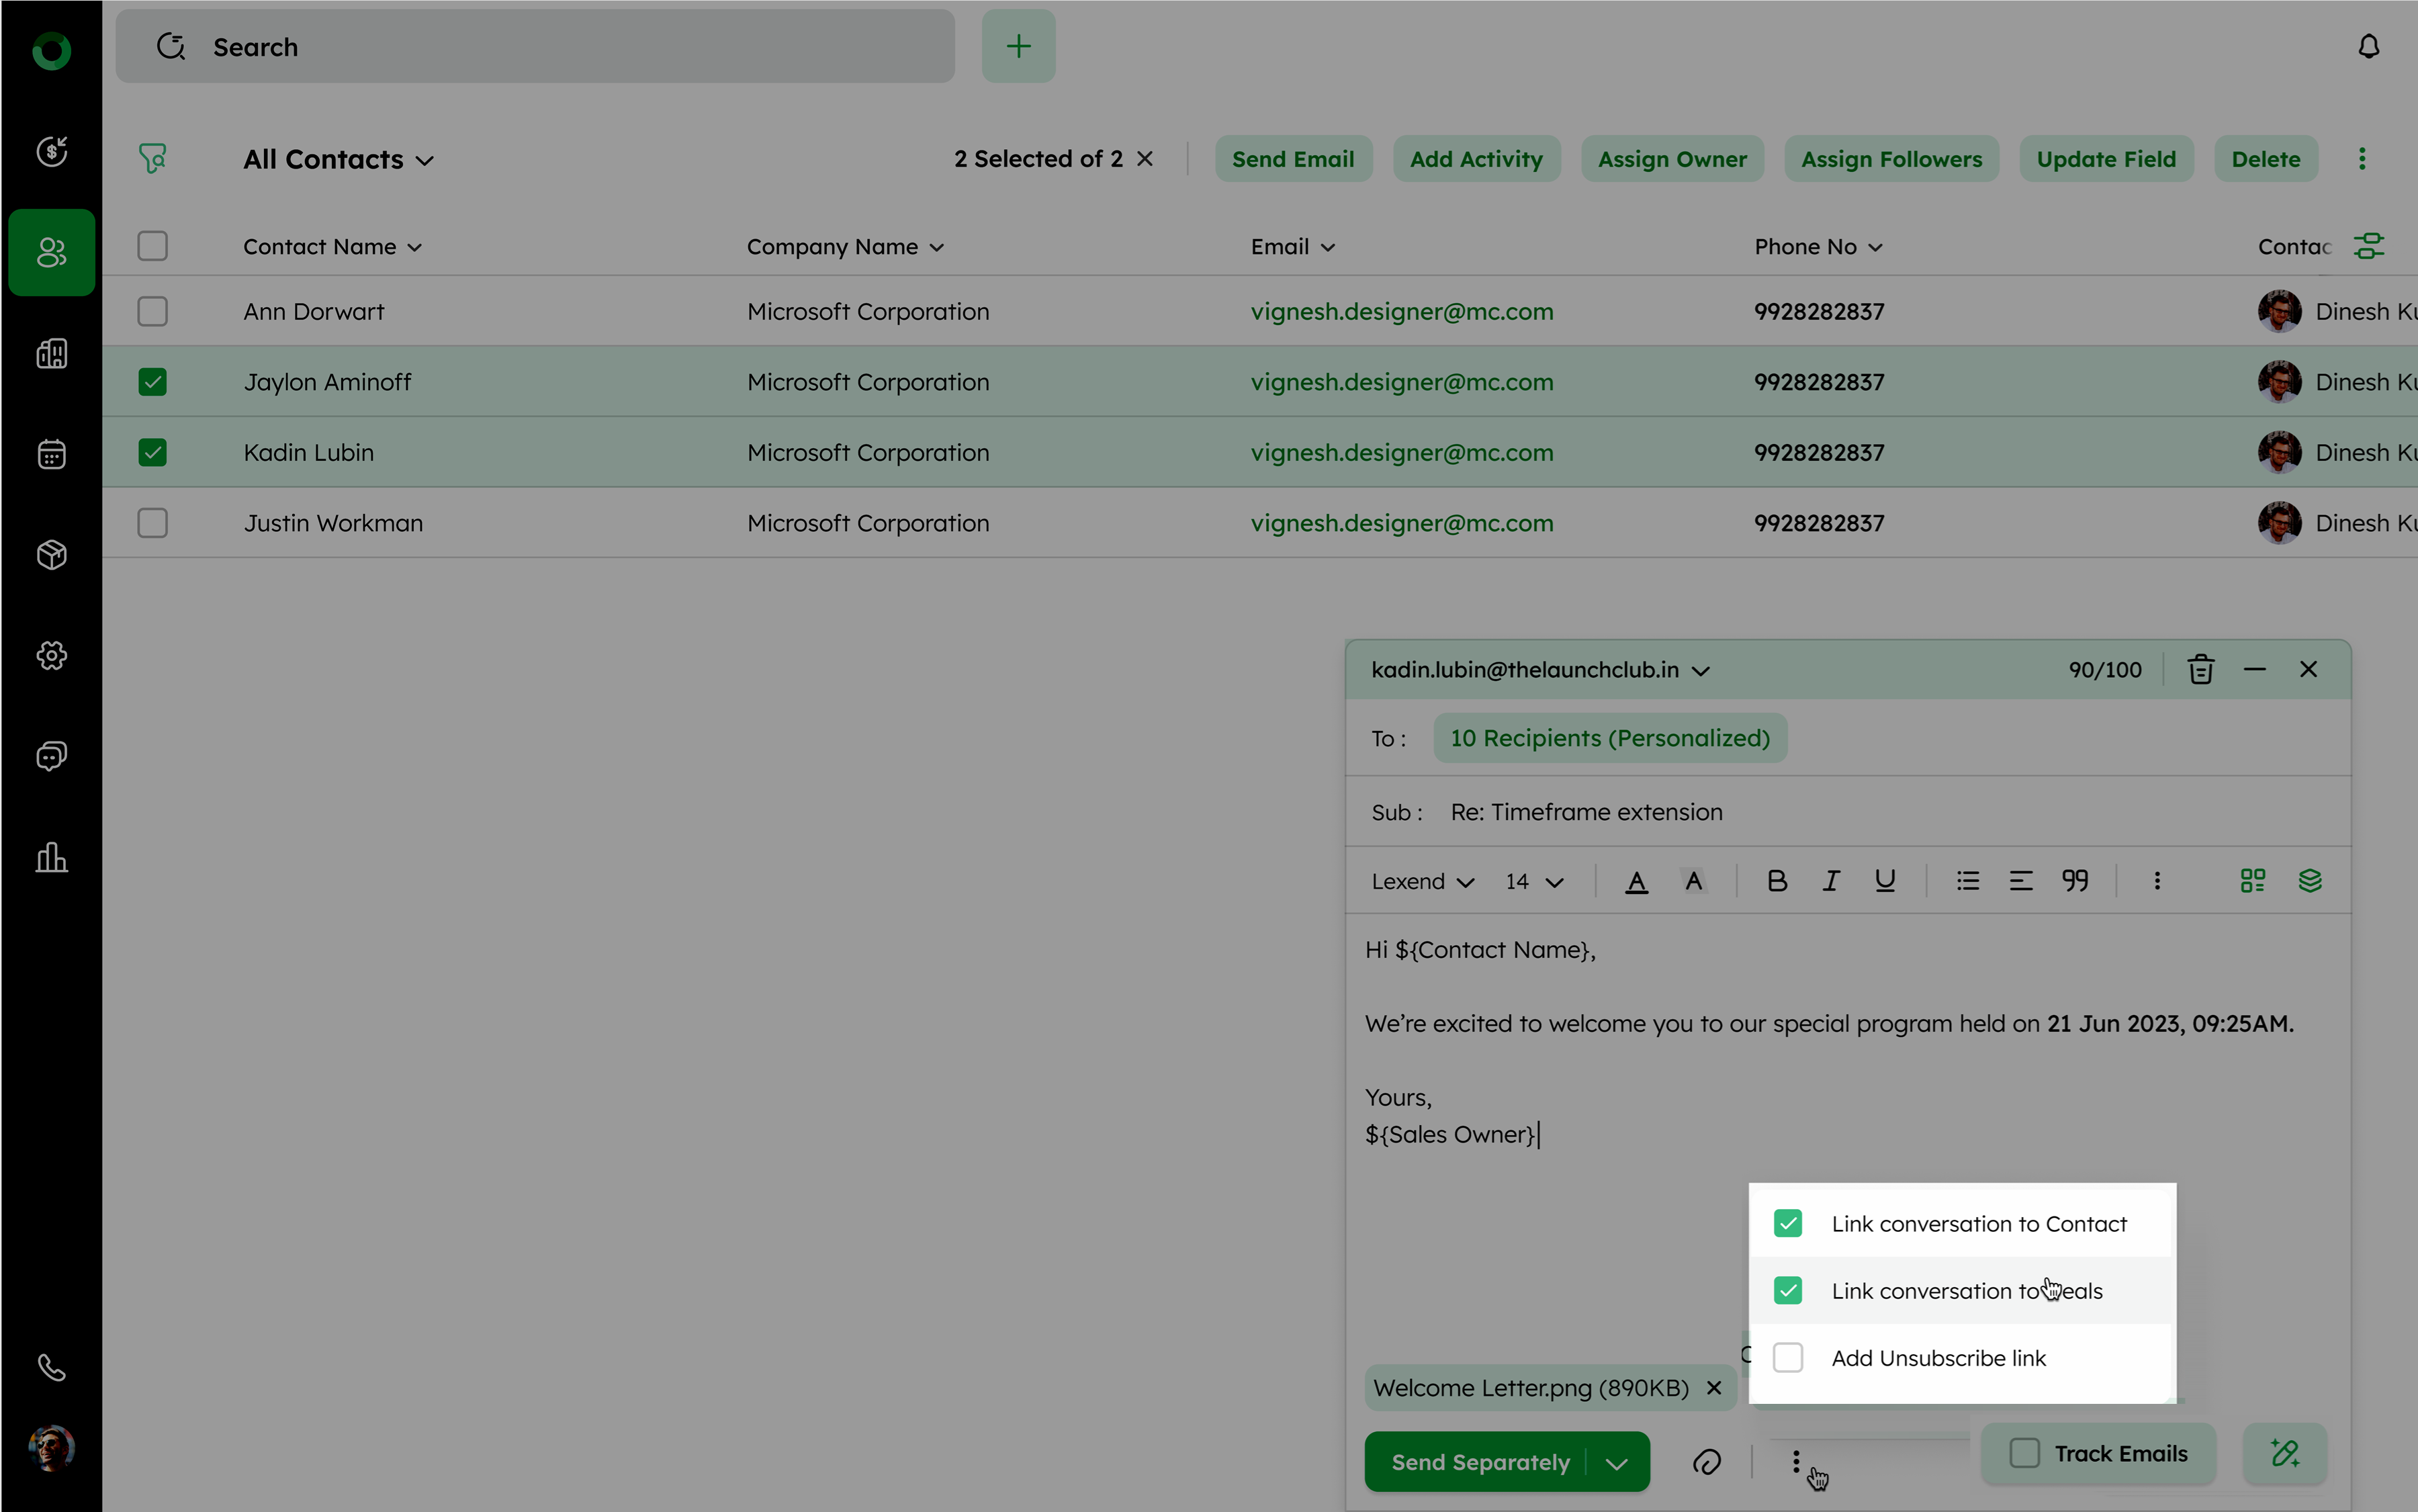
- Next to the attachment, the ellipsis icon offers options to:
- Link to Contact: Displays the conversation on the contact's detailed page.
- Link to Deal: Displays the conversation on the associated deal's detailed page.
- Add Unsubscribe Link: Add an unsubscribe link to the email. If the recipient clicks it, a confirmation pop-up appears when sending the email, allowing the user to confirm sending by clicking Yes.
You can send emails to a maximum of 100 recipients per day. This count applies even if the user has synced multiple email addresses.
Tip: Use NIRA AI Email Composer to automatically generate optimized email subjects and content, which can then be reviewed and refined to meet your specific requirements.
How Do I Bulk-Add Activities for Multiple Contacts?
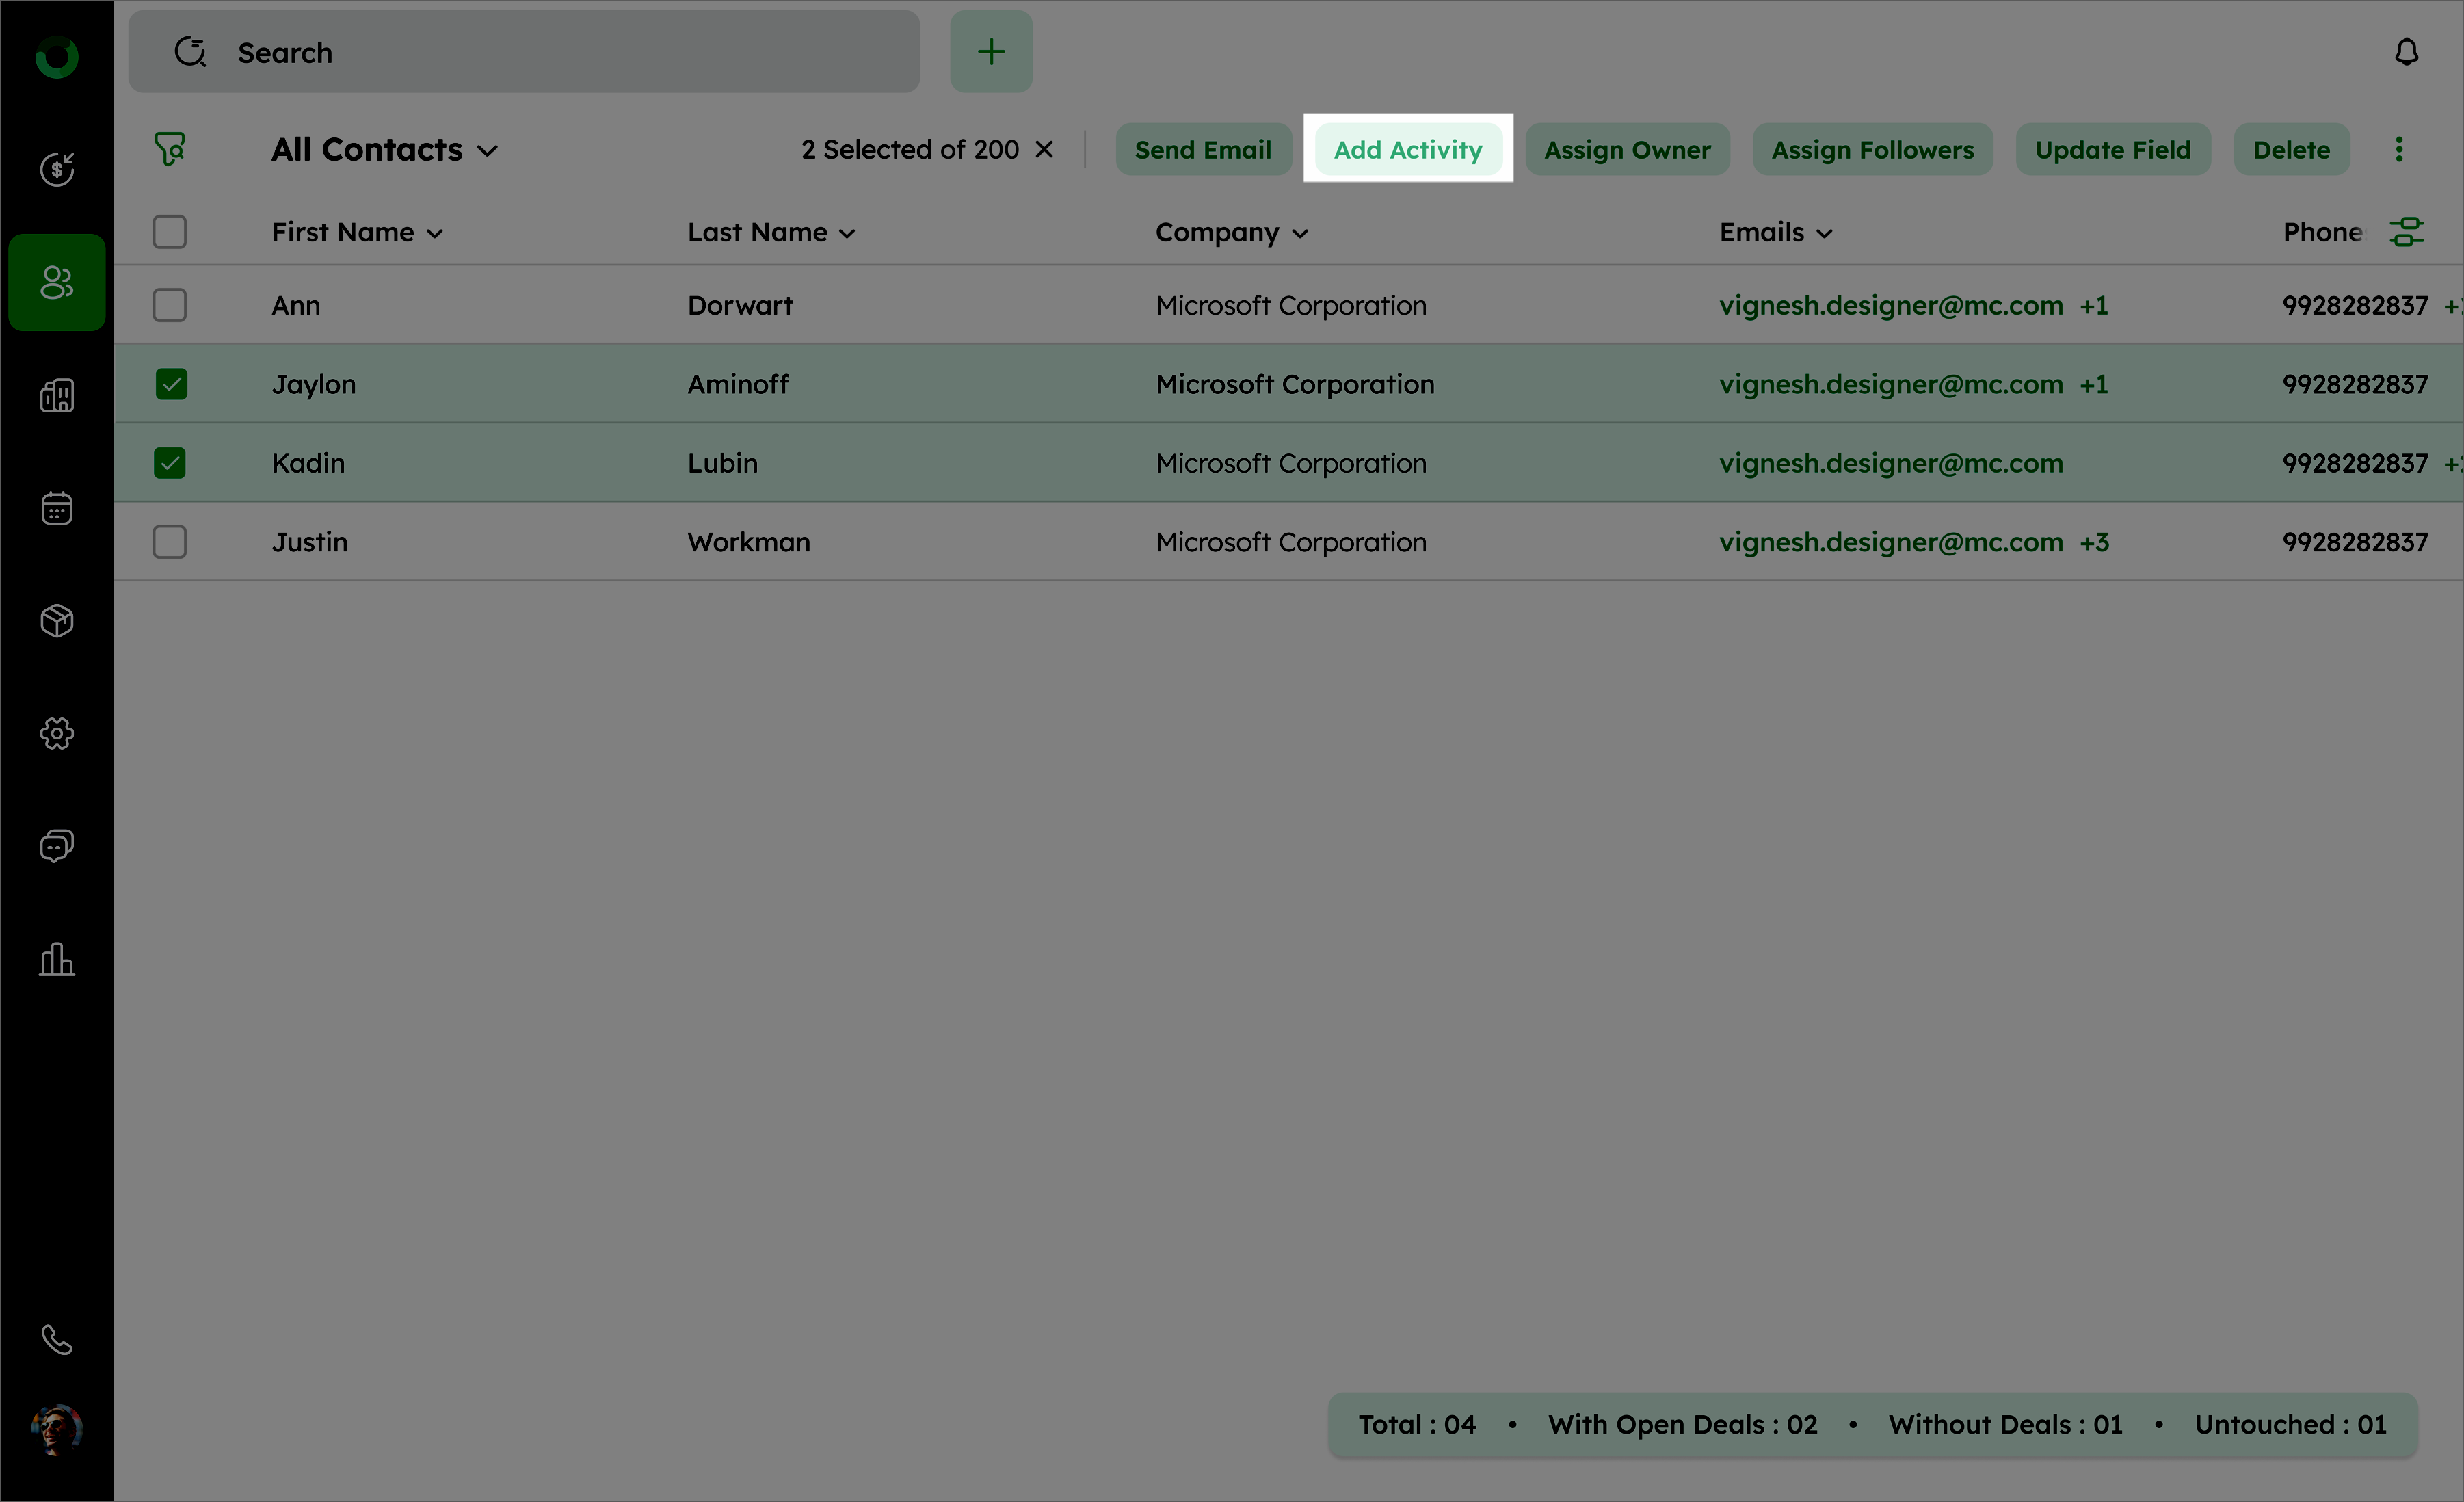
Bulk-adding activities lets you to log the same type of interaction or task for multiple contacts at once. Whether it's follow-up calls, meetings, or routine tasks, this feature ensures that all selected contacts are updated consistently. By using bulk adding actions, you save time, reduce manual effort, and maintain an organized record of your interactions.
- In the Contact List View, select the checkboxes next to the contacts you want to add an activity for.
- Click the Add Activity button in the toolbar.
- Fill the following details for the activity: Title, Type, Date and Time, Availability, Reminder, Priority, Sales Owner, Collaborators, and Private Note.
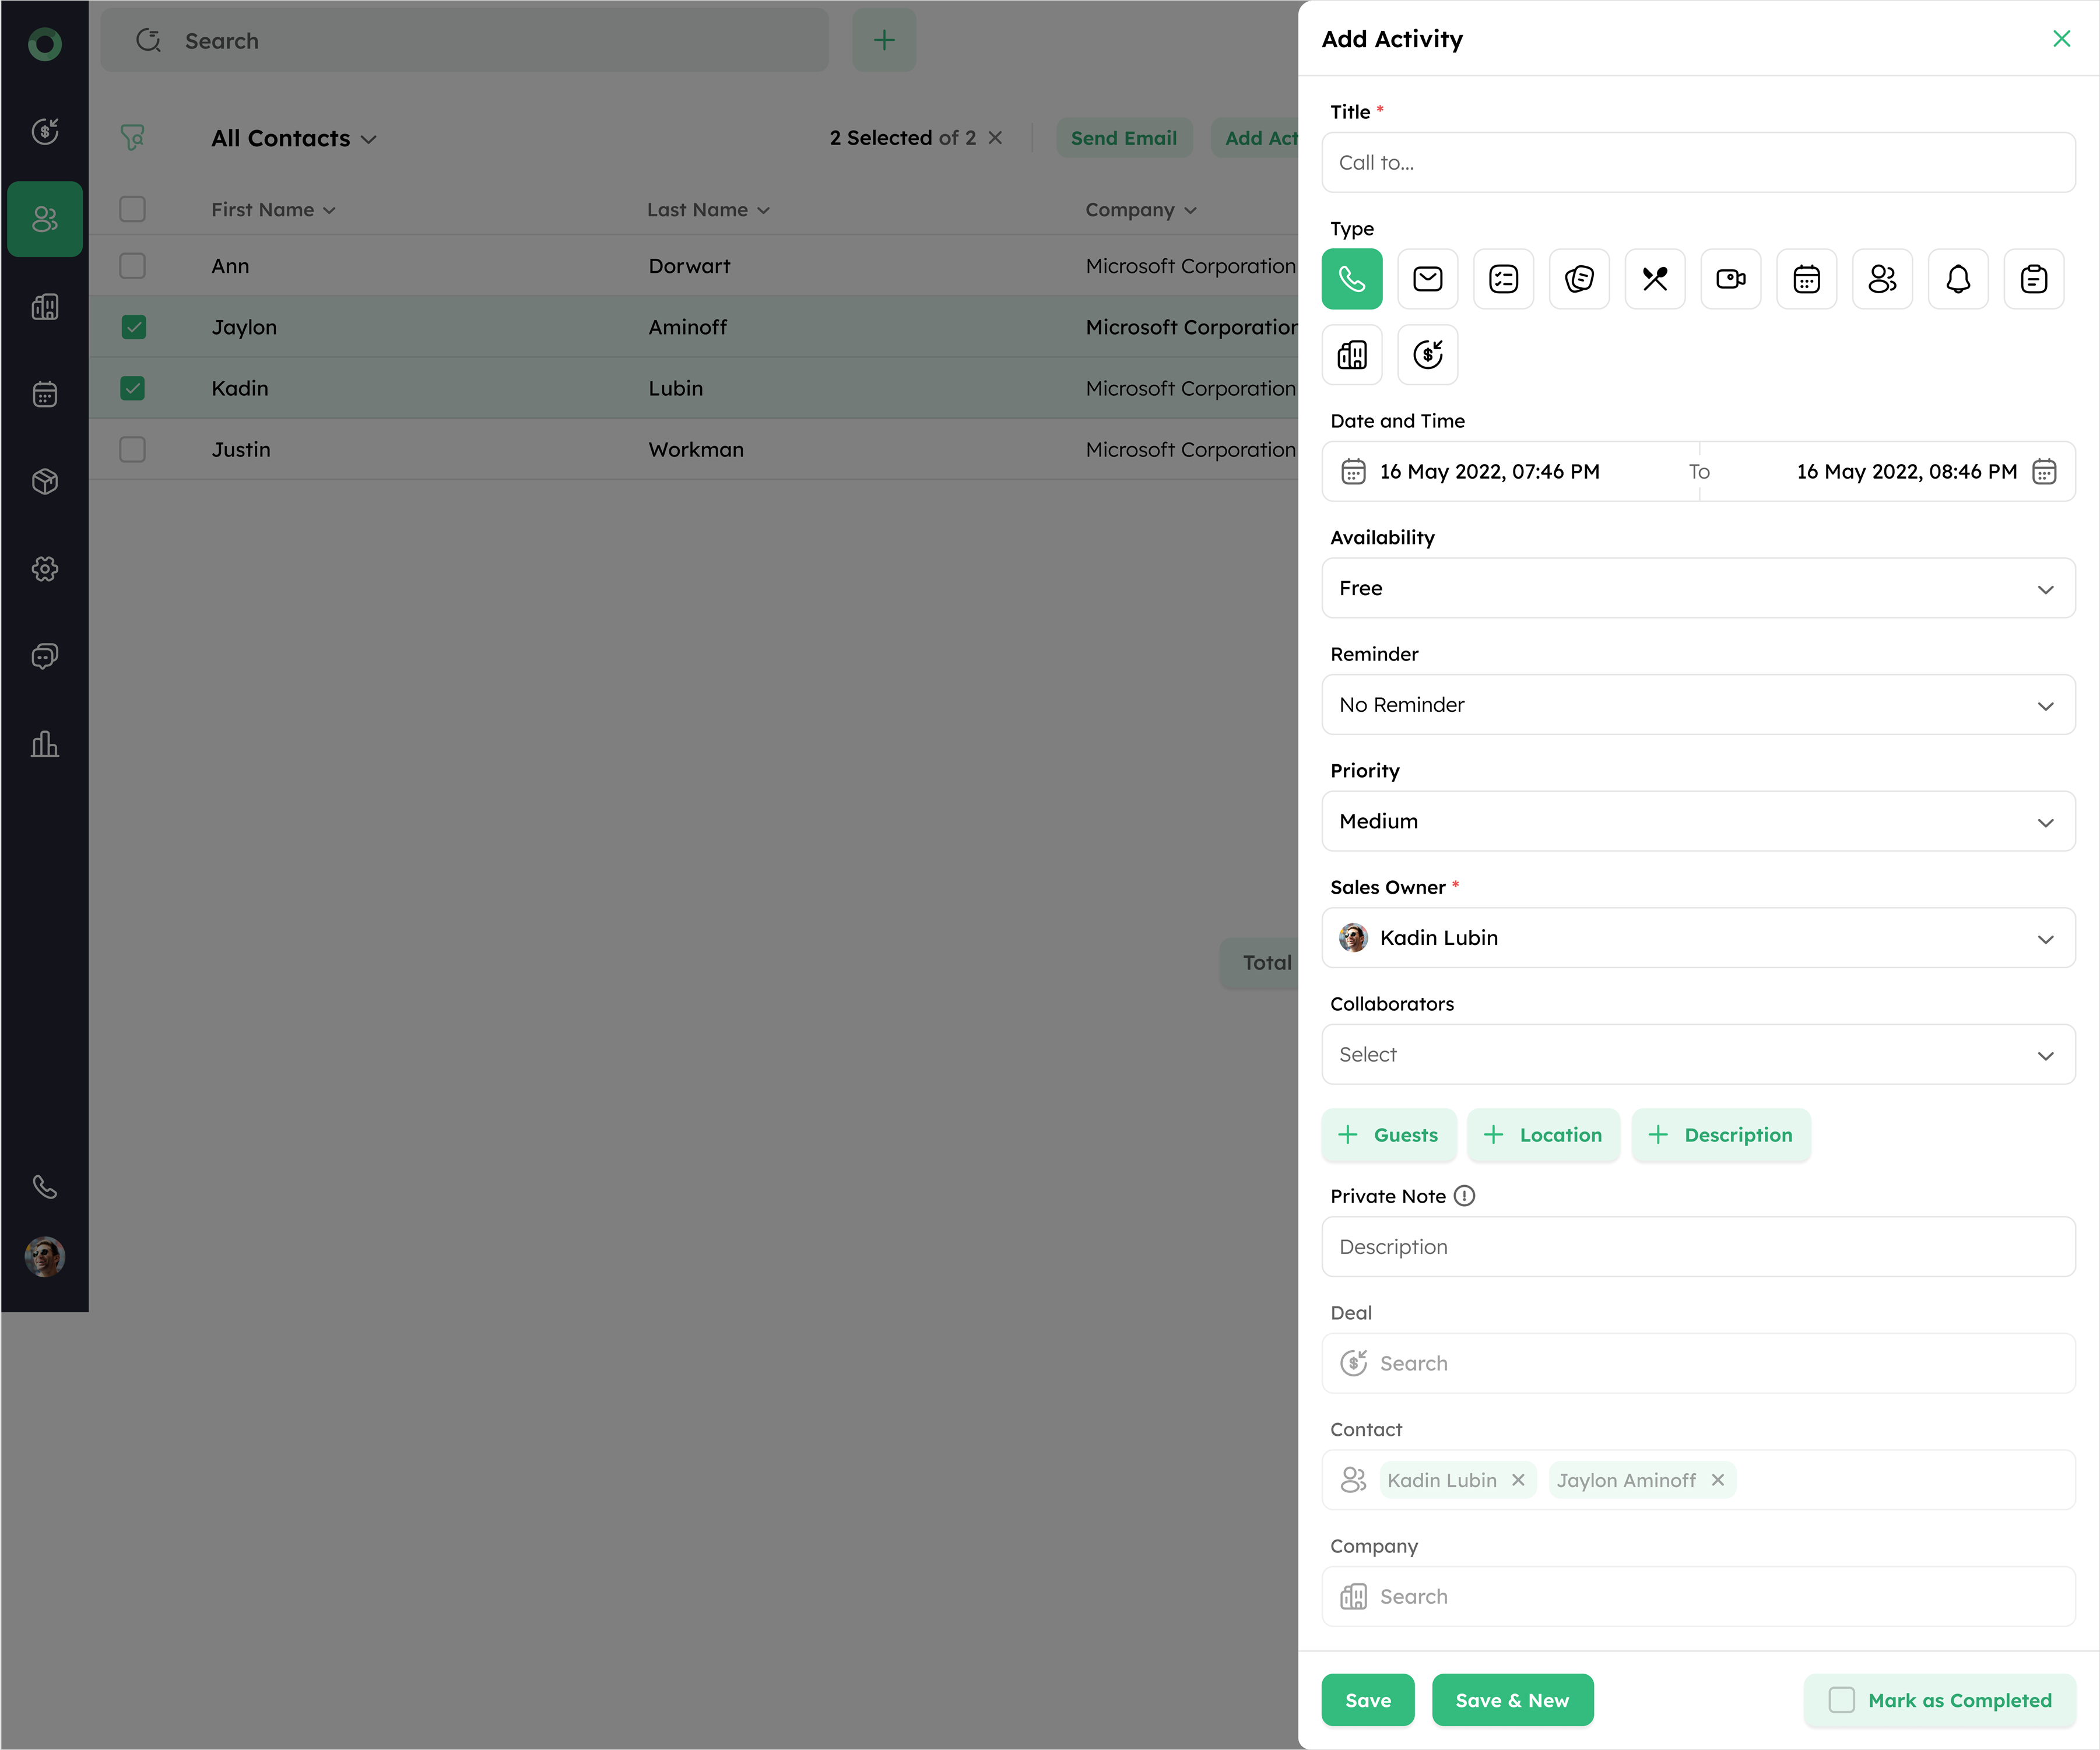
- Click Save to log the activity for all selected contacts.
How Do I Bulk-Assign a New Contact Owner?
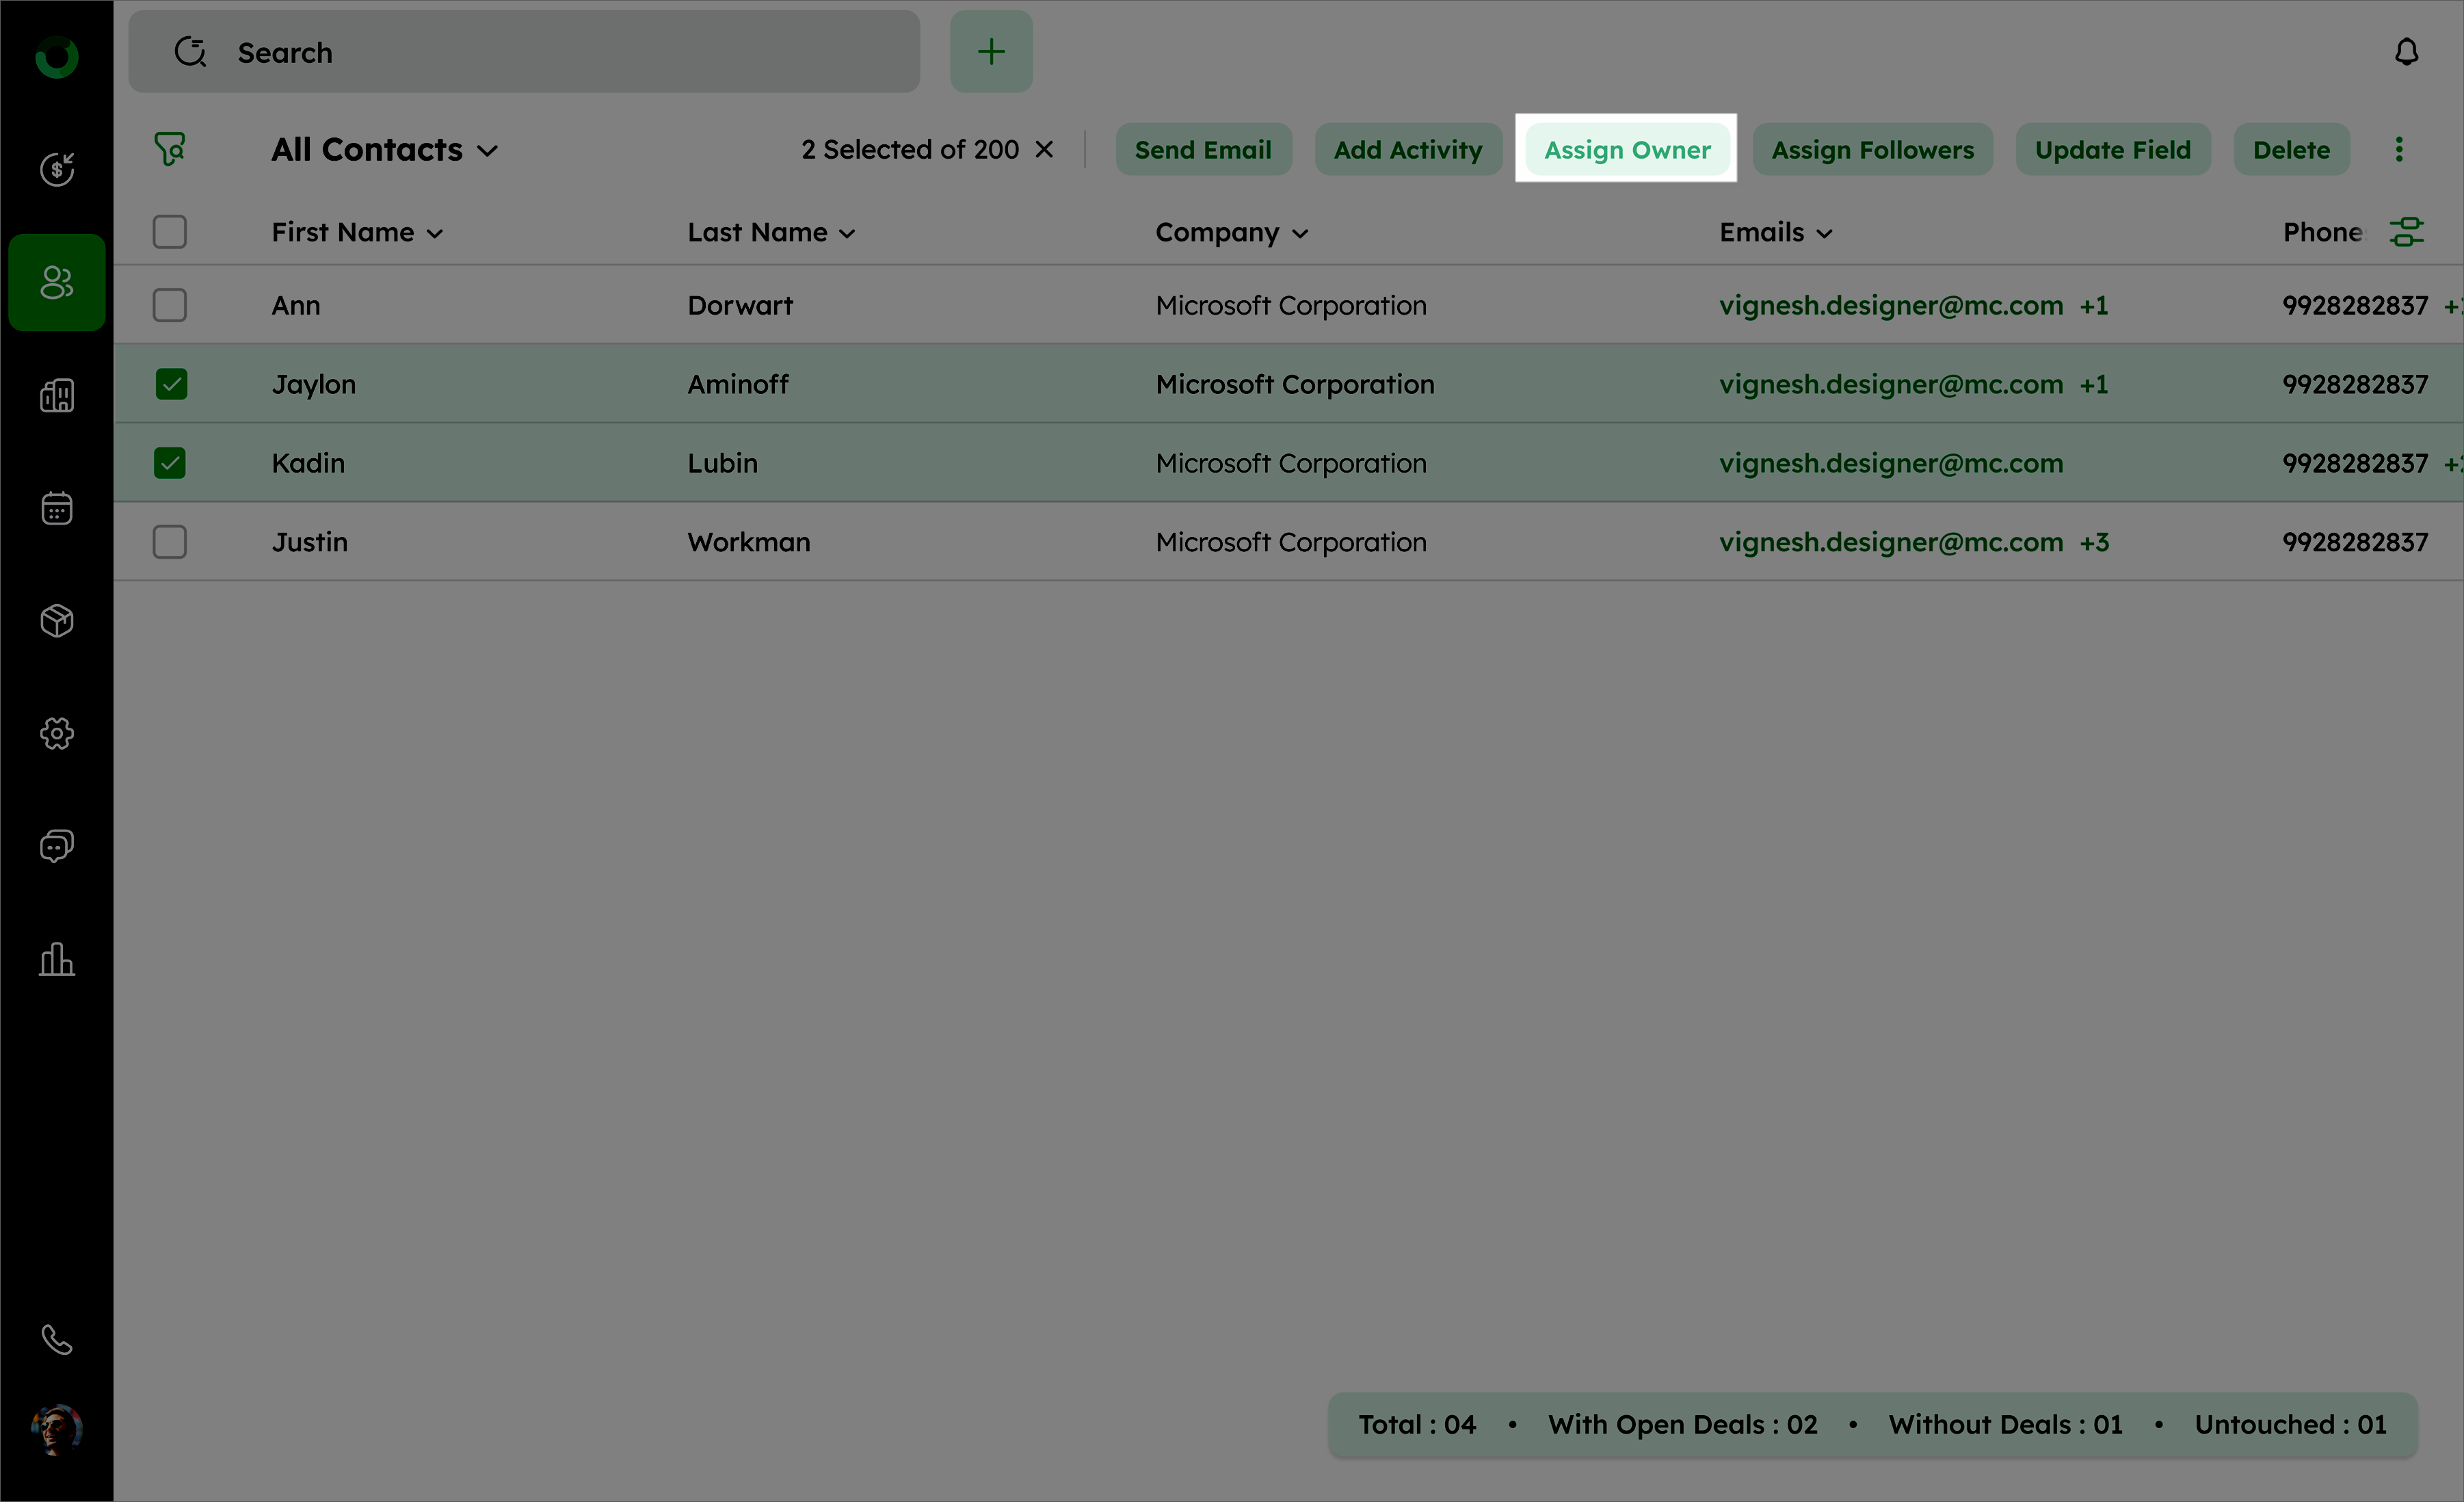
Bulk assigning an owner helps to distribute responsibility efficiently across your team, ensuring that contacts are managed by the appropriate individuals.
- Access the contact list view and select the contacts you want to assign by checking their boxes.
- Click the Assign Owner option in the toolbar. It will open the Assign Owner window.
- Choose the new owner from the dropdown list.
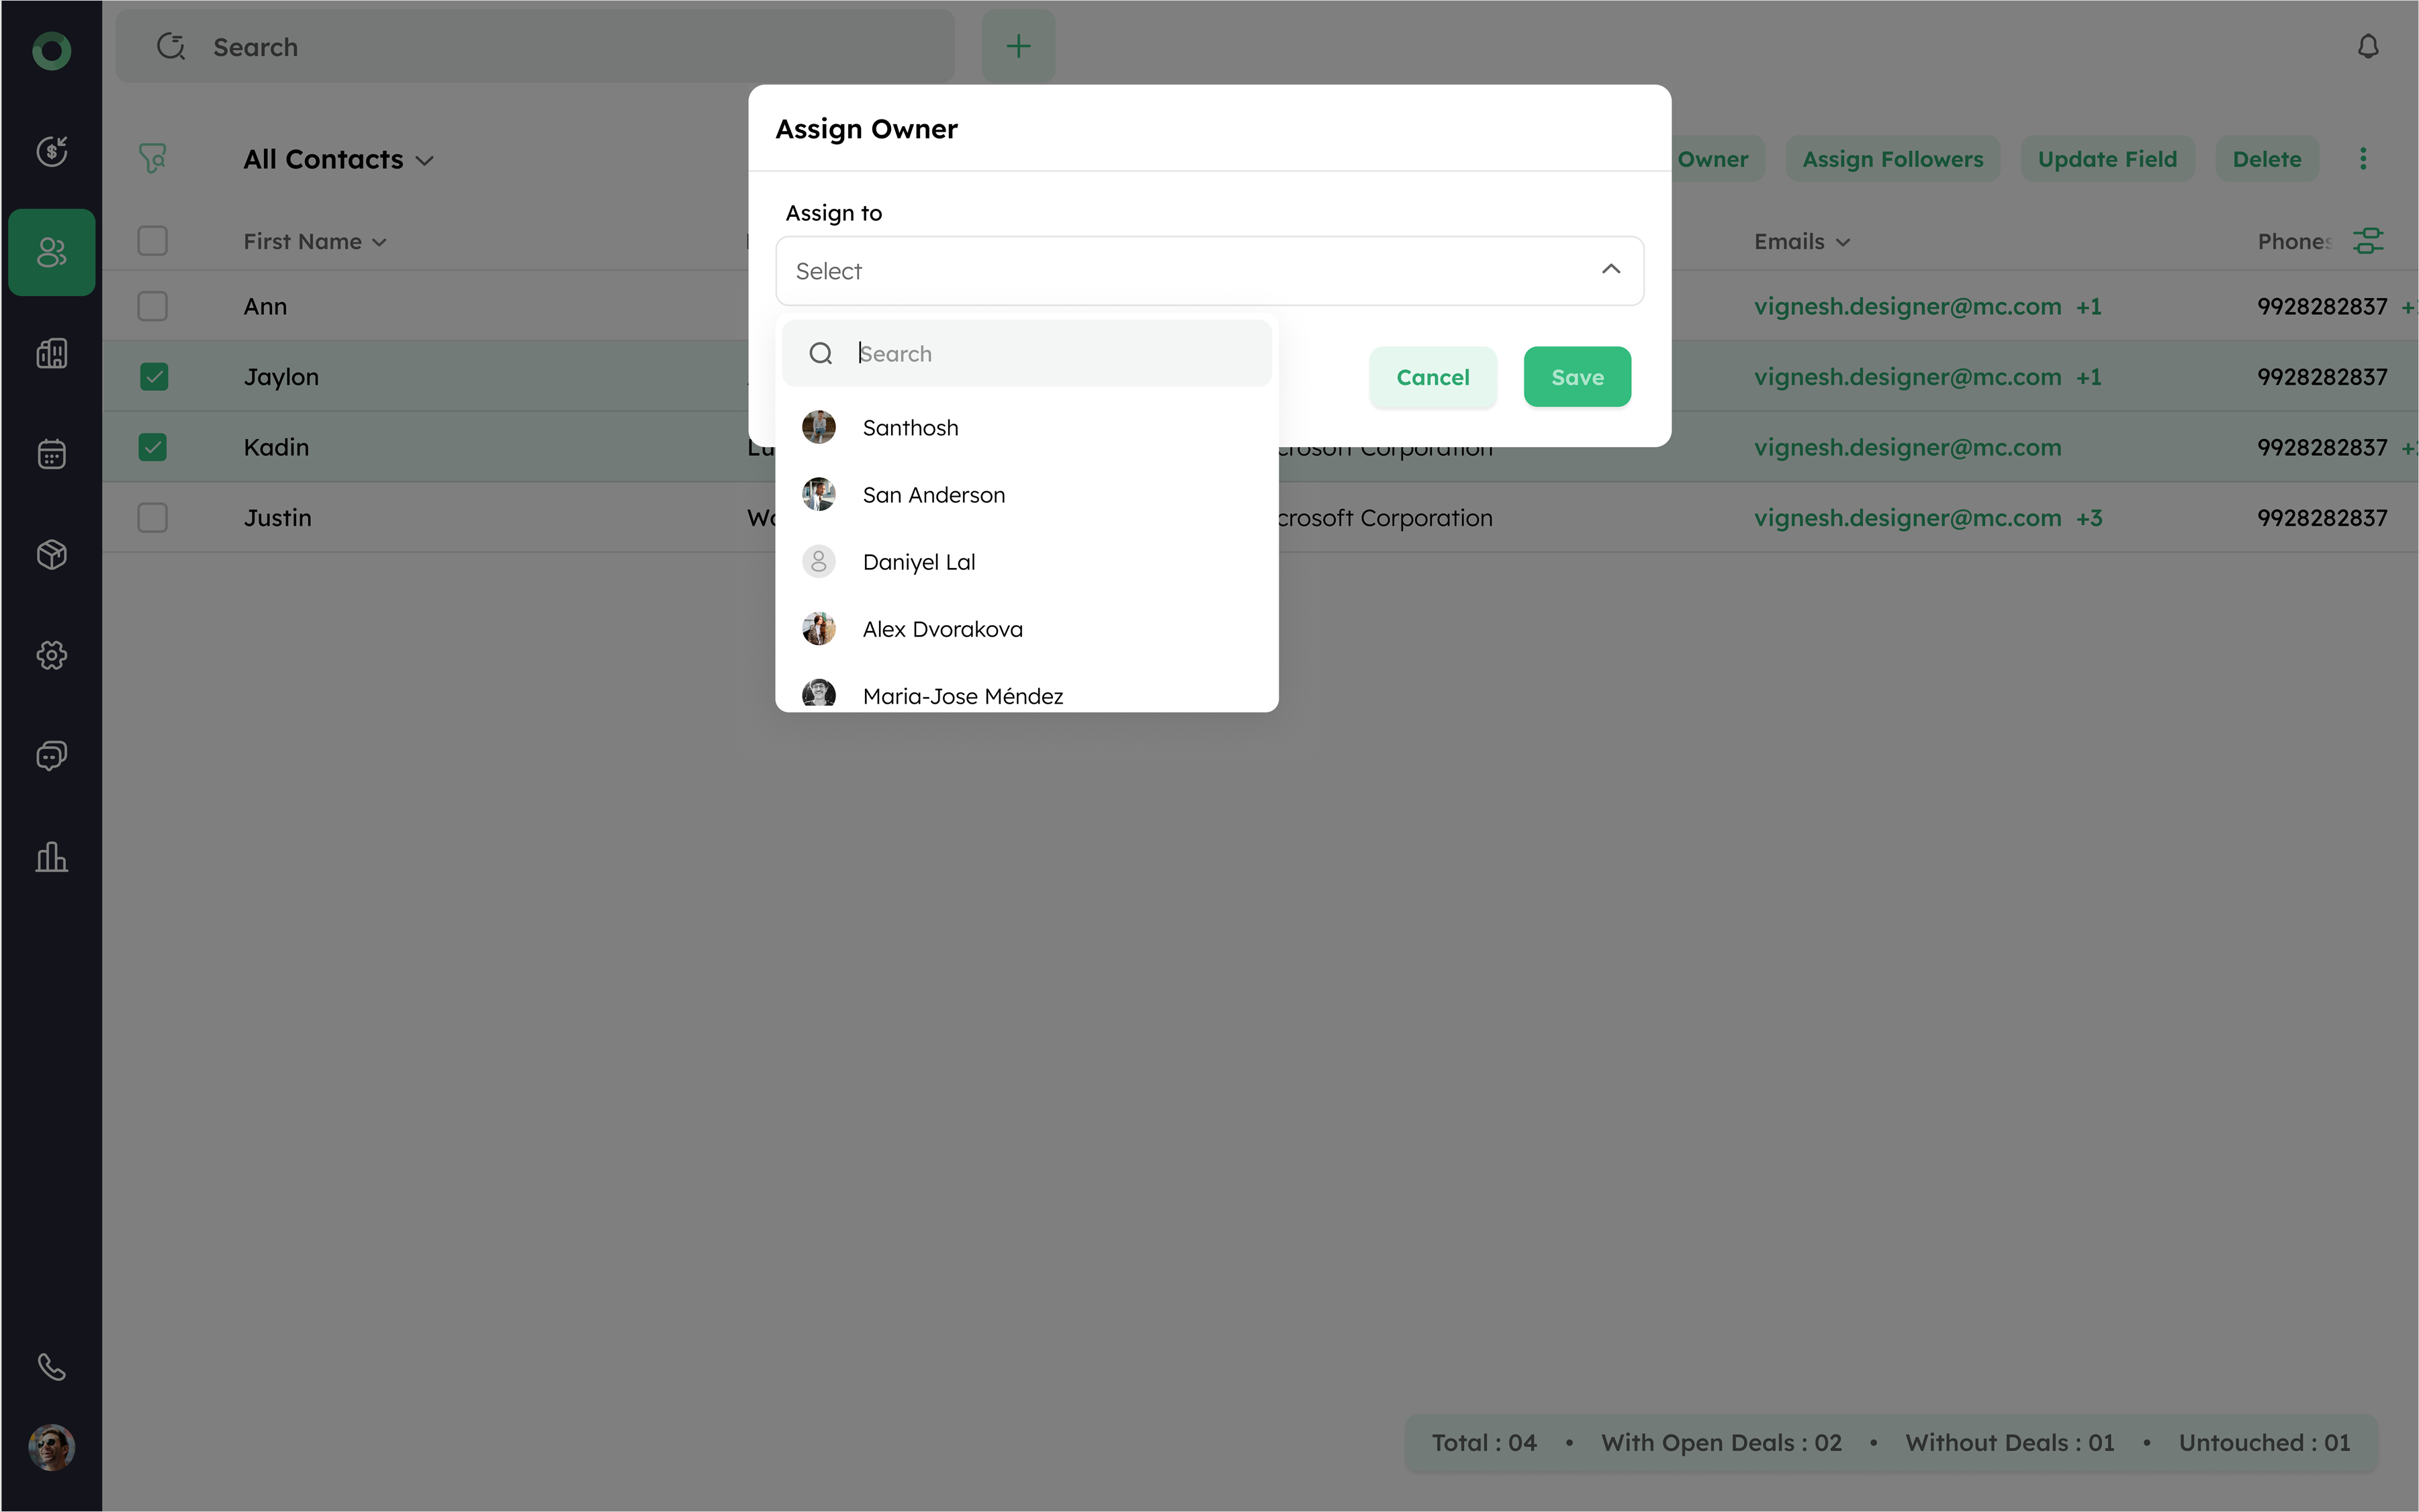
- Click Save to assign the selected owner to all chosen contacts.
Tip: Bulk assigning owners is useful for quickly reallocating responsibilities during team changes or workload balancing.
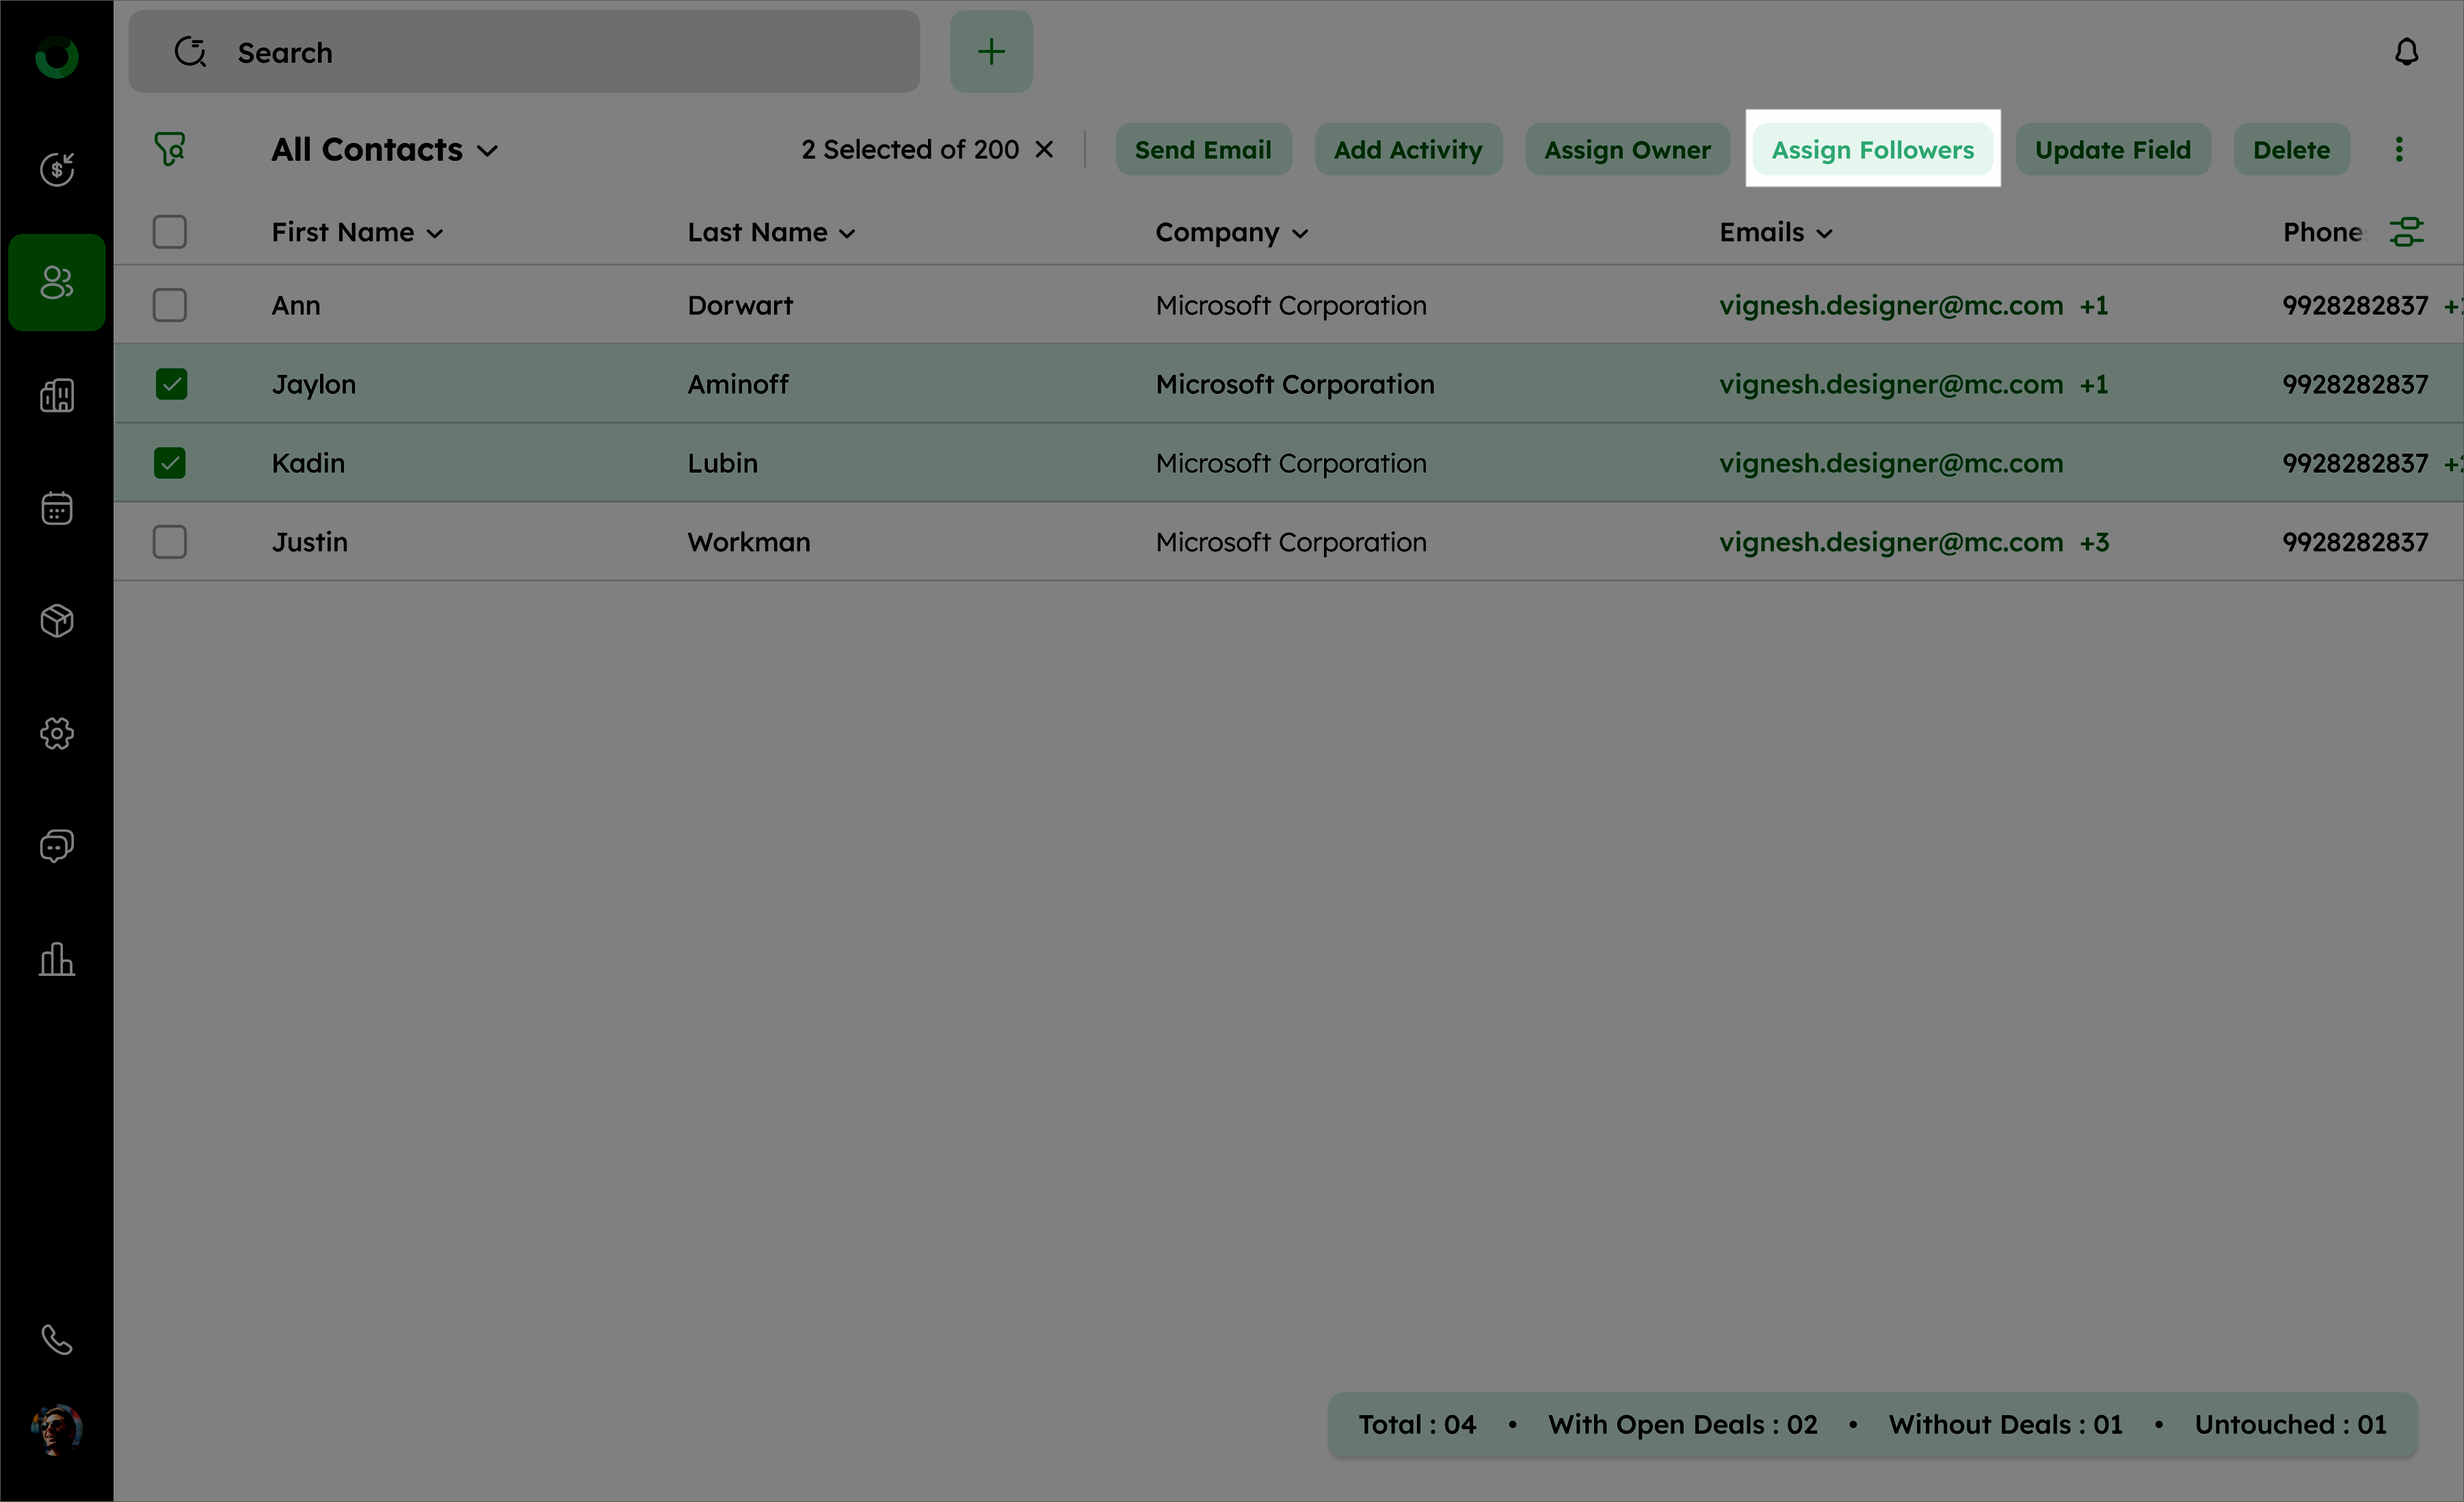
How Can I Bulk-Assign Followers to Contacts?
Bulk Assign Followers helps keep team members informed and engaged, ensuring that updates and activities on contacts are visible to the right people.
- Access the Contact List View and select the contacts you want to assign followers to by checking their boxes.
- Click the Assign Followers option in the toolbar. It will open the Assign Followers window.
- Choose the followers from the list.
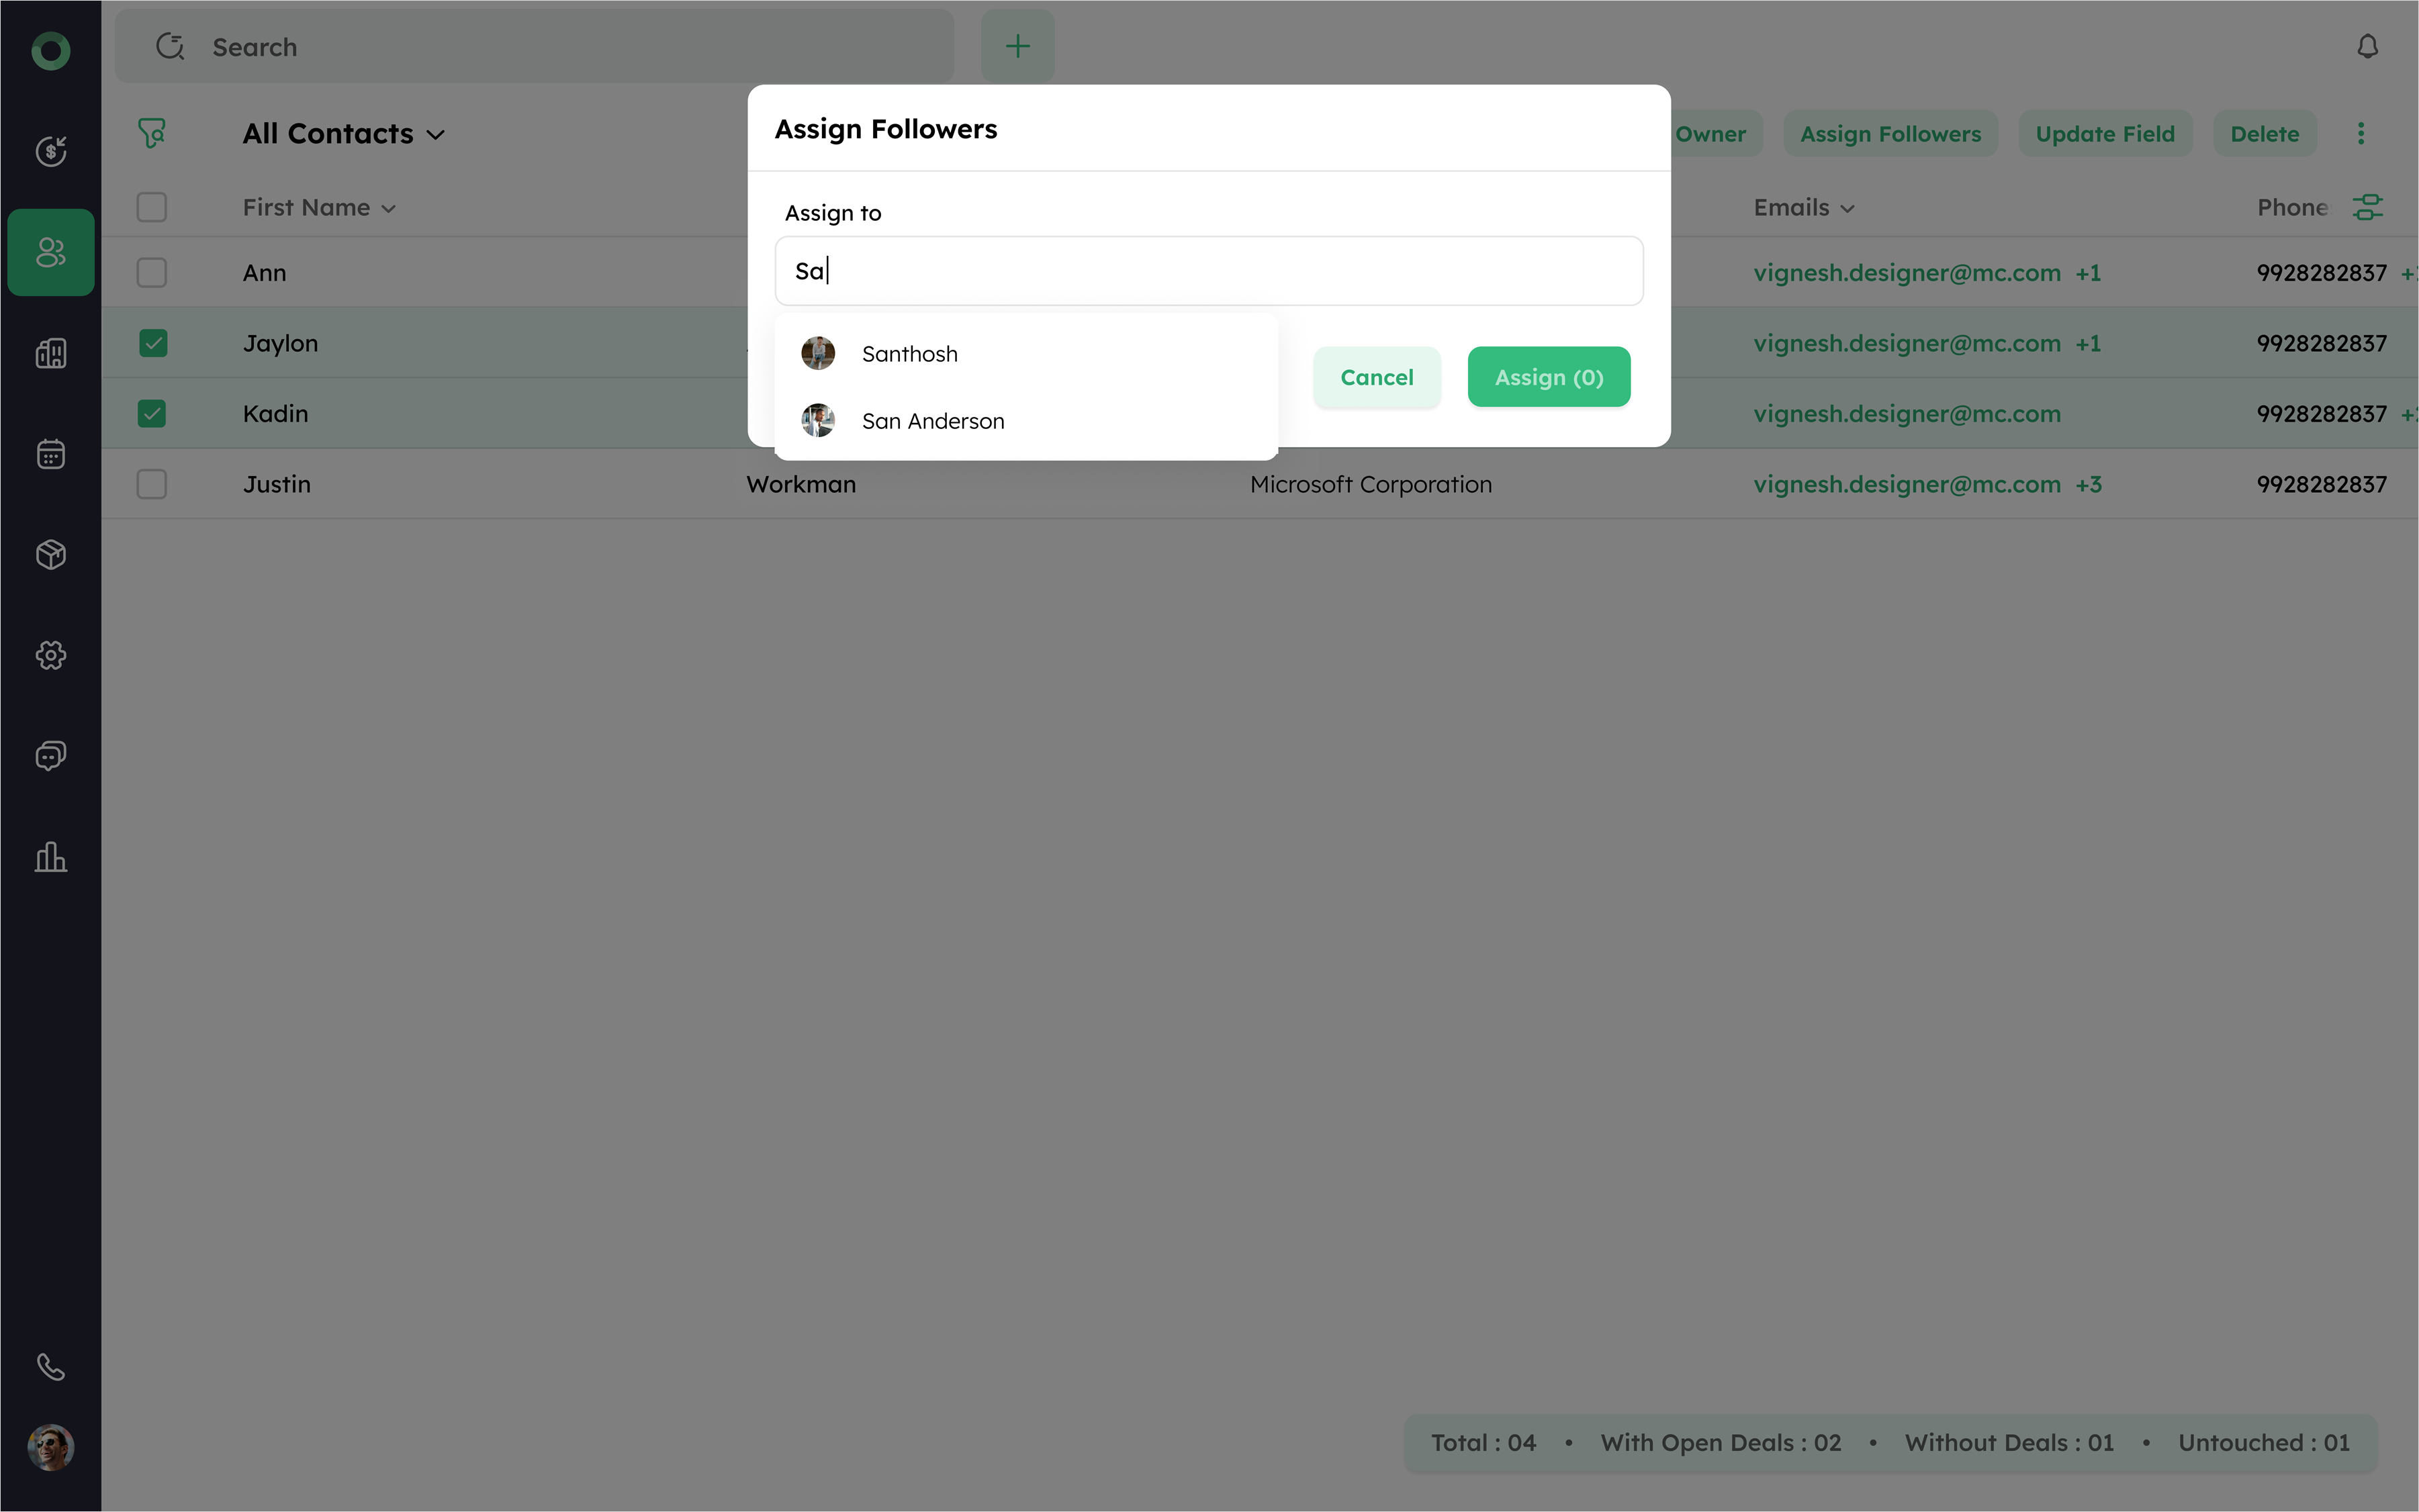
- Click Assign to add the selected followers to all chosen contacts.
Tip: Bulk assigning followers is useful for keeping multiple team members updated on key contacts, especially during collaborative projects or shared account management.
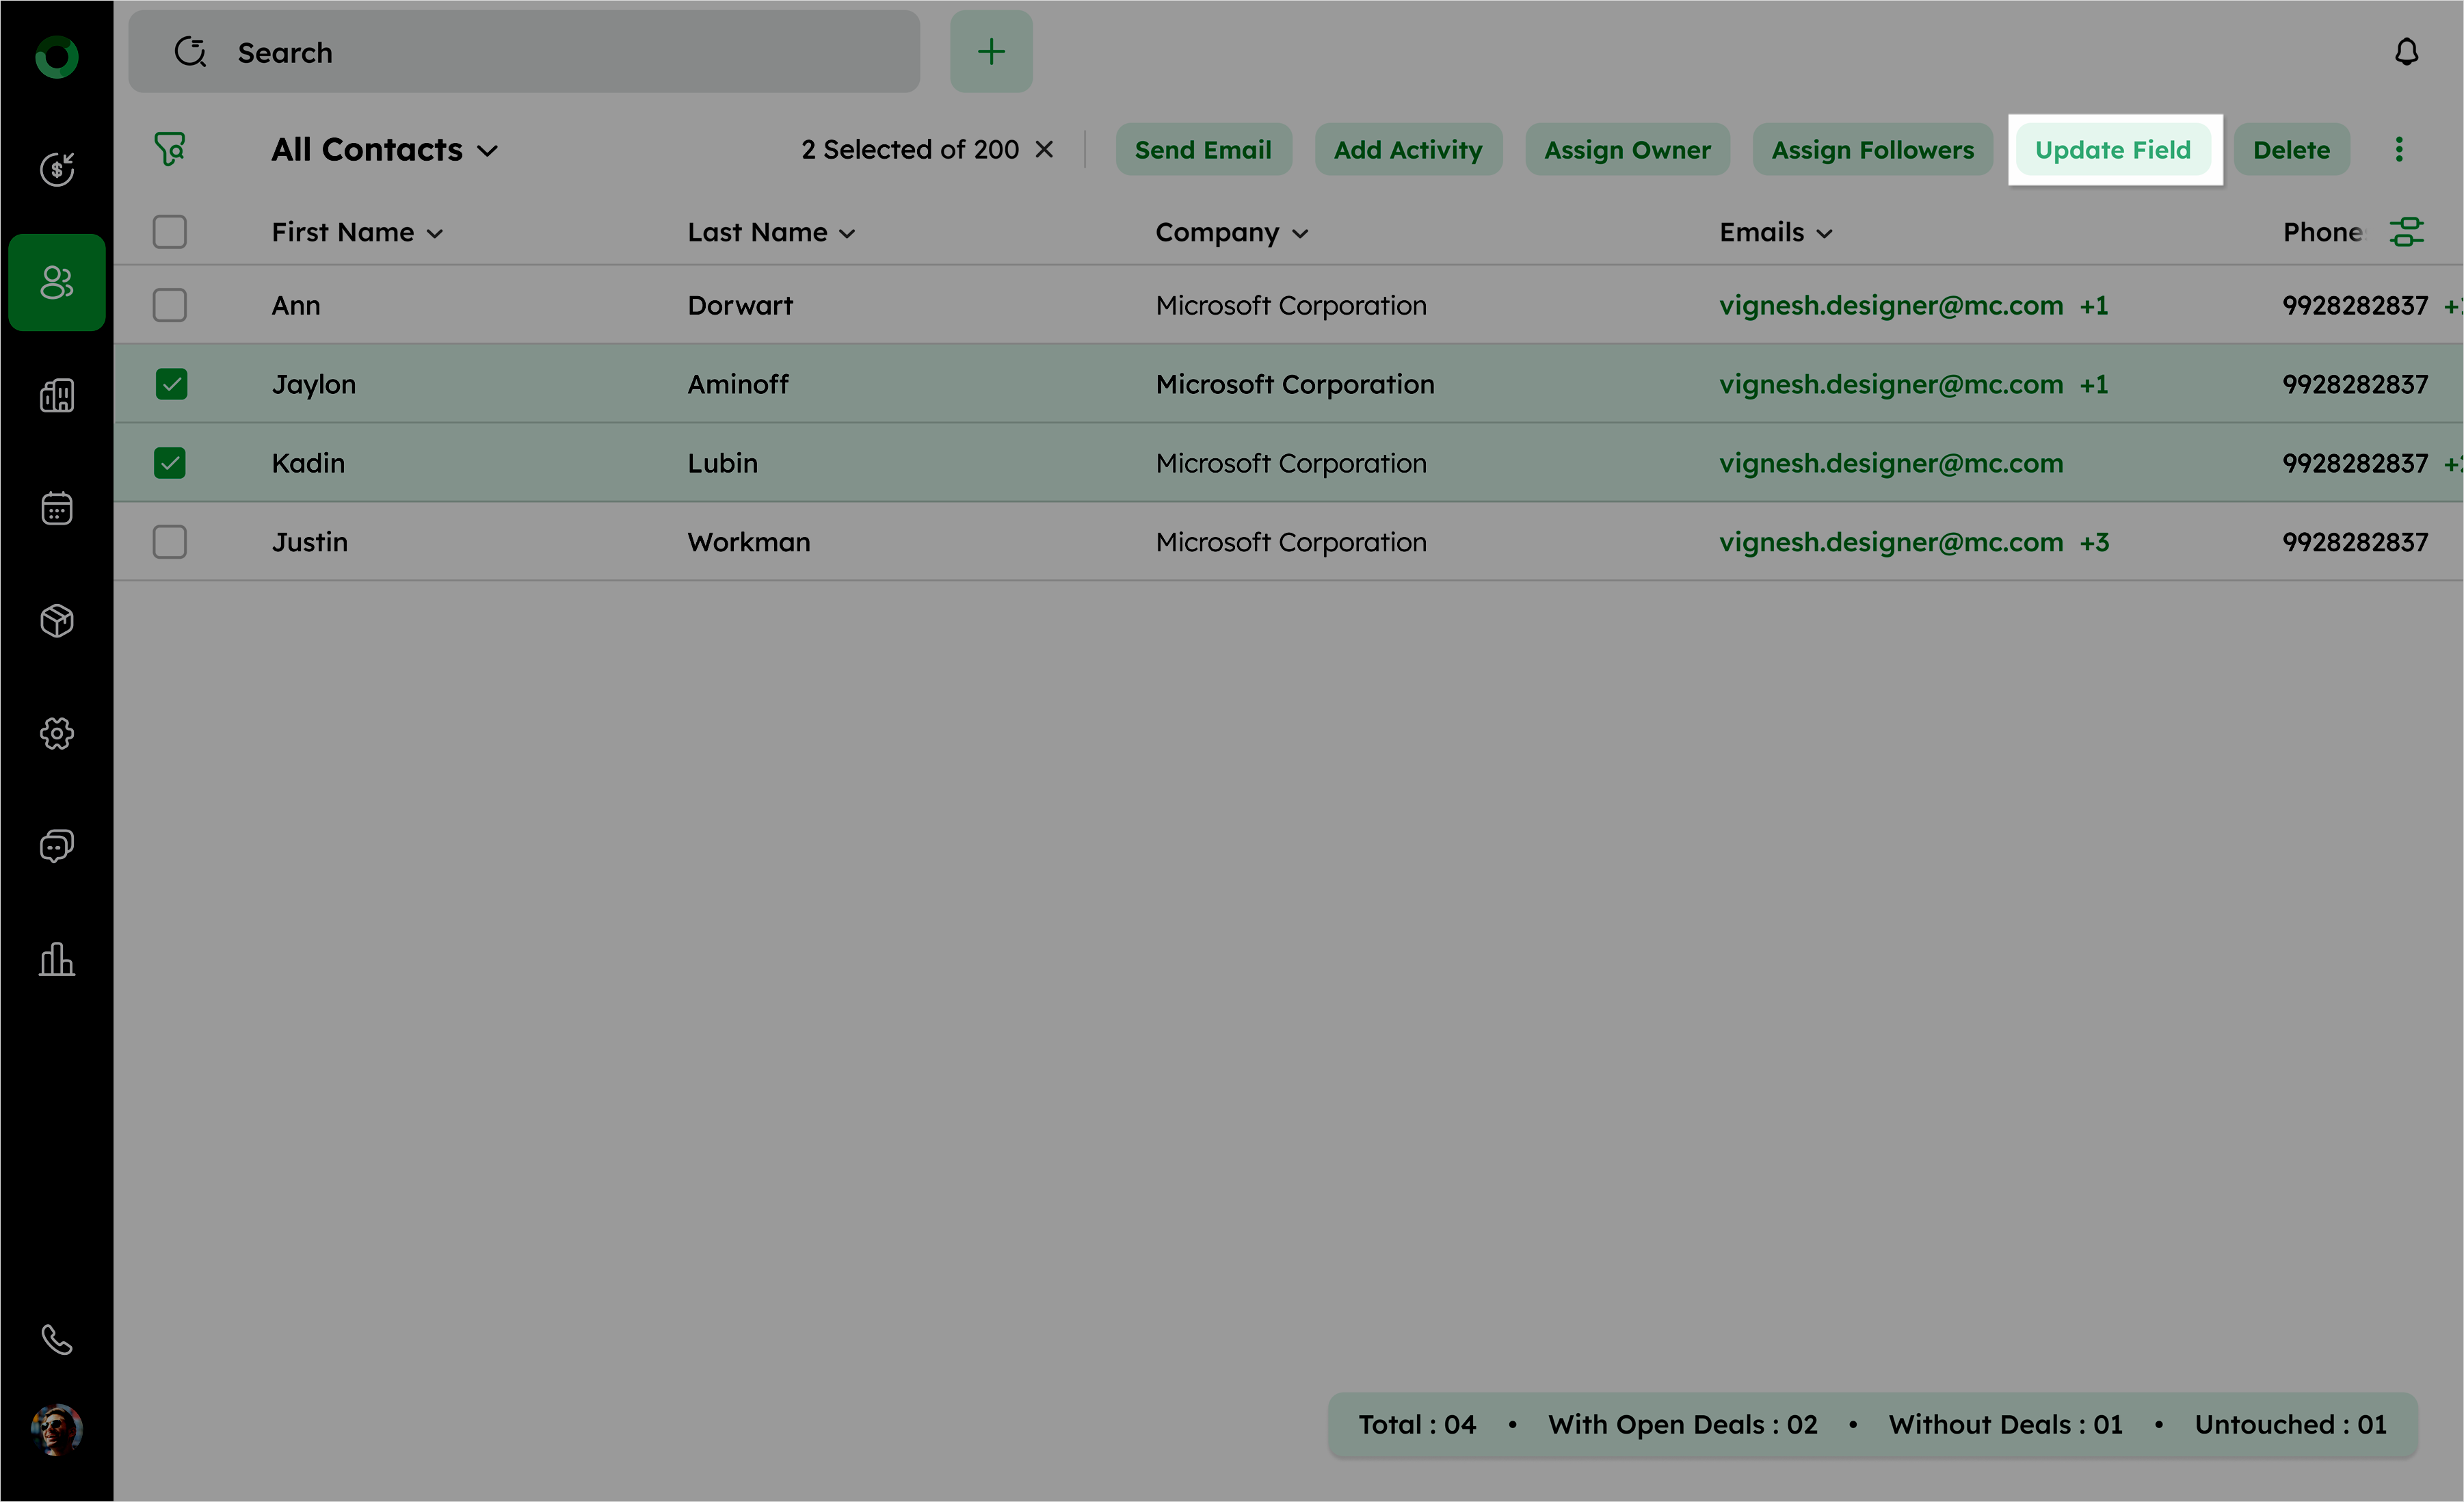
How to Bulk-Update a Field Value Across Multiple Contacts?
The Update Field option allows for rapid updates across multiple contacts, ensuring consistency and reducing errors. It saves time by eliminating the need to edit each contact individually and maintains data accuracy for streamlined operations.
- Access the contact list view and select the checkboxes beside the contacts you want to edit.
- Click the Update Field in the toolbar. The Update Field drawer will open .
- Click on the dropdown list under the Select Field drawer. Choose the field you want to update from the available system and custom fields.
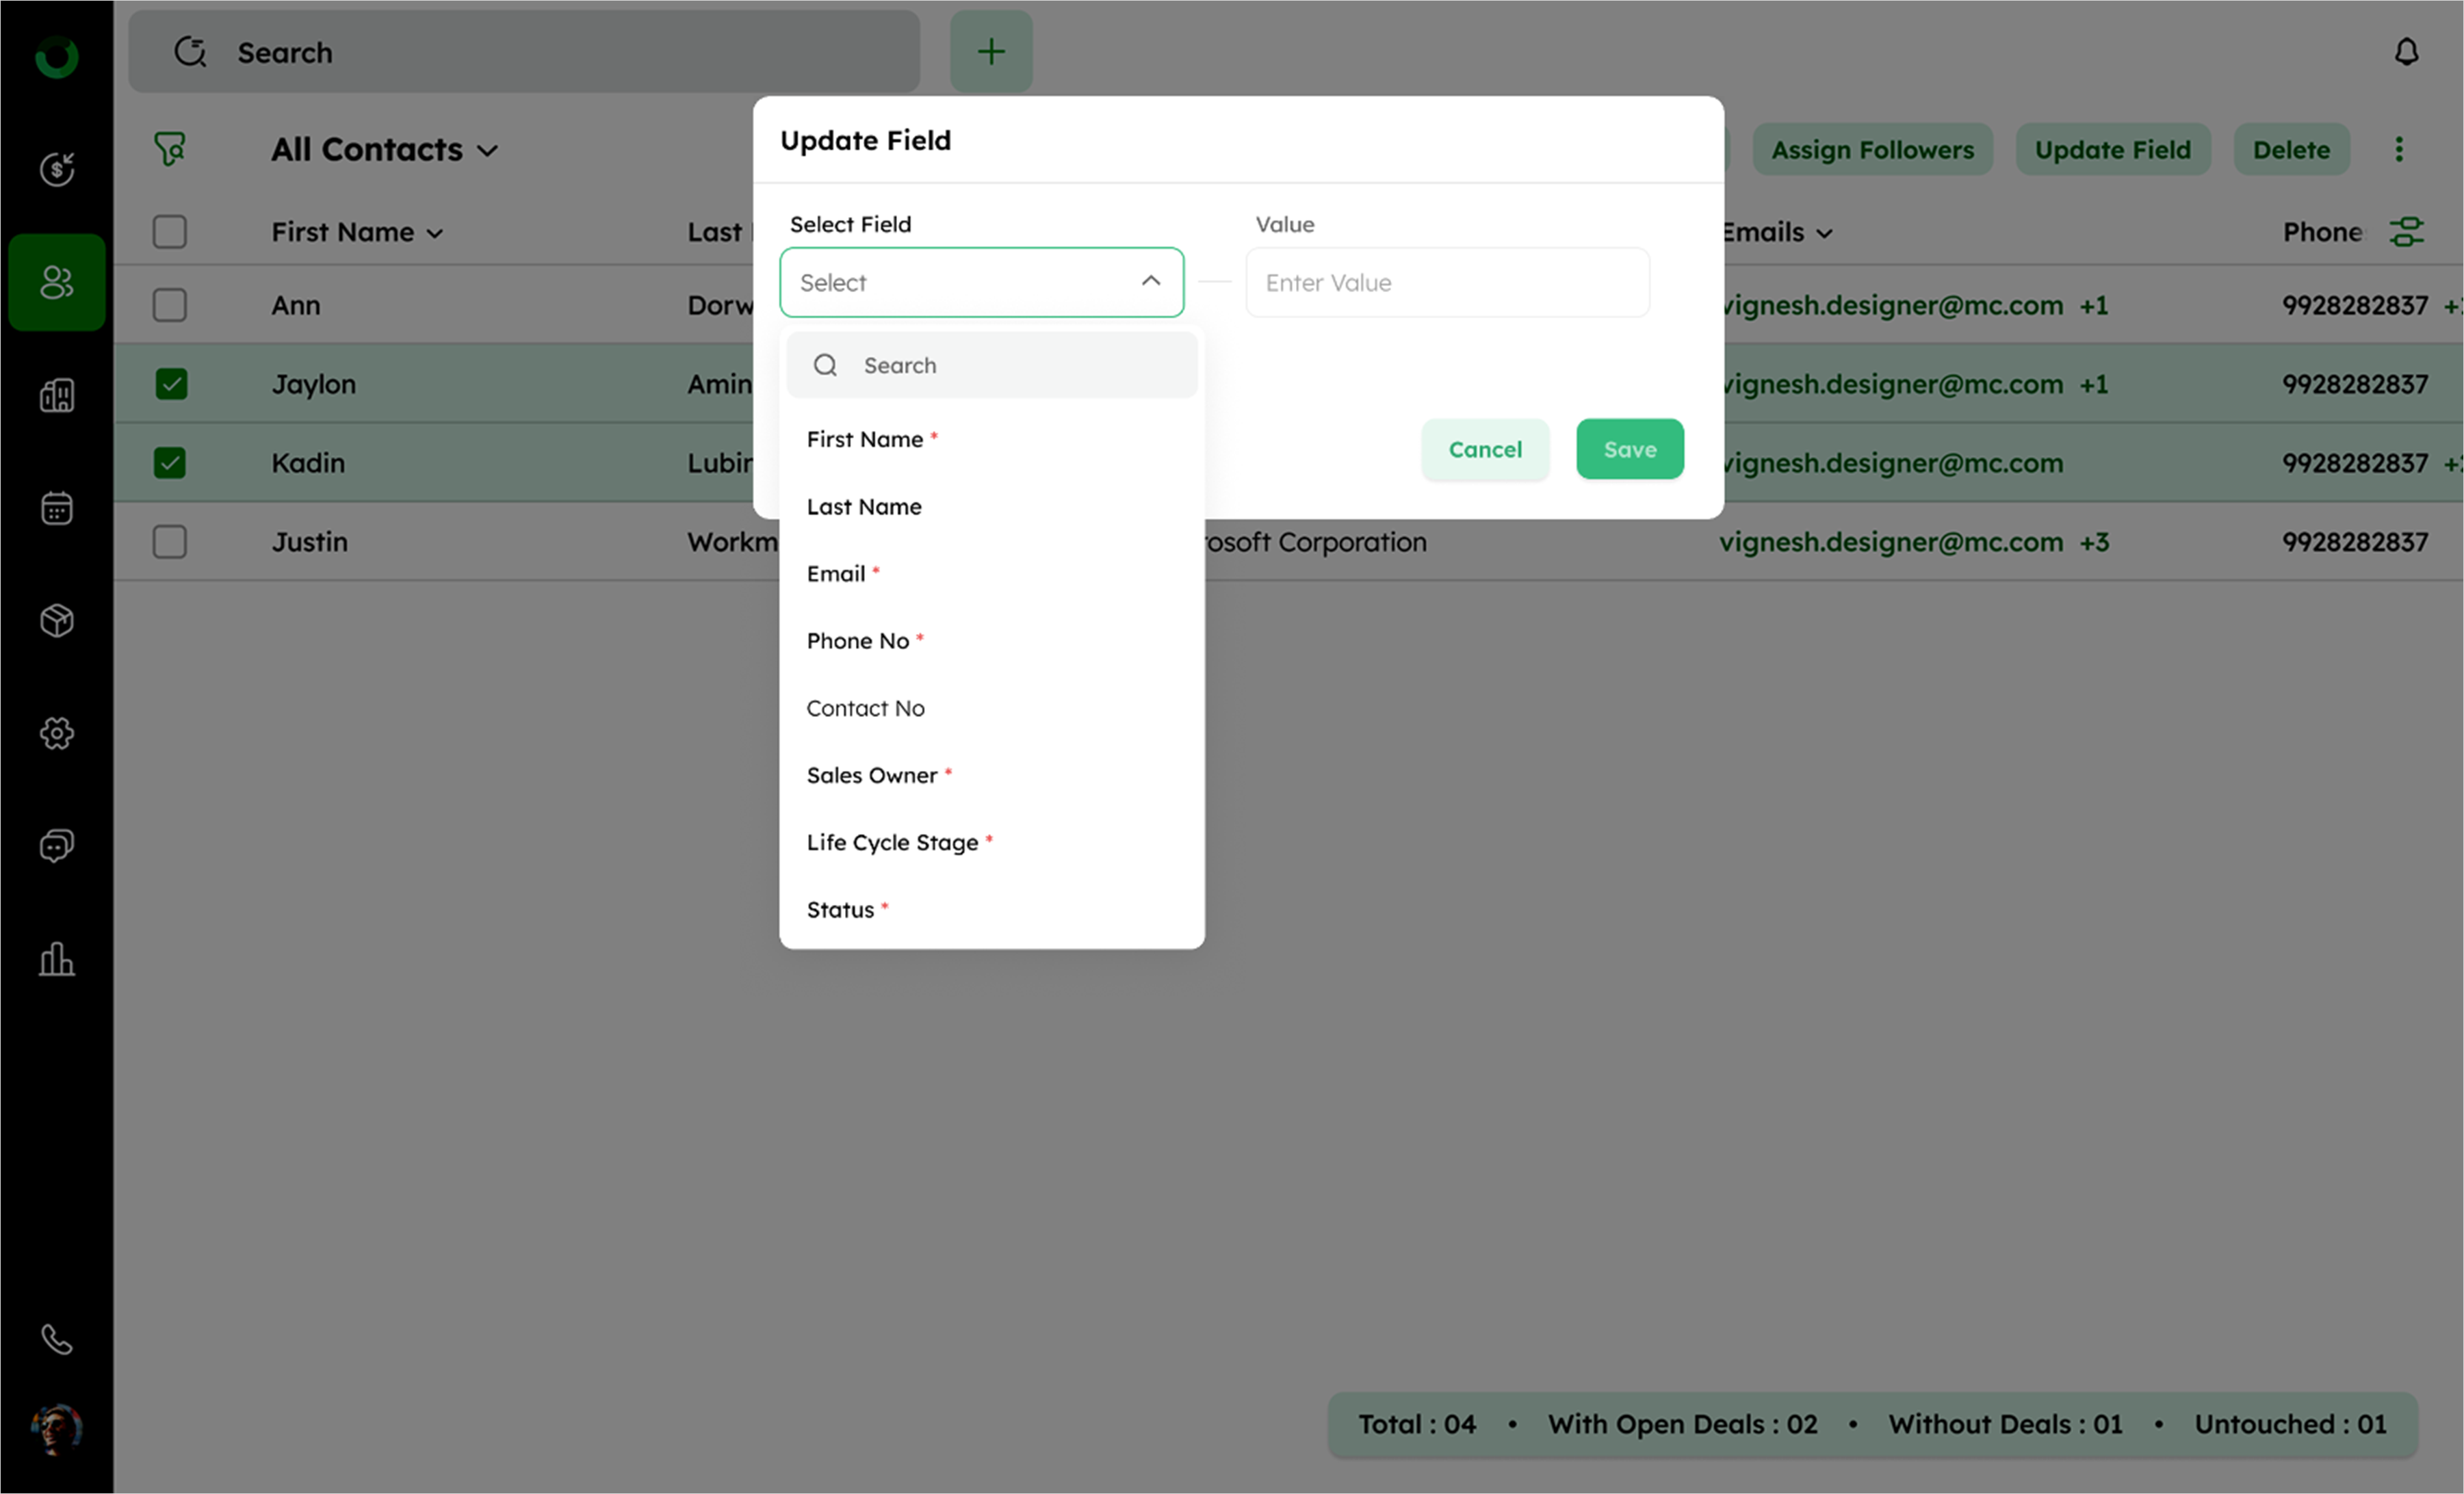
- Fields marked with an asterisk must have values. Non-required fields can be saved with no value, which will remove the existing value.
- Enter the new value. Click Save to apply changes.
- All contact fields are available in the dropdown except for the auto-generated fields.
- If no value is selected and you try to click Add More Field or Save, a red validation line will appear.
- After the contact creation, if the required field is marked, updating other fields will trigger a validation message.
How Do I Bulk-Delete Outdated Contact Records?
Bulk deleting helps you to remove outdated or duplicate contacts. This keeps your contact list up to date.
- Go to the Contact List View.
- Select the checkboxes next to the contacts you want to delete.
- Click the Delete button in the toolbar.

- In the confirmation dialog box, click Delete to confirm the deletion.
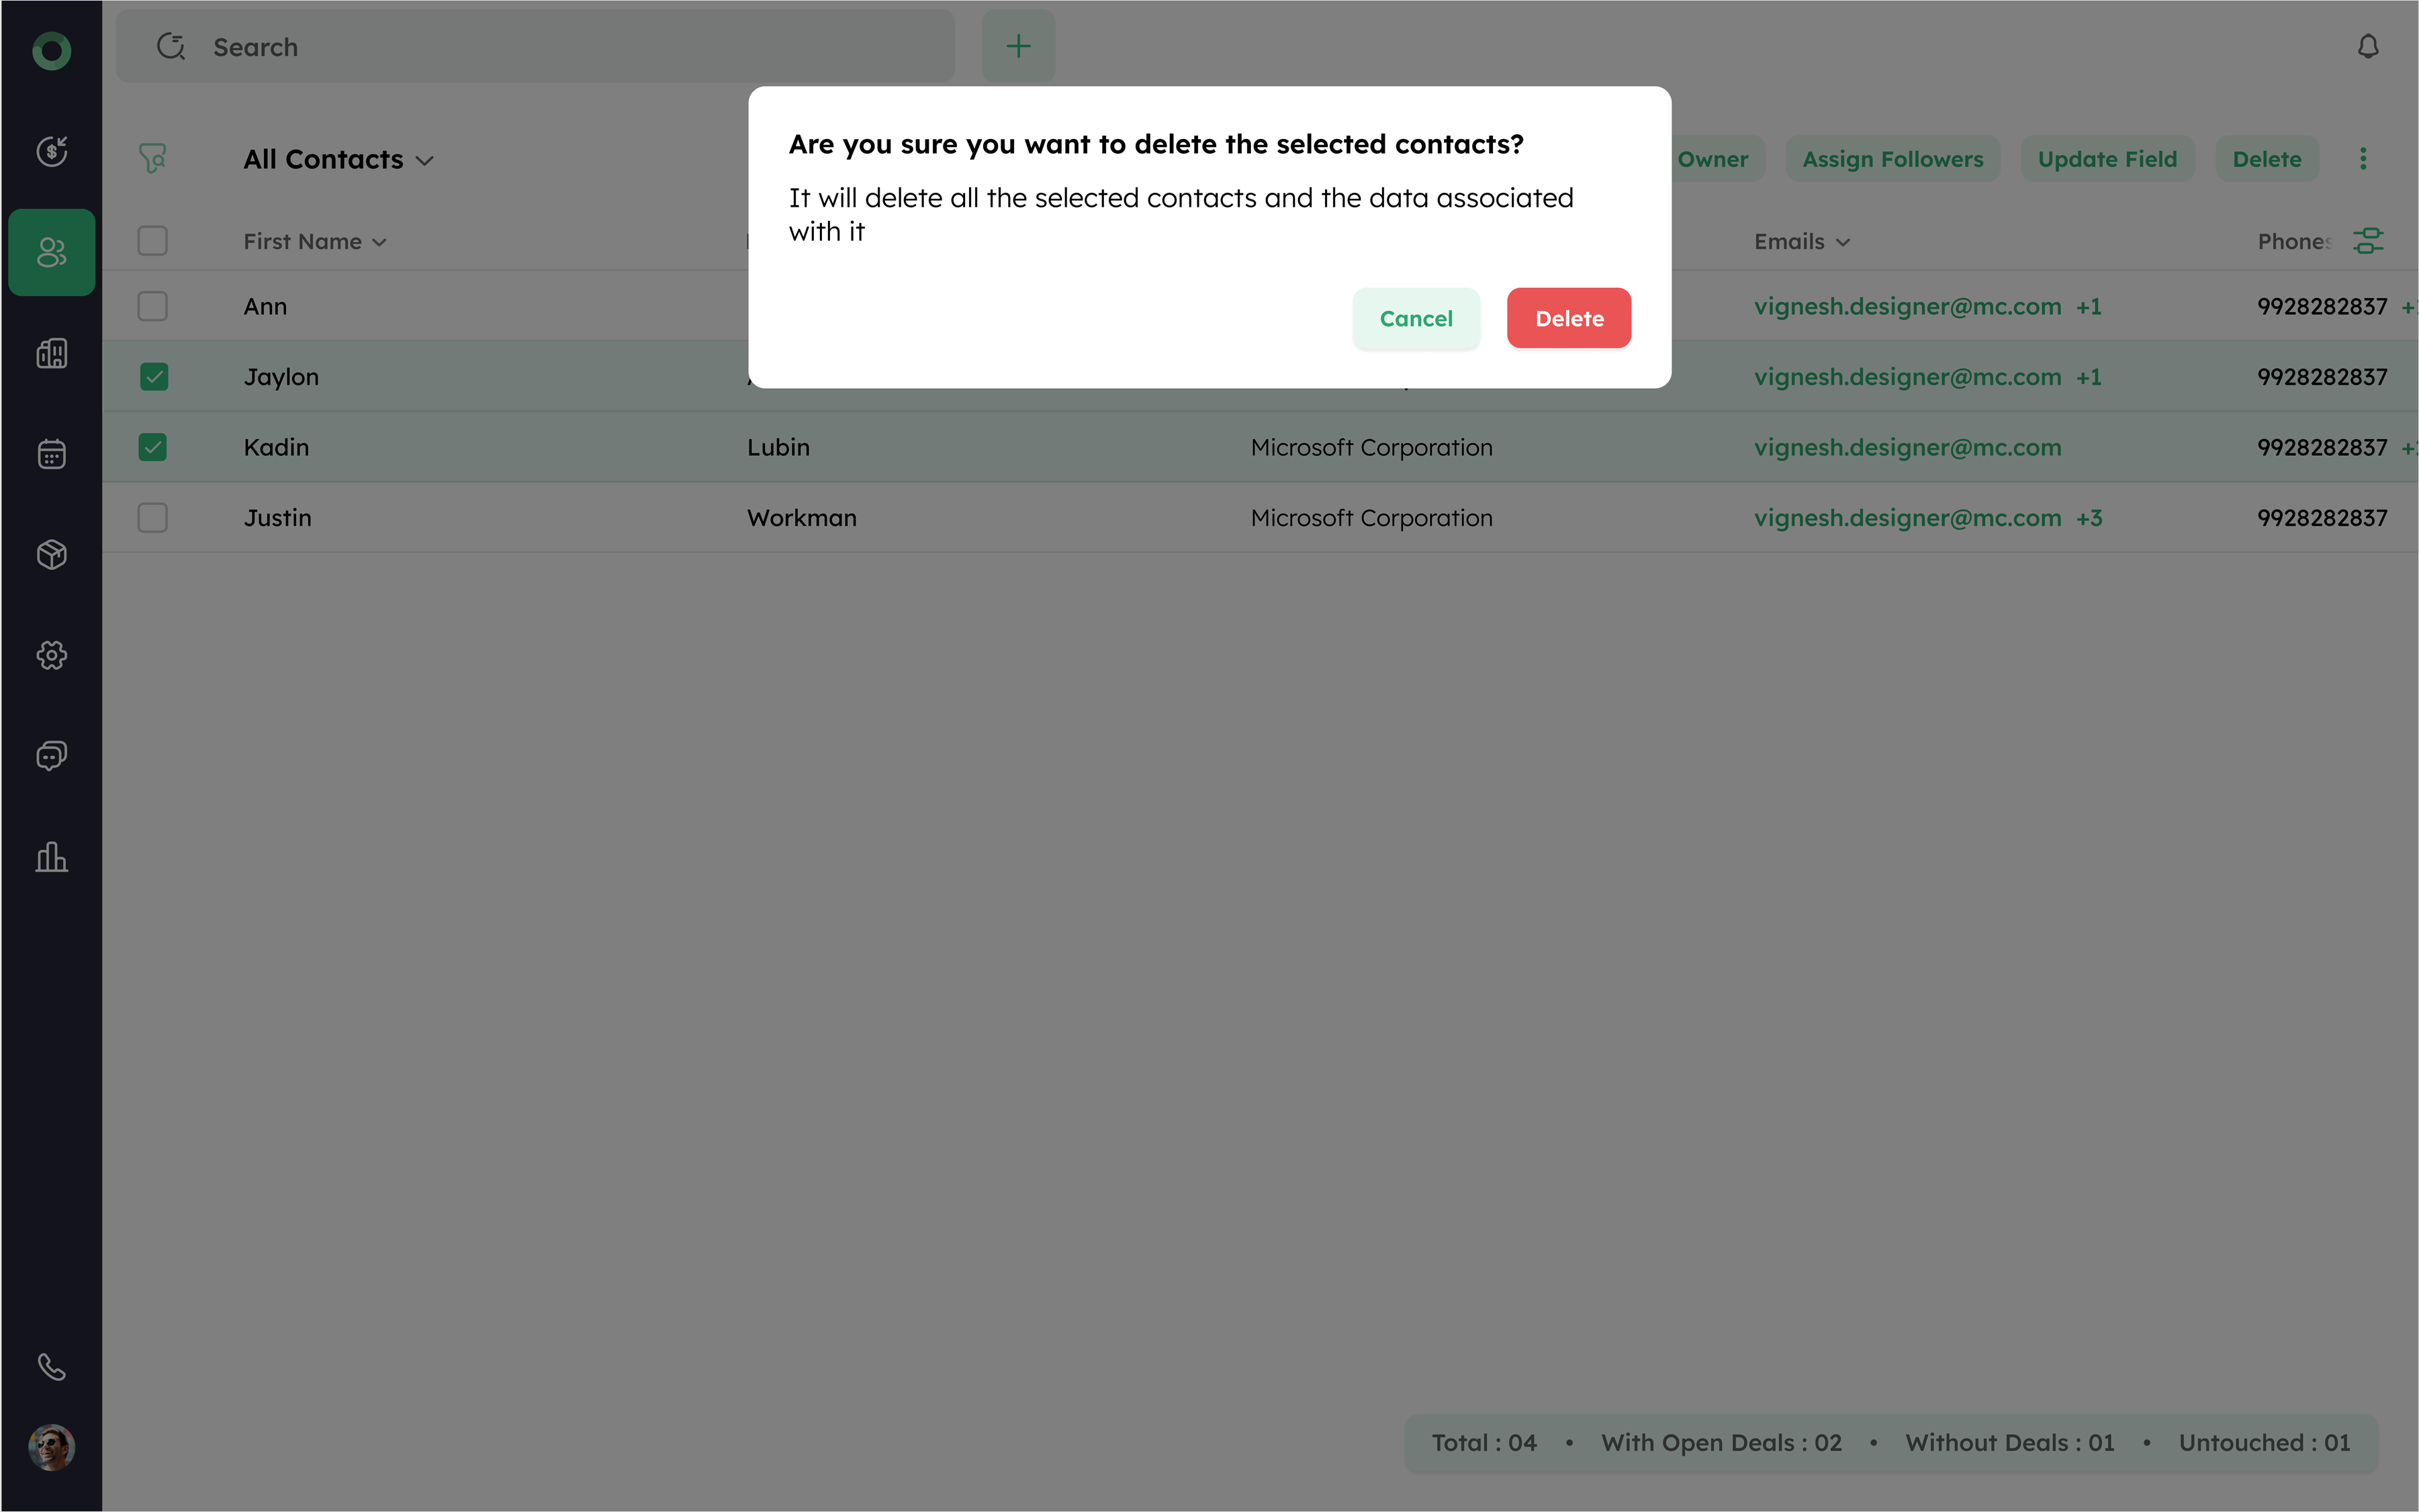
Deleted contacts are moved to the Recycle Bin and can be restored if needed.
How to Bulk-Export Contacts for Reporting or Backup?
Bulk exporting contacts allows you to create backups, generate reports and transfer contact information to other systems.
- Go to the Contact List View and select the contacts you want to export by checking their boxes.
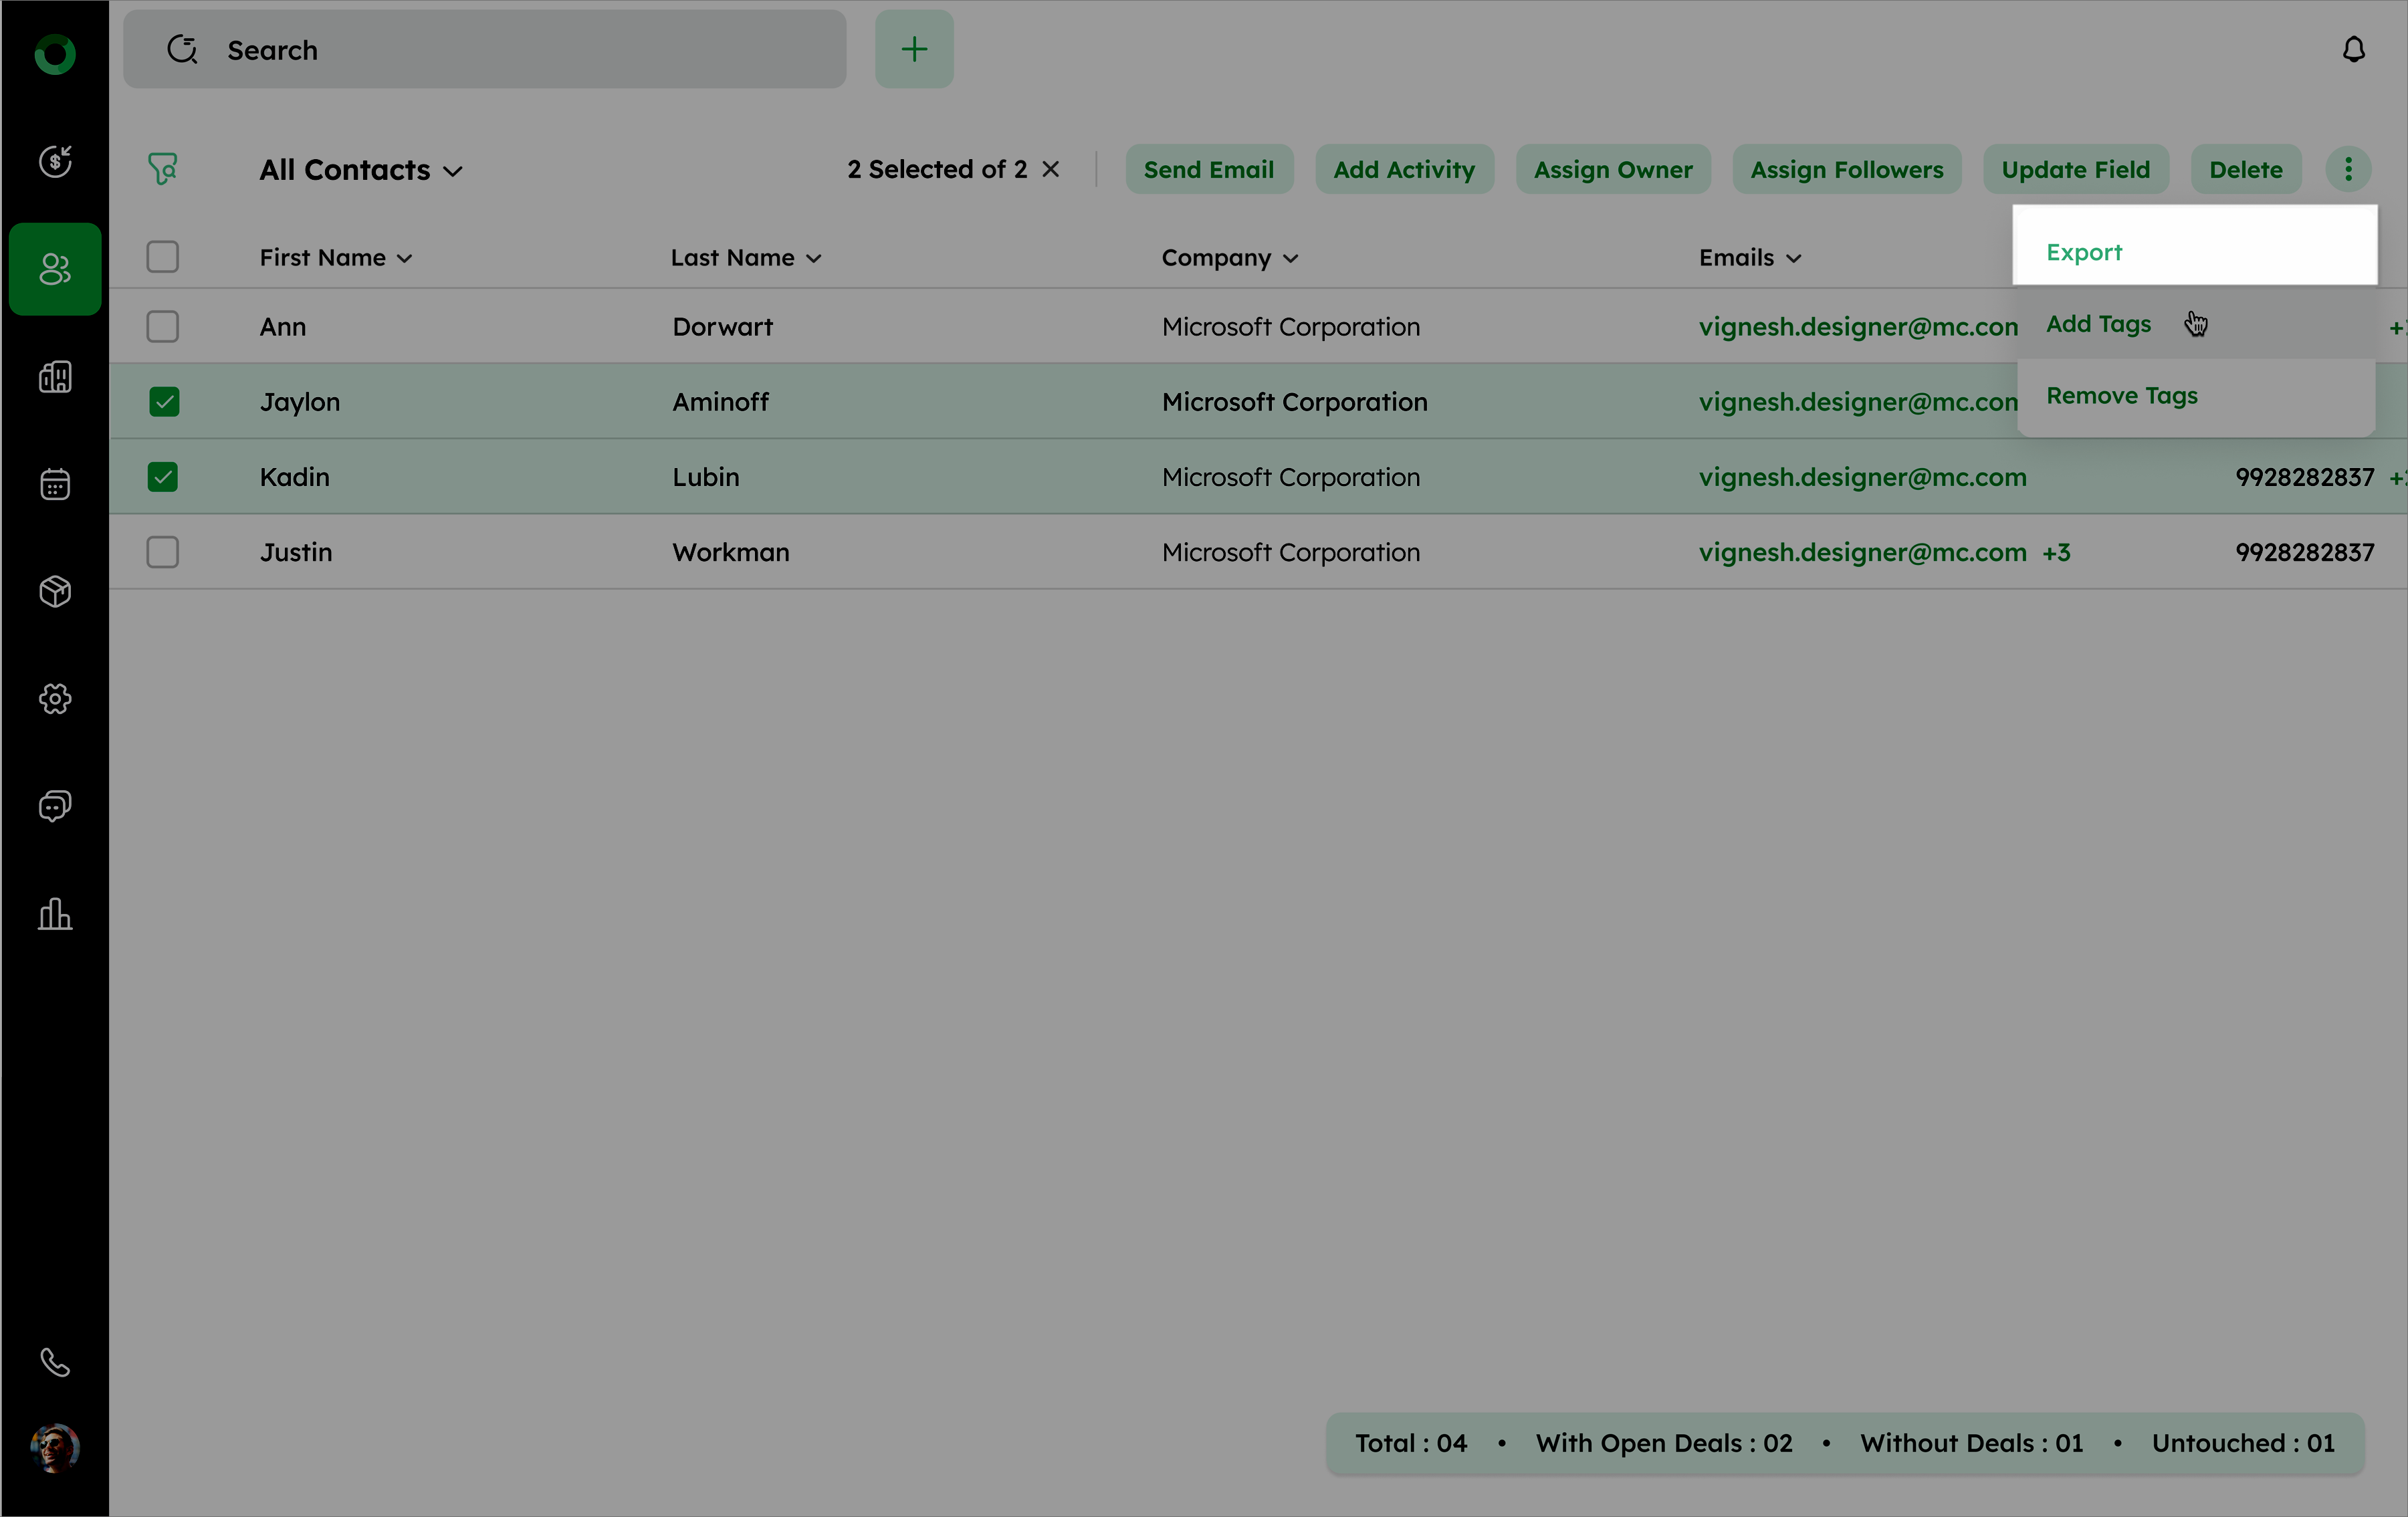
- Click the Export button located under the ellipsis (⁝) icon.
- Choose the desired export format, such as XLSX, XLS, or CSV.
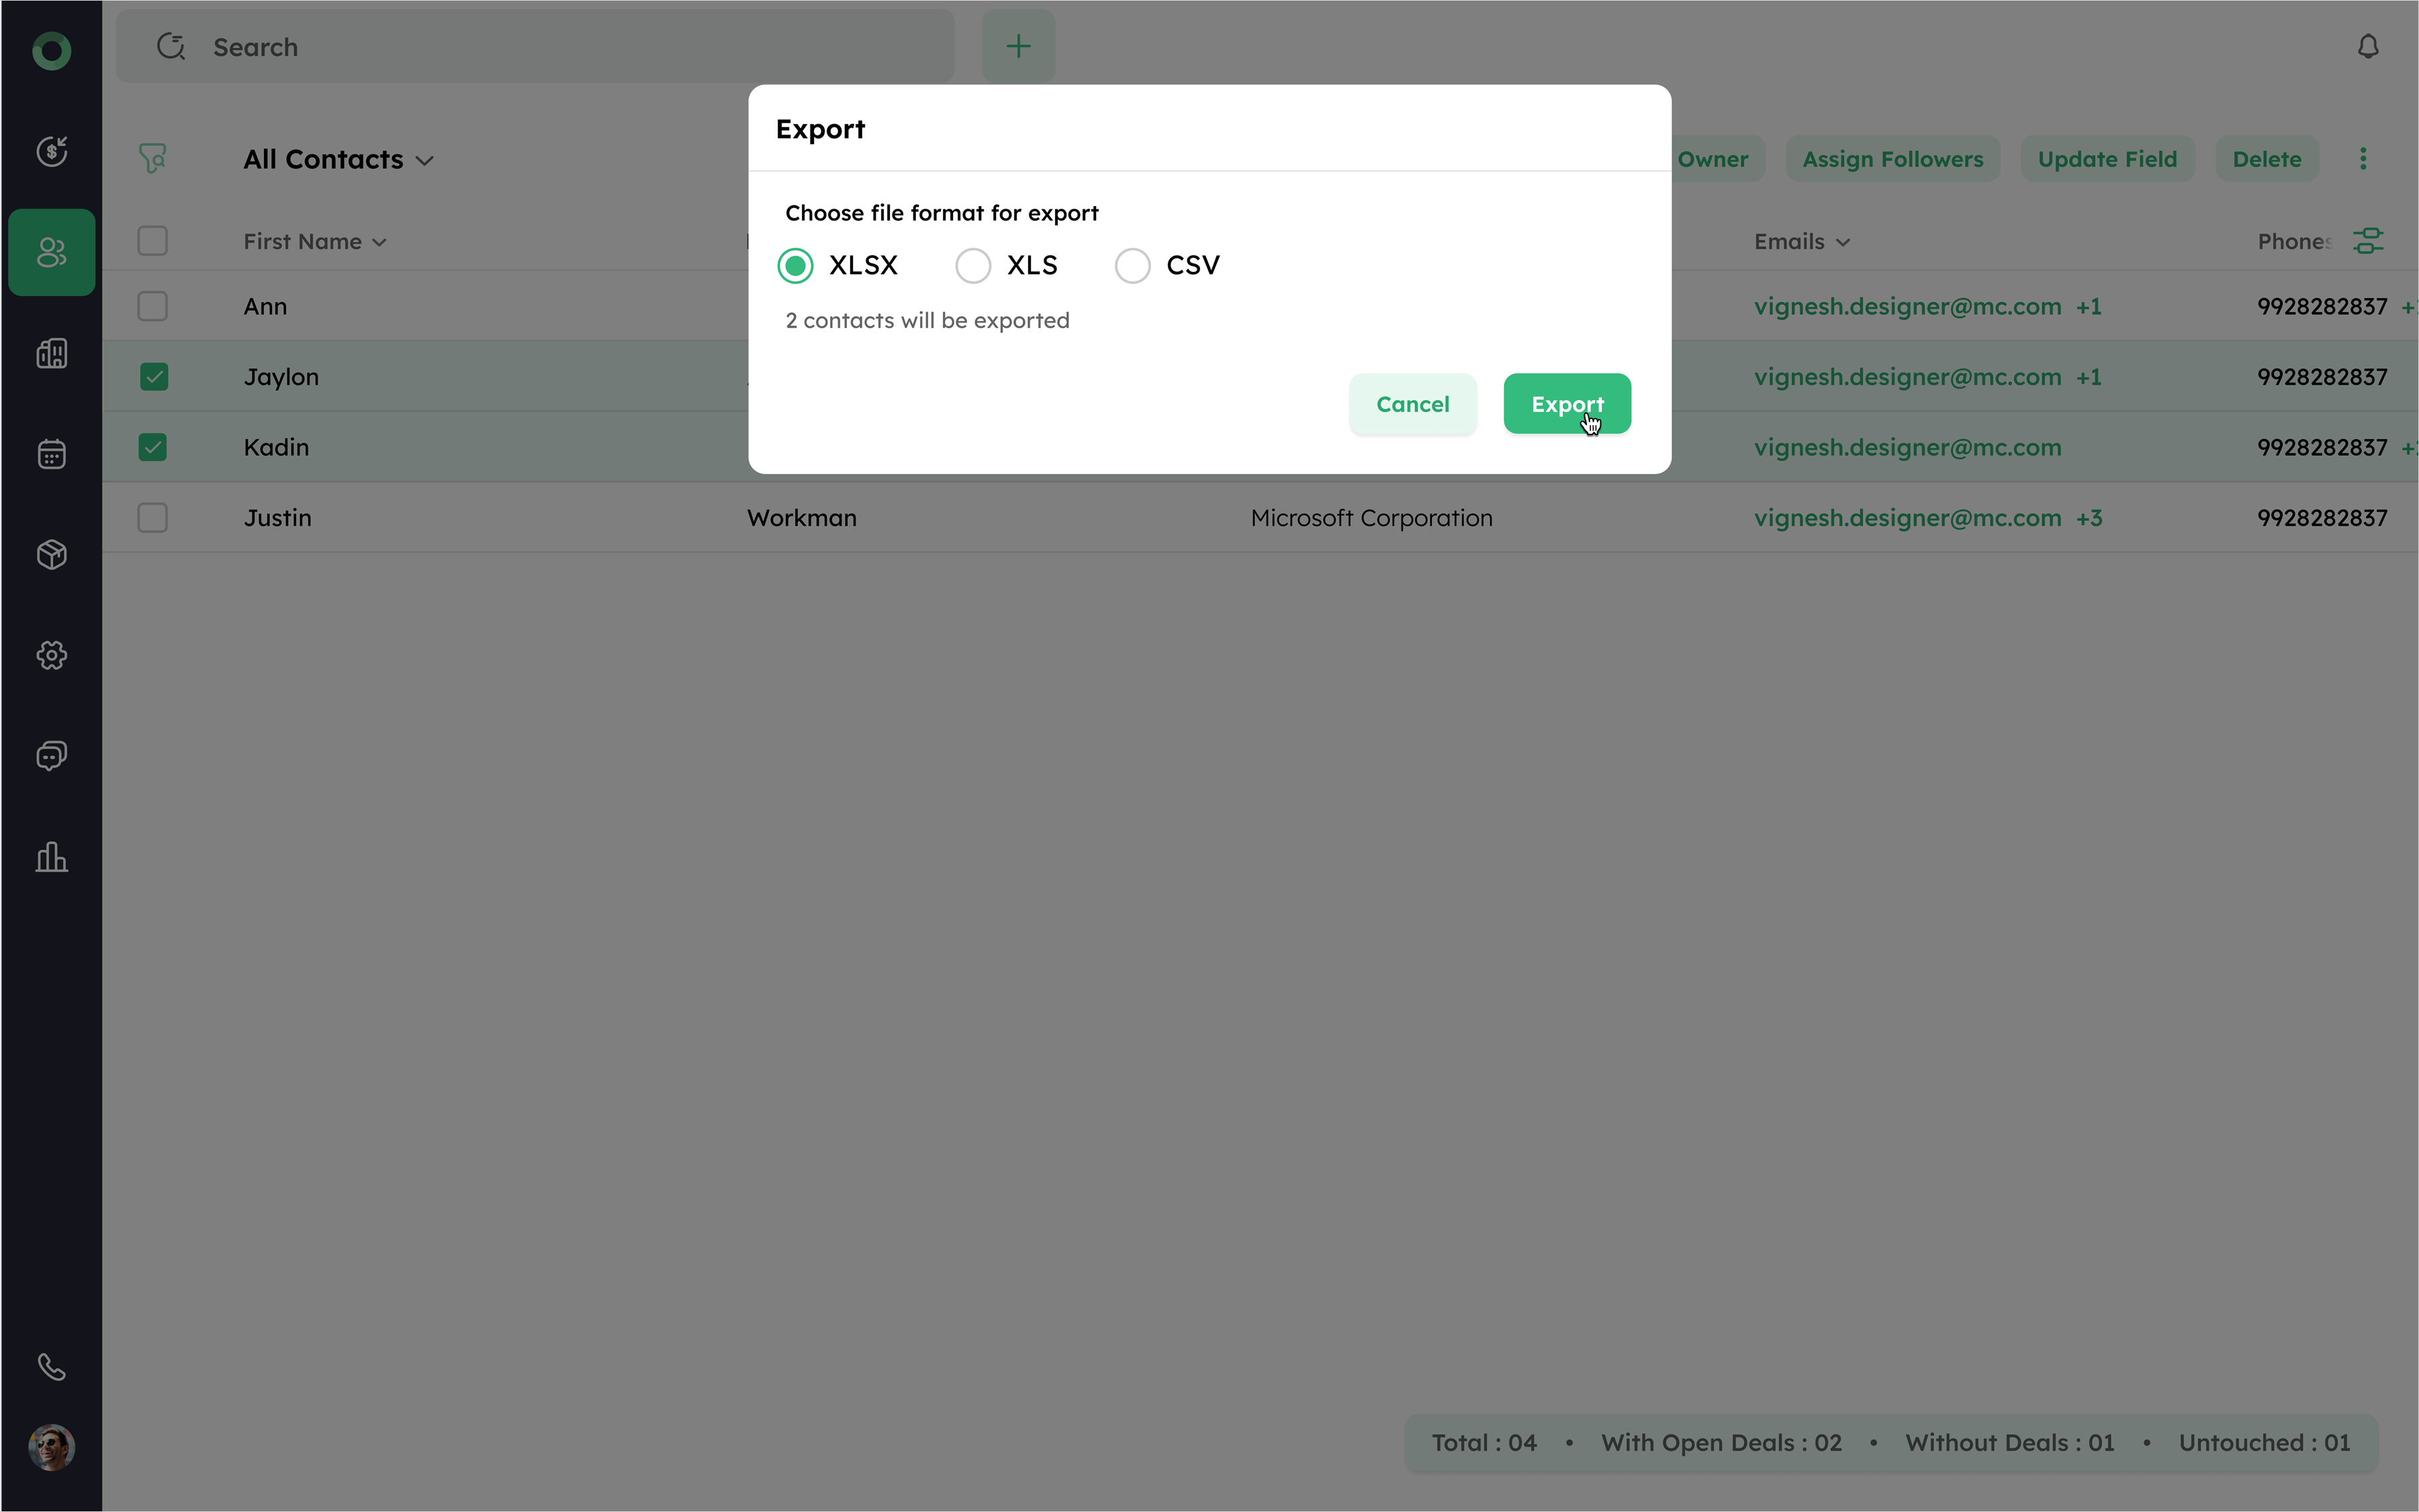
- Click Export to initiate the download process.
Once the export is complete, a download option will appear.
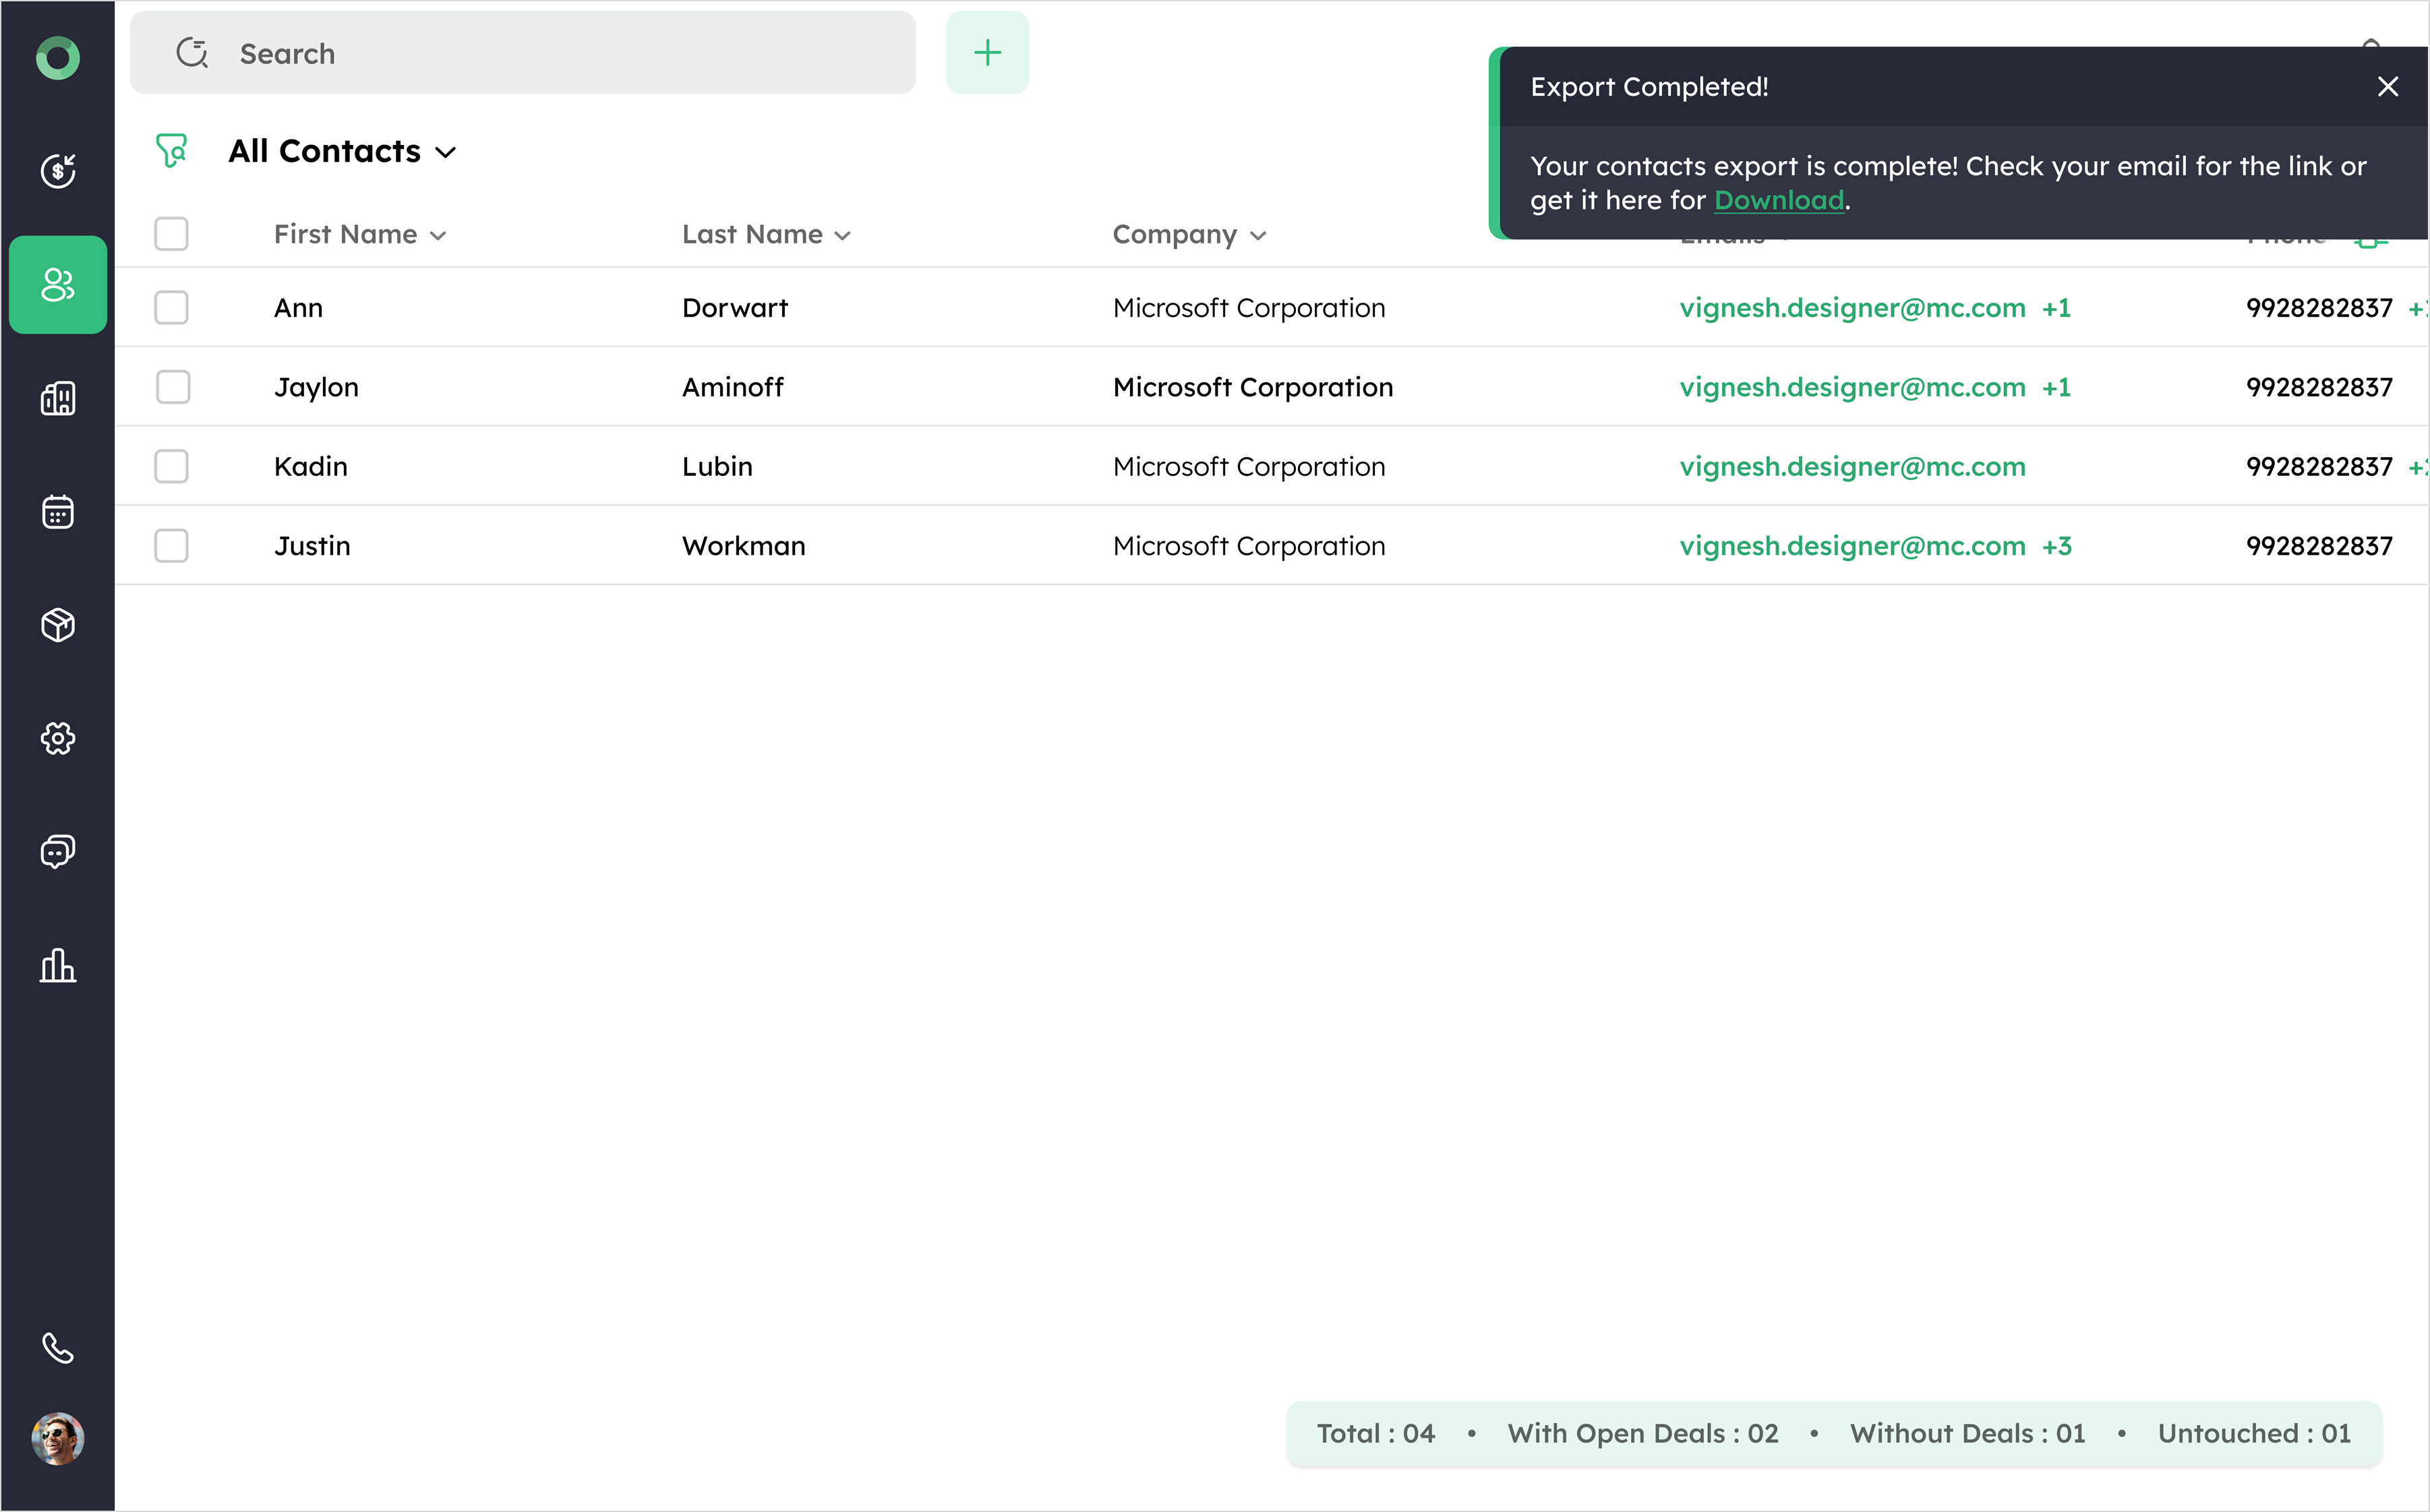
- Click Download to retrieve the exported file and save it to your device.
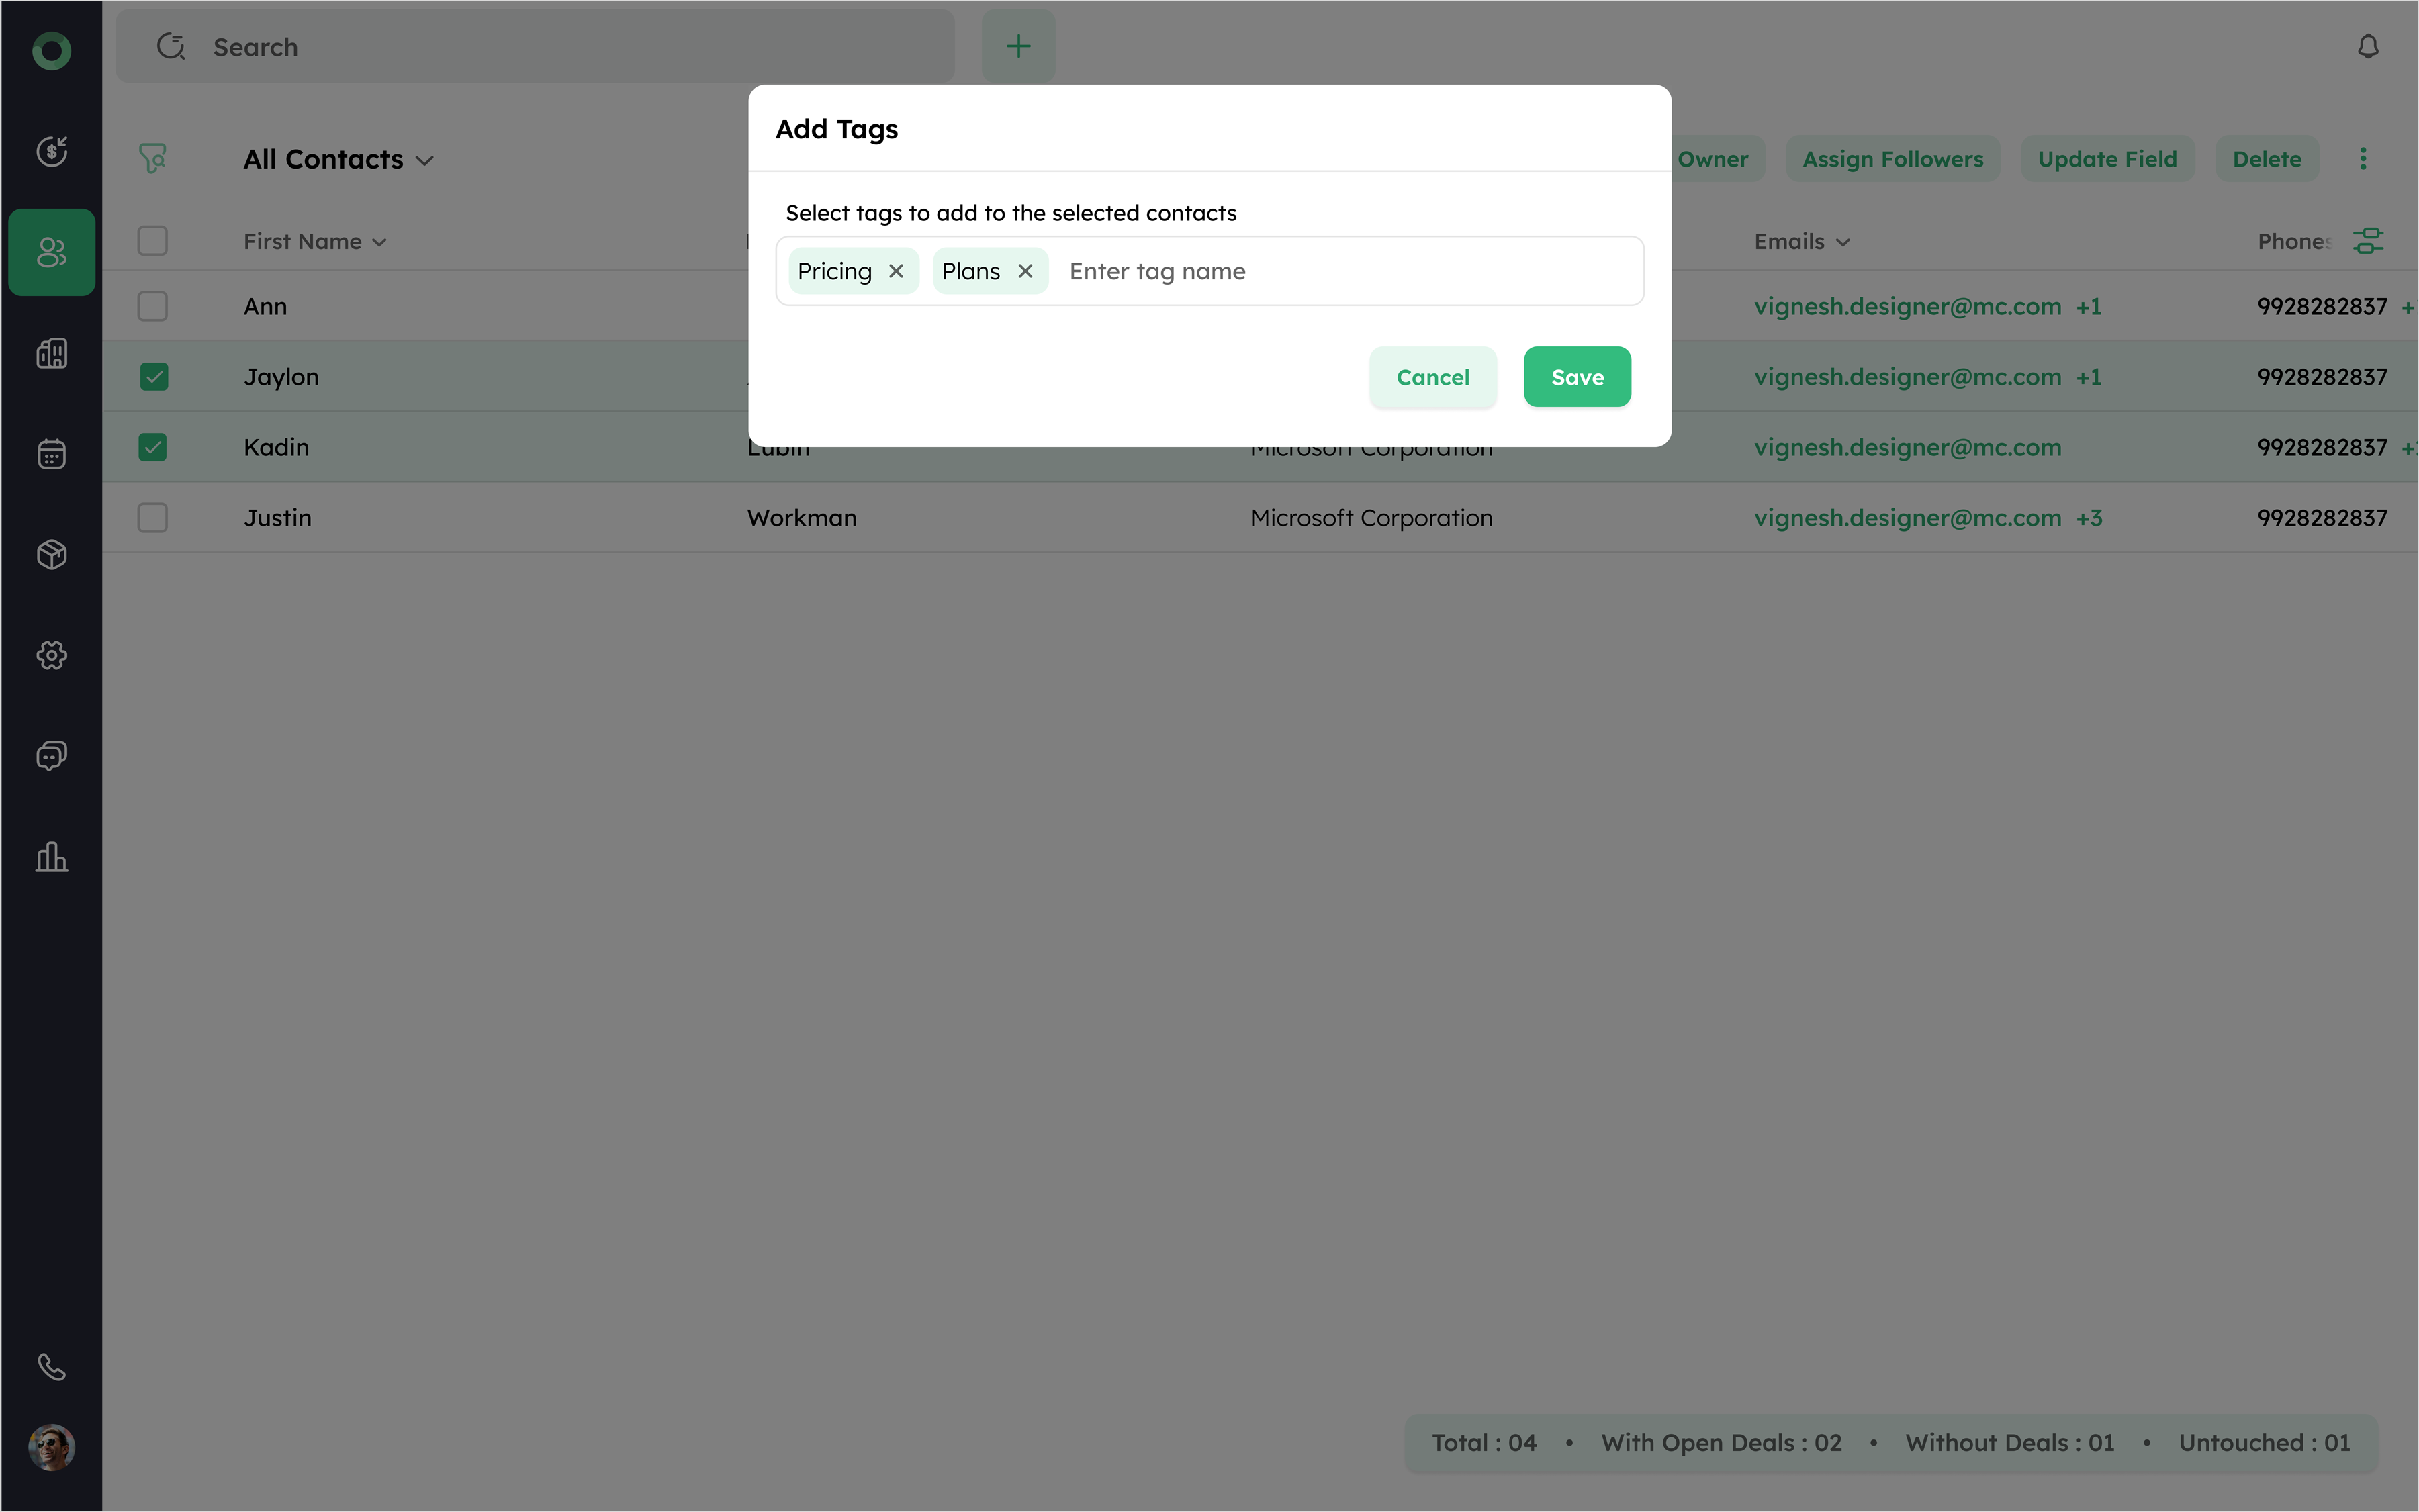
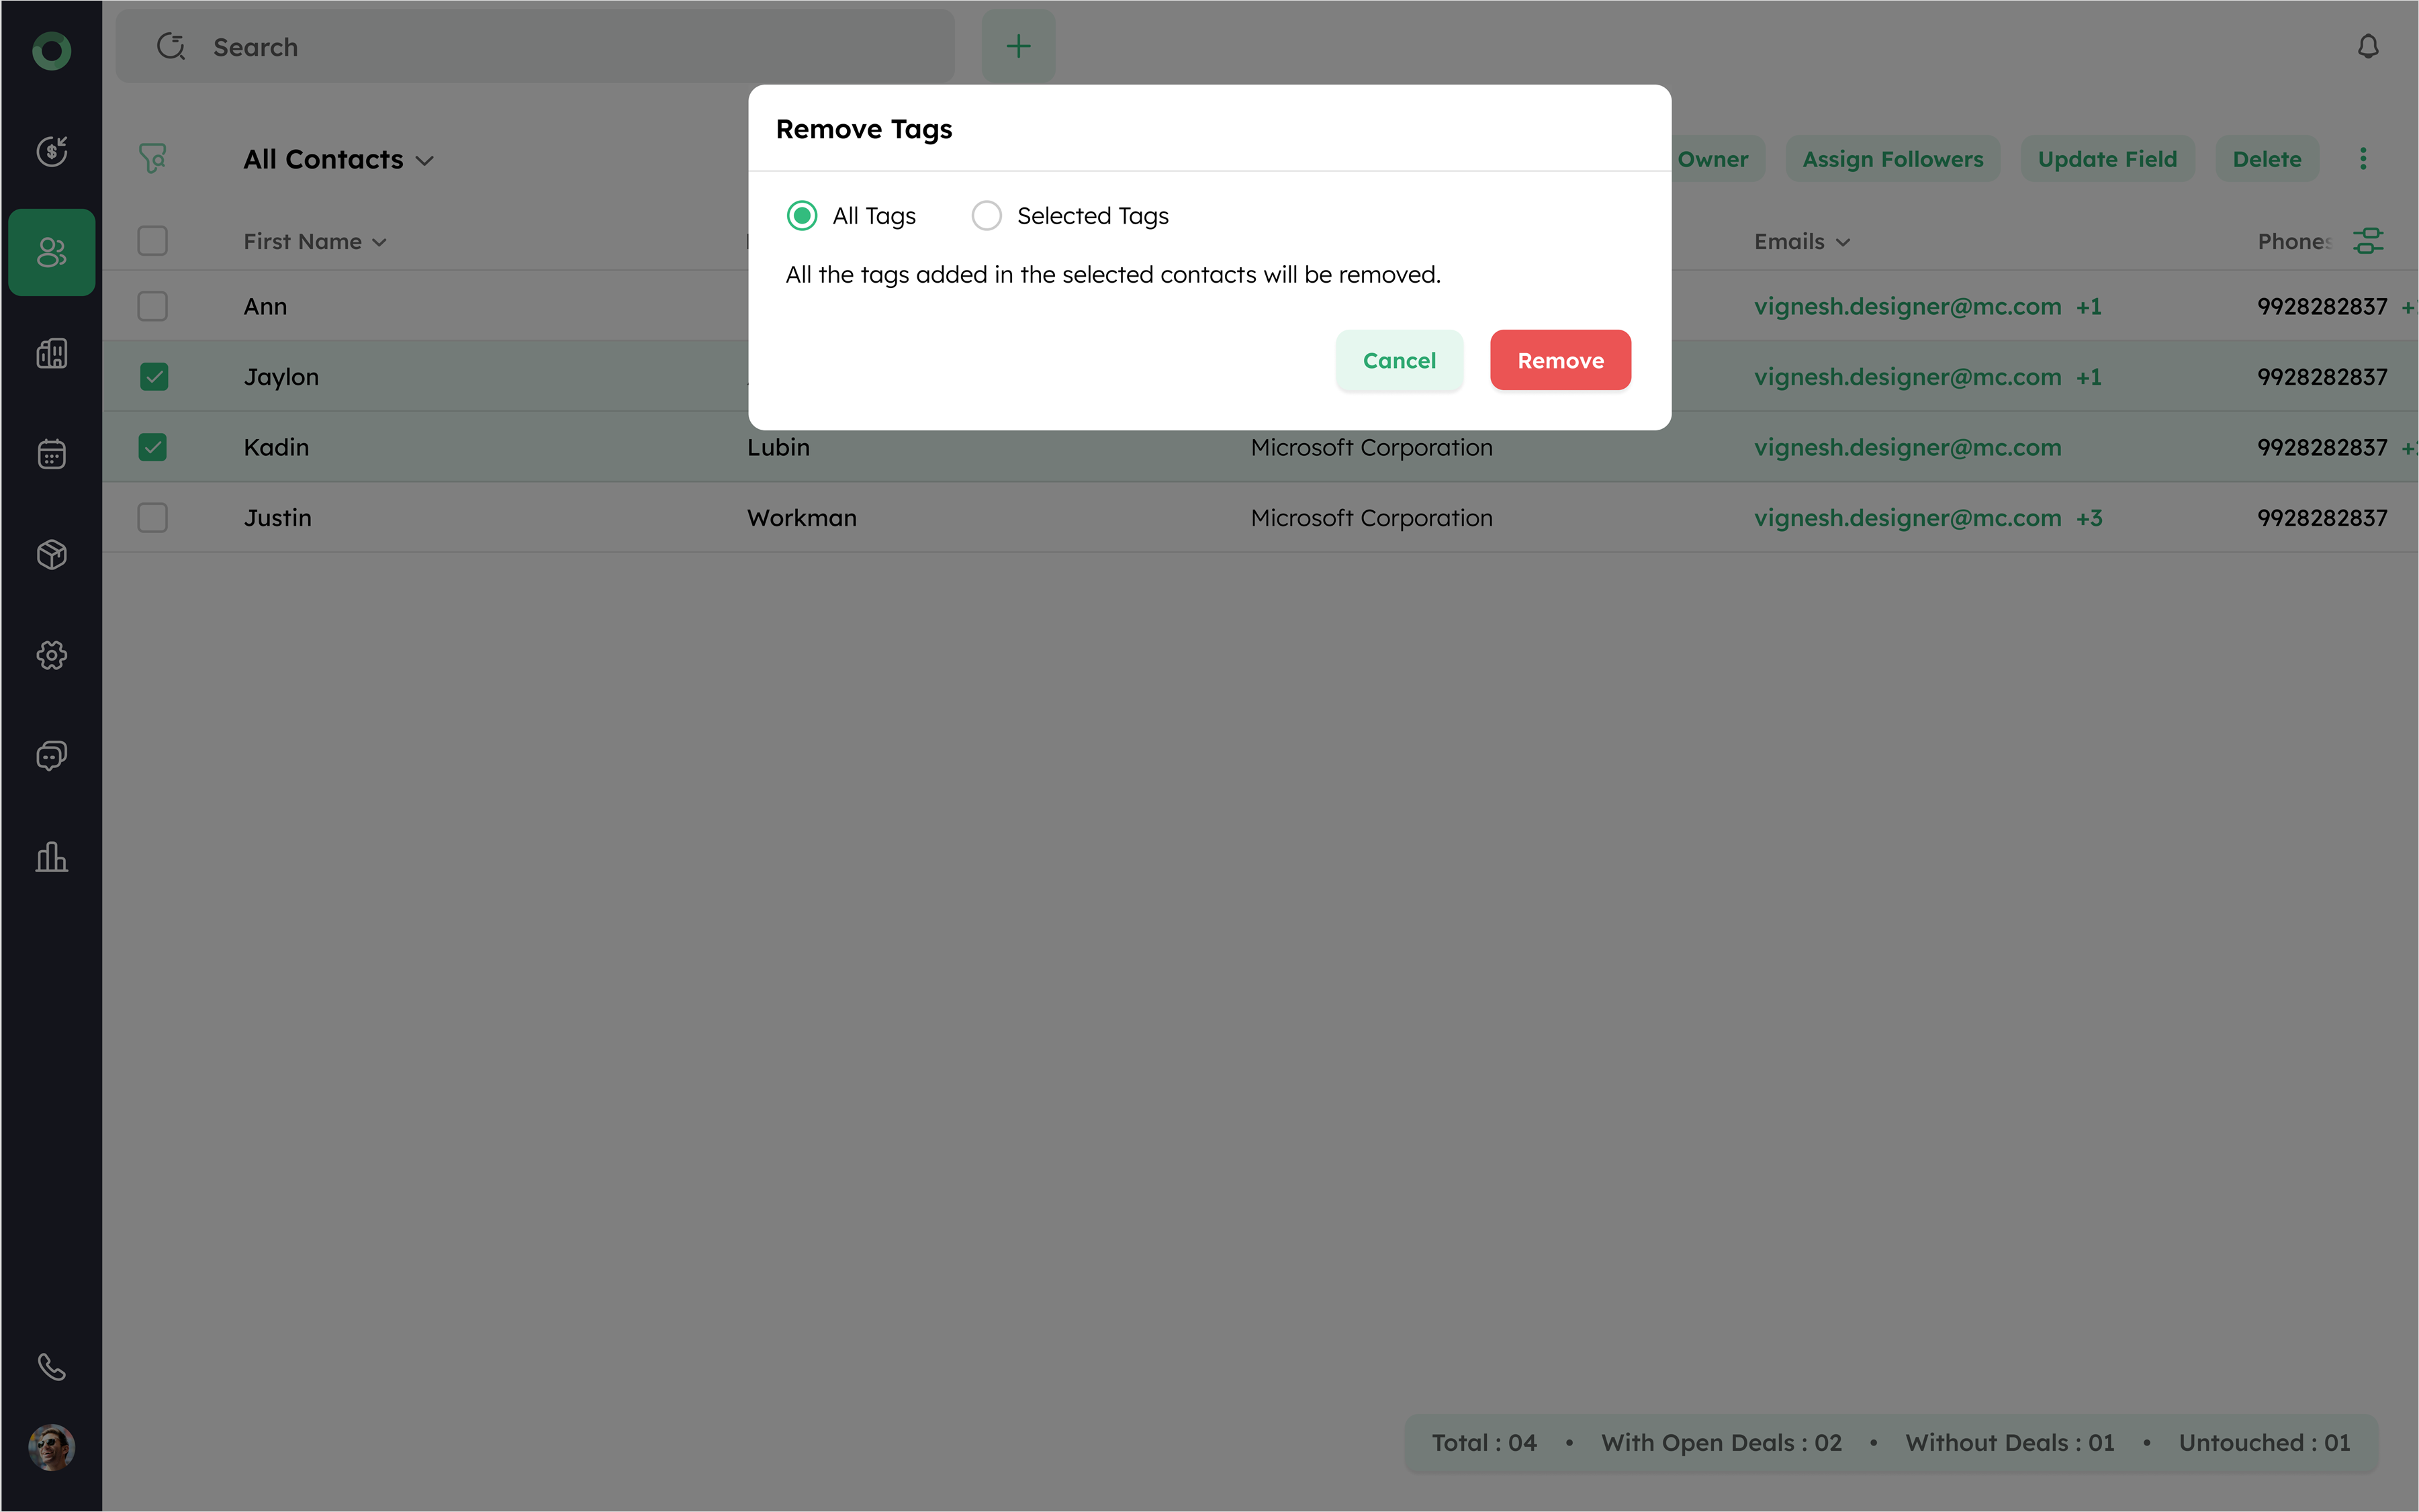
How Can I Bulk-Add or Remove Tags from Contacts?
Bulk tagging or untagging allows you to categorize or recategorize your contacts, also it makes easier to filter and manage them on specific attributes. Plus, it helps to segment records and organize your contact list.
- Access the Contact List View and select the contacts you want to tag or untag using check boxes.
- Click the Add Tags/Remove Tags button located under the ellipsis (⁝) icon.
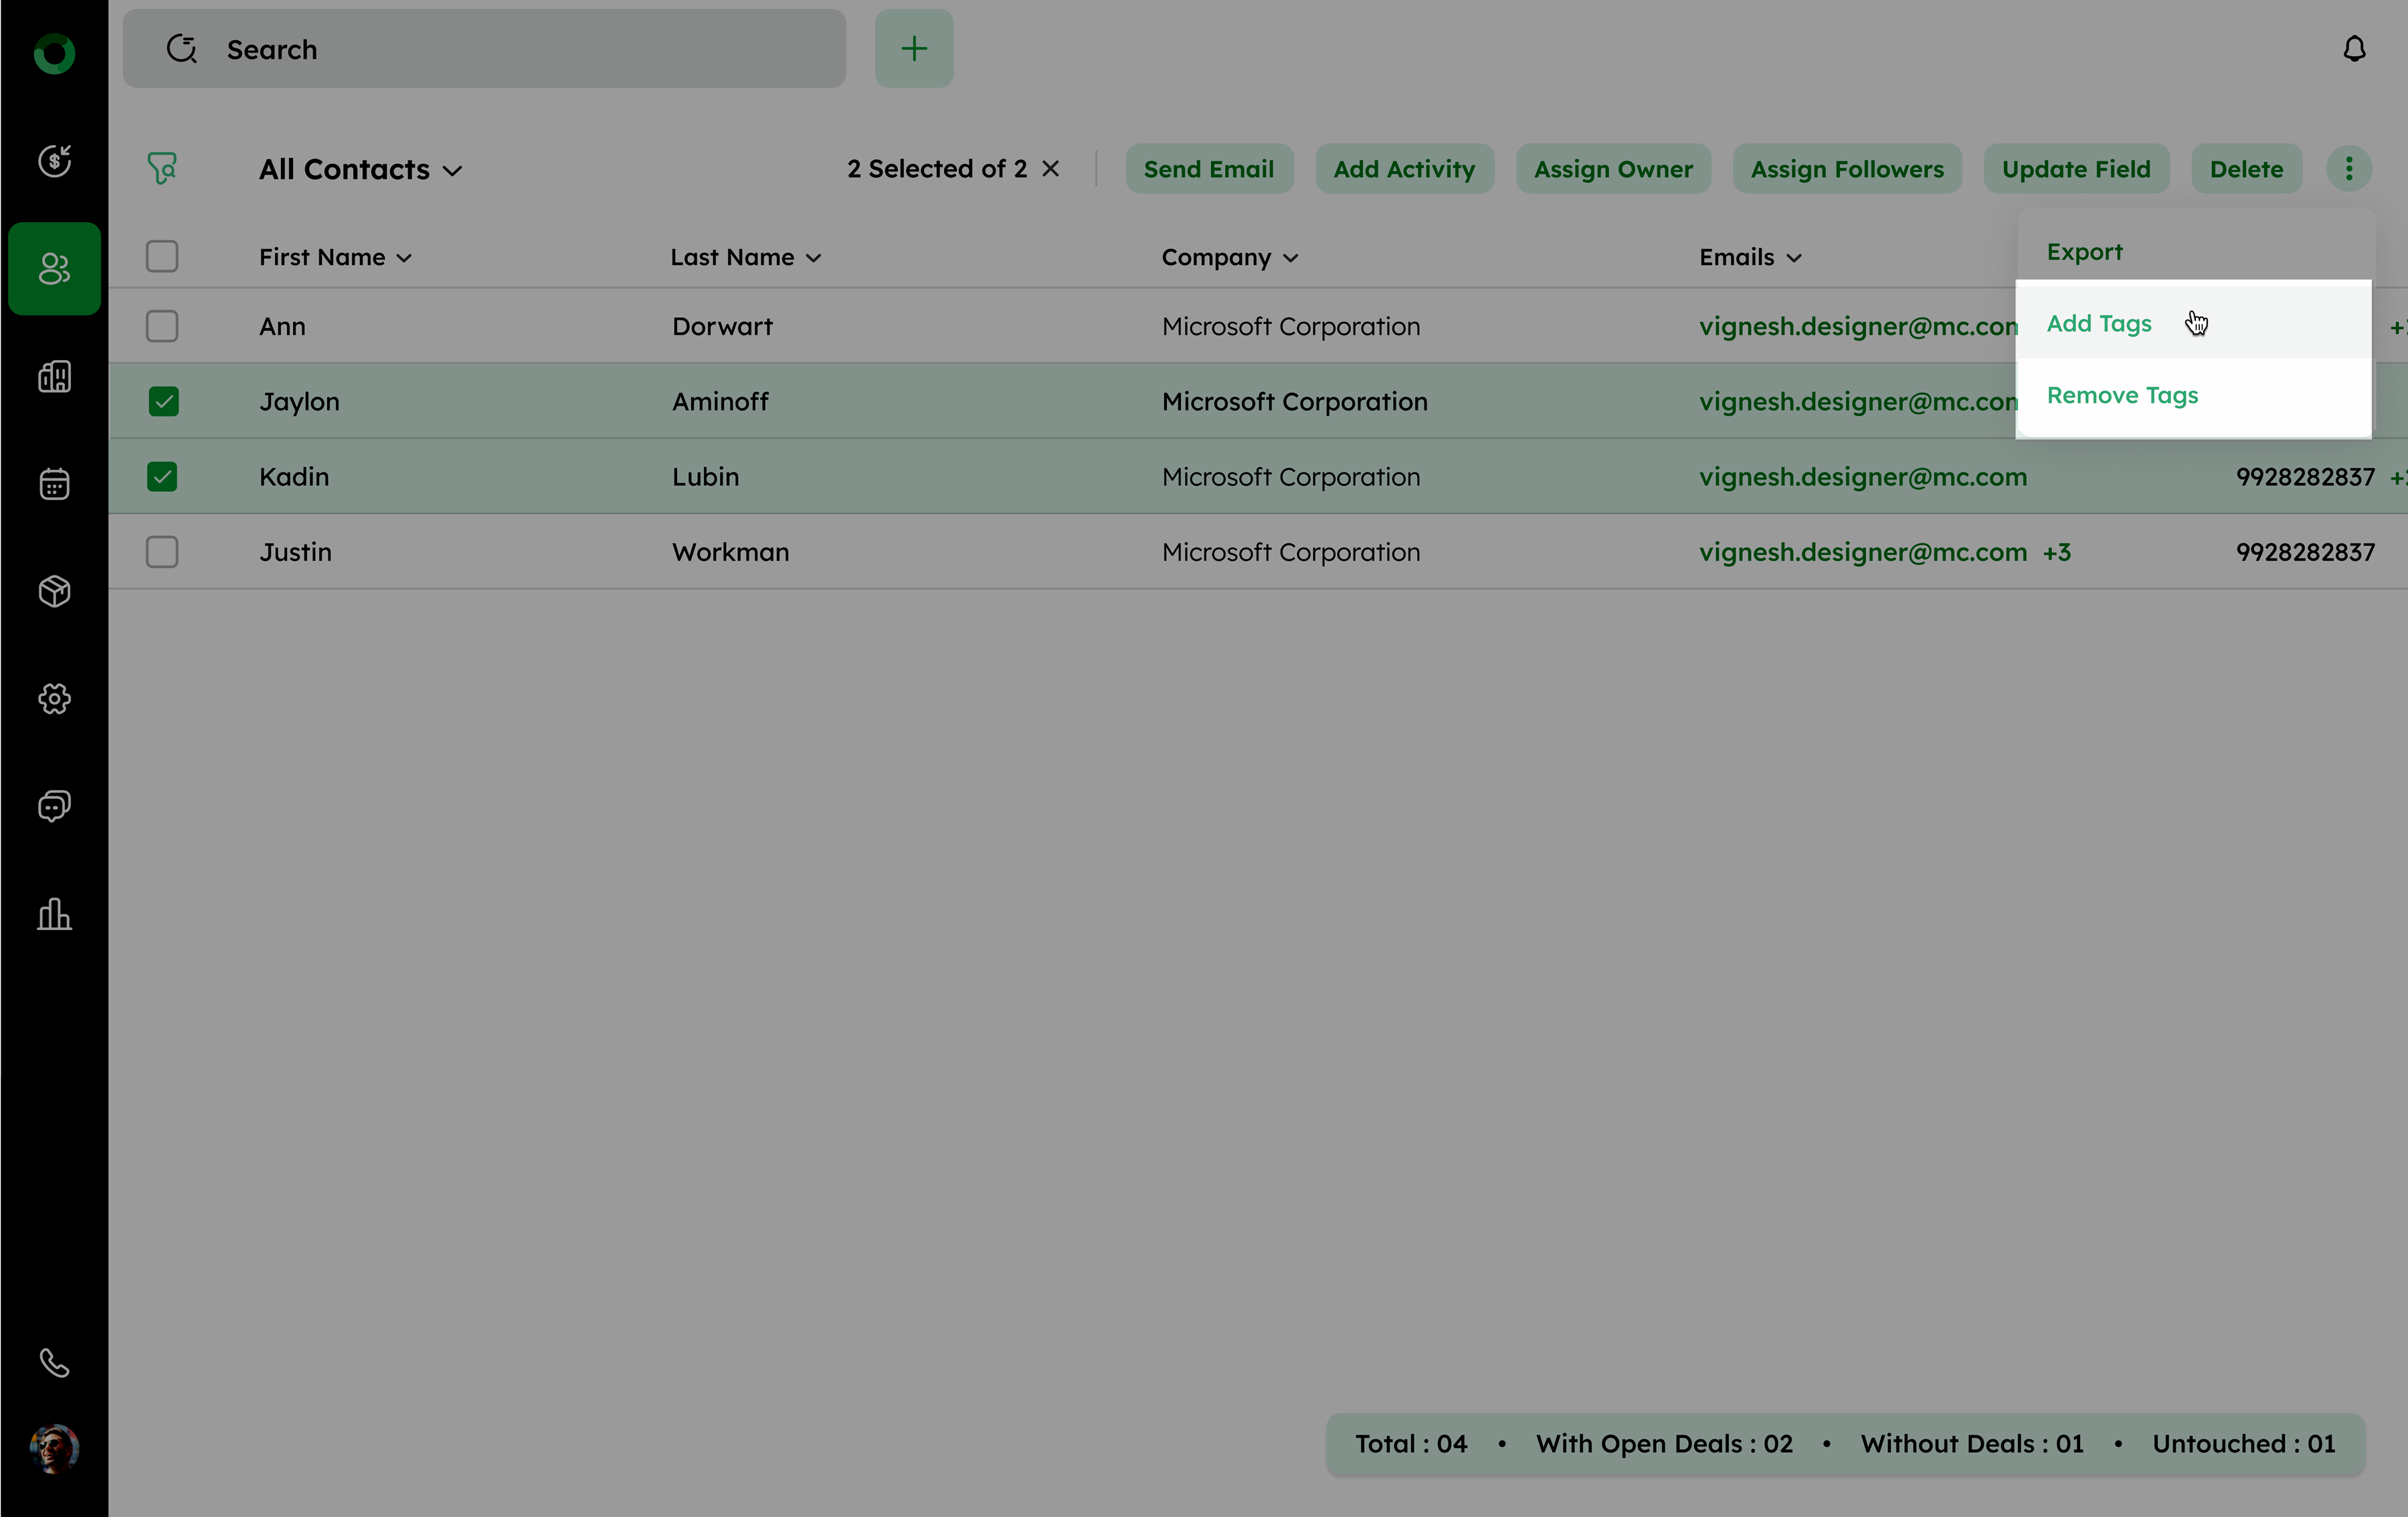
- Select the tags you want to add or remove from the list.
- Click Save/Remove to update the tags or remove the tags for all selected contacts.