Setting Up and Customizing Contact Fields
In Twozo you can customize and manage contact fields to capture the details most important to your business. This flexibility helps you to keep data organized and accessible, record essential information for every contact, and improve communication and relationship management.
Understanding Default Contact Fields
Contact fields are data entry points that store information about each contact in your database. These fields make it easier to search, organize, and manage your contact details effectively.
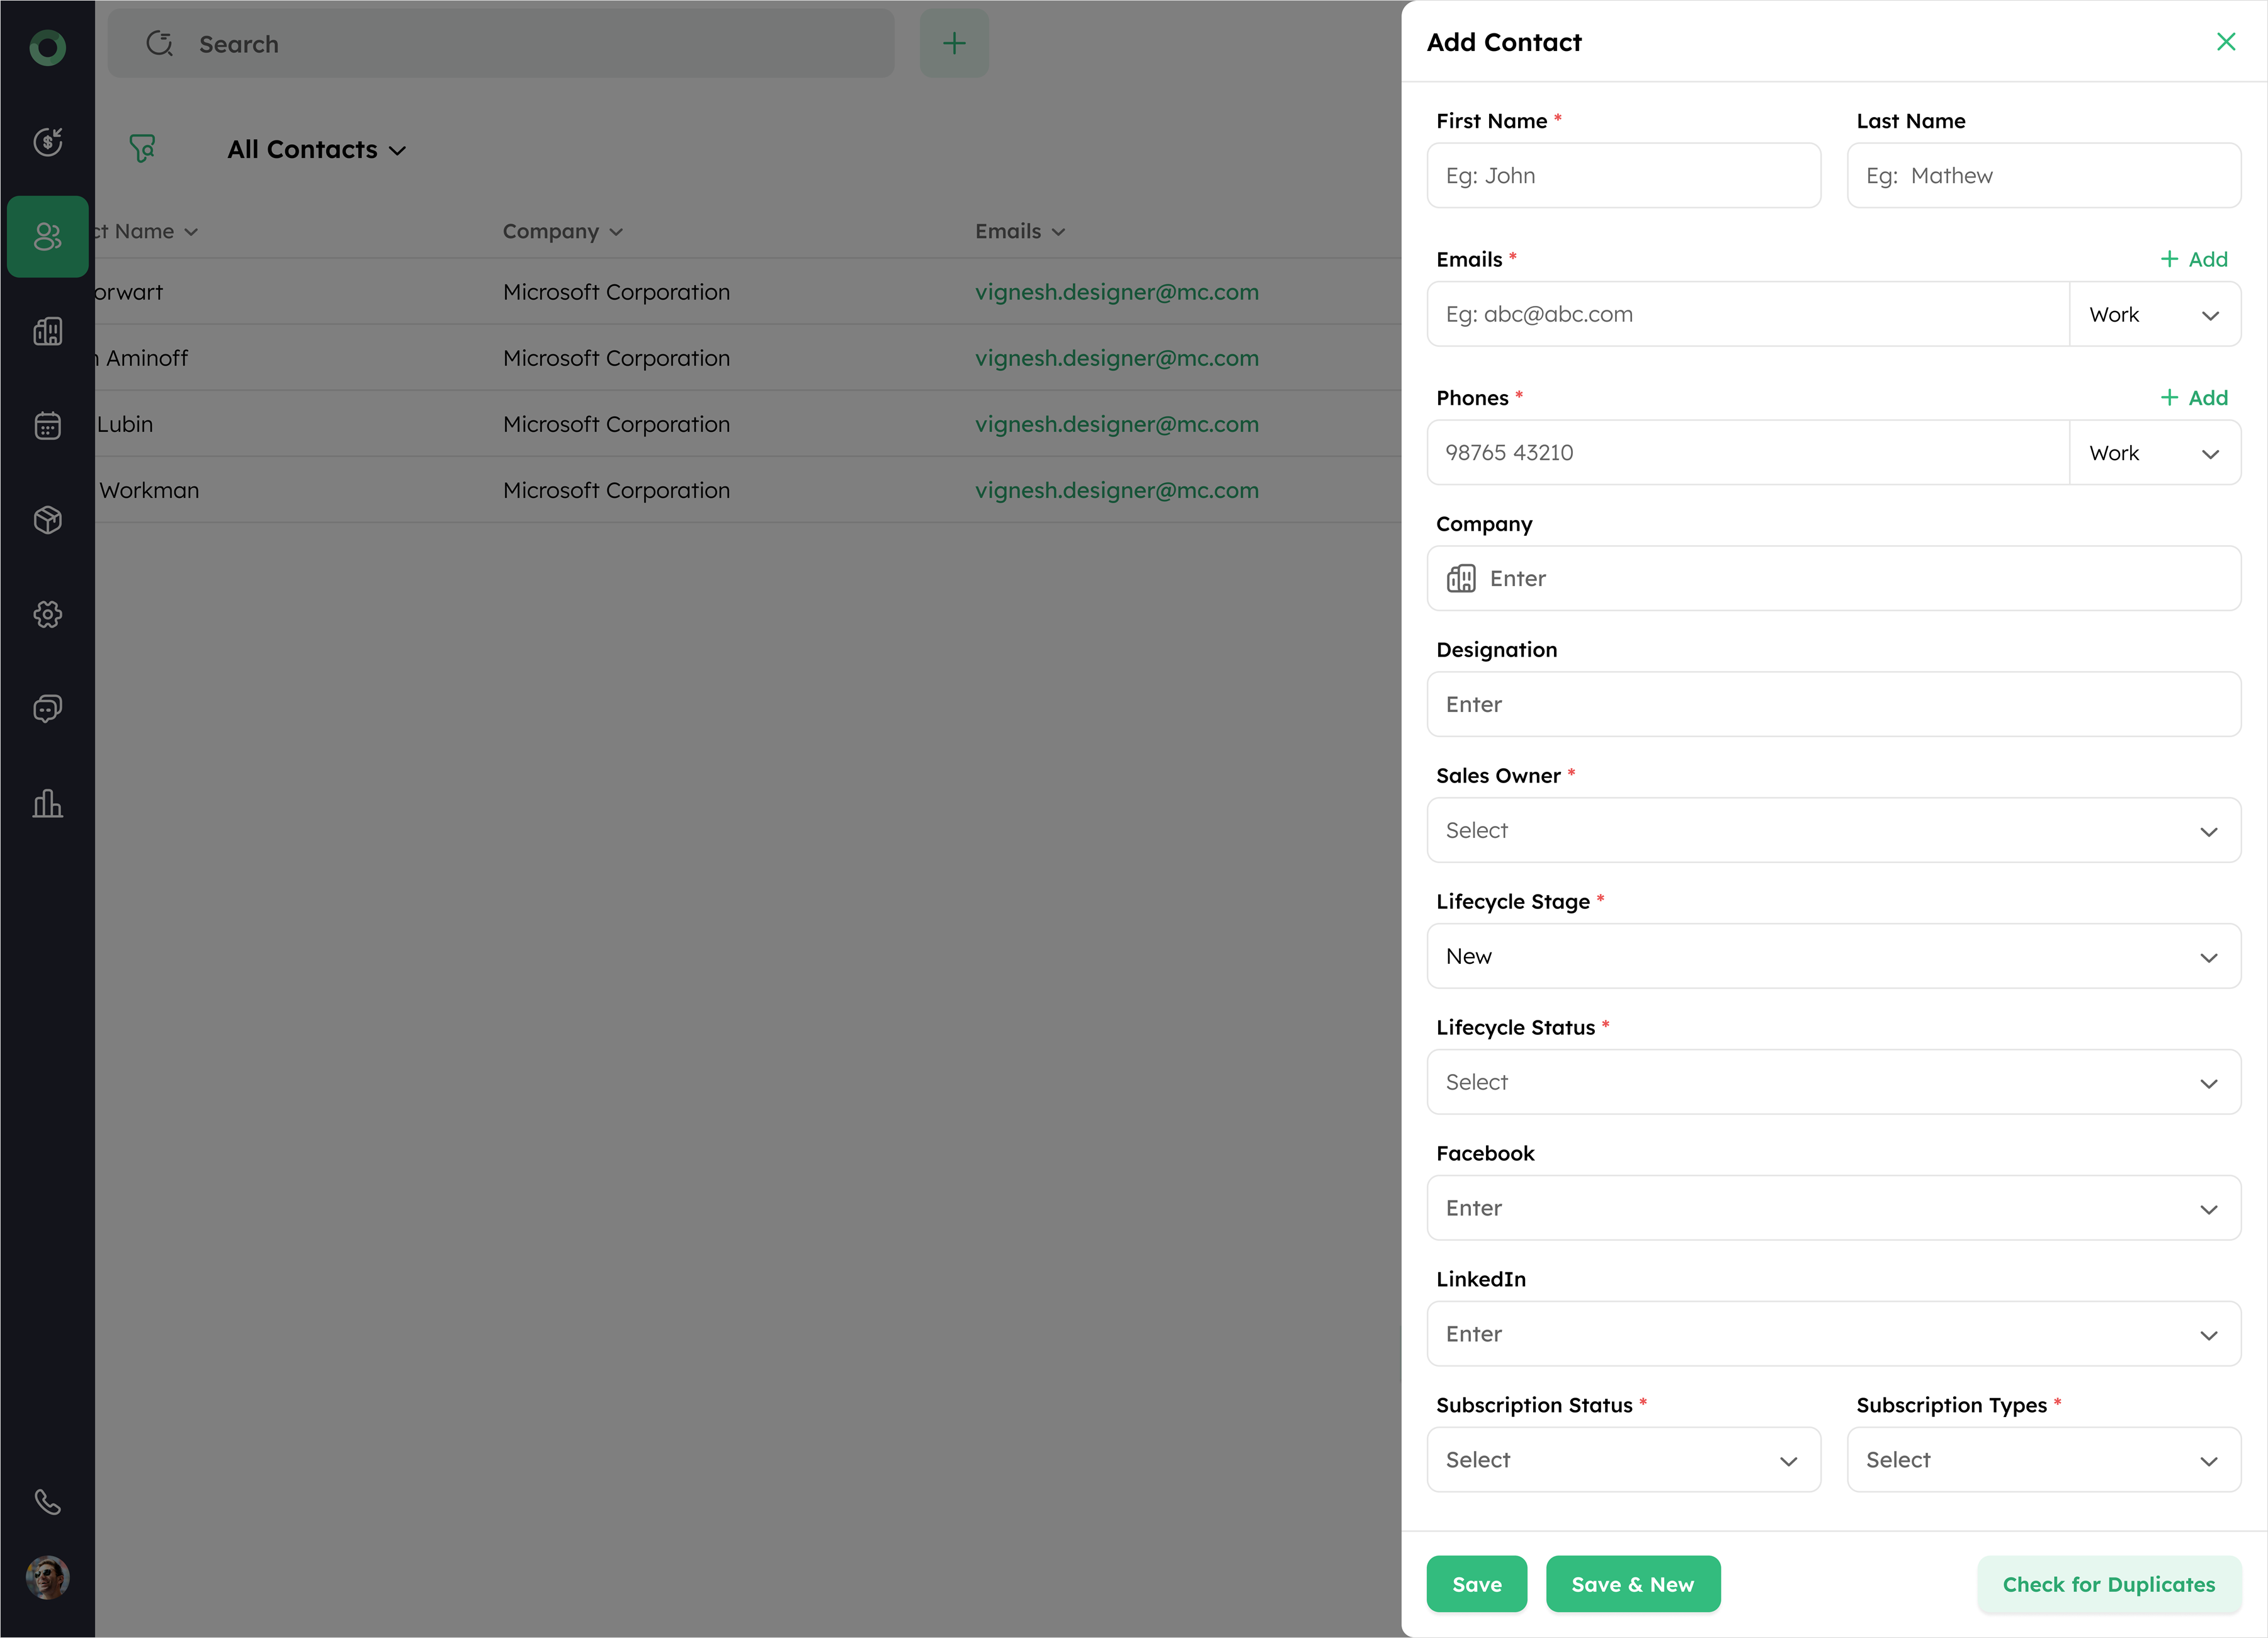
The list of default fields is as follows:
| Field Name | Description |
|---|---|
| First Name * | The contact's first name. |
| Last Name | The contact's last name. |
| Emails * | The contact's primary email address. |
| Phones * | The contact's primary phone number. |
| Company | The name of the contact's associated company. |
| Designation | The job title or role of the contact within their company. |
| Sales Owner * | The user who created or is managing the contact. |
| Lifecycle Stage * | The stage of the contact within the sales pipeline. |
| Lifecycle Status * | The current status of the contact in the lifecycle stage. |
| The URL of the contact's Facebook profile. | |
| The URL of the contact's LinkedIn profile. | |
| Subscription Status * | Indicates whether the contact is subscribed or unsubscribed from communications. |
| Subscription Types * | The categories of communication the contact is subscribed to (e.g., Newsletter, Promotional, Product updates). |
An asterisk (*) indicates a mandatory field.
Customizing and Creating New Contact Fields
Custom fields in Twozo let you capture additional details like age or alternate addresses. These fields can be added manually when creating a contact or during data import. This feature helps to keep your contact database organized and tailored to your business needs.
Follow the below steps to customize the fields,
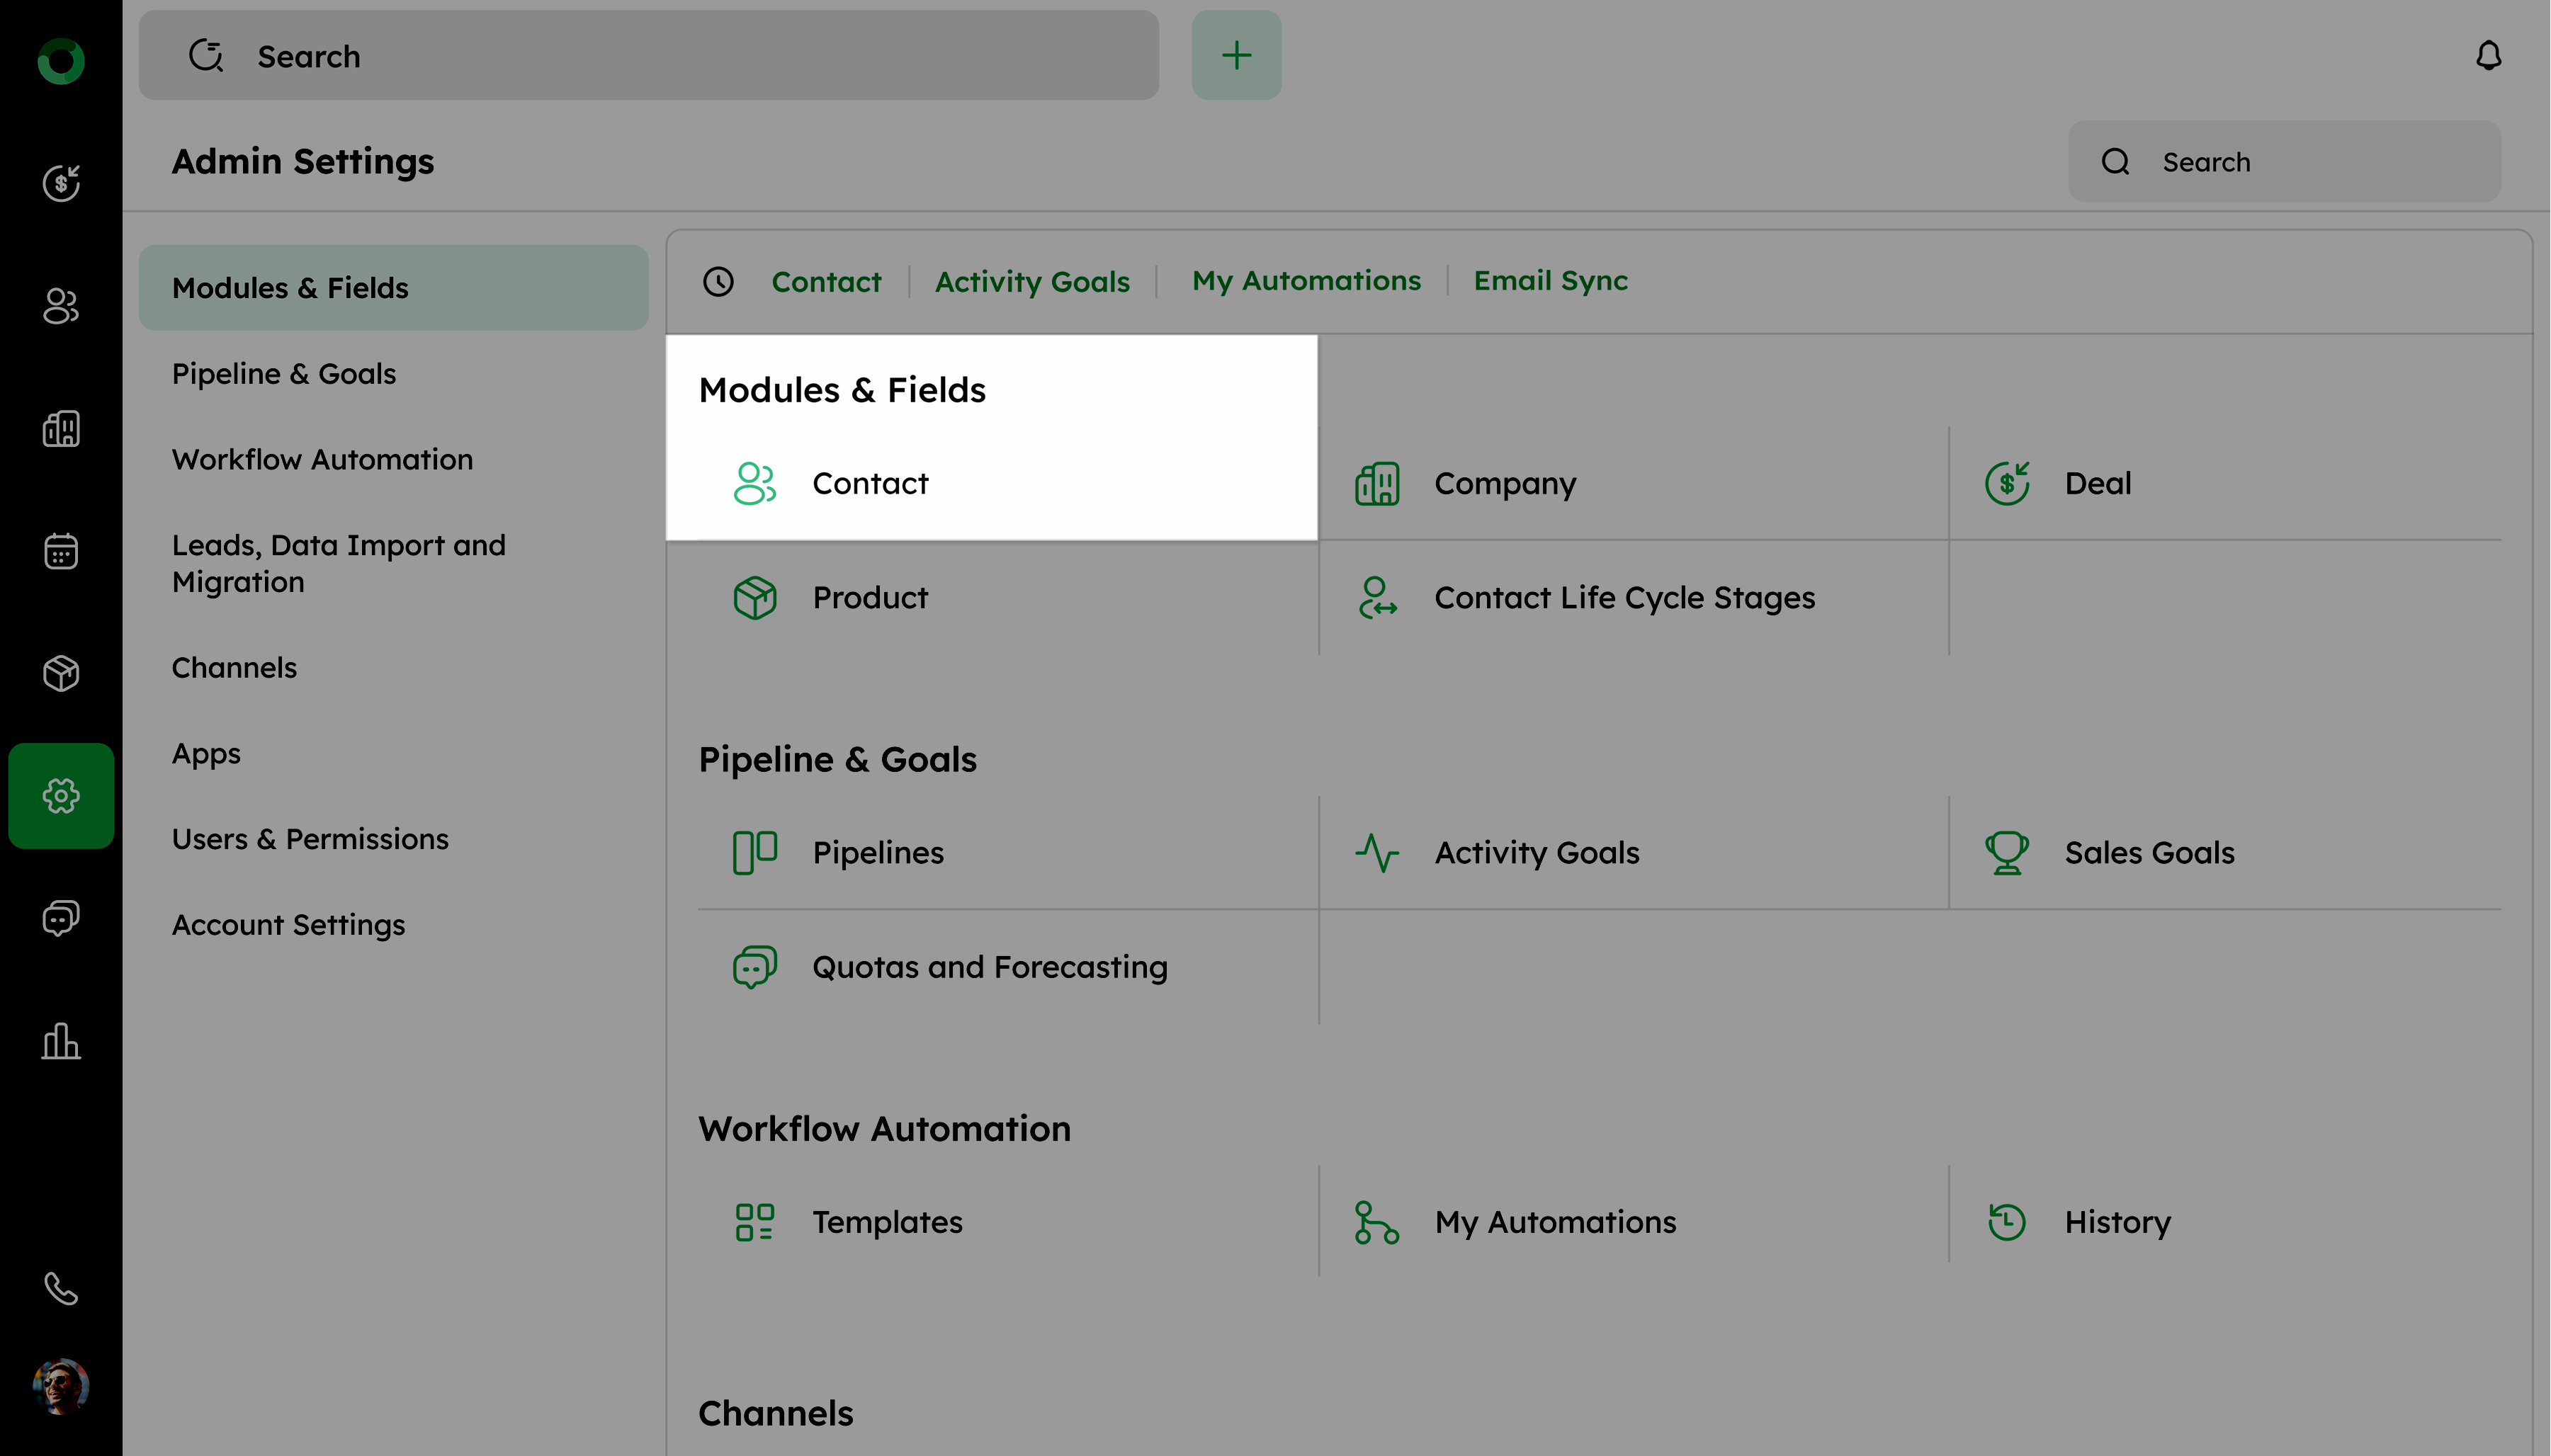
- Log in to your account as an administrator.
- Go to Admin Settings and select Contact under the Modules & Fields option.
- Click + Custom Field and enter the field name and type.
- Select Add View to display the field on the contact creation form.
- Select Required to make it mandatory for users.
- Click Add to save the custom field.
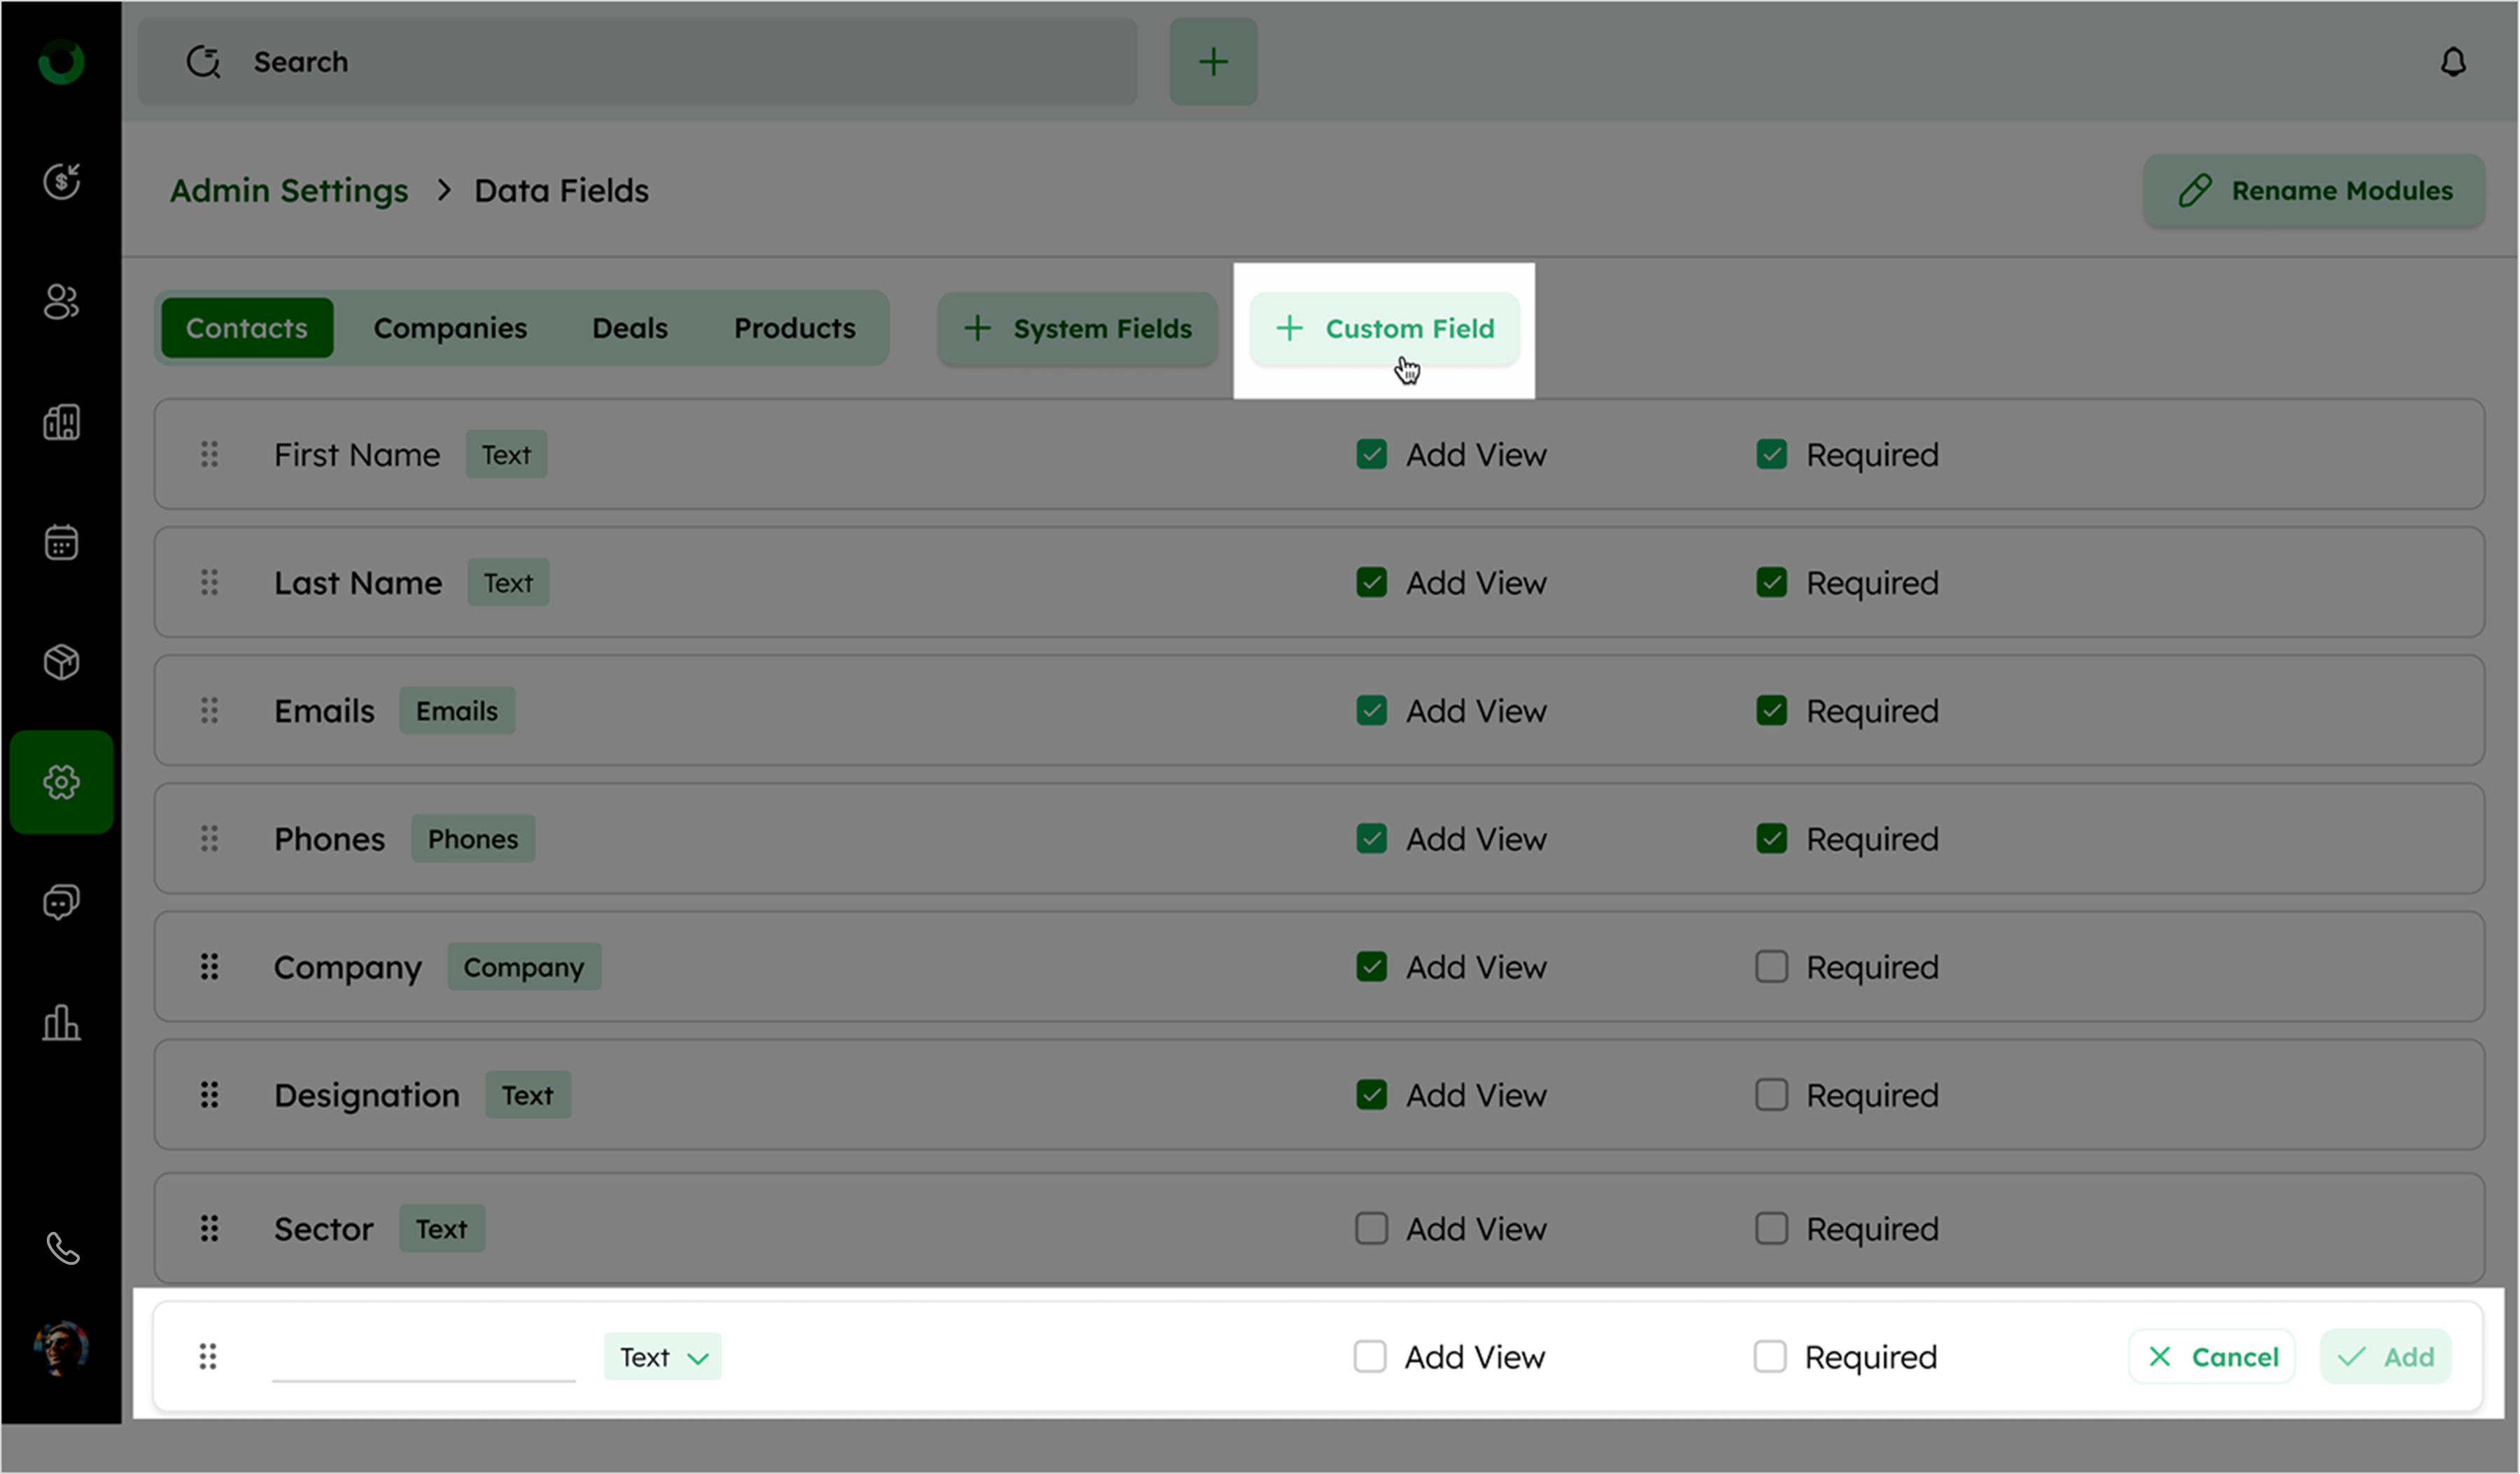
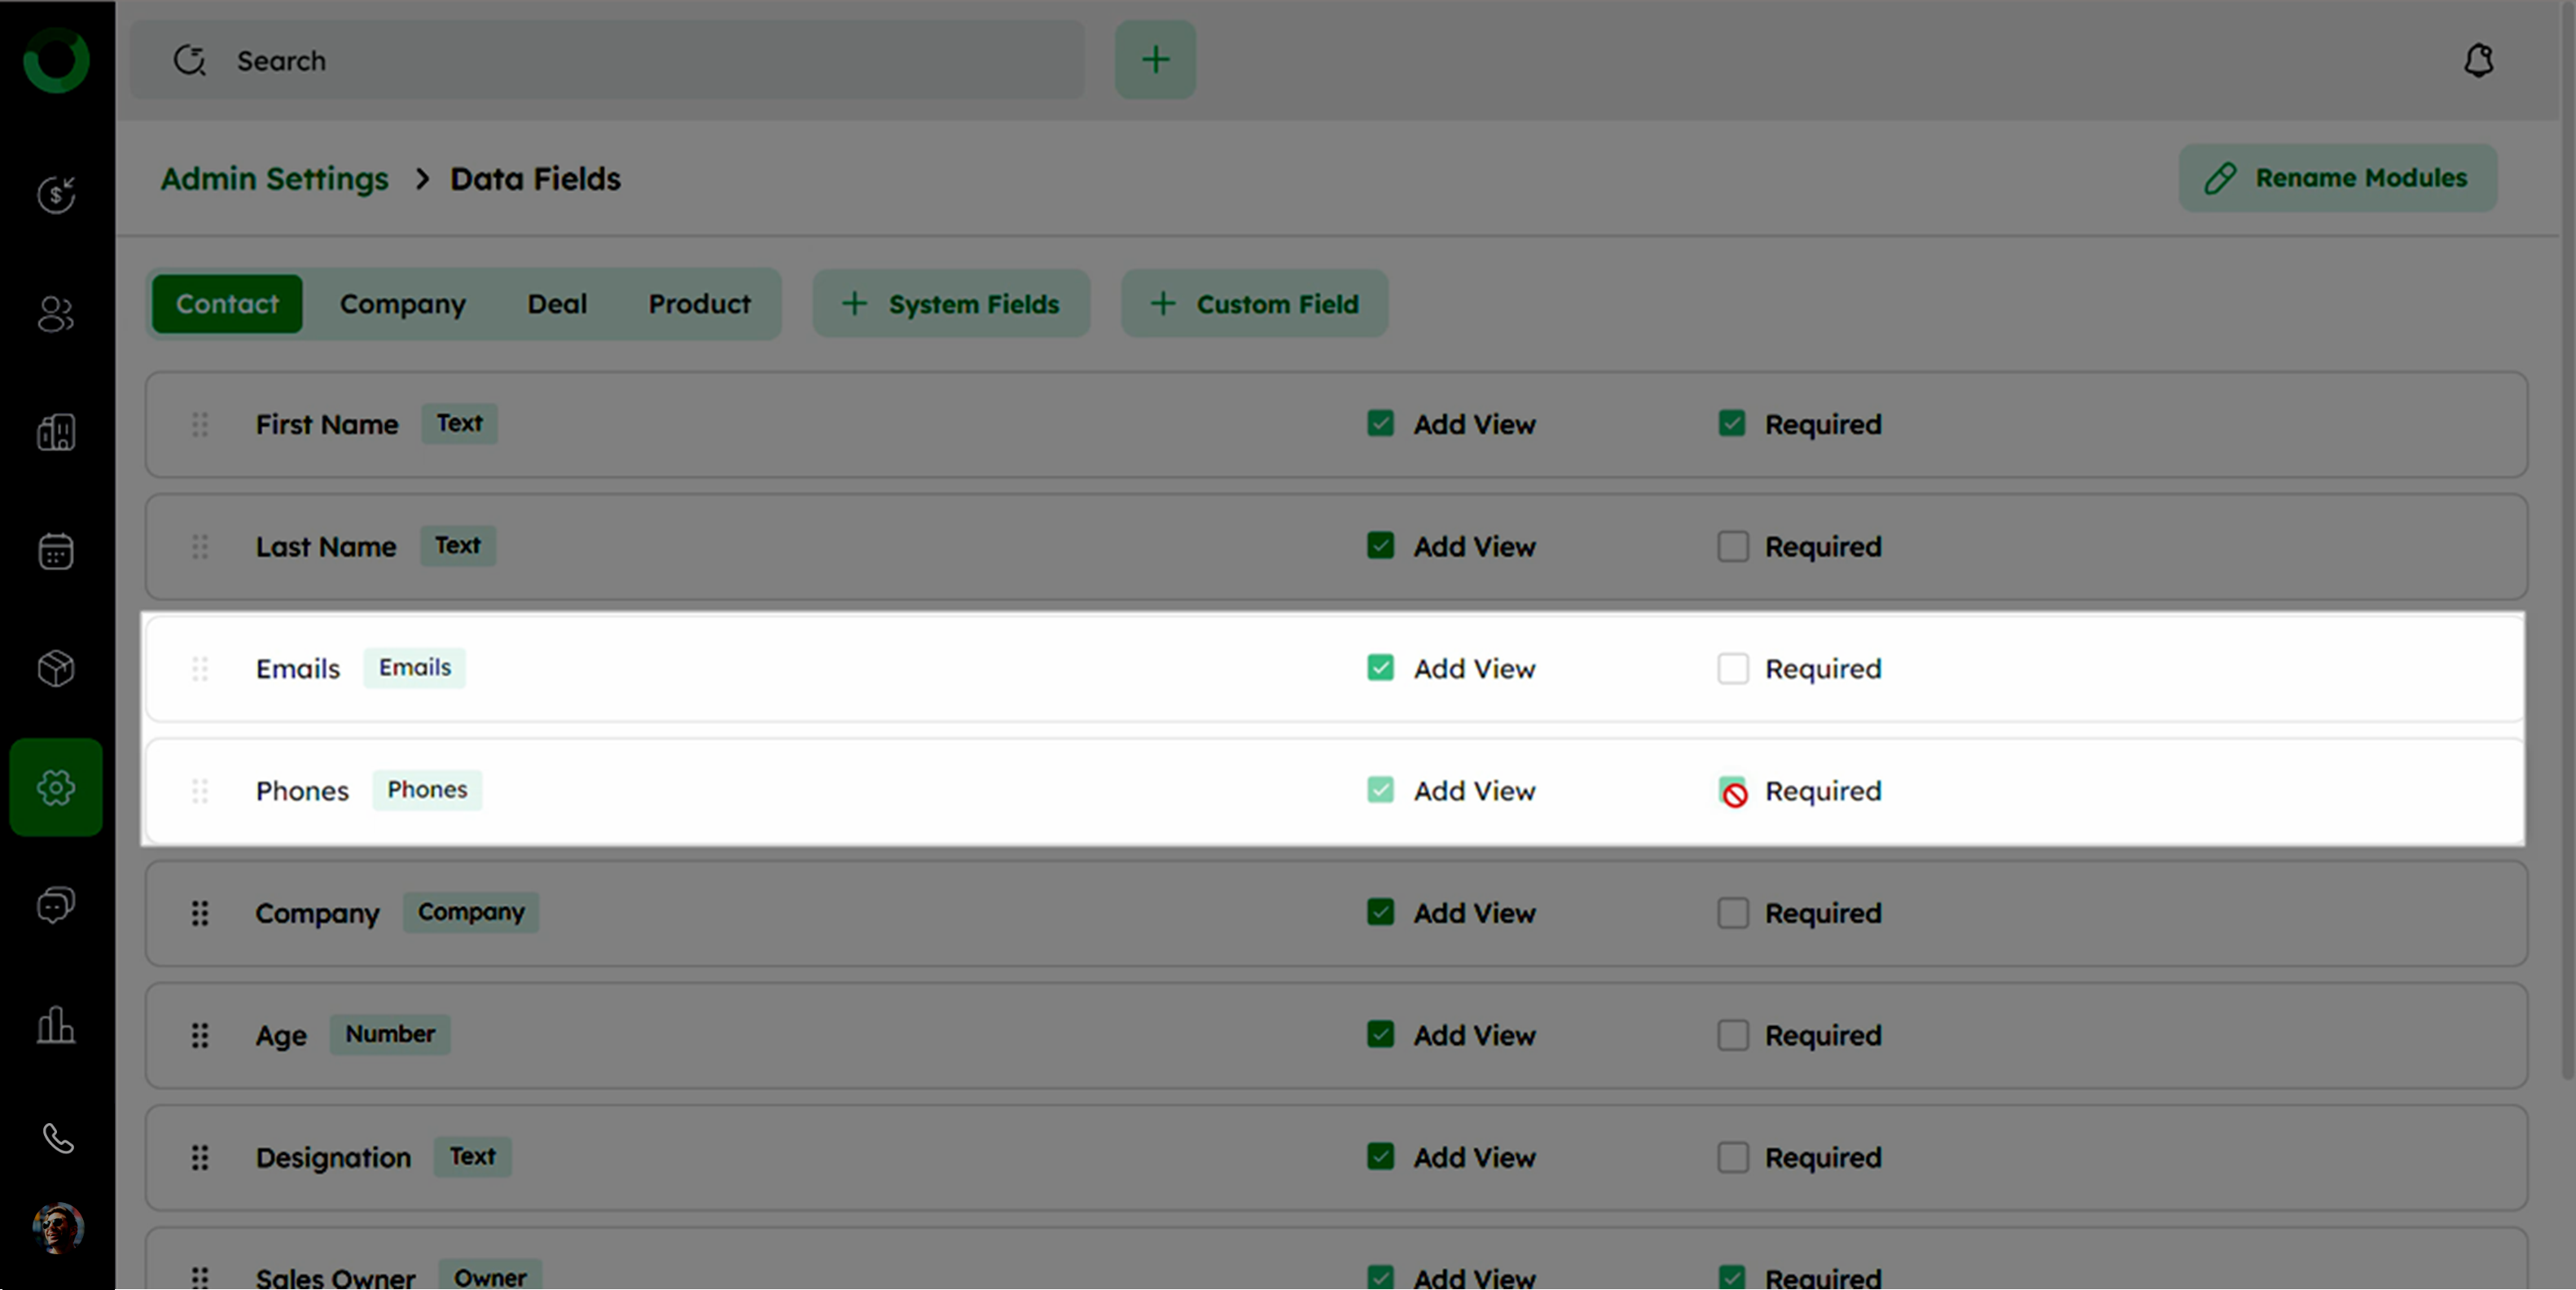
At least one field, Email or Phone, must be marked as required.
Managing Multiple Contact Details
Adding multiple email addresses and phone numbers to a contact is essential for maintaining comprehensive and accessible communication details. It ensures that you can reach the person through various channels and keep their information organized.
- Open an existing contact or create a new one.
- In the Emails section, click +Add to enter additional email addresses.
- In the Phones section, click +Add to enter additional phone numbers.
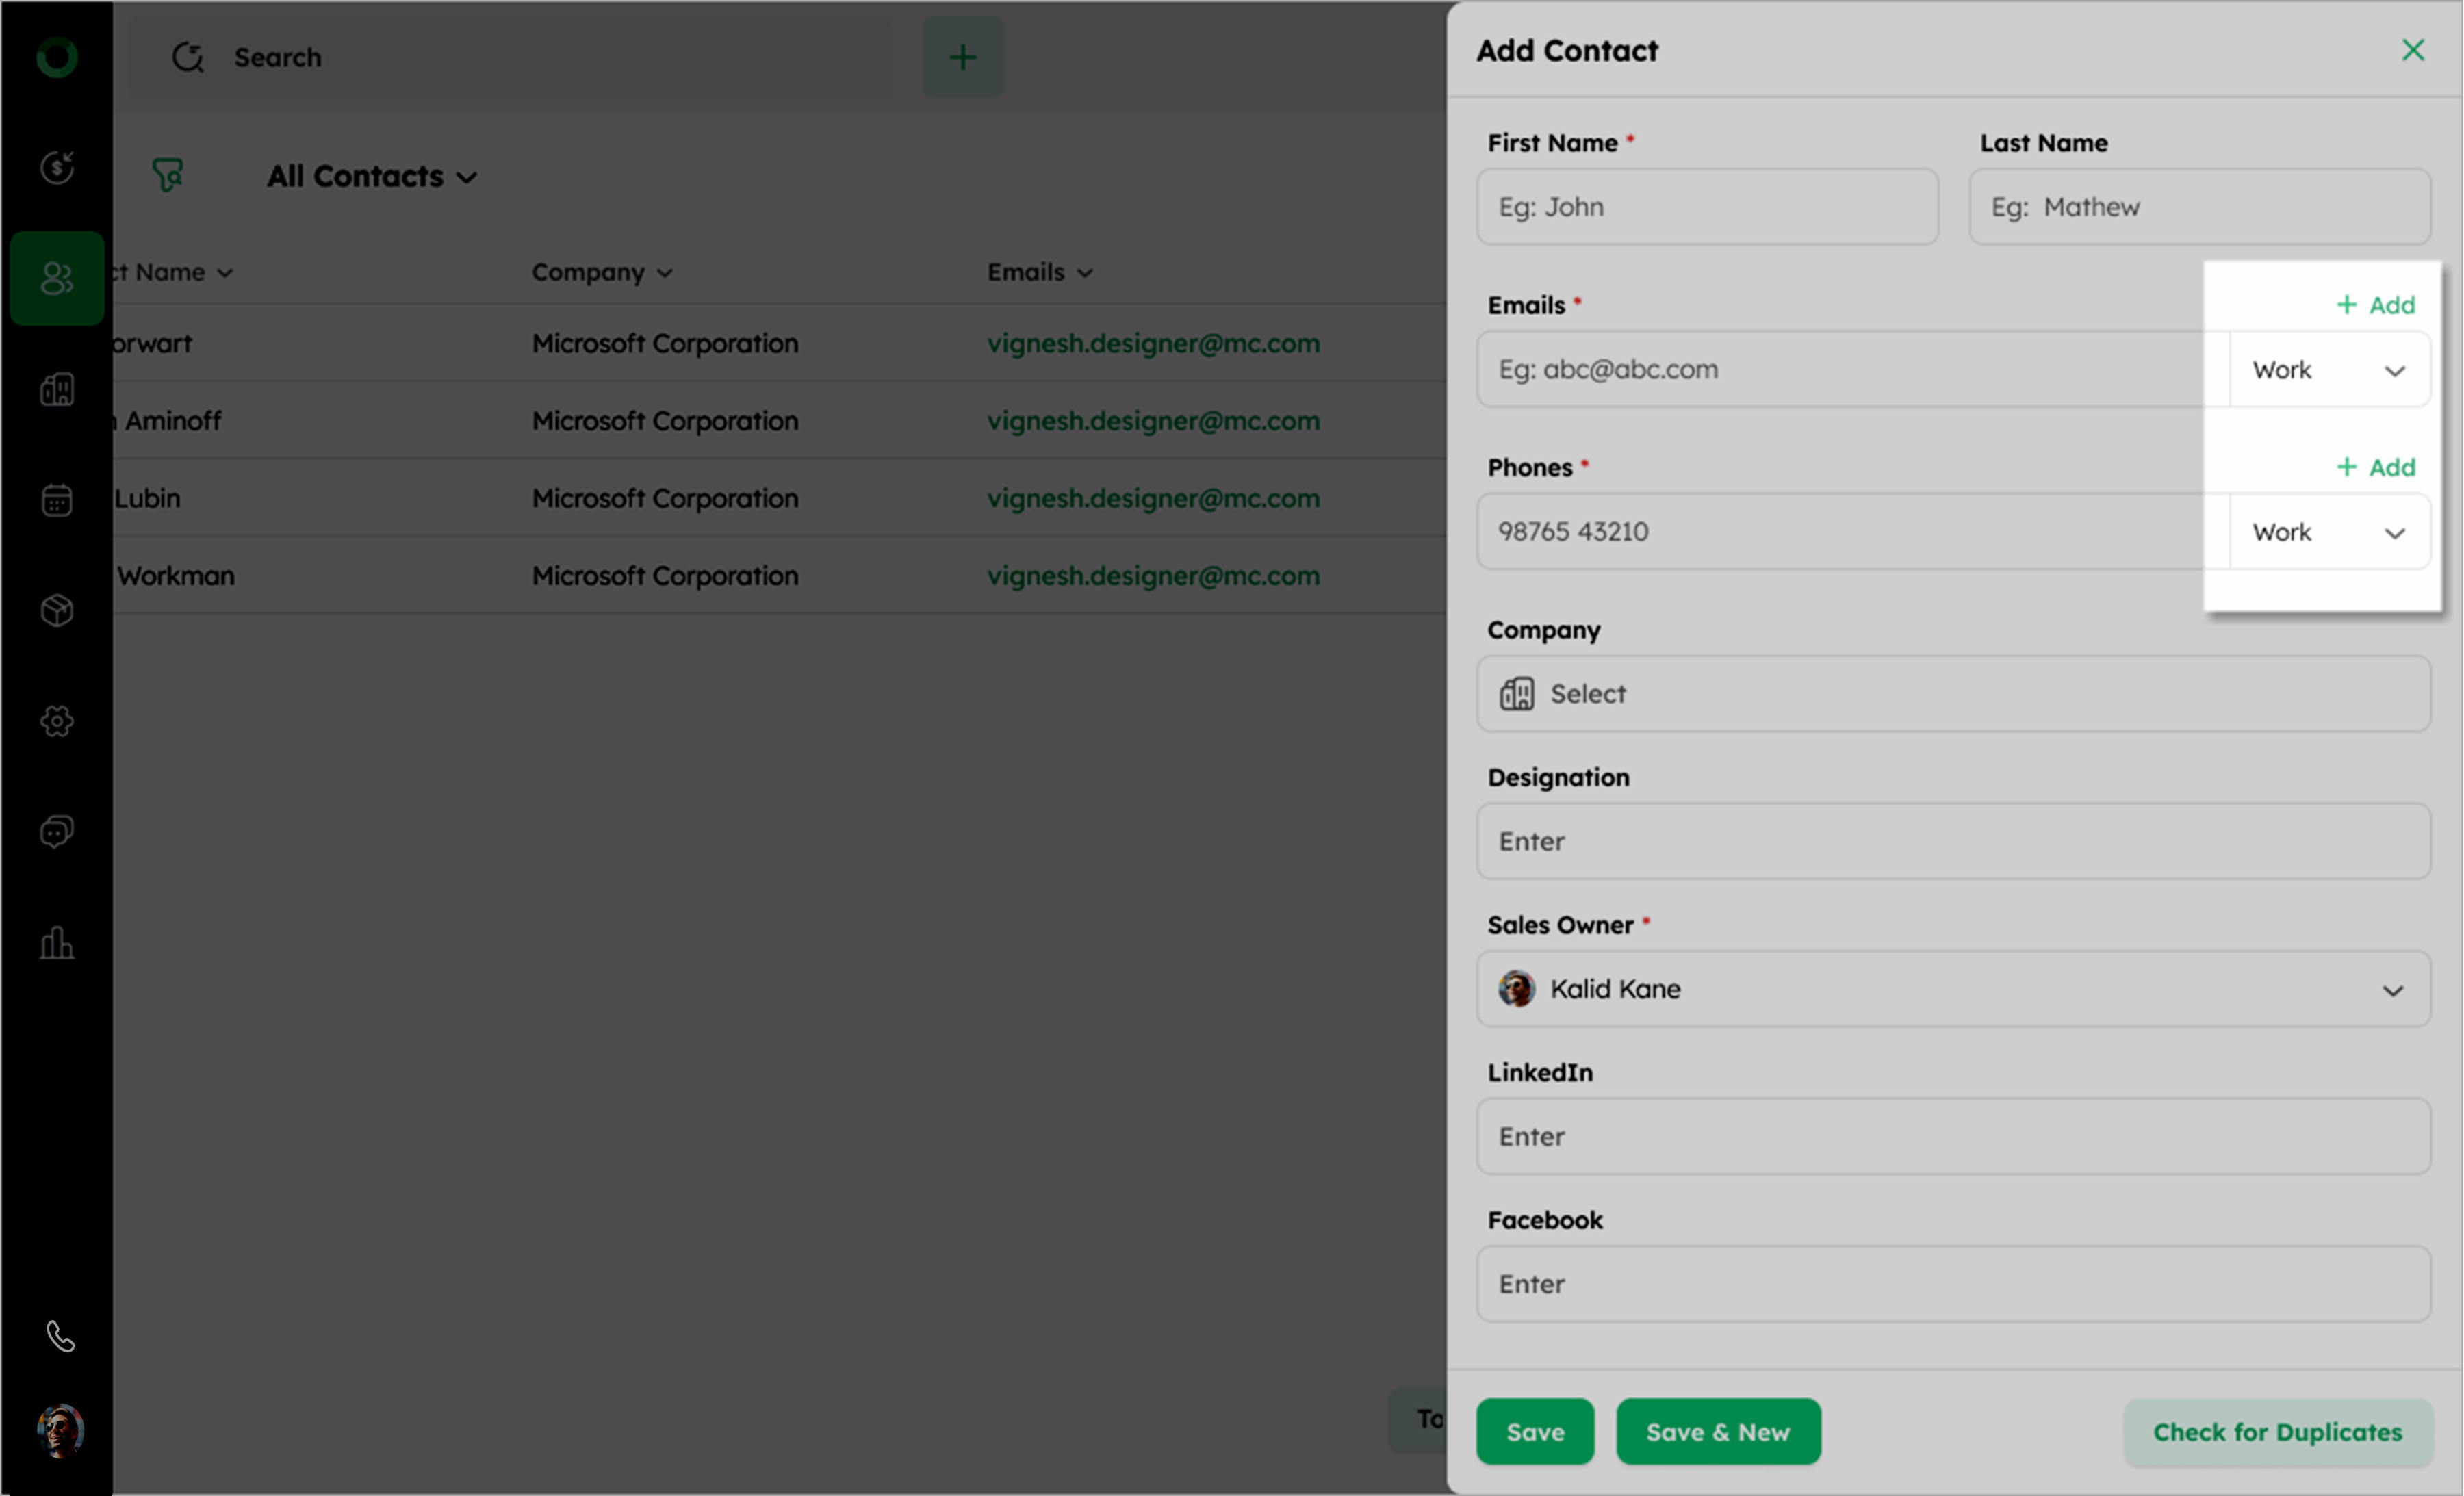
- Assign appropriate labels like Work, Home, etc. to each mail and phone number.
- Click Save to apply the changes.
- You can add up to 10 phone numbers and email addresses for each contact.
- The first phone number and email address added are marked as the primary ones.